Vesper Marine VESPWMX850 AIS WatchMate - WMX850 User Manual
Vesper Marine Limited AIS WatchMate - WMX850
UserManual.wiki
>
Vesper Marine
>
VESPWMX850 User Manual
User Manual
Navigation menu
Upload a User Manual
Namespaces
Wiki Guide
HTML
PDF
Info
Views
User Manual
Discussion / Help
Navigation
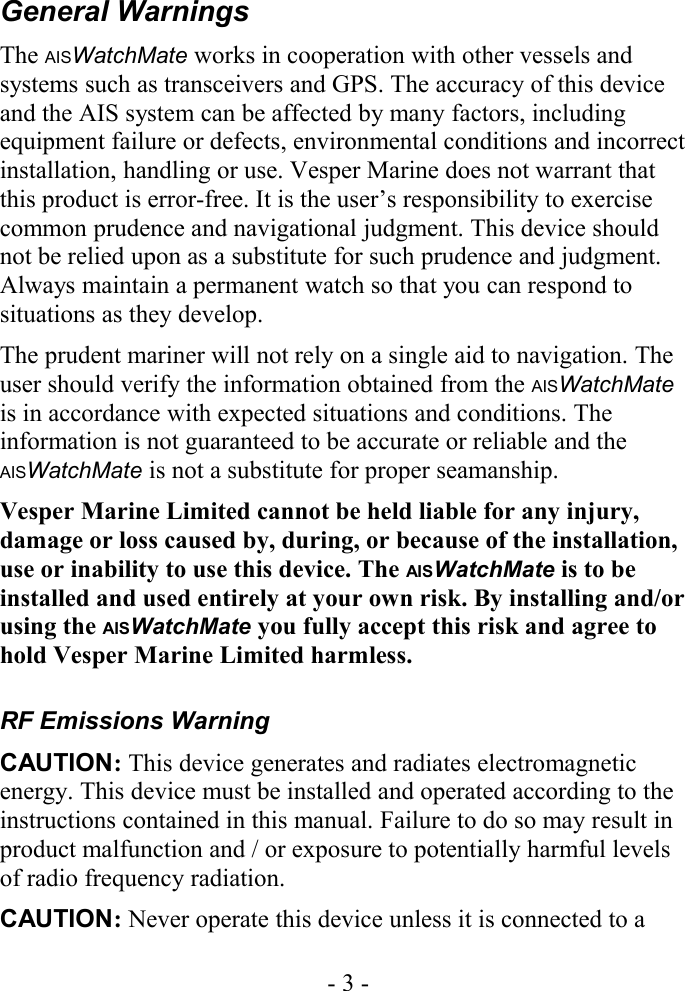
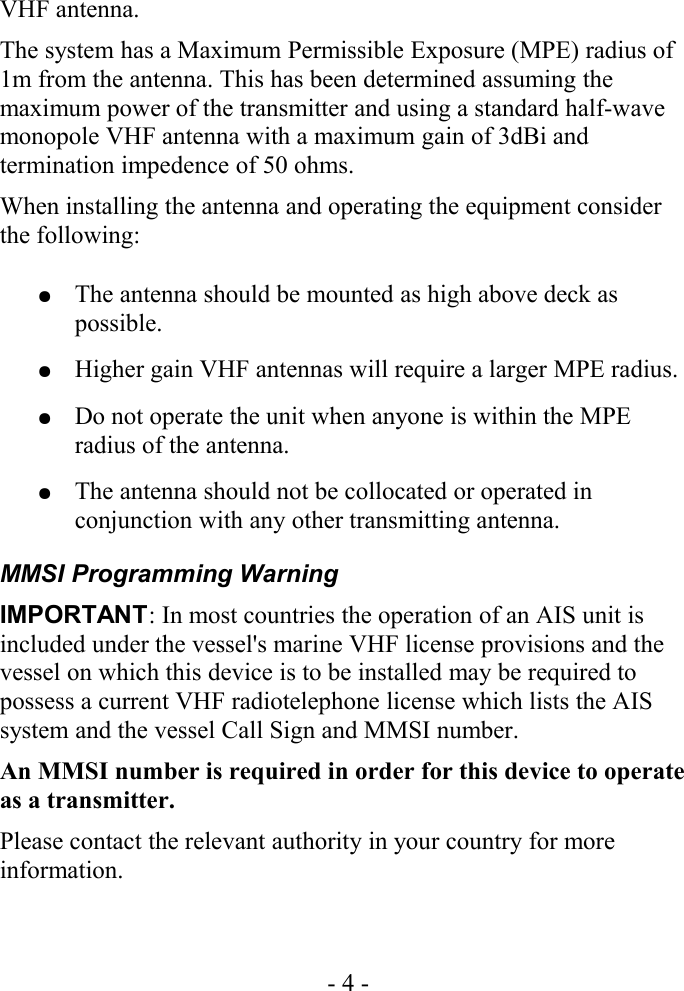
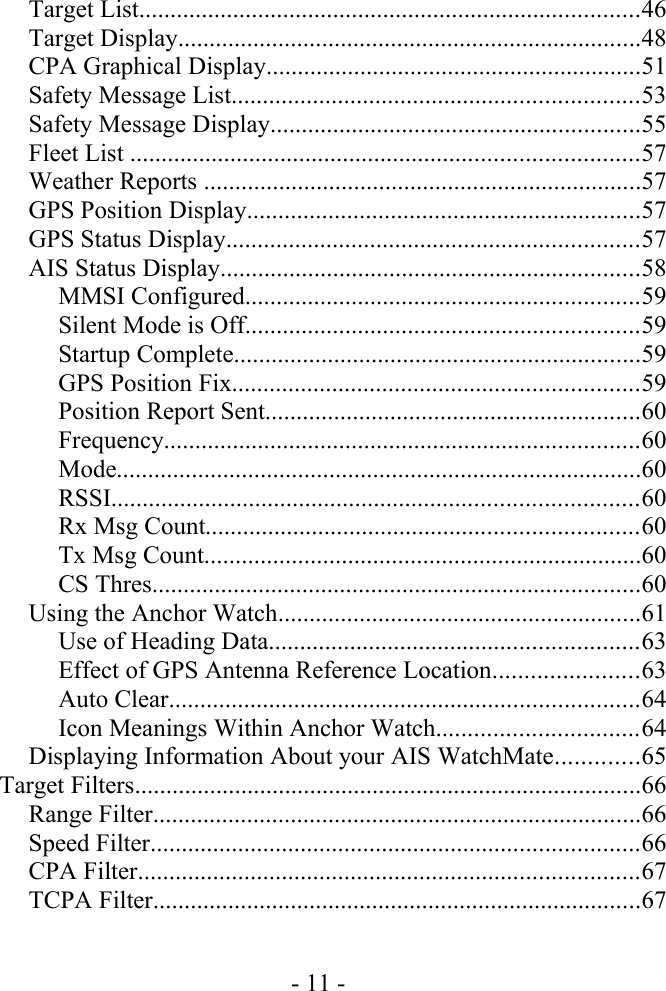


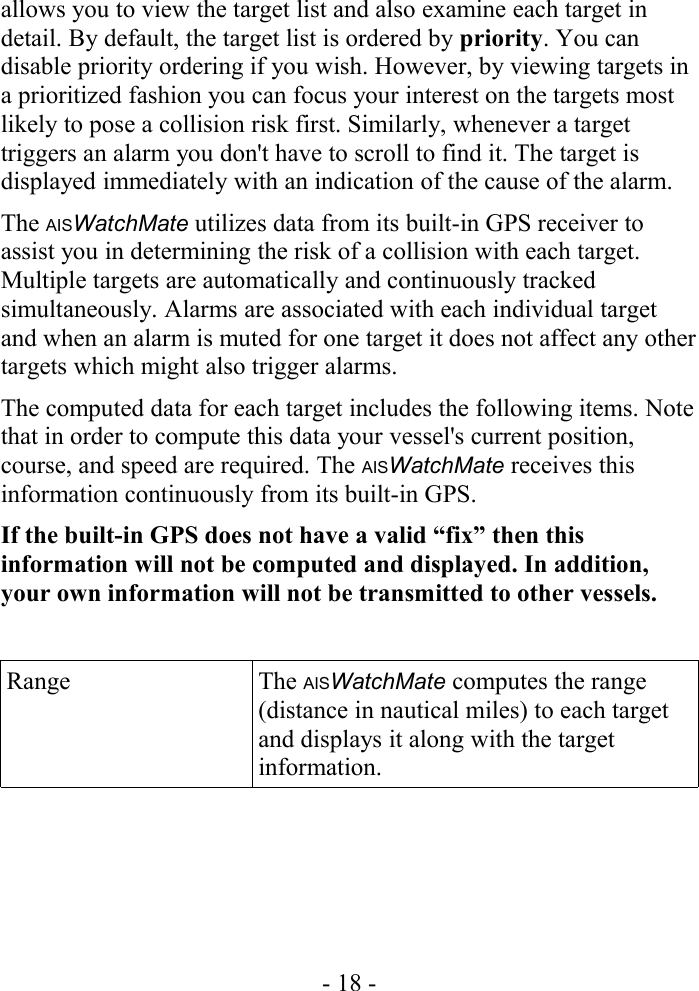
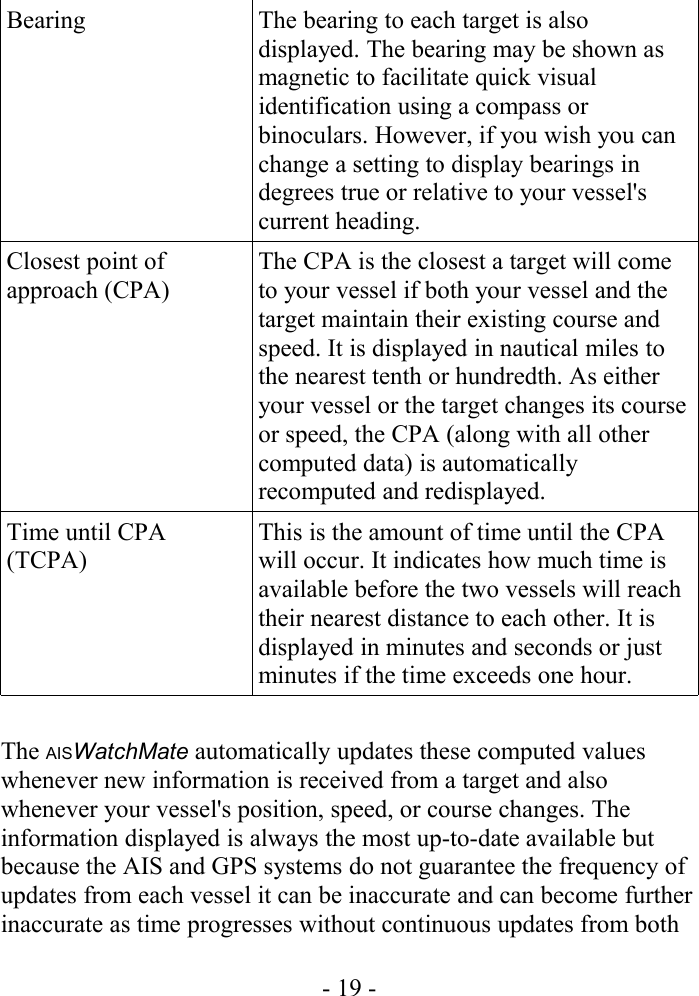
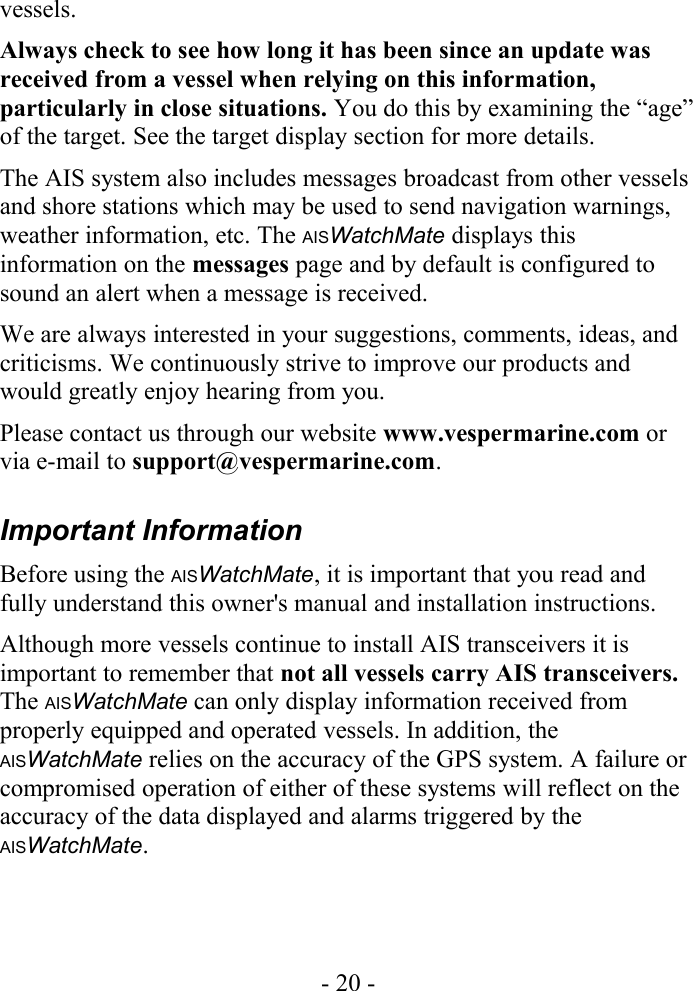
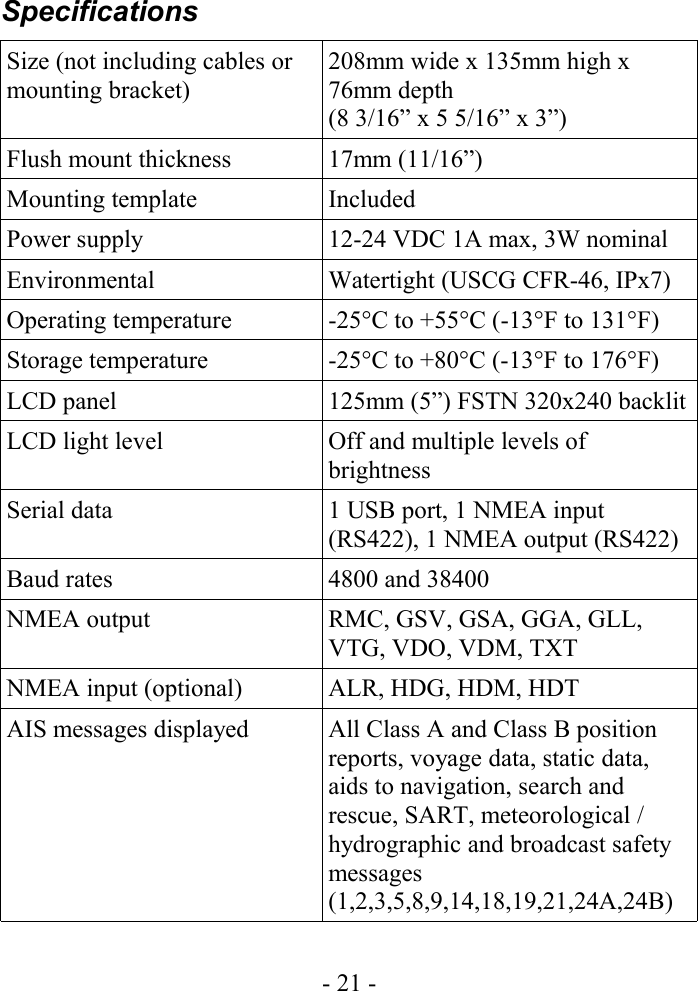

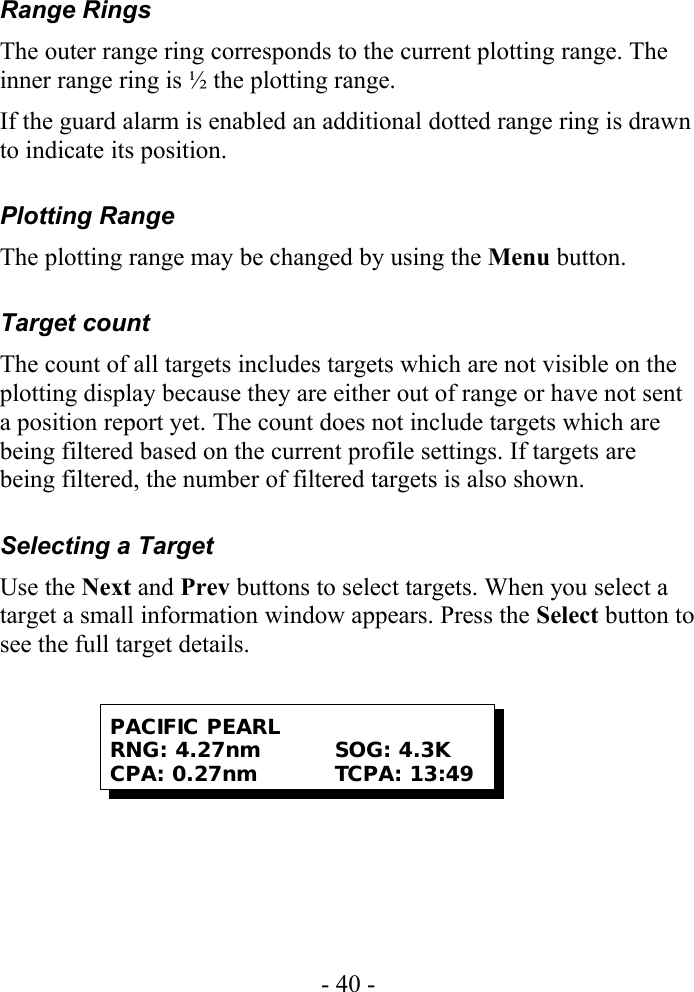
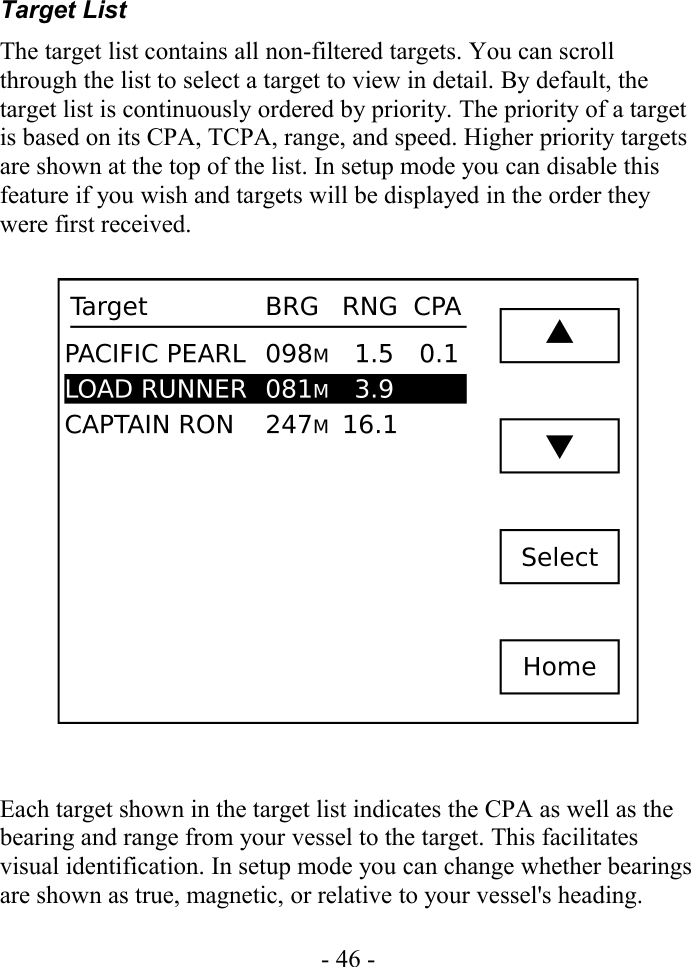
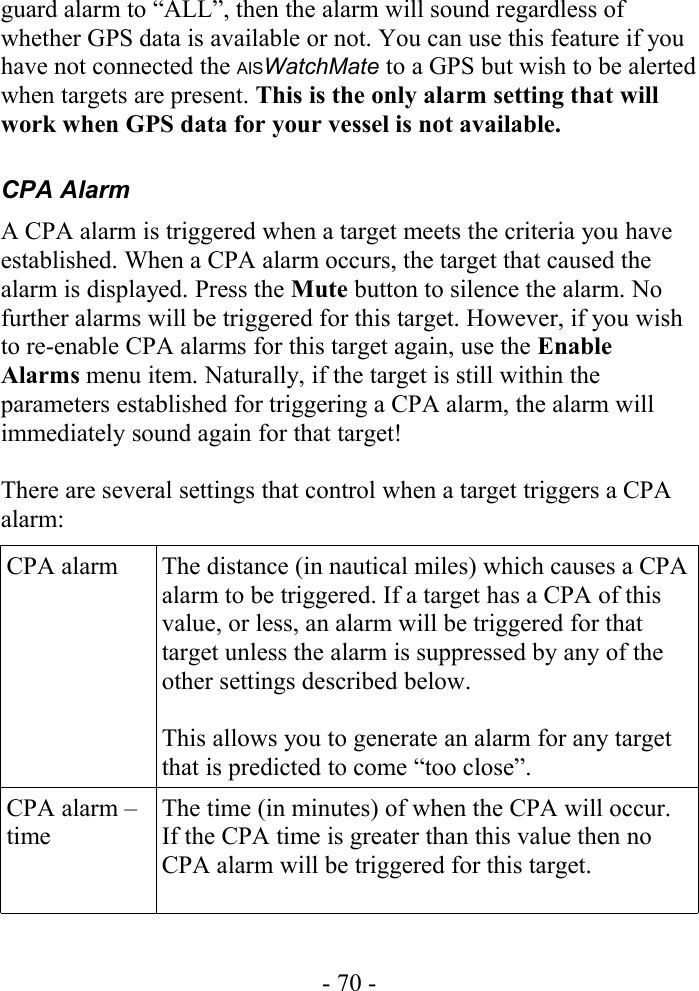
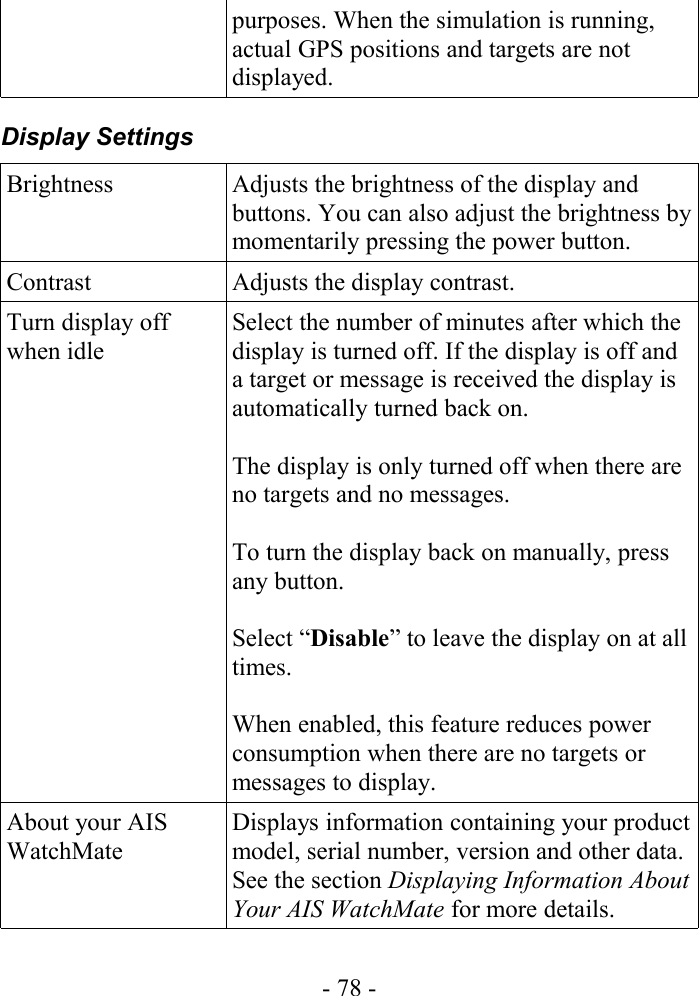
![Display ScreensHome Page – Situation DisplayThe home page displays targets using a graphical situation display similar to a radar. The display is oriented either Heading-Up or North-Up depending on the profile and settings. If heading data is not available for your vessel, then it is oriented course-up or north-up. The heading or course may be displayed in magnetic or true degrees depending on a setting in setup mode.You must have a valid GPS fix for any targets to be shown on the situation display.- 39 -SelectMenuPrevNext042T[6nm]Coastal3 Targets1 Filtered1 MsgPlotting rangeCurrent Alarm ProfileNav AidYour positionYour heading Total targets andfiltered targetsSafety messagesOrdinary targetDangerous targetGuard range !Transmit warning](https://usermanual.wiki/Vesper-Marine/VESPWMX850/User-Guide-1379652-Page-39.png)