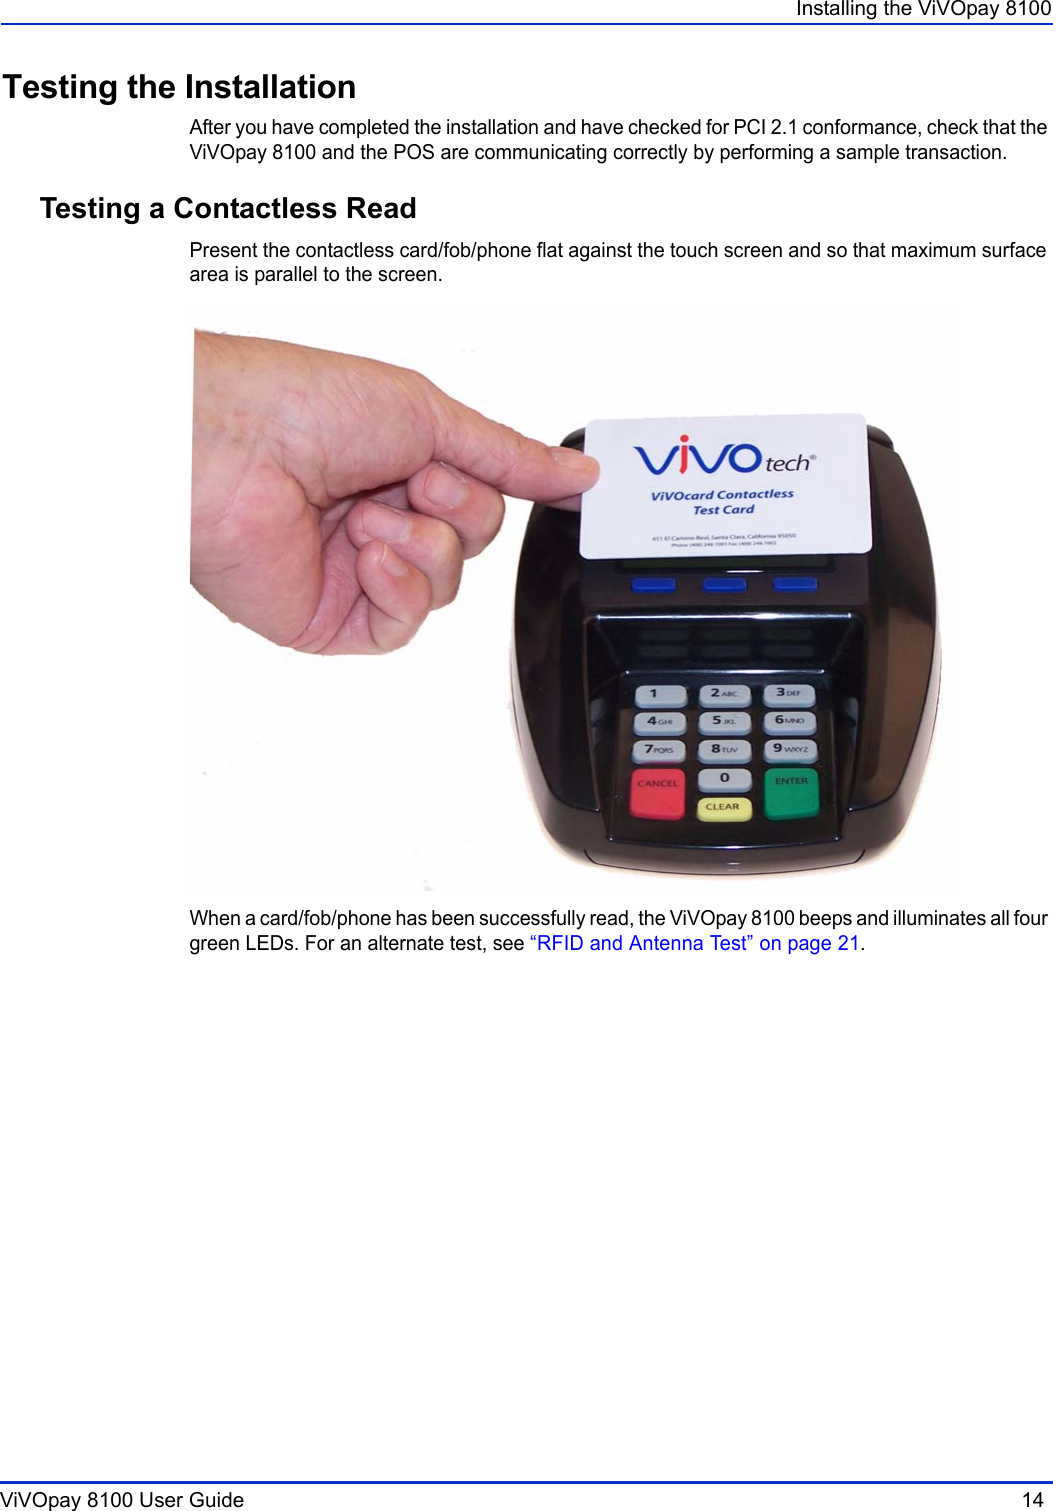
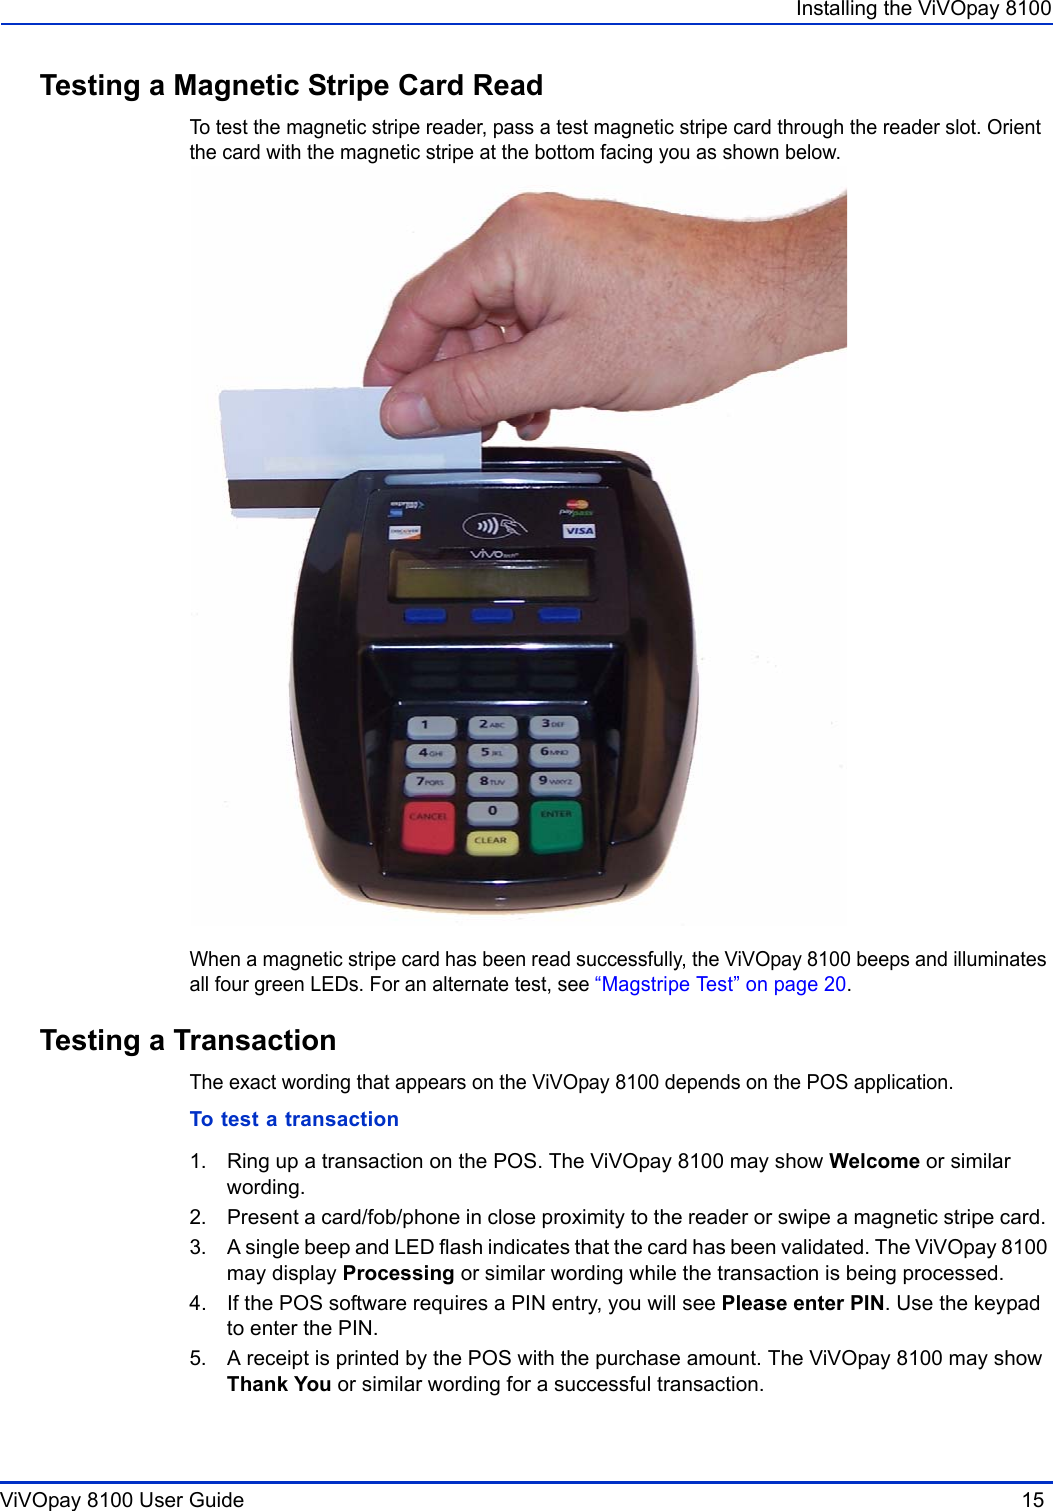
ViVOtech VIVOPAY8100 PCI-PED v2.1 & ISO/IEC14443 Contactless Reader User Manual ViVOpay 8100 User Guide
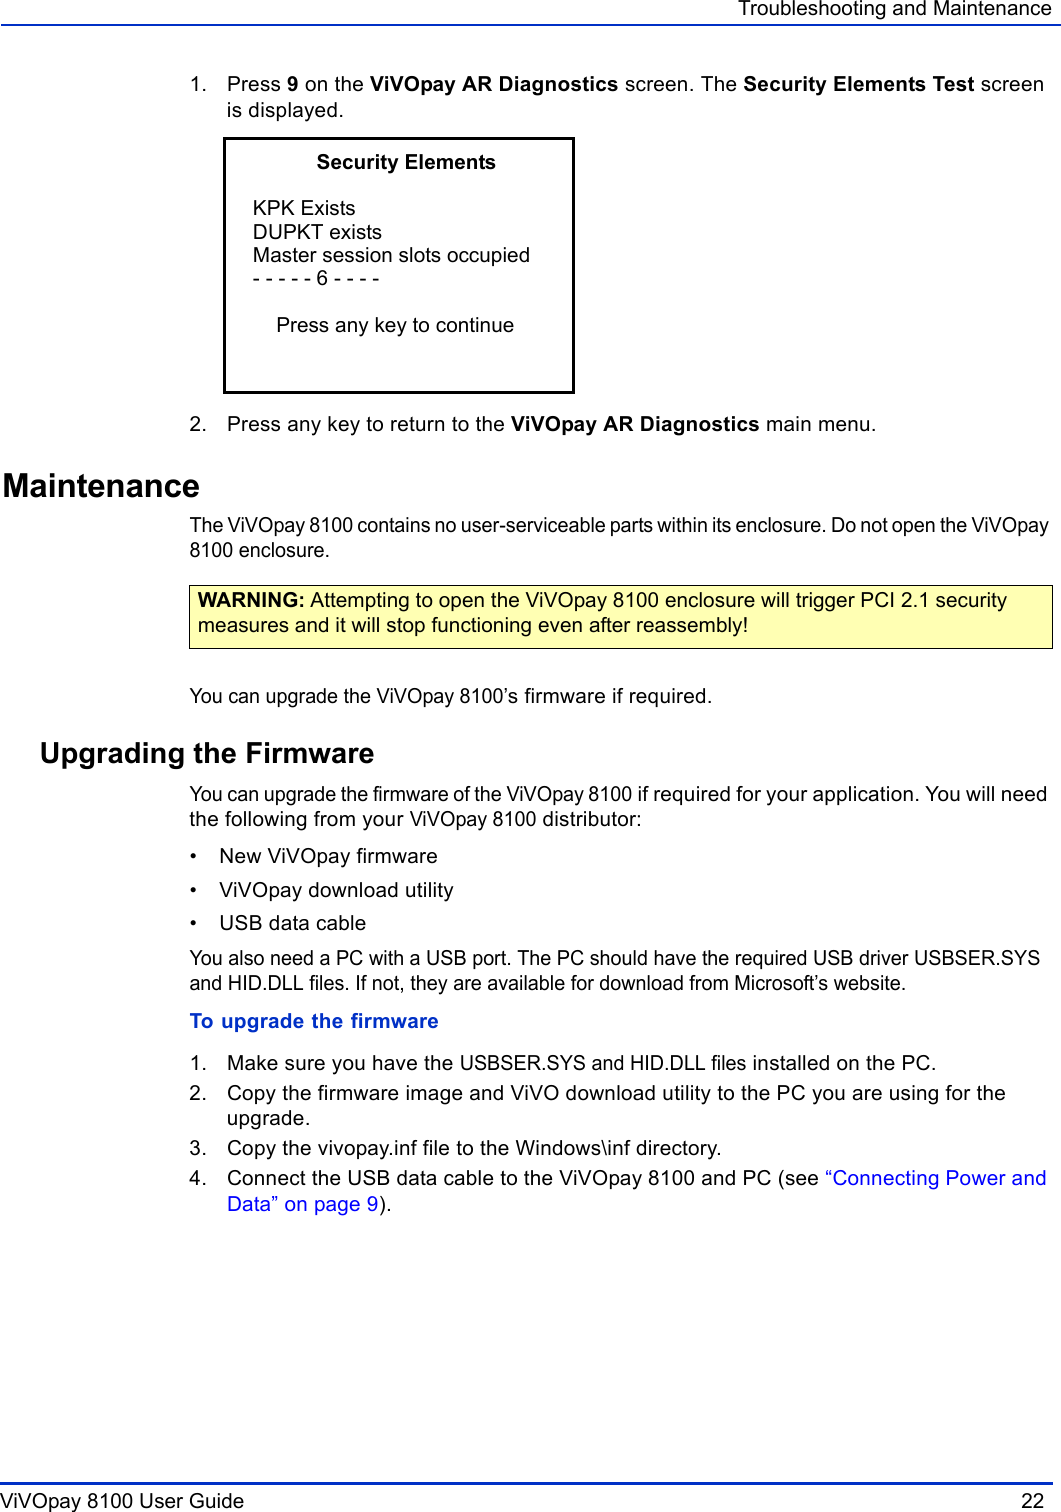
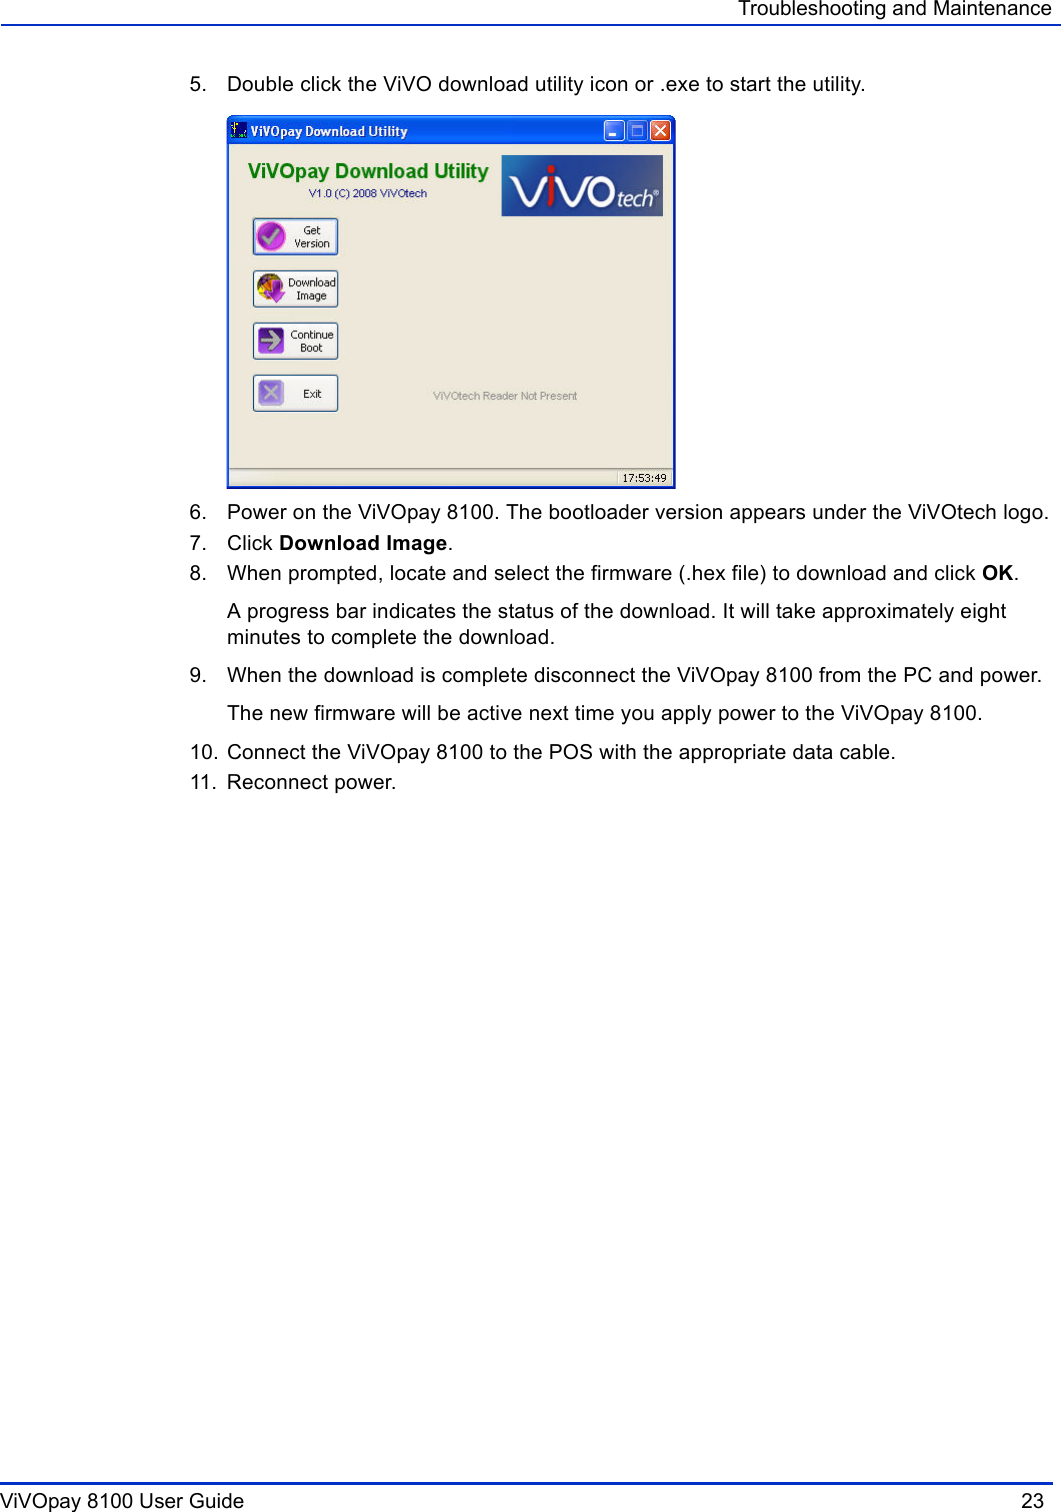
ViVOtech, Inc. PCI-PED v2.1 & ISO/IEC14443 Contactless Reader ViVOpay 8100 User Guide
UserManual.wiki
>
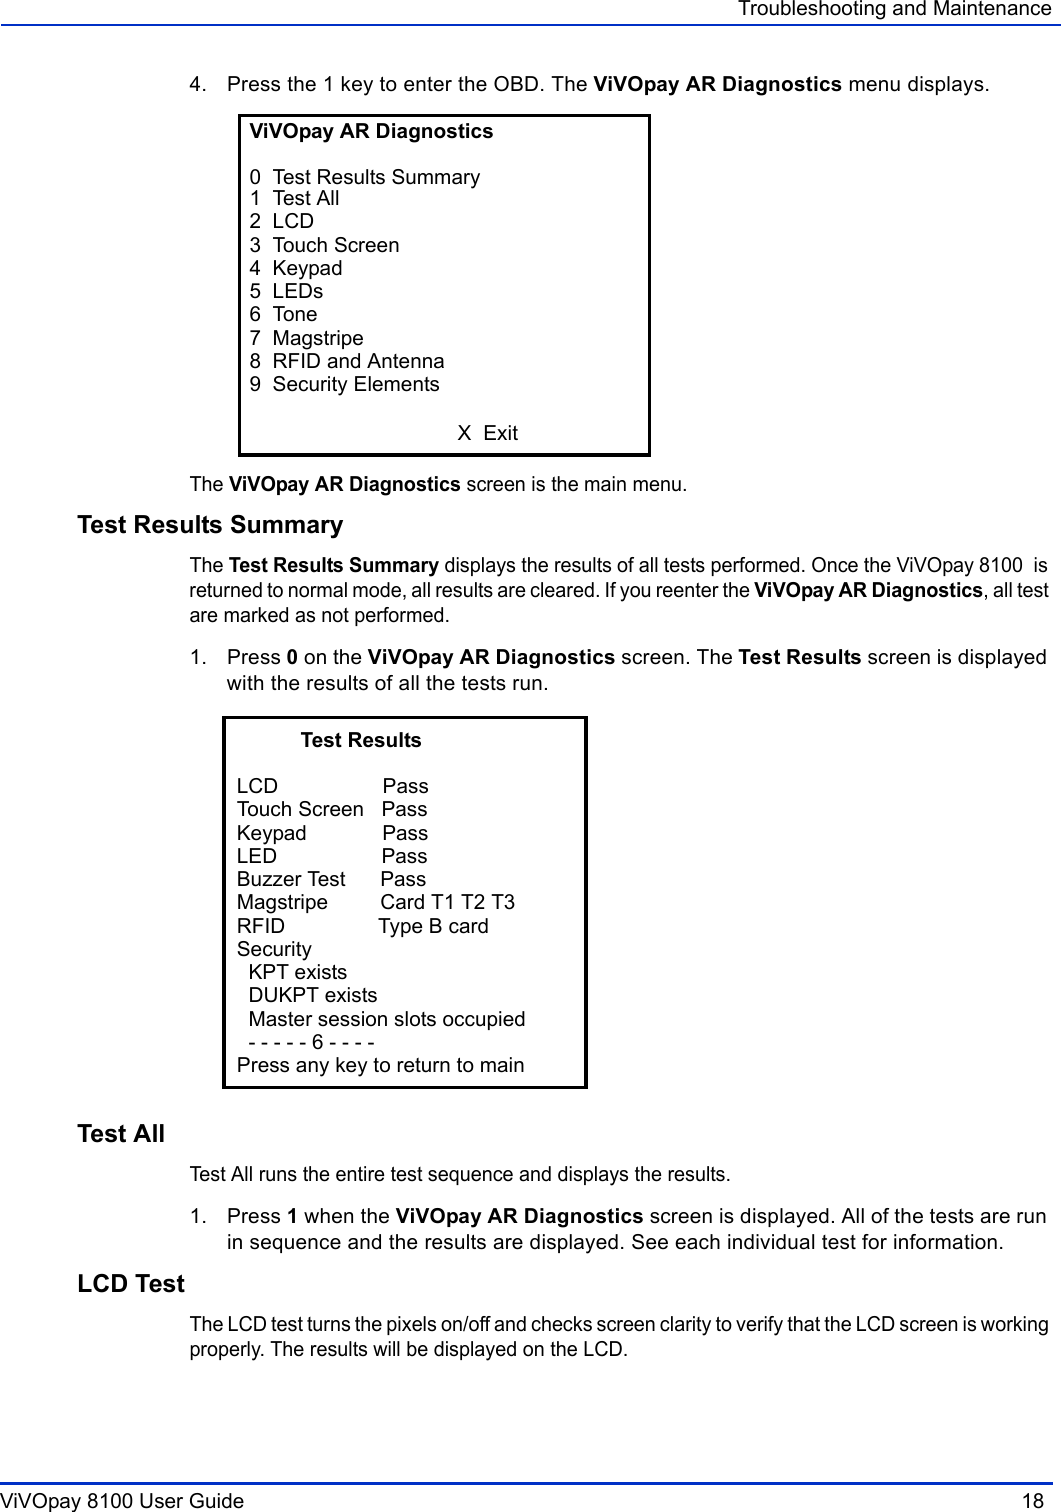
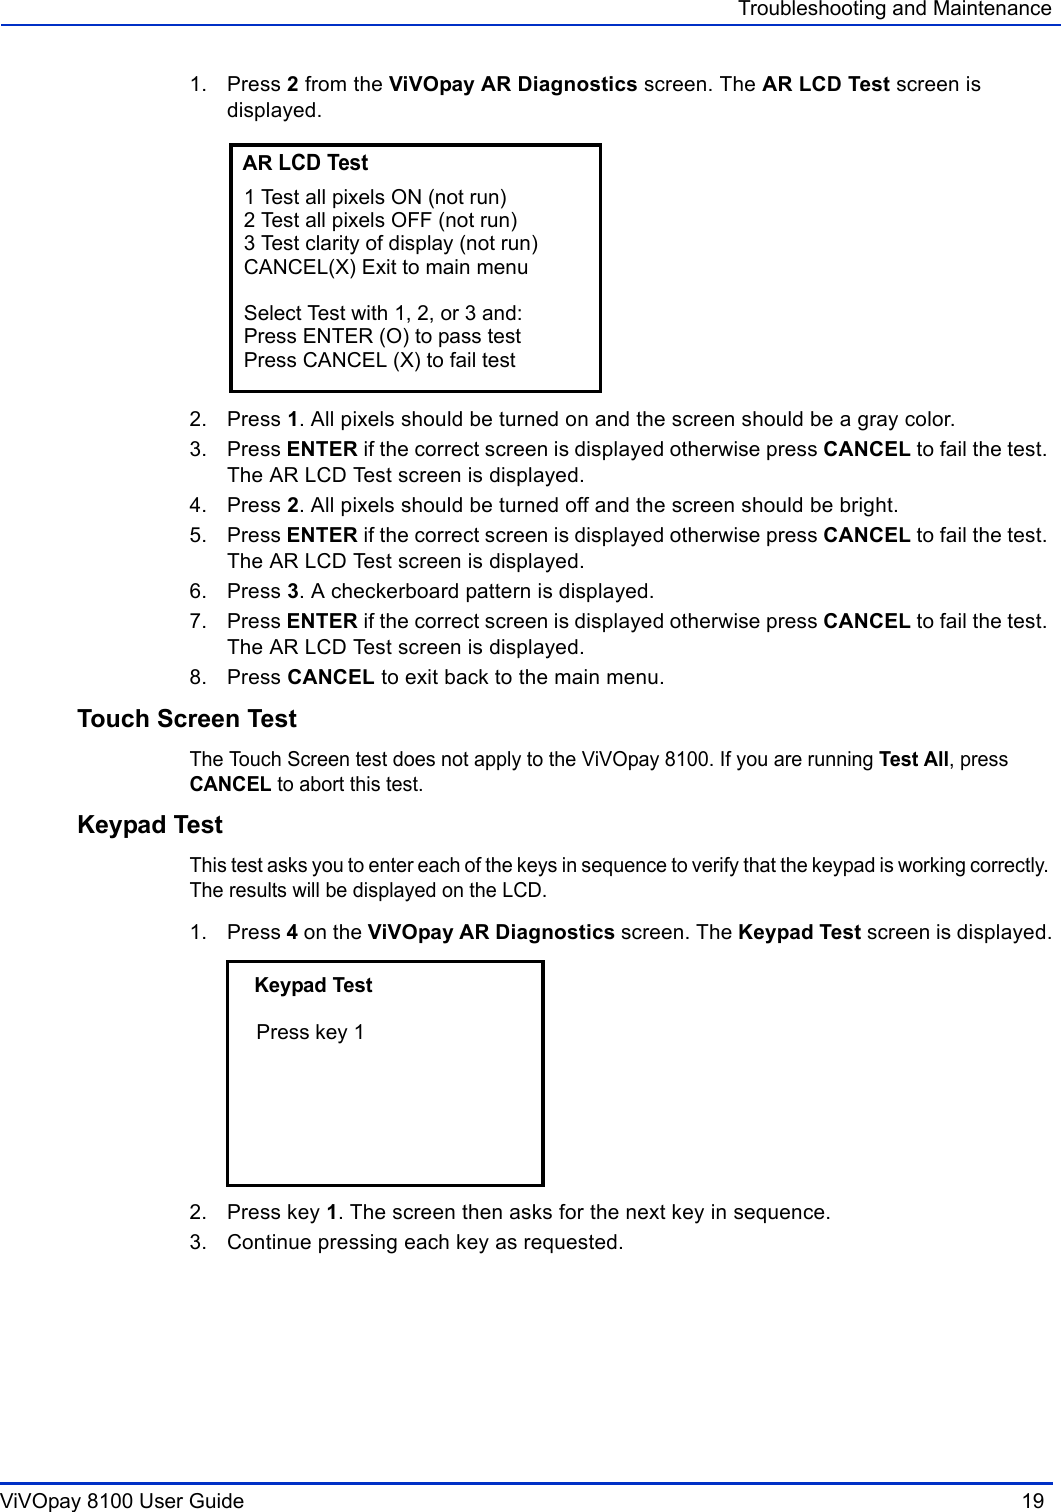
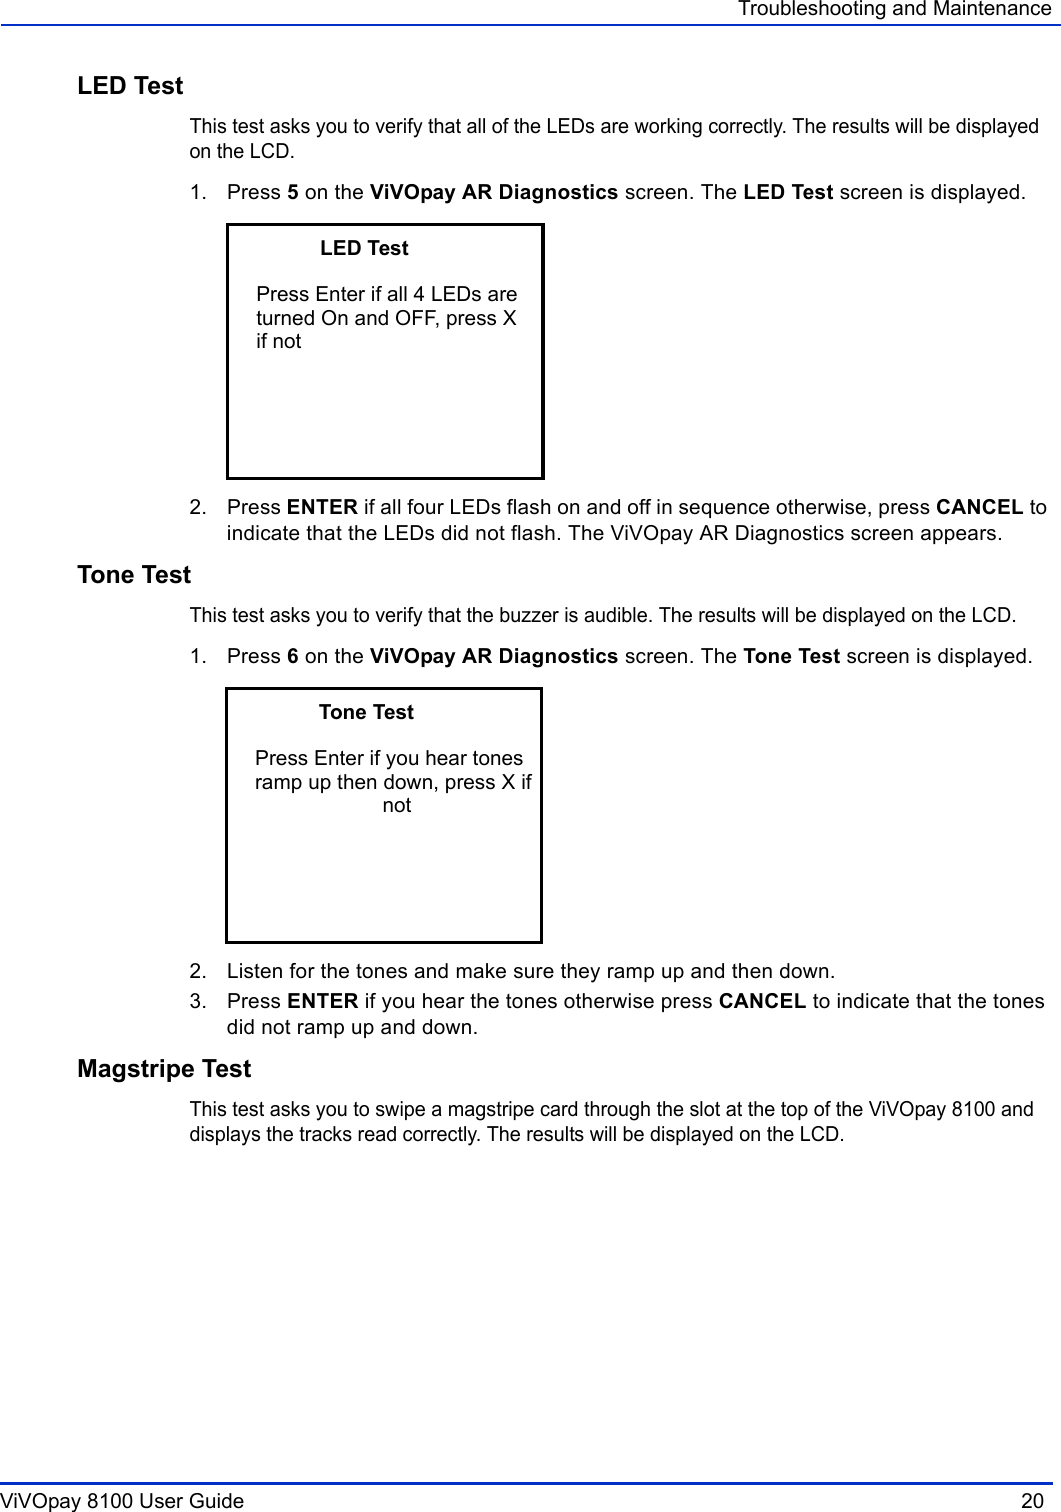
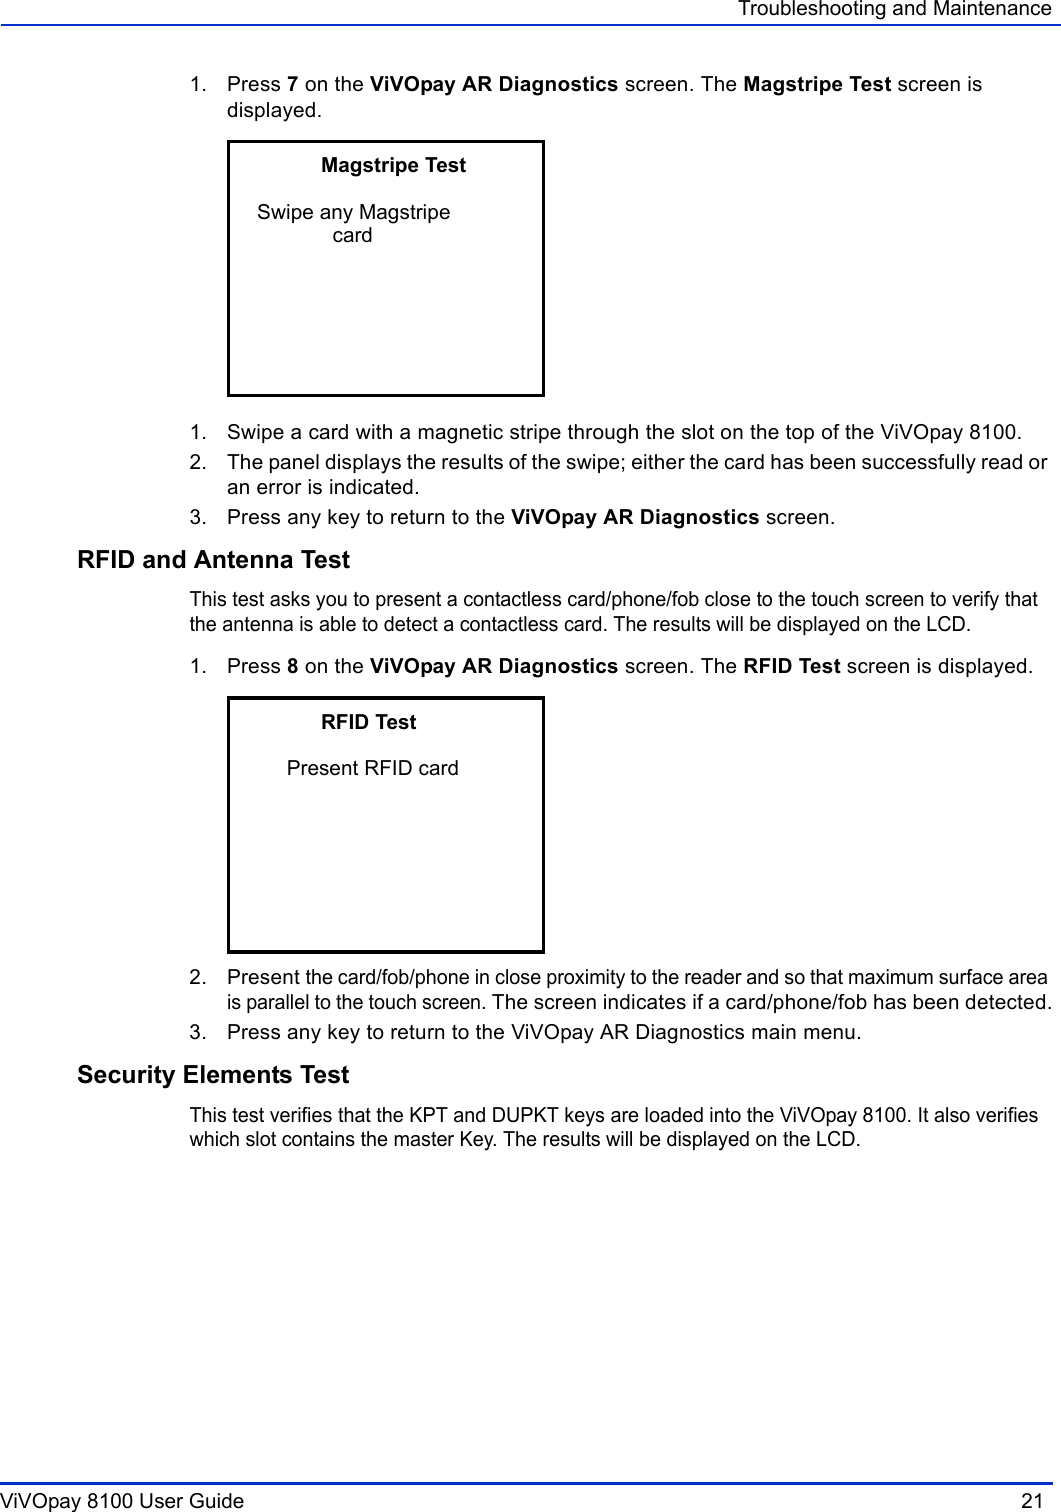
ViVOtech
>
VIVOPAY8100 User Manual
User manual
Navigation menu
Upload a User Manual
Namespaces
Wiki Guide
HTML
PDF
Info
Views
User Manual
Discussion / Help
Navigation