ViVOtech VIVOPAYKIOSKII Contactless Card reader User Manual Testing Software
ViVOtech, Inc. Contactless Card reader Testing Software
UserManual.wiki
>
ViVOtech
>
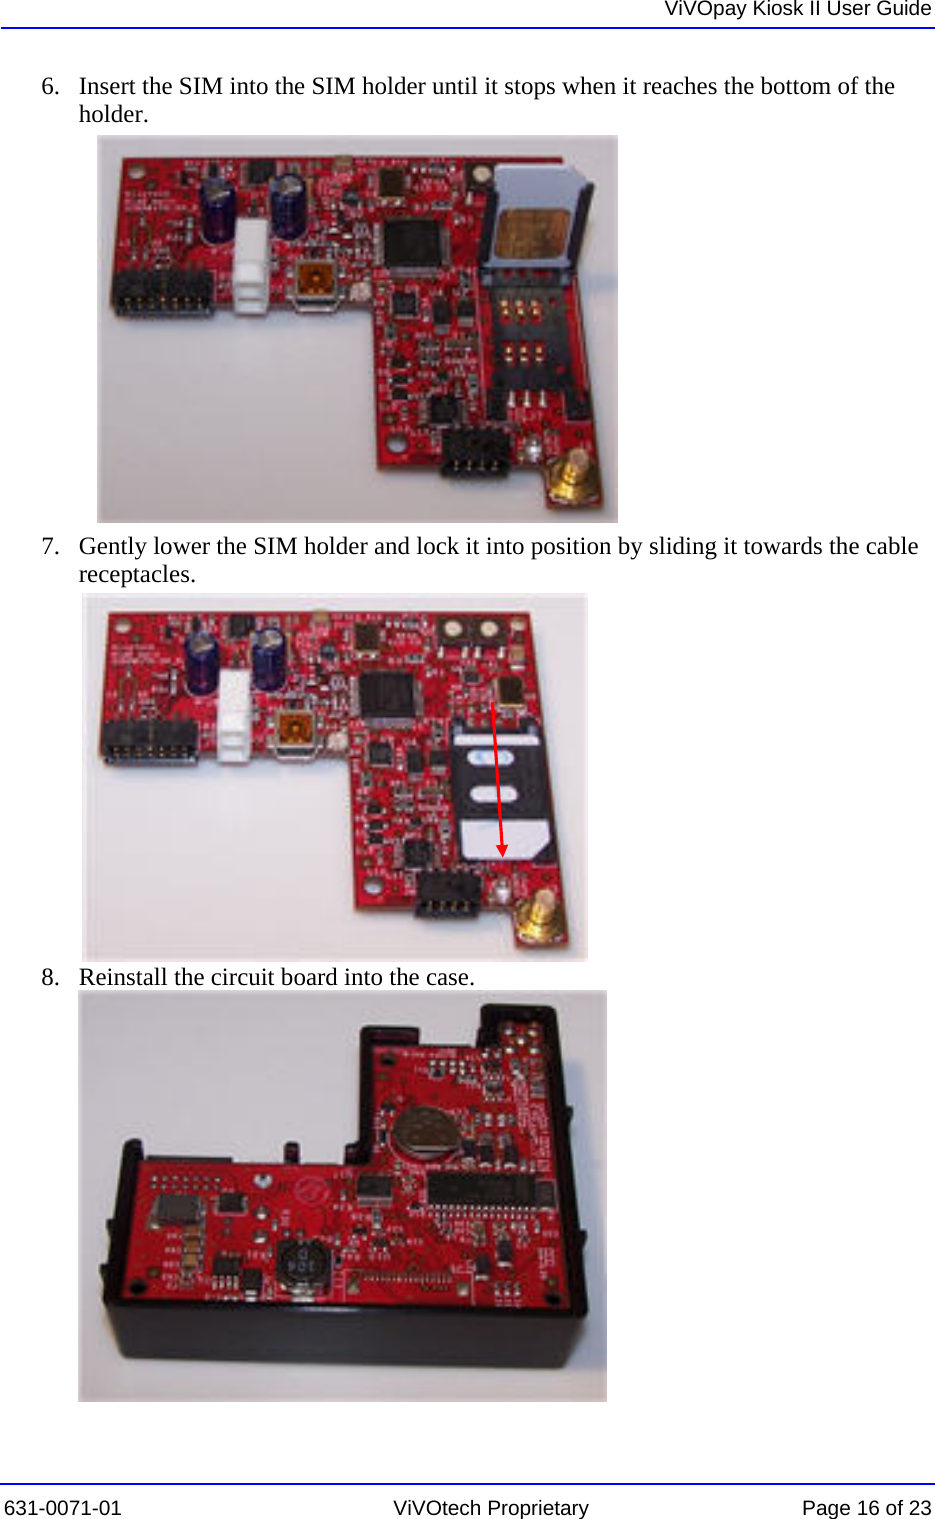
VIVOPAYKIOSKII User Manual
User manual
Navigation menu
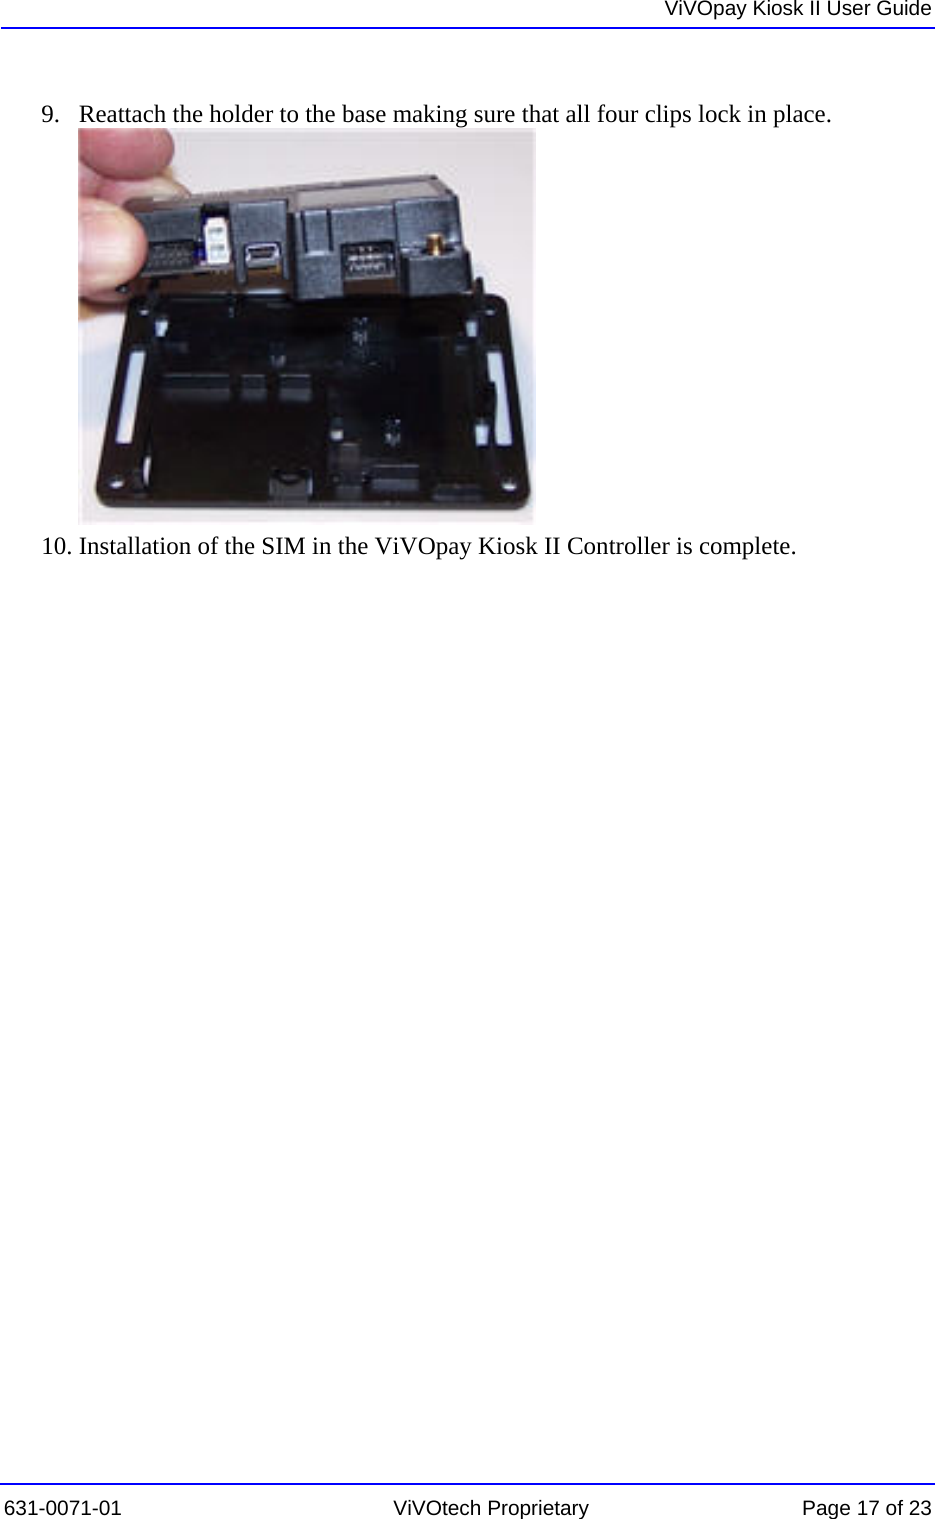
Upload a User Manual
Namespaces
Wiki Guide
HTML
PDF
Info
Views
User Manual
Discussion / Help
Navigation
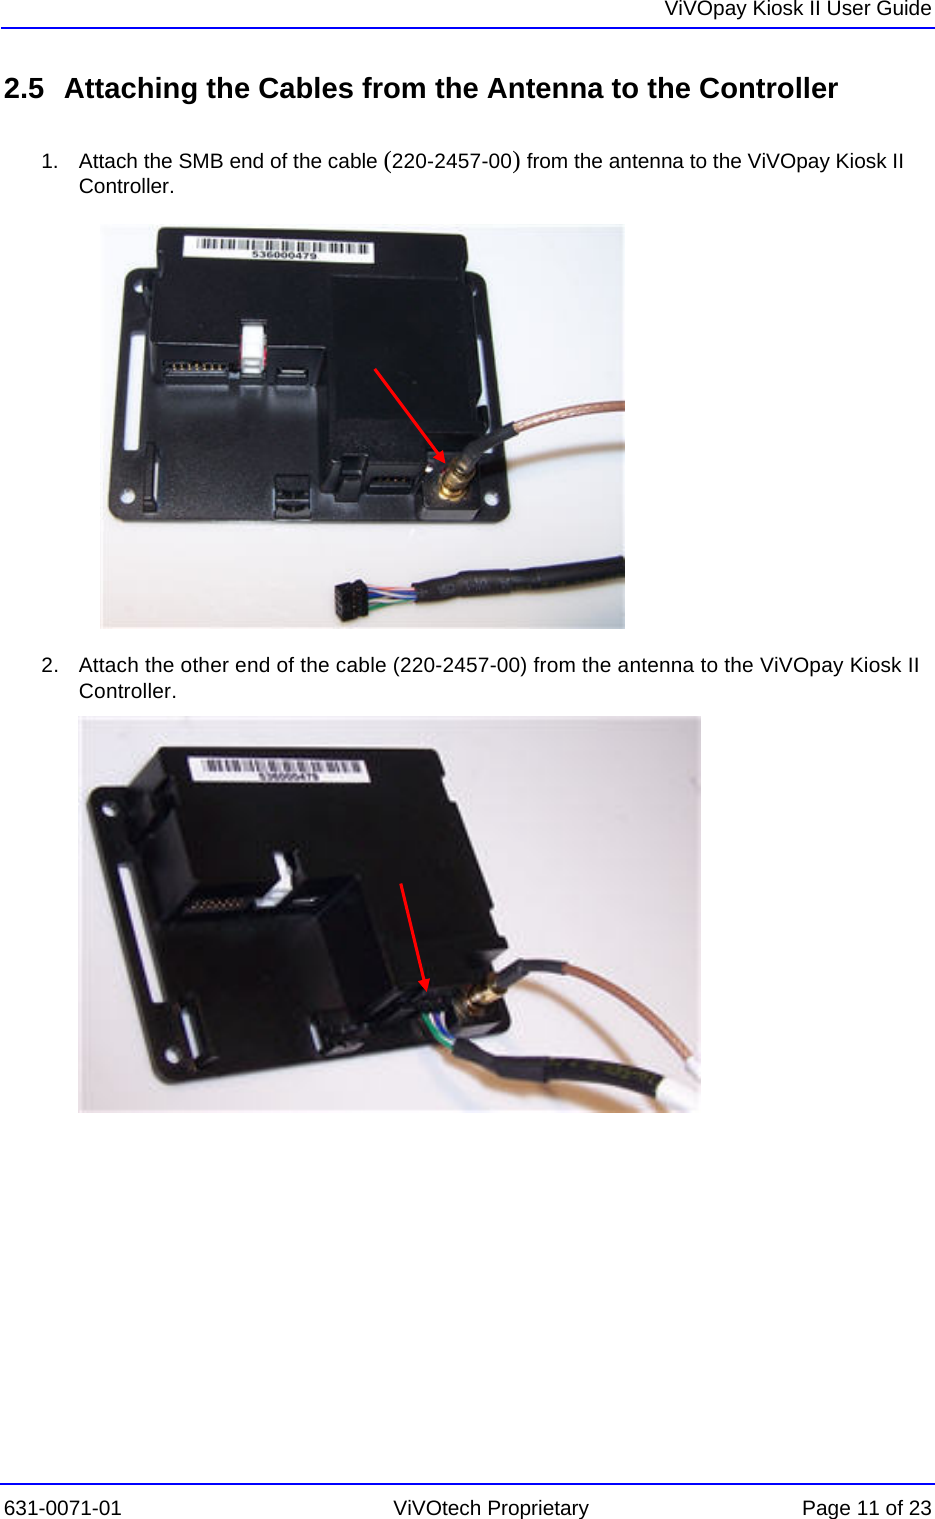
![ViVOpay Kiosk II User Guide 631-0071-01 ViVOtech Proprietary Page 3 of 23 FCC Regulatory Compliance Notices Class B Equipment This equipment has been tested and found to comply with the limits for a Class B digital device pursuant to Part 15 of the FCC Rules. These limits are designed to provide reasonable protection against harmful interference in a residential installation. This equipment generates, uses, and can radiate radio frequency energy and, if not installed and used in accordance with the instructions, may cause harmful interference to radio communications. However, there is no guarantee that interference will not occur in a particular installation. This device complies with part 15 of the FCC rules. Operation is subject to two conditions: (1) This device may not cause harmful interference, and (2) this device must accept any interference received, including interference that may cause undesired operation. If this equipment does cause harmful interference to radio or television reception, which can be determined by turning the equipment off and on, the user is encouraged to try and correct the interference by one or more of the following measures: • Reorient or relocate the receiving antenna. • Increase the separation between the equipment and the receiver. • Connect the equipment into an outlet on a circuit different from that to which the receiver is connected. • Consult the dealer or an experienced radio/TV technician for help. IC Compliance Warning: Operation is subject to two conditions: (1) This device may not cause harmful interference, and (2) this device must accept any interference received, including interference that may cause undesired operation. User Information The user’s manual or instruction manual for an intentional or unintentional radiator shall caution the user that changes or modifications not expressly approved by the party responsible for compliance could void the user's authority to operate the equipment. In cases where the manual is provided only in a form other than paper, such as on a computer disk or over the Internet, the information required by this section may be included in the manual in that alternative form, provided the user can reasonably be expected to have the capability to access information in that form. [54 FR 17714, Apr. 25, 1989, as amended at 68 FR 68545, Dec. 9, 2003] Cautions and Warnings Caution: The unit should be mounted 1-2 feet away from other units. Can be adjusted based on lane setup. Caution: Danger of Explosion if battery is incorrectly replaced. Replace only with same or equivalent type recommended by the manufacturer. Discard used batteries according to the manufacturer’s instructions. Warning: Avoid close proximity to radio transmitters which may reduce the ability of the reader.](https://usermanual.wiki/ViVOtech/VIVOPAYKIOSKII/User-Guide-1055215-Page-3.png)
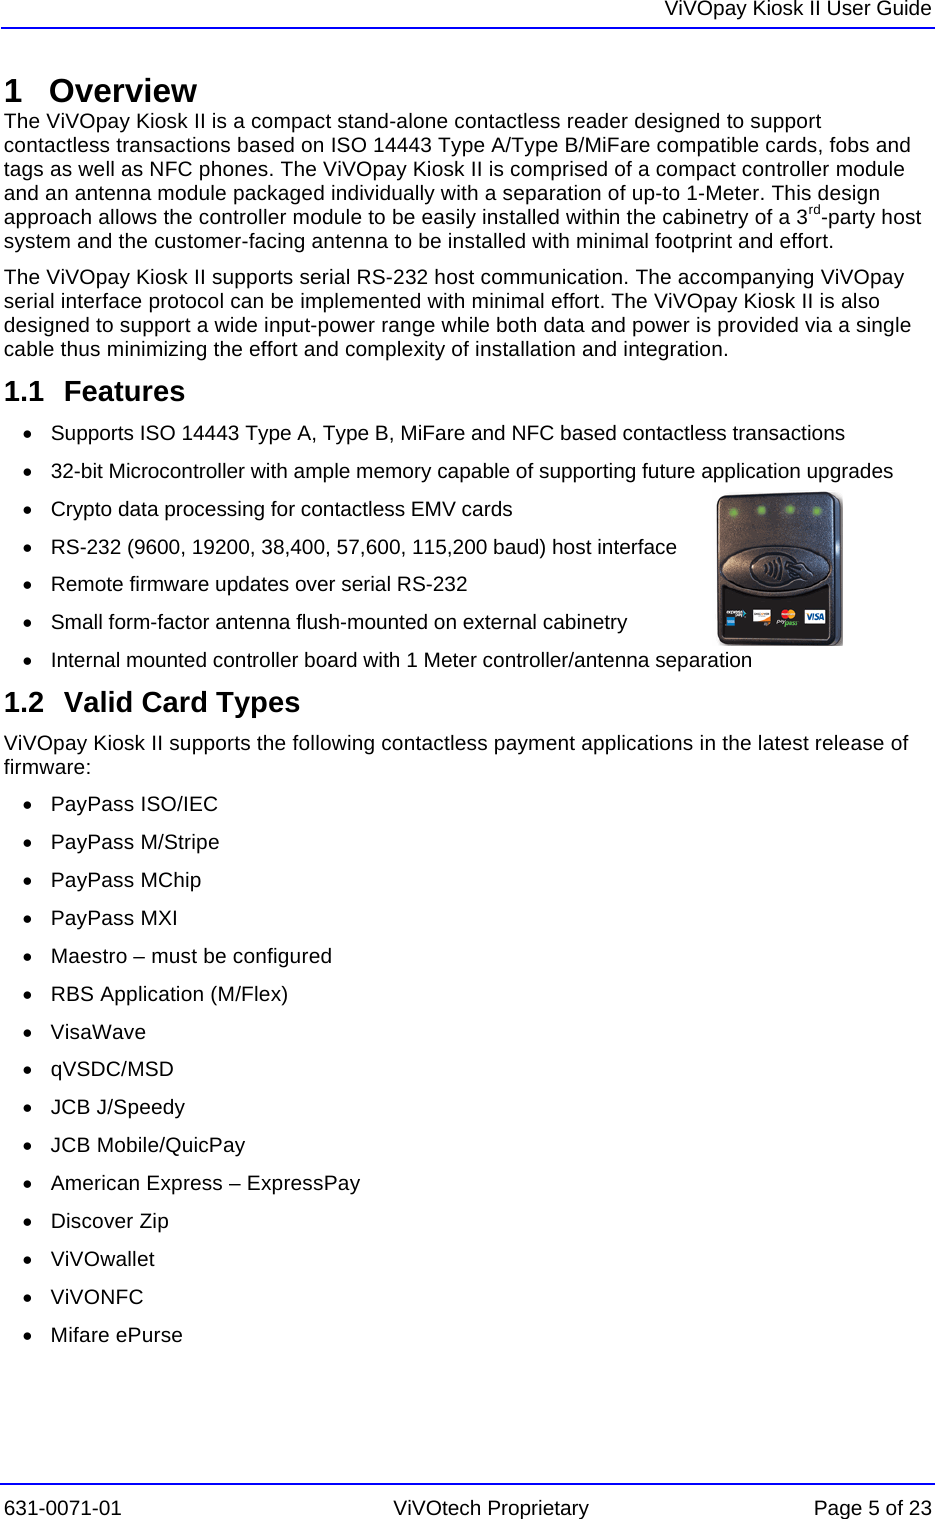
![ViVOpay Kiosk II User Guide 631-0071-01 ViVOtech Proprietary Page 10 of 23 2.4 Mounting the ViVOpay Kiosk II Controller Note: The ViVOpay Kiosk II Controller must be mounted within 1 meter of the external antenna. Make sure that the cable will be able to reach from the external antenna to the ViVOpay Kiosk Controller if the external antenna is mounted of a surface that opens (such as a door) when the antenna mounting surface is fully opened. The ViVOpay Kiosk II installer must use their discretion when mounting the Controller. If it acceptable, the installer can drill four holes for mounting the Controller if screw heads can appear on the outside of the Kiosk. In this case, it would be advisable to use security screws to prevent tampering with the screws. If drilling additional holes on the outside of the Kiosk surface is not acceptable, the installer can use double-sided tape to mount the Controller to any clean surface. 2.4.1 Mounting the ViVOpay Kiosk II Controller Using Screws 1. Position the ViVOpay Kiosk Controller on the interior of the II making sure that there is sufficient room for the external antenna mounting surface to be fully opened. 63.50 [ 2.500 ]2. Locate the four 4.4mm (0.173 inch) mounting holes by holding the ViVOpay Kiosk Controller in position and mark the holes. The following diagram shows the spacing on the holes to be drilled for mounting the ViVOpay Kiosk II Controller. 3. Drill the four 4.4 mm (0.173) mounting holes using a number 17 drill bit. 4. Use four screws and nuts to mount the ViVOpay Kiosk Controller to the Kiosk surface. (Mounting screws are not provided and must be supplied by the installer.) 5. Tighten the nuts to hold the ViVOpay Kiosk II Controller in position so that it does not move. 2.4.2 Mounting the ViVOpay Kiosk II Controller Using Mounting Tape 1. Position the ViVOpay Kiosk II Controller on the interior of the Kiosk making sure that there is sufficient room for the external antenna mounting surface to be fully opened. 2. Attach double-sided tape to the mounting surface. 3. Position the ViVOpay Kiosk II Controller over the mounting tape and gently apply pressure to hold the Controller in position.](https://usermanual.wiki/ViVOtech/VIVOPAYKIOSKII/User-Guide-1055215-Page-10.png)