ViaSat FT2225 Fixed L-Band satellite modem with WLAN and Bluetooth User Manual
ViaSat, Inc. Fixed L-Band satellite modem with WLAN and Bluetooth
UserManual.wiki
>
ViaSat
>
FT2225 User Manual
User Manual
Navigation menu
Upload a User Manual
Namespaces
Wiki Guide
HTML
PDF
Info
Views
User Manual
Discussion / Help
Navigation

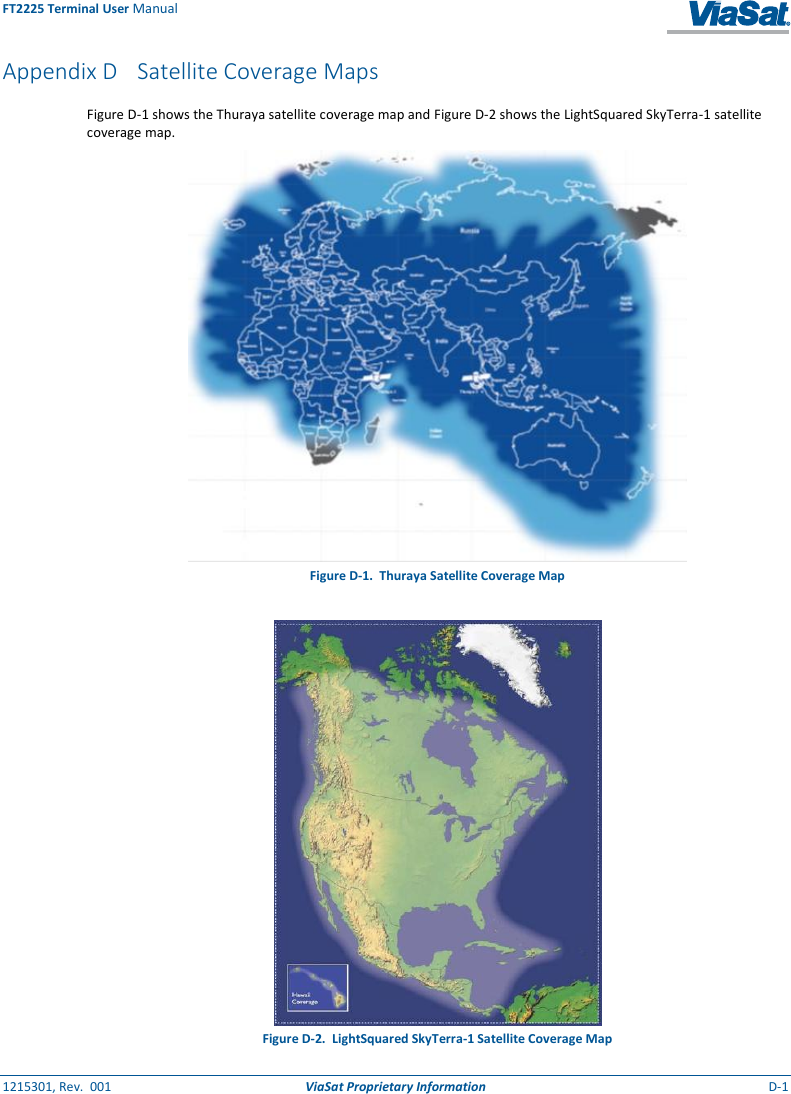
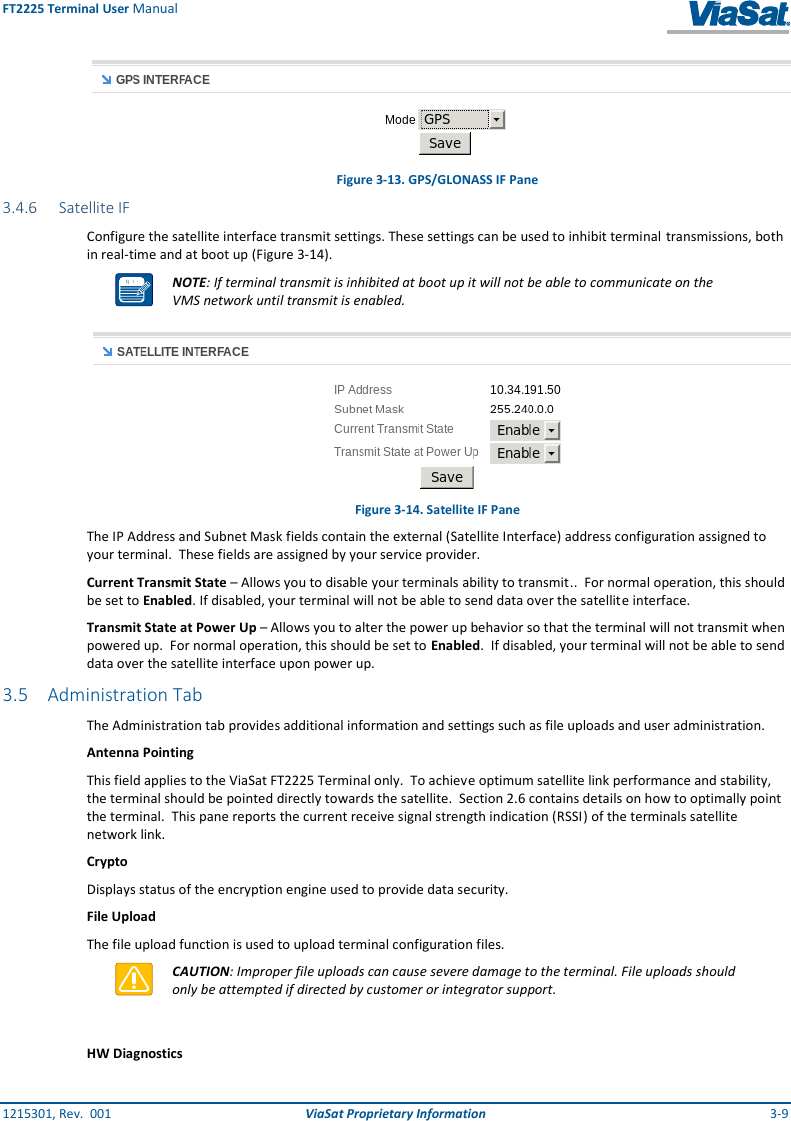
![FT2225 Terminal User Manual 1215301, Rev. 001 ViaSat Proprietary Information 3-8 5. Server Port – Set to the port number on the Server IP that the packets will be sent to. This port can be the same as the Incoming Port, but does not need to be. 6. When complete, click Add and the assignment will show up in the Port Forwarding Assignments shown in Figure 3-11 . Figure 3-11. Port Forwarding Pane 3.4.4 WIFI IF The WIFI IF pane is used to configure your wireless access point interface for the WLAN (Figure 3-12). To configure the access point settings set the following: 1. SSID – This is also known as your network name. Provide a unique SSID for the network. The name must not exceed 32 keyboard characters. 2. Network Password – The terminal uses WPA2 encryption. Use this field to set the network password for the WLAN. 3. Channel – Choose the operating channel for your WLAN. 4. Click Save. Figure 3-12. WIFI IF Pane 3.4.5 GPS/GLONASS IF The GPS/GLONASS IF pane is used to select the operating mode for the GPS/GLONASS location services (Figure 3-13). Select the pull-down for the desired mode and click Save. Comment [DC1]: Confirm with Kyle Smith Comment [DC2]: The last time I saw this sw, this was not a user configurable setting. Confirm with Kyle Smith](https://usermanual.wiki/ViaSat/FT2225/User-Guide-2810719-Page-30.png)
![FT2225 Terminal User Manual 1215301, Rev. 001 ViaSat Proprietary Information C-1 Appendix C Roof Mount Example The FT2225 can be installed on any flat surface that is wide as the bottom outline, as shown in Figure xx. Comment [PT3]: Need the roof mount graphic](https://usermanual.wiki/ViaSat/FT2225/User-Guide-2810719-Page-41.png)