ViaSat RG1100 Afterburner Wireless Home Gateway User Manual
ViaSat, Inc. Afterburner Wireless Home Gateway
ViaSat >
User Manual
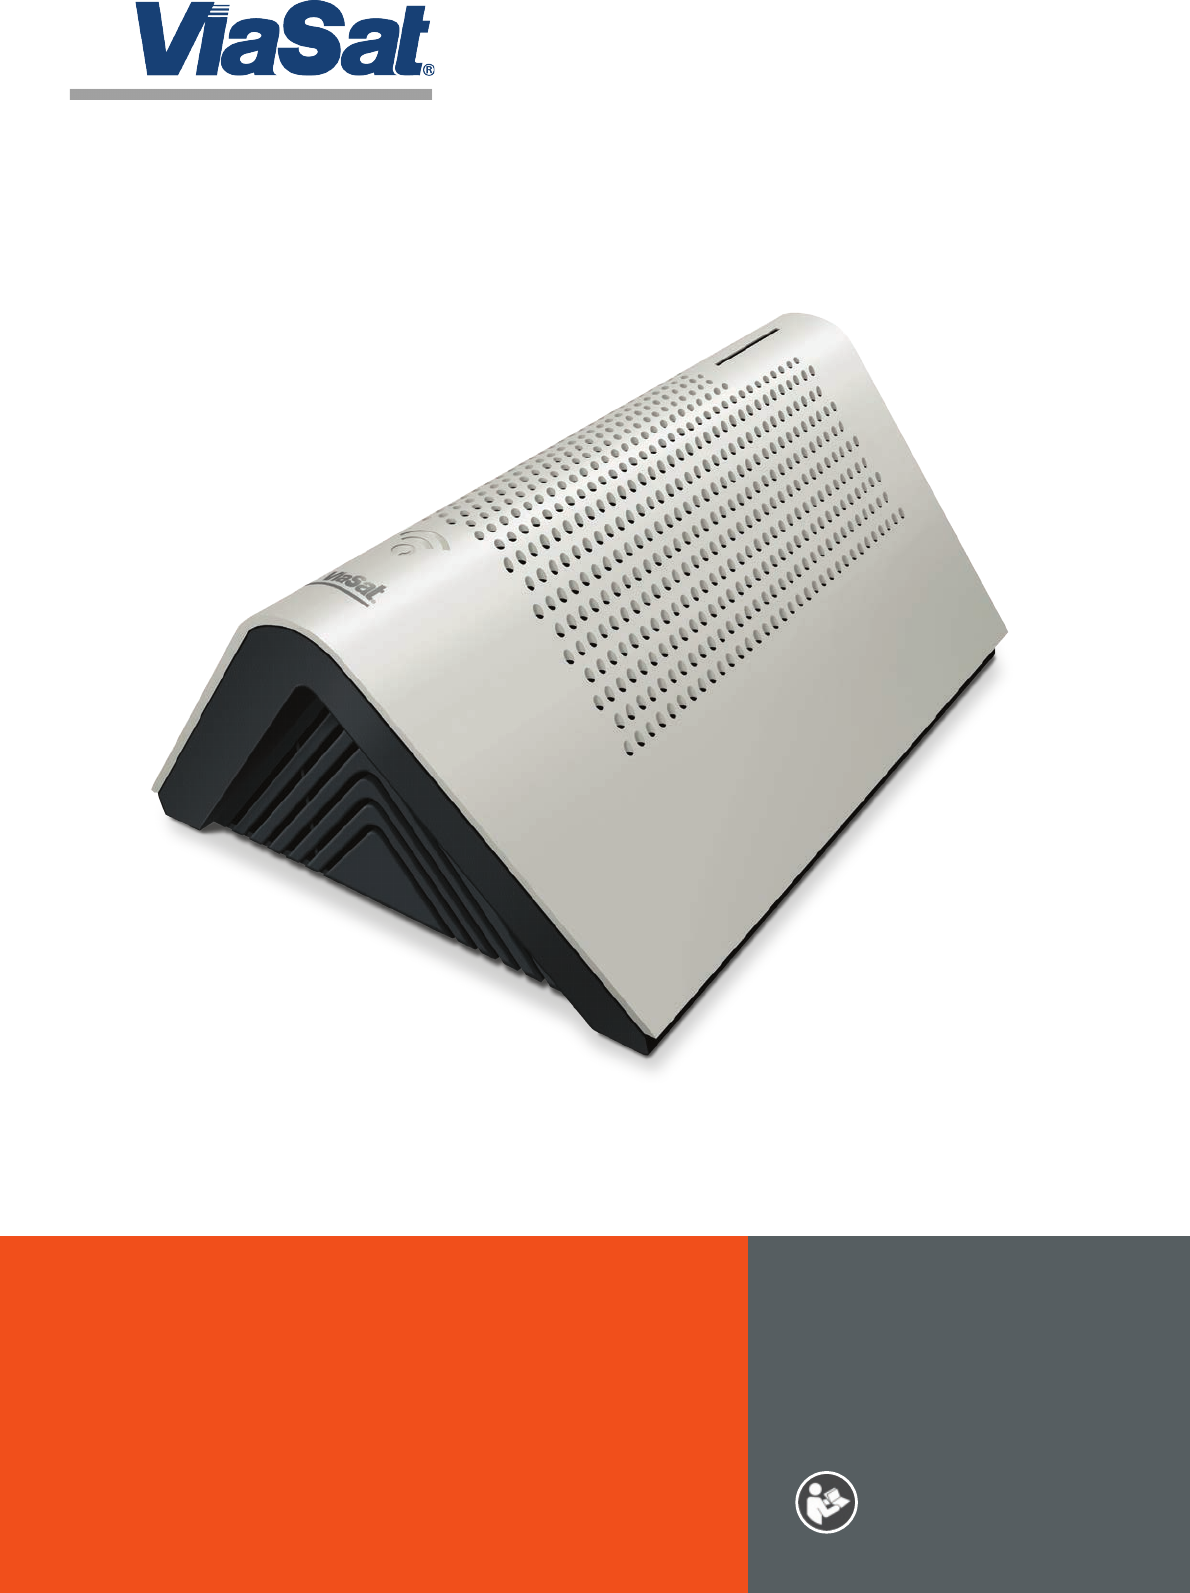
ViaSat WiFi
Gateway
USER GUIDE
Read entire user guide for
additional instructions and
product information.
2
WELCOME TO
ViaSat® Satellite Internet
Whether you’re streaming your favorite videos, downloading important files or
connecting with friends and family, the ViaSat WiFi Gateway brings the best of the
internet to you in one simple device.
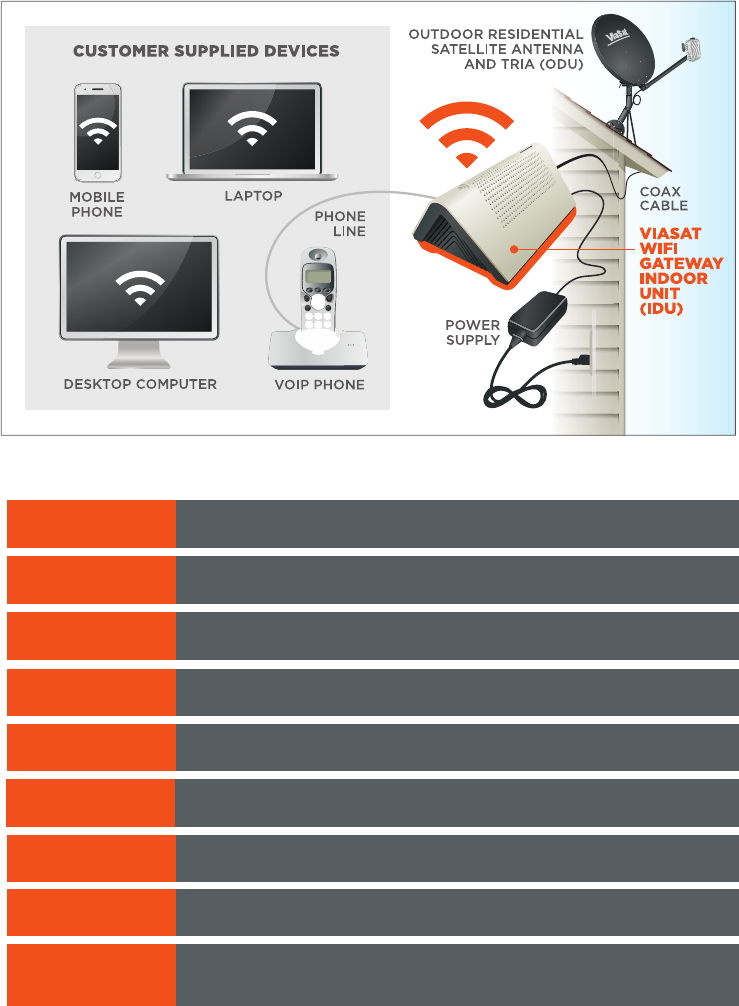
Your residential terminal system could consist of the following items shown below:
INSIDE THIS GUIDE
SECTION 1 What’s In the Box
SECTION 3 Connecting the ViaSat WiFi Gateway
SECTION 2 Important Safety Information
SECTION 7 Indicator Lights
SECTION 5 Setting up ViaSat Voice telephone service
SECTION 8 Troubleshooting
SECTION 9 Warranty, Environmental and Other
Information
SECTION 4 ViaSat WiFi Gateway Specifications
SECTION 6 Connecting your WiFi devices
3
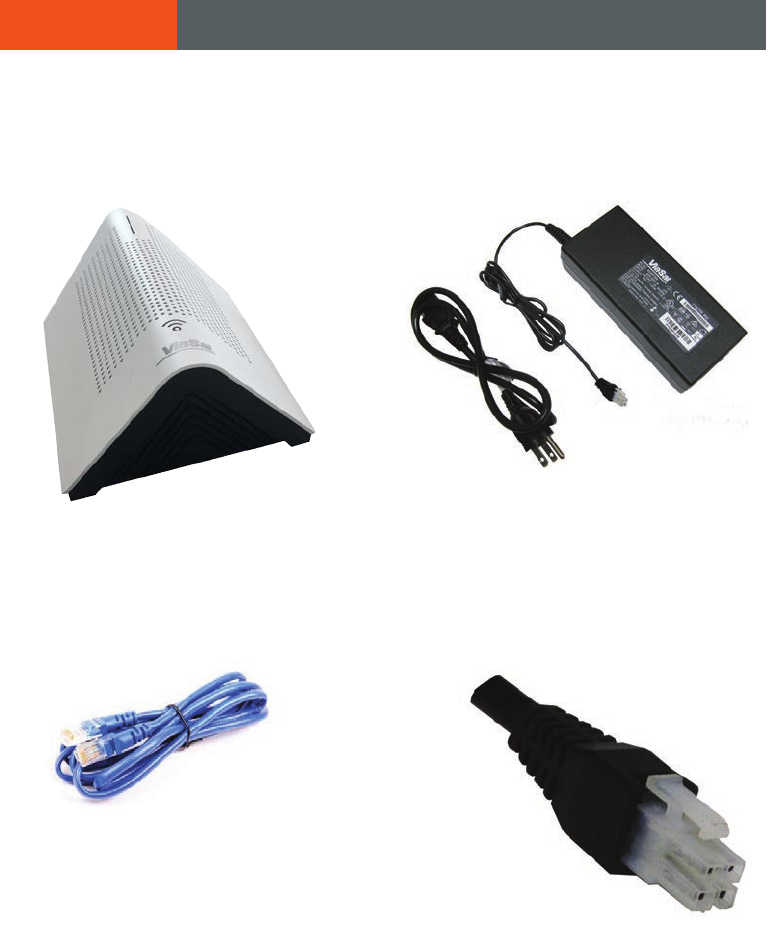
Your ViaSat WiFi Gateway includes everything shown here:
SECTION 1 What’s In the Box
ViaSat WiFi Gateway
Ethernet cable for connecting
your ViaSat WiFi Gateway to your
computer
Power supply, AC power
cord, and four prong DC
power connector and cord
(for use with ViaSat WiFi Gateway
only)

4
SECTION 2 Important Safety Information
To reduce the risk of serious injury or death due to electric shock or fire, read and follow
this safety information. The following are definitions for important icons.
WARNING WARNING indicates a hazardous situation which, if not avoided, could
result in serious injury or death.
NOTICE NOTICE is used to address practices not related to physical injury. NOTICE is
used for procedures or practices that, if not followed, could result in equipment damage.
Exposed Coax Hazard
When the ViaSat WiFi Gateway is powered on, there is DC voltage present in the coax
cable connector and any coax cable that is plugged in. Do not touch an exposed coax
cable when the system is powered on.
Do Not Open the ViaSat WiFi Gateway
Do not open the ViaSat WiFi Gateway or attempt to service interior parts. There are
no user-serviceable parts inside the ViaSat WiFi Gateway. The ViaSat WiFi Gateway
should only be opened by a qualified service professional.
Keep ViaSat WiFi Gateway Dry
Keep the ViaSat WiFi Gateway away from water. Keep the gateway in a spot away from
open windows. Do not place cups or other containers of liquid near the gateway. Do not
use cleaning fluids or sprays, to remove dust.
NOTICE To avoid equipment damage, only wipe the ViaSat WiFi Gateway housing with
a clean and dry cloth.
Satellite Dish Hazard
The transmitting equipment is capable of generating RF levels above the maximum
permissible uncontrolled exposure level. Do not place head or other body parts in the
radiation beam pattern of the transmitter feed horn and/or antenna when the transmitter
is on. Unplug the ViaSat WiFi Gateway before performing maintenance to any satellite
dish components.
Electric Shock Hazard from Improperly Grounded System
To reduce the risk of electric shock, before installing the ViaSat WiFi Gateway, be sure
the electrical and cable system is properly grounded. ViaSat expects that this ViaSat
WiFi Gateway will be installed where:
• Electricaloutletsareproperlywiredandgrounded.
• AllcomputerequipmentattachedtotheGateway is properly grounded.
• TheViaSatthree-prongpowercordmustbeconnectedtoaproperlygroundedthree-
prong AC outlet.
• Donotuseadapterplugsorremovethegroundingprongfromtheplug.
• ThecabledistributionsystemisgroundedinaccordancewithANSI/NFPA70,the
NationalElectricalCode(NEC)—inparticular,Section820.93:GroundingofOuter
Conductive Shield of a Coaxial Cable.
• If you are unsure if your system is properly grounded, consult a licensed electrician.
5
SECTION 3 Connecting the ViaSat WiFi Gateway
WARNING To reduce the risk of serious injury or death from electric shock, do not
install the ViaSat WiFi Gateway if there is risk of lightning activity in the area.
WARNING
PROP65WARNING:Thisproduct,includingelectricalwiring,containschemicals,
including lead, known to the State of California to cause cancer, birth defects or other
reproductive harm. Wash hands after use.
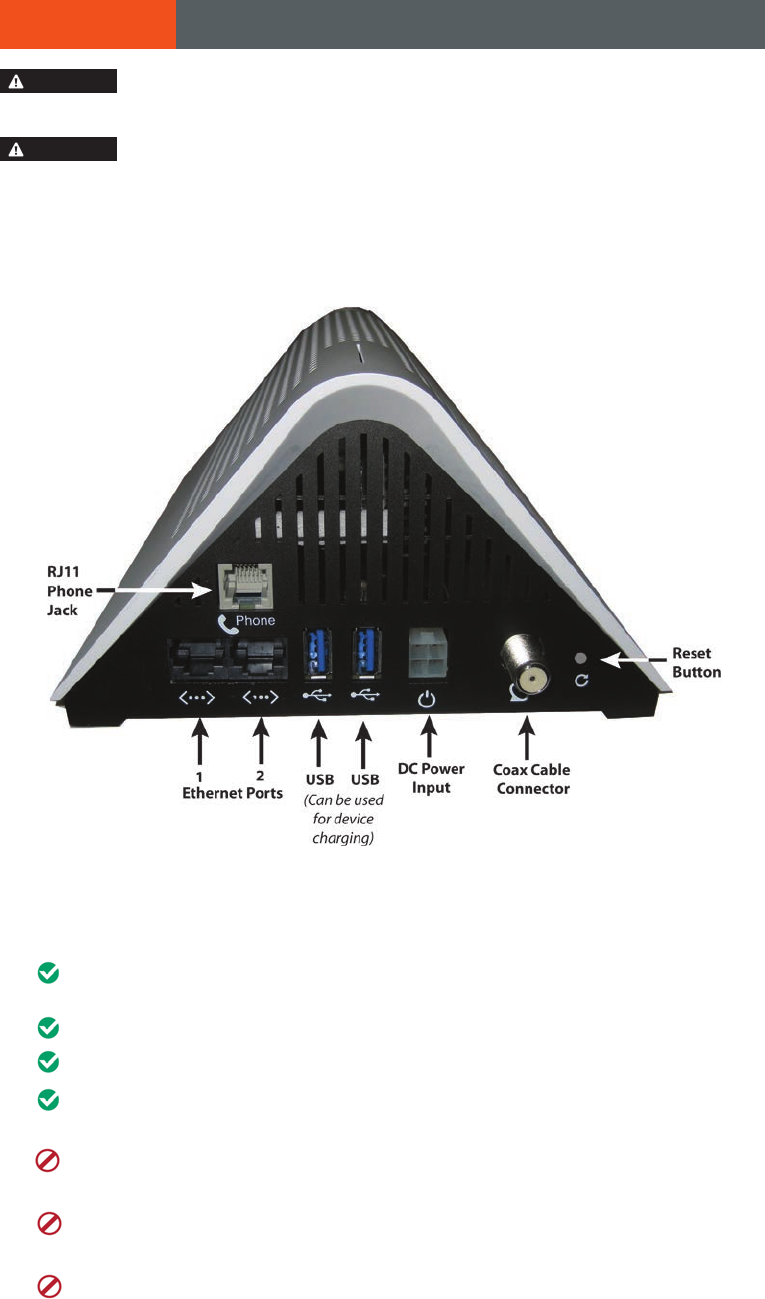
1 Attach the coax ODU cable connector to the ViaSat WiFi Gateway identified in the
photo below. Also shown are the phone jack, USB and Ethernet ports, and power input.
2PlaceyourViaSatWiFiGatewaynearyourcomputersoyoucanmaketheEthernet
and USB connections. Avoid placing near mirrors, metal cabinets, or Bluetooth devices.
For the best experience:
PlacetheViaSat WiFi Gateway on a hard surface. Soft surfaces like a
rug or carpet may block ventilation to the unit.
Makesurethereareatleast3inchesofclearancearoundtheunit.
Make sure there is adequate ventilation for the unit to avoid overheating.
Keep the ViaSat WiFi Gateway in a climate-controlled location
between0-40°C(32-104°F).
Do not paint or adhere decals to the ViaSat WiFi Gateway housing. This can
block ventilation holes in the ViaSat WiFi Gateway housing.
Do not position the ViaSat WiFi Gateway near heat sources, such as
ventilation openings on televisions and electronic devices like microwaves.
Keep the ViaSat WiFi Gateway away from heating vents and direct sunlight.

6
3 Tips to improve your wireless network’s connection speed and range:
Make sure that your gateway is in a good location:
For the widest coverage area, install your gateway near the center of your home.
Avoid placing the gateway on or near metal objects (such as file cabinets and
metal furniture), reflective surfaces (such as glass or mirrors), or masonry walls.
Any obstruction can weaken the wireless signal (even non-metallic objects), so
the fewer obstructions between the gateway and the wireless device, the better.
Placethegatewayinalocationawayfromotherelectronics,motors,anduorescent
lighting.
Many environmental variables can aect the gateway’s performance, so if your
wireless signal is weak, place the router in several locations and test the signal
strength to determine the ideal position.
If possible, upgrade wireless network interfaces (such as wireless network cards
incomputers)fromolderwirelessstandardsto802.11n.Ifawirelesslynetworked
device uses an older standard, the performance of the entire wireless network
may be slower.
4 Connect one end of an Ethernet cable to the back of the ViaSat WiFi Gateway and the other
to the Ethernet jack on your computer. The ViaSat WiFi Gateway includes two Ethernet
connections,youcanuseeitherone.ForwirelessconnectionsseeSection6.
5 Attach the DC power adapter to the back of your ViaSat WiFi Gateway, and then plug the cord
into a standard AC power source.
A professional installer, or a service help desk, will help you provision your gateway so you may
begin your service.
WARNING To reduce the risk of electric shock, do not connect the plug into an extension
cord or other outlet unless the plug can be fully inserted.
NOTICE Only use the provided AC Power Adapter with the ViaSat WiFi Gateway.
Note: You can record your default WiFi password and a user’s updated password here:
ProvidedWiFiPassword:_______________NewWiFiPassword:_________________
You can also remove the peelable top label that shows the default factory set WiFi Name
andPasswordandstickithereforsafekeeping.Storethisusermanualinasafeplacefor
future reference.
Additional information:
Installer’sname:______________________________
Installer’sphonenumber:_______________________

7
SECTION 4 ViaSat WiFi Gateway Specifications
WiFi type: 802.11ac3x3MU-MIMO2.4/5.0GHzDual-band,Dual-
concurrent WiFi router.
Ports & Processor: 2 Gigabit Ethernet ports; Quad-core processor, Coax
connection to satellite dish; universal power supply
Wireless security: SupportsWEP,andWPAsecuritystandards.
Other features: RJ11phonejack(forViaSatVoiceonly),
2USB3.0ports(canbeusedforchargingdevices),
Guestaccessnetworkcapability,Parentalcontrols,universal
AC power supply
Now that your ViaSat WiFi Gateway is fully connected, it’s time to set up your
optional Voice telephone service, if you have ordered it.
1 Connect your computer to the ViaSat WiFi Gateway using WiFi or an Ethernet
cable.
2 Connect your telephone to the standard phone jack on the rear of the ViaSat
WiFiGatewayusingphonecablewithRJ11connectors.
SECTION 5 Setting up ViaSat Voice telephone service
8
Activating your wireless network:
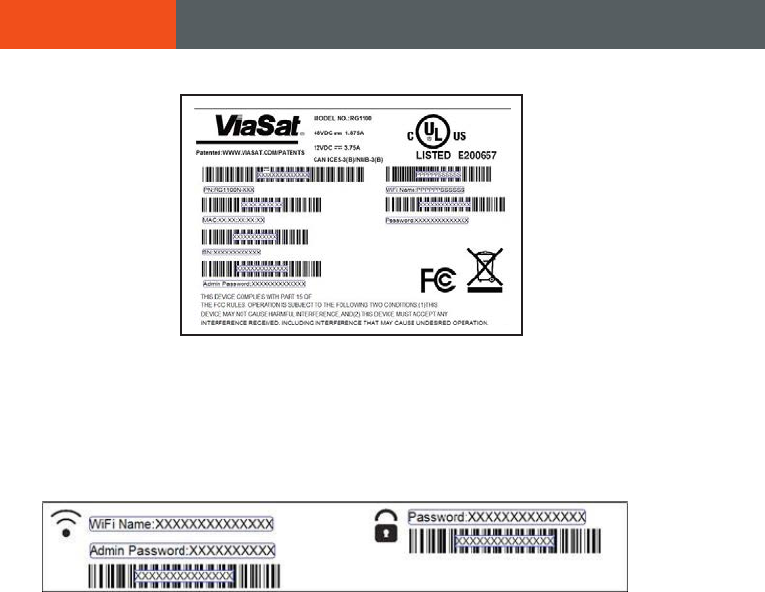
The ViaSat WiFi Gateway already has a secure, randomly assigned WiFi network name
and password. You can find this information printed on a label on the bottom of your
gateway device (sample shown above), as well as an easily accessible and more readible
removeable label on the top of the gateway (shown below).
If you would like to use this network name and password, no further action is needed on
your part.
This label can be removed and inserted in this manual on the back of the front page so
that it is not easily visible, but is available for future reference. Store this manual in a safe
place.
FindyourWiFinameinthelistofavailableWiFinetworksonyourPCormobiledevice.
Enter the password. If your ViaSat system is online you will be able to connect to the
internet.
Changing Network Name (SSID) and password
URL links to help you change your WiFi settings will be supplied at a later date.
These setting include options such as:
SECTION 6 Connecting your WiFi devices
• Changing your network name and password
• SettingupParentalControls
• Advanced settings
9
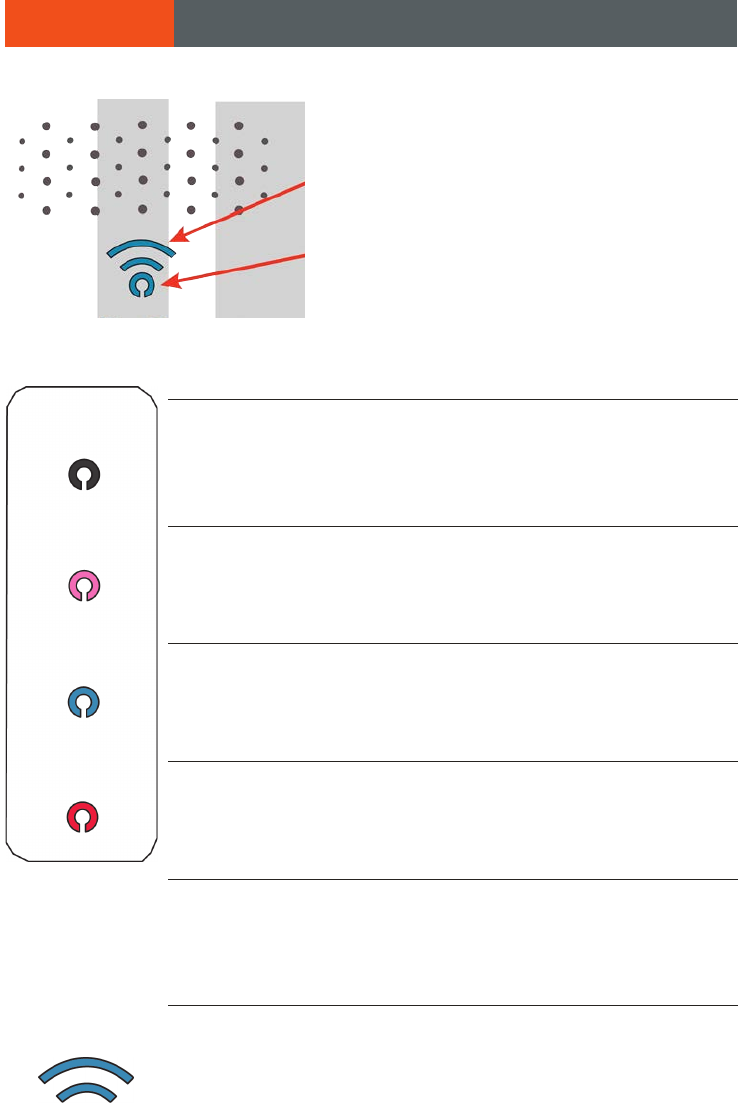
NO LIGHT No power
SOLID PURPLE Ranging,attemptingnetworkentry,DHCP
BLINKING PURPLE Installation mode (pointing and peaking)
SOLID BLUE Online
BLINKING BLUE Software upgrade
SOLID RED Oine
BLINKING RED Fault detected
This WiFi indicator light on your ViaSat
WiFi Gateway will light up blue when WiFi is
available. It is not lit when WiFi is not active.
This LED indicator shows the status of the
ViaSat WiFi Gateway.
Here’s what all those LED colors mean:
Pleasenotethatitisnormalfortheindicatorlighttoashnumerous
colors or go dark for a few seconds when it is first powered on. Allow
three to five minutes for your ViaSat WiFi Gateway to fully connect.
No light: WiFi is OFF
Solid blue light: WiFi is active
SECTION 7 Indicator Lights

10
If your ViaSat WiFi Gateway is not performing as expected:
1 First check to make sure your WiFi signal is active. If you have connected the gateway to
your computer with an Ethernet cable and do not have Internet service (and the WiFi LED
on the Gateway is not lit), the problem could lie with the gateway. Resetting the gateway
may be required.
2 Use a paperclip, or pen tip, to press the reset button on the side of the gateway (caution:
do not press and hold the reset button for more than five seconds, this will restore the IDU
factory settings, i.e., the original password provided for your gateway that is printed on the
top and bottom labels.) After about a minute, you should see the WiFi LED on the gateway
light up and have an active WiFi signal.
3 If resetting doesn’t fix the issue, unplug the IDU and plug it back into the electrical outlet
for a full reboot of power to both the IDU and the ODU.
4 URLs for additional troubleshooting tips will be supplied at a later date.
Warranty Notice
• ViaSat,Inc.(“ViaSat”),theproviderofViaSatInternet,doesnotprovideawarrantytothe
end user for this product. Any such warranty from ViaSat, including the implied warranty
of merchantability or fitness for a particular purpose, is hereby disclaimed.
Environmental Alerts
WEEE
• ViaSathasmarkedthisproductwiththeWasteElectricalandElectronicEquipment
(WEEE) symbol as a convenience to its customers for environmental responsibility per
EuropeanUnionDirective2012/19/EU.Thisproductshouldbecollectedanddisposedof
in accordance with national and local laws and regulations. Waste electrical and electronic
products must not be disposed of with household waste.
ROHS Compliant
ThisproductisincompliancewithEuropeanUnionDirective2011/65/EU.
REACH Compliant
ThisproductisincompliancewithEuropeanUnionDirective1907/2006/EU.
Energy Eciency
The external power supply complies with US Department of Energy, Level VI, energy
eciency requirements.
SECTION 8 Troubleshooting
SECTION 9 Warranty, Environmental and Other
Information

11
Environmental Compliance Contact Information
For more information regarding environmental compliance, please send correspondence to Compliance-
ProductEnvironmental@viasat.com.
Open Source Software Information
This product incorporates various open source software packages that are distributed under license terms as
described at http://www.viasat.com/FOSS-Usage.
Other Notices
• ViaSatdeclaresthattheViaSat WiFi Gateway is Listed and is in compliance with Canadian,
U.S. safety standards, and NOM (Mexico).
• ViaSatdeclaresthattheViaSat WiFi Gateway is in compliance with the essential requirements and other
relevantprovisionsofEuropeanUnionDirective1999/5/EC.
• TheViaSat WiFi Gatewaycomplieswith47CFRFCCRulesandRegulationPart15,Satellite
Communications,andPart15SubpartB,ClassBDigitalDevice.OperationoftheWiFifunctionalityofthe
ViaSat WiFi Gatewayissubjecttothefollowingtwoconditions:(1)itmaynotcauseharmfulinterference,
and (2) it must accept any interference received, including interference that may cause undesired operation.
The ViaSat WiFi Gateway contains a WiFi wireless LAN radio transmitter and accordingly has been certified
ascompliantwith47CFRPart15oftheFCCRulesforintentionalradiators.Productsthatcontainaradio
transmitteroperatingunder47CFRPart15arelabeledwithFCCIDandFCClogo.
The manufacturer is not responsible for any radio or television interference caused by unauthorized
modification of the devices included with this product, or the substitution or attachment of connecting
cables and equipment other than specified by the manufacturer. In addition, such unauthorized modification
may void the user’s authority to operate the ViaSat WiFi Gateway. Correction of interference caused by such
unauthorized modification, substitution, or attachment is the responsibility of the user.
• TheViaSat WiFi Gateway was qualified under test conditions that included the use of the supplied cable
between system components. To be in compliance with regulations, the installer or user must use this cable
and install it properly.
FCC Statement:
Federal Communication Commission Interference Statement
This equipment has been tested and found to comply with the limits for a Class B digital device, pursuant
toPart15oftheFCCRules.Theselimitsaredesignedtoprovidereasonableprotectionagainstharmful
interference in a residential installation. This equipment generates, uses and can radiate radio frequency
energy and, if not installed and used in accordance with the instructions, may cause harmful interference
toradiocommunications.However,thereisnoguaranteethatinterferencewillnotoccurinaparticular
installation. If this equipment does cause harmful interference to radio or television reception, which can be
determined by turning the equipment o and on, the user is encouraged to try to correct the interference by
one of the following measures:
• Reorient or relocate the receiving antenna.
• Increase the separation between the equipment and receiver.
• Connect the equipment into an outlet on a circuit dierent from that to which the receiver is connected.
• Consult the dealer or an experienced radio/TV technician for help.
FCC Caution: Any changes or modifications not expressly approved by the party responsible for compliance
could void the user’s authority to operate this equipment.
ThisdevicecomplieswithPart15oftheFCCRules.Operationissubjecttothefollowingtwoconditions:(1)
This device may not cause harmful interference, and (2) this device must accept any interference received,
including interference that may cause undesired operation.
ForproductavailableintheUSA/Canadamarket,onlychannel1~11canbeoperated.
Selection of other channels is not possible.
This device is restricted for indoor use.

12
IMPORTANT NOTE:
FCC Radiation Exposuire Statement
This equipment complies with FCC radiation exposure limits set forth for an uncontrolled environment. This
equipmentshouldbeinstalledandoperatedwithminimumdistance26cmbetweentheradiator&yourbody.
IC Statement:
This device complies with Industry Canada license-exempt RSS standard(s). Operation is subject to the
followingtwoconditions:(1)thisdevicemaynotcauseinterference,and(2)thisdevicemustacceptany
interference, including interference that may cause undesired operation of the device.
Le présent appareil est conforme aux CNR d’Industrie Canada applicables aux appareils radio exempts
delicence.L’exploitationestautoriséeauxdeuxconditionssuivantes:(1)l’appareilnedoitpasproduire
de brouillage, et (2) l’utilisateur de l’appareil doit accepter tout brouillage radioélectrique subi, même si le
brouillage est susceptible d’en compromettre le fonctionnement.
ForproductavailableintheUSA/Canadamarket,onlychannel1~11canbeoperated.Selectionofother
channels is not possible.
PourlesproduitsdisponiblesauxÉtats-Unis/Canadadumarché,seullecanal1à11peuventêtreexploités.
Sélection d’autres canaux n’est pas possible.
Thedeviceforoperationintheband5150–5250MHzisonlyforindoorusetoreducethepotentialforharmful
interference to co-channel mobile satellite systems.
lesdispositifsfonctionnantdanslabande5150-5250MHzsontréservésuniquementpourune
utilisationàl’intérieuranderéduirelesrisquesdebrouillagepréjudiciableauxsystèmesdesatellitesmobiles
utilisant les mêmes canaux.
IMPORTANT NOTE:
IC Radiation Exposure Statement
ThisequipmentcomplieswithICRSS-102radiationexposurelimitssetforthforanuncontrolledenvironment.
This equipment should be installed and operated with minimum distance 31 cmbetweentheradiator&your
body.
Cet équipement est conforme aux limites d’exposition aux rayonnements IC établies pour un environnement
non contrôlé. Cet équipement doit être installé et utilisé avec un minimum de 31 cm de distance entre la source
de rayonnement et votre corps.
Trademark Notice
ViaSat and the ViaSat logo are trademarks or registered trademarks of ViaSat in the U.S. and/or other
countries.
Documentation Notice
©Copyright2017ViaSat,Inc.,allrightsreserved.Theinformation,specicationsandfeaturescontained
in this document are subject to change without notice and should not be construed as a commitment
by ViaSat.
6155ElCaminoReal
Carlsbad,CA92009
1257275Rev.001