ViewSonic N210 Airsync N210 Media Station User Manual
ViewSonic Corporation Airsync N210 Media Station Users Manual
Users Manual
ViewSonic N210 0
NexTVision N210
Video Process Box
User Guide
Guide de l’utilisateur
Bedienungsanleitung
Guía del usuario
Guida dell’utente
Guia do Usuário
Användarhandbok
Käyttöopas
Airsync N210
Media Station
Stand-alone video process box
ViewSonic N210 1
Contents
Introduction...................................................................................... 3
Key Features ................................................................................................................3
Package Contents ........................................................................................................3
Precautions...................................................................................................................3
Precautions...................................................................................................................4
Start Your Installation ...................................................................... 5
Connecting the NexTVision N210.................................................................................5
Connector Descriptions ................................................................................................5
Power On......................................................................................................................6
Control Button Descriptions..........................................................................................6
Getting Started ................................................................................. 7
Wireless connection .....................................................................................................7
Taskman .......................................................................................................................8
Program........................................................................................................................11
Settings............................................................................................. 14
The Accessibility Control Panel ....................................................................................14
The Certificates Control Panel...................................................................................... 17
The Date/Time Control Panel ....................................................................................... 18
The Display Control Panel............................................................................................18
The Internet Options Control Panel ..............................................................................19
The Keyboard Control Panel ........................................................................................20
The Mouse Control Panel.............................................................................................21
The JETCET PRINT Pro Control Panel ........................................................................21
The Management Tools Control Panel..........................................................................21
The Network and Dial-up Connection Control Panel ....................................................23
The Network Files Settings Control Panel ....................................................................23
The Network Printer Properties Control Panel.............................................................. 24
The Owner Control Panel .............................................................................................25
The Password Control Panel........................................................................................26
The PC Connection Control Panel................................................................................26
The Power Control Panel .............................................................................................27
The Printers Control Panel ...........................................................................................27
The Regional Settings Control Panel............................................................................28
The RDP Connection Control Panel ............................................................................. 28
The Remove Programs Control Panel..........................................................................29
The System Control Panel............................................................................................ 30
The TriCEutility Control Panel....................................................................................... 30
The Volume & Sounds Control Panel ...........................................................................30
Other Information ............................................................................ 32
Specifications................................................................................................................32
Troubleshooting............................................................................................................33
Customer Support ........................................................................................................34
Cleaning the Case........................................................................................................35
Limited Warranty........................................................................................................... 36
Appendix........................................................................................... 37
ViewSonic N210 2
Safety Guidelines .........................................................................................................37
Compliance Information for U.S.A. ...............................................................................37
Federal Communication Commission Interference Statement
This equipment has been tested and found to comply with the limits for a Class B digital device,
pursuant to Part 15 of the FCC Rules. These limits are designed to provide reasonable protection
against harmful interference in a residential installation. This equipment generates, uses and can
radiate radio frequency energy and, if not installed and used in accordance with the instructions,
may cause harmful interference to radio communications. However, there is no guarantee that
interference will not occur in a particular installation. If this equipment does cause harmful
interference to radio or television reception, which can be determined by turning the equipment
off and on, the user is encouraged to try to correct the interference by one of the following
measures:
-Reorient or relocate the receiving antenna.
-Increase the separation between the equipment and receiver.
-Connect the equipment into an outlet on a circuit different from that
to which the receiver is connected.
-Consult the dealer or an experienced radio/TV technician for help.
This device complies with Part 15 of the FCC Rules. Operation is subject to the following two
conditions: (1) This device may not cause harmful interference, and (2) this device must accept
any interference received, including interference that may cause undesired operation.
FCC Caution: Any changes or modifications not expressly approved by the party responsible for
compliance could void the user's authority to operate this equipment.
IMPORTANT NOTE:
FCC Radiation Exposure Statement:
This equipment complies with FCC radiation exposure limits set forth for an uncontrolled
environment. This equipment should be installed and operated with minimum distance 20cm
between the radiator & your body.
This transmitter must not be co-located or operating in conjunction with any other antenna or
transmitter.
ViewSonic N210 3
Introduction
The N210 (NexTVision™N210) is an external “Stand-Alone” video process box that can
communicate over Ethernet 10/100 or over wireless 802.11x infrastructure. There is an option to
attach an external “Patch” antenna that will enhance the wireless signal.
Whenever a monitor is levelesely / Ethernet to the N210 via VGA or DVI/I, it can become a tether
“Mira” device.
Key Features
z Windows CE.Net or XP embedded software image with latest ICA and RDP protocols
z Support wireless feature that built-in 802.11 Mini-PCI with optional external ViewSonic patch
antenna or Ethernet 10/100
z MPEG 1, 2 and 4 decoding capability for A/V streaming over IP/UDP/RTP/RTCP protocols.
z Built-in Microsoft IE Browser and variety of PLUG-IN's
z Configurable to multiple platforms via an I/O adapter card
z High performance 2D/3D graphics controller
z Rich Multimedia experience for playing mp3 and Windows Media Player music and various
video files
z Supports 16 bits stereo sound with built-in Microphone-in, Headphone-out, and Audio-out
z A quickly recovery button for software image recovery
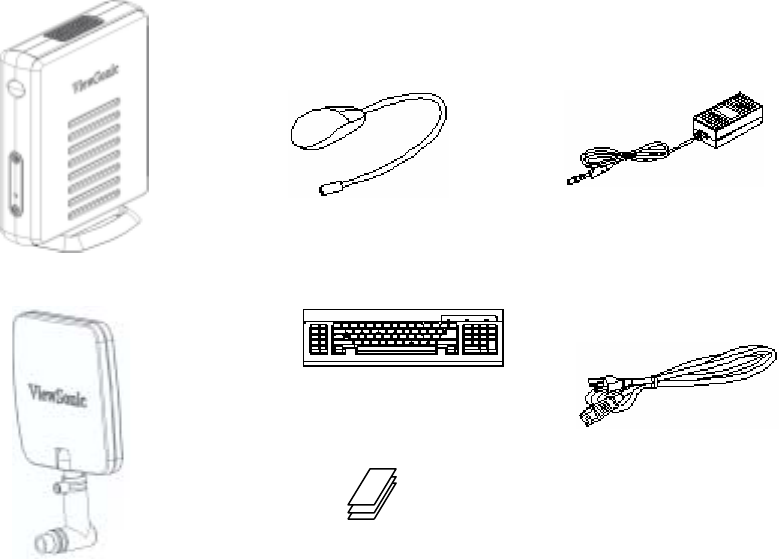
Package Contents
This NexTVision comes with the items shown below. Check to be sure your unit is complete.
1. NexTVision N210 main unit
2. Power supply & US power cable
3. Quick start card
4. USB keyboard & mouse
5. Patch antenna bundle optional
Power Adapter
USB Keyboard
Quick Start Card
USB Mouse
Power Cord
NexTVision main unit
Patch antenna
ViewSonic N210 4
Precautions
1) Avoid exposing your N210 to direct sunlight or another heat source. Orient your N210 away
from direct sunlight to reduce glare.
2) Always handle your N210 with care when moving it.
3) Place your N210 in a well-ventilated area. Do not place anything on your N210 that prevents
heat dissipation.
4) Ensure the area around the N210 is clean and free of moisture.
5) Do not place heavy objects on the N210, or power cord.
6) If smoke, abnormal noise, or strange odor is present, immediately switch the N210 off and call
your dealer or ViewSonic. It is dangerous to continue using the N210.

ViewSonic N210 5
Start Your Installation
Connecting the NexTVision N210
Follow these instructions to connect the NexTVision N210 to its peripheral devices:
1. Plug one end of the power cord to an AC outlet and the other end into the power adapter. Then
connect the power adapter to the N210.
2. Connect the monitor to the video connector port?
3. Connect the USB keyboard and USB mouse to the USB type A ports.
4. Connect the ViewSonic patch antenna to the antenna out and screw in the bolt or connect the
10/100-TX network cable to the RJ-45 network connector.
6. Connect the printer or other compatible devices to the USB type A port if necessary.
(see figure below.)
Connector Descriptions
Power Connector
Connects the power adapter with the power cord to the device
RJ-45 Network Connector
Connects the built-in 32-bit 10/100-TX Ethernet network LAN Controller to a host or Hub
LED Lan Link and activity Indicators
Green:Green-on indicates a successfully connected network link.
Amber: Amber-on indicates that network packets are being sent or received through the RJ-45
port
Audio out
Connects line output for Audio
Headphone out
Connects an external speaker or headphone
Microphone In
When the host server supports a record software program and the related protocol as well, the
connects a microphone (when host server supports a program for audio recording and related
protocols)
USB Ports (type A)
Microphone
-
in
Audio-out
Headphone-out
N
et
w
o
rk
VGA
DVI
USB ports (type A)
USB ports (type B) DC
ViewSonic patch antenna-out
ViewSonic N210 6
Connects USB type peripheral such as keyboard and mouse
USB Ports (type B)
Allows image recovery via the USB port (connector-B)
VGA Port
Connects a standard VGA compatible device
DVI
Connects a high quality Digital Video Interface compatible device
Antenna-out
Allows wireless connection, please connect the ViewSonic patch antenna and screwed the bolt
Power On
When you have made all the connections, turn on the NexTVision N210 by pressing the power
switch then turn on the monitor.
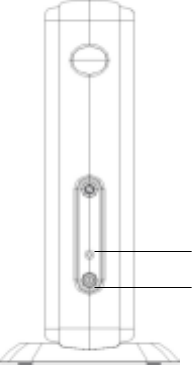
Control Button Descriptions
Power Switch
Press this button to turn the device on or off.
Power LED Indicator
Green: indicates the system is powered on.
Amber: indicates the device is in sleeping status.
Green: when blinking indicates the Brightness adjustment value has reach its limitation.
Power LED indicator
Power
ViewSonic N210 7
Getting Started
Push the power-on switch to turn on the device so you can access the Windows CE.Net
operating system (OS).
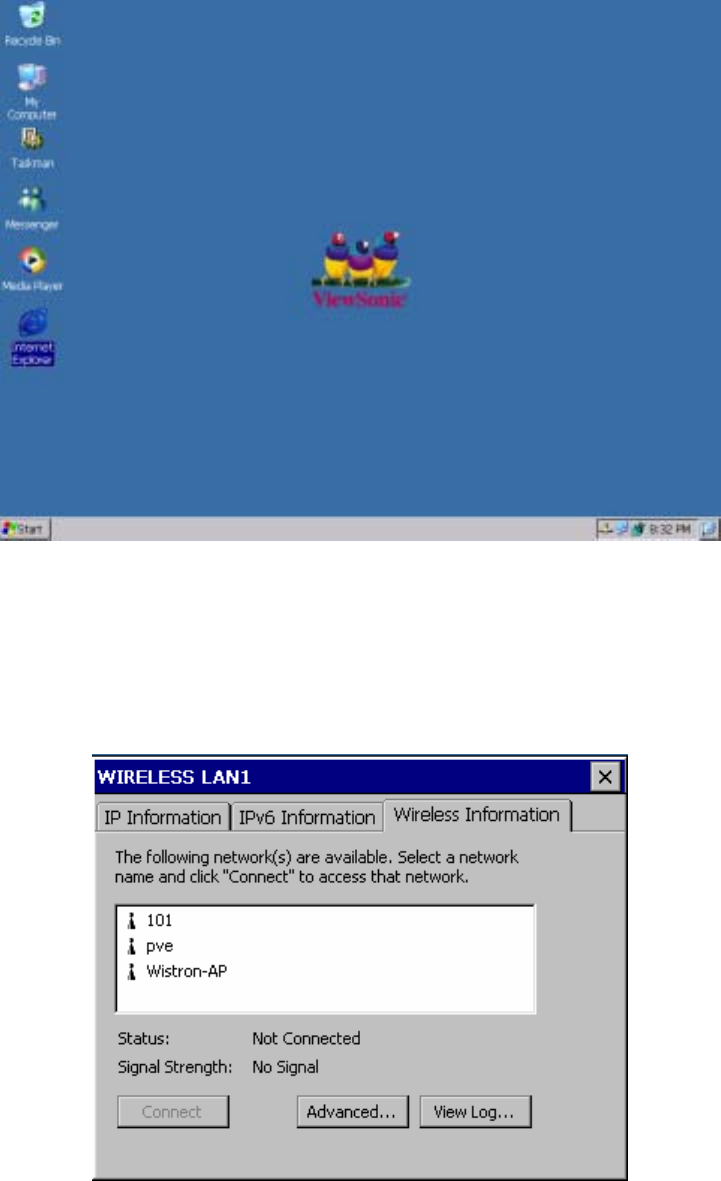
Wireless connection
You can connect a ViewSonic patch antenna to the NexTVision N210 for wireless connection.
With the NexTVision N210 on, and the wireless connection active, the wireless network properties
will appear on the screen. These include the IP information tab, IPv6 information tab, and
Wireless Information tab.
All available Access Point servers around will have been automatically detected. Please choose
one then press the Connect button to connect the chosen Access Point (AP). Once a wireless
connection is activated, its connection status and signal strength will be displayed showing data
such as “status : good” and “signal strength : high”. IP information is detected automatically as
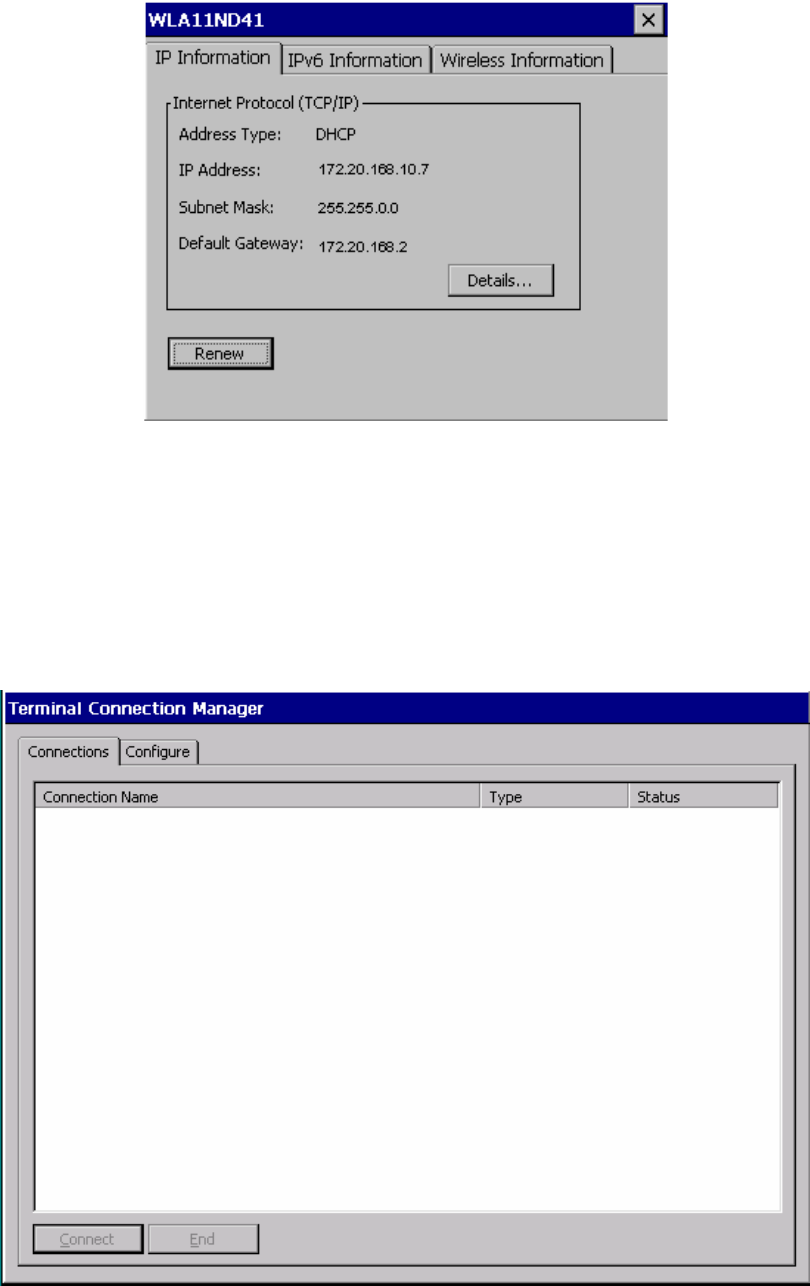
ViewSonic N210 8
shown below. You can also click the Renew button to set a new IP address.
When you have confirmed that your wireless network connection is active, you can close this
window.
Taskman
The Terminal Connection Manager will help you to manage your network connection. Shown here
is the Terminal Connection Manager dialog box with its Connections properties and Configure
properties tabs.
Connect TAB
Highlight a connection from the Connection Name box then click the Connect button to make
a server connection. You can also just double-click this connection to make a server
connection. The user can define any number of host connections for each client available on
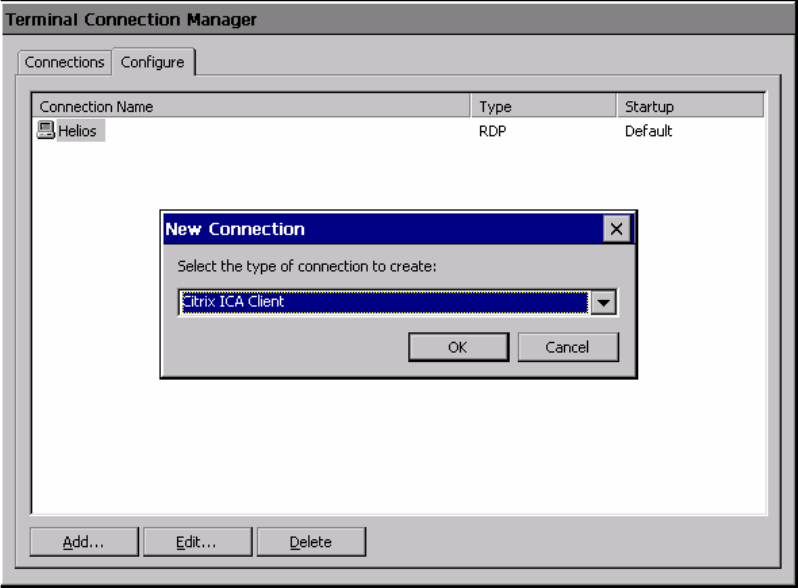
ViewSonic N210 9
a unit.
End
To end the connection, highlight the required connection then click the End button.
Add Button
This function is used for creating a new connection. Select the Configure icon then click this
Add button to create a new connection.
z RDP
This is a terminal service client that allows you to connect to a MicrosoftNT or Windows
2000 terminal server.
You can access a Windows Terminal Server and use all programs installed on the
server via Remote Desktop Connection. For example, you can run the desktop version
of Outlook instead of Inbox.
z ICA
The Citrix ICA (Independent Computing Architecture) is also a terminal service client. It
allows you to run Citrix MetaFrame software and connect to the terminal server. When
you access to the server, you can use all the programs installed on the server via the
ICA protocol.
Edit Button
The Edit command button allows the user to edit the properties of an existing connection.
Highlight the connection from the Configure list then click the Edit button. (You can just
double click the Connection from the Configure tab to make changes.)
Net Connection TAB
Use this function to adjust the connection server name and the server address. If you want to
automatically log onto the server, select the Automatic Logon icon. Enter the Username,
Password, and Domain information in these fields.
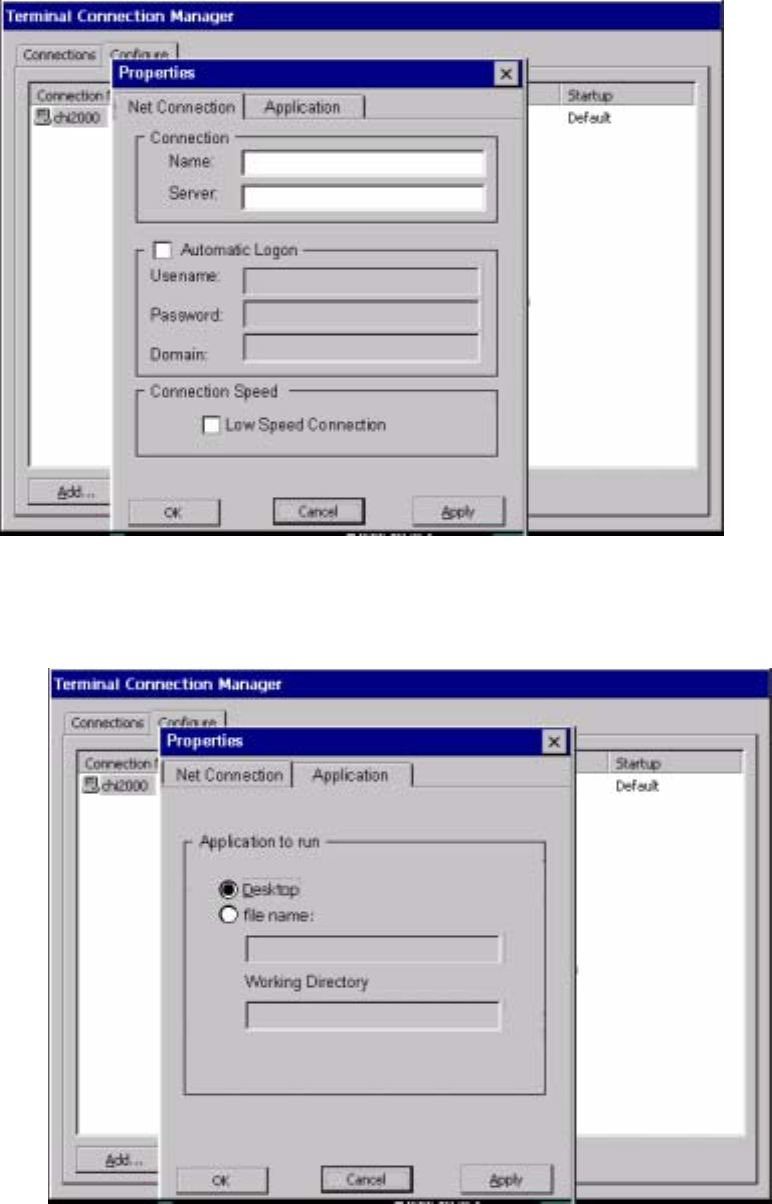
ViewSonic N210 10
Application TAB
Use this to select the application type you want. Initially, the Windows NT Desktop is selected
by default. You can also select the File name button, enter the name of the application you
need then specify the working directory.
Delete Button
In the menu window, use the Delete button to delete a connection. Choose the Connection
you want to delete, click this Delete button. The Confirm Connection Delete dialog box will
appear. Click Yes to complete the deletion. Click No to cancel the deletion.
ViewSonic N210 11
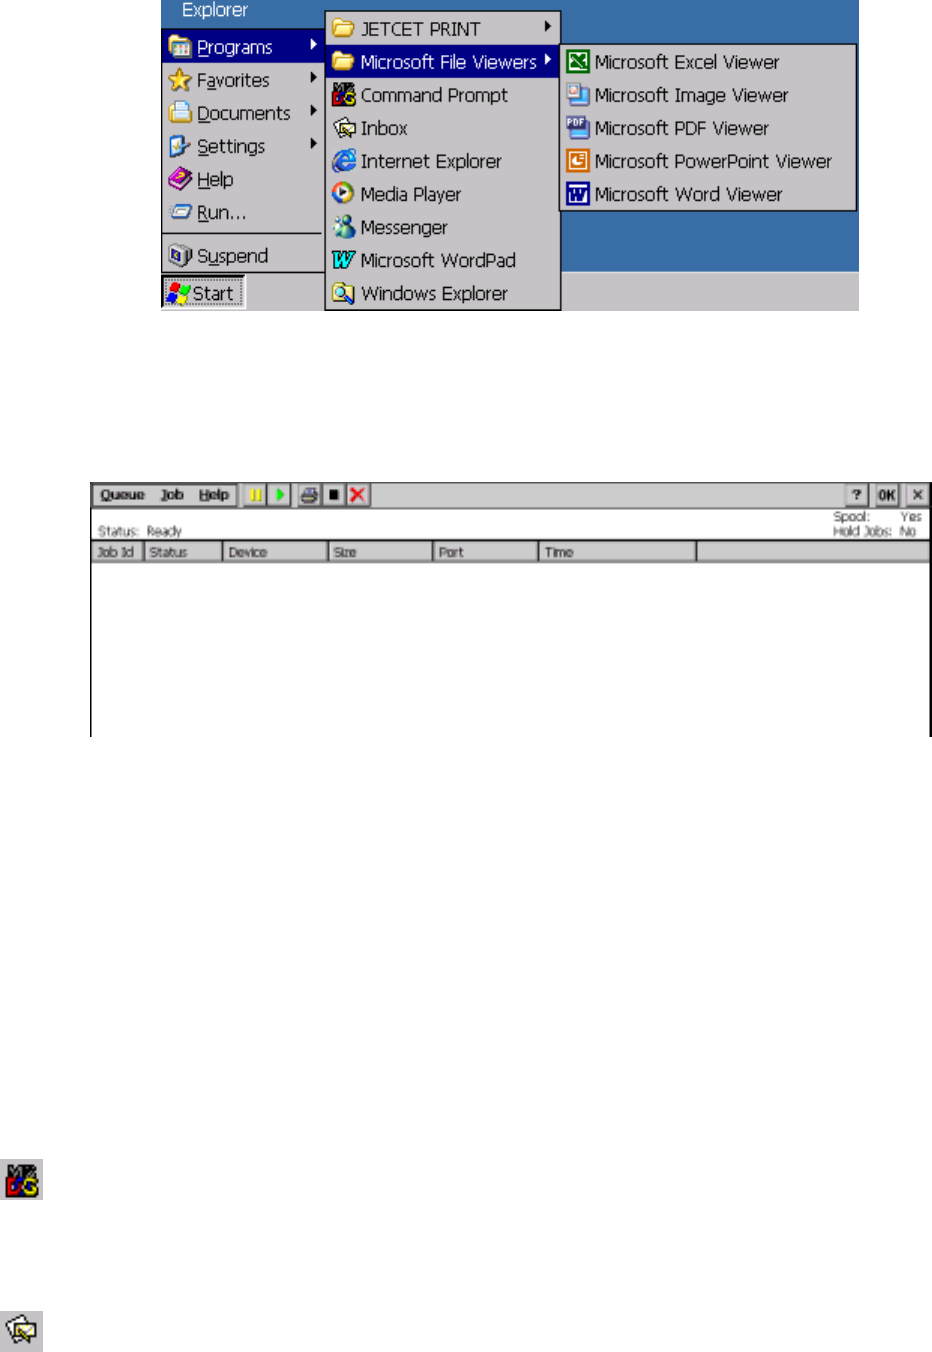
Program
To open a program that isn't on the desktop, select the Program’s name from Programs on the
Start bar. There are many applications available as shown here.
JETcent Print
Spool documents to be printed, then open the JETCET PRINT Spool from Programs to print
them.
File Viewer
The Microsoft File Viewers provided include the following.
1. Word Viewer: Four files are created from Microsoft Word 97, Word 2000 and Word 2002
including Rich Text Format (.rtf) can be read
2. Excel Viewer: The Excel Viewer displays documents created by Microsoft Excel 97,
Excel 2000 and Excel 2002
3. Image Viewer: Use this application to browse the picture files including bitmap, JPEG,
PNG and GIF files
4. PDF Viewer: Read Portable Document Format (PDF) files that have a .pdf extension
5. PowerPoint Viewer: View your presentations created in Microsoft PowerPoint 97,
PowerPoint 2000 and PowerPoint 2002
Command Prompt
You can execute any command in the command prompt window, please key in command name
after C:>. (Key in “command_name /? “ to find out more details.)
Inbox
ViewSonic N210 12
You can create an e-mail service in the Inbox. You will need to provide settings information such
as POP3 or IMAP4 server name, SMTP host name, user name, password, and domain name.
You can this info from your Internet service provider (ISP) or your Network Administrator.
To setup an e-mail service, open the Inbox application then select Options of Services name,
press the Add button to set the service type, then follow the steps in the Setup Wizard.
IE
You can browse the web page with Internet Explorer after establishing an Internet connection.
As a web page is downloaded, a small hourglass icon will show at the bottom of your screen.
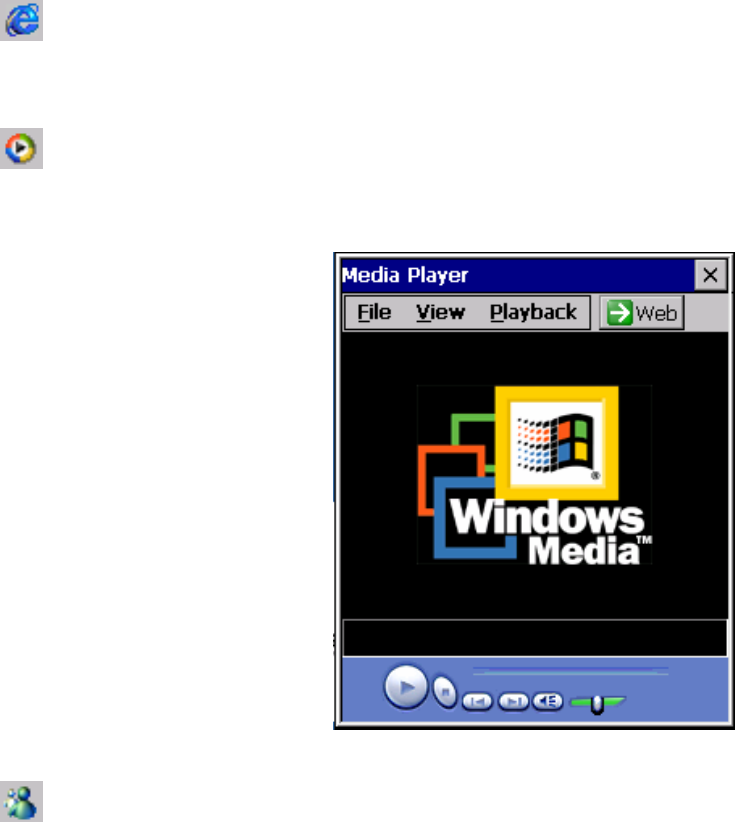
Media Player
Microsoft Media Player provides an audio and video files player for files download, or from an
internet Web-site or FTP-site.
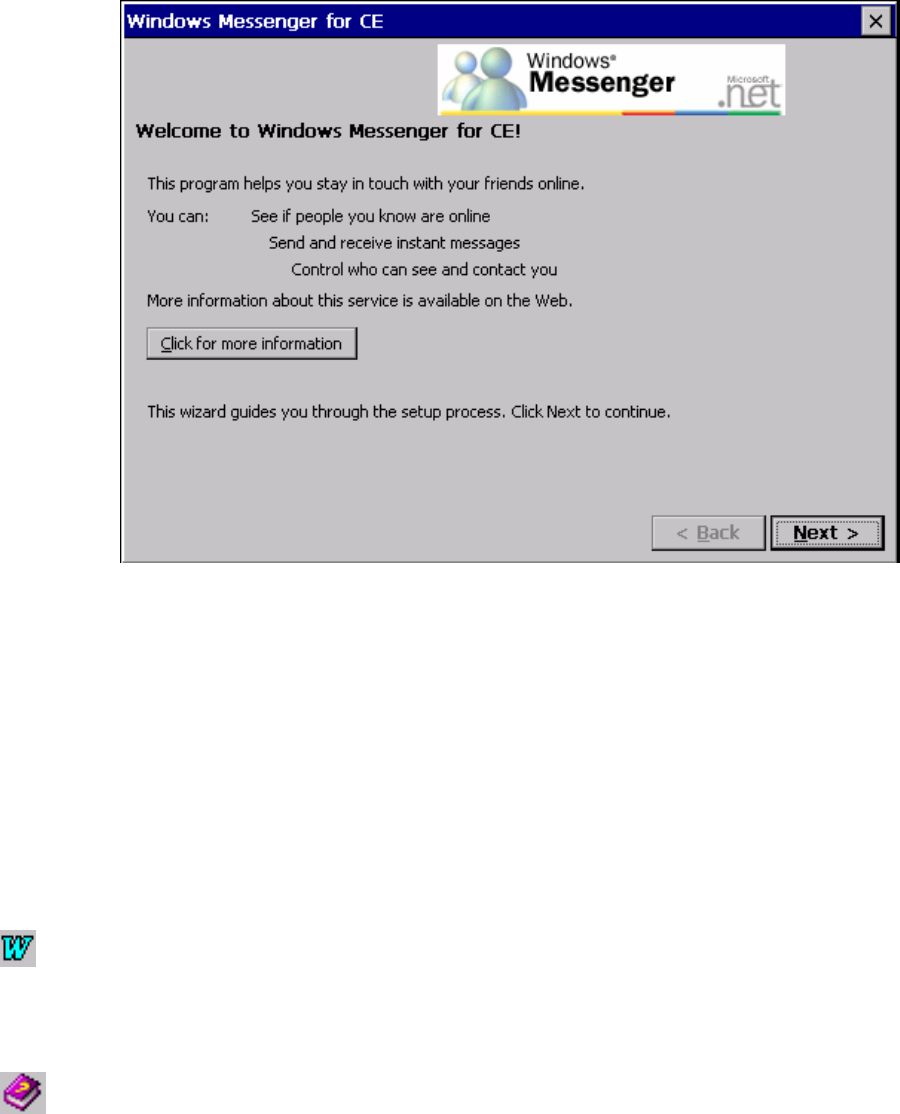
Messenger
The Messenger function allows you to communicate in real-time using text-based messaging,
VoIP, and more. Please follow the on-screen Wizard Guide directions to setup Messenger then
click Next to continue.
ViewSonic N210 13
z See who's online.
When your colleagues are online, they can see and contact you. You can send and receive
instant messages to them. You can also announce your own presence to a list of watchers that
you define.
z Talk by microphone
Talk with a colleague anywhere in the world using the microphone and speakers on your
device. The Messenger supports high-quality voice calling from your Windows CE device.
z Communicate using Session Initiation Protocol (SIP) or Hotmail contacts
Windows Messenger supports communication with your colleagues in the enterprise using
SIP-based communications service. You can also talk to your Hotmail contacts using the .NET
Messenger.
WordPad
You can create and edit documents or templates in WordPad. The WordPad look and feel is
similar to the desktop version of Microsoft word.
Help
If you have any problems or need more detailed information, please use online HELP.
ViewSonic N210 14
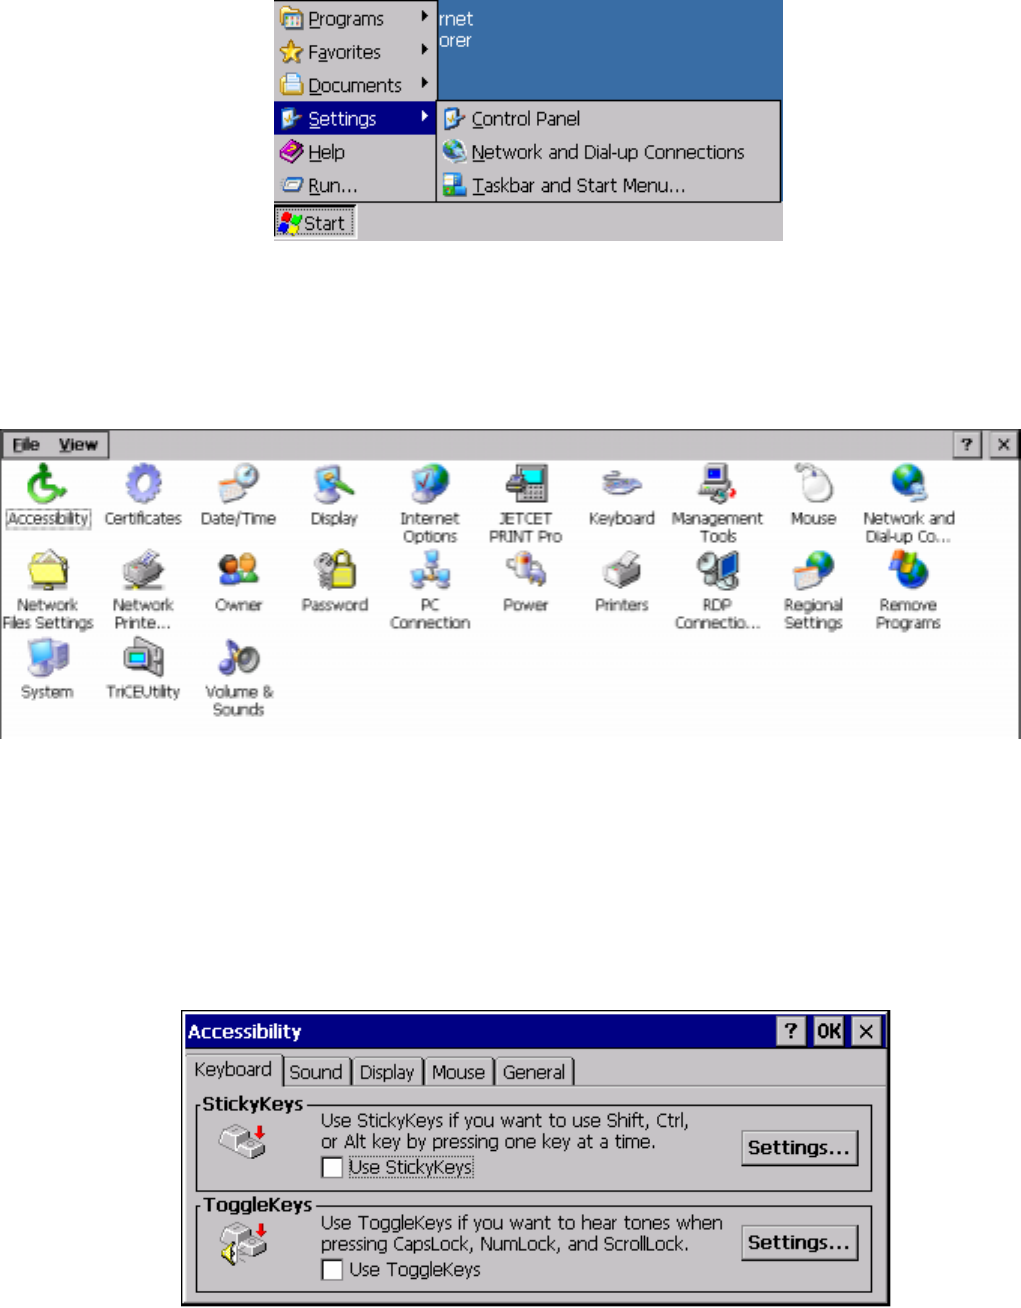
Settings
System settings information is maintained by the various control panels provided under settings in
the Start Bar. There are a lot of tools that control and maintain mainly system hardware
configuration information in the Control Panel of Setting name from the Start bar.
The settings functions provided include: Accessibility, Certificates, Date/Time, Display,
Internet Options, JETCET PRINT Pro, Keyboard, Mouse, Management Tool, Network and
Dial-up connection, Network Files Settings, Network Printer Properties, Owner, Password,
PC Connection, Power, Printers, RDP connection, Regional Settings, Remove Programs,
System, TriCEUtility and Volume & Sounds. Double-click an icon to open the dialog for that
setting.
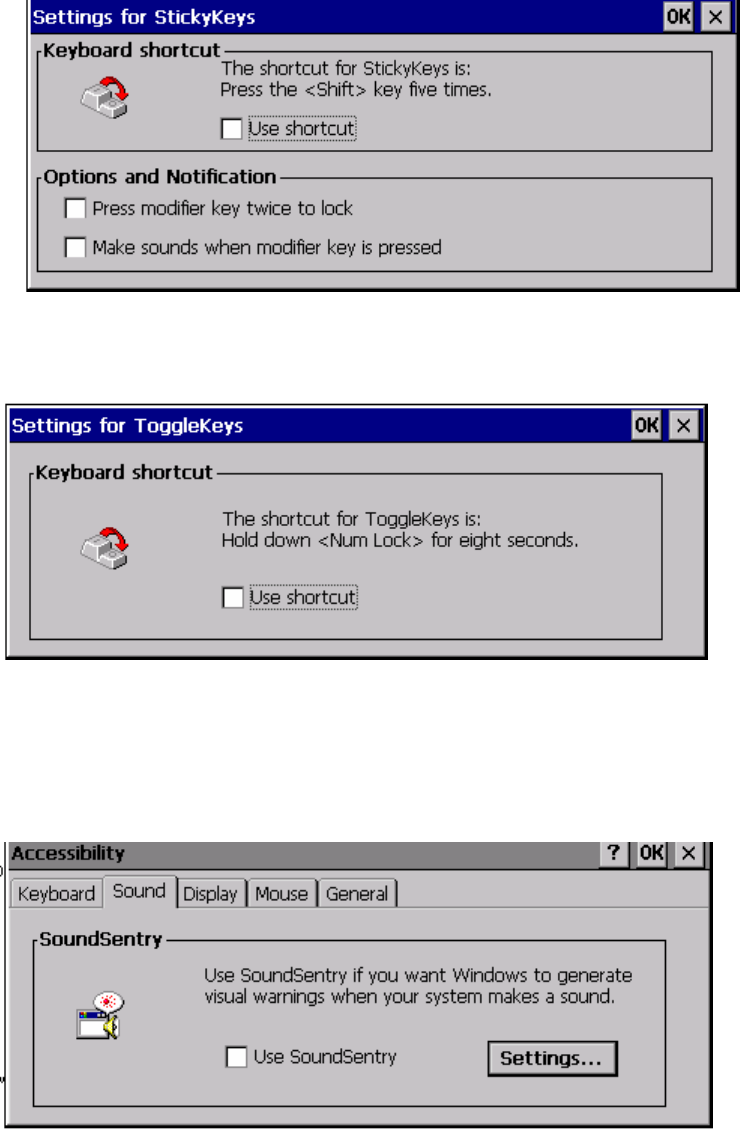
The Accessibility Control Panel
The Accessibility options allow a user with physical limitations to more easily use the system.
Double-click the Accessibility Options icon to open the dialog box, it provides five properties in
which you can enable and configure options to improve accessibility.
Keyboard TAB
ViewSonic N210 15
SkickyKeys: Selected the StickyKeys option for simulation the effect of pressing a pair of
keys, such as CTRL-X. Hold down the CTRL, ALT, or SHIFT key first then press another key
so that these keys are pressed together. Press the Settings.. button for advance setting as
shown in the following figure.
Togglekey: Selected the ToggleKey option to generate a tone when pressing the CAPS
LOCK, NUM LOCK and SCROLL LOCK keys. Press the Settings.. button to enable the
shortcut option.
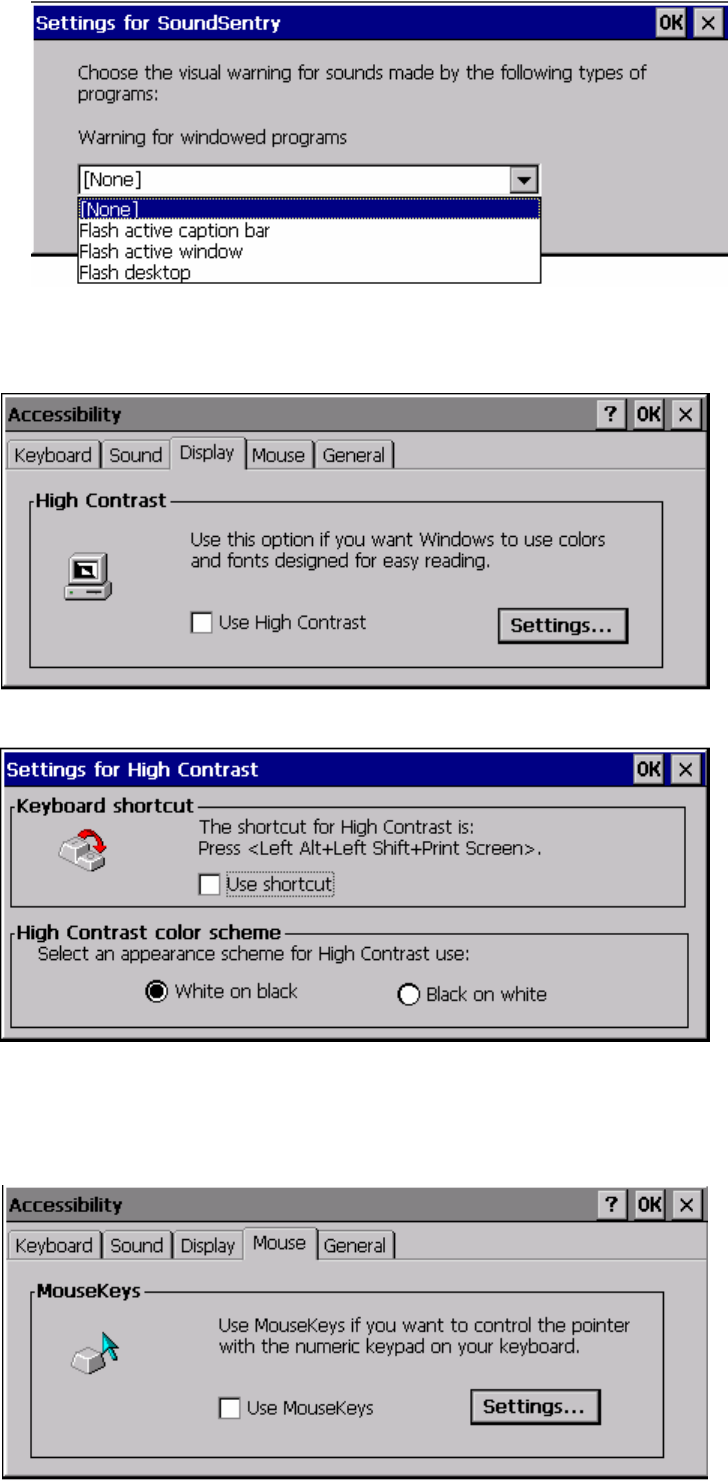
Sound TAB
SoundSentry: Displays a visual indicator when your system makes a sound. The indicator
can be a flashing active window, a flashing active caption bar, or a flashing desktop.
Click the settings.. button to choose the sound type for the visual indicative used.
ViewSonic N210 16
Display TAB
High Contrast: Use high-contrast colors and special fonts to make the screen easy to read
and use.
Click the Setting.. button to set the keyboard shortcut and color scheme.
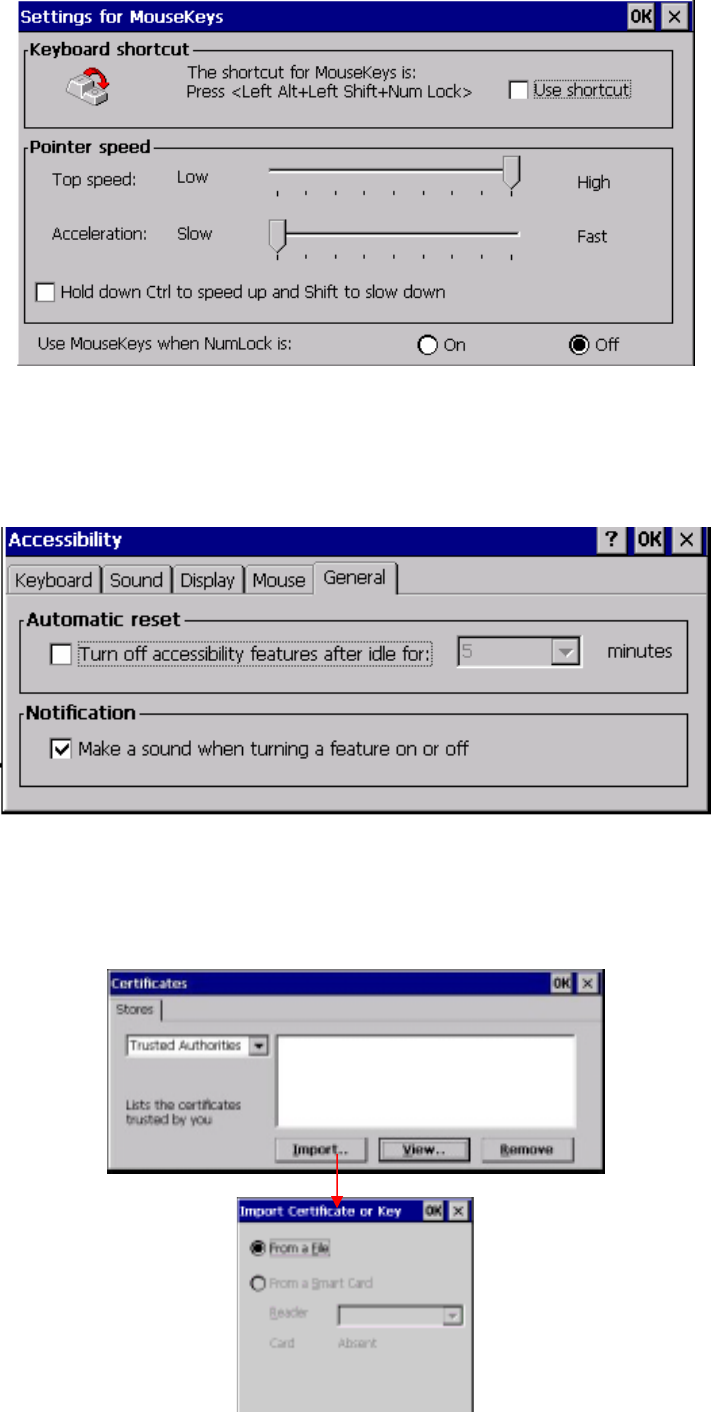
Mouse TAB
Select the Use Mousekeys option to enable the numeric keypad instead of the mouse for
moving the pointer on the screen.
ViewSonic N210 17
Click the Settings.. button to set the keyboard shortcut and pointer speed.
General TAB
Provides settings for managing the options in the General tab, including when to
automatically turn off the options and whether to give a warning when turning on or off an
option.
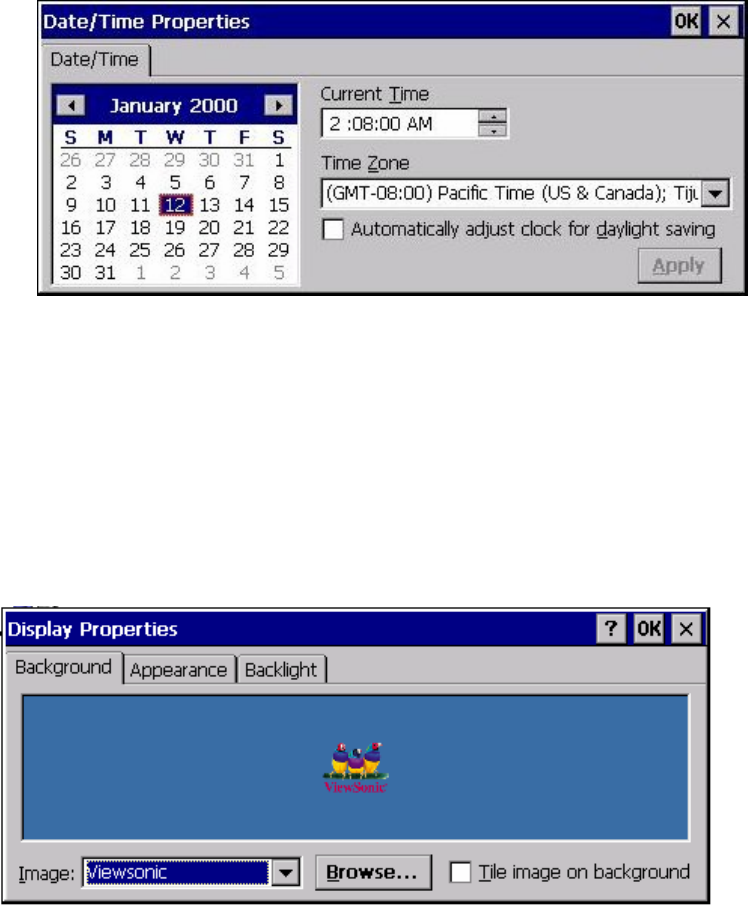
The Certificates Control Panel
Certificates Properties dialog box allows you to view your device Certificates information and the
dialog box. You can also press the import button to import the certificates from a file.
ViewSonic N210 18
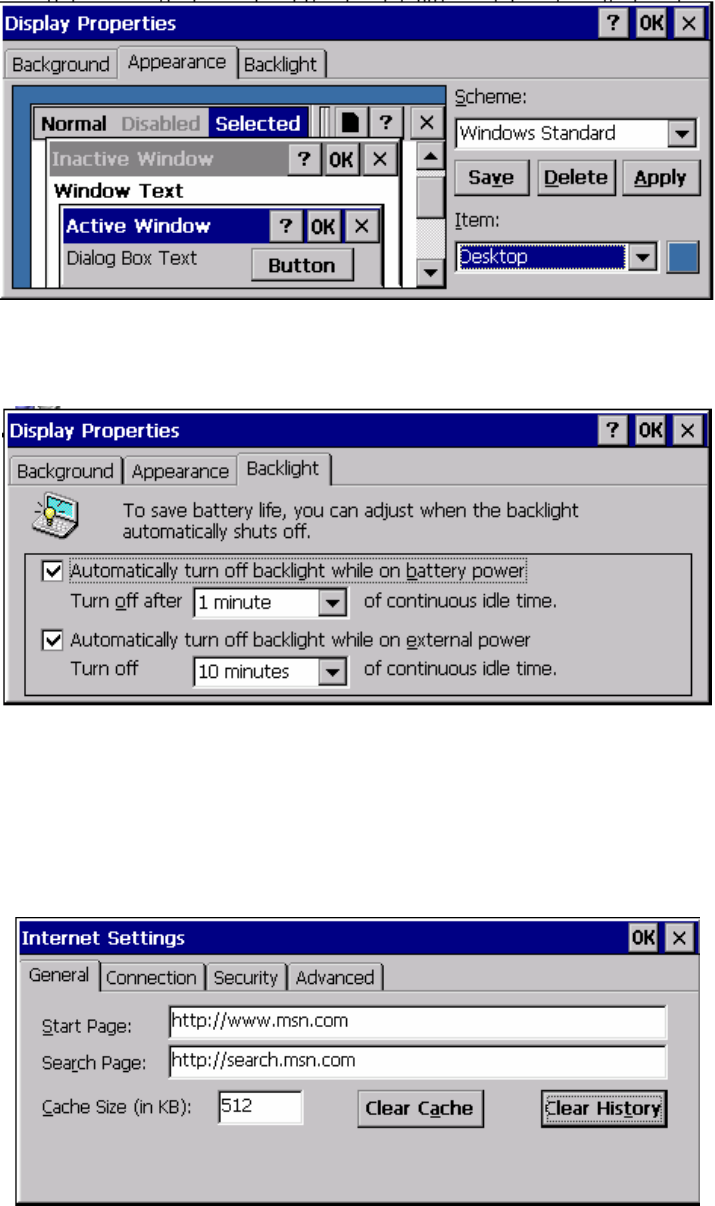
The Date/Time Control Panel
Date/Time Properties allows you to set the date and time on the device.
Use the calendar to set the date. Select the Time Zone and check the dialog box if daylight
savings time is currently in effect. To manually set the time, enter a time slightly ahead of the
actual time in Current Time text box, and then just as the actual time reaches the set time, click
on the Apply button.
The Display Control Panel
Display Properties allows you to set your Background, Appearance, and Backlight Time Out
settings.
Background TAB
The ViewSonic logo is the default background. You can press the Browse button to change
the background image.
Appearance TAB
Changes the color scheme of the desktop.
ViewSonic N210 19
Backlight TAB
Sets the backlight shut off time for saving battery life. You can also change the time setting.
The Internet Options Control Panel
General TAB
The start page field allows you to set the web browser’s default start up page. You can also
set the search web site for your searching. Web page favorites are stored in the cache
memory. You can set the cache storage size.
Connection TAB
Sets the LAN or Autodial connection and enables the proxy server when you access the
Internet.
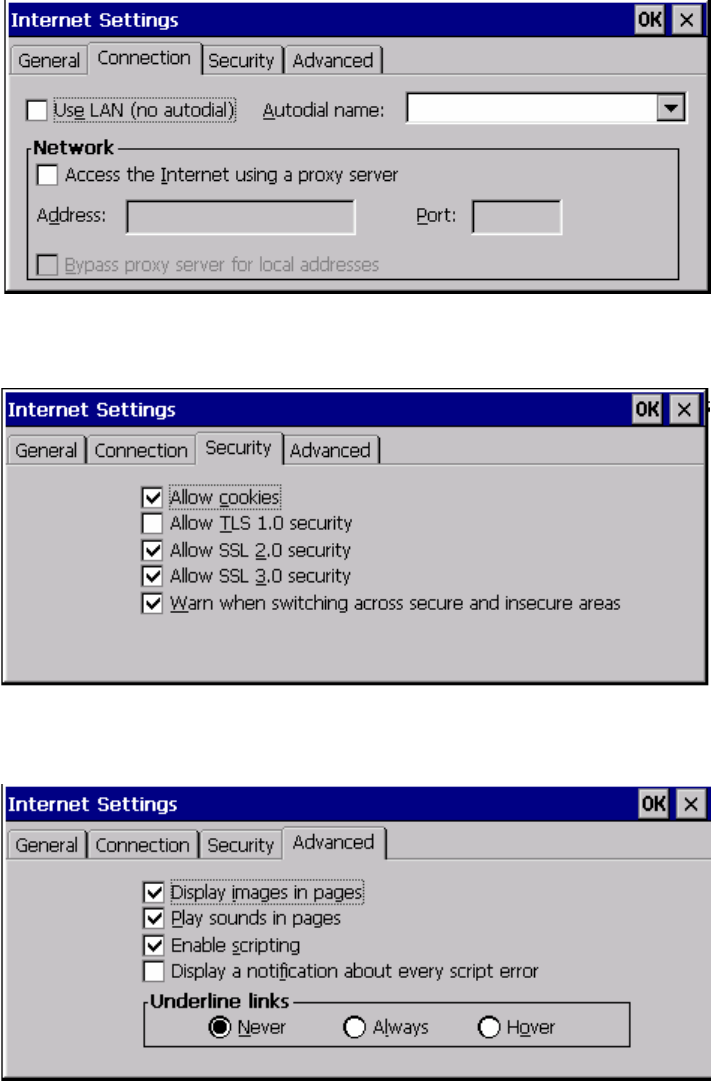
ViewSonic N210 20
Security TAB
Sets security options when accessing the Internet.
Advanced TAB
You can set advanced function for browsing.
The Keyboard Control Panel
The Keyboard properties are settings for the keyboard configuration. You can set the cursor
blink-rate and repeat-rate.
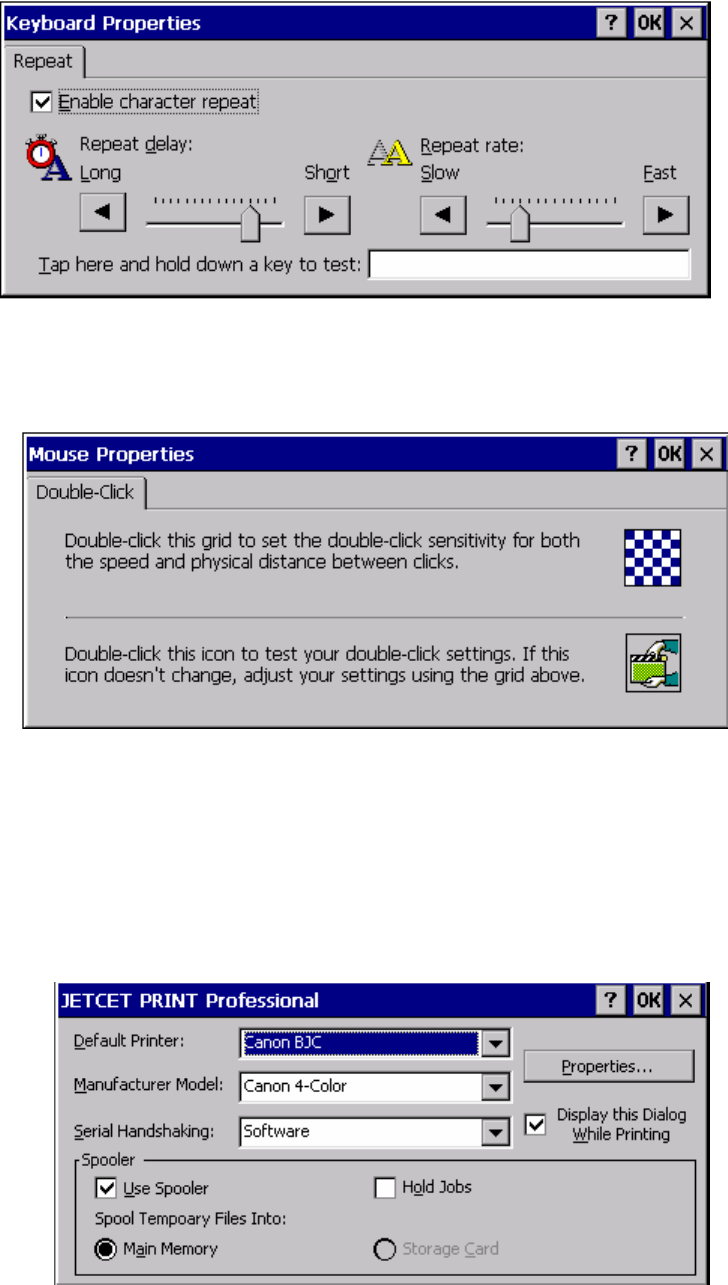
ViewSonic N210 21
The Mouse Control Panel
Tap the checkerboard grid to adjust the speed as needed Double-tap the clapboard icon for
testing.
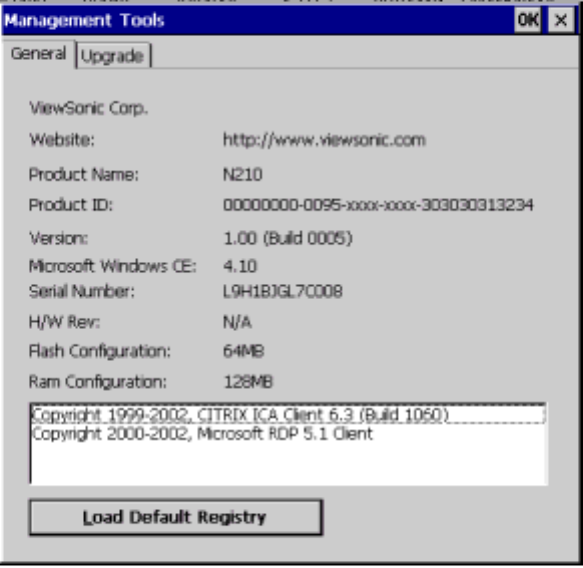
The JETCET PRINT Pro Control Panel
The JETCET PRINT dialog sets the default printer and it’s properties. Press the Properties
button to configure JETCET Print to meet printing requirements.
Enable the User Spooler option, to print the spooled document in JETCET spool. Otherwise,
select the Hold Jobs to hold it.
The Management Tools Control Panel
General TAB
Provides general information that including “Company Name”, “Web site”, ”Copyright”,
“Product Name”, “S/N”, “Software version”, and “Microsoft Windows CE version”.
ViewSonic N210 22
Upgrade TAB
Upgrade sets properties for a quick upgrade of Fireware and OS via FTP protocol from your
server.
Enter the server name, file name, user name and password in the FTP upgrade setting field
then press the Upgrade button to upgrade immediately. Make sure the server is ready before
attempting an upgrading process.
If the connection failed or no designated file is found, the dynamic upgrade will do nothing.
When successfully downloaded, the upgrade will prompt you with a Restart dialog box to
boot up the new system image
[Note:] It is the system administrators responsibility to manage upgrade privileges on
the FTP server side. The Default user account will be anonymous if you leave the
connection field blank.
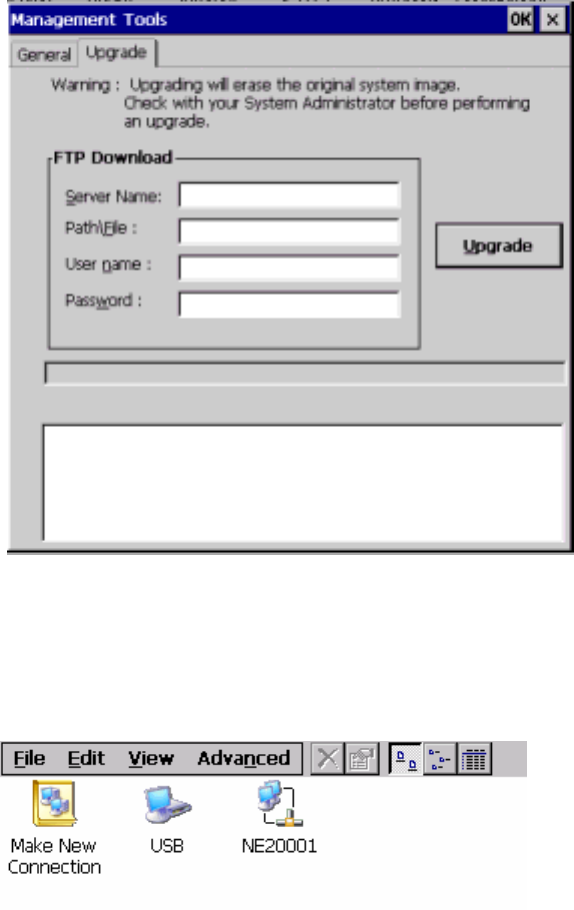
ViewSonic N210 23
The Network and Dial-up Connection Control Panel
Click the Make New Connection icon then follow the Network Connection Wizard to establish
connections. You can also click one of the Connection icons to configure the connection
properties.
The Network Files Settings Control Panel
To set a network file in the Network File Properties, key in the Domain Group name then press
the Search button to search all available computers on the domain network. You can pick
someone from the search result list then click the Connect.. button to connect. Or you can pick
someone up from the connection list then click the Disconnection button to disconnection.
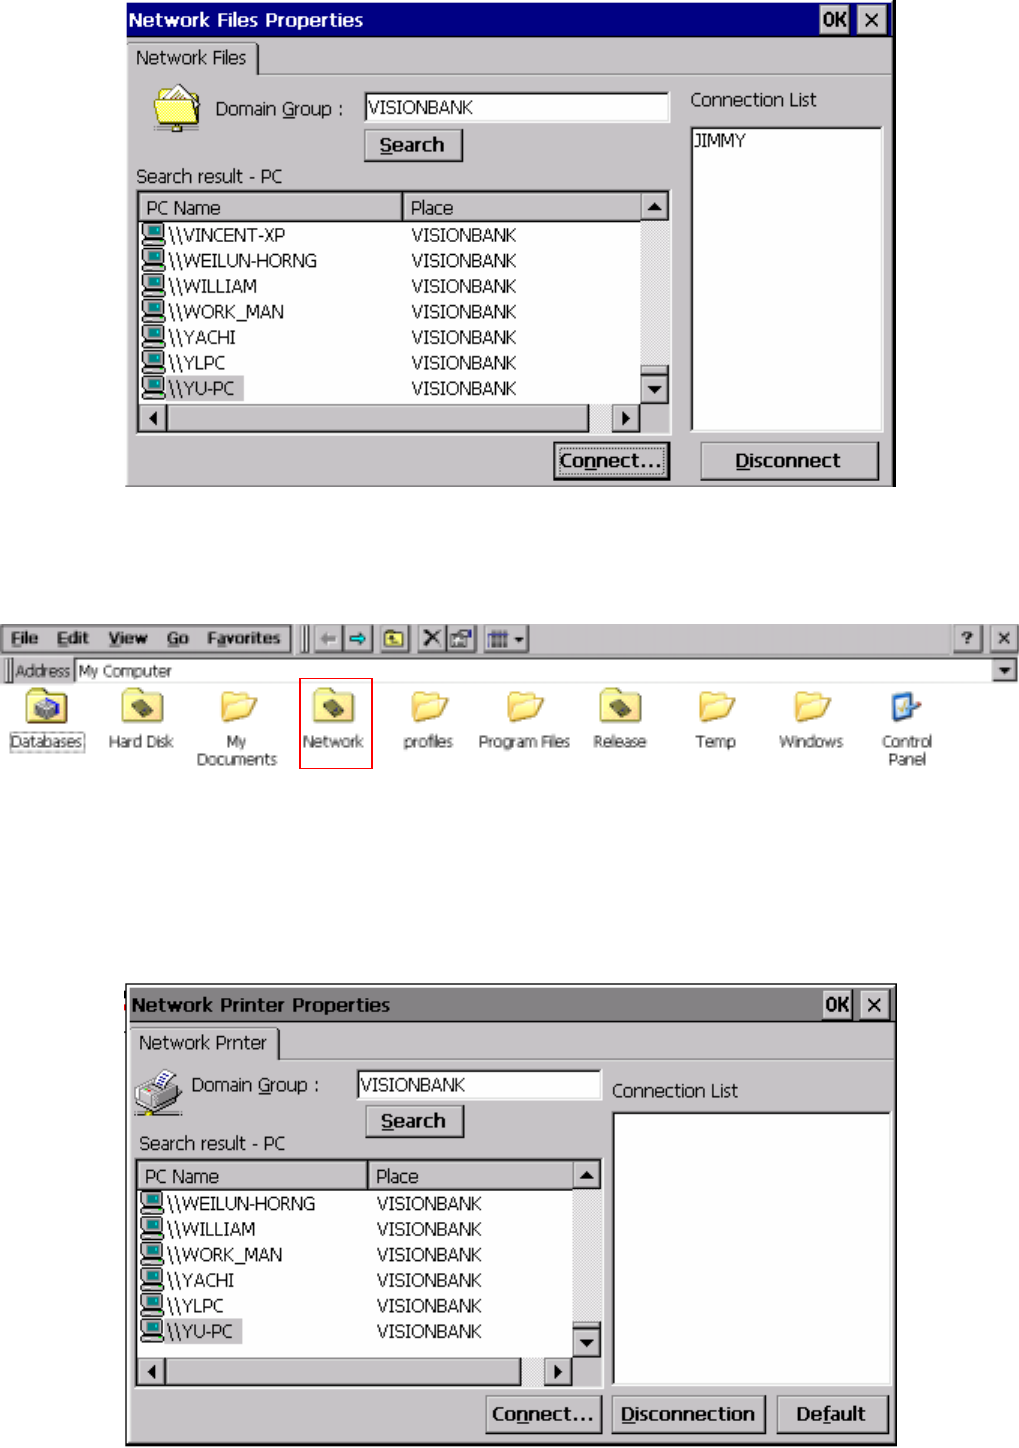
ViewSonic N210 24
Key in the Server name, user name, and password in the appropriate field then click the Connect
button to connect. This will allow you to find the Network Files in the My Computer/ Network
directory.
The Network Printer Properties Control Panel
To set a network printer in Network Printer Properties, key in the Domain Group name then
press the Search button to search all available printers in the domain network. You can pick
someone from the search result list then click the Connect.. button to connect. Or, you can pick
someone from the connection list then click the Disconnection button to disconnection.
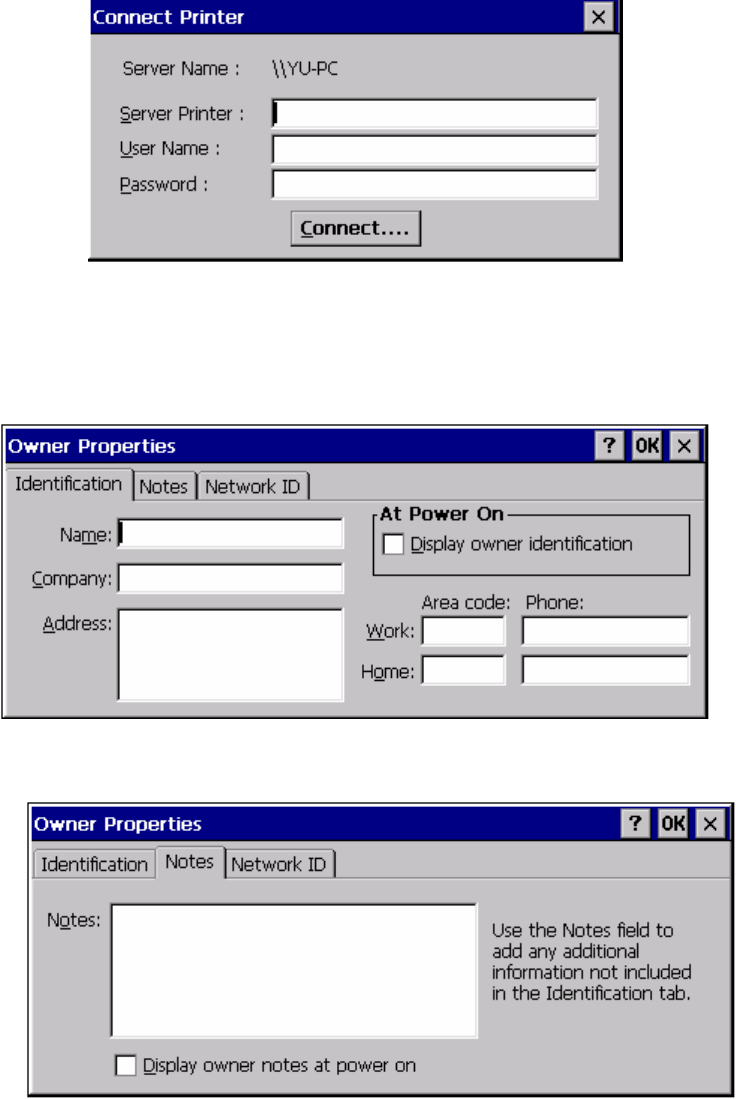
ViewSonic N210 25
key in the Server Printer name, user name and password in these fields then click the Connect
button to connect. Then you can find out the Network Printer in the My Computer/ Network
directory.
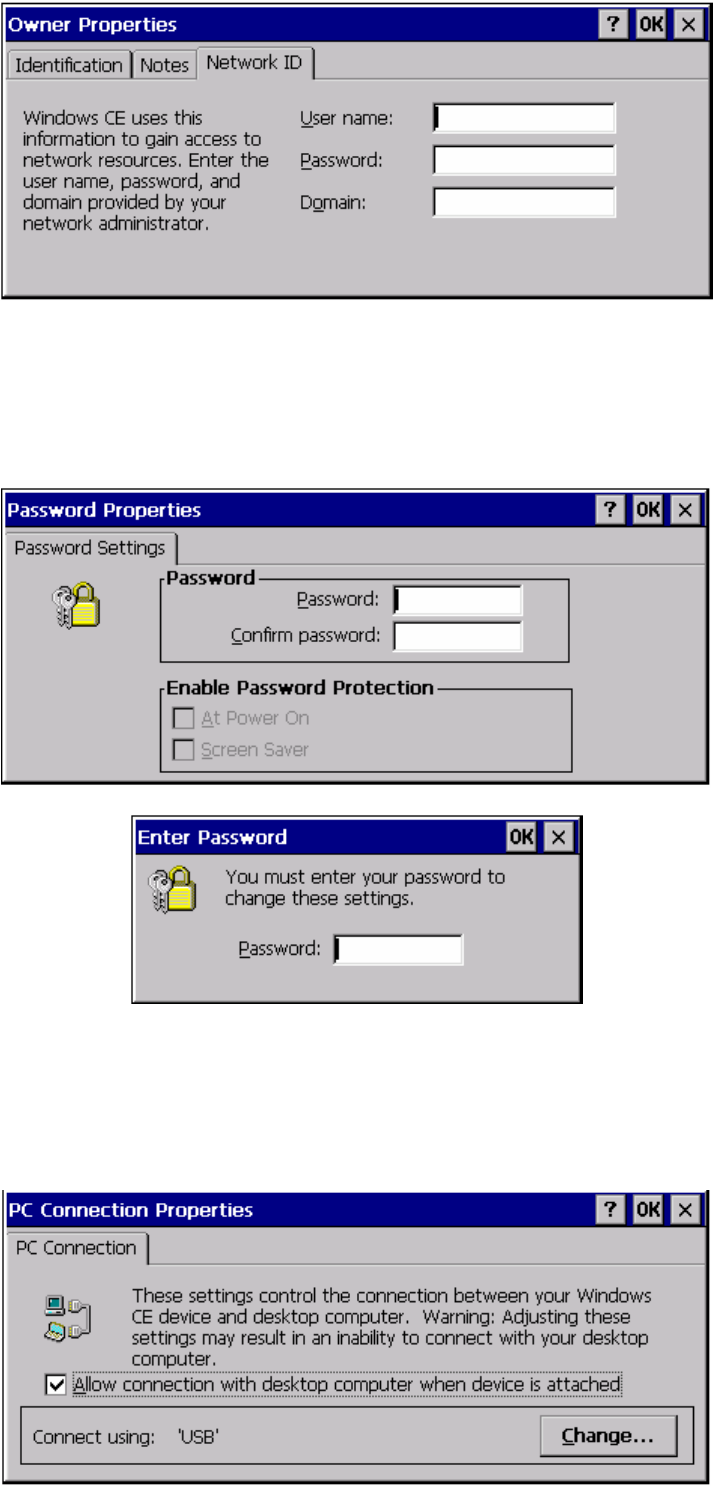
The Owner Control Panel
Manage user accounts in the Owner Properties windows. You can create a new user account
and fill in identification information like name, company, address and others as need.
If you wrote some additional information in the Notes field and if the Display owner notes at
power on is selected, when you power on the device, the notes will appear.
Set the user name, password and domain name that will be asked to log on to when you access
network resources.
ViewSonic N210 26
The Password Control Panel
A password is created for protecting the control panel settings. When you open any control panel
property the Enter Password dialog box appears. If you have selected the Enable Password
Protection At Power On you will be asked to log in your password when the device is started up.
The PC Connection Control Panel
Make sure Allow connection with desktop computer when device is attached is selected.
Due to the baud rate of your device you must match the baud rate on your PC. If you change one
setting, you must change it on the other.
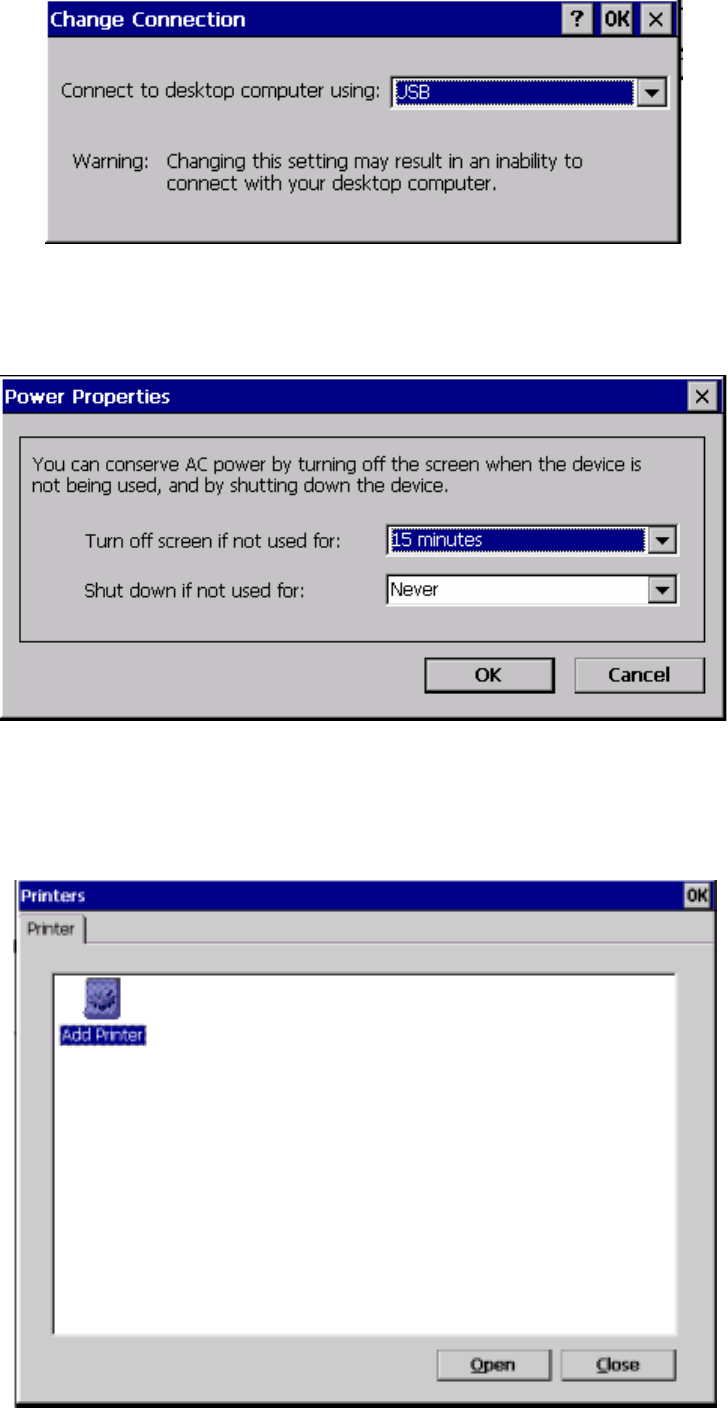
ViewSonic N210 27
You can also press the change button to select a select a different connection.
The Power Control Panel
Set the idle time for before turning off the screen or shuting the device down when not in use.
The Printers Control Panel
Double-click the Add Printer icon to add a local printer from the Setup Wizard windows.
ViewSonic N210 28
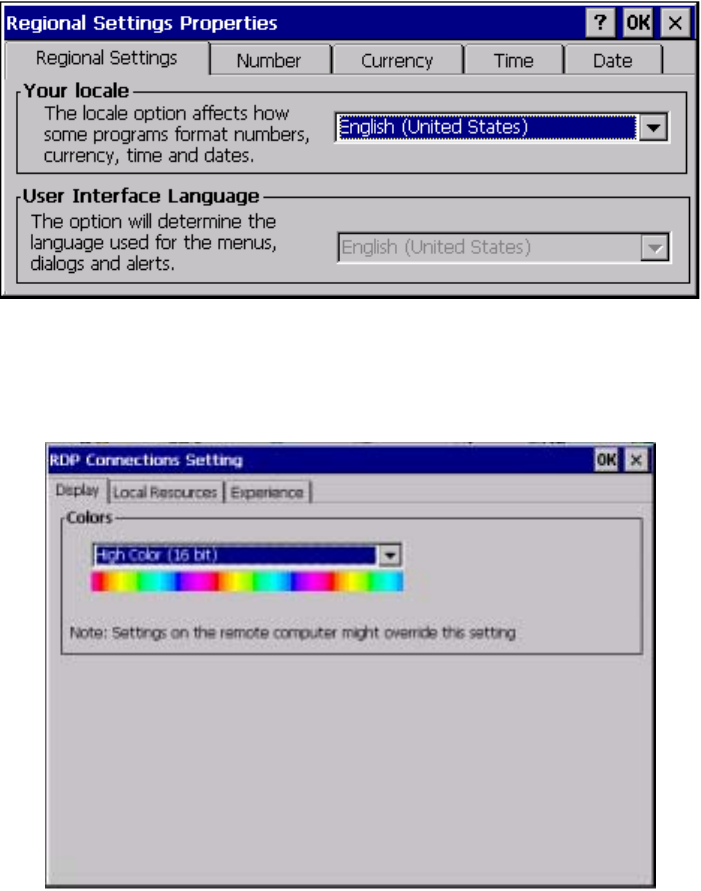
The Regional Settings Control Panel
Allows you to set the locale affecting how some programs format numbers, currency, dates and
time. After you select a locale that the characteristics will be determined.
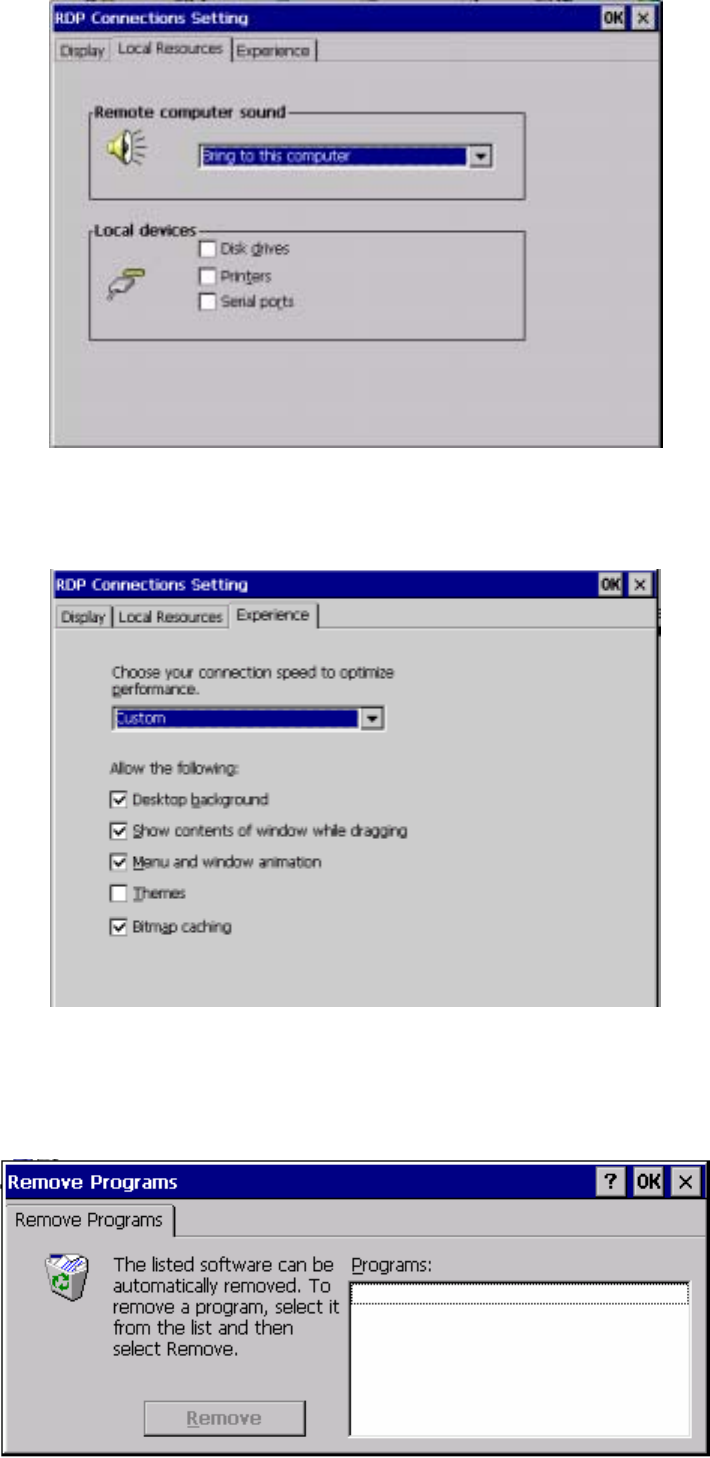
The RDP Connection Control Panel
Display
Select a color resolution your device supports.
Local Resources TAB
The Local Resources tab, allow you to change the remote computer sound and local
devices settings.
In the Remote Computer Sound drop-down menu, you can either bring sound to this
computer or leave it at remote computer.
(Connects automatically to select local devices when logged on to the remote computer.)
ViewSonic N210 29
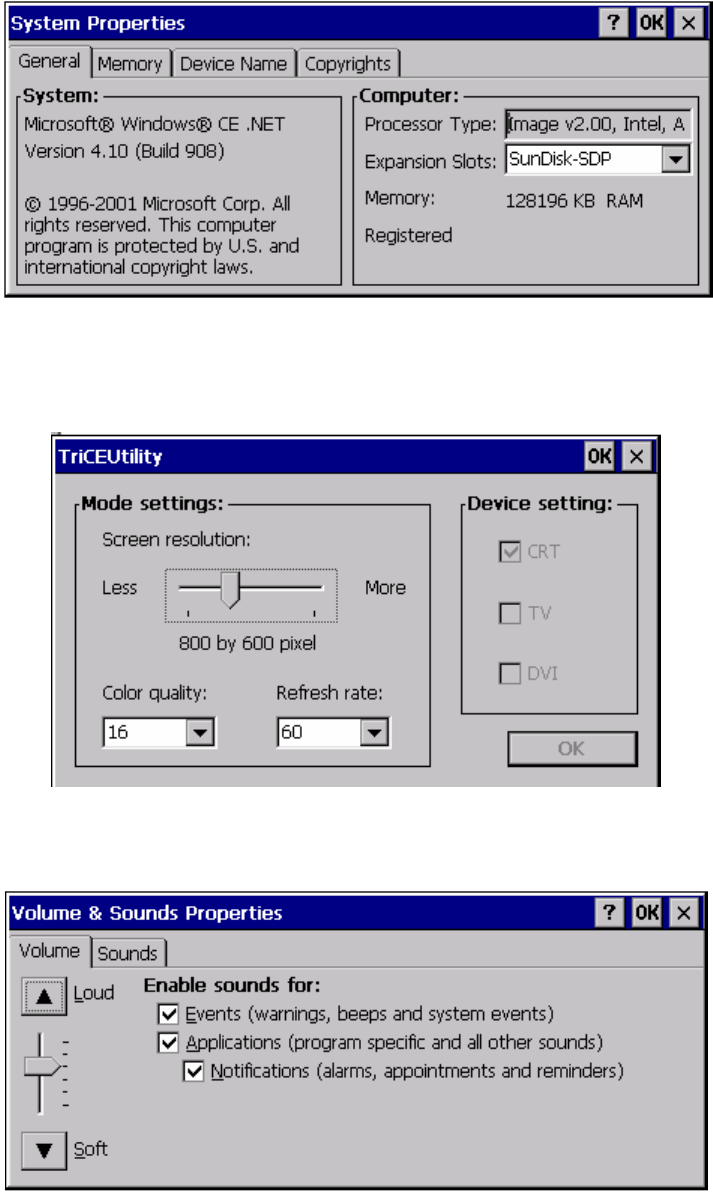
Experience TAB
Choose a Modem, BroadBand, Lan or Custom connection mode from the drag-down
menu. Click the check box to optimize connection performance speed.
The Remove Programs Control Panel
Any installed program, that will be listed on this window. Select a program that you want to
remove from the list then press the Remove button to delete it.
ViewSonic N210 30
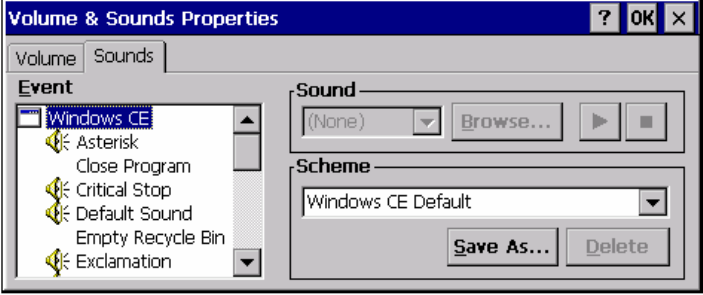
The System Control Panel
System Properties allows you to view your device’s software and hardware, system information
adjust the memory allocation settings, the device name, and copyrights.
The TriCEutility Control Panel
Sets simultaneous display for TV, CRT and DVI screen, screen resolution, color quality, and
refresh rate.
The Volume & Sounds Control Panel
Volume & Sounds Properties allows you to adjust the device’s Volume and Sounds settings.
ViewSonic N210 31
ViewSonic N210 32
Other Information
Specifications
CPU Vendor: National SC 1100 200-300 MHz processor.
Memory 1 SODIMM x 128MB or 64MB
32MB or 64MB CF
Display Trident CyberBlade XP graphics card
Sigma Design Em8476 MPEG DECODE
16 bit high color with 1024*768 resolution
Networking Wireless LAN driver
TCP/IP with DNS and DHCP
10/100-TX Ethernet, twisted pair (RJ-45), Wake-on-LAN ready
Point to Point Protocol (PPP)
I/O Ports One DC-in
One DVI
One VGA out
One Ethernet 10/100 (RJ-45)
4 x USB (type-A)
One USB (type-B) for disaster recovery
One Microphone-input
One Headphone output
One Audio-out
Wireless 802.11x in Mini-PCI socket (On SC300)
Power Adapter Input: 100-240V / 50~60Hz
Output: +12V DC
Dimensions 118 x 243 x 209 mm (WxHxD)
Weight 1.5 kgs (main unit)
Safety
Regulation FCC-B, TUV/GS, CE-Mark, cUL, UL, CB report, C-Tick, BSMI,
CCC, NOM, PSB, GOST
Standard
Accessories Main unit
Power supply & US power cable
Quick start card
Patch antenna bundle optional
USB type keyboard & mouse
ViewSonic N210 33
Troubleshooting
If you are experiencing trouble with the NexTVision N210, refer to the problems and solutions
listed here. If the problem persists, please contact or our service center before contacting your
local dealer.
Common Problems / Frequently Asked Questions
Problem: No power
z Make sure power button (or switch) is ON.
z Make sure A/C power cord is securely connected to the DC power supply and the power supply is firmly
connected to the device.
z Plug another electrical device (such as a radio) into the power outlet to verify that the outlet is supplying
proper voltage.
Problem:Power is ON but no screen image
z Make sure the video cable supplied with the Display is tightly secured to the video output port on the back of
the computer. If the other end of the video cable is not attached permanently to the Display, tightly secure it to
the NexTVision display.
z Adjust brightness and contrast of monitor.
Problem:Control buttons do not work
z Press only one button at a time.
Problem: The device cannot be turned on.
Check that all I/O and power connectors are correctly and securely connected as described in the installation
section.
Make sure the pins of the connectors are not bent or broken.
Problem: LAN function cannot be started.
Ensure that the cable is securely connected to the network RJ-45 connector and that the other end of the cable
is also securely connected to its correct device. Make sure the link LEDs do light when the cable is well
connected.
Contact your system administrator.
Problem: Network server cannot be logged on.
Ensure that the required network setting have been entered properly.
Contact your system administrator.
Question: How to upgrade image?
For upgrade image, please follow the instructions:
1. Enter the “Control Panel” window.
2. Enter “Management Tools”. (you may see two pages in this window)
3. Choose “Upgrade” page
4. Fill in the data:
(1) Server Name:
(2) Path\File:
(3) User Name:
(4) Password:
Refer to page 21 FTP upgrade for more details.

ViewSonic N210 34
Customer Support
For technical support or product service, see the table below or contact your reseller.
NOTE: You will need the product serial number.
Country/
Region Web site T = Telephone
F = FAX Email
United States
viewsonic.com/
support T: (800) 688-6688
F: (909) 468-1202 service.us@viewsonic.com
Canada
viewsonic.com/
support T: (800) 688-6688
F: (909) 468-1202 service.ca@viewsonic.com
United Kingdom viewsoniceurope.com T: 0800 833 648
F: (01293) 643910 service.eu@viewsoniceurope.com
Europe, Middle,
East, Baltic,
countries, and
North Africa
viewsoniceurope.com Contact your reseller
service.eu@viewsoniceurope.com
Australia and New
Zealand viewson ic.com.au T: +61 2 9929 3955
F: +61 2 9929 8393 service.au@viewsonic.com
Singapore/India
and Southeast
Asia
viewsonic.com.sg T: 65 273 4018
F: 65 273 1566 service.sg@viewsonic.com
Other Asia/Pacific
countries viewsonic.com.tw T: 886 2 2246 3456
F: 886 2 8242 3668
service.ap@viewsonic.com
South Africa viewsonic.com/asia T: 886 2 2246 3456
F: 886 2 8242 3668 service.ap@viewsonic.com
ViewSonic N210 35
Cleaning the Case
z MAKE SURE THE NexTVision N210 IS TURNED OFF.
z NEVER SPRAY OR POUR ANY LIQUID DIRECTLY ONTO THE CASE.
To clean the case:
1. Use a soft, dry cloth.
2. If still not clean, apply a small amount of a non-ammonia, non-alcohol based, mild
non-abrasive detergent onto a clean, soft, lint-free cloth, then wipe the surface.
Disclaimer
ViewSonic does not recommend the use of any ammonia-based or alcohol-based cleaners
on the case. Some chemical cleaners have been reported to damage the case.
ViewSonic will not be liable for damage resulting from use of any ammonia-based or
alcohol-based cleaners.
ViewSonic N210 36
Limited Warranty
VIEWSONIC Video Process Box
What the warranty covers:
ViewSonic warrants its products to be free from defects in material and workmanship during the
warranty period. If a product proves to be defective in material or workmanship during the warranty
period, ViewSonic will, at its sole option, repair or replace the product with a like product. Replacement
product or parts may include remanufactured or refurbished parts or components.
How long the warranty is effective:
ViewSonic® LCD displays are warranted for one (1) year for all parts including the light
source and one (1) year for all labor from the date of the first consumer purchase.
Who the warranty protects:
This warranty is valid only for the first consumer purchaser.
What the warranty does not cover:
1. Any product on which the serial number has been defaced, modified or removed.
2. Damage, deterioration or malfunction resulting from:
a.Accident, misuse, neglect, fire, water, lightning, or other acts of nature, unauthorized product modification, or failure to follow instructions supplied with the product.
b.Repair or attempted repair by anyone not authorized by ViewSonic.
c.Any damage of the product due to shipment.
d.Removal or installation of the product.
e.Causes external to the product, such as electrical power fluctuations or failure.
f.Use of supplies or parts not meeting ViewSonic’s specifications.
g.Normal wear and tear.
h.Any other cause which does not relate to a product defect.
3. Removal, installation, and set-up service charges.
How to get service:
1.For information about receiving service under warranty, contact ViewSonic Customer Support. You will need to provide your product's serial number.
2.To obtain service under warranty, you will be required to provide (a) the original dated sales slip, you’re your name, (c) your address, (d) a description of the problem,
and (e) the serial number of the product.
3.Take or ship the product freight prepaid in the original container to an authorized ViewSonic service center or ViewSonic.
4.For additional information or the name of the nearest ViewSonic service center, contact ViewSonic.
Limitation of implied warranties:
THERE ARE NO WARRANTIES, EXPRESS OR IMPLIED, WHICH EXTEND BEYOND THE DESCRIPTION CONTAINED HEREIN INCLUDING THE IMPLIED
WARRANTY OF MERCHANTABILITY AND FITNESS FOR A PARTICULAR PURPOSE.
Exclusion of damages:
VIEWSONIC'S LIABILITY IS LIMITED TO THE COST OF REPAIR OR REPLACEMENT OF THE PRODUCT. VIEWSONIC SHALL NOT BE LIABLE FOR:
1.DAMAGE TO OTHER PROPERTY CAUSED BY ANY DEFECTS IN THE PRODUCT, DAMAGES BASED UPON INCONVENIENCE, LOSS OF USE OF THE
PRODUCT, LOSS OF TIME, LOSS OF PROFITS, LOSS OF BUSINESS OPPORTUNITY, LOSS OF GOODWILL, INTERFERENCE WITH BUSINESS
RELATIONSHIPS, OR OTHER COMMERCIAL LOSS, EVEN IF ADVISED OF THE POSSIBILITY OF SUCH DAMAGES.
2.ANY OTHER DAMAGES, WHETHER INCIDENTAL, CONSEQUENTIAL OR OTHERWISE.
3.ANY CLAIM AGAINST THE CUSTOMER BY ANY OTHER PARTY.
Effect of state law:
This warranty gives you specific legal rights, and you may also have other rights which vary from state to state. Some states do not allow limitations on implied
warranties and/or do not allow the exclusion of incidental or consequential damages, so the above limitations and exclusions may not apply to you.
Sales outside the U.S.A. and Canada:
For warranty information and service on ViewSonic products sold outside of the U.S.A. and Canada, contact ViewSonic or your local ViewSonic dealer.
ViewSonic LCD MM Warranty (V1.0) Release Date: 12-17-2002
ViewSonic N210 37
Appendix
Safety Guidelines
Warning: This device must be operated with the original power supply, part number: SA150A-1240V-3
CAUTION: Danger of explosion if battery is incorrectly replaced. Replace only with same or equivalent type recommended by the manufacturer. Discard used
batteries according to manufacturer’s instructions.
CAUTION: The socket-outlet should be installed near the equipment and should be easily accessible.
CAUTION: Use a power cable that is properly grounded. Always use the appropriate AC cord that is certified for the individual country. Some examples are listed below:
USA.................UL
Canada.............CSA
Germany..........VDE
Switzerland ..... SEV
Britain ............. BASE/BS
Japan ............... Electric Appliance Control Act
IMPORTANT NOTICE CONCERNING POWER CORD SELECTION
The power cord set for this unit has been enclosed and has been selected according to the country of destination and must be used to prevent electric shock. Use the
following guidelines if it is necessary to replace the original cord set, or if the cord set is not enclosed.
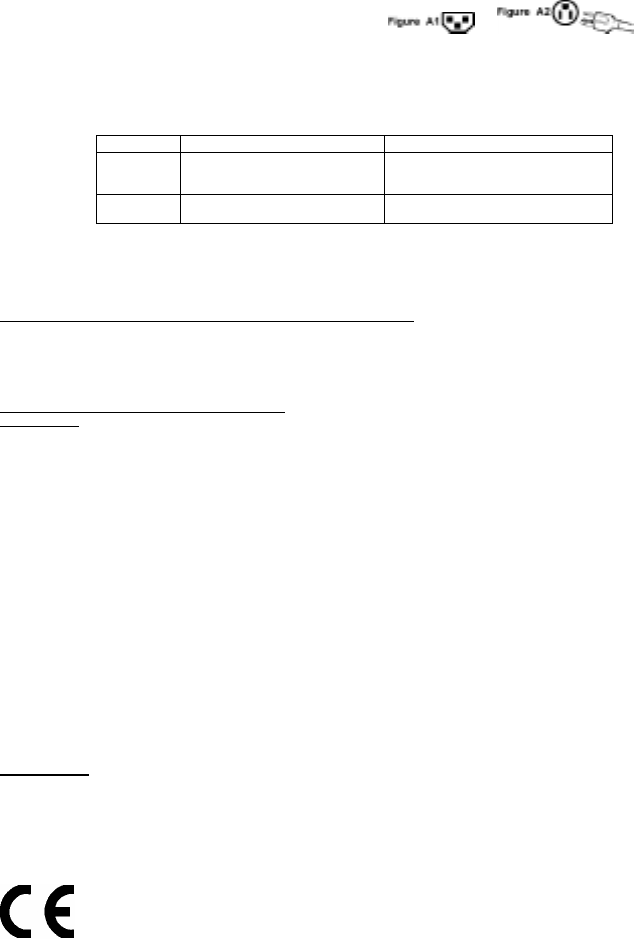
The female receptacle of the cord set must meet IEC-60320 requirements and may look like (Figure A1 below):
For the United States and Canada
In the United States and Canada the male plug is a NEMA5-15 style (Figure A2), UL Listed, and CSA Labeled. For units which are mounted on a desk or table, type SVT
or SJT cord sets may be used. For units which sit on the floor, only SJT type cord sets may be used. The cord set must be selected according to the current rating for
your unit. Please consult the table below for the selection criteria for power cords used in the United States and Canada.
Cord Type Size of Conductors in Cord Maximum Current Rating of Unit
SJT 18 AWG
16 AWG
14 AWG
10 Amps
12 Amps
12 Amps
SVT 18 AWG
17 AWG 10 Amps
12 Amps
For European Countries
In Europe you must use a cord set which is appropriate for the receptacles in your country. The cord set is HARCertified, and a special mark that will appear on the outer sheath, or on the insulation
of one of the inner conductors.
AC PLUG CORD PRECAUTIONS FOR THE UNITED KINGDOM
FOR YOUR SAFETY PLEASE READ THE FOLLOWING TEXT CAREFULLY.
IF THE FITTED MOULDED PLUG IS UNSUITABLE FOR THE SOCKET OUTLET THEN THE PLUG SHOULD BE CUT OFF AND DISPOSED OF SAFELY.
THERE IS A DANGER OF SEVERE ELECTRICAL SHOCK IF THE CUT OFF PLUG IS INSERTED INTO AN APPROPRIATE SOCKET.
If a new plug is to be fitted, please observe the wiring code as shown below.
If in any doubt, please consult a qualified electrician.
WARNING: THIS APPLIANCE MUST BE EARTHED.
IMPORTANT: The wires in this mains lead are coloured in accordance with the following code:
Green-and-Yellow: Earth
Blue: Neutral
Brown: Live
If the coloured wires of the mains lead of this appliance do not correspond with the coloured markings identifying the terminals in your plug, proceed as follows:
The wire which is coloured GREEN-AND-YELLOW must be connected to the terminal in the plug which is marked by the letter E or by the Earth symbol or coloured GREEN or
GREEN-AND-YELLOW.
The wire which is coloured BLUE must be connected to the terminal in the plug which is marked with the letter N or coloured BLACK. The wire which is coloured BROWN must be connected to the
terminal in the plug which is marked with the letter L or coloured RED.
If you have any questions concerning which proper power cord to use, please consult with the dealer from whom you have purchased the product.
Compliance Information for U.S.A.
This equipment has been tested and found to comply with the limits for a Class B digital device, pursuant to part 15 of the FCC Rules. These limits are designed to provide reasonable protection
against harmful interference in a residential installation. This equipment generates, uses, and can radiate radio frequency energy, and if not installed and used in accordance with the instructions,
may cause harmful interference to radio communications. However, there is no guarantee that interference will not occur in a particular installation. If this equipment does cause harmful
interference to radio or television reception, which can be determined by turning the equipment off and on, the user is encouraged to try to correct the interference by one or more of the following
measures:
• Reorient or relocate the receiving antenna.
• Increase the separation between the equipment and receiver.
• Connect the equipment into an outlet on a circuit different from that to which the receiver is connected.
• Consult the dealer or an experienced radio/TV technician for help.
FCC Warning
To assure continued FCC compliance, the user must use grounded power supply cord and the provided shielded video interface cable with bonded ferrite cores. If a
BNC cable is going to be used, use only a shielded BNC(5) cable. Also, any unauthorized changes or modifications not expressly approved by the party responsible for
compliance could void the user's authority to operate this device.
CE Conformity for Europe
The device complies with the requirements of the EEC directive 89/336/EEC as
amended by 92/31/EEC and 93/68/EEC Art.5 with regard to “Electromagnetic
compatibility,” and 73/23/EEC as amended by 93/68/EEC Art.13 with regard to “Safety.”

ViewSonic N210 38
ViewSonic Corporation