ViewSonic VS14445G Tablet PC User Manual Z97T User guide2011 9 20
ViewSonic Corporation Tablet PC Z97T User guide2011 9 20
UserManual.wiki
>
ViewSonic
>
VS14445G User Manual
>
User Manual
Contents
1.
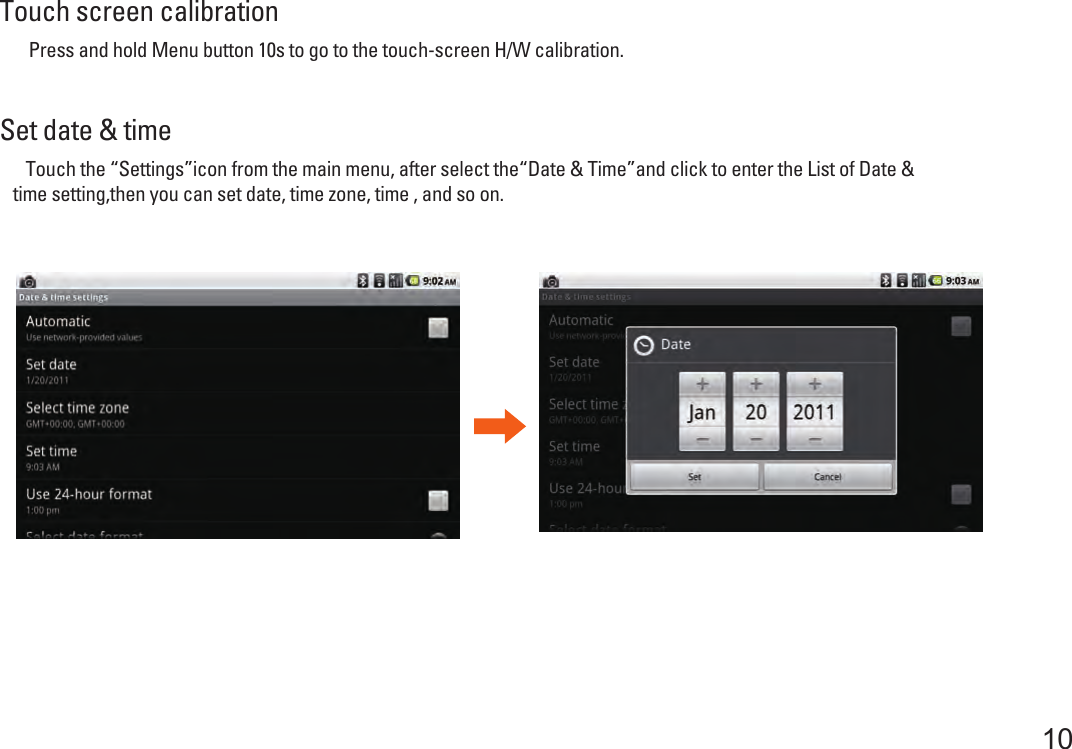
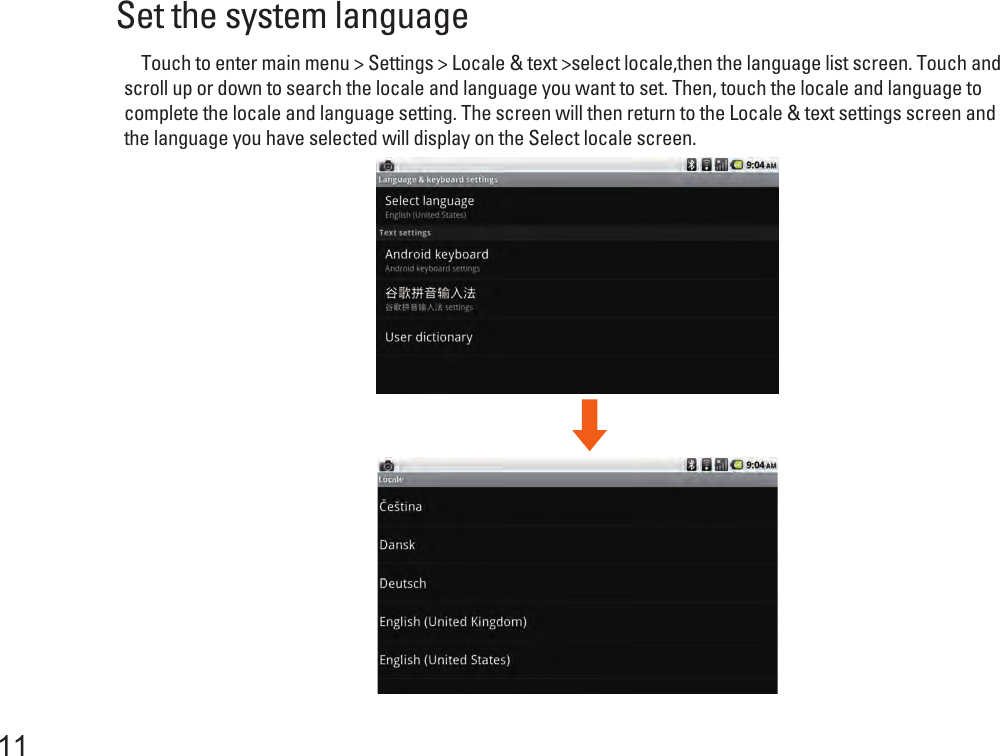
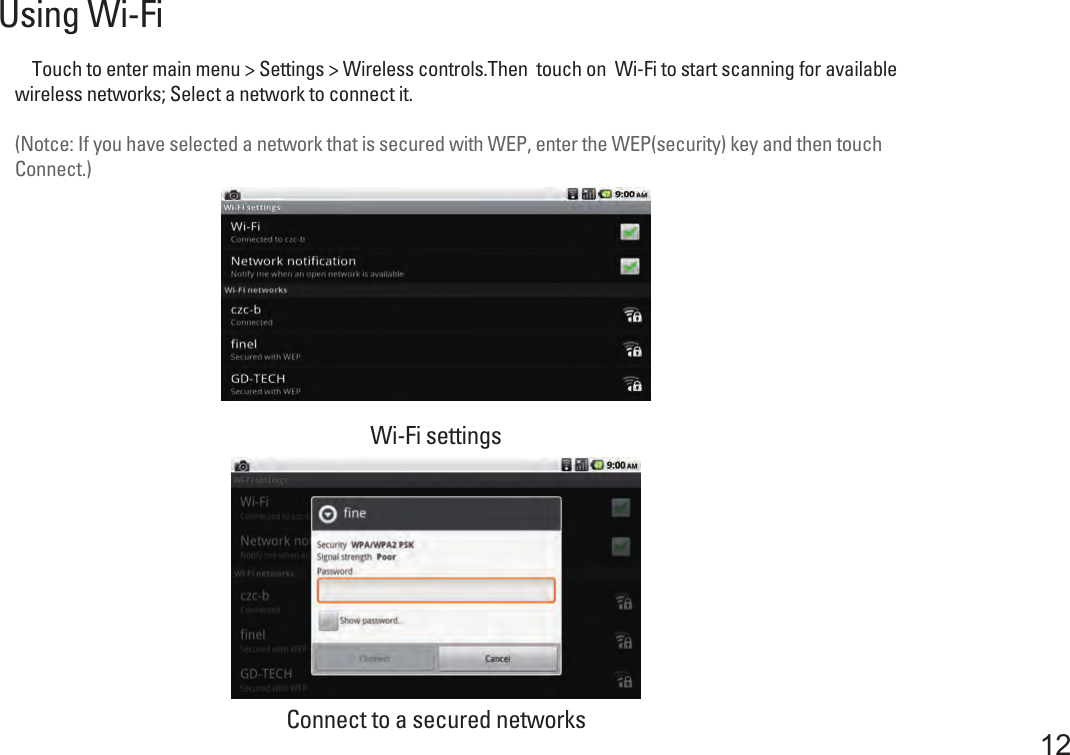
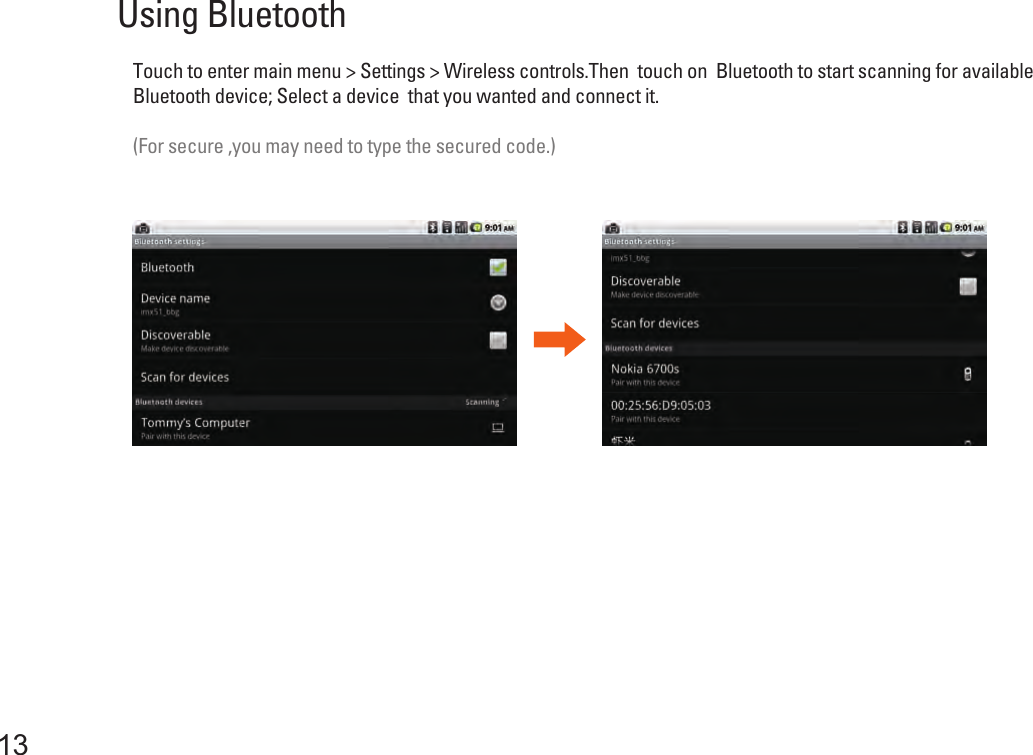
User Manual
2.
user manual
User Manual
Navigation menu
Upload a User Manual
Namespaces
Wiki Guide
HTML
PDF
Info
Views
User Manual
Discussion / Help
Navigation


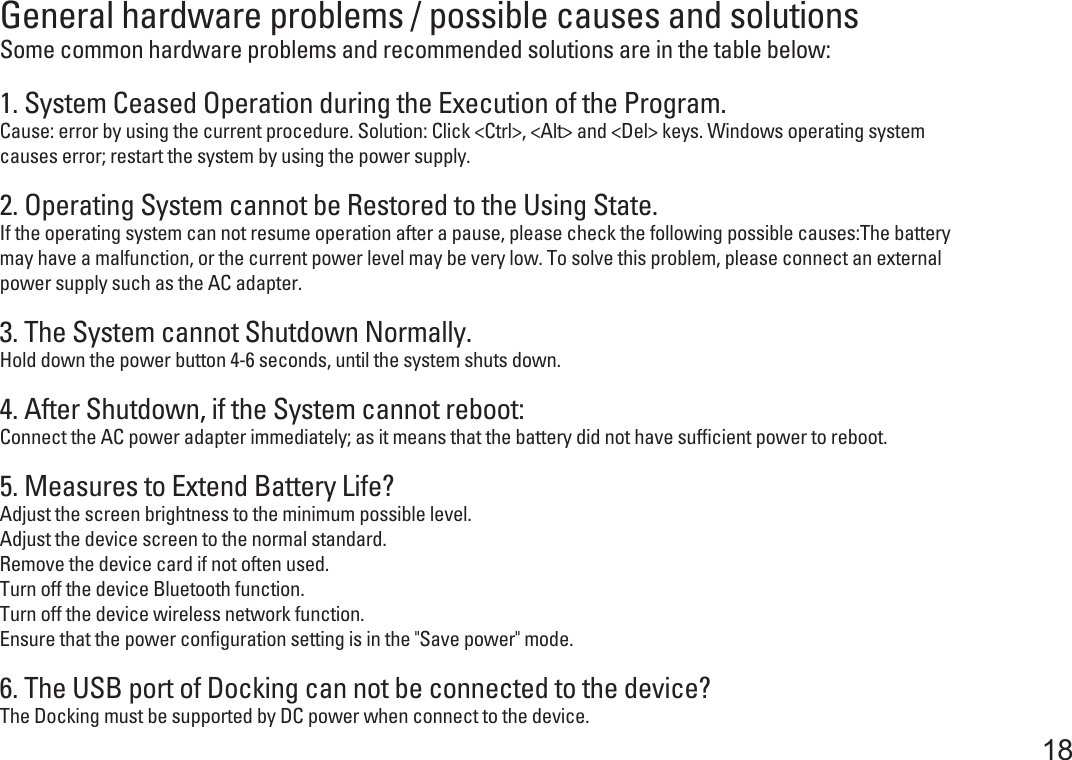
![7. Wireless Network Breaks after 2 to 3 Minutes on line, and cannot resume on-line.This may be due to interference caused by channel, please change the AP's channel and re-line.8. The device cannot connect to the Internet Network.Internet service providers (ISP) account is not setup; please contact your network service company for assistance.9. The device has been online via a Wireless Network, but still cannot connect to another Computer.Please check the device driver is installed correctly. If the driver is not installed correctly, press the [Start] -> [Control Panel] -> [System] -> [Device Manager] -> [Network Adapters], you will find a yellow exclamation mark on the network tag. If a yellow exclamation mark occurs, please use the driver CD to reinstall the device driver.10. Good Signal Strength, but cannot connect to the Network.Please check the TCP / IP address settings are correct or not.12. The device cannot continue running.An external or internal storage device could be the cause of this problem as it is not operating properly when storing the content.11. If water accidentally penetrates the device, how to solve this problem?At this point, do not connect the device's power supply, or it will cause more serious damage to the device. Unplug the power supply and power cord, remove any attached external devices (such as: drive). Dry any liquid that was spilledon the device; wipe stains with a soft cloth to reduce potential damage to the unit. Dry the body and other equipment with fans, and then send it to the nearest device repair center to diagnose and repair the device by qualified engineers, in order to reduce the damage to the device.19](https://usermanual.wiki/ViewSonic/VS14445G.User-Manual/User-Guide-1665270-Page-23.png)