Vitelcom Mobile Technology M342 TRI-BAND GSM 850/1800/1900 MHz MOBILE PHONE User Manual GRUNDIG mobile
Vitelcom Mobile Technology, S.A. TRI-BAND GSM 850/1800/1900 MHz MOBILE PHONE GRUNDIG mobile
Users Manual

Safety on the road.________________________________
Please remember that using a mobile phone during driving is prohibited.
Follow the rules as applicable in each country.
Stop the car in a safe place if you need to answer or use the phone.
Please always remember the following before using the phone in
emergencies.
Focus on driving only.
Remember the most considerable thing is nothing but your safety.
If you want a Hands-Free device on vehicles, let it installed by an authorized
engineer.
Safety in hospital _________________________________
The mobile phone since designed to transmit electric waves can disturb
functions of electric or medical appliances.
Remember to turn the phone off always in hospital.
Safety in flight ___________________________________
Remember the phone if used in the airplane can disturb functions of electric
wave equipment of the airplane.
Therefore, the use of the phone is illegal in the airplane.
Remember to turn the phone off always during flight.
Safety in places where explosion is predictable________
In such places as gas stations or chemical factories where explosion is
predictable, the use of any electric wave equipment is illegal and prohibited.
Turn off the phone and avoid the use near any gas station.
10

Infrared equipment and safety ______________________
This phone includes infrared transmission equipment.
Do not let infrared rays come in contact with eyes of others nor use together
with other infrared equipment.
Electrical equipment ______________________________
Most electric appliances are secured and protected against the effect of the
phone radio frequency.
Nevertheless, there are some products that are not protected against.
A person who works in a manufacturing company of those products, wearing
heart pulsimeter is desired to keep at least 15cm away from the phone to
avoid the electric wave.
If applicable problems still occur as before to the person with heart
pulsimeter, then the phone shall be turned off.
The phone can disturb functions of some kind of microphones.
In this case, please contact the manufacturing factory of such microphones
for further information.
Since the radio frequency signal generated from this phone may have an
influence on electric equipment of a car (air bag, brake, and so on), please
be well informed thereof via its maker.
11

Battery and parts _________________________________
This phone uses a rechargeable battery of Lion Technology.
The battery if completely recharged is usable to call for a duration of 230
minutes and available for standing-by for a duration of 180 minutes.
Do not use any charger or battery if damaged or worn out.
Do not touch any circuit of the battery. It will cause damage thereon.
If the battery is kept in hot temperature, its function and duration may be
deteriorated.
Keep temperature always as similar as possible.
The phone if kept in too high or too low temperature may not operate from
time to time even if the battery completely recharged.
Time required to recharge the battery may be different according to several
factors such as capacity left, type of battery and charger, and so on. For the
better performance of recharge, keep suitable temperature.
The battery although completely recharged can be discharged of itself as the
time elapses.
Unplug the switch of the charger if not used.
For effective operation of the phone, please stand the phone always
lengthwise.
Do not throw the battery in a ditch or a fire.
The battery shall be recycled according to its related laws.
Use only the battery, charger and parts attached to the phone just as
provided from the factory.
Parts shall be compatible to be used.
If not, its warranty will be invalid.
If some parts need replacement, contact the agency you joined to order.
Fill up the battery to the maximum prior to its first operation.
12

Opening/commencement of the phone _______________
Slightly push the upper from down below to open the phone.
If the phone is turned on, a lamp will be on the screen. The screen will be off
if the phone is shut.
Button __________________________________________
Arranged shapes and basic names of the buttons used on GRUNDIG mobile
are as shown below;
On/Off button
Keep pressing this button to turn the phone on and off.
Press this button to finish the call.
Press this button for return to the initial screen even if other applicable
screen is displayed for some menu.
13
2. Cellular Phone
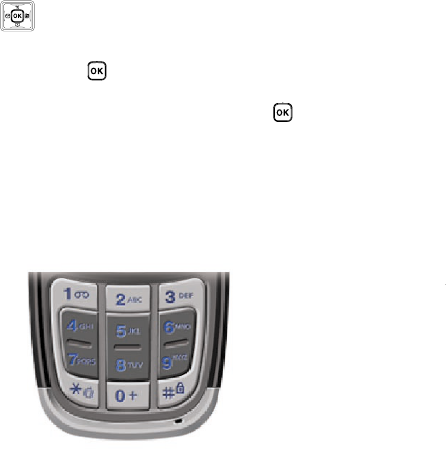
Direction button
It allows the user to move to 4 directions (up and down, right and left) from
the phone menu .
Option list can be selected with this button.
Press the square button (OK) in the center to select the list presently
positioned.
When camera mode is positioned, press this central button to take a
picture. On the basic screen press the central upper button to display the call
record. In the same way press the central bottom button to display the
address book. Press the left button to show messages received and press
the right button to start entering new text messages
Alphabet/number button
0 to 9 is available for user to write number, text or symbol.
Buttons * and # have lots of functions to be used variously in phone menu.
14
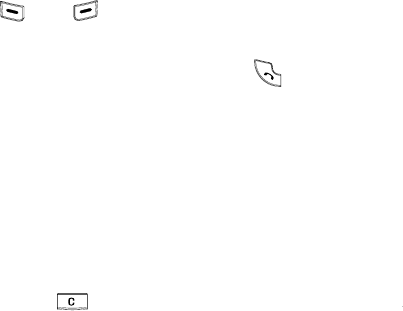
Select button
Select button of Left Right executes the option right above.
Send button
After pressing desired phone number, press the send button to start
the call to the number. If the line is not busy, press this button
to show the phone numbers called before.
LED display
Down below the direction button blue LED blinks every 2 seconds to let you
know the phone is turned on.
If GRUNDIG mobile is recharged with the phone off, this LED will be turned
on the same.
Clear button
Press the clear button (CLR) to delete the last number while entering
numbers, to delete the last letter while entering names, or to return to the
previous step while looking at the phone menu
Camera button
Use this button located at the upper left side of the phone to take a picture or
to execute camera mode where images can be enlarged or brightness can
be increased or decreased.
Sound button
This button tunes the volume with up&downkey, when a call is incomming.
15
In the beginning __________________________________
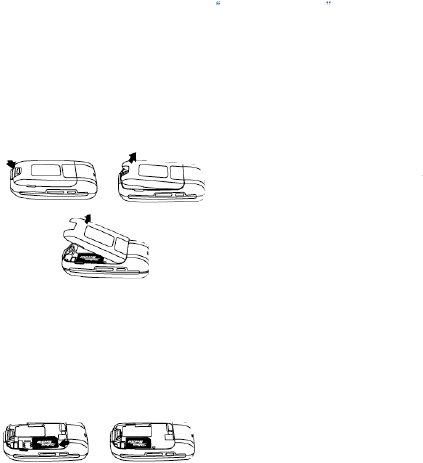
Installment of SIM card
To answer the phone or to call, GRUNDIG mobile needs a SIM card
available, which the communication company may have installed already.
Note If GRUNDIG mobile is used, installation state of the SIM card will be
displayed. If the SIM card is not installed, a paragraph Confirm SIM card
will be displayed.
Installment of SIM card
1- Remove the battery after pulling the hook outward with GRUNDIG mobile
turned off.
The battery since adhered to the cover will come out as one component.
2- After the battery is removed, insert the SIM card to the hole. At this
moment, make sure the corner of card fits well on the rim of the hole so to
insert the card, checking the remaining aspect.
Insert SIM card as shown in the following figure.
16
3 - As for the two holes, make sure the cover on the rear fits well to insert the
battery.
Finally, keep pressing the lower of the cover till it sounds Tic .
3 - Pull the hook and insert the cover and the battery.
Note Follow these procedures or some defects may occur on the support
parts of the entrance, which will not be guaranteed.
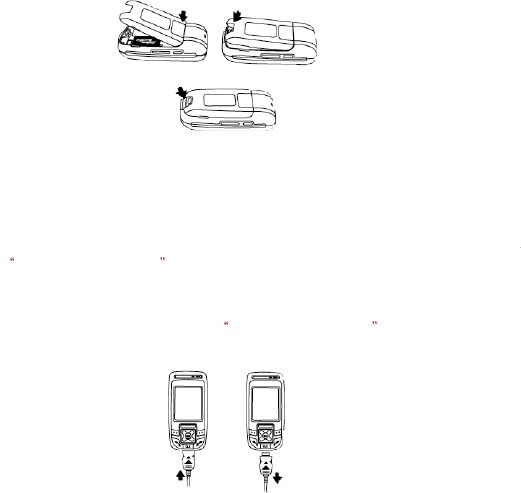
Battery charge
1- Insert the charger as shown in the figure. The screen will display the
Battery is being charged while the phone is turned on for several
seconds before returning to the previous step. (your phone is available
even during the battery is charged)
If the phone is turned off, display of Battery is being charged will be
continuously displayed.
17
2- If the charge is completed, the screen will be as shown in the figure. To
remove the charger hold and press the both ends to extract.
Phone ON/OFF ___________________________________
Keep on pressing the red button for 5 seconds to turn on the phone.
This function is designed to avoid unintentional ON or OFF of the phone
when kept in a pocket or luggage.
Start
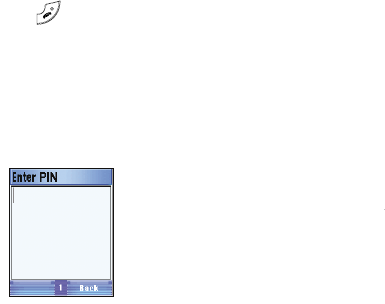
If PIN enable setting on after the phone is turned on, you will be required to
input 4-digit password. Input correct password and press OK button.
Note: If password is not input, only emergency call will be available with
SOS button.
In case the phone has been off for long, you may be asked to make sure if
date and time are correct.
If they are not correct, press edit button.
If the date is correct, press OK button.
If the date is not correct, input new date using the number on the button pad
and then press OK button.
18
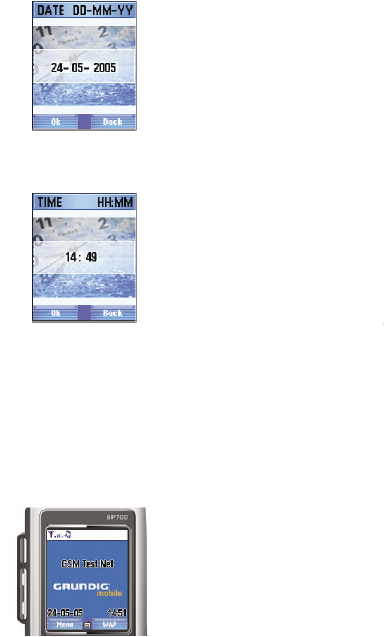
If the time is correct, press OK button.
If the time is not correct, input new time and then press OK button.
Stand-by screen
Note For about 1 minute and 30 seconds after the phone is on, its image
and menu may be displayed a little slower than usual. This delayed time is
for environmental setting of the menu. And the menu will not be displayed
during this duration.
After this duration, the speed will be back to normal.
Stand-by screen is displayed when the phone is available to answer or use
to call.
19

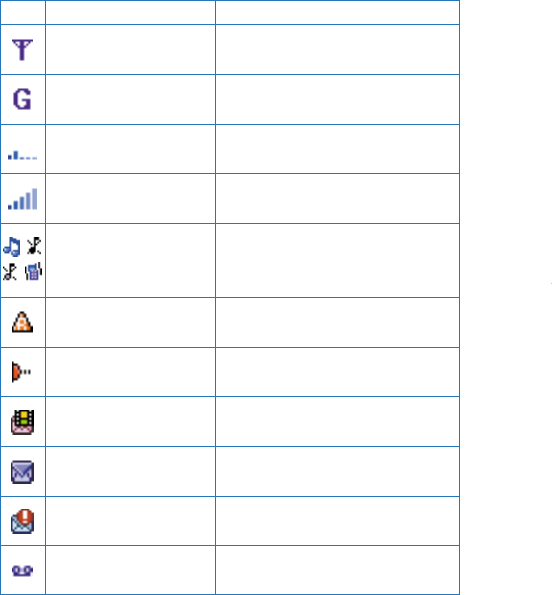
Upper part
*It is a line to display the status of the phone with various icons.
*It is a line to display the status of the phone company providing the
mobile services.
Central part: If the phone is not available yet for services, bumpy paper type
of background is displayed, where main menus are displayed here too.
Lower part: On the top, day, month, year and present time will be displayed. On
the bottom, optional menu button will be displayed as a selection button. If services
are not started for the phone, the option is displayed with menu, wap and glass
typed icon in the center. If the phone is ready In the center of this selection
menu, a room-shaped icon will be displayed.
- Press the selection button located below the menu in stand-by screen
state so to display the main menu.
- Press the selection button located below the wap menu in stand-by
screen state so to display the WAP menu.
- Press the upper of the direction button in stand-by screen state so to
display the missed call.
- Press the lower of the direction button in stand-by screen state so to
display the phonebook.
- Press the left of the direction button in stand-by screen state so to
display the messages received.
- Press the right of the direction button in stand-by screen state so to
display new message state.
- Press OK button to display multimedia state.
Note OK button even though displayed usually with a different function, has
the same function as the selection button when pressed.
In order to press OK button, press the button located in the center of the
direction button.
20

The direction button will be used mainly to appropriate functions of the
phone.
- Keep on pressing Start/End button in stand-by screen state to turn off the
phone.
- When the screen is in a normal state, press Send Button to display the call
record.
- In order to make a call, press number first in stand-by screen state and the
call button next. Keep on pressing one number among 2, 3 and 7 and a
call to the number as input will be made. In the following table, various
functions are described as applicable when number buttons are pressed for
short or long in stand-by screen state.
They are company mode and individual mode, where a relevant SIM card
mode will appear if any password is input in stand-by screen state. Company
mode and individual mode have their own numbering system respectively.
Dual SIM card: Dual SIM card has 2 passwords and 2 relevant modes
respectively.
21
Short Long
1 No.1 Call connected to voice box
2 No.2 Fast call
3 No.3 Fast call
5 No.5 Fast call
7 No.7 Fast call
9 No.9 Fast call
0 No.0 Symbol +
* Symbol * button has a function to move directly to audio mode
menu where the bell volume of the phone can be
adjusted.
Icons displayed in stand-by screen state _____________
22
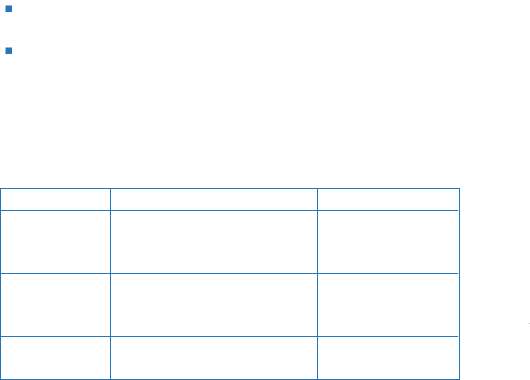
Icon Name Description
Antenna/GPRS
Always displayed to show service area if
reached
GPRS connection
Substituted for Antenna icon to show
GPRS area if reached
Service available level
Always displayed to show service
available level (0 to 5) in a bar graph
Service available level A
The greatest service available level with
the maximum bars
Bell mode
There are 6 modes available (sound
only, vibrate only, sound after vibrate,
sound with vibrate, silence, manner)
Roaming state
Displayed while user is in other service
area or receiving a call abroad
Infrared mode
Displayed when connected via the
infrared ray
New multimedia message
Displayed when a multimedia message
received
New Message
This will be displayed when a new
message is received.
Messages full
Displayed when the memory reaches the
capacity limit
New voice message
Displayed when a new voice message is
received
Calls ___________________________________________
Making a call
To make a call, press desired phone number in stand-by screen state and
then Call Button (blue) .
If you input the wrong number, press Clear Button (CLR) to delete
the last number input. In order to delete a specific number, move the cursor
right behind the number to delete (press the left of OK button) and then
press Clear Button.
Press End Button (red) to finish the call.
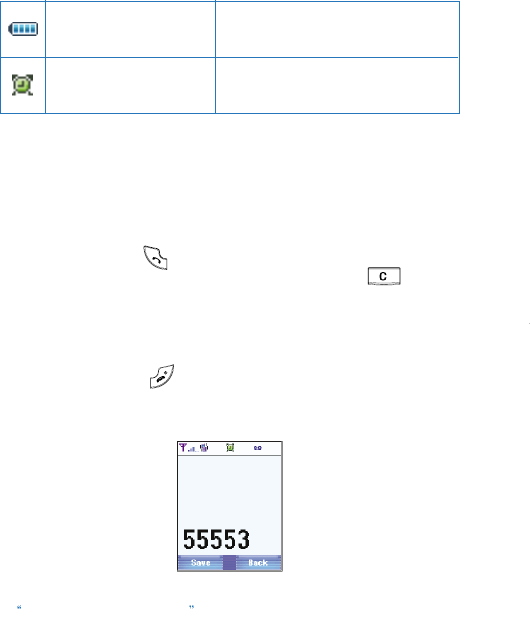
In the stand-by state of the phone, input number to display the following
screen.
If the inputed phone number is displayed, just press Save Button and
specify a save folder.
23
Battery lef Displayed approximately to show the
actual capacity of the battery state
Alarm Displayed if alarm is set via the calendar

If SIM card or the memory of the phone is displayed automatically, specify
a related type of the phone too.
(Refer to the user manual for more detailed procedures)
Answering the phone
Press Call (receive) Button to answer the phone call.
Press Start/End Button not to answer the phone call.
Whole menus ____________________________________
In the stand-by state, press the menu button to go back to standard menu.
Press the direction button (up/down/left/right) to get into menu desired. While
pressing the menu button, press relevant number to get into the category
applicable.
Figures of the icons, names of the categories, brief description of each menu
and short-cut buttons are as in the following table;
24
Icon Menu
Connection
Description
Button
Phone book 1 To save phone numbers
Messages 2
To read and write text
messages
Multimedia 3
To deal with camera and
image album
Leisure 4
To download and select new
video games and melody
images
Common screens and system in various menus _______
Input phone number
When you start inputting number in stand-by state, the number will be
displayed, moving from right to left as it is inputed. If the number input
reaches the end of the left, the number will move to the upper line to prepare
a space for the next numbers to input.
During inputting number, the screen will be as shown below.
In order to insert a number between numbers just entered, use the direction
button (up/down/left/right) to move the cursor.
Press CLR button to delete the number on the left of the cursor.
25
WAP 5 To move to wap service menu
Calls 6
To look through call record and
voice messages sent and
received
To use calendar, calculator,
Extras 7 downloading program,
information on various events
(meeting, birthday), etc.
To specify volume, calling
Setting 8 melody, background image
and other environment of the
phone

Writer
Writer is used to input phone number, text or number.
All kinds of writers (phone number, number, text) have their own functions
respectively.
Writer of phone number
It is used to input phone number from the phonebook. Above all, press
number in stand-by screen state to get into the screen of writer function.
0 ~ 9 are available to enter, which has the following features.
* Press 0 to display + character.
* Press <*> and <#> to input characters of <*> and <#> respectively.
* Press CLR button to delete the last number input. Keep on pressing
CLR button to delete the whole number input (whole number) and to
return to stand-by screen state.
26

* Press OK/Save/Enter button (menu displayed on the left of the
screen) to go to next step. Press Previous Button to go back to the
previous step of the screen.
* Press Navigator Button (up/down/left/right) to move the cursor to the
direction as designated.
Writer of number
It is used to input password 1, password 2 and call-restricted password.
Press the following buttons to make use of its functions specified.
* Use the buttons 0 to 9 to press such number 0 to 9 as applicable.
* <*> button has no function.
* # button is used to display the decimal point, excepting in the screen
of password 1 and 2.
* Press CLR button to delete the last number input. Keep on pressing
CLR button to delete the whole number input.
* Press OK button to go to next screen. Press Previous Button (Atras)
to go back to the previous screen.
* Press the direction button left or right to make the cursor move to the
direction as indicated.
Writer of text
It is used to input text of names or messages. There are 4 input methods for
text writer.
* Capital letter input: displays all the input text in capital letters. This
can be used together with Multi Input and Smart Input which will be
later described.
* Small letter input: displays all the input text in small letters. This can
be used together with Multi Input and Smart Input.
* Capital & Small letter input: In case with Multi Input accompanied,
this will change the text if once input by user, to small letters
27

automatically. In case with Smart Input accompanied, this will make
the first letter be a capital letter, and the rest be small letters
automatically.
In case with Number Input (1), number input is available fast. (Press
number 0 to 9 to display 0 to 9 as applicable, and press # button to display
the decimal point.)
Note Press <*> shortly to change input sequence as follows;
AB, ab, Ab, 1.
Input method is displayed between the two menus in the center of the
bottom line of the screen.
(See below):
As described above, there are two input methods.
* Multi Input (Multiple Input)
* Expected Input (Smart Input)
Note Keep on pressing <*> button in text writer to change to other input
method.
(Multi Input - Expected Input)
In the Expected Input method, the method is underlined. In case with the two
accompanied, it will be displayed as below.
28

Multi Input
This method operates differently according to the language specified.
If Spanish has been specified, following text will be displayed when you
press one numeric button repeatedly.
Smart Input
This makes fast text input available. With the improved technology of (Press
and Expect), a function to expect is realized, making use of the dictionary
prepared in the language specified.
In this way the writer provides the serial expected characters of text when
the user presses the button once.
Text selector
Press # button shortly in the screen of text mode to display text selector
29
Button 1a2a3a4a5a6a7a
Press Press Press Press Press Press Press Press
1 Space . , @ / 1
2 A/a B/b C/c 2 / ¸ / /
3 D/d E/e F/f 3 / Ø/
4 G/g H/h I/i 4 Œ//
5 J/j K/k L/l 5 J/j K/k
6 M/m N/n O/o 6 / / æ/
7 P/p Q/q R/r S/s 7
8 T/t U/u V/v 8 / /
9 W/w X/x Y/y Z/z 9
00
*
#
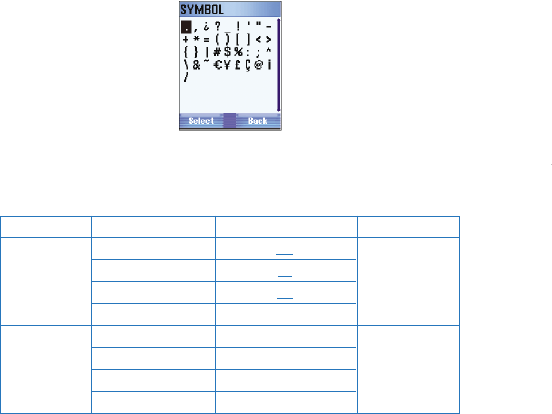
which can display special characters which are not available in general text
mode.
Move the direction button (up/down/left/right) on the text desired to select
those special characters.
If you seleted the special charater, press OK button to input applicable
character.
Characters available are as follows;
All the input methods and all the languages available in GRUNDIG Mobile
have been summarized in the following table.
30
Input type Input method Mark Language
Capital AB
Multi Input Small ab
Capital & small Ab
Number 1
Capital AB
Smart Input Small ab
Capital & small Ab
Number 1
English
&
Spanish
&
French
English
&
Spanish
&
French
In address book, phone number, name and other information are saved and
displayed.
There are three points of contact in address book.
1. SIM: Information related with contact is saved in SIM memory only.
2. Only the phone: Information is saved in phone memory only.
3. Double (copy): Name and phone number of these contacts are
saved in SIM memory and phone memory.
Besides, there are three address books.
1. Mixed Phonebook: Shows all contacts saved in SIM memory and
phone memory.
2. Terminal Phonebook: Shows double-saved contacts in both sides
and information saved in phone memory only.
3. SIM Phonebook: Shows double-saved contacts in both sides and
information saved in SIM memory only.
A special icon represents each contact.
In this way, duplicate contact uses visit card-shaped icon , and SIM
contact uses SIM card-shaped icon , and the next
icon is used for phone contact.
The followings are several rules used in address book.
* As specified, address book displays whole address book on the
screen to show all contacts.
* In the address book, contact and contact group will be saved in the
same list .
Group will be represented by a special icon.
* Information in the phone book is displayed in alphabetic order. Phone
number correspondent to each name is marked on the right of the line
31
3. Phonebook
under the screen.
* Up to 14-character and 20-digit input can be saved in the phone book.
(If the first text input is some symbol to represent international call, up
to 21 is available)
* Up to 4 phone numbers are available for a name.
* Up to 250 addresses can be saved in SIM memory. (The number of
addresses available differs from each other according to card
capacity)
* Up to 500 entries can be saved in phone memory.
* If all the information of a name can not be displayed at a time on
screen, press the direction button to move the information horizontally
so to display and read the rest on screen (being accordingly changed)
to the end.
...... if displayed in the end of the screen means that there is more
information to come.
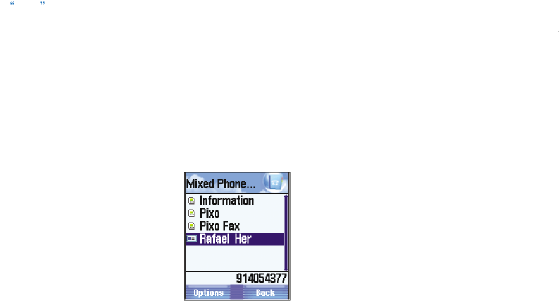
Mixed Phonebook ________________________________
This address book shows all the contacts saved in phone memory and SIM
card memory.
The following figure shows the appearance of this screen.
Below this screen (just above the option and the previous buttons)
expected contact number is displayed.
32

Remember the icon will disappear from this line if the contact is a group.
Up to 750 contacts can be shown via the whole address book (phone
memory plus SIM card memory in total)
How to enter Mixed Phonebook
There are two methods to get into whole address book.
- Press downward direction button in background screen.
- In the basic menu screen, press Select Button while address book
icon is selected.
To make a call, select the one desired and press Call Button .
Or find the entry to call directly on the list. Press only the first letter of the
contact desired to call to display in alphabetic order all the names which
have the letter in front.
Press option button up/down (any button if selected and kept on pressing,
the selected one keeps on going up or down) to show option list which can
be selected.
The options are as follow;
* View Card
* Call contact
* New contact
* Send a message
33

* Delete contact
* Delete All
* Copy contact to phone / SIM
* Change Phonebook
* New group
* Search
* Receive card(s)
* Own number
* Memory status
And options for group are as bellow;
* View group
* Send message to group
* New group
* Rename group
* Delete group
* New contact
* Receive card(s)
* Change Phonebook
* Memory status
34
The function of each option is as follows;
In order to select one of them, select direction button first and then press
Select Button.
View card
This option shows details on contact being selected.
(See the figure below)
*Name of contact is used as a title of View Card.
*It shows phone number of contact selected.
*Even if contact is empty since saved in phone address book, it always
displays E-mail address icon and reference .
*Information correspondent to contact is displayed in the following
order.
Name of contact (it appears on the upper of the screen)
Home phone number
Cell phone number
Company number
Fax
E-mail address
User s configuration (memo)
35
Attached image
Attached sound
Group joined
Note Use SIM card to display the phone number of the name selected only.
Press Previous Button to go back to the previous screen. Press option
button to display options which can be applied to the name selected.
Call contact
It makes a call to the name (person) selected.
Send a message
It sends a message to the name selected.
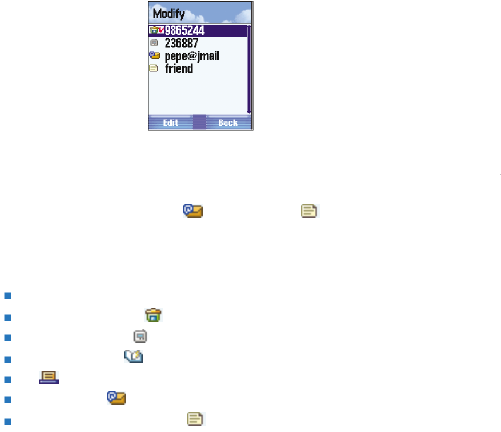
Modify
This option if selected can change the information of the name selected.
Select information to change and press right softkey to display various
options related with.
These options are different from each other according to the location where
the name is (SIM address book, phone address book).
For example, the following options will be displayed if right softkey is
pressed with the number selected.(See the figure below)
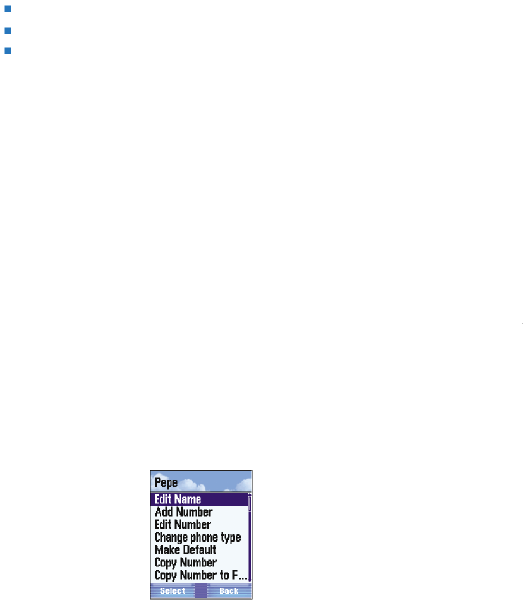
Each option displayed this moment can be applied as follows;
36
37
Name option function
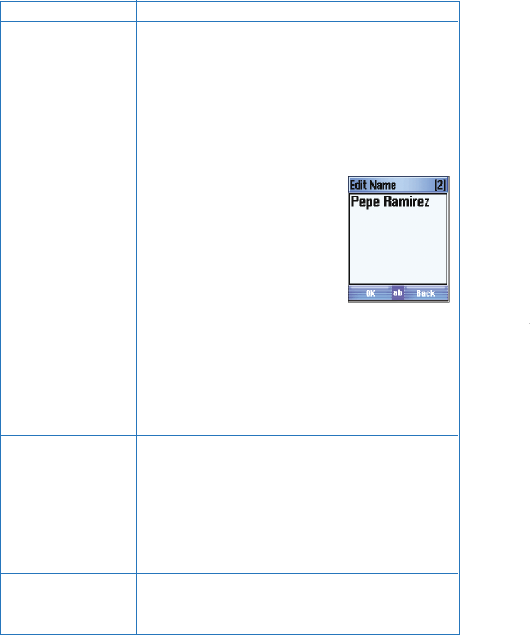
Edit Name: This option always appears regardless of the name
selected. It changes the selected name to a different
name.Even though the name saved in both sides is
selected and changed, there will no effect on the both
memories. Changing name which is saved in both sides
will be different between the two
(SIM, phone):SIM memory keeps
the name as before but the phone
memory saves the changed
name.In order to edit name, erase
the text to change first, write new
text thereon as desired and then press OK button.See
the upper right of the screen. - Edit name: shows the
number of the characters available to the maximum. (Up
to 14 characters available for names)
Add number: adds phone number to a selected name.If this option is
selected, a number pad is displayed where new phone
number can be inputed. Then, press OK button and
input desired number to be specified as home number,
cell phone number, company number or fax number.
Edit number: changes selected number. If this option is selected, you
can get into screen to write number. This changes the
group type (home, company, etc.) of the selected phone
number.
Copy Number copies the number to phone.
Change phone typr Change the type of phone number
Copy number to SIM: copies selected number to SIM card or phone number
memory from the present location.
Copy number to FDN: Fixed Dial
number (FDN) functions to allow
calls to be sent only to designated
groups and specific phone
numbers. And this option is used to copy selected
phone numbers from FDN of SIM address book. To
select this function, input password 2 (4-digit) and press
OK button.
Card melody: specifies melody for phone number related with a name.
Card photo: specifies an image for a name previously selected.
38

Delete contact
deletes a selected name and its whole information contained. You will be
asked to confirm before starting this option. Erase number: deletes presently
selected name s number or E-mail address, etc. You will be asked to confirm
before starting this option.
Copy number to SIM(or phone)
copies selected phone number to SIM card or phone memory from the
present location.
If this is applied with the established number copied, the contact will
be duplicated and displayed just once in the whole address book
during Only Phone mode.
And if the contact in the address book is of Only Phone mode,
different from the saved number, a new contact of Only SIM mode will
be created with the same name and the same phone number.
If the contact is saved both sides, there will be no change even if the
established number is copied.
If the contact is saved both sides and a number different from the
established number is saved with the same name, a new contact of
Only SIM mode will be created.
Card melody
It is used to specify desired melody for selected contact number. Select this
option to display my melody screen and there select desired melody.
39

Card photo
It is used to set desired image for selected contact.
Select this option to display my picture screen and there select desired
picture.
Send card
This option sends saved data in memory card to specific contact via infrared.
Select this option to display send card screen and select via IR to use it.
Call Contact
It is the second option of the address book. Select number input in the
previously selected contact to make a call. For this operation, select Call
contact option on option screen and press Enter button to display selected
contact and its related phone number list.
Note: If just one phone number is found available in the selected contact,
press direct call button right there. Otherwise you can choose one of the
phone number which is in the contact.
Press call button or green call button to send a signal to selected number
and to display number on screen at the same time.
Press previous button to return to address book screen.
40
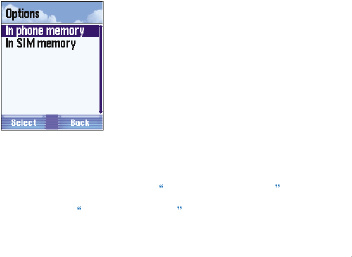
New contact
This option adds new contact to address book. Select this option to display
the following screen.
Note: New contact can not be made directly to whole address book.
For this operation, you should make it first in SIM or phone address book
and then copy the contact to address book next. Select In phone memory
to make contact in address book. Select In SIM memory to save contact
in card. Select option as desired and press Select button.
Note: Press * (asterisk) to specify phone using capital or small letters or
shortcut button.
(Ab - change capital to small; 1 - number, AB - all capital, ab - all small)
Press Previous Button to display option screen again. Use numeric buttons
to write name and then press OK button to save it. Press this button to
display address book screen.
41
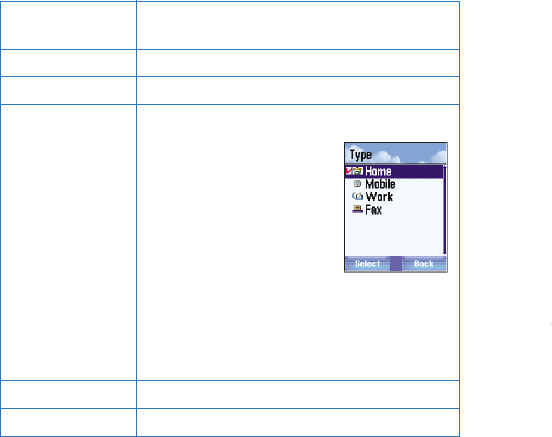
Input number with numeric buttons and then press OK button to save this
number in memory and to display option screen of type. From here select
the type of the phone number (home, mobile, work, fax.) and press Enter
button. Press Previous Button to return to address book screen again and
the name just input will be displayed.
Send message
This option is used to send SMS (short message) or MMS (multimedia
message) to previously selected contact. Details on these two messages are
as follow;
Short message
Select short message on option screen and press Select button to display
number list applicable to the selected contact. If just one number is found
available in the selected contact, start writing text message right there.
Note: If a message needs to be sent to several persons, you should add
their numbers in Add new recipient options before writing the message.
After a message is written (up to 1042 letters available for a message),
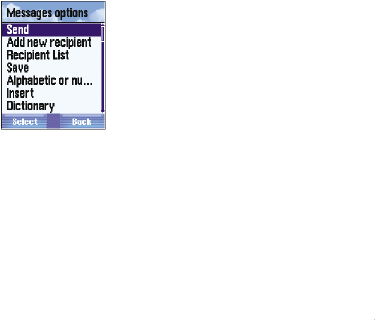
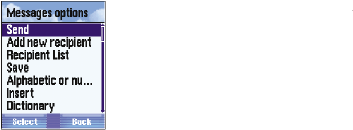
press option button to display the various message functions as follows;
42
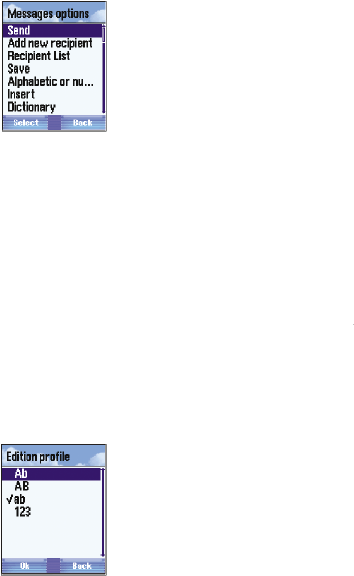
* Send: sends a text message to a receiver with this option designated
(Press Enter button).
* Add new recipient: selects other SMS message receivers. To enter
receiver setting screen, press Enter button to display the screen, and
there write receiver s name desired or press the name to enter
address book to select receivers.
* Recipient list: If this option is selected, previously selected list of
receivers of text messages will be displayed. If you want to change the
list, press option button again to display the screen, where you may
add recipient, Delete or Delete all as desired.
* Save: saves the just written message in memory.
* Alphabetic or numeric mode: This option is used to select a function
to write messages (characters, capital letter, small letter and
numbers).
43

* Insert: inserts selected Picture, animation, melody, sound, symbol
and Template to a message to send. For example, you may select
sound from the list as desired to insert. (When you selected, melody
will sounds for a little while). The selected sound or melody will be
heard when its receiver confirms the message. In this manner, choose
Template option to select text prepared before on the list (e.g.
Vergent! Please call! Where are you? etc.)
*Dictionary: This option is used to correct or cancel spelling of the
written message. Select On to start correcting spelling.
* Send option: On this screen, you may select the valid period of
written message (1 hour, 6 hours, etc.) and ensure the message is
received.
Valid period of a message means time duration during the message stays in
the communication network if not sent to its receiver. After this time, the
message will be erased automatically even if not sent to its receiver.
This option sends multimedia message to previously selected contact.
How to send multimedia message is as follows;
Multi-media message
* Select Send message on option screen and press Enter.
* If the screen with several options appears, select multimedia
message and press Enter again.
* If there are several phone numbers in previously selected contact, you
should select a number to send the message first.
* New multimedia message screen will be displayed with the following
options.
44
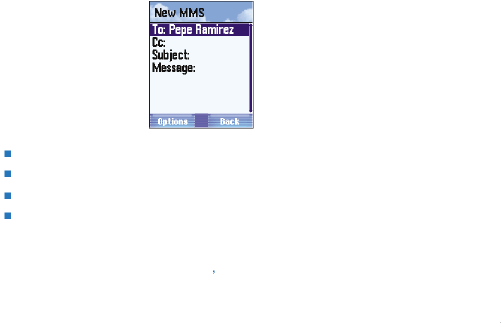
To: where message receiver s contact will be displayed.
CC: where other receiver s contact will be displayed.
Subject: where title of message to send will be displayed.
Message: where text message to send will be input.
* Press option to add a new receiver. First, press option button, select
Add recipient option and then press Select to get into number input
screen. And there, write receiver s number or press name button to
select in a address book list.
Press OK button to return to new multimedia message screen. If the
number of the multimedia message receivers are 2 or more, there will
be all the numbers available to receive on the upper blank.
* Select CC on new multimedia message screen to send the multimedia
message s copy to other receivers, and follow the procedures as
specified above.
* Select Subject option to add title to a message to send and press
Select button. On the screen displayed, write title and press OK button
to finish.
* To add a message select Message option and press Select button. If
the option button is pressed, the following options are displayed.
45

Send message: If this option is selected, you may send the just written
message to previously selected receiver(s).
Edit text: It is used to edit text. (You may change text using Write Text or
Delete Text function in the option menu of previously written text.)
Remove text: It is used to remove the pre-inputted text.
Add picture: It is used to attach picture or image already saved in the
phone. Select the memory(internal or external) what you want to use and
select the image to attach.
Add sound: It is used to add desired sound to multimedia message.
Select the memory(internal or external) what you want to use.
(You may select the sound saved in the memory external memory or the
sound being recorded to the phone using the microphone.)
Add page: It is used to add up to 5 slides to a message to send. Each
message is made up of one or more slides. Text, image and sound can be
saved in each slide. Use the following options in option menu to add a new
slide and its details. If a new slide is added, there will be 2 new options in
the menu. They are Remove current page (used to delete attached file
applied) and Go to page (used to apply another attached file among
attached files saved.)
Save as draft: saves the written multimedia message in Draft MMS folder.
Alphabetic or numeric mode: You may select a mode to input
messages. (Capital letters, small letters, etc.)
Dictionary: You may correct spelling of the message written.
Page view: displays the appearance of the present message s page.
MMS Preview: displays all details of the completed multimedia message.
Object timming: It is time required during each object on the page is
displayed or played.
Start time plus object time can not exceed the time required for page
play time.
Page timming: displays the play time in second during the attached file is
played. (Up to 99 seconds available)
46
MMS priority: displays priority of multimedia messages sent. (High,
Medium, Low)
MMS information: displays various details included in message. (It is a
brief list.) Sende s name, receiver s name, title, specified priority, date
sent, message capacity, etc.
Delete contact
deletes selected contact from address book. How to delete from whole
address book is as follows;
47
Contact type Execute Result
Mixed Phonebook If Delete Contact option is selected, Delete contact from the
screen will be displayed to whole address book
confirm.(Are you sure to delete?)
Terminal Delete contact from whole The contact is deleted
Phonebook address book from all the
address books
SIM Phonebook The contact is left only in SIM Delete contact from
address book whole address book
Press No/Cancel to cancel the execution. Press Yes to delete contact, a
message Operation complete! will appear.
After that, address book list will be displayed again. (You can see the
deleted details.)
Delete all: deletes all contacts saved in selected address book (SIM, cell
phone or whole address book).
Copy contact to SIM: used to copy selected contact. You should copy only
the name and number of contact as expected. This option can be executed
to cell phone memory from SIM memory or to the contrary according to the
following rules. (it is different according to the type of contact or copy.)
48
Contact type Execute Result
Copy Copy contact Since the contact is previously
saved in both memories, copy of
the contact to SIM memory is not
available.
Only from
cell phone

If you want to copy contact saved in SIM or cell phone memory, or if the
contact with the same name exists, you should newly make the contact with
the same name in both memories (Including all the phone numbers which
belong thereto). (However, the phone number will not be changed)
During copying contact, In progress screen will be displayed.
Completed or Error in progress screen will be displayed to inform you of
the state. If memory is full, progress will not be successful but a message will
be displayed to let you know insufficient capacity of the memory.
Change phonebooks: opens other address book. If this option is selected,
the following options of menu will be displayed.
* Mixed phonebook: means both address books summed up.
* SIM phonebook: means address book saved in SIM card.
* Terminal phonebook: means address book saved in cell phone
memory.
Select address book to open, and then press OK. The name of this option is
Mixed phonebook where contact information is available after confirmed.
49
New group
specifies group of contacts. The group of contacts means a meeting for user
to send call and message to at once. For example, if one group is classified
into family, friends, co-workers, etc., you may use this option conveniently to
send the same message to all the members of a specific group as classified.
Specify groups as applicable to receive group messages.
Up to 5 groups available.
Follow the procedures below to specify a group with new contact.
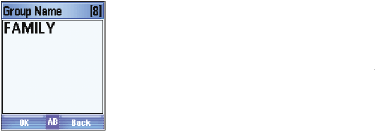
1. Select New Group on option screen. (From address book menu)
2. Press select button to display Group Name screen.
3. Write desired name using alphabet buttons. (Up to 14 characters
available for a name)
Press OK button to finish. And you can see that the new group name is
displayed on the next screen as specified.
4. It is empty at first since the group is newly specified (Empty list).
Press Add button to add another contact to this group.
5. The following options will be displayed.
a. New member: It is used to appoint the contact on the established
contact list to be a new member.
50

b. Create member: In order to make a new member in a group,
contact, its phone number and other procedures than described
above for Make New Contact shall be fulfilled.
c. Remake group: displays the screen to change previously specified
group name to another name.
6. If new contact is made or added to group, Call member, Add
member (with contact selected from established address book),
Create member (starting from 0), Remove member, Set Group
melody (any call to the group members will make specific melody
sound) and Set group Photo are available.
If new group is made, press Previous Button to display its name on the
list.
Search
This option is used to search for other contacts on the contact list.
Select Search option to display Search by name screen.
On the screen write more than 1 characters of the contact name to find.
If written, the applicable name with the same characters is displayed.
Now you may search up and down to find the name on the list.
For example, press No.2 button to fast reach names with the first character
of C.
If there is no name with such a character, the button will show names with
the next character (in alphabetical order).
51
Receive card
It receives a phonebook data from PC through an infrared port.
If this option is selected, Receive card screen appears, where Via infrared
rays option is available.
Press Enter button to start to receive messages via an infrared device.
If transmission is normal, new card will be added to address book.
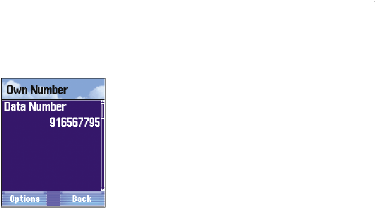
Own number
My phone number(s) is saved in special address book inside SIM card.
Select My Number option on the phone call service menu and press Enter
to have access to this function. (If not informed of this route, please ask from
the first).
All the lists of phone numbers belonging to Own Number will be displayed
(For example, cell phone number, fax number, etc.).
How to add or cancel number is as follow;
1. Select specific number, press Add/ Delete, and then Select.
2. On the next screen all numbers belonging to the specific number are
displayed. : Data, fax...ƒ (see next figure)
Press Select
a. Add: adds new phone number onto list
b. Edit: writes or changes name added to the specific number or other
number
c. Delete: deletes selected phone number. Press Enter to finish.
52
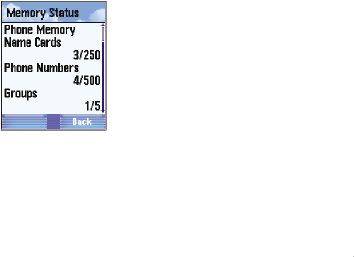
Memory status
This option is used to confirm the capacity and the condition of SIM card or
phone memory.
On the state window, the following information is provided.
* Names saved in cell phone memory (up to 250 available)
* Phone numbers saved in cell phone memory (up to 500 available)
* The number of groups saved in cell phone memory (up to 5 available)
* The number of names saved in SIM card memory (up to 250
available)
Group Setting /Group Work ________________________
If a user group is made, select address book option on the main menu and
then desired group on the contact group list to perform group work.
Click Option button to display the following lists;
* View group
* Send message to group
* New group
* Rename group
* Delete group
* New contact
* Receive card
* Change phonebook
53

* Memory status
Functions of these options are as follow;
View group
It is used to view all the members belonging to selected group. On the list
select a member and press/Option button to apply the followings:
Make a call to members, Delete, Add new member to group, Group melody
or image setting.
Send message to group
It is used to send SMS text message or MMS multimedia message to
selected group members.
* In the first case (text message), SMS message screen will be
displayed to write message. Use the function with alphabet /number
button or press option button to display message option. (Refer to
Send Message described above).
If SMS message has been written with its receiver specified, press
Send option to send the message to the designated number of the
selected contact.
* In the second case (MMS message), this option sends MMS
multimedia message to selected members. First, select multimedia
message on Select screen and press Ok to display new MMS screen.
How to use this screen and its options has been described above (see
Send Message).
If MMS message is written (including text, image, sound, etc.) with its
receiver designated, you may send the message in the following
procedures;
54

1. Select message on new MMS screen.
2. Press Select button to display message screen.
3. Press Select/Option button and select Send Message on the list
displayed (first option of the list).
4. Press Ok button to send the message.
New group
This option is used to add new group to address book. Select new group on
Select screen and press Ok button to display Group Name screen. How to
use this screen and its options has been described above (see New Group).
Rename group
It is used to change selected group name. Select Rename group on Select
screen and press Ok to display Rename group screen. Use numeric
buttons to change to new name. Press OK button to finish.
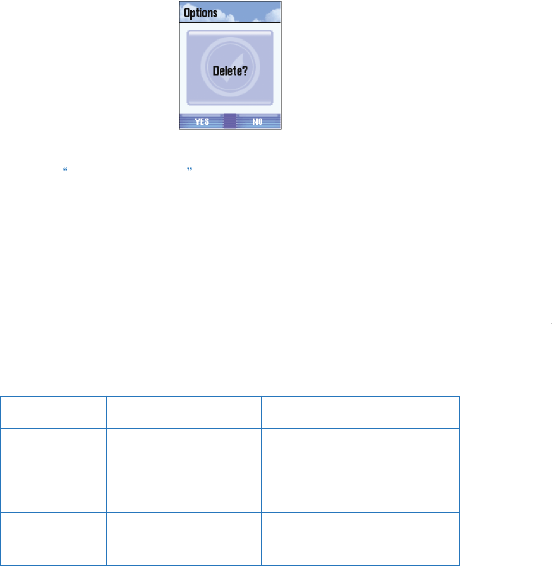
Delete group
It is used to delete selected group. Select Delete Group on Select screen
and press Ok to display the following message screen to confirm
Delete?
Press Yes button to delete the selected group and its all information, which
will never be recovered. Now contact list in address book will be displayed.
Press No button to cancel Delete and return to address book screen.
55

New Contact
It is used to add new contact to address book. Select New Contact on
option screen and press Ok to display option screen. How to use this
screen and its options has been described above (see New Contact)
Receive card
It is used to receive card through infrared port. If this option is selected,
Receive card screen appears, where Via infrared rays option is available.
Press Ok button to start to receive messages via infrared.
If transmission is succeed, new card will be added to address book.
Change Phonebook
As described in Change PhoneBook above.
Memory status
As described in Memory Status above.
Terminal Phonebook ______________________________
It displays the contacts saved in phone memory and the contacts saved in
both (cell phone and SIM card) only, thus to show details of whole address
book always.
Follow the procedures below to set and apply phone address book.
1. Press menu button on background screen to display main menu with
phone options.
2. Select phonebook and press Ok to display phonebook screen.
56

3. Press option button to display option screen.
4. Select Change Phonebook and press Ok to display Change
Phonebook screen.
5. Select the last option on this screen and press OK button to set and
apply Terminal phonebook.
Note: From now on, the Terminal phonebook will operate till other type of
phonebook is selected (even if GRUNDIG mobile is turned off).
All the options related with phonebook are as specified in Mixed
phonebook (excepting the following)
* New contact (name): Newly input contacts are saved all in the phone
memory (they become the contacts only for the cell phone). Thus,
right after this option is selected, Name screen will be displayed,
where you should write new contact name and select a location to
save this information (similar to whole address book)
* Erase/Delete contact: If this option is selected, only the contacts saved
in phone memory will be deleted. In other words, if the same contact is
saved in both, copy of the contact in SIM card is kept (still displayed in
whole address book or SIM address book)
* Copy name to SIM: If this option is selected, copy of contact to SIM
card memory is available. If the contact exists already in SIM card, a
message will appear to let you know. Contact name and selected
number only will be copied.
SIM phonebook __________________________________
SIM phonebook shows only the information saved in SIM card memory and
the information saved in both, thus displaying whole address book always.
Follow the procedures below to set and apply SIM address book.
57

1. Press menu button on background screen to display main menu with
phone options.
2. Select Phonebook and press Ok to display address book screen.
3. Press option button to display option screen.
4. Select Change phoneBook and press Ok to display Change
phonebook screen.
5. Select the second option on the screen and press OK button to set
and apply SIM phonebook.
Note: From now on, the SIM phonebook will operate till other type of
phonebook is selected (even if the terminal is turned off).
All the options related with SIM phonebook are as specified in Mixed
phonebook (excepting the following)
* View card: With this option selected, SIM address book shows the
following information only: Phone number included in contact, group
the contact joined (if any).
* New contact: Newly input contacts are saved all in the SIM card
memory. Thus, right after this option is selected, Name screen will be
displayed, where you should write new contact name but you don t
need to select a location to save this information (similar to whole
address book)
* Delete contact: If this option is selected, only the contacts saved in
SIM memory will be deleted. In other words, if the same contact is
saved in both, copy of the contact in phone memory is kept.
* Copy name to phone: If this option is selected, copy of contact to
phone memory is available. Contact name and selected number only
will be copied.
The menu option named Message allows settings of text message,
multimedia message, chatting, and environmental services for messages.
58
The menu defined as message allows text message, multimedia message,
chatting, cell phone mailing, and connection to environmental services for
messages.
Follow the procedures below to connect to message menu.
1. Press menu button in stand-by screen state of GRUNDIG mobile to
display main menu.
2. Press the direction button to select message menu (second options
available on the first line)
3. Press Enter button to display message items on main menu.
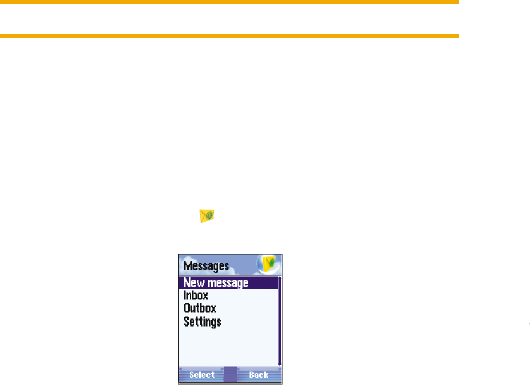
The options on this menu are as follow;
* New message: As described before, it is used to write new text
message and multimedia message.
* Inbox: Shows the list of text messages received.
* Outbox: Shows the list of text messages sent.
* Setting: changes environmental settings of communication system of
messages.
The following is about text messages, multimedia messages and options
related with environmental settings.
59
4. Messages
Receive text _____________________________________
Text message
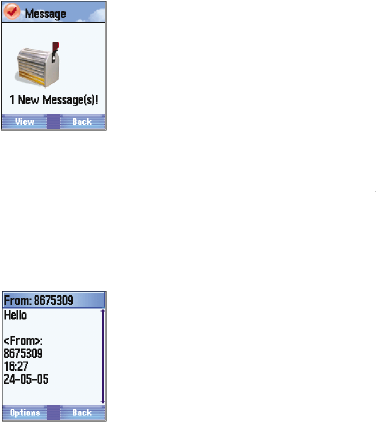
If receiving a new text message, the phone (SMS and EMS) will sound
(sound can be cancelled if requested). And a screen appears to display the
number of messages received.
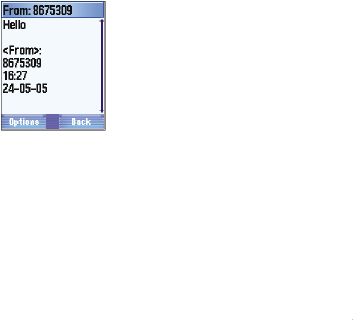
Press View button to confirm the new text message, and press Back button
to return to the previous screen.
* Open: opens the text message for you to read its details.
* Send: sends a message to other phone registered.
* Erase: deletes received messages from the list.
Select Open to display the received message including sender s phone
number, received date and time, and its details. (See the figure below)
Multimedia message
Reaction of the phone which received MMS message (multimedia message)
is different based on the specified display option.
60

Recovery display can be defined as specified in the described procedures in
<multimedia message>.
Send new message _______________________________
As previously described, two different types of messages can be sent.
* One is short message (SMS) composed of text only and the other is
multimedia message (MMS) composed of text, image and music. How
to use these is as follows;
SMS message
Follow the procedures below to send a new SMS message.
1. Select new message on message menu and press select button or
OK button.
2. Select short message on new message menu and press OK
button.
3. Go to message writer separately specified and input text as desired.
4. Press option button to display message option screen.
5. Select one or more receivers of message to be sent.
6. If receivers are selected, select Send on message menu and press
Enter button.
61
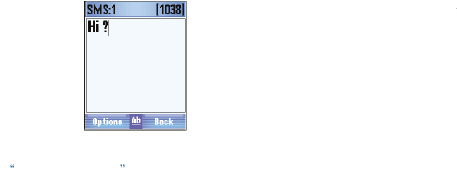
SMS message, New message _______________________
Follow the procedures below to go to the menu related with Write text
message.
1. Go to message menu.
2. Select new message and move the cursor on short message option.
3. Select Enter
4. Write text to send as desired.
5. Press option button.
It will display the following options on the screen.
* Introduce recipient: displays receivers of message. You may select
receiver s name using phonebook or directly input phone number.
You can select Add new recipient to send the same text to all
receivers added at a time.
* Save: saves text which is not yet sent in phone memory. The text will
be saved in unsent box in outbox folder.
* Alphabetic or numeric mode: shows how to input capital letters,
small letters, capital and small letters, or numbers.
Press <*> button shortly to step to other various modes (Ab, AB, ab,
1).
62
* Input : allows user to insert some object in a message. For example,
image (simple static picture), animation (small moving picture),
melody (music), sound (simple bell), symbols (press <#> button to
display text writer to select symbol as desired thereon), or Template
which are available.
Insert one of 4 objects in a message to display a series of icons on the
message (simple musical note, square)
* Dictionary: makes spelling dictionary on or off.
* Sending option: makes active or inactive the information menu on
valid period of message (for example, 1 hour or 6 hours, up to 1 week)
or confirmation of message if received or not.
The message whose valid period is over will not be sent but deleted.
Confirmation of message allows you to ensure that the message is received.
If once details of message are specified, the receiver will display menu list
related with the message (see the figure below).
* Send: sends a message to a specific receiver only. The number of
text letters will be displayed on the screen as follows. Press OK button
to send the message.
63
* Add new recipient: adds a new receiver of message.
* Recipient: shows the list of receivers of message. Press option
button to input a new receiver or to delete the existing receiver
* Other options (Save, Alphabet/Number mode, Insert, Dictionary,
Send option) are previously described.
Multimedia message
Follow the procedures below to send a multimedia message.
1. Press new message on message menu.
2. Select multimedia message and press Ok.
3. Write the following; (see the figure below)
a. To: where main receiver s phone number will be surely specified.
Up to 1024 characters are available for receiver and up to 20
numbers for the phone number. Press NAMES menu to set
receivers.
64
b. Cc: where other receiver s contact will be displayed to receive copy
of message. How to select receivers is as described previously. You
may input several phone numbers or E-mail addresses to send a
message to many receivers at a time through address book screen.
c. Subject: where title of message will be displayed. Select this option
and press Select button to go to Subject screen described previously
to input up to 100 characters.
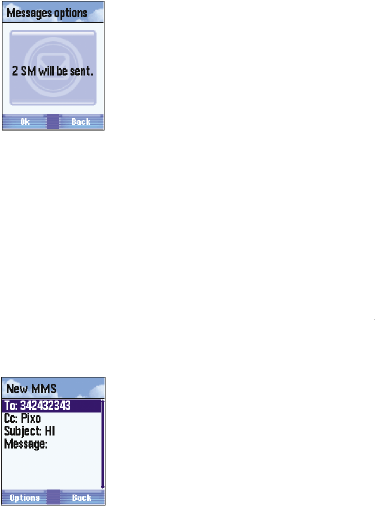
d. Message: where details of message are written. This option is
applied as described in < Send Message > and <Multimedia
Message>. Press option button on Send Message to send the
message written. On the next screen the capacity of the message will
be displayed. Press Ok button to send the message. If you want to
save the message before sending, select Save as Draft button on
the menu and press OK button.
In box __________________________________________
It is a space to save all the messages received including SMS, MMS and
other messages to send. The received box includes all the lists of the
messages received.
If a message is received, separately specified sound of bell will operate.
And as shown below, an image will be displayed on the screen.
65

Select View button to see the message right after it is received. And press
Previous Button to read it later. If Previous Button is pressed, envelope-
shaped icon will be displayed on the upper of main menu screen, which
means there is a massage not read yet .
View saved message not read yet
Follow the procedures below to read new message saved.
1. Select Inbox on message menu and press option button.
2. Following options are available on the Inbox menu.
a. Read text message: Select text message option to display text
message list, received. Each message has an icon and sender s
number. There are two kinds of icons;
* This icon means that the message in the Inbox is not read yet.
* This icon means that the message in the Inbox is read already.
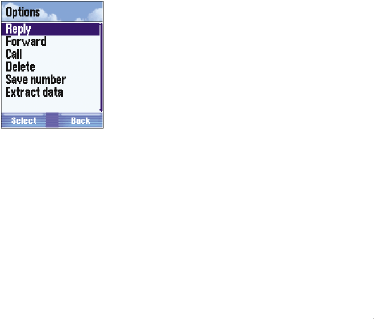
Select a text message to read now and press option button. Select Open
(press Delete button if you want to delete it) and press Ok button to display
the following screen showing such information as text message, sender s
phone number, date and time when the message was sent.
66
* Reply: displays Write Text Screen to replay to the message received.
Write message as desired. If you want to know how to write and send
text message (SMS), refer to <New Message>.
* Forward: delivers the received message to others. Input the phone
number directly thereon or select a receiver on address book.
Then press OK button.
* Call: makes a call to message sender¡fls number. Press option
button to display the menu where Save address book, Make a call,
Send number using MMS or SMS, and Send SMS & MMS message
are available.
* Delete: This option allows you to erase text message that you read or
get vid of all message.
* Save number: saves the phone number of text sender¡fls in phone
memory or SIM card (name of the phone user, type of the phone and
number of home, company, cell phone, fax, etc.)
* Extract data: allows you to make use of the phone number, E-mail
address or URL address saved in the text message received.
67
Select phone number and press option button to send phone number, MMS
and SMS message making use of Save address book, Make a call and MMS
& SMS message. Select E-mail address and press option button to send
MMS to the selected mail address or use MMS or SMS to send the mail
address.
Press option button with URL address selected to send the selected URL
using SMS or MMS, to save the URL in WAP address book, and to have
access to the address with its connected WAP page open.
b. Read multimedia message (MMS): Select multimedia message option to
display the list of multimedia messages received and saved. Select
message to read and press option button to display various option menus.
* Save object: saves melody and image attached.
* Previous slide: shows the previous slide.
* Next slide: shows the following slide.
* Reply: replies to message received.
* Reply to all: replies to all senders.
* Forward
* MMS information: displays additional information on the received
MMS message.
* Delete: deletes selected MMS.
* Delete all
* Call sender: makes a call to MMS sender.
* Extract data: allow you to make use of the phone number, Email
address or URL adress saved in the MMS message received.
68
Out box _________________________________________
It is the place all sent messages are saved (messages sent or saved after
written). The sent box saves two types of messages, which are SMS (text
message) and MMS (multimedia message). Follow the procedures below to
go to the sent messages box.
1. Press menu button on main menu screen.
2. Select message icon and press Ok buttons.
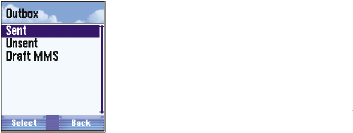
3. Select Out Box on the displayed list and press select button to
display the screen as follows;
Where the following options are available:
a. Out box: where short messages or multimedia messages sent or
saved will be found. Select Sent Message and press option button to
open or delete the message.
If a message is opened, the details of the message will be displayed on
screen. The options related with Open Text Message are as follow;
1. Forward: forward text message
2. Call: makes a call to receiver of text message.
3. Delete: deletes text message.
4. Save number: saves receiver s phone number in SIM card or phone
memory. The options related with multimedia message displayed on
screen are as follow;
69

1. Write: edits all information related with To, Cc, details or message.
2. Resend: resends text message
3. MMS information: displays brief information related with multimedia
message.
4. Delete: deletes multimedia message.
5. Delete all: deletes all multimedia messages saved in Sent Box.
b. Un-sent: shows text message or multimedia message not sent
but saved only.
Other functions related with this option are the same as specified
in Sent messages.
c. Draft MMS: Use Save button to display temporary box of
multimedia messages saved. Refer to <Multimedia Message>. Go
to Draft MMS screen to find MMS messages saved. Press Details
Button on the temporary box list to edit. Press option button simply
to have access to options related with selected temporary box. The
options (Edit, Send message, MMS information, Delete, Delete
all) are the same as described in Sent Messages.
Options _________________________________________
Follow the procedures below to get to message screen.
1. Press menu button on the phone screen
2. Select message icon and press enter button.
3. Select Options on the displayed list and press select button.
Then, 3 options will be displayed as follows;
70
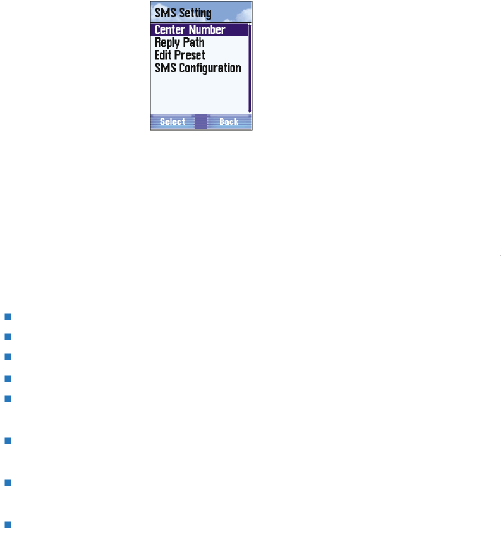
SMS Setting
It is used to define a series of text message options. The options displayed
on screen are as shown below;
* Center Number: specifies number of message center. It is the phone
number of the center for you to call in order to send or receive
messages. Its service provider shall specify this number previously.
* Reply path: makes the application of the center on or off as
necessary to send or receive messages.
* Edit Preset: edits details of messages saved in dictionary. Up to 5
messages can be saved in dictionary. The message saved in the
phone is of up to 70 characters as described below;
Urgent!
Prease call!
Reminder!
Where are you?
Art airport
* SMS configuration: specifies sending type.
GPRS only: makes messages be sent only in GPRS type. And
messages if not in GPRS type will not be sent.
GPRS preferred: makes messages be sent in GPRS type. And
messages even if not in GPRS type will be sent in GSM type instead.
GSM only: makes messages be sent only in GSM type. And
messages if not in GSM type will not be sent.
71
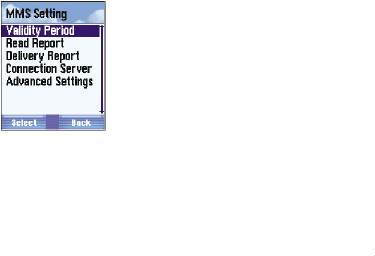
MMS Setting
It is used to define a series of options for multimedia message. The options
displayed on screen are as shown below;
* Valid period: Maximum period can be specified as necessary to make
message sent.
If once the period is over, the message will be automatically deleted. 1
hour, 12 hours, 24 hours, 72 hours, 1 week and the maximum are
available for the period. The maximum has been previously
established by its service provider. However, the minimum is 1 hour
as described above.
* Read Report: If this option is executed, you can be sure if its receiver
has read the message or not. Once the receiver read the message,
the time and date when the message was read will be sent to its
sender. No option is available for this function. It lets you be sure if the
message has been read by the receiver or not.
* Delivery Report: If this function is executed, the message sender will
have information on message transfer from MMS service center,
through which the message sender can be sure if the message has
been read by the receiver or still saved in MMS service center. This
information includes the receiver s phone number, message details,
present state (if transferred or kept in MMS service center), transfer
time and date.
If this function is executed, related information will be sent.
* Connection Server: It is used to specify the options related with
72
multimedia message server. In other words, it means the computer
which sends multimedia message (MMS) sent or received by user.
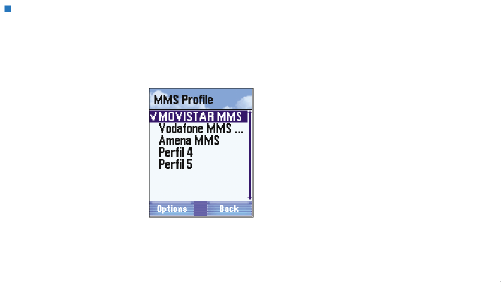
MMS Profile: This option is used to make MMS information transfer
function active. Select desired information and press option button.
And press Details Button to show details of the information described
above.
Use Modify option to edit information.
* Rename: changes the name of information.
* GSM Settings: displays environmental setting of GSM connection and
specifies number to call, type of terminal (analog or digital), and
inactive duration till the service is available.
* GPRS Settings: helps to change the address of APN or
communication network (e.g. wap. Movistar. es)
* GSM/GPRS preference: specifies connection type to use (GPRS
preferred, only GPRS or only GSM)
* Login name: specifies name of the user (default is WAPTM).
73

* Password: means password to be used (default is WAPTM).
* Gateway Address: shows IP address of gateway. Default is
192.168.80.21. Contact service provider for further information.
* Connection type: displays connection type (connection oriented,
secured connection oriented, connection less, secured connection
less)
* Homepage URL: lets user go to URL address of wap.Movistar.com as
specified previously.
* DNS address: shows IP address of DNS server.
MMS server address: shows connection address to MMS service
Select MMS server address and press OK button to change server
address or to get into the server. Press OK button to make the
address valid.
74

CB Message
Group message means a text message which will be sent to all the members
who have joined the communication company.
(Messages for common interest, ads, PR, etc., as displayed on the main
menu of the phone)
These messages will be sent to all the phones located in designated places
with the applicable channel setting.
Note: Select the following option on main screen to go to its sub-menu.
Message/ Settings/ CB Message
* Reception: allows you to receive group messages if this option is
selected.(Default is set to off)
* Channels: defines a channel to receive this kind of messages. Select
a new channel from the list to display on screen and use option
button to execute. If you want to add a new channel to list, select any
channel and press option button and then Add. Input new channel
number to number writer and press OK button (Up to 3-digit number is
available and the number shall be surely input. If not, channel setting
will not be available)
The Write option of sub-menu edits name and number assigned to the
selected channel on the list. Up to 10 channels are available.
* Mode: shows 5 methods to display received message on screen via
this sub-menu (These methods specify environment of received group
message or each channel used) (see the figure below)
75

In order to use a previous option, select the option and press OK button.
* CB LBT: shows group messages recently received, not saved nor
deleted on this screen. If there is no message, List is empty will be
displayed. If there is any message, its related title will be shown. Press
details button for further information. To save the message press
Yes button, and press No to delete.
* Saved CB List: shows group messages previously saved on screen
(refer to Previous Option)
If there is no message, List is empty will be displayed. If there is any
message, its related title will be shown. Press option button to delete
messages open or saved.
76
The multimedia menu has a function related with taking pictures with digital
camera.
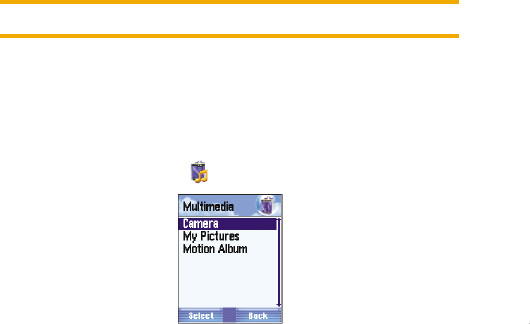
Follow the procedures below to go to the multimedia menu.
1. In stand-by state, press menu button to display main menu option.
2. Select multimedia icon (first line, third option) and then press OK.
The icons are as follow;
A list for multimedia menu will be displayed, whose options are as follows;
* Camera: operates image camera.
* My picture: displays list of images taken by the built-in camera.
* Motion Album: displays list of video files taken or saved.
77
5. Multimedia

Take a picture____________________________________
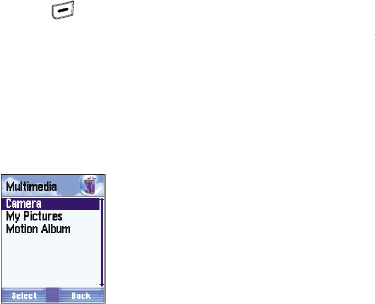
There are there methods to take a picture with GRUNDIG mobile.
* Fast access: In stand-by state of the screen, press OK on the center
of the direction button and select its icon .
* Enter via main menu: On the menu screen, select multimedia option
and press Enter to display the list showing camera option to select.
Press Enter again. If the camera operates anyway, let the phone
stand lengthwise with its number pad downward, then catch hold of an
object to take a picture of using the direction button (ensure that
camera controller is located at the rear central upper of the phone)
and press OK in the center to take a picture.
* Hot Key: In stand-by screen, press left side-upper key to intialize
camera mode.
Note: Wait a few seconds for the digital sensor to adjust to digital tone of
color when starting camera operation, which will make the quality of images
excellent.
Note: Sound similar to the shutter of a camera will be heard for you to feel
the same as with the actual camera when the moment a picture is taken.
If you want to delete the picture just taken, press Cancel and return to
camera mode. On the contrary, if you want to save the picture, press Save
in the album with a name you want. After then, the camera mode will be
ready again. The automatically created names of the pictures taken and
saved are of numeric date containing Year (2 digits), Month (2 digits) and
Day (2 digits) with the sequence number of the pictures.
Ex.) 050212-7 means image number 07 taken on Feb. 12, 2005)
78
If once the camera starts to operate, just press option button to
specify environmental setting related (Mode, Size, Flash, Quality)
Press Option to display setting option menu as follows;
* Mode: sets camera mode as necessary (3 modes available)
Normal mode: Press OK to take a normal picture.
Multishot Mode: Press OK to take 9 pictures continuously.
Motion mode: makes and saves a video file as necessary in phone
memory.
* Size: sets the resolution of images (4 levels available): Mega(1280
X960 pixels), VGA (649X480 pixels), QVGA (320x240 pixels) and
Normal (128x60 pixels).
* Flash: where flashing can be active or inactive. Three methods are
available; Autoflash (flashes whenever the camera takes a picture),
On (flash are always on), Off (never flashes)
* Quality: sets image related quality (3 levels available: high, medium
and low)
Other options
The camera built-in GRUNDIG mobile includes functions of digital zooming
and glossy adjustment.
79
If the camera starts to operate, the following icon will be displayed on the
option below the screen (see Take a picture).
* You may enter camera setting option described above.
* If you want to enlarge or reduce image size, select the upper key
(Enlarge image) and press OK. You can enlarge the image 5 times
gradually. Pressing the upper again at the maximum zooming will lead
to the minimum zooming function. The maximum zooming is available
based on the size-related environment specified.(5 times of zooming
will be available as described)
* Brightness can be adjusted higher or lower. If you want to apply this
function, select left key and then press OK in the center.
* Effectiveness can be adjusted to each mode(eg. Normal, Black and
White, Sepia, etc)
* If you press right option key and select the icon, the camera
mode will be cancelled and multimedia menu will be displayed again.
View images & Play videos
It easily allows you not only to see, save or delete images or videos taken
but also to change their names as follows;
Go to multimedia menu and find the following menu displayed, as described
in the beginning in multimedia details.
80

Image management
Select My pictures and select the memory(internal or external) and press
OK. In several seconds, the list of images taken will be displayed just like
downloaded or received images. These images will be arranged in date/time
sequence. On the list, select any image you want to edit and press Option
to display the following menu.
* Open: opens images on the phone screen.
* Send: sends images via infrared rays to user of text messages (only if
there is no reserved right to the images)
* Camera: starts camera mode again.
* Rename photo: writes or edits names of images with name writer.
* Delete: deletes selected images.
* New Folder: makes a new folder.
* Move: move the image to internal/external memory.
* Copy: copy the image to internal/external memory.
The procedures described above will ask you to confirm.
Video management
On multimedia menu, select Motion Album option and press OK. In several
seconds, the list of videos will be displayed just like downloaded or received
videos. These videos will be also arranged in date/time sequence. On the
list, select any video you want to work on and press Option to display the
following menu as in Image Management (open, send, camera, rename
motion, delete)
81

Work on image
You can work on images as you can enlarge, rotate, move or change names
of images as follows;
Rotate image
Follow the procedures below to execute this operation.
1. In stand-by state, select icon to start camera mode.
2. Select My picture and press Enter.
3. Select an image to work on and press Option button.
4. Select Open and press Enter to display the selected image on the
screen.
After the selected image is displayed on the screen, you can enlarge,
reduce, move or rotate the image quick and simply;
Please find R(means rotation) between Option and Back buttons on the
line below the screen. Press Left or Right key to rotate the image 90¡ to the
left or right respectively. And press Up or Down key to go to next image.
Send image______________________________________
You can send image or video saved in album using multimedia message via
infrared rays.
Follow the procedures below to apply this option.
1. Press OK button to start camera mode.
2. Select My picture and press OK.
3. Select an image or video to send and press Option button.
4. Select Send and press Enter to display the menu with two options as
follows;
82

a. MMS: where you can send image to selected receiver using
multimedia message. Press Enter to display the screen to write
multimedia message on.
Follow the procedures as described in Multimedia Message.
b. Infrared rays: where you can send image to other device or
equipment using infrared port (only if there is no reserved right to the
image)
Note: Video file can t be sent while attached to multimedia message
orinfrared port.
How to use image album___________________________
You can save images taken and received via multimedia message in image
album. You can also make a multimedia message using the saved images.
Note: GRUNDIG mobile has a Digital Rights Management function to
protect from illegal copy. Any image whose rights are reserved can¡flt be
sent)
Follow the procedures below to apply this option.
1. In stand-by state of GRUNDIG mobile, press menu button to display
main menu option.
2. Use the direction button to select multimedia option.
3. Press OK to display multimedia option list.
83
MP3 Player ______________________________________
Press Ok in idle states and go to MP3 player. You can play the MP3 sound
as following below.
How to play the MP3 sound press List and go to option.
a. Play: You can prelisten the MP3 sound before adding in MP3 play
list.
b. Add File: Add the MP3 sound to MP3 play list.
C. Add folder: Add the MP3 sound folder to MP3 play list.
d. Delete: Deletes the MP3 sound that are in the MP3 play list.
e. Delete all: Deletes all the MP3 sound that are in the MP3 play list.
f. File information: Show the information about the MP3 file.
About the MP3 player
start/pause normal
stop one music report
next full repeat
previous
Storage Selection_________________________________
You can select the default storage memory.
Format SD Card __________________________________
Formats the T-Flash if the card operates very slow.
84

In Leisure menu, you can play and download the Games, melodies and
images.
- Games: Play games and download such gamesvia WAP server.
- Melodies: Operate/download the melodies to use.
- Images: Operate/download the images to use
Games __________________________________________
* My Games: Select My Games in games menu to play the game.
* Info: Information about the game.
* Download: Select Download to download the game via WAP
server.
* Setting
1. Connection: Set the item about downloading.
2. Execuion: Set the sound and backlight for games.
* Memory: Shows status of meemory.
Melodies ________________________________________
* List: Shows the melodies which are avalable to use.
1. My melodies: Shows the melody from FDA/MMS or rewrded voice
which are located in internal/external melody.
2. Default melodies: Shows the melodies which are located in the
phone by default.
* Info: Information about the melody.
* Download: Select Download to download the melody via WAP
server.
85
6. Leisure

Images__________________________________________
* List: Shows the images which are available to use.
1. My picture: Shows the images from FDA/MMS which are located
in internal/external memory.
2. Default picture: Shows the images which are located in the phone
by default.
* Info: Information about the image.
* Download: Select Download to download the image via WAP
server.
86
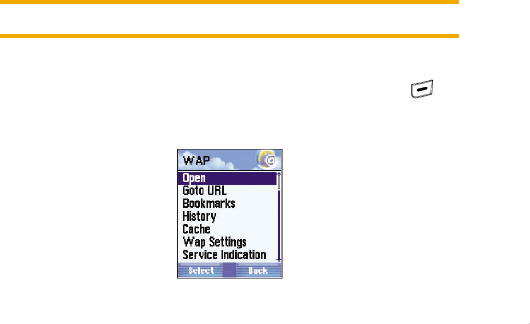
You may have access to WAP via two routes.
* In stand-by state of GRUNDIG mobile, press right option key .
* In stand-by state, press menu button and with WAP option selected,
press OK to display the option list as shown below;
The following is available with the options displayed on this screen.
* Open
* Goto URL
* Bookmarks
* History
* Cache
* Wap Settings
* Service Indication
* Certificate
If you want to have information on such services, please contact your
service guide of the communication company.
87
7. WAP
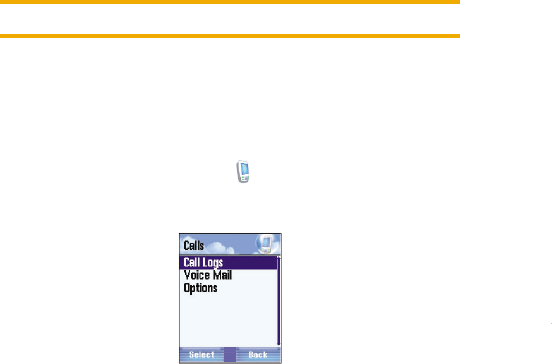
Through this Calls menu, you can move to call Logs, voice mail and mainly
used number list.
1. Press menu when the phone is in stand-by state to display options
on main menu.
2. Use the direction button to select a Calls icon (second line, second
menu). The icons are as follow;
3. Press OK button. The Calls option in principal menu will be
displayed.
* Call Logs: displays 3 types of calls; missed, received and dialed
number.
* Voice Mail: leaves a message to voice box of the phone called.
* Options: specifies environmental setting for call options. 4 options are
as follows;
88
8. Calls
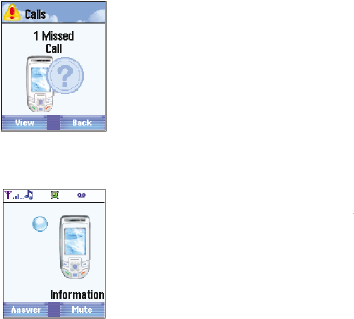
Call logs management_____________________________
Call lists saved in phone memory are classified into 3 types.
* Missed: means that a call is received but not answered, which
displays the following screen.
* Received: means that a call is received and answered (to answer the
call, press Answer button displayed as shown on the screen below.
* Dialed numbers: means that a call is sent.
The record of 3 types of the calls will be managed in the same manner.
Follow the procedures below to see details of one among those three.
* Select call list on call screen (please be well informed of the route to
be here in addition to the previous list). And press OK button.
* Go to call list screen of the 3 types of calls described above.
* Select a call list desired (Missed, Received or Dialed Numbers). And
press OK button.
A list applicable to its selected type of calls will be displayed.
89

Note: If you want to see call record in stand-by state, press Send button
(blue) directly to go to sent call list.
The list of calls displays phone numbers. If a number is identical to the
number in the phone book, its contact name will be displayed instead of the
phone number. The call record displays time and date when message is
sent or received in regular order (first one on the list is the most recent
record.)
A new effective call is recorded on the first place of the list. If the list gets full,
the last record will be erased. If a previously recorded call is made or dialed
again, its record will not be created again but just moved to the first place.
Missed
Select In Missed option on call logs and press OK button to show record of
calls received but not answered. Select the call not answered and press
option button to see the following menu.
* Select one number on the list of calls not answered and make a call
thereto (Call)
* Send a message to the selected number (Send message)
Displays information of selected call on screen(details)(refer the dialed
number)
* Save this number in phone address book or SIM card (Save)
* Delete the list of calls not answered (Delete)
Received
On the Call logs, select Received option and press OK button to display the
last list of calls answered. Select a call received and press option button to
display option menu as before (Missed)
Dialed Numbers
On the Call logs, select Dialed Numbers option and press OK button to
90
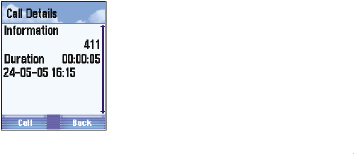
display the list of calls dialed.
Select a call desired and press option button to display new menu with the
following options.
* Call: tries a call to the phone previously selected.
* Send message: sends a message (Short or multimedia) to selected
number. Its writing type is identical to the type described in <Send new
message >.
* Details: displays information of selected call on screen (see below).
* Name of the contact related with selected phone number in case this
number exist in adress book
* Selected phone number
* Call duration
* Called time and date
Press Call button to make a call to the selected number. Press Previous
Button to return to option menu.
* Save: allows you to add new contact to address book conveniently.
You should specify where to save information and details of contact
name, phone type, etc., as described previously in address book
options.
* Delete: deletes selected number from call list, which needs your
confirmation. Press Yes button to confirm Delete Call.
91
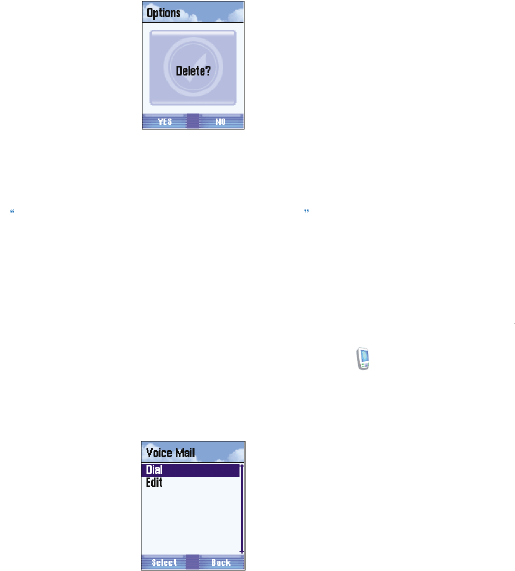
Voice Mail _______________________________________
It is an automatic answering machine (run by communication company)
saying Please, leave your message for me to call back when the call can
not be answered or the phone is out of service area or turned off. Follow the
procedures below to enter the voice box.
1. In stand-by state of GRUNDIG mobile, press menu button to display
main menu option.
2. Use the direction button to select Calls icon (second line, second
menu) and then press OK. The icons are as shown below .
3 On call screen, select voice mail and press OK button to display
voice box screen showing the options related with this function (See
the figure below).
The options are as follow;
92
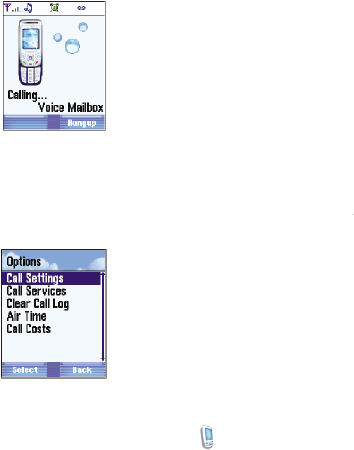
Whatever option is selected (Dial, Activate or Voice mail greetings), you
may hear instructions if connected to the number you joined. And if any of
those is unavailable, an error message will be displayed on screen of the
phone.
In case a call is made to voice box, you will see the following display;
Options _________________________________________
Call logs, Voice mail and Useful number has the identical options as shown
below. You may get to its option menu through the following operation;
1 On the phone screen, press menu to display main menu option.
2 Use the direction button to select Calls icon and then press Enter
(second line, second option). The icons are is as follow;
3 On Calls screen, select the option and press OK to enter option
screen.
The following is to describe the option.
93
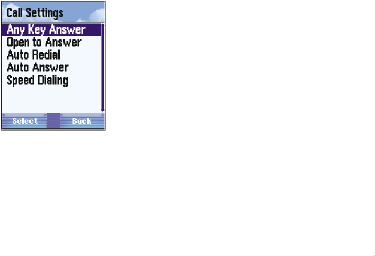
Call settings
Select call option on option menu and press Enter (check previous
procedures to know how to reach here) to display the following screen:
This option allows you to specify environmental setting through several
special options related with call.
* Any Key Answer: starts connection if active to any call when any
button on the pad is pressed. This option can be made on or
off(Press OK button to have access to this option)
* Open to Answer: starts connection if active to any call when
GRUNDIG mobile folder is opened. This option is initially kept off.
* Auto Redial: If this function of GRUNDIG mobile is selected, dialing
will be repeated to any number if the connection is failed since in
absence or not answered. In 5 seconds, the phone will try to make a
call to the number again automatically. If you don t want to use this
function, press Previous Button, or press OK Button to use.
The call if the connection is failed again will be retried in 60 seconds.
This function can be made on or off, however, kept inactive initially.
94

* Auto Answer: If this is selected, the call received will be automatically
answered, which has 4 options (Press OK button to display those): off,
3 seconds, 5 seconds and 10 seconds. It is the duration just before
the phone answers the received call automatically.
* Speed Dialing: If this option is applied, you can make a fast call.
Select number and then press it to make a fast call thereto in stand-by
state. How to make it available is as follows;
Setting speed dial number
In GRUNDIG mobile, individual phone number can be set to each number
button of 2 to 9 and 8. For example, if you want to set button No.7 for certain
fast dial number, the procedures below shall be followed.
1 In stand-by state, press menu button to display main menu option.
2 Use the direction button to select Calls icon and then press OK.
3 On Calls screen, select Option and press OK to display option
screen.
4 Select Calls settings and press OK.
5 Select Speed Dialing option and press OK button to go into speed
dial setup screen.
6 Select option 7 and press set to display phone number list saved in
address book.
7 Select any contact number you want to connect with button No.7 and
press OK.
95
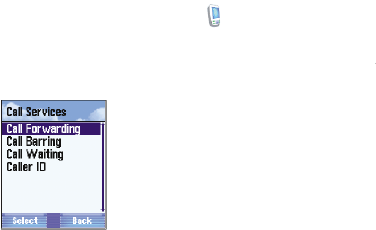
8 Press option button and select Set or Delete if you want to Edit or
Delete the speed dial connection.
9 Keep on pressing back Button till you reach the screen in stand-by
state.
If the fast dial number is presently active, keep pressing button No.7 till the
call is connected.
Call Services
The call service includes such functions stand-by call, environmental setting
and restricted display of sender.
The service is available as follows;
1 In stand-by state, press menu button to display main menu option.
2 Use the direction button to select calls icon and then press
OK(second line, second option). The icons are as follow;
3 On Calls screen, select Option and press OK to go to option screen.
4 Select Call Services and press OK button to display the following
screen.
The options of this menu have the following functions related.
96

Call Forwarding
It allows you to make received Call to go to other phone number. Select this
option and press OK button to use this function, which has 4 sub-menus as
follows;
Voice: specifies received voice call.
Data: specifies received data.
Fax: specifies received fax.
All: specifies all received calls.
You can specify the time when you want to set the option for all the received
calls (For this operation, select an option of voice, data, fax or all and press
OK button).
All calls of data, fax or voice: receives all types of calls selected.
Busy: receives all calls selected even during you are connected with
other phone.
INo answer: The service provider shall specify the number of bells to
make In-absence mode active if call is not answered.
Unreachable: receives all calls sent even if out of service area.
Unconditional: cancels all the previous options if all the type of calls
received is specified.
Once after the type and the number of calls received are specified, you
should execute the applicable option. First,
1. On the voice menu, select one of the present options
(Unconditional, Busy, No answer, Unreachable) and press OK.
97
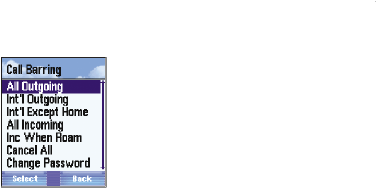
2. Select Activate to perform Received Call on the displayed menu. In
addition, select Activate to specify calls received, select Cancel to
cancel and select State to know the state of call received. And then
press OK.
3. Select Activate and press Enter to display the following options;
a. To Voicemail: If this selected, calls will be sent to the voice box
number as specified in your phone.
b. To Phonebook: If this option selected, calls will be sent to the
single phone saved in address book. Select this option and press
Enter to display details of address book.
c. To other number: If this option selected, calls will be sent to
designated number (number writer will be displayed where up to 21
digits are available).
Call Barring
This makes calls be sent and received only under the specified conditions.
Select this option on menu to make use of this service.
Select Barring Call service and press OK to display its options as follows;
98

* All outgoing Calls: Restricts All outgoing calls, which is controlled by
password.
* Int l Outgoing: Restricts All outgoing calls to abord, which is
controlled by password.
* Int l Expect Home
All Incoming: Restricts All incoming calls which is controlled by
password.
Inc when Roam
* Cancel All: Cancel All the pre-setted restricts at a time, which is
controlled by password.
* Change Password: In order to change password for call barning,
select change password option and press OK. then input the correct
existing password first and then new password twice(it is to confirm
that the new password is correct).
* Note: The password used for call restriction shall be 4-digit number.
99

Call waiting:
This service is used to make other call stand by while a precedent call is
connected, which can be applied or cancelled as necessary. In order to
apply this function, select Stand-by call option on call service menu (see the
first of the manual if you are not familiar with the route to this screen) and
press Enter to display the following options;
* Apply: applies Call Waiting call option.
* Cancel: cancels Call Waiting call option.
* State: displays the state of Call Waiting call.
Select state option and press Enter to show the state of stand-by call.
100

Caller ID:
This will let you know the number and the name from which call is sent. In
order to apply this function, select Confirm sender option on call service
menu and press OK to display the following options;
* Show caller: shows sender s phone number
* Hide own: hides my phone number for its receiver not to see.
* show connected: displays sender s number for me conveniently to
check the number if dialed wrongly or correctly.
* Hide own when forward: hides my number from its receiver s phone
dialed wrongly. Select applicable option to use and press OK.
Caller ID
In order to identify sender s phone number, select Show Caller or show
connected option and press OK. On the succeeding screen, select Status
and press OK.
101
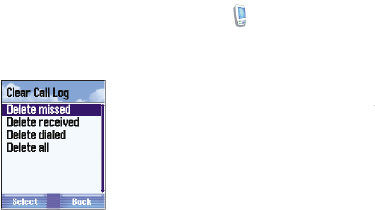
Hide own
If you don t want to reveal your phone number to the phone dialed, select
Hide own option and press OK. On the succeeding menu, select Cancel and
press OK.
Clear call Log
This option is used for you to erase all the call lists through call option menu.
(Missed, Received, Dialed).
It will erase all the record of calls with ease.
1. In stand-by state, press menu button to display main menu option.
2. Use the direction button to select Calls icon (second line, second
option) and then press OK. The icons included are as follow;
3. On calls screen, select Option and press OK to go to option screen.
4. Select Clear call Log and press OK to display the following screen.
* Delete Missed: deletes all calls in absence saved.
* Delete Received: deletes all received calls saved.
* Delete Dialed: deletes all sent calls saved.
102

* Delete all: deletes all the lists of calls saved.
The procedures for each case above are identical as follows;
Select desired option and press OK to display a confirming screen.
Press Yes to erase or press No to cancel.
Air time
This provides information on calling time used in total (time used for calls
dialed and received including the last one).
Follow the procedures below to use this option.
1. In stand-by state, press menu button to display main menu option.
2. Use the direction button to select calls icon (second line, second
option) and then press OK. The icons included are as follow;
103
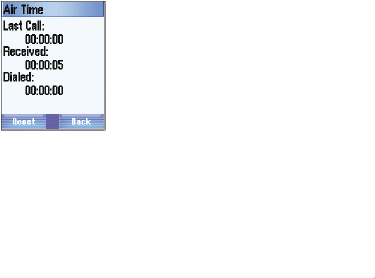
3. On calls screen, select Option and press OK to go to option screen.
4. Select Air Time and press OK to display the following information.
5. Press Back button to go out of this screen.
6. Press Reset button and select desired option on the menu below to
set the counter to 0 (Zero)
a. All: erases all the accumulated time used for calls received and
sent.
b. Dialed: erases the accumulated time used for calls sent.
c. Received: erases the accumulated time used for calls received.
d. Last Dialed: erases the time used for the last call.
7. Every option if selected will ask you to confirm.
Call costs
This informs you of the amount of total cost of all calls and the last call
including the maximum amount/cost of calls. The cost may be expressed in
some unit or currency. Follow the procedures below to go to this option.
104
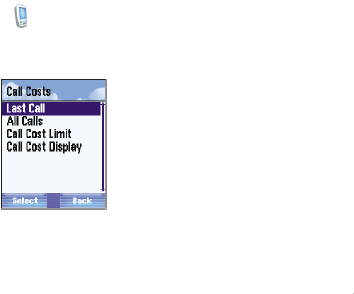
1. In stand-by state, press menu button to display main menu option.
2. Select calls icon (second line, second option) and then press OK.
The icons are as follow;
3. On calls screen, select Option and press OK to go to option screen.
4. Select Call costs and press OK to display the following options.
a. Last call: displays the cost of the last call, which can be expressed
in specific unit or currency through Display calling cost option
(described later)
b. All calls: displays the cost of all calls. Press Reset button to delete
the cost displayed. The terminal will ask you to input PIN 2. The
password shall be input correctly. If not, the cost of all calls will not
be deleted. If so, a message The cost of calls is set to 0(zero) will
be displayed.
c. Call Cost Limit: limits the maximum cost of calls available. Select
this option to display on or off option screen. Then, select on and
input PIN 2 correctly to display the screen to write the desired
maximum cost of calls on. In order to cancel this option, select off
and input PIN 2 correctly.
d. Call Cost Display: where display type of calling cost is specified
with two options of specific unit or currency. If you want to
change options, input PIN 2 correctly.
105
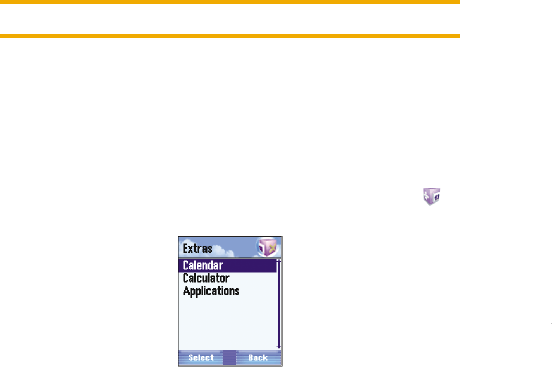
The options on Extras menus allow you to connect to other functions of the
phone and SIM card (My services, Calendar, Applications). Follow the
procedures below to enter Extras menus.
1. In stand-by state, press menu button to display main menu option.
2. Use the direction button to select Extras menus icon (third option,
second line) and then press OK. The icons related are as follow;
Option list related with Extras menus will be displayed as shown below;
How to operate each tool will be described later.
My Services _____________________________________
It allows you additional services with SIM card used in addition to functions
available in GRUNDIG mobile, providing information on news, economics,
sports, lottery and weather.
How various the services can be depends on the type of SIM card.
106
9. Extras
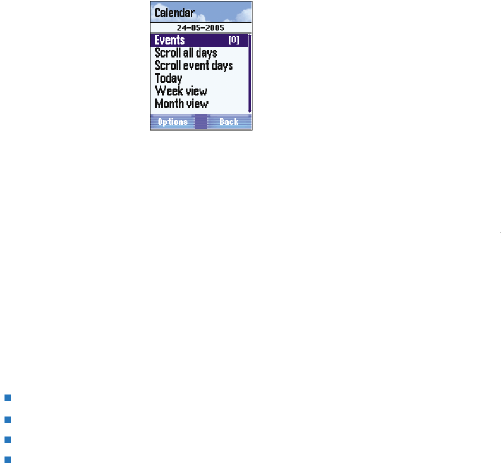
Calendar ________________________________________
On Other menus, select Calendar and press OK to go to its related option
list, where you can set an alarm for a specific event.
Main options related with Calendar will be displayed as shown below;
The title of the calendar screen is the date specified as seen (24-05-2005 on
the previous screen). On the other hand, the number of events specified is
displayed on the right side of the option line (The number of events is 0 on
the previous screen).
Events
On Calendar screen, select Events option and press OK to display the
screen, where you can add, delete or execute an event.
Follow the procedures below to apply this function;
1. On option screen, select Add event and press OK.
2. Go to the screen where you can select the type of event to specify.
Alarm: sets an alarm for time Alert.
Meeting: sets an alarm for meeting.
Birthday: sets an alarm for birthday.
Memo: sets an alarm for other types of events.
Note: Definition of each alarm differs a little according to each case as
follows;
107
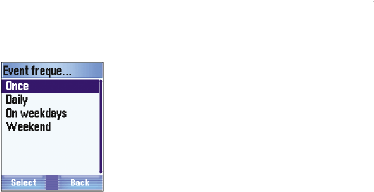
3. Select an event type among three and press Enter (Up to 20 events
can be added. And date and time of the phone are always used when
a new event is added).
4. The following describes how to add text for event being specified.
A text writing screen will be displayed for you to input 64 characters.
After text is written, press OK button.
5. The next procedure is how to input event date (Default is the present
date of the phone). Use Up/Down direction keys or input numbers
directly on the key pad so to specify the date.
Note: Setting of starting time only will be enough for an event type of
birthdays.
6. Now, Start and End time (when the phone operates the alarm) of
desired event shall be set. Use the phone button directly or Up/Down
button to input.
7. Now, how many times the event will be repeated shall be specified,
where the following options are available. Select a desired option and
press Enter.
You don t need to set the period in case of birthday event.
108

8. Set alarming time to inform you that an applicable event will be open.
(Alarming time screen); None, 1 day prior, 30 minutes prior and 15
minutes prior are available, where you can select an exact time
option you want. After a time option is selected, press OK.
You don t need to specify details as in alarm types or birthday event.
9. Finally, specify the type of alarm to inform you that an applicable
event will be open. There are 2 types of alarm available.
A. Visual: uses blinking light to operate the alarm.
B. Ring visual: uses sound and light to operate the alarm.
Select a desired alarm type and press OK to finish all the procedures.
Note: The sound of the time alarm is different from that of the event alarm.
When a call is received while an alarm operates, the alarm will stop till the
call is finished. In the beginning the alarming bell will go on for 1 minute, and
then for 5 minutes if not stopped by user. After the third bell, the alarm will
stop then.
The following icons will be displayed on the icon bar of the upper screen
when you specify the alarm. The screen of event alarm is as shown
below;
109
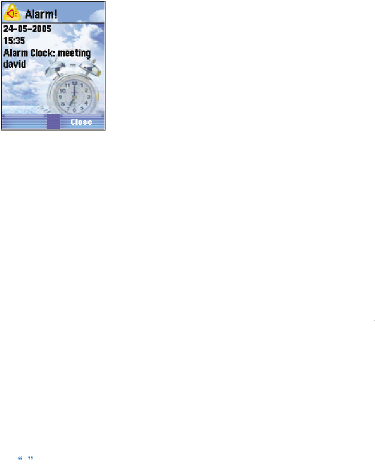
View calendar
Any event once after specified can be checked everyday through the
following options displayed on calendar screen;
* Events: creates or changes events, which is previously described.
* Scroll all days: checks events displayed on calendar everyday. If this
option is selected, the option button will have names of Next and
Previous. Press Next button to go to next day on calendar, where the
day s specified events will be displayed. Press Previous to go to
previous day on calendar.
* Scroll event days: shows the event specified date only on calendar.
Next and Previous option buttons will be displayed.
* Today: leads you directly to present event. With this option specified,
select Option and press OK.
* Week view: shows the week of the present date. Any day if with any
event will be displayed in xmark (See the figure below).
110
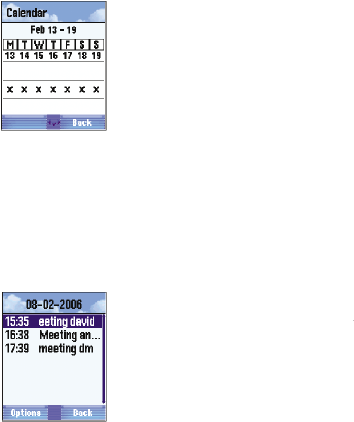
Month view: shows the month of the present date.
Other event options
You can execute other operation on calendar menu. Select Event option on
the displayed screen and press OK. Then, choose Select and press OK to
display the event list arranged, based on specified date and its operation
time (See the figure below).
* Details: shows details of the event selected (type, date, operation
time, related expression and alarming time)
111

* Edit: edits specific details related with event (Description, Date, start
time, end time, frequency, etc.)
* Delete: deletes selected event. You will be asked to press Yes to
confirm).
Note: Factors to be written for event are different according to its type. That
is to say, all kinds of events do not have the same factors. See below;
* Alarm: description, time and date.
* Meeting: description, date, start time, end time, frequency, alarm type,
alarm time.
* Birthday: description, date, time and alarm type.
Return to calendar menu, select Event option and press Option button to
display the list familiar to you, where event options are available, however,
some are not mentioned yet.
* Select: You can select the reservated events.
* All event: You can add a event.
* Go to: goes to the date designated on calendar in order to see the
event set on the date described.
* Delete past events: deletes all the events which happened before
today.
Select this option and press OK. Then you will be asked to confirm.
* Delete all events: deletes all the events specified, which will ask you
to confirm.
Press Back button to return to previous menu (It is the fastest route to get
out of the calendar menu).
112
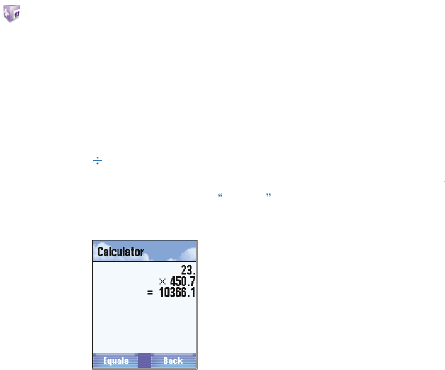
Calculator ______________________________________
GRUNDIG mobile calculator helps you to perform basic calculation work.
Follow the procedures below to use the calculator.
1. In stand-by state, press menu button to display main menu option.
2. Use the direction button to select Extras menus icon (third option,
second line) and then press OK. The applicable icon is as shown
below;
3. Select Calculator and press OK to go to Calculator screen, where
you can perform calculation work.
- Use number keys to input numbers desired.
- Use # key to display a decimal point.
- Use * key to make a negative number.
- After desired number is input, press updown Nevigation key to input
the signs of +, -, x and .
- Input the first number and then the second number to calculate.
- Te get the result of the calculation, press Equals button (See the
figure below).
- You can use the acquired result to apply to other calculation with
up/down nevigation key buttons. This calculator does not support
simultaneous multi-calculation. You should divide the object into
several in such a case and then perform each calculation in due
consideration of calculation priority.
Press Back button to return to previous screen.
113
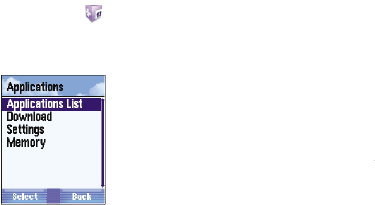
Applications _____________________________________
On Applications menu, you can find much newer and exciting applications
all available to download.
Follow the procedures below to go to Applications menu.
1. In stand-by state, press menu button to display main menu option.
2. Use the direction button to select Extras menus icon and then press
OK. The icons are as shown below;
3. Select Applications and press OK to go to Applications screen with
the options as follow;
a. Application list: shows application list saved in GRUNDIG mobile or
downloaded.
b. Download: allows you to go to application download center provided
in GRUNDIG mobile.
c. Setting: sets application and downloading methods.
d. Memory: shows the capacity of memory remained.
Note: This option is identical to the option described in <Games>.
114
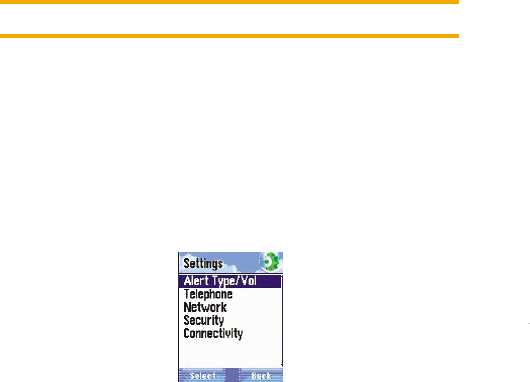
In Settings menu, you can specify all appearances of GRUNDIG : (for bell
volume of call received, calling bell melody, background screen image, other
setting options of communication network, security and connection) Follow
the procedures below to get to Setting menu.
1. In stand-by state, press menu button to display main menu option.
2. Use the direction button to select Settings icon (fourth option, second
line) and then press OK.
The icons are as shown below; Option list of Settings menu is as shown
below;
a. Alert Type/Vol : sets bell volume of call received, or other options.
b. Telephone : sets options related with the cell phone.
c. Network : sets communication network to connect to the phone.
d. Security : sets the appearance of security for Reject access or View
phone list.
e. Connectivity : sets infrared connection or modem.
Details of each option are as follows;
115
10. Settings
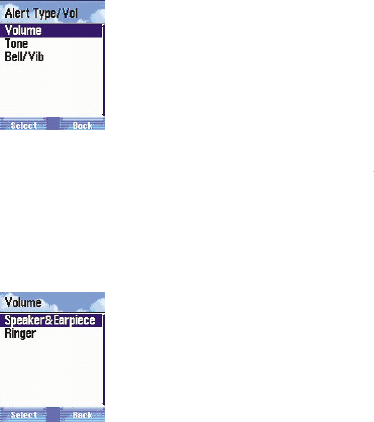
Alert Type/Vol___________________________________
On Settings menu, select Alert Type/Vol option to specify bell volume of
call received or other options.
Note: In stand-by state of the screen, keep pressing *(asterisk) for a few
seconds to change the option to manner mode, if you keep pressing
*(asterisk) for a few second again in manner mode it will change to the
predefined mode.
1. Volume: Sets volume from Speaker&Earpiece and Ringer for hearing or
speaking. Select applicable option and press OK. Press the
upper of the center button to turn the volume up, or the lower to
turn the volume down. After the volume is set, press OK to return
to volume menu.
Note: 5 levels of volume are available; Min (1 bar), Low (2bars),
Middle/Normal (3 bars), High (4 bars) and Max (5 bars).
116
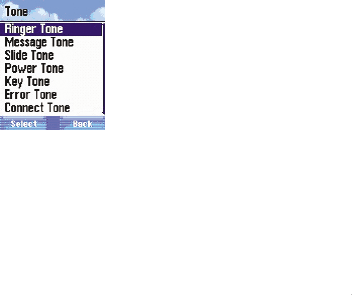
2. Tone : Set Ring tone and other sound options
a. Ringer Tone : Sets melody for received call. Select this option and press
OK to display My melodies (downloaded or from external memory) and
Default Ring call(Boccherini ~ Maquina Escribir) and MP3 melodies.
b. Message Tone : allows you to apply or cancel the sound function
operated whenever the message is received(Off, Tone1 ~ Tone5)
c. Slide Tone : allows you to apply or cancel the sound function operated
whenever you slide up/down your cell phone.
d. Power Tone : allows you to apply or cancel the sound function operated
whenever you on/off your cell phone.
e. Key Tone : allows you to apply or cancel the sound function operated if a
button is pressed. Each button has an individual tone. Select off option if
you want to make no sound when a button is pressed.
f. Error Tone : allows you to apply or cancel the sound function operated if
an error occurs on the phone (Default is set on).
g. Connect Tone : allows you to apply or cancel the sound function
operated whenever your phone is connected to the other.
117
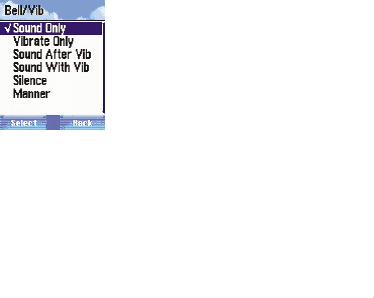
3. Bell/Vib : Set the sound mode when the phone operates.
a. Sound Only : Alerts(Ring) only with sound when you have a call or/and
operates the phone.
b. Vibrate Only : Alerts(Ring) only with vibration when you have a call
or/and operates the phone.
c. Sound After Vib : Alerts(Ring) with sound after the vibration when you
have a call or/and operates the phone.
d. Sound with Vib : Alerts(Ring) sound with vibration when you have a call
or/and operates the phone.
e. Silence : No Alerts(Ring) except LED blinking when you have a call
or/and operates the phone [Sound in games, Alarm]
f. Manner : No Alerts(Ring) only with vibration when you have a call or/and
operates the phone [sound in games, Alarm]
118
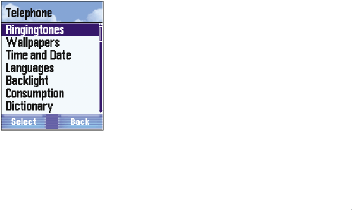
Telephone ______________________________________
On Setting, select Telephone option and press OK to go to phone setting
option which will show the phone screen as follows;
Each option includes the following menu;
Ringingtones
On the Telephone screen, select melody setting option to go to List of
Melodies or Download new melody.
119

List of Melodies
On Ringingtones menu (refer to Setting phone bell for the route to this
menu), select list of Melodies and press OK to display 2 options as follows.
a. My melodies: Select the memory(internal or exteral) what you want
to use and choose saved melody to play in the phone.
b. Default Ring Call: It will display melody list included in GRUNDIG
mobile. Select any melody you want to use as a phone bell and press
Confirm (select the melody on the list and wait a few seconds if you
want to hear it).
C.MP3 Melodies
In this option you can use MP3 sound for the Ringtone. Press play for
prelisten, then press select to set for the Ringtone.(If you want to clear the
MP3 for Ringtone, please select again the default melodies or the melody
which you download from WAP)
On Ringingtones menu, select Download option to have access to melody
downloading service provided by the communication company. This service
makes you download and save all types of melody in GRUNDIG mobile, for
you to use as a phone bell. The downloaded melody will be saved in My
melody folder.
Wallpapers
On the phone screen, select wallpapers option.
On wallpapers screen, select an image (taken or saved in Picture file, or
downloaded via service provider, or existing) to use a background screen.
The procedure to select is described in Images Option of Leisure menu.
Time and date
On the Telephone screen, select Time and date option and press OK to
display the 4 options as follows;
120
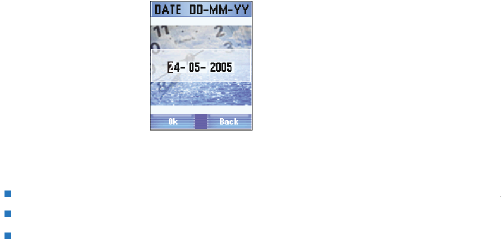
* Date: Select this option and press OK to edit the date on the phone.
Write new date on designated form (DD/MM/YYYY if written in
Spanish). With number key, write down Day (2 digits), Month (2 digits)
and Year (4 digits), and press OK button to confirm the change and
return to previous screen. If you want to cancel the change or return to
previous screen, just press back without pressing OK.
* Change Date format: Select this option and press Enter to edit Date
form displayed on the phone, where 3 options are available.
DD-MM-YY: established form (day-month-year)
MM-DD-YY: form in English (month- day- year)
YY-MM-DD: commonly used form in communication (year- month-
day)
Select a desired form and press Confirm to return to previous option
screen.
* Time: Select this option and press OK to edit Time displayed on the
phone. With number key, change Time as desired and press OK
button to confirm the change and return to previous screen. If you
want to cancel the change or return to previous screen, just press
Back without pressing OK.
121

Note: If Time is based on 12 hours system, AM or PM can be selected as
necessary. Select AM or PM and press Up/Down key.
* Change Time format: Select this option and press OK to edit Time
form displayed on the phone, where 2 options are available.
24 hours: it is an established option, where time is displayed 00:00 to
23:59 regardless of AM or PM. If you want this option, select Option
and press Confirm to return to previous screen.
12 hours: This option is based on 12 hours system, where 00:00 to
12:00 of AM and PM (before and after noon) is displayed. If you want
this option, select Option and press OK to return to previous screen.
Languages
On the Telephone screen, select Language option and press OK to display
Language screen, where you can choose a language you want to use. (If a
language is selected, all menu options, option button, message, form, etc.
will be displayed in the language selected)
Available languages are as follows:
* Automatic
*
* English
*
On the list, select a language you want to apply and press OK. If Automatic
is selected, the phone will select a language as specified in SIM card.
122

The phone will choose applicable country s cell phone code (MCC) and
install its applicable language. If such information is not available or there is
no SIM card in the phone, Spanish will be applied for you to use.
Backlight
On the Telephone screen, select Setting Backlight option and press OK to
display Backlight screen, where 2 options are available;
Lighting (screen and key pad) and Time (duration the backlight is kept on
when the phone is not operated). Lighting has two options;
* Normal mode: with the highest illuminance, it operates whenever the
user operates the key pad.
* Dimmed mode: with low illuminance, it operates if the user does not
operate the phone for some specified time.
If you want to make the mode active in case the phone is not operated for
some specified time, select desired mode on Backlight screen and press
OK to display 2 options;
* Normal: Press OK to display time setting screen where you can set
the time as desired to make the screen dim automatically if there is no
key operation for specified time. 10 to 60 seconds are available. If an
applicable option is selected, press OK button to return to previous
screen.
* Dimmed: Press OK to display time setting screen where you can set
the time duration how long the screen shall be kept dim. 10 to 60
seconds are available. If a desired option is selected, press OK button
to return to previous screen.
123

Consumption
On the phone screen, select Consumption and press OK to display 3
options of battery consumption; Normal, Low and Very low as described
below
* Normal: LED will blink every 2 seconds.
* Low: LED will blink every 4 seconds.
* Very low: No blink
In the Low and Very low modes, 10 types of lighting are available.
Dictionary
On the Telephone screen, select Dictionary option and press OK to display
3 setting items.
* Personal dictionary: It is used in Expected Mode when you write a
message. If your phone dose not expect a word to input when you are
writing a new message, you can add the word to the Personal
dictionary for the phone to expect it later. Select Personal dictionary
option and press OK. And then, press On and OK button.
* Used word Dictionary : If this option is selected, a word whenever
input will be automatically saved in this dictionary, which will apply
Expected mode for next messages.
124

If you want to apply this, press OK and select On to Confirm.
* 2nd language: Expected mode is also applied to the 2nd language. In
case with this option executed a word is not found in main language
dictionary, the word will be searched for in the 2nd language
dictionary. If you want to apply or cancel this option, with the option
selected press OK and choose English or Spanish as necessary or
None (if 2nd language is not necessary). After then, press OK button.
Welcome message
This is used to specify an initial greeting which will be shown on the screen
for a few seconds when the phone is turned on (How to set is described as
shown below). The greeting is of text factor and graphic factor, which are all
available for you to set. Select <Setting phone environment> and press
Enter on the Greeting option to display greeting message with 2 options as
follows;
* Message: This may or may not show text messages. Select a proper
option and press OK. Select On and press OK to input a text message
you want to display on the screen of the phone when it is turned on
(up to 13 characters available). After desired text is input, press OK.
125
* Animation: You may set animation option or may not if not necessary.
Select a proper option and select on to Confirming to display the
image played.
Reset setting
If you want to go back to initial environment after some environmental
settings have been applied to the phone, simply select reset setting option
and press OK to display Reset setting to default? . Select Yes or No as
necessary.
Note: If once the initial setting is recovered, all the saved environment
information will be deleted.
Network_________________________________________
Select Network on the setting menu to go to the setting option of network
environment and press OK to display network related screen with menu
options as follows.
126

* Select Mode: sets how to find communication network (Automatic,
manual)
* Preferred: specifies environmental setting of communication network
list as desired by user.
* Select Band: allows you to select frequency automatic, GSH900 /
DCS1800 and PCS1900.
Each option will be described later.
Select Mode
On Network screen, choose select mode and press OK to display select
mode screen with 2 PLMN communication network options.
* Auto: PLMN of desired communication network list can be
selected automatically. The highest frequency of PLMN will be always
selected.
* Manual: While this option is selected, frequency of available PLMN
communication network can be selected by hand. If this option is
executed, Search screen will appear to search for all available
PLMNs.
127
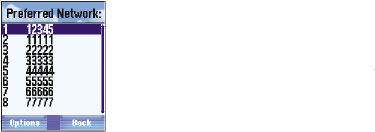
ROM of the phone if reserving PLMN information will display its name.
Or national codes for communication network will be displayed.
After such a communication network is selected, the phone will try to
enter the communication network. The cell phone if registered
completely will be in stand-by state. If not, the cell phone will display a
list for you to search for other communication network.
Preferred
It helps you to define PLMN list in preferred sequence.
Select Preferred on Network screen and press OK (See < Setting
communication network environment> for the route to this option>).
Preferred is as shown below;
PLMN communication network connected will be displayed on this screen in
preferred sequence.
Available option buttons are as follows:
* Insert: allows you to attach communication network code preferred.
Input 5 digits of communication network code and press OK button.
The code just specified will be input in front of the communication
network code specified prior to this process.
* Move: moves a code onto other list. First, select a desired code and
press option button. Then select Move and press OK.
On Table of contents screen, a location desired on the list shall be
specified. Press OK button to finish.
128
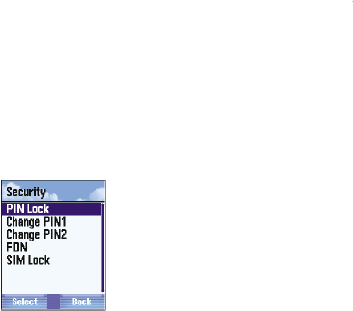
* Delete: deletes desired communication code from communication
network list. Select communication network code to delete from the
preferred. Choose its option and press Delete and Enter. Then press
Yes to confirm.
Select Band
This option is used to set environment of the phone in order to search for
communication network automatically or by hand.
In case of manual mode, GSM900/DCS1800 or PCS1900 of frequency can
be selected. For its details, choose select Band on Network screen and
press OK to display Band option screen with previously described options
* Automatic: previously specified option
* GSM900/DCS1800
* PCS1900
Select a desired option and press Confirm.
Security_________________________________________
The cell phone is of security system necessary to specify environment
accordingly to personal need.
On Adjust menu, select Security to enter Setting security environment
option (See <Setting> menu for the route to this). Then the following screen
will be displayed, whose options are also available in other menu.
129
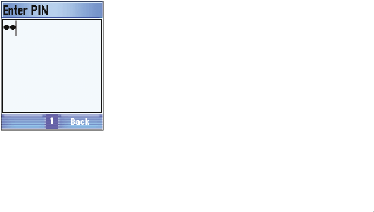
How to apply or cancel password
Password input screen will appear whenever the phone is turned on if
password has been specified. Correct password shall be input in order to
use the phone (See the figure below).
Note: Correct password of 4 digits shall be input.
3 times of wrong password input
The phone will warn you that it would be the last chance for you to have
access, displaying <One more incorrect password will close the password
input screen>)
The password while input will be displayed in black dot on the screen to
keep from exposed. 3 times of wrong password input will display PUK
screen.
PUK (personal unlocked password) is of 8 digits necessary to cancel SIM
card.
If PUK appears, press Confirm. Before the phone confirms PUK just input,
you should input a new number. If they are identical, the phone will cancel
the lock and you should remember the password just inputted. If PUK
number is inputted incorrectly, all the procedures above shall be repeated.
Retrying is available for 10 times. More than 10 times will make your card
keep locked till repaired only by the communication company.
130

While the PIN and PUK is input, press SOS button to connect to emergent
call.
In order to make password required whenever the phone is turned on, select
PIN lock option and press OK to get to PIN lock screen. Select On and
press OK to input password.
If the message <Input password> is displayed, input 4-digit password of the
phone (You have 3 chances only as described) and press OK button. If
password is correct, Password executed will be displayed.
If you want to cancel the password which was once set, go to PIN Lock
screen and select off. Then press OK button and input correct password.
Change PIN 1 & 2
In case you don t like the password 1 or 2 which was input in your phone,
you can easily change it.
1. Select Change PIN 1 or 2 on Security screen and press OK (See
<Setting security environment> for the route to this option).
2. A message will be displayed, saying <Input old PIN>. Then input the
previous password and press OK (You have 3 chances only. If the
third password is incorrect again, the phone will be locked).
3. A message will be displayed, saying <Input new PIN>. Then input
new 4-digit password and press OK.
131

4. A message will be displayed again, saying <Verify new PIN>. Then
input new 4-digit password again and press OK. If they are identical,
your password has been changed. If they are not identical for 2
times, a message <You must enter the same PIN> will be
displayed, which means restart of the process from the beginning.
Note: Password 1 and 2 are of the identical system as described above.
Setting FDN environment
Restricted call list is used to restrict the call only to specific phone number.
On Security screen, select FDN option and press OK to display FDN screen
with 2 options as follows;
* FDN only: decides to execute fixed phone as necessary. However, its
default is Inactive. In order to execute this function, select On and
press OK, where you will be asked to input correct PIN 2 (You have 3
chances only. If the third password is incorrect again, the phone will
be locked).
Now, press OK button. If PIN 2 is correct, FDN call mode will operate
and allows the call to be connected only to the number in FDN
address.
If you want to cancel this mode, follow the same procedures as above.
* Numbers: specifies the number allowed to call when Only FDN mode
is set active (which will be saved in FDN address book). Select
Numbers option and press OK to display the list of existing phone
numbers. If you want to add other number or cancel, press Option to
display the following list for your easy access.
132

* Details: displays details of selected contact on FDN list.
* New: adds new number to FDN list (you will be always asked to input
password 2).
* Send message: sends a message to selected number.
* Call: tries to connect to selected number.
* Search: uses address book to search for specific number saved in
FDN list.
* Delete: deletes specific phone number (you will be always asked to
input password 2).
* Delete all: deletes all the phone numbers saved in FDN (you will be
always asked to input password 2).
SIM Lock
Lock SIM card is used to keep the phone from robbed. If environment of the
phone is specified only for a specific SIM card, it will not be compatible with
any other SIM card.
The phone will have specific SIM code when SIM code of a specific SIM
card is saved in phone memory. When the phone is turned on and when SIM
card is inserted in the phone, it will be checked if identical to SIM code saved
in the phone. if not identical, 112 emergency call mode only is available.
Select Lock SIM option and press OK to specify Lock SIM card.
133
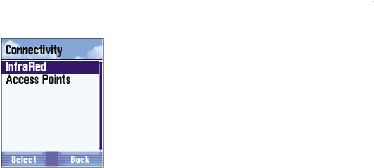
SIM Lock setting screen has the following options.
* On
* Off
Note: 3 chances are allowed for you to input correct PCK code. If all failed,
PCK will be locked and you shall turn the phone off and then on.
Note: If you try to turn the phone on with different SIM card while SIM is set
locked, the phone will show a message <This is an invalid SIM card>.
Emergency call only will be available again.
Connectivity ____________________________________
It allows your phone to connect to other equipment, which is available via
built-in infrared port and WAP connection as well. Select Connectivity sub-
menu on the Setting option to specify connection environment as shown
below;
InfraRed
You can use the phone as a modem or receive data from other equipment
via infrared port. Select Infrared option on Connectivity screen to apply this
function (See <Connectivity>)
134

Press OK to go to the screen with the following option.
* Modem: makes the infrared port active or inactive necessarily to
receive instructions from other equipment (Two options are available;
On and Off. The existing option specified has been through
confirmation).
Select On option and press OK to execute the infrared connection.
After the connection is set, infrared connection icon will be displayed on
the upper screen. While
While data is sent, this icon will blink.
Note: When the modem is operated by infrared rays, the connection via
serial port will be cut off. And once the infrared connection expires, it will
change to serial port connection.
* IR Reception: executes infrared connection in order to receive
external data. Press OK on On option to apply this function. If this
option is executed, infrared modem will be canceled automatically.
* Connection Duration: specifies connection duration via infrared rays.
1, 5, 10 and Until Deactivation are available. Default is 5 minutes.
* My Objects: displays MMS messages and data moved or received
from infrared port or applications, any of which can be sent to others,
being attached to a multimedia message later. All its saved files which
have 5 sub-files available respectively can be sent via infrared port.
135

My Picture: saves applicable format of images and allows you to
connect to the images saved in Image album, where you can open
the image file you want to send to other user, change its name or
delete.
My Animation: saves applicable format of animation and allows you
to connect to the animation saved in the file folder, where you can
open the animation file you want to send to other user, change its
name or delete.
My Melodies: saves applicable format of sound and melody and
allows you to connect to the melody saved in the file folder, where
you can open the melody file you want to send to other user, change
its name or delete.
Various Objects: saves other formats of files than compatible and
allows you to save all kinds of files. This option has the same
procedures as described above.
Object Inbox: saves all the files related with multimedia messages,
saved or received from other applications which have no file folder.
How to apply this option is as described previously.
Note: The phone may receive various types of data (image, animation,
melody or sound) from other equipment via WAP page, infrared port or
cable. All the data will be saved in the Object inbox folder upon received.
Press Object inbox folder option to enter the folder to manage the data
saved therein.
Press option button to go to the following menu option.
136
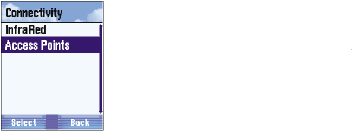
* Details: shows details of a file saved (Number of files, Directories,
size, Available Phone memory).
* Open: opens a file with suitable application. For example, JPEG
image files will be opened by an image viewer, and MIDI sound files
by a sound player.
* Rename: changes the name of a folder.
* Delete: deletes a folder selected.
* New Folder: makes a new file folder to save a group of files therein.
* Sort: arranges files in desired sequence.
Access points
Select Access Points and press OK to display Condition screen as shown
below (See <Connectivity>), where 5 connection conditions are displayed.
1. Select a connection condition desired and press Option.
2. On the displayed screen, select Activate and press OK.
137
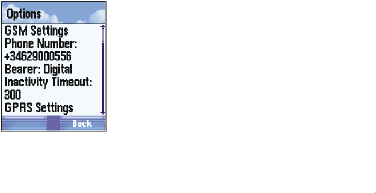
3. On the confirming screen, press Yes to finally select the connection
condition. Then, press Back to return to Condition screen.
Details of a specific condition are also displayed. Select Option and Details
and press OK to get this information as similar as shown below.
Press Previous button twice to return to Condition screen, where you can
finally change the environmental setting per condition respectively.
1. Select a desired condition to change and then press OK.
2. Select Modify and press OK.
Setting options of connection environment will be lengthily displayed on
menu.
Refer to MMS options for details of meaning and function of this option.
138

1.0 version
Note: The details of this manual are regarded as correct at the moment
when printed. However, Movistar reserves the right to change its details and
functions without prior notice.
The functions and details described in this manual may have been already
modified, based on the functions of GRUNDIG mobile on which SIM card is
installed or the functions of the communication network.
139

140
Exception of quality warranty
This warranty will be void in the following cases;
1. In case the product is misused or used for other purposes than specified in the present safety standard
of its applicable country, or any instruction described in the manual is violated.
2. This warranty dose not include normal defects unavoidable during use.
3. This warranty dose not include normal defects unavoidable on plastic, paint, key pad or antenna.
4. Movistar is not liable to any defect caused by repair, change, or technical support provided by
unauthorized service center or person, or any defect caused by other accessories than original. The
original accessories are to be manufactured by Vitelcom and certified by Movistar.
5. This warranty dose not include defects on personal paint or parts.
6. Battery and charger will be guaranteed for 6 months only. If the battery is charged through other charger
than Movistar¡fls, this warranty will be void.
7. In case of defects caused by robbery, theft, thunder, fire, moisture, flood, electric waves of other
equipment, electro-magnetic variables, electric wire, or natural disasters.
8. If the serial number is removed from the product, or erased, or illegible.
Separately from the legal warranty, those clauses above are the only resource for its maker or dealer to
use in case of defects. In addition, this warranty excludes other warranties tacitly related with goods sales.
Movistar has a right to hand over the freight expense (caused by delivery to service center) to user.
Conditions for complete warranty
The quality of the product will be guaranteed by its provider Movistar for a period of one year upon
purchased against defects or abnormal operation due to faulty materials or workmanship, when authorized
engineer can repair or change the defective parts based on his judgment. If the customer is not satisfied
with the result or the product falls still short of the optimum performance, the customer has a right to
exchange the product for an equivalent one or to ask an equivalent refund to the product only providing
that Movistar as the subject of quality warranty is informed of such fact within 10 days after the product
repaired.
The person in charge of quality warranty shall pay back all the expenses paid first for the product and the
phone card to complete the refund of the product.
During the warranty period, all the replaced defective parts will belong to the manufacturer.
Any customer who wants to make a protest against the warranty is to present the followings;
a) The customer able to read, shall present the original warranty where purchase date, purchase shop,
type of product, serial number, IMEI number, accessories manufacturing date and code are described, and
the original statement of tax account,
Movistar considers that the period of quality warranty on the product is for 12 months after the date of
purchase. The agent shall repair all the defective parts or product free of charge (parts, labor).
There will be no extension of warranty term on the repaired product.
Any change in this warranty is subject to prior written approval of Movistar. The user is recommended to
read the instructions described in the manual thoroughly to make good use of the features of the product
before operating.
Safety Information
1 . SAFETY INFORMATION FOR FIXED WIRELESS TERMINALS
.POTE NTIALLY EXPLOSIVE ATMOSPHERES
Turn your phone OFF when in any area with a potentially explosive atmosphere and
obey all signs and instructions. Sparks in such areas could cauls e an explosion or fire
resulting in bodily injury or even death.
INTERFERENCE TO MEDICAL DIVICES
Certain electronic equipment may be shielded against RF signal from you wireless
phone. (pacemakers, Hearing Aids, and so on) Turn your phone OFF in health c are
facilities when any regulations posted in these areas instruct you to do so. RF signals
may affect improperly installed or inadequately shielded electronic system in motor
vehicles.
.EXPOSURE TO RF ENERGY
Use only the supplied or an approved replacement antenna. Do not touch the antenna
unnecessarily when the phone is in use. Do not move the antenna close to, or
couching any exposed part of the body when making a call.
SAFETY INFORMATION FOR RF EXPOSURE
Body worn operation
This device was tested for typical body-worn operations with the back of the phone
kept 15 mm. from the body. To maintain compliance with FCC RF exposure
requirements, use only belt-clips, holsters or similar accessories that maintain a 15
mm. separation distance between the user’s body and the back of the phone, including
the antenna. The use of belt-clips, holsters and similar accessories should not contain
metallic components in its assembly. The use of accessories that do not satisfy these
requirements may not comply with FCC RF exposure requirements, and should be
avoided.

SAR INFORMATION
THIS MODEL PHONE MEETS THE GOVERNMENT’S
REQUIREMENTS FOR EXPOSURE TO RADIO WAVES.
Your wireless phone is a radio transmitter and receiver. It is designed and manufactured not to
exceed the emission limits for exposure to radiofrequency (RF) energy set by the Federal
Communications Commission of the U.S. Government. These limits are part of comprehensive
guidelines and establish permitted levels of RF energy for the general population. The guidelines
are based on standards that were developed by independent scientific organizations through
periodic and thorough evaluation of scientific studies. The standards include a substantial safety
margin designed to assure the safety of all persons, regardless of age and health. The exposure
standard for wireless mobile phones employs a unit of measurement known as the Specific
Absorption Rate, or SAR. The SAR limit set by the FCC is 1.6 W/kg. *
Tests for SAR are conducted with the phone transmitting at its highest certified power level in all
tested frequency bands. Although the SAR is determined at the highest certified power level, the
actual SAR level of the phone while operating can be well below the maximum value. This is
because the phone is designed to operate at multiple power levels so as to use only the power
required to reach the network. In general, the closer you are to a wireless base station antenna, the
lower the power output. Before a phone model is available for sale to the public, it must be tested
and certified to the FCC that it does not exceed the limit established by the government adopted
requirement for safe exposure. The tests are performed in positions and locations (e.g., at the ear
and worn on the body) as required by the FCC for each model. The highest SAR value for this
model phone when tested for use at the ear is 0.114 W/Kg
and when worn on the body , as
described in this user guide, is 0.278 W/Kg . (Body-worn measurements differ among phone
models, depending upon available accessories and FCC requirements). While there may be
differences between the SAR levels of various phones and at various positions, they all meet the
government requirement for safe exposure. The FCC has granted an Equipment Authorization for
this model phone with all reported SAR levels evaluated as in compliance with the FCC RF
exposure guidelines. SAR information on this model phone is on file with the FCC and can be found
under the Display Grant section of http://www.fcc.gov/ oet/fccid after searching on FCC ID:
TKHM342.
Additional information on Specific Absorption Rates (SAR) can be found on the Cellular
Telecommunications Industry Asso-ciation (CTIA) web-site at http://www.wow-com.com. * In the
United States and Canada, the SAR limit for mobile phones used by the public is 1.6 watts/kg
(W/kg) averaged over one gram of tissue. The standard incorporates a sub-stantial margin of safety
to give additional protection for the public and to account for any variations in measurements.
U.S.A.
U.S.FEDERAL COMMUNICATIONS COMMISSION
RADIO FREQUENCY INTERFERENCE STATEMENT
INFORMATION TO THE USER
NOTE : This equipment has been tested and found to comply with the limits for a Class B
digital device pursuant to Part 15 of the FCC Rules. These limits are designed to provide
reasonable protection against harmful Interference in a residential installation This equipment
generates, uses, and can radiate radio frequency energy and, if Not installed and used in
accordance with the instructions, may cause harmful Interference to radio communications.
However, there is no guarantee that interference will not occur in a particular Installation. If this
equipment does cause harmful interference to radio or television reception, which can be
determined by turning the equipment off and on, the user is encouraged to try to correct the
interference by one or more of the following measures:
*- Reorient or relocate the receiving antenna.
Increase the separation between the equipment and receiver.
*- Connect the equipment into an outlet of a circuit different from that to which the receiver is
connected.
*- Consult the dealer or an experienced radio/TV technician for assistance.
Changes or modification not expressly approved by the party responsible for Compliance
could void the user’s authority to operate the equipment. Connecting of peripherals requires
the use of grounded shielded signal cables.
FCC Compliance Information
This device complies with Part 15 of FCC Rules.
Operation is subject to the following two conditions:
(1) This device may not cause harmful interference, and
(2) This device must accept any interference received.
Including interference that may cause undesired operation.