Vitelcom Mobile Technology SP-100 TRI-BAND GSM 850/1800/1900 MHz MOBILE PHONE User Manual 6p 70p
Vitelcom Mobile Technology, S.A. TRI-BAND GSM 850/1800/1900 MHz MOBILE PHONE 6p 70p
Contents
- 1. Users Manual 1 of 2
- 2. Users Manual 2 of 2
Users Manual 1 of 2
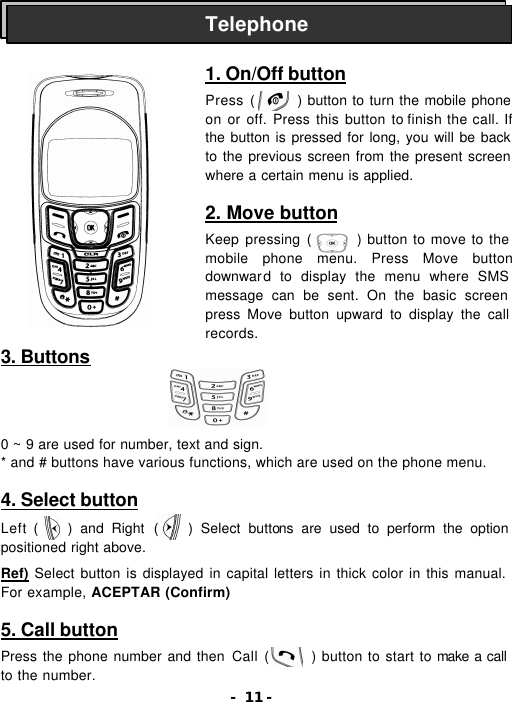

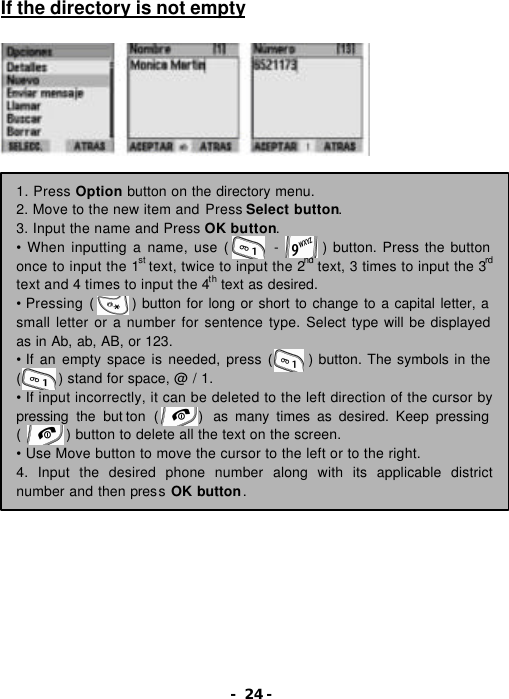
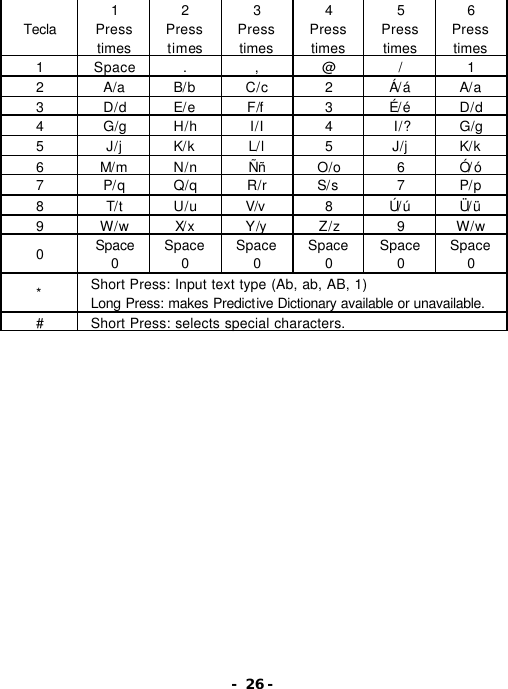
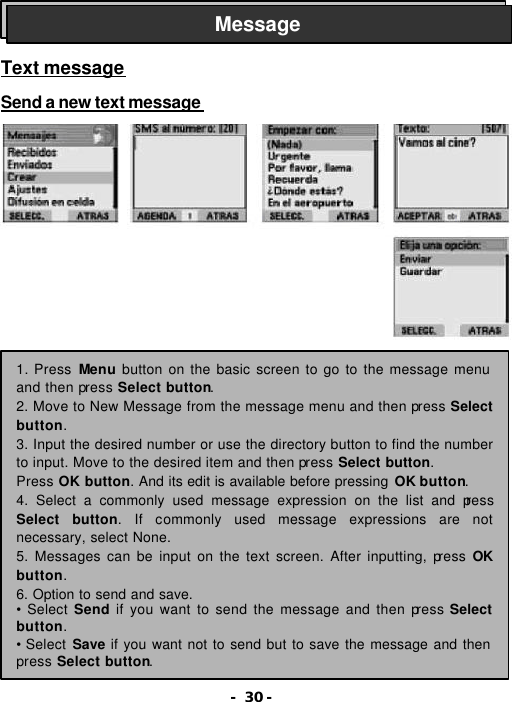
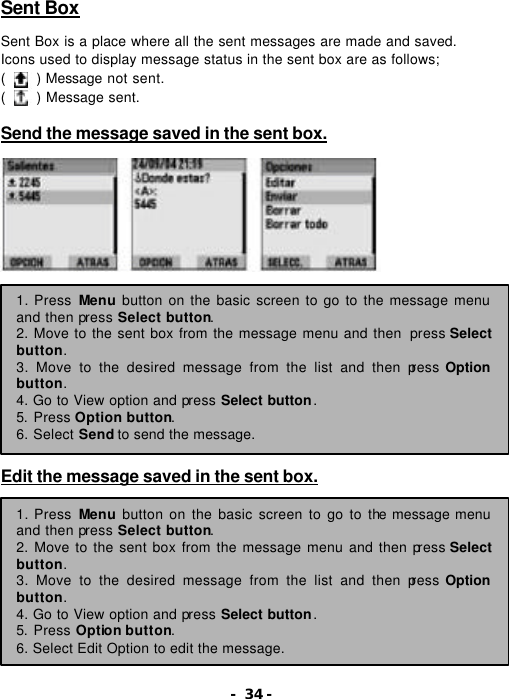
![- 25 - If the directory is empty 1. Press New on the directory menu and press Select button. 2. Input the name and press OK button. 3. Input the phone number and press OK button. Ref) Quick save- Press the phone number on the basic screen and then press Save button. Input the name and press OK button. Ref) Keep pressing ( ) button to display the list of special characters. . , ¿? _ ! ‘ ” - + * = ( ) [ ] < > { } | # $ % : ; ^ \ & ~ ¥ Ç @ ¡ /](https://usermanual.wiki/Vitelcom-Mobile-Technology/SP-100.Users-Manual-1-of-2/User-Guide-591815-Page-15.png)