Vocera Communications B1000 Vocera B1000 Badge User Manual UserGuide
Vocera Communications Vocera B1000 Badge UserGuide
Contents
Manual

Vocera User’s Guide

ii ··· Copyrights and Trademarks
©2002 Vocera Communications, Inc. All rights reserved.
Vocera Communications is a trademark of Vocera Communications, Inc.
All other trademarks, service marks, registered trademarks, or registered
service marks are the property of their respective owners.
Vocera Communications, Inc.
20230 Stevens Creek Blvd.
Cupertino, CA 95014
tel :: +1 408 790 4100
fax :: +1 408 790 4101
www.vocera.com
Part No.: TBD

Important Safety Instructions ··· iii
Important Safety Instructions
Badge and Battery Charger Safety
When using a Vocera badge or battery charger, always follow basic safety pre-
cautions to reduce the risk of fire, electric shock, and injury, including the fol-
lowing:
1. Read, understand, and follow all warnings and instructions in the product
documentation and on the product itself.
2. Only use the battery charger indoors.
3. Unplug the charger from the wall outlet before cleaning. To clean the
badge, battery, or charger, wipe with a damp cloth. Do not use liquid clean-
ers or aerosol cleaners.
4. Do not position the badge battery, or battery charger near water; for exam-
ple, near a sink, wash bowl, or toilet. Do not spill liquid of any kind on the
product. Doing so may short out parts, causing damage to the product and
creating the risk of fire or electric shock.
5. Do not place the charger on an unstable surface, as a fall may cause serious
damage to the charger.
6. Never place the badge or charger near or over a radiator or heat register.
Do not operate the charger in a cabinet or other enclosure unless proper
ventilation is provided.
7. Operate the charger only from the type of power source indicated on its
label. Use only with the power adaptor that comes with the charger, or
with a Vocera-approved replacement.
8. Only use the Vocera badge with a Vocera battery.
9. Do not allow anything to rest on the charger’s power cord. Do not locate
the charger where the cord may be damaged, or where the cord may cause
someone to trip. Keep the power cord away from operating machinery.
10. Do not overload outlets or extension cords, as this may cause a fire or elec-
trical shock.
11. Do not put anything other than a Vocera badge or Vocera battery into a
charger slot, as other objects may touch dangerous voltage points or short
out parts, which could result in fire or electric shock.
12. To reduce the risk of electric shock, do not disassemble any part of the
product. Take the badge or charger to qualified service personnel when ser-
vice or repair work is required. Opening or removing covers may expose you
to dangerous voltages or other risks. Incorrect reassembly can cause electric
shock when you use the product again.
13. Take the badge or charger to a qualified service provider:
• If the power cord or plug on the charger is damaged or frayed.
• If liquid has been spilled into the badge or charger, or if the badge or
charger has been exposed to rain or water.

iv ··· Important Safety Instructions
• If the badge or charger does not operate normally after you follow the
operating instructions.
• If the badge or charger has been dropped or damaged.
• If the badge or charger exhibits a distinct degradation in performance.
Battery Safety
1. Use only the batteries supplied with the product, or Vocera-approved
replacements.
2. Do not use the battery to power any device other than a Vocera badge.
3. Charge the battery only in a Vocera charger, and according to the instruc-
tions in “Charging the Battery” on page 41. These instructions are also
included with the charger.
4. Do not charge the battery in a place where static electricity is generated, or
let the battery touch something that is statically charged.
5. The battery can be stored at temperatures between -20° C and 40° C, and
can be charged within a 0° C to 45° C. Do not use the battery when tem-
peratures exceed 60° C or fall below -20° C.
6. Do not put battery into a microwave oven, conventional oven, dryer, or
high pressure container, or dispose of the battery in a fire. Under these con-
ditions, the cell may explode.
7. Do not open, puncture, or subject the battery to strong physical shock.
8. Stop using the battery if it exhibits abnormal heat, odor, color, deformation,
or is in an abnormal condition.
9. If leakage or foul odor is detected, it is especially important to keep the bat-
tery away from fire. If liquid leaks onto your skin or clothes, wash well with
fresh water immediately.
10. If liquid leaking from the battery gets into your eyes, do not rub your eyes.
Rinse the eyes well, and consult a doctor immediately.
11. Handle batteries with care to avoid shorting the battery with conducting
materials such rings, bracelets, and keys. The battery may overheat, causing
burns.
12. After the battery has reached the end of its useful life, we recommend recy-
cling the materials at a recycling center in your community. If you choose to
dispose of the batteries, consult the regulations that are in force in your
locale.
13. When recycling or discarding the battery, make it non-conductive by apply-
ing vinyl tape to the terminals located on the side edges of the battery.

Table of Contents ··· v
Table of Contents
Important Safety Instructions . . . . . . . . . . . . . . . . . . . . . . iii
Badge and Battery Charger Safety . . . . . . . . . . . . . . . . . . iii
Battery Safety . . . . . . . . . . . . . . . . . . . . . . . . . . . . . . . . . . iv
Welcome to Vocera . . . . . . . . . . . . . . . . . . . . . . . . . . . . . . . .1
Getting Started . . . . . . . . . . . . . . . . . . . . . . . . . . . . . . . . . . .3
Badge Features . . . . . . . . . . . . . . . . . . . . . . . . . . . . . . . . . 6
Badge Display and Button Operation . . . . . . . . . . . . . . . . 7
Badge Indicators and Warnings . . . . . . . . . . . . . . . . . . . 11
Adjusting the Volume . . . . . . . . . . . . . . . . . . . . . . . . . . . 13
Using Hold and Do Not Disturb . . . . . . . . . . . . . . . . . . . . 13
Cleaning the Badge . . . . . . . . . . . . . . . . . . . . . . . . . . . . 14
Charging the Battery . . . . . . . . . . . . . . . . . . . . . . . . . . . 14
Battery Disposal . . . . . . . . . . . . . . . . . . . . . . . . . . . . . . . 17
Basic Calling . . . . . . . . . . . . . . . . . . . . . . . . . . . . . . . . . . . . .19
Logging In and Out . . . . . . . . . . . . . . . . . . . . . . . . . . . . 19
Recording Names and Greetings . . . . . . . . . . . . . . . . . . . 20
Calling Other Badge Users . . . . . . . . . . . . . . . . . . . . . . . 20
Calling Groups . . . . . . . . . . . . . . . . . . . . . . . . . . . . . . . . 21
Training the Genie . . . . . . . . . . . . . . . . . . . . . . . . . . . . . 21
Answering a Call . . . . . . . . . . . . . . . . . . . . . . . . . . . . . . 22
Using Buttons to Answer “Yes” or “No” . . . . . . . . . . . . 23
Ending a Call . . . . . . . . . . . . . . . . . . . . . . . . . . . . . . . . . 23
Call Waiting . . . . . . . . . . . . . . . . . . . . . . . . . . . . . . . . . . 23
Putting a Caller on Hold/Releasing the Hold . . . . . . . . . . 23
Using Do Not Disturb . . . . . . . . . . . . . . . . . . . . . . . . . . . 24
Recording a Message . . . . . . . . . . . . . . . . . . . . . . . . . . . 24
Playing, Saving, and Deleting Voice Messages . . . . . . . . . 25
Advanced Commands . . . . . . . . . . . . . . . . . . . . . . . . . . . . .29
Blocking and Accepting Calls . . . . . . . . . . . . . . . . . . . . . 29
Forwarding Calls . . . . . . . . . . . . . . . . . . . . . . . . . . . . . . . 29
Making a Conference Call . . . . . . . . . . . . . . . . . . . . . . . 30
Adding or Removing Yourself From a Group . . . . . . . . . . 33
Recording Names for Groups . . . . . . . . . . . . . . . . . . . . . 33
Locating a User or Group Member . . . . . . . . . . . . . . . . . 34
Getting Information . . . . . . . . . . . . . . . . . . . . . . . . . . . . 35

vi ··· Table of Contents
Email and Text Messaging . . . . . . . . . . . . . . . . . . . . . . . . . 37
Sending a Voice eMail Message . . . . . . . . . . . . . . . . . . . .37
Sending an Email Message to a Badge . . . . . . . . . . . . . . .38
Viewing Text Messages . . . . . . . . . . . . . . . . . . . . . . . . . .38
Caring for the Badge . . . . . . . . . . . . . . . . . . . . . . . . . . . . . . 41
Charging the Battery . . . . . . . . . . . . . . . . . . . . . . . . . . . .41
Cleaning the Badge . . . . . . . . . . . . . . . . . . . . . . . . . . . . .44
The User Console . . . . . . . . . . . . . . . . . . . . . . . . . . . . . . . . . 45
Troubleshooting . . . . . . . . . . . . . . . . . . . . . . . . . . . . . . . . . 47
The Genie Has Trouble Understanding You . . . . . . . . . . .47
Your Badge Is “Beeping” or “Chirping” . . . . . . . . . . . . . .48
Your Badge Keeps Resetting . . . . . . . . . . . . . . . . . . . . . .49
The Badge Logs Out When Placed in the Charger . . . . . . .49
You Hear a “Busy Signal” When You Press the Call Button 49
License and Sales Agreement . . . . . . . . . . . . . . . . . . . . . . . 51
Specifications and Compliance Statements . . . . . . . . . . . 53
System Specifications . . . . . . . . . . . . . . . . . . . . . . . . . . . .53
Federal Communications System (FCC) . . . . . . . . . . . . . . .55
Industry Canada Statement . . . . . . . . . . . . . . . . . . . . . . .55
Badge Operation and EME Exposure . . . . . . . . . . . . . . . .56
Index . . . . . . . . . . . . . . . . . . . . . . . . . . . . . . . . . . . . . . . . . . . 59
Command Reference . . . . . . . . . . . . . . . . . . . . . . . . . . . . . . 63
Summon/Dismiss the Genie . . . . . . . . . . . . . . . . . . . . . . .63
Log In/Out . . . . . . . . . . . . . . . . . . . . . . . . . . . . . . . . . . . .63
Record Your Name and Greeting . . . . . . . . . . . . . . . . . . .63
Basic Calls . . . . . . . . . . . . . . . . . . . . . . . . . . . . . . . . . . . .63
Voice Messages . . . . . . . . . . . . . . . . . . . . . . . . . . . . . . . .64
Call Blocking/Accepting . . . . . . . . . . . . . . . . . . . . . . . . . .64

Welcome to Vocera ··· 1
Welcome to Vocera
Your new Vocera badge provides fast, simple, person-to-person com-
munications over your company’s wireless network. You don’t need to
memorize a number, and you don’t need to page someone and wait for
a response. Using voice commands, Vocera instantly connects you to the
people you need, reducing phone tag, overhead paging, and physically
searching for a person. It also gives you the freedom to be mobile, even
when you are expecting an important call.
Your badge has a built-in speaker, microphone, radio, and a display that
shows caller ID and messages. Badges communicate with each other
using your in-house wireless local area network (LAN). This design per-
mits you to be reached even in areas where cellular phones experience
“dead spots.” And since badges transmit and receive calls in a different
frequency range than cellular phones, they can be used in areas where
cellular phones are prohibited because of concerns about interference
with other equipment.
A central computer, the Vocera server, controls all badge communica-
tions. As you use your badge, you are prompted by the “Genie,” which
is the voice interface to this computer. The Genie recognizes simple
commands in a “verb-noun” format. For example:
“Call Charles Jones.”
“Record a message for Tech Support.”
“Block all calls.”
Your badge includes three attachment options. You can wear the
badge on a lanyard around your neck, or use the pocket clip or universal
clip to attach the badge to your clothing. These options enable you to
do other tasks while you use the badge. They also position the badge
microphone in the correct position for optimal speech recognition.
Always wear your badge only with a Vocera-supplied or
approved attachment option.

2 ··· Welcome to Vocera
This Guide describes how to use and care for your badge:
• Before you use your badge for the first time, read the Important
Safety Instructions on page iii.
•Getting Started on page 3 describes all the features of the badge,
and give instructions on how to attach the lanyard, pocket clip, and
universal clip, wear the badge, log in, adjust the volume, and charge
the battery.
•Basic Calling on page 19 describes how to use the most common
calling and message features.
•Advanced Commands on page 29 describes more complex
operations, such as conference calls, and gives commands that are
available only if your badge is given special permissions on the
Vocera server.
•Email and Text Messaging on page 37 describes how to send
email messages from and to a badge, and how to view them on the
badge display. It also provides an overview of how to send a text
message from the User Console.
•Troubleshooting on page 47 tells you how to diagnose and
correct simple problems.
•Specifications and Compliance Statements on page 53 provide
badge specifications and regulatory information.
•License and Sales Agreement on page 51 defines the terms
under which this badge, and the software that controls the badge,
may be used.
•Index on page 59 helps you find information quickly.
•Command Reference, at the back of this Guide, lists the most
commonly-used commands.
Getting Started ··· 3
Getting Started
If this is the first time that you are using a badge, you can get started
right away by following these simple steps.
1. Charge the battery. New batteries must be charged before use. See
“Charging the Battery” on page 41 for instructions.
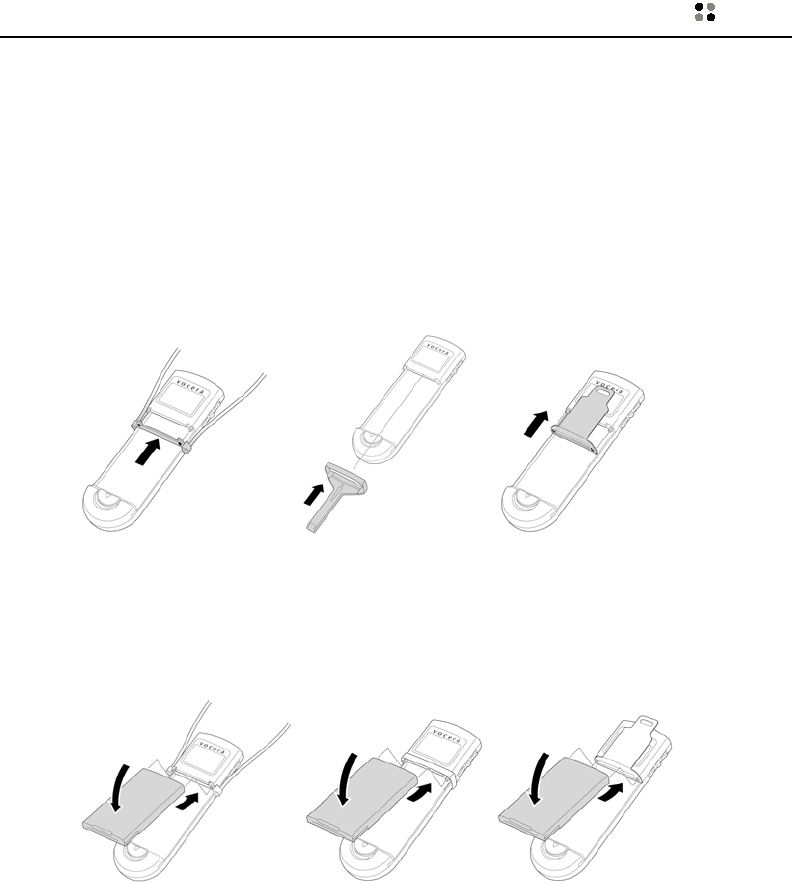
2. Choose an attachment and connect the lanyard, pocket clip, or uni-
versal clip to the badge. You must do this before you install the bat-
tery.
3. Install the battery. To do this, slide the holes in the top of the battery
over the small pegs at the top of the badge’s battery compartment
and then press down gently to seat the battery.
The badge will begin its startup sequence. Wait until the badge dis-
play reads either “Logged Out” or shows someone’s name.
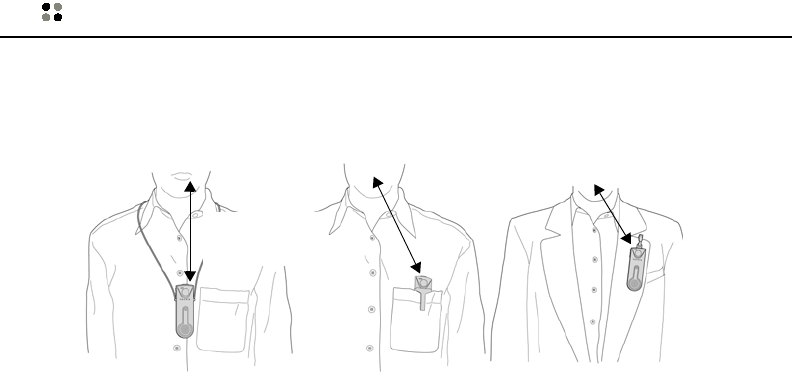
4. Put the badge on, and make sure it is in the proper position.
Lanyard Pocket Clip Universal Clip
Lanyard Pocket Clip Universal Clip
4 ··· Getting Started
For optimal speech recognition, the microphone on the top of the
badge should be between 6 to 12 inches (15 to 30 centimeters)
from your mouth.
5. Log in: Press the Call button and wait for the Genie to answer.
If the Genie answers by saying “Good morning,” “Good after-
noon,” or “Good evening” and them prompting for your
name: Say your first and last names.
If the Genie answers by saying “Vocera” or by playing a tone:
Say “Log me in as <your first and last name>. (example: “Log me in
as John Smith.”)
6. Record your name.
Press the Call button, wait for the Genie to answer, and then say
“Record my name.”
The Genie will prompt you to record your name. If you do not
record your name, the Vocera system uses speech synthesis to say
your name.
Your badge is now ready for use. You can press the Call button at any
time, wait for the Genie to answer, and then give the Genie a command
such as:
“Call Jim Olsen.”
“Record my greeting.”
“Play my messages.”
Lanyard Pocket Clip Universal Clip
6 to 12 inches
(15 to 30 cm)

Getting Started ··· 5
See the following sections to familiarize yourself with all the features of
your badge.
• As you use the badge, pay attention to the indicators and alerts
described on page 11, particularly the low battery alert that warns
you when you need to charge the badge’s battery.
• For a complete description of Vocera voice commands, see “Basic
Calling” on page 19 and “Advanced Commands” on page 29.
• “Command Reference” on page 63, at the back of this Guide,
is a handy quick reference to the most commonly-used voice
commands.
6 ··· Getting Started
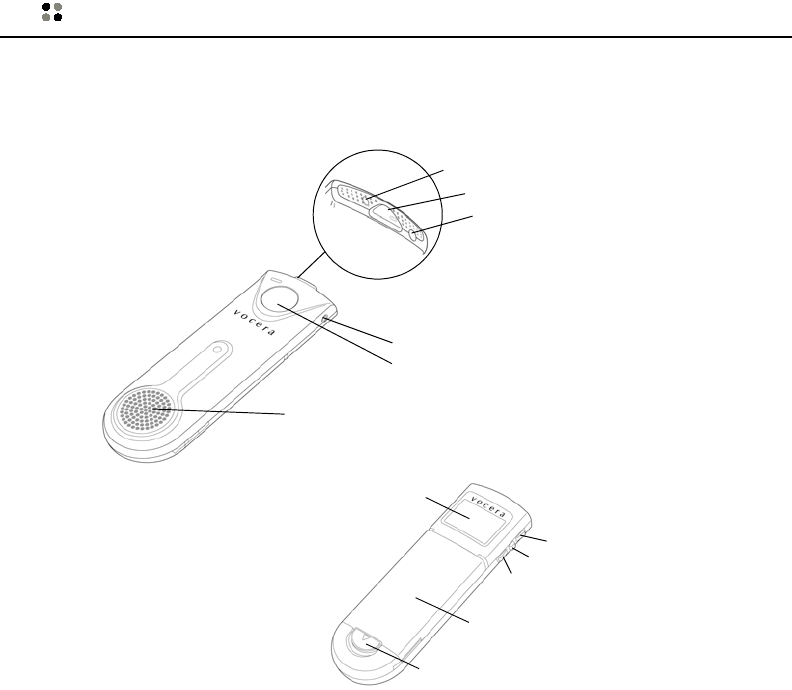
Badge Features
Call Button
Begins and ends all voice communications such as making calls, sending
and listening to messages, and recording your name and greeting. You
can also use the Call button to answer “Yes” to any Genie prompt that
requires a yes or no response.
Speaker
Speaker volume can be adjusted using the buttons on the left side of
the badge. (See “Adjusting the Volume” on page 13.)
Headset Jack
Accepts an earphone/microphone-style headset (sold separately),
for times when you want more privacy or are working in a noisy
Speaker
Call Button
Headset Jack
Front View
Hold/DND Button
Indicator Light
Microphone
Top View
Battery
Battery Latch
Up Button
Badge Display
Select Button
Down Button
Back View
Getting Started ··· 7
environment. The badge’s own microphone and speaker operations are
suppressed when a headset is attached.
Microphone
Has a unidirectional design that gathers and transmits speech while
minimizing the pickup of background noise.
Hold/DND Button
Places a current call on hold and puts the badge in Do Not Disturb mode
when the badge is idle. (See “Using Hold and Do Not Disturb” on
page 13.)
Indicator Light
Provides message alerts and out-of-network and low battery warnings.
(See “Badge Indicators and Warnings” on page 11.)
Badge Display
Displays badge status, text messages, and control menus. (See the fol-
lowing section for a complete feature description.)
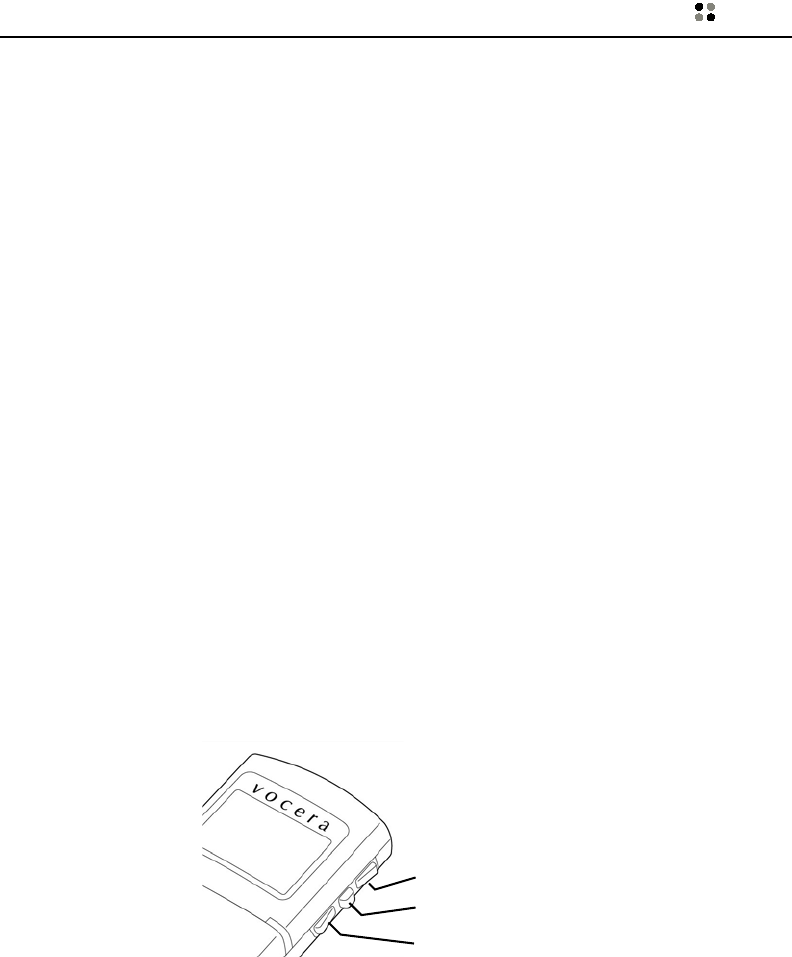
Badge Display and Button Operation
As you look at the display on the back of the badge, you can press the
Up button to scroll through the main menu choices: Messages, Volume,
Power Off, Info, and then back to the main screen. (If you use the Down
button, the order is reversed.)
To see information about any of these choices, press the Select button.
The follow sections describe the button operations in detail.
Up
Select
Down
8 ··· Getting Started
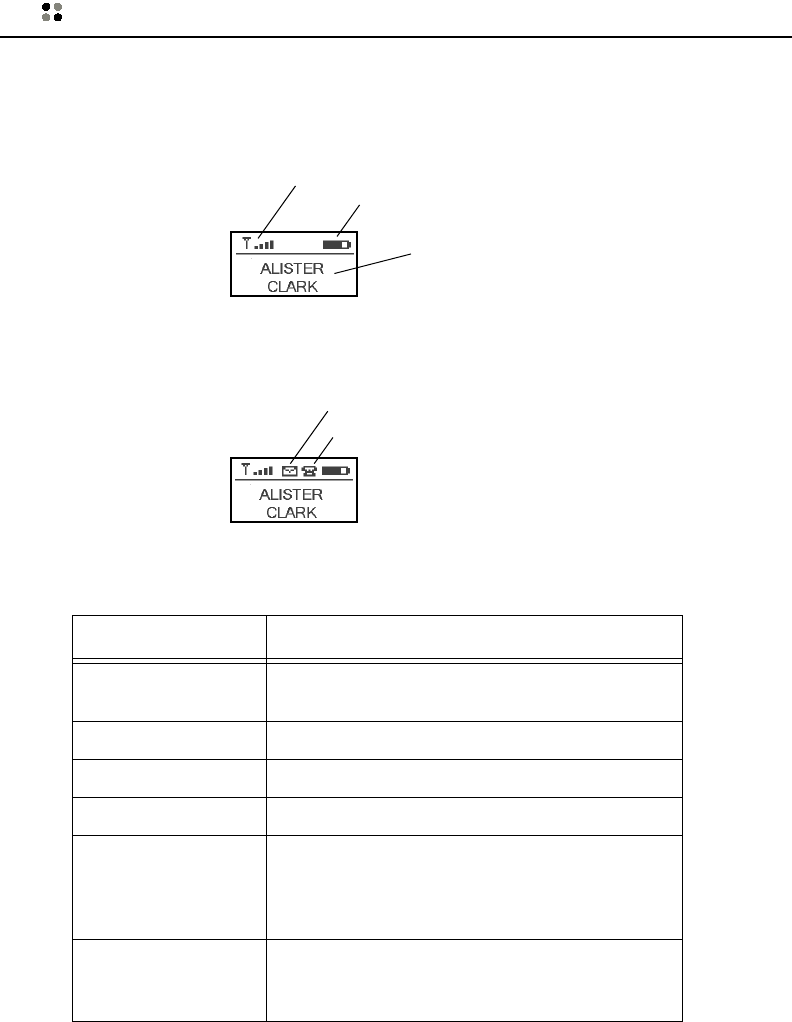
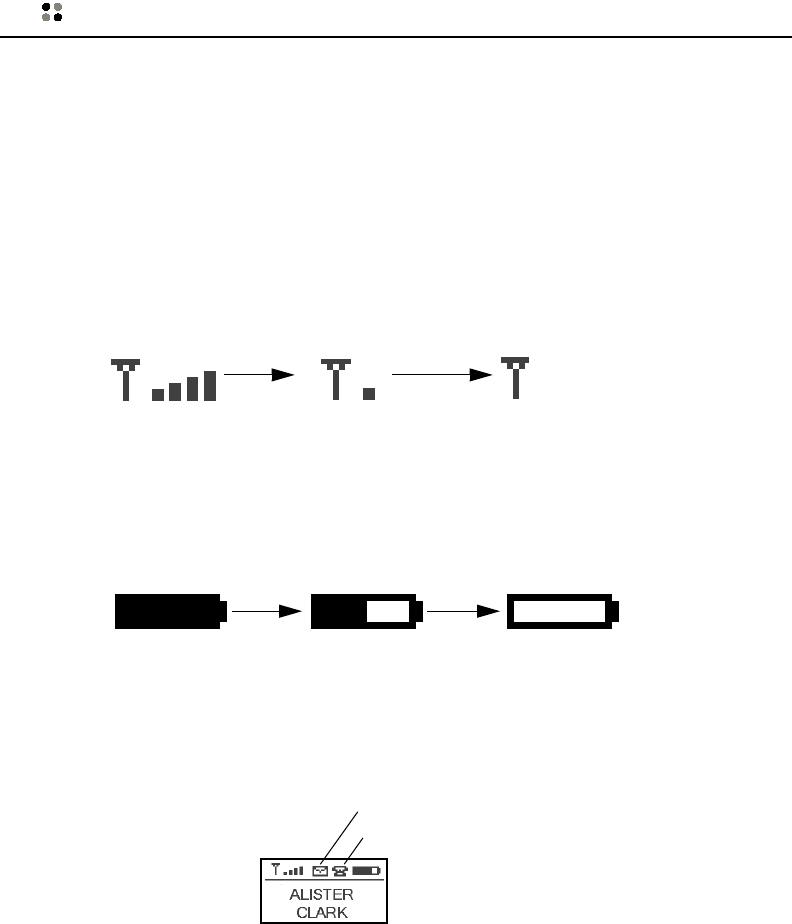
Main Screen
When you turn on the badge, the badge display shows a message area
with symbols above it.
In addition, when you have new text or voice messages, the following
symbols appear:
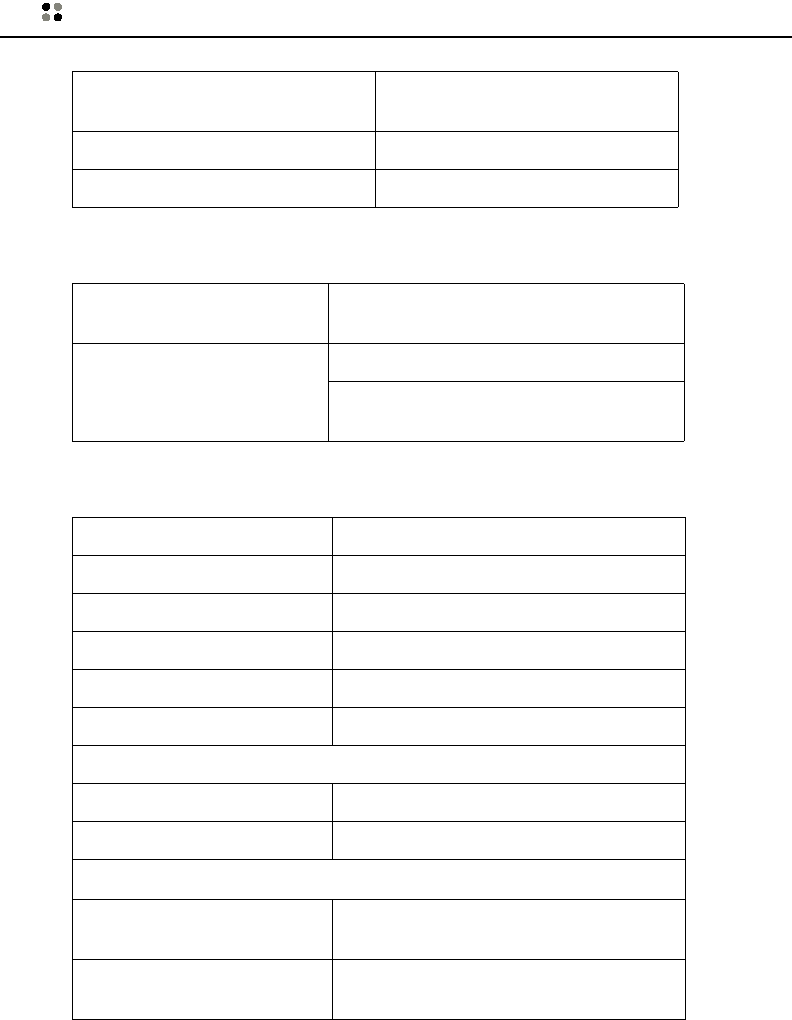
The message area may show one of the following:
Message Meaning
Name - not blinking The name of the person who currently is logged in
to the system using the badge.
Name - blinking The caller’s name.
Vocera The badge is communicating with the Genie.
Logged out No one is logged in using the badge.
Searching for Access
Points The badge is out of network range, or is not able to
connect with the network. If you are sure you are
within network range, contact the Vocera adminis-
trator.
Searching for Server The badge within network range, but is not com-
municating with the Vocera server. Contact the
Vocera administrator.
Signal Strength
Battery Level
Message Area
Unplayed Voice Message
Unplayed Text Message
Getting Started ··· 9
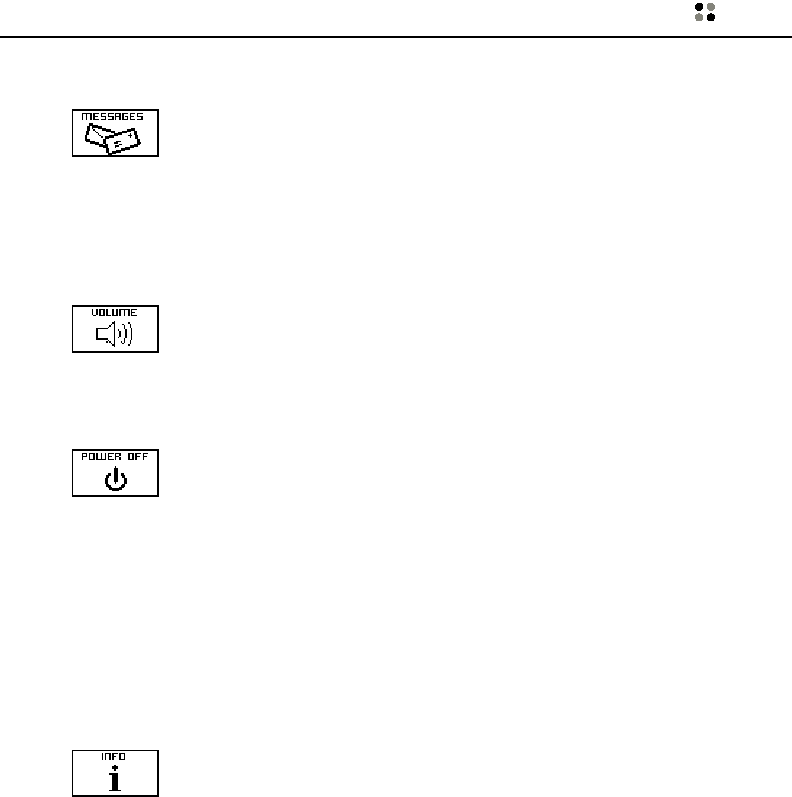
Messages
Your badge can display email messages and text messages
that were sent from the Vocera User Console. To read
these messages, select the Messages feature. See “View-
ing Text Messages” on page 38 for instructions on how to
do this.
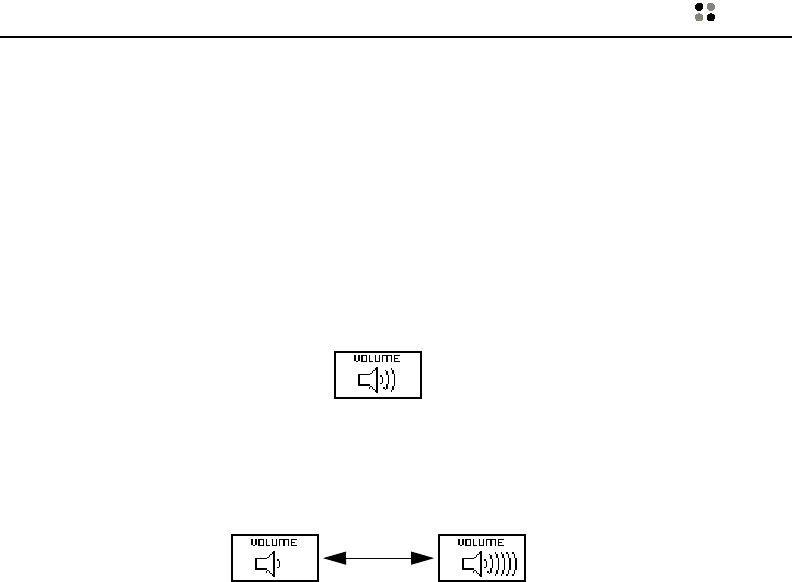
Volume
The Volume feature controls the sound level of the speaker.
See “Adjusting the Volume” on page 13 for instructions on
how to change the volume.
Power Off
Power Off turns off all power to the badge and the badge
display, preserving the battery charge when you are away
from the network.
To turn off the power:
1. Press the Up button until you see the Power Off icon.
2. Press the Select button to select the Power Off feature.
To turn power on again, press the Call button.
Info
The Info feature gives you information about the badge,
and how it is connected to the network.
The Info menu contains the following selections:
•Battery
The battery strength in volts. The badge operates correctly when
the battery level is 3.5 V or greater.
•Badge MAC
A unique identifier that is also used as the Badge ID by the Vocera
server.

10 ··· Getting Started
•Location
Shows the location name or the physical network address of the
access point with which your badge is currently communicating.
•Badge IP
The network address of the badge.
• Server IP
The network address of the Vocera server.
•Version
The badge firmware version.
• SSID
The network name for the group of access points to which your
badge is authorized to connect. (SSID stands for Service Set Identi-
fier.)
• AP MAC
The physical network address assigned to the access point to which
the badge is currently connected.
•User
The name of the person who is currently logged in to the network
using this badge.
Most of the Info features are intended to be used by your system admin-
istrator for diagnostic purposes.
To view badge information:
1. Press the Up button until you see the Info icon:
2. Press the Select button to select the Info feature.
3. Press the Up or Down button to scroll through the information
screens.
There may be secondary menus associated with each selection. To
choose a selection from a secondary menu, press the Select button.
To move back to a higher-level menu, press the Call button.
Getting Started ··· 11
4. When you are finished, press and hold the Select button until the
display returns to the main screen.
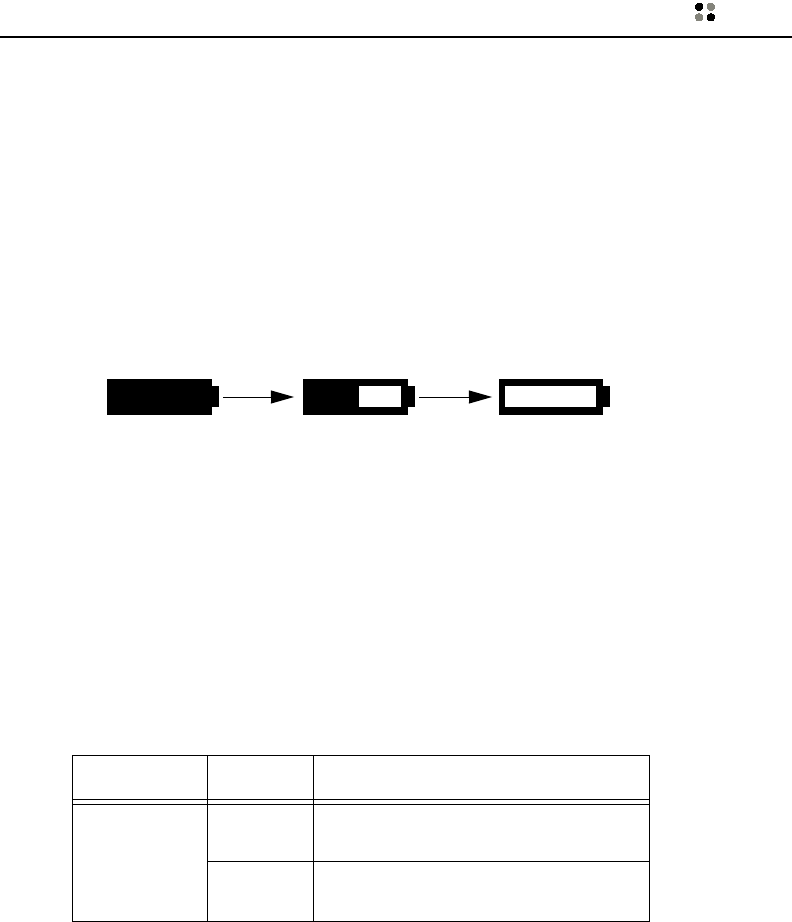
Badge Indicators and Warnings
The most common condition for which you need a warning is a low bat-
tery. There are several easy ways to find out if you need to recharge the
battery:
1. The green indicator light on the top of the badge turns red and
blinks quickly.
2. The battery level indicator on the badge display shows “empty.”
3. An alert tone plays at regular intervals.
NOTE: This tone may be disabled by the Vocera Administrator.
The following sections describe the other indicator light conditions and
audible alert features of your badge.
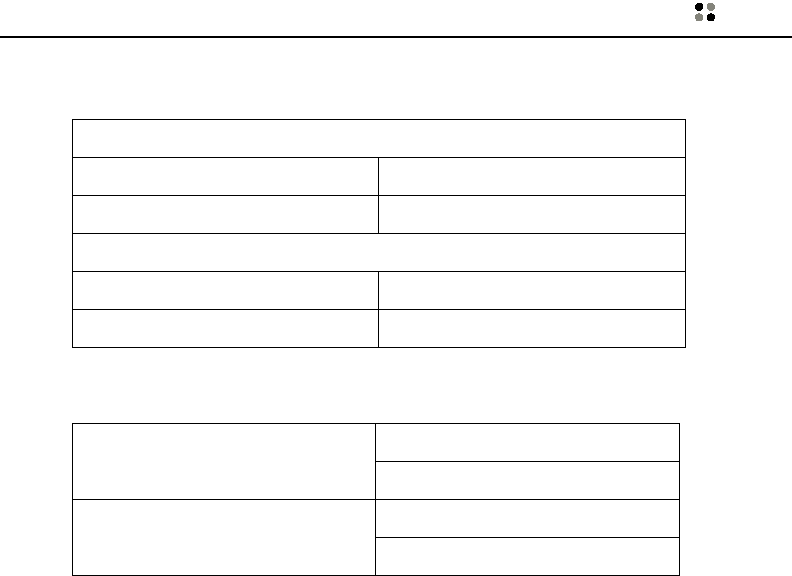
Indicator Lights
The color and blink rate of the indicator light on the top of the badge
give you the following information:
Color Blink Rate Meaning
Green Slow Normal operation. No new voice or text
messages
Fast Normal operation and you have new
voice and/or text messages
Fully charged Partially used Empty
12 ··· Getting Started
The Hold/DND button has a yellow indicator light that blinks when a call
is on hold or you have put the badge in Do Not Disturb mode.
Alert Tones
The Vocera administrator chooses the alert tones that you hear by set-
ting options for your badge on the Vocera server. Your badge may play
the following alert tones:
If you find that you are not receiving a warning that you would find
useful, or if you do not want to be notified of any or all of the above
conditions, ask the Vocera administrator to change your settings. The
administrator can also set an option to disable all alerts when the badge
is in Do Not Disturb mode.
Red Slow Badge is out of range or is not communi-
cating with the Vocera server.
If the badge is out of range, you will see
the message “Searching for Access
Points” on the badge display
If the badge is in-range, but is not con-
necting to the server, you will see the
message “Searching for Server.”
Fast The battery needs to be recharged.
Tone Meaning
On/Off Network Alert You just moved out of the range of the wireless
network, or you just moved in to the wireless
network range.
Low Battery Alert Your battery needs to be recharged.
Text Message Alert You just received a new text message
Voice Message Alert You just received a new voice message.
Color Blink Rate Meaning
Getting Started ··· 13
Adjusting the Volume
To adjust the volume when you are on a call
Press the Up button as many times as necessary to increase the volume
to the level you want, or press the Down button to decrease the vol-
ume.
To adjust the volume when the badge is idle:
1. Turn the badge over to view the display.
2. Press Up until you see the Volume icon:
3. Press Select to select the Volume feature.
4. Press Up as many times as necessary to increase the volume to the
desired level, or press Down to decrease the sound level. The display
changes accordingly.
5. Press Select to set the new level and return to the main screen.
Using Hold and Do Not Disturb
The Hold/DND (Do Not Disturb) button has two functions associated
with calls: to hold calls in progress, and to put the badge in Do Not Dis-
turb mode when the badge is idle.
• To put a call on hold, press the Hold/DND button. To release the
hold, press the button again.
While a call is on hold, you can press the Call button to summon
the Genie. When the Genie answers, you can call another badge
user, check for new messages, or issue any other command. Once
the command has been carried out and the operation is completed,
the Genie automatically reconnects you with the party on hold.
• To put the badge into Do Not Disturb mode, press the Hold/DND
button when no call is in progress. Callers are told that you are
unavailable, and are invited to leave a message, or are forwarded to
another destination, if forwarding is active for your badge. (See
“Forwarding Calls” on page 29.)
14 ··· Getting Started
A small yellow indicator on the Hold/DND button blinks when the badge
is in Hold or Do Not Disturb mode.
You can also use the Hold/DND button to answer “No” to any Genie
prompt that requires a yes or no response.
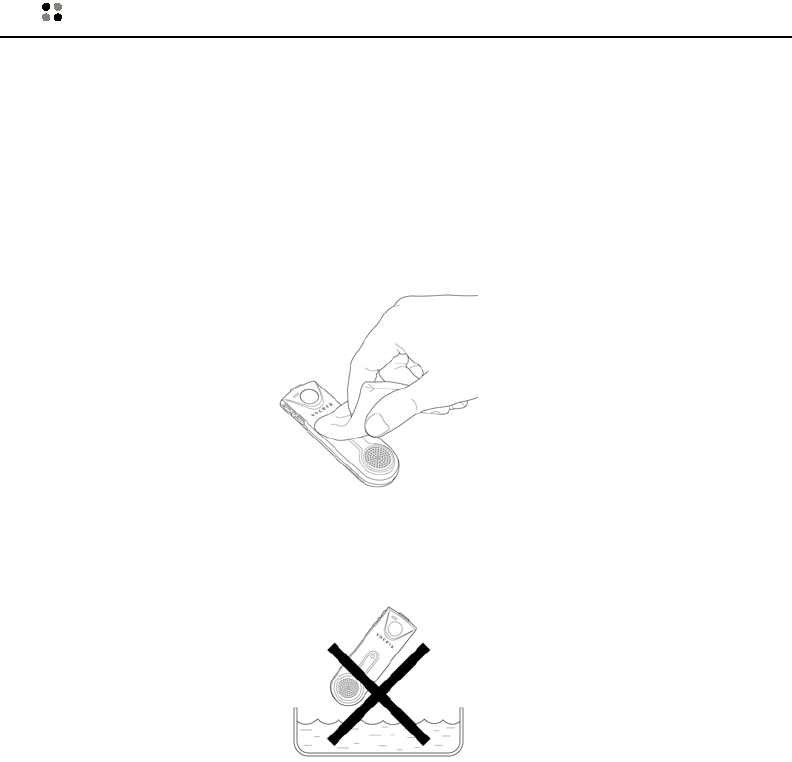
Cleaning the Badge
To clean a Vocera badge, use a soft, damp cloth or disinfectant wipe.
IMPORTANT: Do not immerse the badge in water: the badge speaker,
microphone, and battery pack are not watertight. Strong detergents or
abrasive cleaners can damage the badge’s finish.
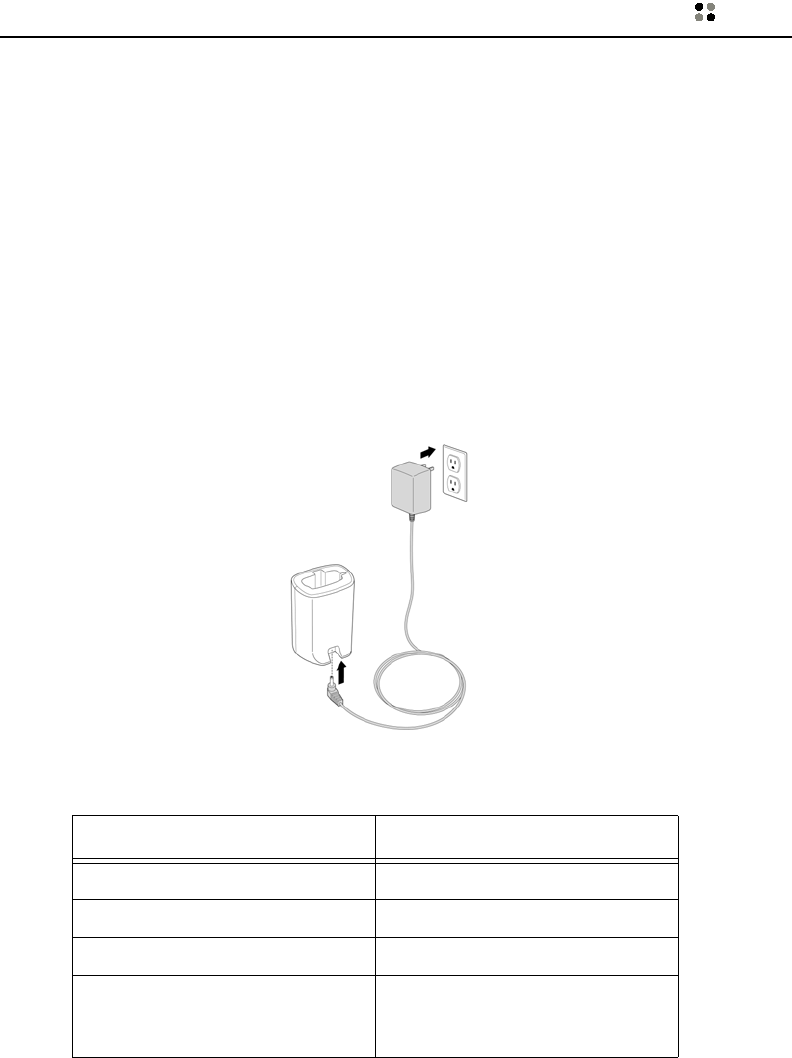
Charging the Battery
The battery can be charged with or without the badge. Before you
begin, if the charger is not already plugged in, attach the single-prong
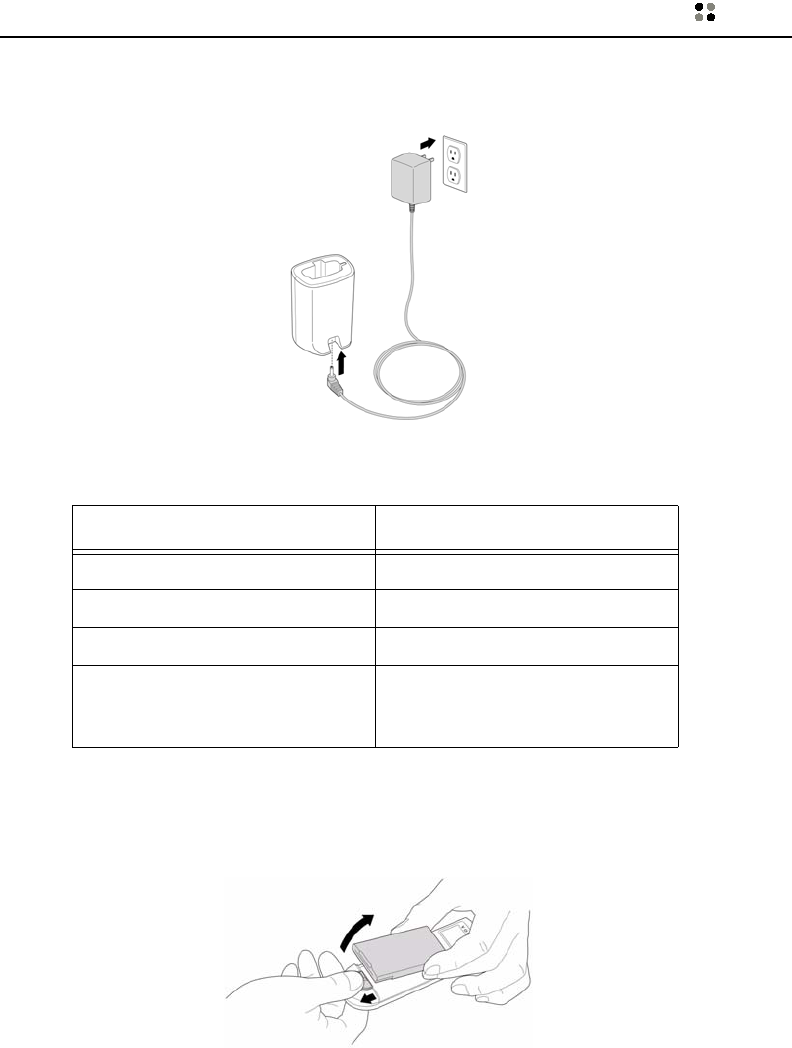
Getting Started ··· 15
plug to the outlet in the charger, and insert the two-pronged power
plug into a 110 V AC outlet.
The indicator light on the top of the charger shows one of the following
conditions:
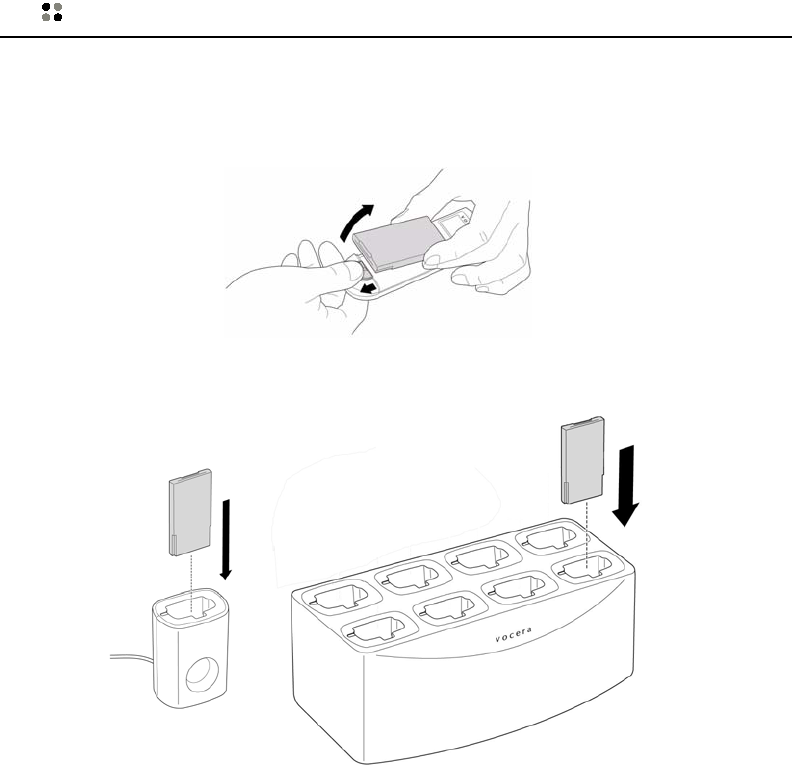
Charging the Battery Without the Badge
1. Slide the battery latch toward the bottom of the badge and remove
the battery with the other hand.
Indicator Meaning
Light off No battery or badge in charger.
Blinking green Battery is charging.
Steady green Battery is fully charged.
Red Battery is unable to charge. Discard
battery (see “Battery Disposal” on
page 17) and charge a new one.
16 ··· Getting Started
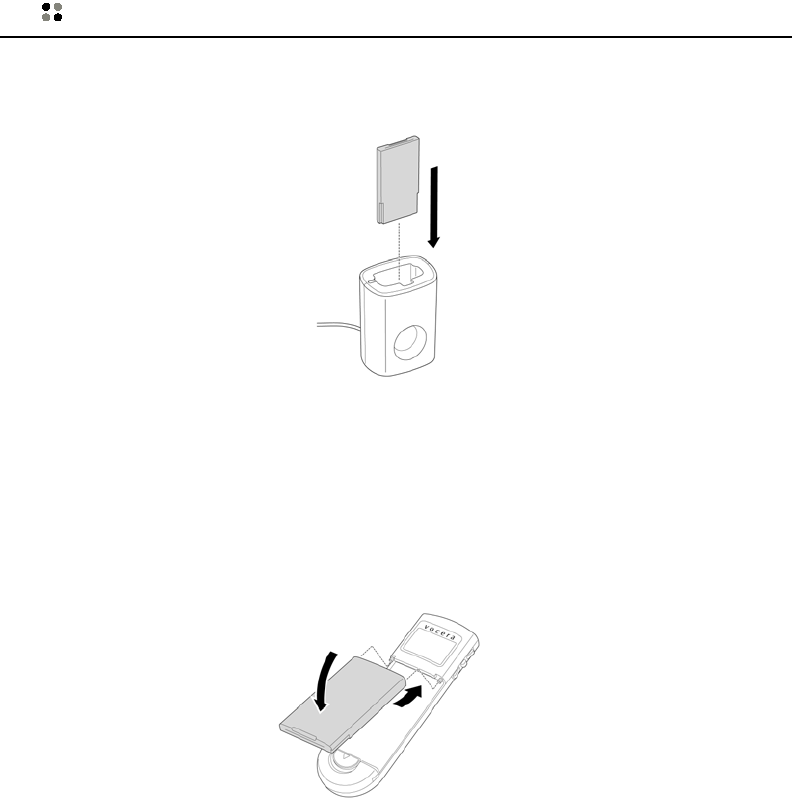
2. Insert the battery into the charger, making sure the battery label
points toward the middle of the charger.
The green indicator light on the top of the charger will begin to
blink when the badge is positioned correctly in the charger, and will
continue to blink while the battery is charging. When the indicator
glows steadily, the battery is fully charged.
3. Remove the battery from the charger, and slide the holes in the top
of the battery over the small pegs in the badge’s battery compart-
ment. Press down gently to seat the battery in the badge.
Getting Started ··· 17
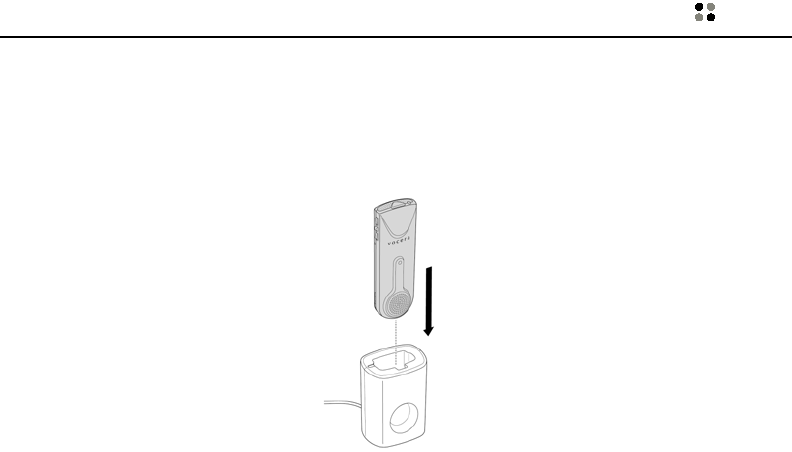
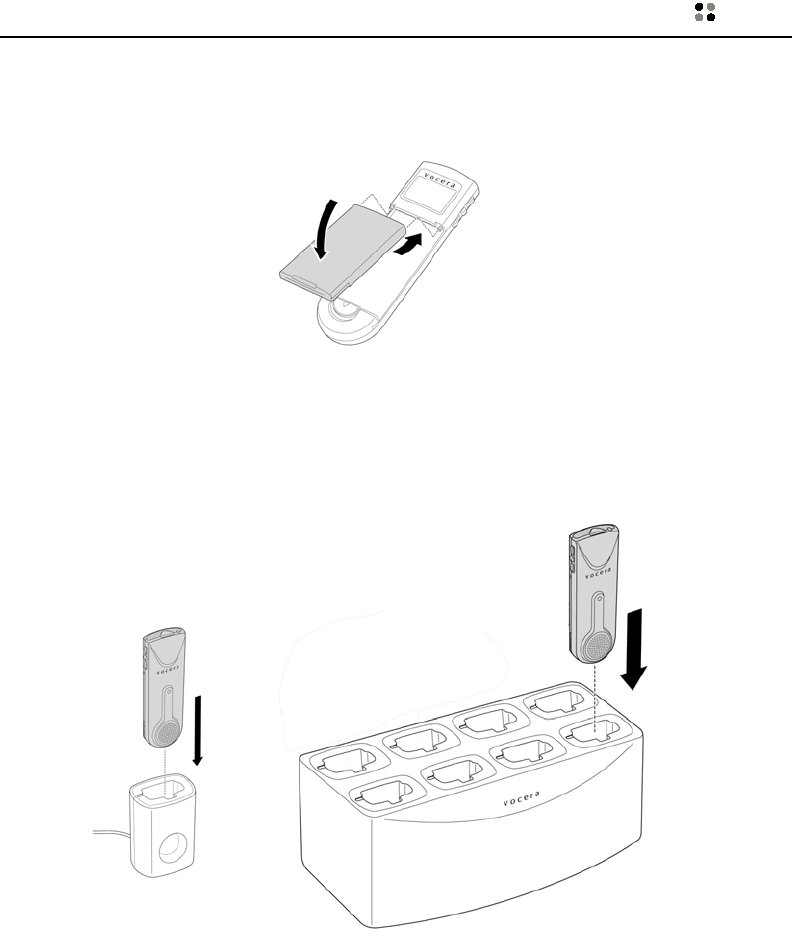
Charging the Battery With the Badge
You can also insert the entire badge into the charger, to charge the bat-
tery without removing it. If you have a single-bay charger, this method
also allows you to use the badge while the battery is charging:
NOTE: If you want to use the badge while it is charging, but you find
that you are logged out when you put the badge in the charger, contact
the Vocera administrator.
Battery Disposal
The badge’s lithium ion batteries can be recharged up to 300 times.
After a battery has reached the end of its useful life, we recommend
recycling the materials whenever possible. You can recycle the batteries
at any commercial or municipal recycling center that accepts lithium ion
batteries.
If you choose to dispose of the batteries, consult the regulations that are
in force in your locale: some local regulations require special disposal
methods for lithium ion batteries, while others permit the batteries to
be placed in landfills.

18 ··· Getting Started

Basic Calling ··· 19
Basic Calling
Your Vocera badge provides one-touch communications. To begin any
kind of call, or to record or play messages, press the Call button on the
badge to summon the Vocera Genie. The Genie will answer with a tone,
a prompt, or both (depending on the setting that is active for your
badge) and will then be ready to accept a voice command.
The following sections describe the most frequently-used voice
commands, by category, followed by tables that summarize the
commands.
Logging In and Out
Your installation may assign a badge to you, or you may share badges
with other users.
If your badge is assigned only to you, you are logged in all the time.
Just press the Call button to begin using the badge.
If your organization shares badges, press the Call button to sum-
mon the Genie.
• If no one is logged in to the system with the badge, the Genie will
greet you and ask you to say your name. Say your first and last
name and you are logged in.
• If someone is already logged in using that badge, the Genie will
answer with a standard tone or greeting. Say “Log me in as” and
then say your name. The other user is now logged out, and you are
logged in to the system.
After you log in, the Genie bows out. To issue another command, press
the Call button again.
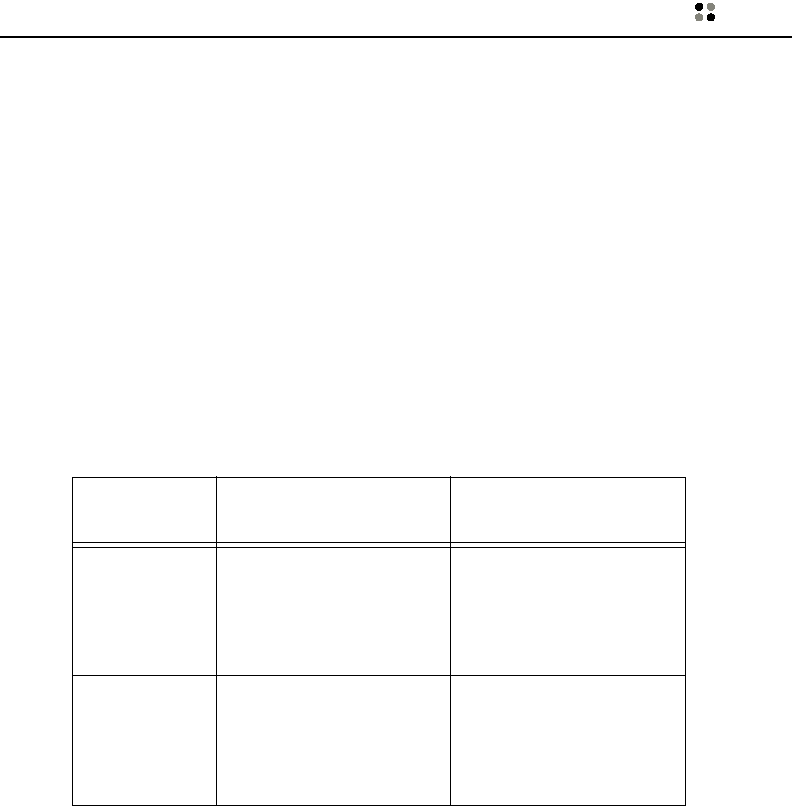
Action Recommended Commands
(Italics indicate an example.) Alternative Forms
Logging in Log me in as John Smith. Log in as John Smith.
Log on as John Smith.
Log me on as John Smith.
Logging out Log me out. Log out.
20 ··· Basic Calling
You can be logged in to the system on only one badge at a time. If you
log in using a second badge, you will be immediately logged out from
the first badge.
NOTE: When you turn the badge off or remove the battery for charg-
ing, you are still logged in to the system. The Vocera administrator may
choose a setting that forces a logout when you place your badge (but
not the battery by itself) in the charger.
Recording Names and Greetings
There are many situations where the Genie says your name: for exam-
ple, to announce your name when you call someone, or to confirm a
command when someone attempts to call you or leave a message. To
allow your callers hear your name in your own voice, and to enable call-
ers to hear a personal greeting when they leave messages, use the fol-
lowing voice commands to record your name, and to record, play, and
erase your greeting.
Calling Other Badge Users
To begin a call, press the Call button, wait for the Genie to answer, and
then tell the Genie to “Call (the user’s name)”. If the person you are
calling is already on a call, a tone will notify him or her that someone
else is trying to call. (See “Call Waiting” on page 23.)
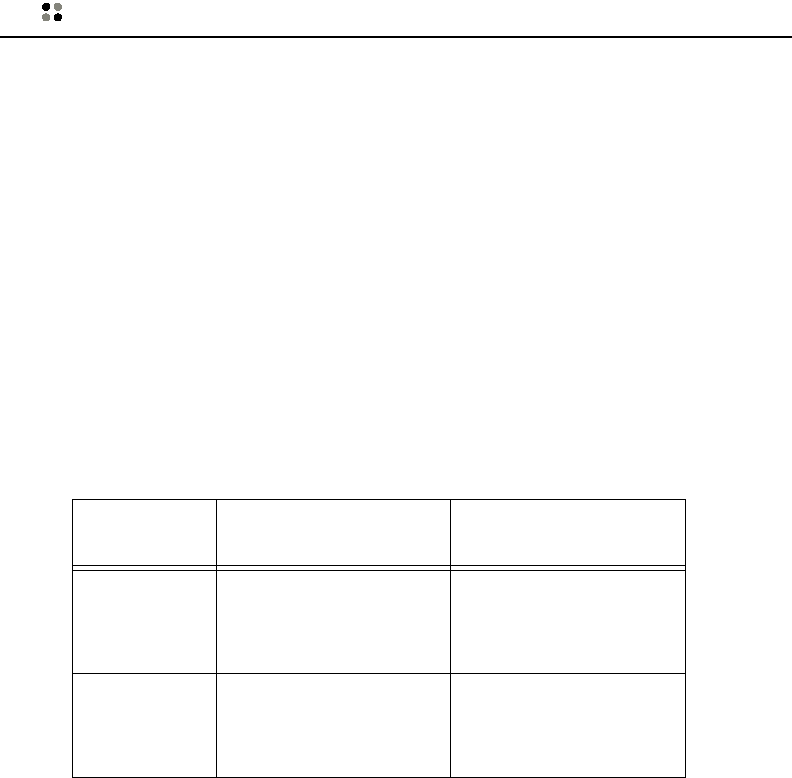
Action Recommended Commands Alternative Forms
Recording your
name Record name. Record my name.
Recording/play-
ing back/eras-
ing your
greeting
Record greeting.
Play back greeting.
Erase greeting.
Record my greeting.
Play back my greeting.
Erase my greeting.

Basic Calling ··· 21
When you call another user and that person is not available, you will be
prompted to leave a message, or you may be forwarded to another
user.
Calling Groups
The Vocera Administrator may create groups of badge users. If this is
the case, the Administrator will provide a list of groups for you to use in
commands.
When you call a group, you are actually calling an available member of
that group, not everyone in the group. The Vocera server determines
whom to call first, based on an option the Administrator has chosen.
To begin a call to a group, press the Call button, wait for the Genie to
answer, and then tell the Genie to “Call (the group’s name).” The
Vocera server searches for an available member of that group.
If no one in the group is available, you will either be prompted to leave a
message (which will be sent to all members of the group) or your call
will be forwarded, depending on the way the group is set up.
Training the Genie
If you find that the Genie has difficulty understanding you when you try
to say the name of an individual, group, or location, or if you simply
want to call someone by a nickname, you can train the Genie to recog-
nize the name as it is spoken by you. To do this:
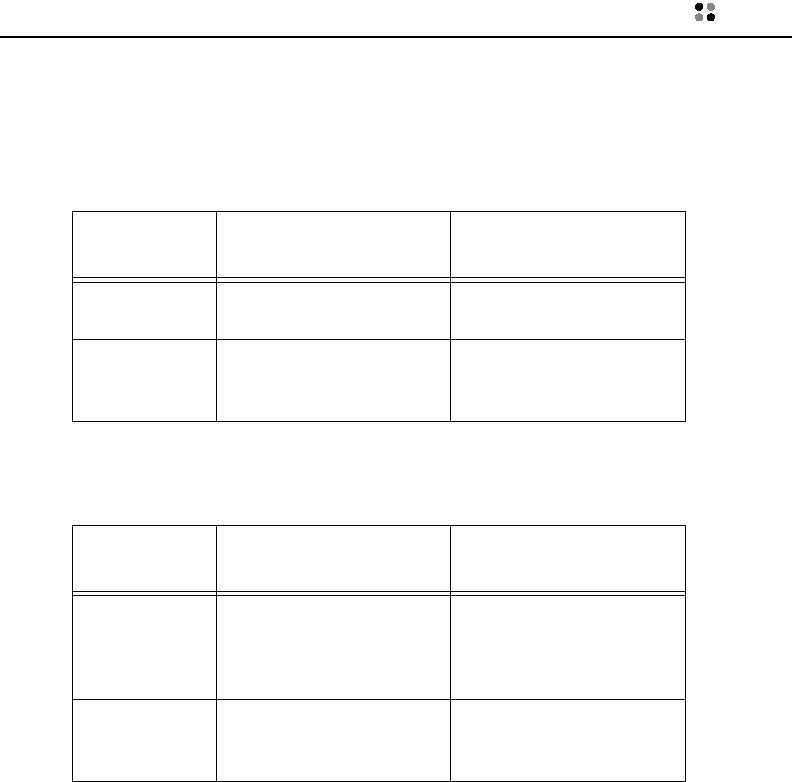
Action Recommended Commands
(Italics indicate an example) Alternative Forms
Calling another
badge user Call John Smith. Find John Smith.
Get me John Smith.
Contact John Smith.
Action Recommended Commands
(Italics indicate an example) Alternative Forms
Calling a group
member Call Tech Support. Find Tech Support.
Get me Tech Support.
Contact Tech Support.
22 ··· Basic Calling
1. Press the Call button, wait for the Genie to answer, and then say
“Learn a name.”
2. When prompted, spell the name of the individual or group.
3. When prompted, say the name (or nickname) of the individual or
group.
If you change your mind, you can tell the Genie to “Unlearn a name.”
The Genie will prompt you for the necessary information.
Answering a Call
When someone calls your badge, you will hear a tone, and the Genie
may prompt you, asking if you want to talk to the caller.
To accept the call, answer “Yes” or press the Call button.
To reject the call, say “No,” or press the Hold/DND button.
When you reject a call, the caller will be prompted to leave a message or
will be transferred to another number, depending on the option the
Vocera administrator set on the server.
If Auto Answer for Incoming Calls is enabled for your badge, all your
calls will be connected immediately, without any action on your part.
Calls will not be put through if you told the Genie to block calls or you
put your badge in Do Not Disturb mode, however. (See “Using Do Not
Disturb” on page 24 and “Blocking and Accepting Calls” on page 29.)
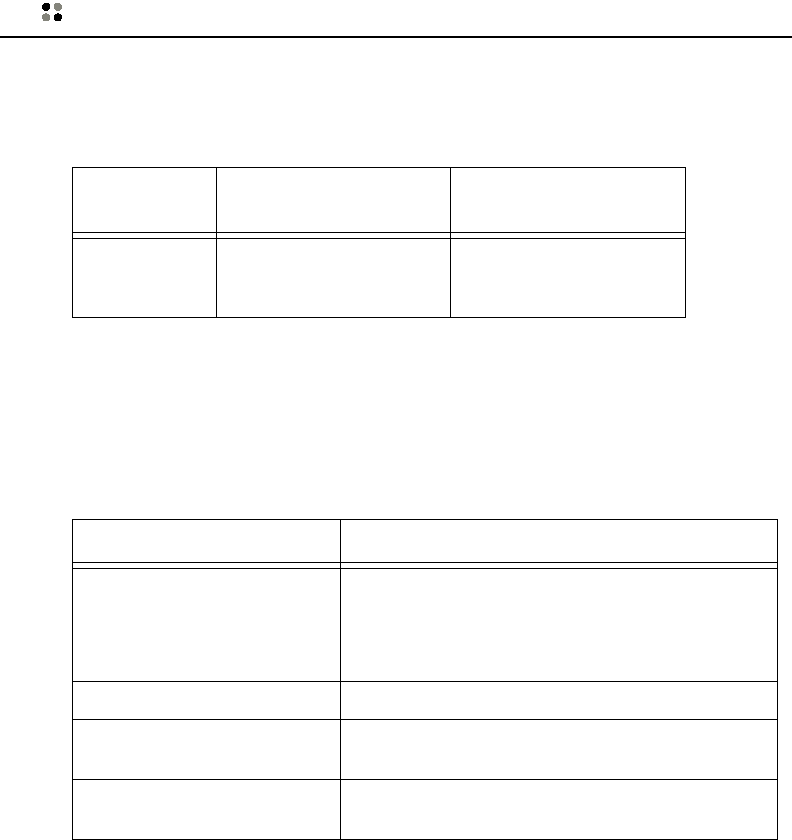
Action Recommended Commands
(Italics indicate an example) Alternative Forms
Train the Genie
to recognize
the way you
say the name
of a user,
group, or loca-
tion
Learn name.
Learn group name.
Learn location name.
Learn a name.
Learn a group name.
Learn a location name.
Delete a
learned user,
group, or loca-
tion name
Unlearn name.
Unlearn group name.
Unlearn location name.
Unlearn a name.
Unlearn a group name.
Unlearn a location name.

Basic Calling ··· 23
Using Buttons to Answer “Yes” or “No”
When a Genie prompt requires a “Yes” or “No” answer, you can say
your response or you can press a button to respond.
To answer “Yes,” press the Call button
To answer “No,” press the Hold/DND button.
As described in the previous section, you can use these buttons to
accept or reject a call. You can also use the buttons to confirm that you
want to save or delete recorded messages, names, and greetings, or
that you want to call a certain party, for example.
Ending a Call
To end a call, press the Call button.
If the other party ends the call, you will be disconnected automatically.
Call Waiting
If you hear a call waiting tone while a call is in progress, it means that
another party is trying to call you. The name of the caller will flash on
your badge display.
To accept the call, press the Call button. The first call is put on hold
and the second call is connected. To end the second call and return to
the original call, press the Call button again.
To refuse the call, ignore the tone, or press the Hold/DND button. The
second call will be treated as an unanswered call; that is, the caller will
be prompted to leave a message, or if you have call forwarding enabled,
will be forwarded to the destination you chose. (See “Forwarding Calls”
on page 29.)
Putting a Caller on Hold/Releasing the Hold
To hold a call, press the Hold/DND (Do Not Disturb) button on the top
of the badge. The yellow indicator on the Hold/DND button blinks when
hold or Do Not Disturb is active. To release the hold, press the Hold/DND
button again.
When a call is on hold, you can press the Call button, and when the
Genie answers, call another badge, send a message, or give the Genie

24 ··· Basic Calling
any other authorized command. This operation is used, for example, in
supervised conference calls (see “Supervised Conferencing” on
page 31).
Using Do Not Disturb
There may be times when it is inconvenient to receive calls and be noti-
fied of messages. (When you are attending a meeting, for example.) The
easiest way to block calls is to press the Hold/DND button on the top of
your badge. When you are ready to accept calls again, press the Hold/
DND button again.
When you activate Do Not Disturb mode, some calls may still be put
through. Callers with VIP Status will be asked if the call is urgent. If they
confirm that it is, the Genie will call your badge and ask if you want to
take the call. (VIP Status is a permission the Vocera Administrator may
grant to some users and not to others.)
To block calls using voice commands, see “Blocking and Accepting
Calls” on page 29.
Recording a Message
You can record messages for individual users, or you can send messages
to all members of a group simultaneously. You can also specify that the
message is urgent.
Urgent messages are treated differently from standard message in the
following ways:
• Urgent messages will be played before standard messages, regard-
less of the order in which they are received.
• If VIP status is enabled for your badge, the recipient will be notified
of your message immediately, even if he or she put the badge in Do
Not Disturb mode, or issued a command to block calls.

Basic Calling ··· 25
The following table shows the commands for recording voice messages.
Playing, Saving, and Deleting Voice Messages
The voice messages that users leave when they call your badge are
stored on the Vocera server. When you play your messages, the Genie
stays connected, so you can use voice commands to save or delete each
message, or to move to the next or previous message in the queue.
Voice messages, both played and unplayed, are deleted when they
reach an age that is chosen by the Vocera administrator. You can use the
Save command to protect a message from this automatic deletion. The
saved message then stays on the Vocera server until you tell the Genie
to delete it.
Action Recommended Commands
(Italics indicate an example) Alternative Forms
Sending a mes-
sage to a
badge user
Record a message for John
Smith.
Send a message to John
Smith.
Broadcasting a
message to a
group
Record a message for Tech
Support.
Send a message to Tech
Support.
Recording an
urgent mes-
sage for a
badge user
Record an urgent message
for John Smith. Send an urgent message to
John Smith.
Broadcasting
an urgent mes-
sage to a group
Record an urgent message
for Tech Support.
Send an urgent message to
Tech Support.
26 ··· Basic Calling
Use one of the following commands to begin playing messages:
The following table shows the commands you can use during message
play to replay, save and delete voice messages.
Action Recommended Commands
(Italics indicate an example) Alternative Forms
Playing new
(unplayed)
messages
Play messages.
Play my messages from
John Smith.
Play my messages from
Marketing.
Play back my messages...
Playing old
(previously
played)
messages
Play my old messages.
Play my old messages from
John Smith.
Play my old messages from
Marketing.
Action Recommended Commands
(Italics indicate an example) Alternative Forms
Replaying the
current
message
Repeat.
Saving the mes-
sage you just
played, or are
in the process
of playing
Save. Archive.
Playing the next
message Next. Skip.
Deleting the
message you
just played, or
are in the pro-
cess of playing
Delete message. Erase messages.

Basic Calling ··· 27
Deleting
messages with-
out playing the
message queue
Delete all messages
Delete messages from John
Smith.
Delete messages from Tech
Support.
Delete all my messages
Erase all my messages
Erase all messages from
John Smith.
Action Recommended Commands
(Italics indicate an example) Alternative Forms

28 ··· Basic Calling
Advanced Commands ··· 29
Advanced Commands
The following sections describe commands that require special badge
permissions or are a little more complicated than the basic calling
commands described earlier. The commands are grouped by category.
When a command requires a special permission, it is noted in the
description. The Vocera administrator enables or disables permissions
for each user. If you do not have permission to use a command that
requires one, the Genie will tell you.
Blocking and Accepting Calls
You can use the following voice commands to block and accept calls.
Some of these commands offer more flexibility than the comprehensive
blocking provided by the Hold/DND button.
When you activate call blocking, some calls that you would expect to be
blocked may still be put through. Callers with VIP Status will be asked if
the call is urgent. If they confirm that it is, the Genie will call your badge
and ask if you want to take the call. (VIP Status is a badge permission
the Vocera administrator may grant to some users and not to others.)
Forwarding Calls
When you cannot answer a call for any reason, or when you block all
calls, or put your badge in Do Not Disturb mode, your caller is usually
Action Recommended Commands
(Italics indicate an example) Alternative Forms
Blocking calls Block all calls.
Block all calls from John
Smith.
Block all calls except from
John Smith.
Hold all calls.
Hold all calls from John
Smith.
Hold all calls except from
John Smith.
Accepting calls Accept all calls.
Accept all calls from John
Smith.
Accept all calls except
from John Smith.
Take all calls.
Take all calls from John
Smith.
Take all calls except from
John Smith.
30 ··· Advanced Commands
prompted to leave you a message. As an alternative, you can forward
your unanswered calls to another badge user, or to a group.
Note that this is different from the way forwarding works with a tele-
phone. When you give the Genie a command to forward calls, your
badge will still receive calls. Only the badge calls that you do not answer
will be forwarded according to your instructions.
When you forward calls to a group, each call will be treated as though it
was made directly to the group. The system will attempt to call a group
member, according to the rules set up for the group. If no one is avail-
able, all group members will receive any message the caller chooses to
leave, or the call will be forwarded to a preselected destination, depend-
ing on the way the group is set up.
The following table summarizes the commands for forwarding to a user
or group:
Making a Conference Call
You can have a conference call with two other badge users (three
parties total, including you).
To begin a three-party conference call, you use the command Confer-
ence, and then say the names of the badge users you want to partici-
pate in the call. For example, “Conference James Madison and Mary
Lamb.”
You can also change any two-party call into a conference call by adding
another party. You can do this in either an unsupervised or supervised
way. The following sections describe each method.
Action Recommended Commands
(Italics indicate an example) Alternative Forms
Forwarding
calls to another
badge user or
to a group.
Forward all calls to John
Smith.
Forward all calls to Tech
Support.
Forward my calls to John
Smith.
Forward my calls to Tech
Support.
Stop forward-
ing (and accept
calls on badge
again).
Stop forwarding. Stop forwarding my calls.

Advanced Commands ··· 31
Unsupervised Conferencing
To add another party without speaking to the new person first:
1. While on a two-party call, press the Hold/DND button.
2. Wait for the Genie to confirm that the call is on hold, and then
press the Call button.
3. Say Invite <person’s first and last names>. All parties are then con-
nected in a conference call automatically.
Supervised Conferencing
You can speak to a new party before adding him or her to a conference
call, or as an alternative, you can switch between the new party and a
call in progress. To do this:
1. While on a two-party call, press the Hold/DND button.
2. Wait for the Genie to confirm that the call is on hold, and then
press the Call button.
3. Say Call <person’s first and last name>.
4. When you finish speaking to the new party, press the Hold/DND
button. The Genie will ask if you want the party to join the confer-
ence call.
5. Answer “yes” to add the person to the call (you are reconnected to
the original caller automatically), or “no” to put the individual on
hold and return to the original call.
6. If you answered “no,” press the Hold/DND button at any time to
switch between the original call and the new party. To end either
call and return to the other, press the Call button while talking to
the party or parties you want to dismiss.
The following table summarizes conference call options.
Action Recommended Commands
(Italics indicate an example) Alternative Forms
Initiating a
conference call Conference James Madison
and Mary Lamb.
Call John Smith.
(You can then add one
more party.)

32 ··· Advanced Commands
Adding
another party
to a call
(unsupervised
method)
Press the Hold/DND button
to put a call on hold. Press
the Call button to summon
the Genie and say:
Invite Robin Hood.
Adding
another party
to a call (super-
vised method)
Press the Hold/DND button
to put a call on hold. Press
the Call button to summon
the Genie and say:
Call Robin Hood.
Returning to
the original call Unsupervised conferenc-
ing: You are returned auto-
matically.
Supervised conferenc-
ing: Press the Hold/DND
button.
Answer “yes” to add the
new party and return to
the original call.
Answer “no” to put the
new party on hold and
return to the original call.
Switching
between a con-
ference call and
a call on hold
Press the Hold/DND button.
Ending a
conversation
and returning
to the other
party
Press the Call button while
talking to the person you
want to dismiss.
Action Recommended Commands
(Italics indicate an example) Alternative Forms
Advanced Commands ··· 33
Adding or Removing Yourself From a Group
If the Vocera administrator has enabled the required permission for your
badge, you can use voice commands to add yourself to or remove your-
self from a group.
You can also find out if you or other badge users are members of groups
by asking the Genie:
Recording Names for Groups
If you have permission to do Group Management, you can record a
group name (for example, “Sales”) and generic singular and plural
group member names (for example, “a sales representative” and “sales
representatives”) for any group.
Description Recommended Commands
(Italics indicate an example) Alternative Forms
Add yourself to
a group* Add me to Technical
Support.
Remove
yourself from a
group*
Remove me from Technical
Support.
Description Recommended Commands
(Italics indicate an example) Alternative Forms
Find the groups
to which you
belong
What groups am I in? What groups do I belong
to?
What groups am I a mem-
ber of?
Find out who is
in a particular
group
Who is in Technical Sup-
port?
34 ··· Advanced Commands
To record group names, press the Call button, wait for the Genie to
answer, and then tell the Genie “Record names for <group name>. The
Genie will prompt you through the process of recording all the names.
Locating a User or Group Member
To find a user or group member in your location, or in neighboring loca-
tions, press the Call button and tell the Genie to “Locate (user or group
name).”
You must have permission to use any of the Locate commands.
Action Recommended Commands
(Italics indicate an example) Alternative Forms
Recording
name prompts
for groups
Record name for Technical
Support.Record name prompts for
Technical Support.
Action Recommended Commands
Find another badge user or
group member*
IMPORTANT: “Find” will call
the user or group.
Locate John Smith.
Locate a member of Tech Support.
Find your current location*Where am I?
Find the current location of
another logged-in user*
Where is John Smith?
Find the nearest group
member*
Locate the closest member of Tech Support.

Advanced Commands ··· 35
Getting Information
You can use any of the following commands to get information about
the current state of your badge
Action Recommended Commands
(Italics indicate an example) Alternative Forms
Find out who
called while
you were out
of network,
were on
another call,
were blocking
calls, or your
badge was in
Do Not Disturb
mode
Who called? Who called me?
Find out who is
currently
blocked from
calling your
badge
Who is blocked? Whose calls are blocked?
Find out who is
logged in to
the badge
Who am I?
Find your cur-
rent location* Where am I?
Find the
current loca-
tion of another
logged-in user*
Where is John Smith?
Find out who is
in a particular
group
Who is in Tech Support? Who is a member of Tech
Support?
Find the groups
to which you
belong
What groups am I in? What groups am I a
member of?

36 ··· Advanced Commands
Email and Text Messaging ··· 37
Email and Text Messaging
The following sections describe how to send a voice message from your
badge to the email addresses of individual badge users or groups, how
to send a standard email message to a badge display, and how to view
messages on the badge display.
Sending a Voice eMail Message
You can send an email message from your badge to individual badge
users or groups. The message you record from your badge will be sent
as a .wav sound file that is attached to a generic text email message.
The recipient can play the message using Windows Media Player or any
other utility that the recipient has associated with sound files.
The email address to which the message is sent is the one that the
administrator entered for the badge user on the Vocera server. If you
send the email to a group, the email will be sent to all members of the
group.
NOTE: If a member of the group does not have an email address, the
Genie will tell you that at least one member did not have an email
address, and will ask if you want to send the message. If you choose to
send it, you will not be told who did not receive the message.
The following table gives the voice commands for sending a message
from a badge to an email address:
Action Recommended Commands
(Italics indicate an example) Alternative Forms
Sending an
email message
from a badge
Send an email message to
John Smith.
Send an email message to
Tech Support.
Record an email message
for John Smith.
Leave an email message for
John Smith.
Record an email message
for Tech Support.
Leave an email message for
Tech Support.

38 ··· Email and Text Messaging
Sending an Email Message to a Badge
You can send conventional email messages that the recipients can read
on their badge displays.
Before you can do this, you need to get the following information from
the Vocera administrator:
• The email address that is dedicated to the Vocera system
• The Login Name of the badge user to whom you want to send the
email
To send the message:
1. In your email client application, start a new message.
2. In the To: field, enter the email address of the Vocera system.
3. In the Subject: field, enter the Login Name of your intended recipi-
ent. (This will often be the person’s first initial followed by the last
name.)
4. In the message area, type your message. Be brief: the message will
be limited to the first 150 characters, or about 20 words. Additional
characters will not be displayed.
5. Send the email message in the usual way.
Viewing Text Messages
Vocera badges can receive email messages and text messages that are
sent from the User Console. To learn how an email message is sent to a
badge, see “Sending an Email Message to a Badge”, above. To see the
Send Text screen where you can enter text messages, see “The User
Console” on page 45. To simplify the following instructions, the term
“text messages” refers to messages from either source.
To view text messages on the badge display:
1. Hold the badge so that the display screen is visible.
2. Press the Up button once to see the Messages icon:

Email and Text Messaging ··· 39
3. Press Select to select the Messages feature. You will see a list of
message subjects, one subject per line. (If a subject is too long to fit
on a line, its display is truncated.) The newest messages are listed
first.
4. Use the Up and Down buttons to scroll through the list of subjects
until you see the message you want to read.
5. Press Select to display the message associated with the selected
subject. The display now shows the body of the message, and then
the sender’s name and the date the message was received by the
server. Use the Up and Down buttons to scroll through the mes-
sage, if necessary.
6. When you finish reading the message, press the Select button to
view a menu of message options. These are:
• TO NEXT MSG - skips to the next newest message. The current
message is saved, but is subject to automatic deletion (see below).
• DELETE MSG - erases the message from the badge memory and
from the Vocera server.
• SAVE MSG - saves the message and prevents it from being auto-
matically deleted. You can save up to 10 messages at one time.
• BACK TO LIST - returns to the list of text messages, where you
can select another message.
7. When you are finished, press and hold the Select button to discon-
tinue reading the messages and return to the main screen.
Text messages are stored on the Vocera server. You are allowed up to 20
text messages at a time, and of these 20, you can save up to 10 mes-
sages. When the message queue gets too long, the Vocera server
deletes the oldest unsaved messages until there is room for the newest
messages.
Each time you log in, copies of your messages are sent from the server
to the memory of the badge, so you can read your text messages even
when you are out of range of the wireless network. When you log off,
text messages are erased from the badge memory, but they remain on
the server.

40 ··· Email and Text Messaging
Caring for the Badge ··· 41
Caring for the Badge
The Vocera badge requires very little maintenance: just recharge the bat-
tery when the power gets low, and clean the badge when necessary.
The following sections describe how to charge the battery separately,
and when it is in the badge, and how to clean the badge.
Charging the Battery
Before you begin, read “Important Safety Instructions” on page iii.
The battery can be charged with or without the badge. Before you
begin, if the charger is not already plugged in, attach the single-prong
plug to the outlet in the charger, and insert the two-pronged power
plug into a 110 V AC outlet.
The indicator light on the top of the charger shows one of the following
conditions:
Indicator Meaning
Light off No battery or badge in charger.
Blinking green Battery is charging.
Steady green Battery is fully charged.
Red Battery is unable to charge. Discard
battery (see “Cleaning the Badge”
on page 44) and charge a new one.
42 ··· Caring for the Badge
Charging the Battery Without the Badge
1. Slide the battery latch toward the bottom of the badge and remove
the battery with the other hand.
2. Insert the battery into the charger, making sure the battery label
points toward the middle of the charger.
The green indicator light on the top of the charger will begin to
blink when the badge is positioned correctly in the charger, and will
continue to blink while the battery is charging. When the indicator
glows steadily, the battery is fully charged.
Caring for the Badge ··· 43
3. Remove the battery from the charger, and slide the holes in the top
of the battery over the small pegs in the badge’s battery compart-
ment. Press down gently to seat the battery in the badge.
Charging the Battery With the Badge
You can also insert the entire badge into the charger, to charge the bat-
tery without removing it. If you have a single-bay charger, this method
also allows you to use the badge while the battery is charging:
NOTE: If you want to use the badge while it is charging, but you find
that you are logged out when you put the badge in the charger, contact
the Vocera administrator.

44 ··· Caring for the Badge
Cleaning the Badge
To clean a Vocera badge, use a soft, damp cloth or disinfectant wipe.
Do not immerse the badge in water: the badge speaker, microphone,
and battery pack are not watertight. Strong detergents or abrasive
cleaners can damage the badge’s finish.
The User Console ··· 45
The User Console
The User Console is a browser-based application that you can use to
customize your personal information and some of the settings for your
badge.
Not all institutions will allow access to the User Console. If yours does,
the Vocera administrator will give you the URL (web address) of the
console, and will either give you login information, or will tell you to use
the Register button to create your own login information.
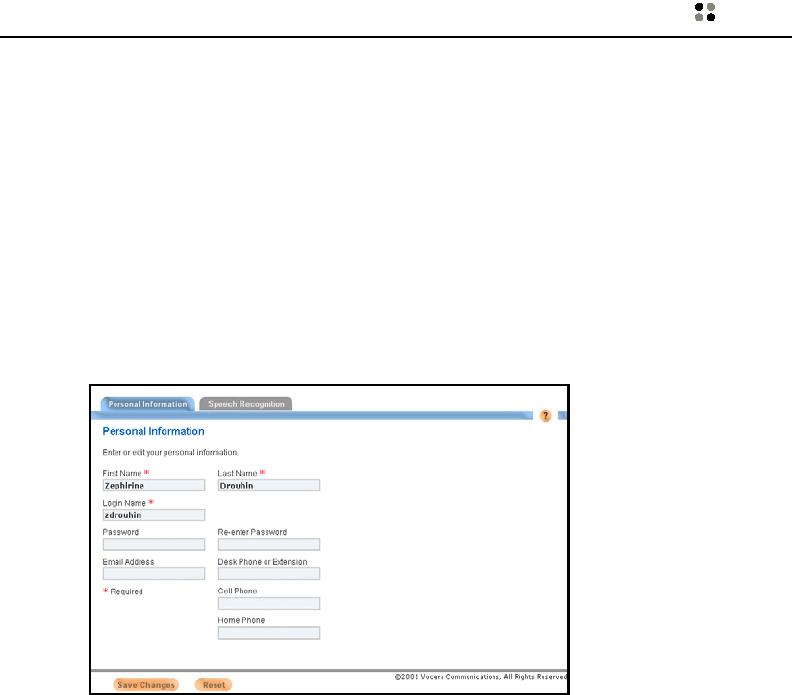
When you log in to the User Console, you see the Personal Information
screen:.
Other links allow you to
• Customize announcement settings for your badge.
• Specify call blocking or call forwarding options (which you can also
do with voice commands - see “Forwarding Calls” and “Blocking
and Accepting Calls” on page 29).
• Create Buddies. A buddy is person who you call by a nickname
when you give a command to the Genie. In addition to the nick-
name, which is required, you can assign a special ring tone and give
the buddy VIP status, which allows you to be contacted even when
you block calls or put the badge in Do Not Disturb mode. You
can have buddies who are badge users, and you can have Outside
Buddies to whom you can send email from your badge.
46 ··· The User Console
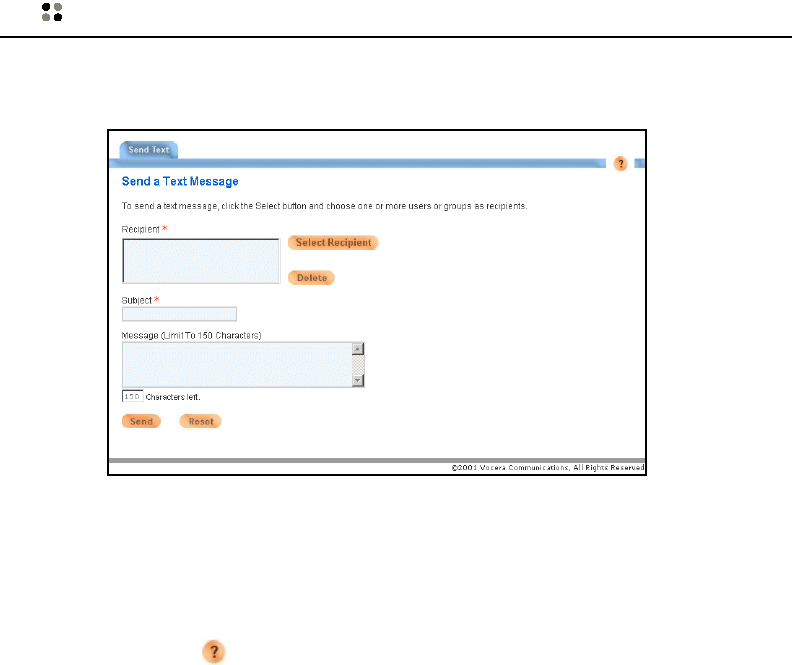
• Send text messages to other badges. The text message screen looks
like this:
• Create, modify, and delete groups. This requires additional
permission from the Vocera administrator beyond access to the user
console.
The User Console has online help for each screen, which you can view
by clicking the button. Documentation in Adobe Acrobat (.pdf) for-
mat is also available from the Vocera administrator.

Troubleshooting ··· 47
Troubleshooting
The Genie Has Trouble Understanding You
The Vocera system is designed to make it as easy as possible for you to
communicate using voice commands. If the Genie does not appear to
understand you, it may be due to one of the following:
• Did you wait for the Genie to answer before giving a command?
If you press the Call button and begin speaking immediately, your
command will not be recognized. You must wait for the Genie to
greet you before you give a command. (The Genie will say “Vocera”
or will play a tone, or both, depending on your badge setting.)
• Did you say the command in the proper format?
The Genie recognizes commands in the format verb-noun. If you
get into the habit of saying the command first, and then giving the
details, you will find it very easy to communicate through your
badge.
Examples:
“Call Jim Olsen.”
“Record a greeting.”
“Block all calls”
“Play old messages.”
• Is the problem that the Genie doesn’t understand “yes” or “no”?
Sometimes, when the Genie gives a prompt that requires a “yes” or
“no” answer (“Should I save that message?” for example), the
Genie will not “hear” you if you answer too quickly. Try counting to
one and then answering.
• Does the Genie have trouble recognizing a name?
You must include both the first and last names of the person you
are trying to contact. If you think the Genie doesn’t recognize a
name because of the way you pronounce it, you can “train” the
Genie to understand you. See “You can use any of the following
commands to get information about the current state of your
badge” on page 35 for instructions.
48 ··· Troubleshooting
Your Badge Is “Beeping” or “Chirping”
The Vocera Administrator can program your badge to issue alerts when
your badge goes out of the range of the wireless network, your battery
is low, you receive a text message, and/or you receive a voice message.
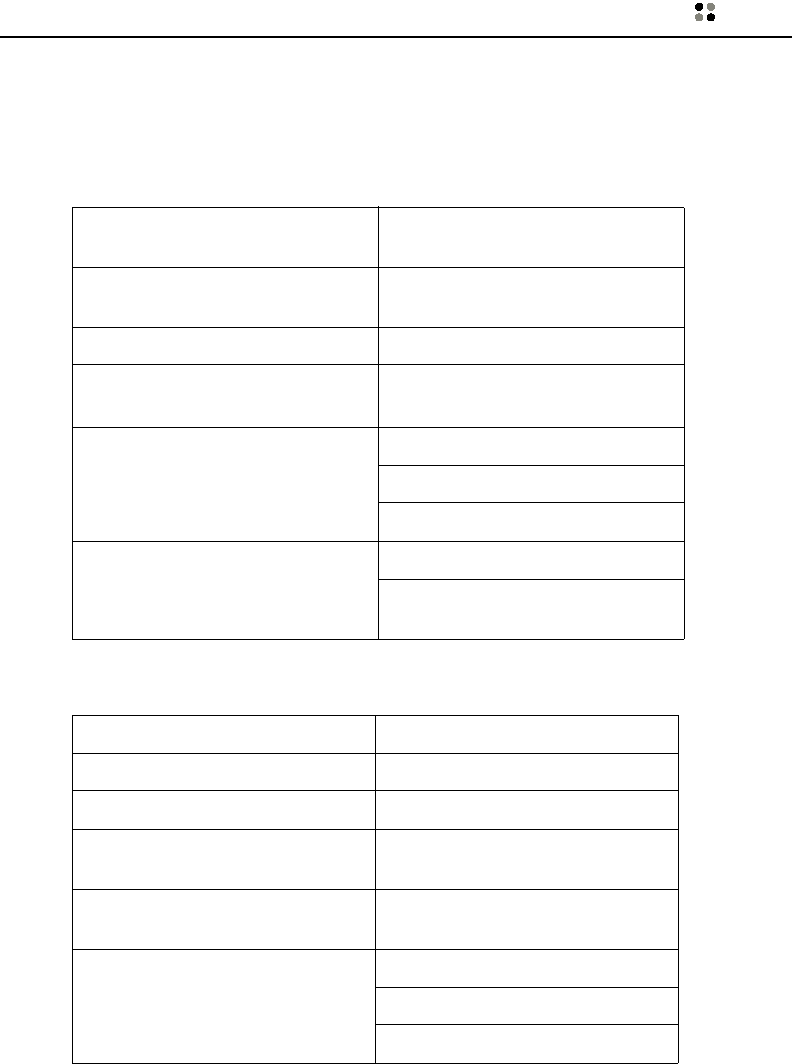
To find out why a particular alert tone is being played, check the indica-
tor light on the top of the badge, and the badge display:
• If the indicator light is flashing a slow red, and the badge display
shows a low signal strength, it means that your badge is out of the
signal range of the wireless network. You will also see the message
“Searching for Access Points” on the display.
If the alert tone starts and stops as you move slightly, it means that
you are at a location where the wireless network coverage begins.
• If the indicator light is flashing a fast red, and the badge display
shows a low battery level, it is time to recharge the battery.
• If the indicator light is blinking a fast green, you have new text or
voice messages. Icons on the badge display will show whether the
new message(s) are voice, or text, or both.
The Vocera administrator can disable or enable any of these alert tones,
and can choose a setting to turn off alerts when the badge is in Do Not
Disturb mode.
Strong Signal Weak Signal No Signal
Fully Charged Partially Used Empty
New Voice Message
New Text Message

Troubleshooting ··· 49
Your Badge Keeps Resetting
If you ignore the low battery signals and alerts long enough, the battery
level will get so low that the badge will reset in an attempt to restore
normal operating conditions. Recharge your battery.
The Badge Logs Out When Placed in the Charger
This behavior is controlled by a badge setting. If you want to use your
badge while it is in a single-bay charger, contact the Vocera administra-
tor.
The multi-chargers do not have cutouts for the badge speaker, so you
cannot use the badge while it is charging in a multi-charger.
You Hear a “Busy Signal” When You Press the Call
Button
All communications with the Genie go through voice recognition ports.
If you hear a busy signal, it means that all these ports are in use. Wait a
short time and try again.

50 ··· Troubleshooting

License and Sales Agreement ··· 51
License and Sales Agreement
YOU WILL NOT BE ABLE TO
INSTALL AND USE THIS PRODUCT
UNLESS YOU AGREE TO THESE
PROVISIONS. RETURN THE PROD-
UCT PROMPTLY FOR A REFUND IF
YOU DO NOT AGREE.
Introduction. This Agreement sets
forth the provisions under which
Vocera Communications, Inc.
(“Vocera”) is willing to sell to you its
communication badge product, con-
sisting of a wireless unit and a single-
bay or eight-bay charger (“Badge”)
and other accessories (e.g., clips, lan-
yards, etc.) (“Accessories”) and
license you to use certain associated
software (“Software”).
License. Vocera grants you, a single
business entity, the non-exclusive
right to install, access, run, or interact
with (“Use”) the Software solely in
conjunction with a Badge, for your
internal business purposes, and sub-
ject to the restrictions below. Vocera
may, in its sole discretion, make avail-
able future updates or upgrades to
the Software, each of which is also
Software subject hereto. All patent
rights, copyrights and other intellec-
tual property rights in the Software
are retained by Licensor and its direct
and indirect suppliers and licensors
(“Licensors”).
Restrictions. The Software may not
be Used (a) on or from any platform
other than a Badge; (b) so as to cir-
cumvent any technological measure
provided by Licensor from time to
time to control access to or limit use
of the Software; or (c) other than as
contemplated by its documentation.
The Badge and Software may not be
imported or exported into any juris-
diction except in compliance with all
applicable laws of the United States
and such jurisdiction. The Software
may not be rented, leased or lent to
third parties (except that a Badge and
the corresponding Software may be
transferred to a third party who has
agreed in writing to be bound hereby.
You may not copy all or any part of
the Software or attempt, encourage
or permit any third party to modify,
adapt, make derivative works from,
reverse engineer, reverse compile, dis-
assemble or decompile the Software
or any portion thereof except and
only to the extent that such activity is
expressly permitted by law notwith-
standing this limitation. You may not
modify or copy the Software. You
agree to retain all product identifica-
tion, copyright and other proprietary
notices of Vocera and Licensors. Your
rights are only as expressly stated
herein. Violation of any of the
foregoing is a material breach
hereof. Vocera may immediately
terminate your rights if you vio-
late the provisions hereof.
Limited Warranty. Vocera warrants
that the Badge and Software con-
forms substantially to Vocera's stan-
dard published specifications and is
free from defects in materials and
workmanship for One (1) year from
purchase. Vocera further warrants
that Accessories are free from defects
in materials and workmanship for
Thirty (30) days from purchase. This
limited warranty extends only to the
original buyer/user of the badge. You
may provide written notice that any
of the foregoing are not as warranted
by contacting the reseller from whom
you purchased the defective compo-
nent no later than ten (10) days fol-
lowing expiration of the applicable

52 ··· License and Sales Agreement
warranty period. As your sole and
exclusive remedy, the defective com-
ponent will be repaired or replaced
or, if Vocera determines that is not
practical, refunded the price you paid
for the original. (Any replacement will
be either new or the cosmetic and
functional equivalent.). The obliga-
tions hereunder are conditioned
upon the return of affected product
in accordance with Vocera's or its
resellers then-current Return Mate-
rial Authorization (RMA) procedures.
NEITHER VOCERA NOR ITS LICEN-
SORS MAKE ANY OTHER WAR-
RANTY, EXPRESS, IMPLIED OR
STATUTORY. LICENSOR AND ITS
LICENSORS DISCLAIM ALL WARRAN-
TIES OF FITNESS FOR PARTICULAR
PURPOSE, MERCHANTABILITY AND
NON-INFRINGEMENT.
Limited Warranty Restrictions.
This warranty does not apply and is
void with respect to (a) cosmetic
damage, (b) product that has been
improperly installed or maintained, (c)
cost of any installation or deinstalla-
tion, (d) equipment or components
not manufactured by Vocera, (e) fail-
ures or defects caused by misuse,
abuse, accidents, physical damage,
abnormal operation, improper han-
dling and storage, neglect, alter-
ations, problems caused by your local
area network (e.g., coverage), expo-
sure to fire, water or excessive mois-
ture or dampness, floods, or extreme
changes in climate or temperature,
acts of God, riots, spills of food or liq-
uids, or other circumstances beyond
the reasonable control of Vocera or
its reseller, (f) products from which
warranty stickers, electronic serial
numbers and/or serial label have
been removed, altered or rendered
illegible, (g) signal reception problems
not caused by defect in material or
workmanship), (h) badges operated
outside published maximum ratings,
(i) performance of Badge when used
in combination with other products
or equipment not manufactured,
approved by or supplied by Vocera, (j)
any Badges which have been opened,
repaired, modified or altered by any-
one other than Vocera or a Vocera
authorized service center, (k) Accesso-
ries and materials subject to normal
wear and tear.
Limit of Liability. Vocera's Licensors
disclaim all liability to you. Vocera
shall not be liable for direct damages
exceeding the price paid by you for a
defective component or for special,
incidental, consequential or indirect
damages, even if advised in advance
of the potential thereof.
U.S. Government Users. The Soft-
ware is a “commercial item” as
defined at 48 C.F.R. 2.101, consisting
of “commercial computer software”
and “commercial computer software
documentation” as such terms are
used in 48 C.F.R. 12.212. Under 48
C.F.R. 12.212 and 48 C.F.R.
227.7202-1 to 227.7202-4, U.S.
Government Users acquire the Soft-
ware only with the rights set forth
therein.
Third Party Licensors. This Agree-
ment may be accompanied by differ-
ing or additional provisions applicable
to portions of the Software provided
by one or more Licensors (“Licensor
Provisions”). User acknowledges and
agrees that its Use of such portions of
the Software is subject to the Licen-
sor Provisions.
Specifications and Compliance Statements ··· 53
Specifications and Compliance Statements
System Specifications
Badge Specifications
Network Specifications
Dimensions 4.2 x 1.4 x .6 in.
(10.6 x 3.5 x 1.5 cm)
Weight 1.6 oz. (46.5 g), with standard
battery pack
LED Indicators Two Indicators: single and two-color
LCD Supports 4 lines of text
14 characters per line
Controls Call button
Hold/Do Not Disturb button
Volume/Menu Selection buttons
Headset Support 2.5 mm gold plated jack
Compatible with Plantronics M170
and M205 headsets
Network Standard IEEE 802.11b
Frequency Band 2400-2483.4 MHz
Data Rates Supported 1, 2, 5.5 and 11 Mbps
Wireless Medium Direct Sequence Spread Spectrum
(DSSS)
Media Access Protocol Carrier sense multiple access with
collision avoidance (CSMA/CA)
Modulation DBPSK@ 1 Mbps
DQPSK@ 2 Mbps
CCK @ 5.5 and 11 Mbps
54 ··· Specifications and Compliance Statements
Server Specifications
Electrical Specifications
Operating Channels 11 channels (U.S., Canada),
3 non-overlapping
Roaming IEEE 802.11b compliant
Encryption 64-bit and 128-bit WEP
Operating Systems Supported Microsoft Windows 2000 Professional and
Windows 2000 Server
Badge Configurability Assignment of SSID
Dynamic and static assignment of IP
addresses
RF Output Power +17 dBm typical
RF Receive Sensitivity -75 dBm at 11 Mbps
Microphone Frequency Range 350 Hz to 3.75 KHz
Microphone Directionality Unidirectional cardioid response
Speaker Frequency Range 950 Hz to 3.75 KHz
Peak Speaker Loudness 75 dBSpl at 25 cm
Batteries
Standard Battery Lithium Ion, 660 mAh typical
High Capacity Lithium Ion, 900 mAh typical
Battery Life
Standard 2.5 hours of talk time, 25 hours of standby
time
High Capacity 3.0 hours of talk time, 32 hours of standby
time
Specifications and Compliance Statements ··· 55
Environmental Specifications
Regulatory Certifications
Federal Communications System (FCC)
This device complies with Part 15 of the FCC Rules. Operation is subject
to the following two conditions:
1. This device may not cause harmful interference.
2. This device must accept any interference received, including inter-
ference that may cause undesired operation.
Industry Canada Statement
This Class B digital apparatus complies with Canadian ICES-003.
Cet appareil numérique de la classe B est conforme à la norme NMB-
003 du Canada.
This device complies with Industry Canada RSS-210 standard. To prevent
radio interference to the licensed service, this device is intended to be
operated indoors and away from windows to provide maximum shield-
ing.
Operating Specifications
Temperature Range 32° to 104° F (0° to 40° C)
Humidity Range 5% to 95% relative humidity
Storage Specifications
Temperature Range -4° to 149° F (-20° to 65° C)
Humidity Range 5% to 95% relative humidity
RF Certifications FCC Part 15.247, Class B
Industry Canada RSS-210
Safety Certifications UL 60950
CSA 22.2950

56 ··· Specifications and Compliance Statements
Badge Operation and EME Exposure
THIS BADGE MEETS THE GOVERNMENT’S REQUIREMENTS FOR
EXPOSURE TO RADIO WAVES.
You wireless badge is a radio transmitter and receiver. It is designed and
manufactured not to exceed the emission limits for exposure to radio
frequency (RF) energy set by the Federal Communications Commission
of the U.S. Government. These limits are part of the comprehensive
guidelines and establish permitted levels of RF energy for the general
population. The guidelines are based on standards that were developed
by independent scientific organizations through periodic and thorough
evaluation of scientific studies. The standards include a substantial
safety margin designed to assure the safety of all persons, regardless of
age and health.
The exposure standard for wireless communications devices employs a
unit of measurement known as the Specific Absorption Rate, or SAR.
The SAR limit set by the FCC is 1.6W/kg. Tests for SAR are conducted
using standard operating positions specified by the FCC with the device
transmitting at its highest certified power level in all tested frequency
bands. The standard incorporates a substantial margin of safety to give
additional protection for the public and to account for any variations of
measurement. Although the SAR is determined at the highest certified
power level, the actual SAR level of the badge while operating can be
well below the maximum value. This is because the badge is designed to
operate at multiple power levels so as to use only the power required to
reach the network. In general, the closer you are to an access point, the
lower the power output.
Before a badge is available for sale to the public, it must be tested and
certified to the FCC that it does not exceed the limit established by the
government-adopted requirement for safe exposure. The tests are per-
formed in positions and locations (e.g., at the ear and worn on the
body) as required by the FCC. The highest SAR value for this badge
when tested for use at the ear is 0.334 W/kg and when worn on the
body, as describe in this User Guide, is 0.043 W/kg. (Body-worn mea-
surements differ, depending upon available accessories and FCC
requirements.) While there may be differences between the SAR levels
at various positions, they all meet the government requirements for safe
exposure. Keep a 2.5 cm seperation from body when badge uses holster or clip.

Specifications and Compliance Statements ··· 57
The FCC has granted an Equipment Authorization for this device with all
reported SAR levels evaluated as in compliance with the FCC RF emis-
sions guidelines. SAR information on this badge is on file with the FCC
and can be found under the Display of Grant section of http://
www.fcc.gove/oet/fccid.
Body-Worn Operation
When wearing the Vocera badge, always use a Vocera Communica-
tions-supplied or approved lanyard, pocket clip, universal clip, or
holster to ensure compliance with FCC RF exposure guidelines.
Antenna Care
Use only the supplied internal antenna. Unauthorized antennas,
modifications, or attachments could damage the badge and may violate
FCC regulations.
Electronic Devices
Most modern electronic equipment is shielded from RF signals. How-
ever, certain electronic equipment may not be shielded against the RF
signals from your badge.
Pacemakers
The Health Industry Manufacturer’s Association recommends that a min-
imum separation of six inches be maintained between a handheld wire-
less communications device and a pacemaker to avoid potential
interference with the pacemaker.
These recommendations are consistent with the independent research
by and recommendations of Wireless TEchnology Research.
Persons with pacemakers
• Should ALWAYS keep the badge more than six inches from their
pacemaker when the badge is turned ON.
• Should ONLY use the badge when wearing it on a belt, using a
Vocera holster and approved headset.

58 ··· Specifications and Compliance Statements
• If you have any reason to suspect that interference is taking place,
turn the badge OFF immediately. To turn the badge off, depress the
Call button for 5 seconds, or remove the battery.
Other Medical Devices
If you use any other personal medical devices, consult the manufacturer
of your device to determine if it is adequately shielded from external RF
energy. You physician may be able to assist you in obtaining this infor-
mation.
Turn your badge OFF in health care facilities when any regulations
posted in these areas instruct you to do so. Hospitals or health care facil-
ities may be using equipment that could be sensitive to external RF
energy.
Potentially Unsafe Areas
Posted facilities - Turn your badge OFF in any facility when posted
notices require you to do so.
Potentially explosive atmospheres - Turn your badge OFF when you
are in any area with a potentially explosive atmosphere. Obey all signs
and instructions. Sparks in such areas could cause an explosion or fire,
resulting in bodily injury or death.
Areas with a potential explosive atmosphere are often, but not always,
clearly marked. They include:
• Fueling areas
• Transfer or storage facilities for fuel or chemicals
• Equipment using liquefied petroleum gas, such as propane or
butane
• Areas where the air contains chemicals or particles such as grain,
dust, or metal powders

Index ··· 59
A
Accepting calls
voice commands 29
Access point
relationship to locations 10
Searching for Access Points mes-
sage 12
Answering calls 22
Auto Answer for Incoming Calls 22
B
Badge operation
adjusting the volume 13
answering calls 22
battery disposal iv
call waiting 23
calling groups 21
calling other badges 20, 21
cleaning 14, 44
conference calls 30
ending a call 23
holding a call 23
logging in 19
safety information iii
safety recommendations 56
Battery
disposal iv, 17
removing from the badge 15, 42
replacing 16, 43
safety information iv
specifications 54
Battery charger
indicators 41
safety information iii
using 42
Beginning a call 19
Blocking calls
voice commands 29
Buddies
calling 20
C
Call waiting 23
Calls
accepting 29
answering 22
blocking 29
call waiting 23
calling groups 21
calling other users 20, 21
conference calls 30
ending 23
forwarding 29
holding 23
starting 19
Cleaning the badge 14, 44
Commands - see “Voice commands”
Compliance statements 55
Conference calls 30
D
Deleting
greeting 20
learned names 21
text messages 39
voice messages 25
Do Not Disturb 24
VIP status effect 24
E
Email messages
saving and deleting 39
sending from a badge 37
sending to a badge 38
viewing on a badge 38
EME exposure guidelines 56
Ending calls 23
F
FCC statement 55
Forwarding calls 29
G
Genie
summoning 19
training 21
Glossary
Index

Index
60 ··· Index
buddy 45
Genie 1
outside buddy 45
text message 46
User Console 45
Vocera server 1
Greeting
personal 20
Groups
calling 21
recording name prompts for 33
H
Hold/DND button
alternative voice commands 29
holding calls with 23
Holding a call 23
I
Industry Canada Statement 55
L
Learning a name 21
License and Sales agreement 51
Logging In and Out
badge 19
M
Messages
playing, saving, deleting 25
recording and sending 24
saving and deleting text messages
39
text message limits 39
N
Name
group name prompts 33
recording 20
P
Playing a message 25
R
Recording a name
group prompts 33
training the Genie 21
your name 20
Recording messages 24
Regulatory statements 55
S
Safety information
badge and charger iii
battery iv
Safety recommendations
EME emissions 56
Saving
email and console messages 39
voice messages 25
Sending messages 24
Shared badges 19
Sound level 13
Speech recognition
training the Genie 21
Starting a call 19
Supervised conference calls 31
T
Terms
buddy 45
Genie 1
outside buddy 45
text message 46
User Console 45
Vocera server 1
Text message
saving and deleting 39
viewing on a badge 38
Troubleshooting 47
U
Unlearning a name 21
Unsupervised conference calls 31

Index
Index ··· 61
V
Voice commands
accepting calls 29
answering calls 22
blocking calls 29
conference calls 30
forwarding calls 29
general guidelines 47
making calls 20, 21
sending messages 24
training the Genie 21
Voice email 37
Voice messages
playing, saving, deleting 25
recording and sending 24
Voice recognition - see “Speech rec-
ognition”
Volume, adjusting 13

Index
62 ··· Index
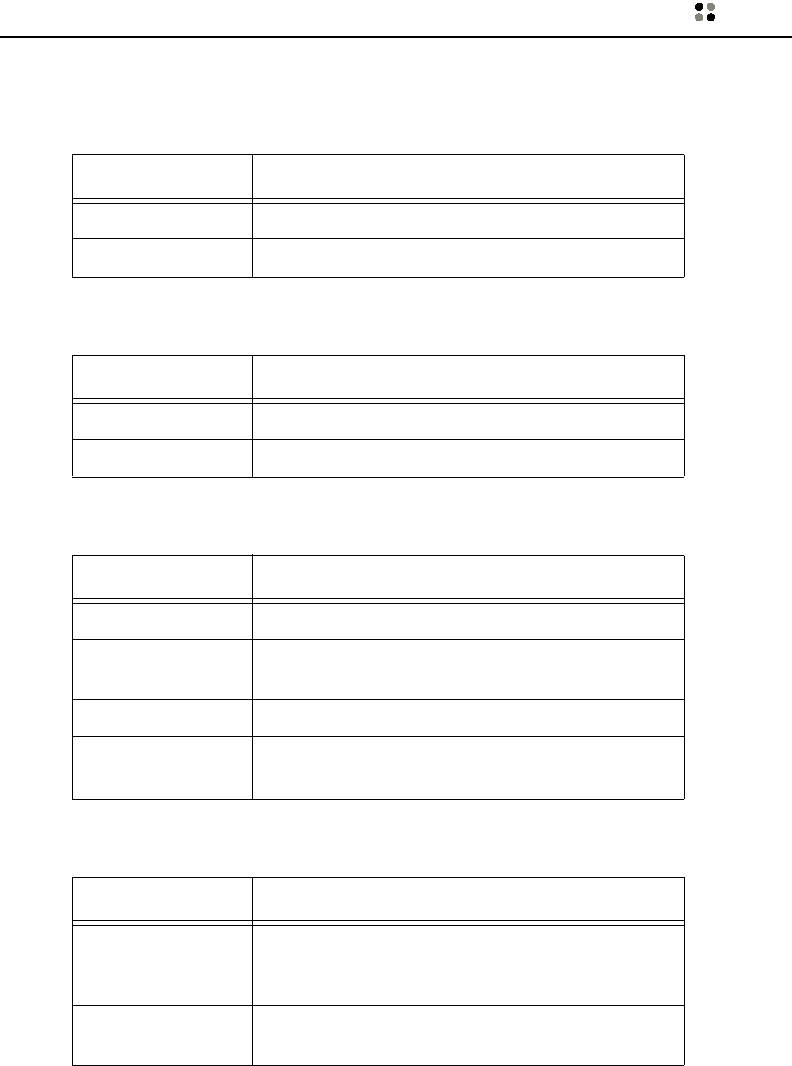
Command Reference ··· 63
Command Reference
Summon/Dismiss the Genie
Log In/Out
Record Your Name and Greeting
Basic Calls
Action Recommended Commands
Summon the Genie Press the Call button. Wait for the Genie to answer.
Dismiss the Genie Goodbye (or press the Call button)
Action Recommended Commands
Log in Log me in as John Smith.
Log out Log me out.
Action Recommended Commands
Record your name Record my name.
Record your
greeting Record my greeting.
Play your greeting Play my greeting.
Erase your greeting Erase my greeting.
Delete my greeting.
Action Recommended Commands
Call another badge
user or group
member
Call John Smith.
Call Tech Support.
Broadcast a mes-
sage to a group Send a message to Tech Support.
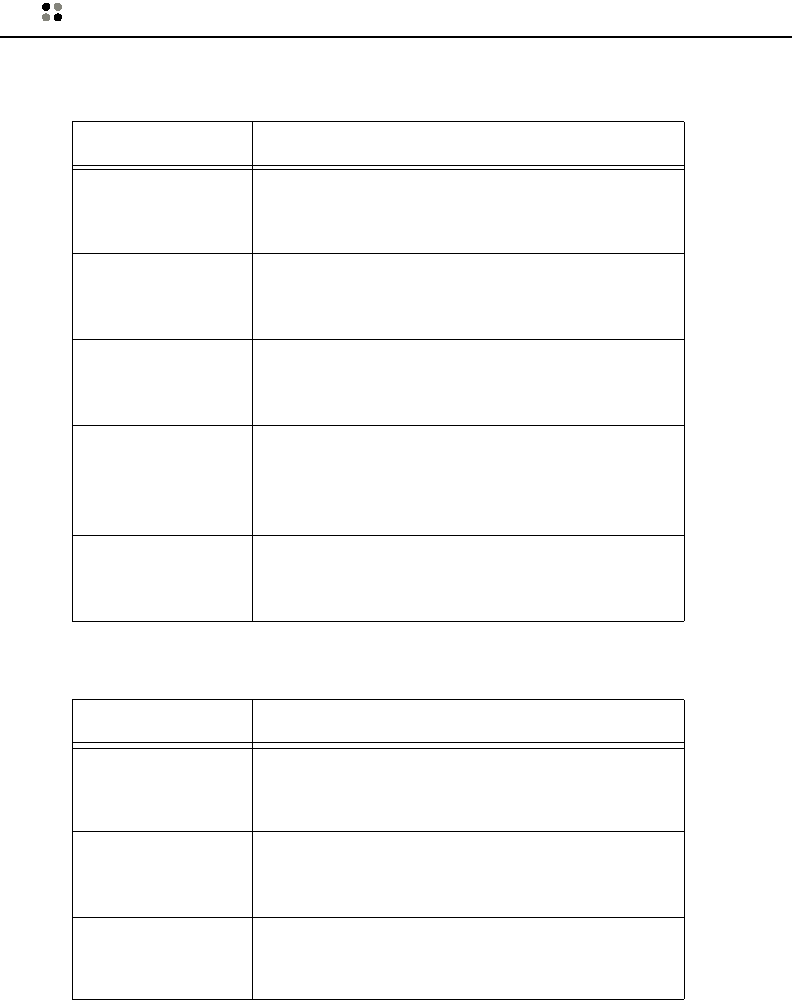
64 ··· Command Reference
Voice Messages
Call Blocking/Accepting
Action Recommended Commands
Send a message to a
badge user, group,
or buddy
Record a message for John Smith.
Record a message for Tech Support.
Record a message for my assistant.
Play new messages Play my messages.
Play my messages from John Smith.
Play my messages from Marketing.
Play old (previously
played) messages Play my old messages.
Play my old messages from John Smith.
Play my old messages from Marketing.
Commands that are
accepted during
message play
Repeat
Save
Next
Delete
Delete messages
without playing the
message queue
Delete all messages.
Delete messages from John Smith.
Delete messages from Tech Support.
Action Recommended Commands
Block calls Block all calls.
Block all calls except from John Smith.
Block all calls except from Tech Support.
Accept calls Accept all calls.
Accept all calls except from John Smith.
Accept all calls except from Tech Support.
Find out who is cur-
rently blocked from
calling your badge
Who is blocked?