Vocera Communications B1000 Vocera B1000 Badge User Manual UserGuide
Vocera Communications Vocera B1000 Badge UserGuide
UserManual.wiki
>
Vocera Communications
>
B1000 User Manual
>
Manual
Contents
1.
Manual
2.
Revised Manual statement
3.
Revised manual final draft
4.
Non modification statement to be in manual IAW 15 21
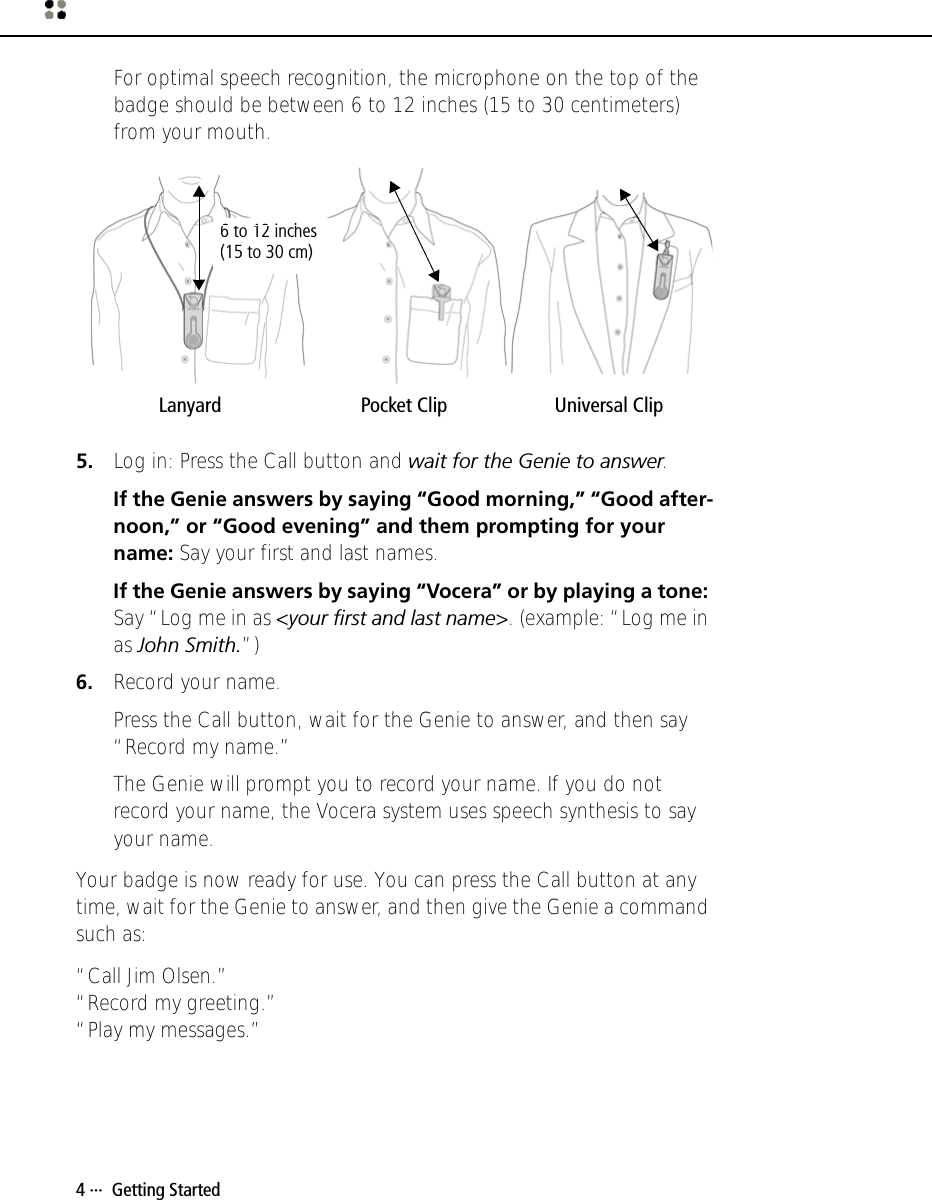
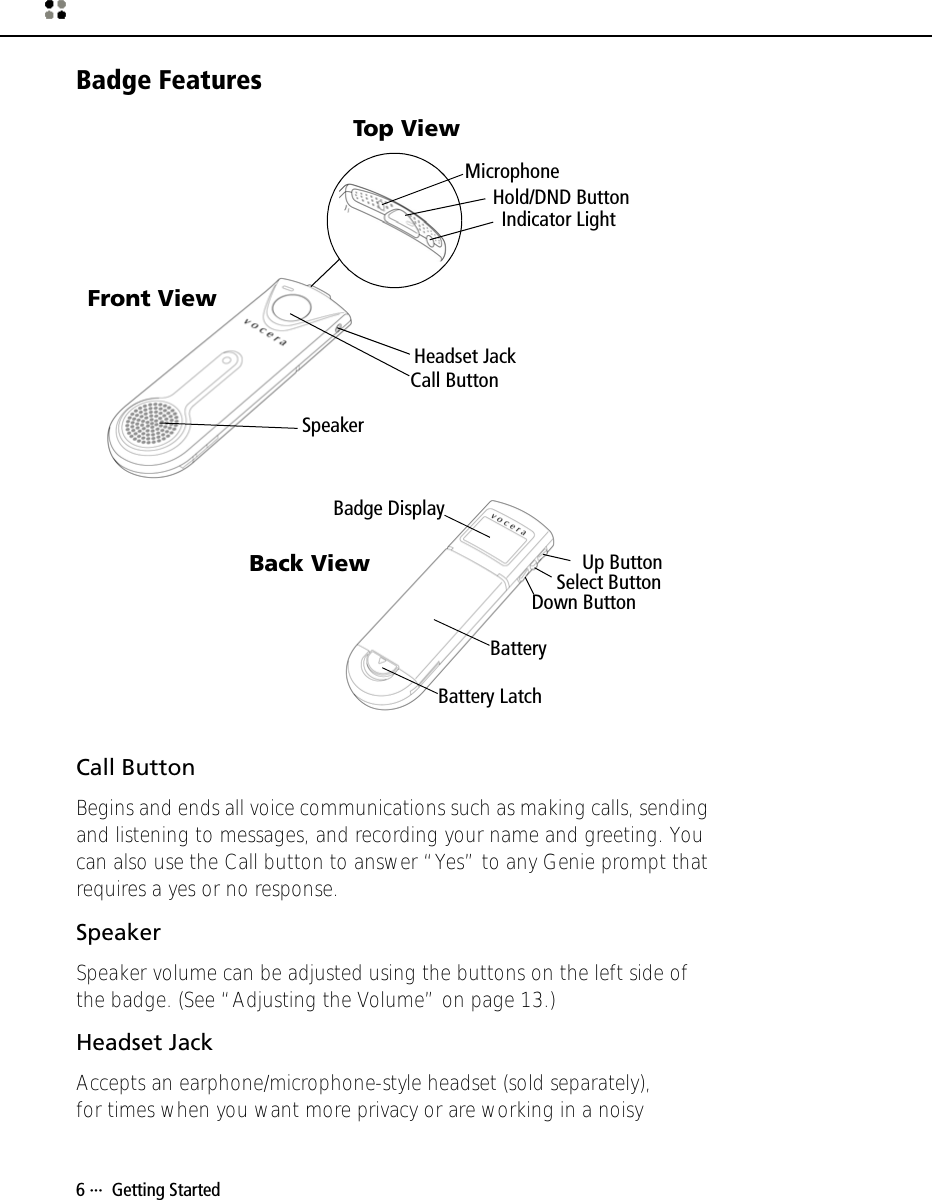
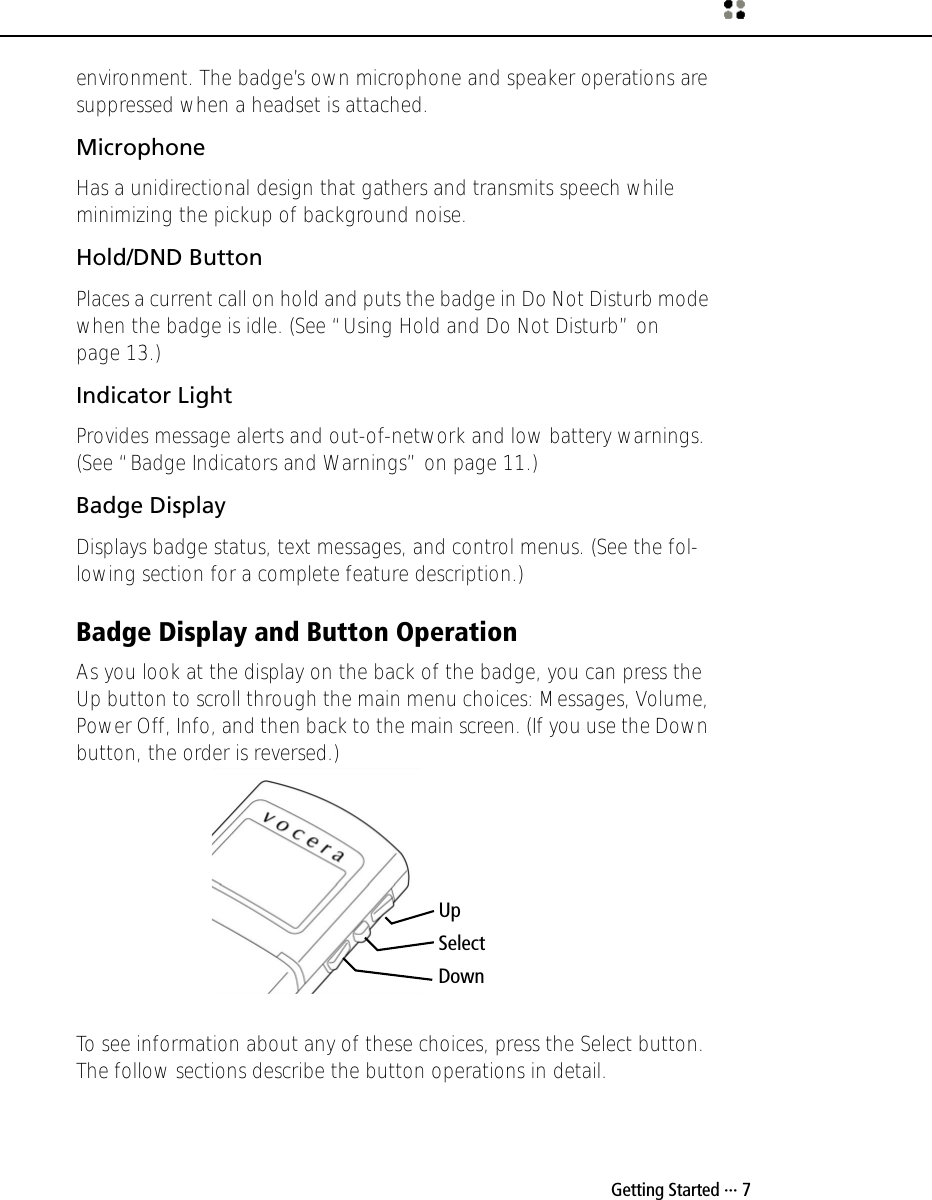
Manual
Navigation menu
Upload a User Manual
Namespaces
Wiki Guide
HTML
PDF
Info
Views
User Manual
Discussion / Help
Navigation