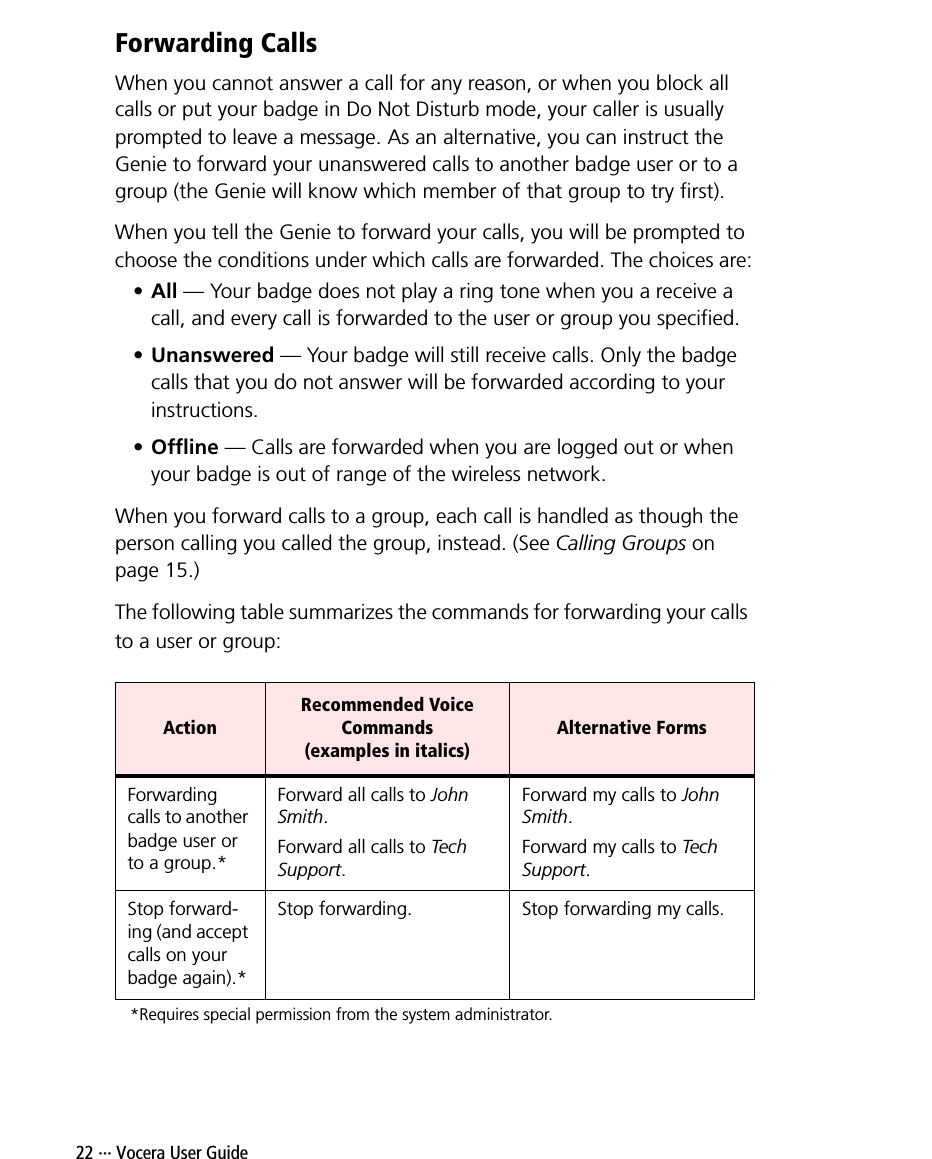
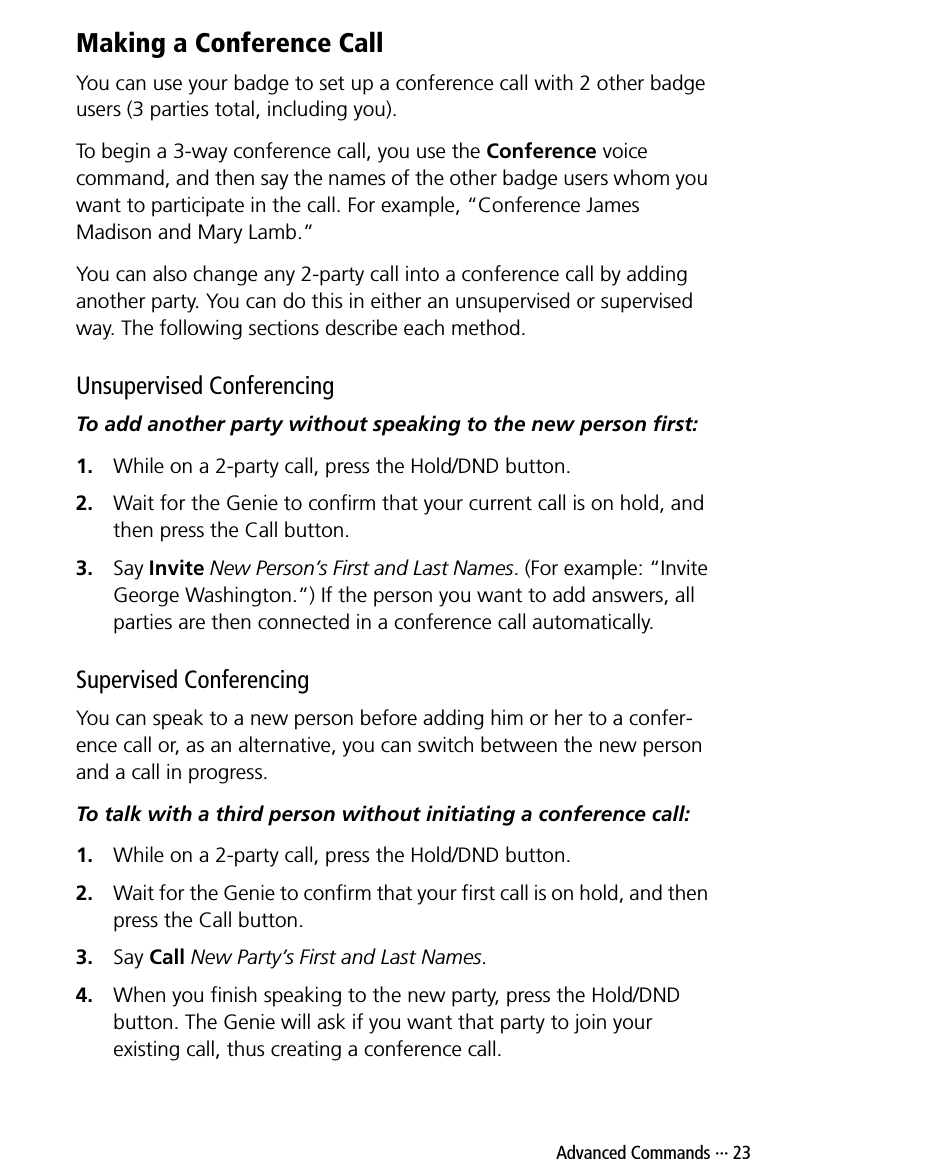
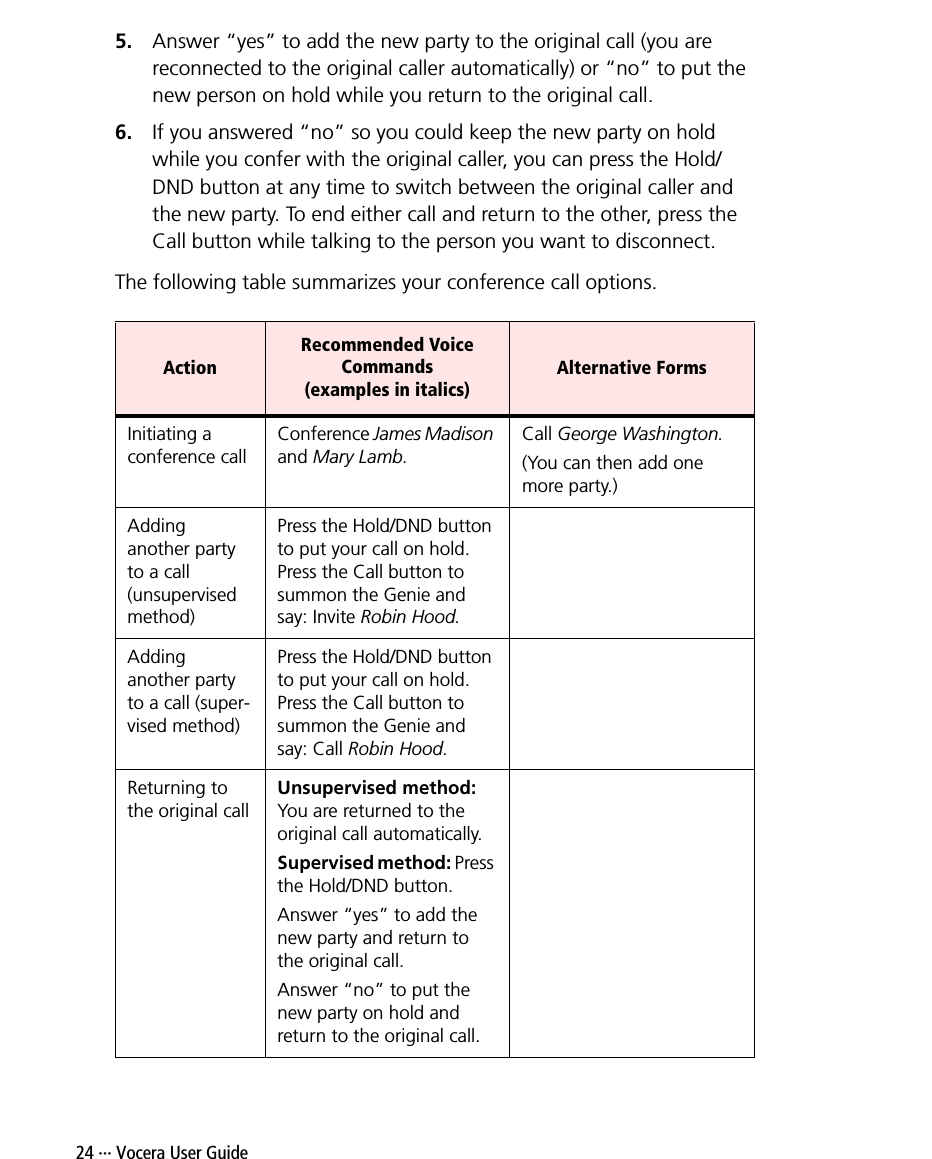
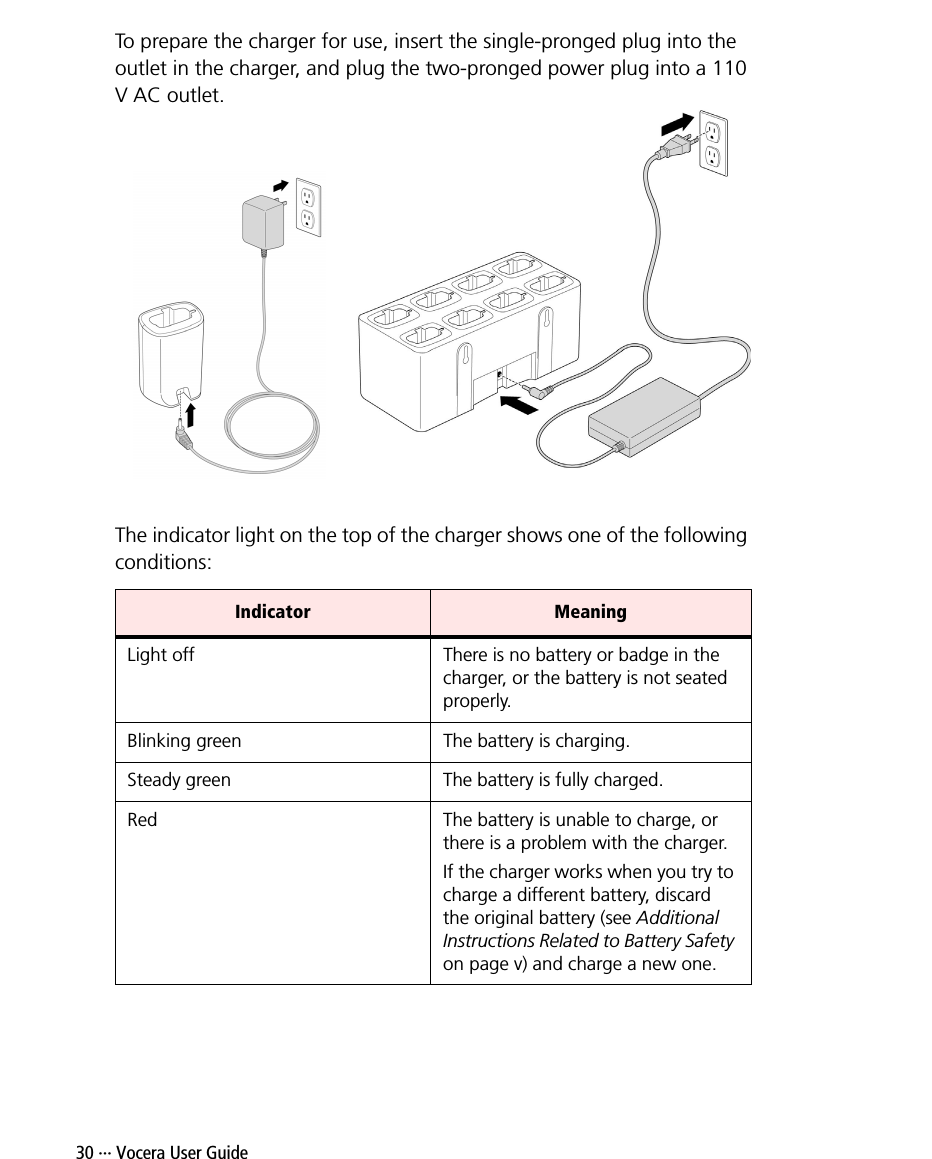
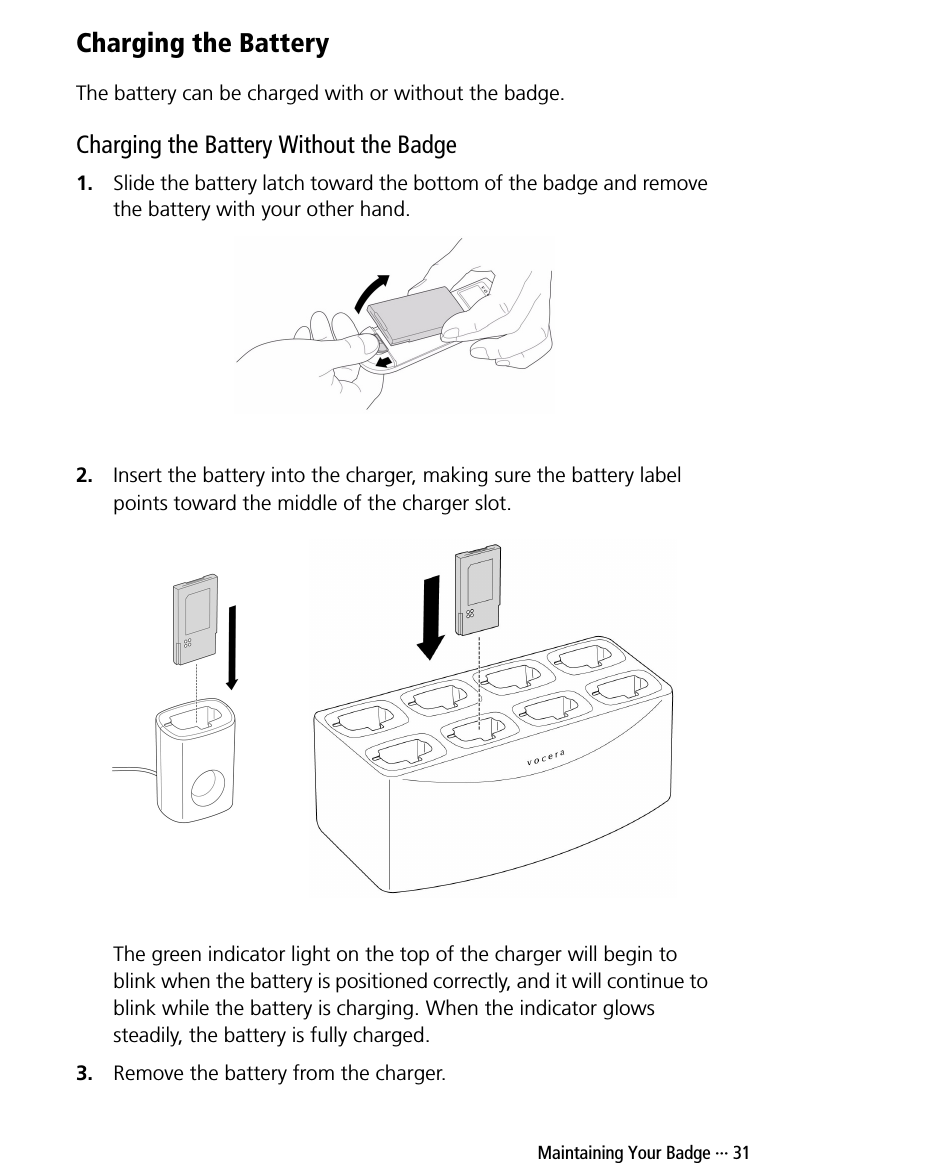
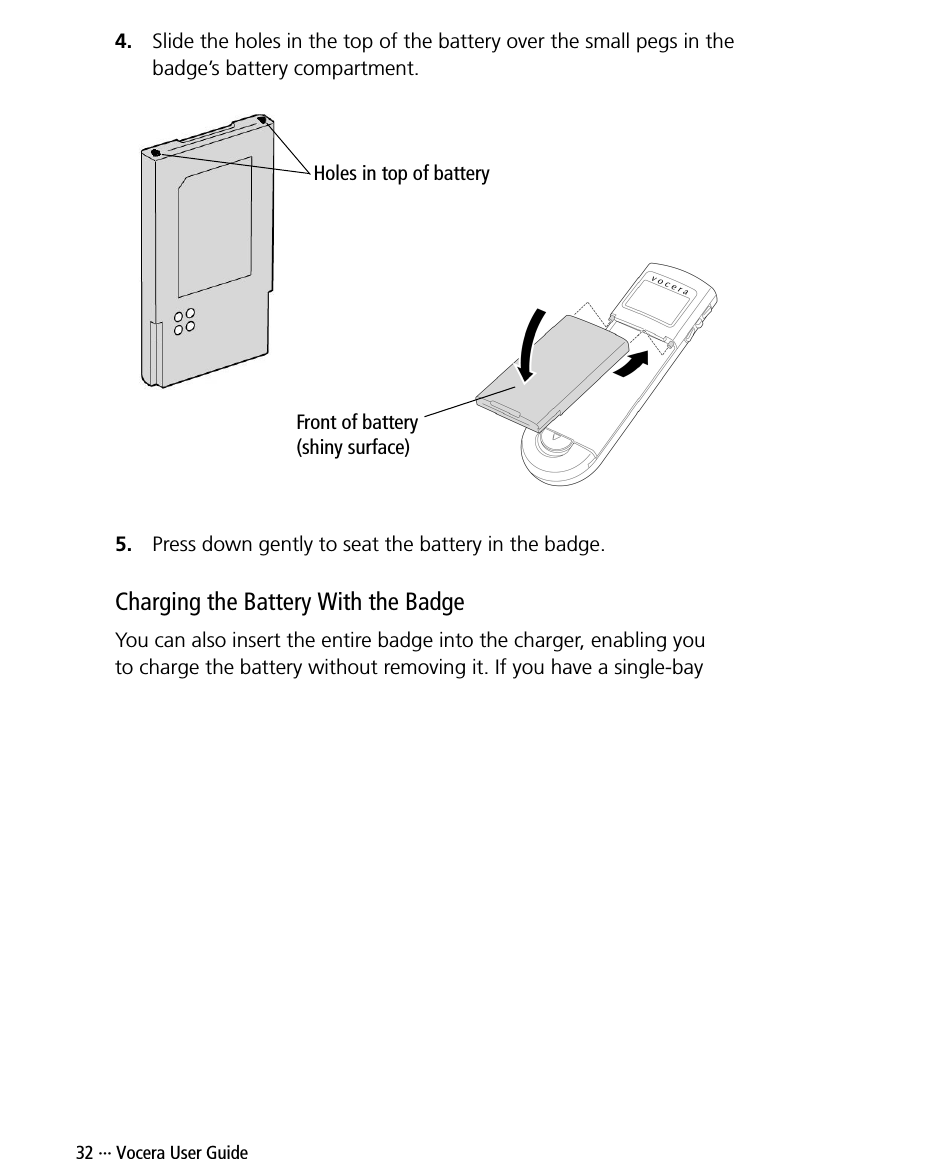
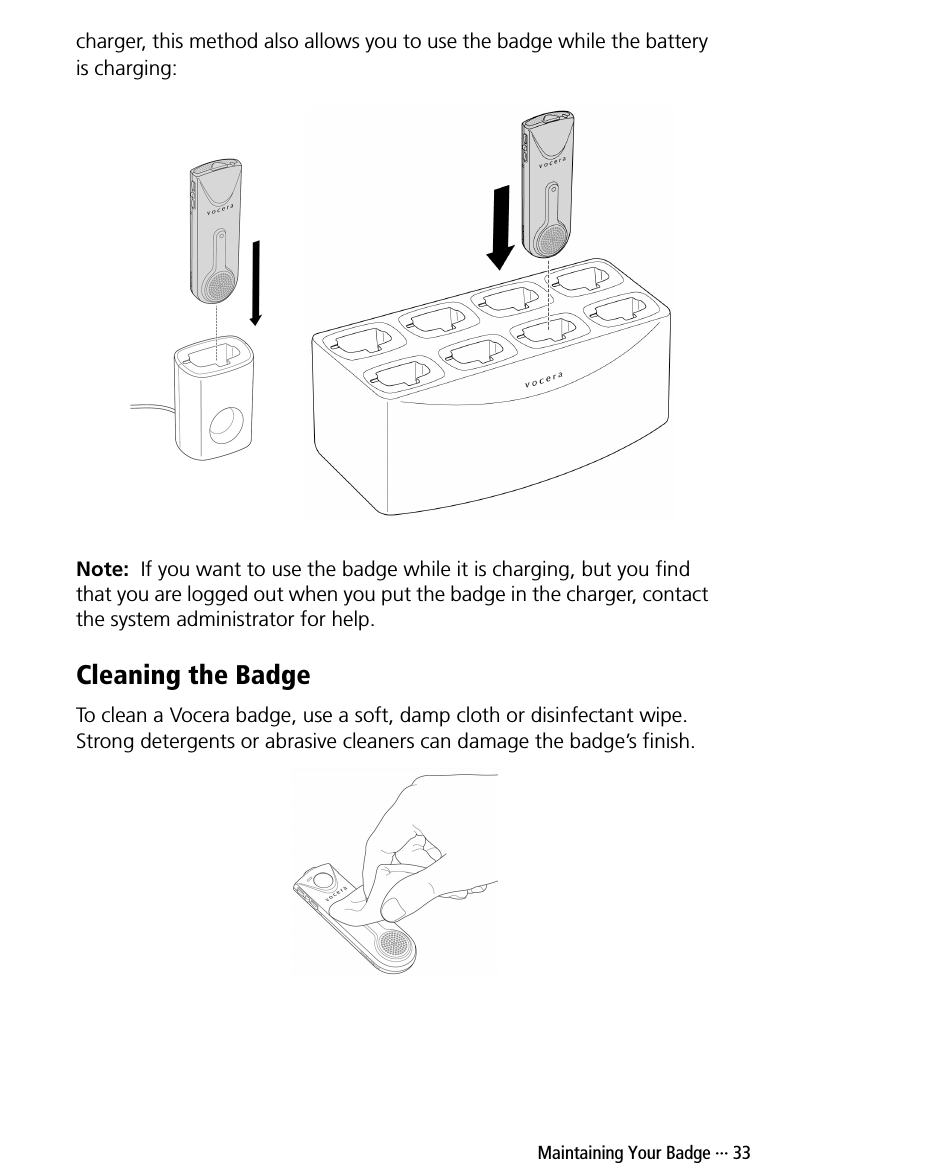
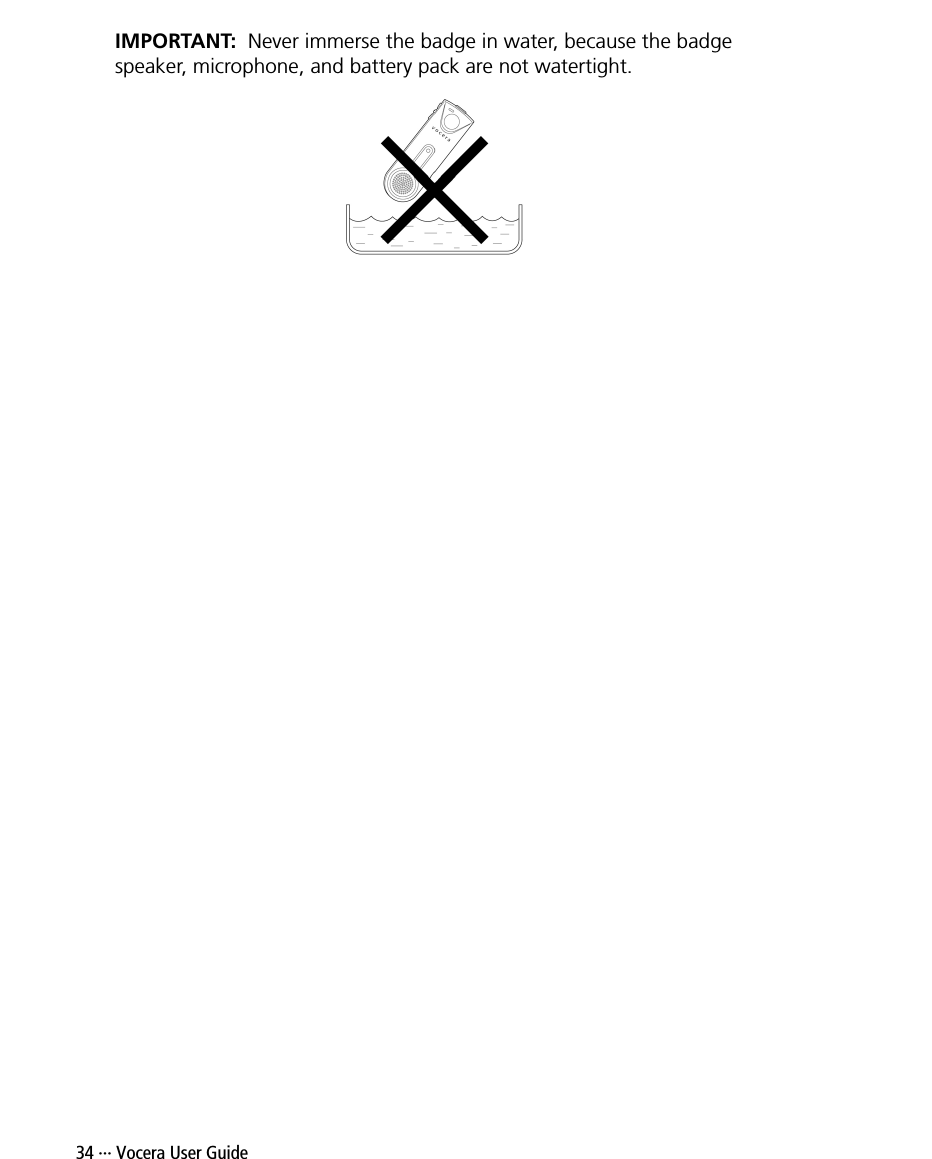
Vocera Communications B1000 Vocera B1000 Badge User Manual UserGuide
Vocera Communications Vocera B1000 Badge UserGuide
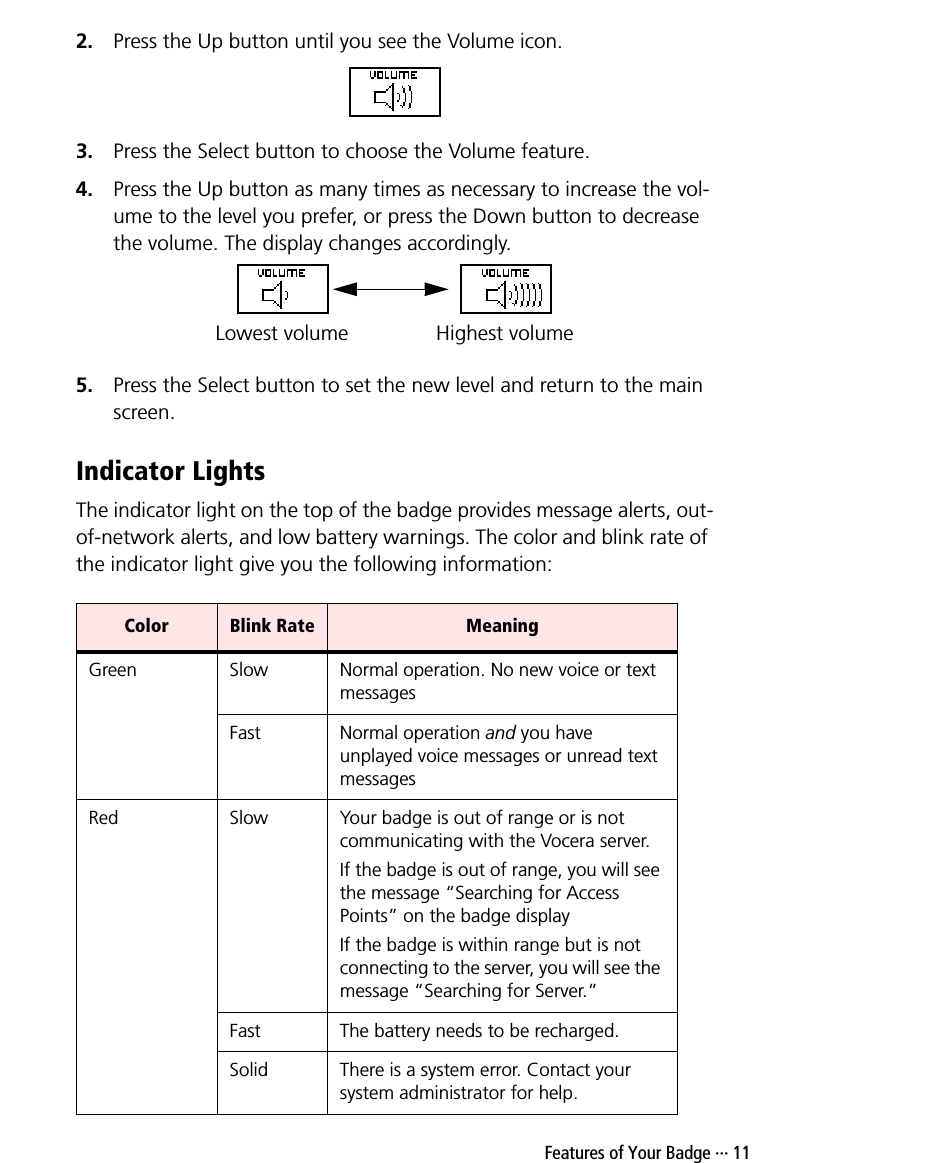
Contents
- 1. Manual
- 2. Revised Manual statement
- 3. Revised manual final draft
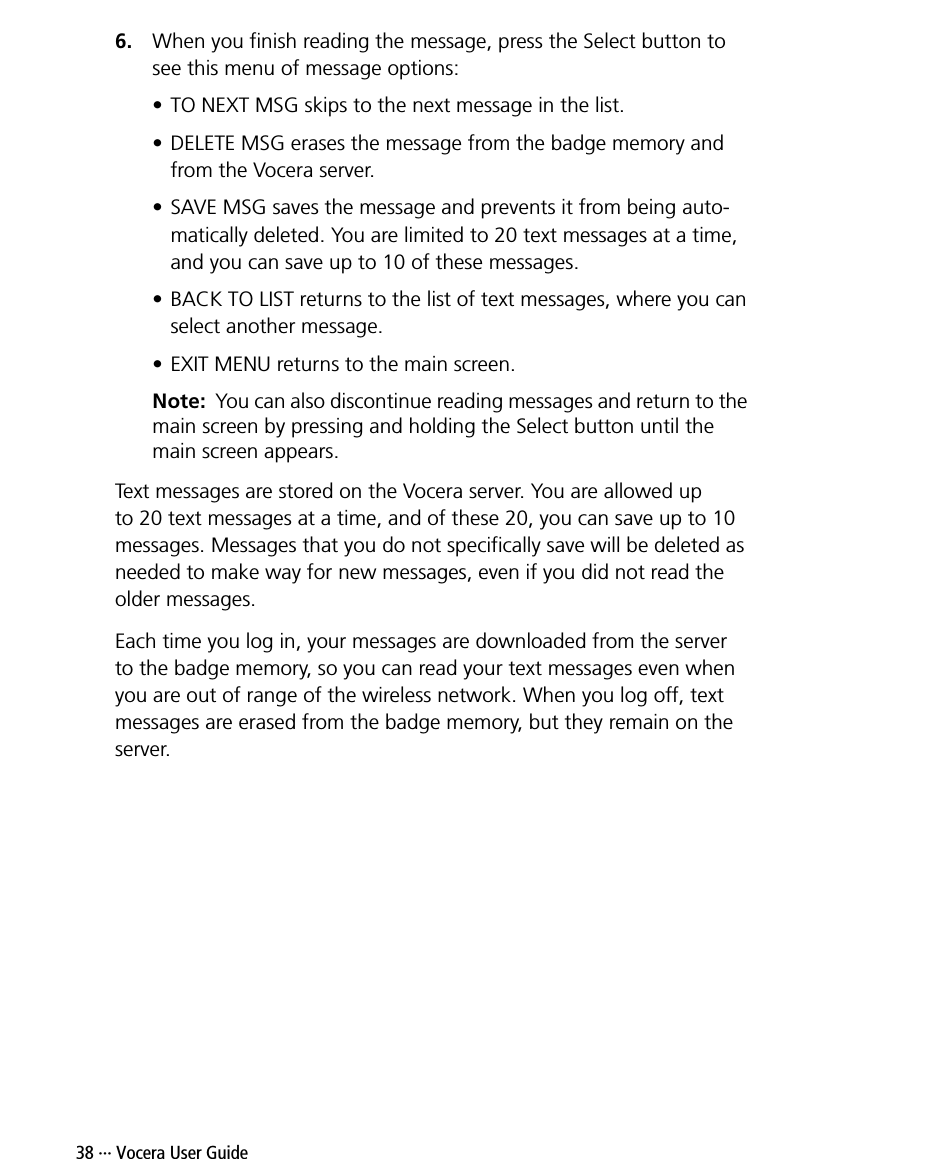
- 4. Non modification statement to be in manual IAW 15 21
Revised manual final draft