Vocera Communications B3000 The Vocera B3000 is a hands-free VOIP Communication Device using 802.11b/g and bluetooth User Manual User s Guide
Vocera Communications The Vocera B3000 is a hands-free VOIP Communication Device using 802.11b/g and bluetooth User s Guide
User's Guide


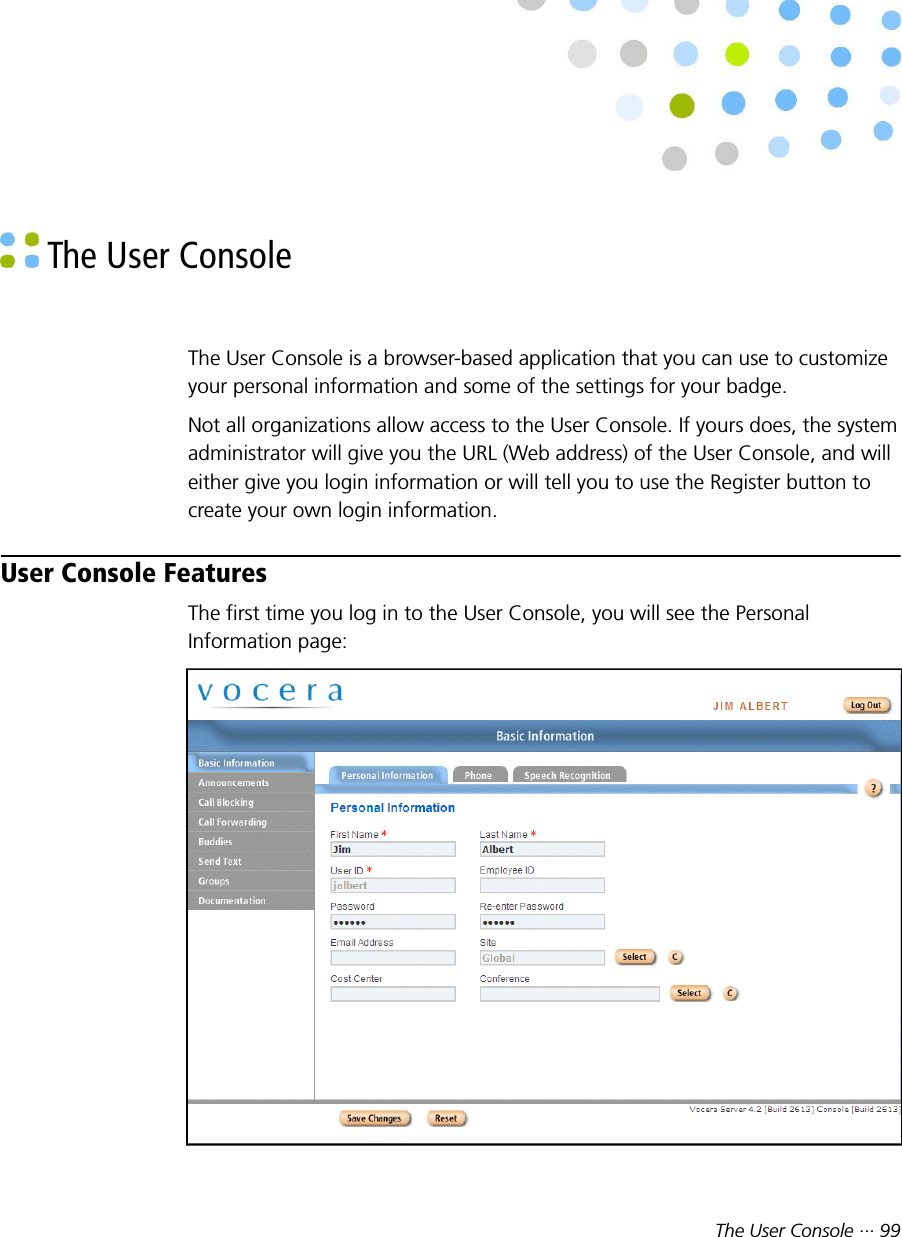
![Custom Settings30 ··· Vocera Badge User GuideWhen you select Messages, the display shows one subject line for each textmessage. On the B3000, the subject line for only one message is shown at atime. A closed envelope symbol next to a subject means you have not yet readthat message; an open envelope means you have already read that message.An [S] means you have already read and saved that message. See Reading TextMessages on page 52 for more information.SettingsThe Settings menu on the B3000 (available only on B3000 badges) displays thefollowing submenus: Volume, Font, and Flip Screen.VolumeThe Volume control independently adjusts the sound level for speakerphoneand headset modes. See Adjusting the Volume on page 31 forinstructions.FontThe Font menu (not available on the B1000A badge) allows you to display alluppercase letters or mixed case letters in text messages. See Adjusting theMessage Font on page 31 for instructions.Flip ScreenThe Flip Screen menu (available only on B3000 badges) allows you to invertthe screen, turning it upside down. When the screen is inverted, you canconveniently read the text by tilting the bottom of the badge up.Note: The Flip Screen setting is saved with the badge. If you share the badgewith other users, you may want to reset the Flip Screen setting to its defaultsetting at the end of your shift.Custom SettingsVocera badges allow you to customize the following settings:Custom Setting Badge TypeFont B3000 and B2000Volume B3000, B2000, and B1000AFlip Screen B3000 only](https://usermanual.wiki/Vocera-Communications/B3000/User-Guide-1552704-Page-30.png)


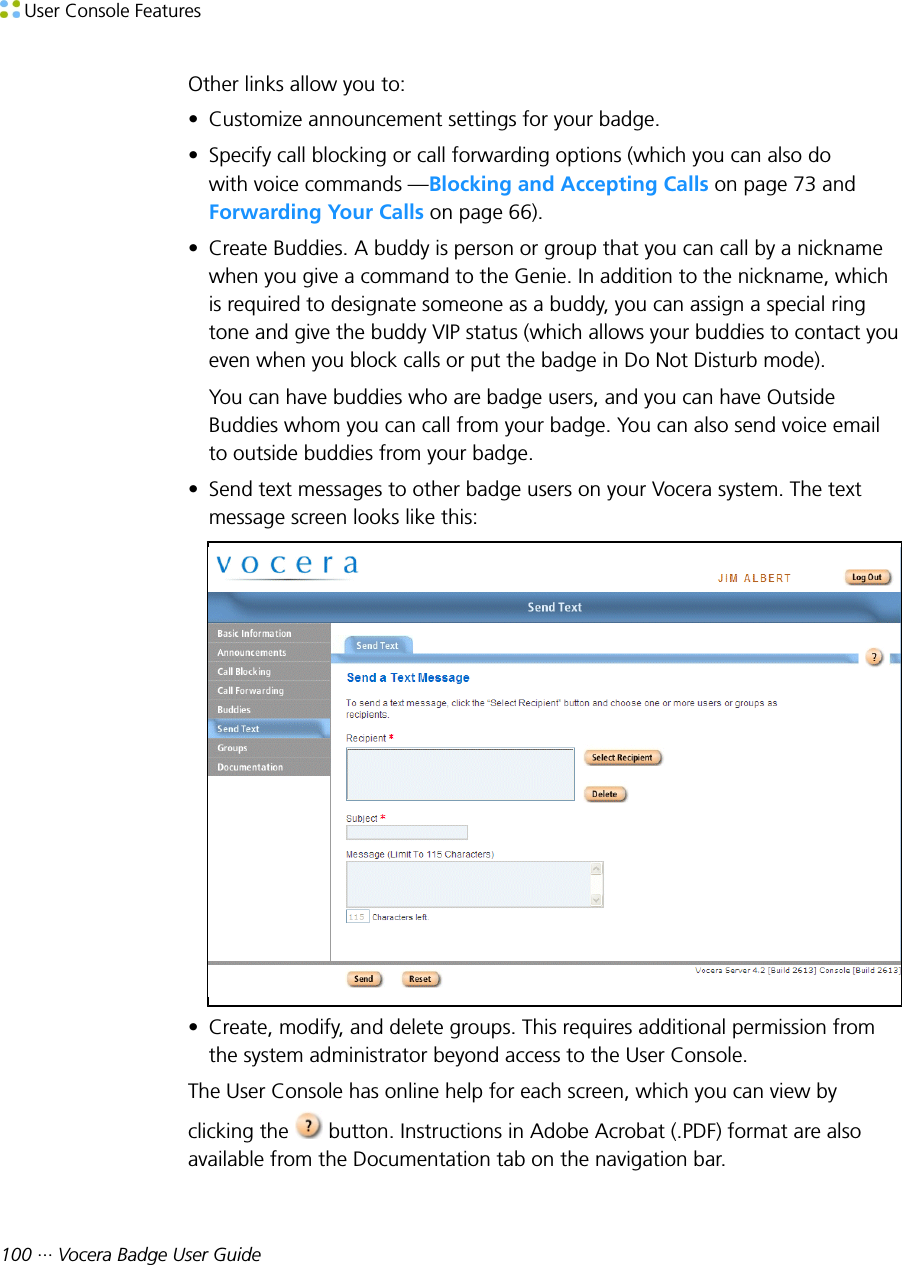
![Sending a Text Message from the User Console88 ··· Vocera Badge User Guide2. In the To: field, enter the email address of the Vocera system.3. In the Subject: field, specify the message recipient using one of thefollowing formats:• The user ID of a Vocera user. For example:jbatista• The name of a group, if the group is in the global site. For exampleI C U Nurses• The name of a group and its site, if the group is in any other site. Specifythe group name in square brackets, followed by the site name in curlybraces. For example:[I C U Nurses] {West Wing}4. In the message area, type your message. Be brief, because the messagewill be limited to 256 characters on B3000 and B2000 badges orsmartphones and 130 characters on a B1000A badge. Additional characterswill not be displayed.Note: When the recipient views the list of text messages, the entry for anemail will show the first thirteen characters of the message.5. Make sure the email message is formatted as plain text; HTML and RTFformats are not supported.6. Send the email message in the usual way.The Vocera server logs in to the Vocera system email account at regularintervals (usually every 30 seconds), downloads all the email in the mailbox, anddistributes each message to the user or group whose user ID or group nameappears on the subject line of the message.Sending a Text Message from the User ConsoleThe User Console is a Vocera utility that runs in a web browser. See The UserConsole on page 99 for a brief summary of the User Console, or see theVocera User Console Guide for a complete description of its features. Not allorganizations allow access to the User Console.You can send messages from the User Console to a user or to a group. If yousend the message to a group, all members of the group receive the message.Recipients can read these short messages on their Vocera device displays.](https://usermanual.wiki/Vocera-Communications/B3000/User-Guide-1552704-Page-88.png)
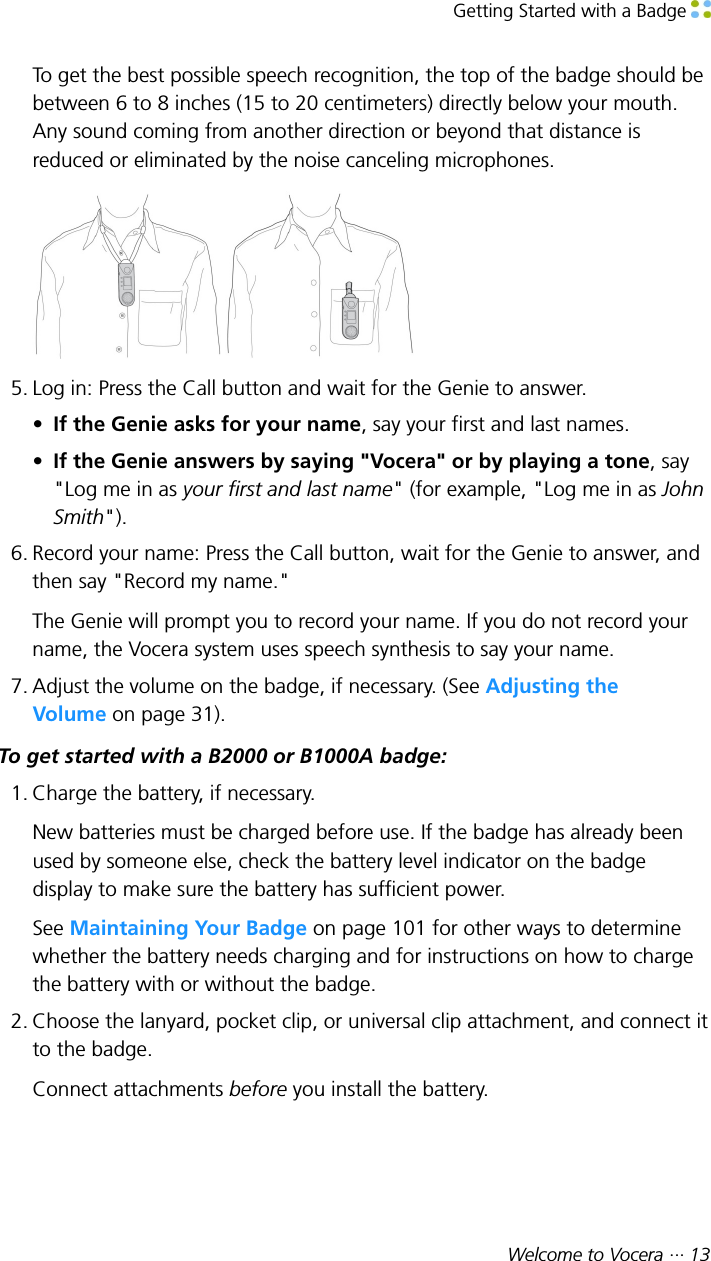
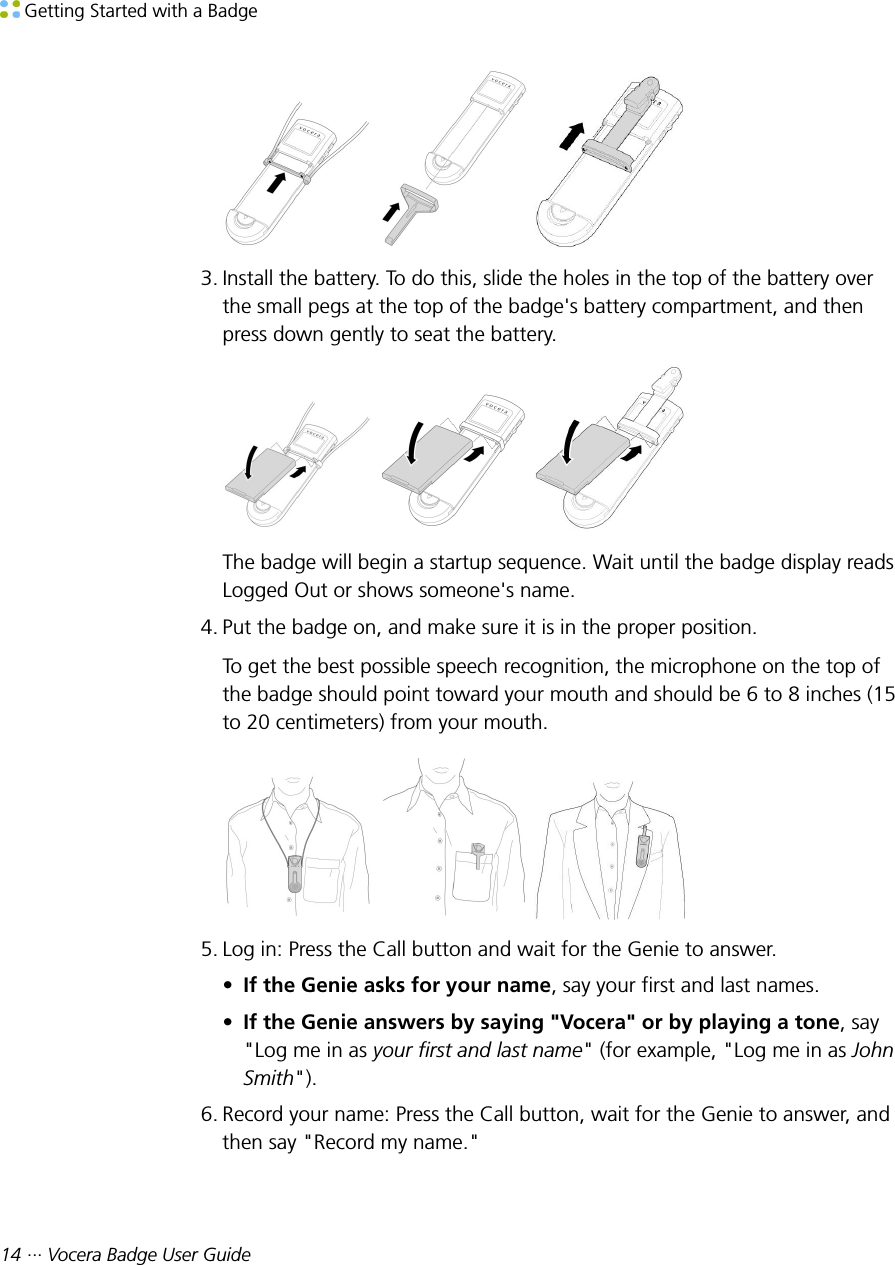
![Starting a Genie Session from a Phone Using Vocera Access Anywhere ··· 93Starting a Genie Session from a PhoneIf your user profile is properly enabled and you have the appropriate permission,you can access the Genie from a phone and use many of the same voicecommands that you use from a badge.When you access the Genie from a phone, you are not logged into the Vocerasystem. You are simply establishing an authenticated Genie session. You canaccess the Genie from a phone even when you are currently logged in from abadge.If Caller ID is not support on your Vocera system, you can start a Genie sessionfrom a phone by calling the Guest Access number of your home site and thenpressing star (*).Note: If you try to start a Genie session from a phone when you do not havepermission, the Genie says, "I'm sorry. You need permission to access the Geniefrom a phone. Please see your administrator."To start a Genie session from a phone using Caller ID:1. Using either your desk phone or cell phone, call the Direct Access numberfor your home site.2. You should be automatically authenticated based on your Caller ID. TheGenie says, "Good morning, [FirstName]. [Chime] Vocera."Note: Depending on your Vocera permissions and the phone you used tomake the call, the Genie may prompt for your first and last name, and thenprompt for your phone access password.3. Say any of the supported commands.If the Genie asks you a question that requires a yes or no response, you canpress the 1 key to answer "yes" or the 2 key to answer "no." See VoceraAccess Anywhere Special Keys on page 95.To start a Genie session from a phone using your name and password:1. Using any phone, call the Guest Access number for your home site.The Genie says, "Good morning. Say the full name of the person or groupyou want to reach or enter an extension."2. Press the star (*) key. This causes the Genie to switch to direct access mode.The Genie prompts you to say or spell your first and last name.3. Say or spell your first and last name.](https://usermanual.wiki/Vocera-Communications/B3000/User-Guide-1552704-Page-93.png)