WINIA Electronics 7NF0009 VCR with DVD Player User Manual DVD Video USA DV6T811N LT
Dongbu Daewoo Electronics Corporation VCR with DVD Player DVD Video USA DV6T811N LT
User Manual
DV6T811N [Hi-Fi]
DVD-VIDEO PLAYER
Owner’s Manual
◆In the initial settings, exclusive channel for
DVD/Video is set to CH 3. Set the TV channel
to CH3 before using it.
◆Region code of DVD/Video player for home is
1 or ALL. In inserting a disc with other region
code, it does not operate. Please only use a
disc with region code 1 or ALL.
◆is a ‘Prohibition’ mark. If this mark is
displayed in operating the product, please
wait for a while, then use it. If " Prohibition"
mark continues to be displayed in pressing a
button after that, it means the button does not
function in the currently played disc.
◆Press a product button on the REMOTE then
use the product.
• DVD operation : [DVD] button
• Video operation : [VCR] button
DVD-Video(USA)_DV6T811N-LT 02.4.16 4:40 PM ˘`A
Product Information
1
Important Safeguards
CAUTION: TO REDUCE THE RISK OF ELECTRIC SHOCK,
DO NOT REMOVE COVER (OR BACK). NO USER-
SERVICEABLE PARTS INSIDE. REFER SERVICING TO
QUALIFIED SERVICE PERSONNEL.
CAUTION
RISK OF ELECTRIC SHOCK
DO NOT OPEN
The lightning flash with arrowhead symbol,
within an equilateral triangle, is intended to alert
the user to the presence of uninsulated
“dangerous voltage” within the product’s
enclosure that may be of sufficient magnitude to
constitute a risk of electric shock.
The exclamation point within an equilateral
triangle is intended to alert the user to the presence
of important operating and servicing instructions in
the literature accompanying the appliance.
WARNING : TO REDUCE THE RISK OF FIRE OR ELECTRIC SHOCK, DO NOT EXPOSE THIS
APPLIANCE TO RAIN OR MOISTURE.
CAUTION : TO PREVENT ELECTRIC SHOCK, MATCH WIDE BLADE OF PLUG TO WIDE SLOT,
FULLY INSERT.
IMPORTANT FOR LASER PRODUCTS
• LASER : This Digital Video Disc Player employs a Laser System. To ensure proper use of this product
please read this owner’s manual carefully and retain for future reference. Should the unit require
maintenance, contact an authorized service location - see service procedure.
Use of control adjustments or the performance of procedures other than those specified may
result in hazardous radiation exposure.
To prevent direct exposure to the laser beam, do not try to open the enclosure. Visible laser
radiation when open and interlocks defeated.
DO NOT STARE INTO THE BEAM.
• DANGER : Visible laser radiation when open and interlock failed or defeated.
Avoid direct exposure to beam.
• CAUTION : Do not open the top cover. There are no user serviceable parts
inside the Unit; leave all servicing to qualified service personnel.
CLASS 1
LASER PRODUCT
FCC NOTICE: This equipment has been tested and found to comply with the limits for a Class B digital
device, pursuant to part 15 of the FCC Rule. These limits are designed to provide reasonable
protection against harmful interference in a residential installation. This equipment generates,
uses and can radiate radio frequency energy and if not installed and used in accordance with
the instructions, may cause harmful interference to radio communications. However, there is
no guarantee that interference will not occur in a particular installation. If this equipment
does cause harmful interference to radio or television reception; which can be determined by
turning the equipment off and on, the user is encouraged to try to correct the interference by
one or more of the following measures:
• Reorient or relocate the receiving antenna.
• Increase the separation between the equipment and receiver.
• Connect the equipment to an outlet on a circuit different from that to which the receiver is
connected.
• Consult the dealer or an experience radio/TV technical for help.
This device complies with part 15 of the FCC Rules.
Operation is subject to the following two conditions: (1) This device may not cause harmful
interference, and (2) this device must accept any interference received, including interference
that may cause undesired operation.
CAUTION: Any changes or modification in construction of this device which are not expressly
approved by the party responsible for compliance could void the user’s authority to operate
the equipment.
DV6T811N-LT(GB) 02.4.19 5:26 PM ˘`1

2
This set has been designed and manufactured to assure personal safety. Improper use can result in electric
shock or fire hazard. The safeguards incorporated in this unit will protect you if you observe the following
procedures for installation, use and servicing. This unit is fully transistorized and does not contain any parts
that can be repaired by the user.
1 READ INSTRUCTIONS
All the safety and operating instructions should be read before the unit is operated.
2 RETAIN INSTRUCTIONS
The safety and operating instructions should be retained for future reference.
3 HEED WARNINGS
All warnings on the unit and in the operating instructions should be adhered to.
4 FOLLOW INSTRUCTIONS
All operating and use instructions should be followed.
5 CLEANING
Unplug this unit from the wall outlet before cleaning. Do not use liquid cleaners or aerosol cleaners. Use
a damp cloth for cleaning.
6 ATTACHMENTS
Do not use attachments unless recommended by the unit’s manufacturer as they may cause hazards.
7 WATER AND MOISTURE
Do not use this unit near water- for example, near a bath tub, wash bowl, kitchen sink or laundry tub, in a wet
basement, or near a swimming pool and the like. Caution : Maintain electrical safety. Powerline operated
equipment or accessories connected to this unit should bear the UL listing mark or CSA certification mark on the
accessory itself and should not be modified so as to defeat the safety features. This will help avoid any potential
hazard from electrical shock or fire. If in doubt, contact qualified service personnel.
8 ACCESSORIES
Do not place this unit on an unstable cart, stand, tripod, bracket, or table. The
unit may fall, causing serious injury to a child or adult as well as serious
damage to the unit. Use this unit only with a cart, stand , tripod, bracket, or
table recommended by the manufacturer.
8A
A unit and cart combination should be moved with care. Quick stops,
excessive force, and uneven surfaces may cause the unit and cart combination
to overturn.
9 VENTILATION
Slots and openings in the case are provided for ventilation to ensure reliable operation of the unit and to
protect it from overheating. These openings must not be blocked or covered. These openings must not be
blocked by placing the unit on a bed, sofa, rug, or other similar surface. This unit should never be placed
near or over a radiator or heat radiator. This unit should not be placed in a built-in installation such as a
bookcase or rack unless proper ventilation is provided or the manufacturer’s instructions have been
adhered to.
10 POWER SOURCES
This unit should be operated only from the type of power source indicated on the marking label. If you are
not sure of the type of power supply to your home, consult your dealer or local power company. For units
intended to operate from battery power, or other sources, refer to the operating instructions.
PORTABLE CART WARNING
(symbol provided by RETAC)
DVD-Video(USA)_DV6T811N-LT 02.4.16 2:37 PM ˘`2
Product Information
3
11 GROUNDING OR POLARIZATION
This unit is equipped with a polarized alternating -current line plug (a plug having one blade wider than the other).
This plug will fit into the power outlet only one way. This is a safety feature. If you are unable to insert the plug
fully into the outlet, try reversing the plug. If the plug still fails to fit, contact your electrician to replace your obsolete
outlet.To prevent electric shock, do not use this polarized plug with an extension cord, receptacle, or other outlet
unless the blades can be fully inserted without blade exposure. If you need an extension cord, use a polarized
cord.
12 POWER-CORD PROTECTION
Power-supply cords should be routed so that they are not likely to be walked on or pinched by items placed upon
or against them, paying particular attention to cords at plugs, convenience receptacles, and the point where they
exit from the unit.
Note to CATV system installer
This reminder is provided to call the CATV system installer’s attention to Section 820-40 of the NEC which
provides guidelines for proper grounding and, in particular, specifies that the cable ground shall be connected to
the grounding system of the building, as close to the point of cable entry as practical.
13 Outdoor Antenna Grounding
If an outside antenna or cable system is connected to the product, be
sure the antenna or cable system is grounded so as to provide some
protection against voltage surges and built-up static charges. Section
810 of the National Electrical Code, ANSI/NFPA No. 70-1984
(Section 54 of Canadian Electrical Code, Part 1) provides information
with respect to proper grounding of the mast and supporting
structure, grounding of the lead-in wire to an antenna-discharge unit,
connection to grounding electrodes, and requirements for the
grounding electrode. See example as shown.
14 Power Lines
An outside antenna system should not be located in the vicinity of overhead power lines, other electric light or
power circuits, or where it can fall into such power lines or circuits. When installing an outside antenna system,
extreme care should be taken to keep from touching or approaching such power lines or circuits as contact with
them might be fatal. Installing an outdoor antenna can be hazardous and should be left to a professional antenna
installer.
15 LIGHTNING
For added protection for this unit during a lightning storm, or when it is left unattended and unused for long periods
of time, unplug it from the wall outlet and disconnect the antenna or cable system. This will prevent damage to
the unit due to lightning and power line surges.
16 DISC TRAY
Keep your fingers well clear of the disc as it is closing. It may cause serious personal injury.
17 OVERLOADING
Do not overload wall outlets of extension cords as this can result in a risk of fire or electric shock.
18 OBJECT AND LIQUID ENTRY
Never push objects of any kind into this unit through openings as they may touch dangerous voltage points or
“short-out” parts that could result in a fire or electric shock. Never spill liquid of any kind on the unit.
19 BURDEN
Do not place a heavy object on or step on the product. The object may fall, causing serious personal injury and
serious damage to the product.
20 DISC
Do not use a cracked, deformed or repaired disc. These discs are easily broken and may cause serious personal
injury and product malfunction.
ANTENNA DISCHARGE UNIT
(NEC SECTION 810-20)
ANTENNA LEAD
IN WIRE
POWER SERVICE GROUNDING
ELECTRODE SYSTEM
(NEC ART 250 PART H)
GROUND CLAMP
ELECTRIC
SERVICE
EQUIPMENT
GROUNDING CONDUCTORS
(NEC SECTION 810-21)
GROUND CLAMPS
EXAMPLE OF ANTENNA
GROUNDING
NEC - NATIONAL ELECTRICAL CODE
DVD-Video(USA)_DV6T811N-LT 02.4.16 2:37 PM ˘`3

4
21 SERVICING
Do not attempt to service this unit yourself as opening or removing covers may expose you to dangerous
voltage or other hazards. Refer all servicing to qualified service personnel.
22 DAMAGE REQUIRING SERVICE
Unplug this unit from the wall outlet and refer servicing to qualified service personnel under the following
conditions.
A. When the power-supply cord or plug is damaged.
B. If liquid has been spilled, or objects have fallen into the unit.
C. If the unit has been exposed to rain or water.
D. If the unit does not operate normally by following the operating instructions. Adjust only those
controls that are covered by the operating instructions. Improper adjustment of other controls may
result in damage and will often require extensive work by a qualified technician to restore the unit to
its normal operation.
E. If the unit has been dropped or the cabinet has been damaged.
F. When the unit exhibits a distinct change in performance-this indicates a need for service.
23 REPLACEMENT PARTS
When replacement parts are required, have the service technician verify that the replacements he uses
have the same safety characteristics as the original parts. Use of replacements specified by the unit
manufacturer can prevent fire, electric shock, or other hazards.
24 SAFETY CHECK
Upon completion of any service or repairs to this unit, ask the service technician to perform safety checks
recommended by the manufacturer to determine that the unit is in safe operating condition.
25 WALL OR CEILING MOUNTING
The product should be mounted to a wall or ceiling only as recommended by the manufacturer.
26 HEAT
The product should be situated away from heat sources such as radiators, heat registers, stoves, or other
products (including amplifiers) that produce heat.
DVD-Video(USA)_DV6T811N-LT 02.4.16 2:37 PM ˘`4

Product Information
5
Advantages of This Product Are .....
• DVD, VCD, CD, CD-R(MP3), CD-RW, VHS, S-VHS playback function
• DVD one-touch record function
• Watching DVD for recording broadcast
• Integrated REMOTE (VCR, DVD)
• Ultra power savings : less than 3W for stand-by mode
• VISS function
• Multiplex sound playback/record
• High Sound Quality of 6 head Hi-Fi
• One Touch timer Recording (OTR)
• MP3 file playback function (CD-R disc having records of MP3 files)
• Various video type-supported (AUTO, NTSC and PAL)
• GUI (Graphical User Interface) OSD (On Screen Display)
By using the [DISPLAY] button on the remote control, information on the DVD/VCD/CD player and disc, can
be displayed on the TV screen.
• Screensaver function (DVD)
• 3D sound (3D sound effect using 2 speakers)
• High bit / high sampling with 27MHz / 10bit video encoder
This unit has 27MHz / 10bit capability, that enables the faithful reproduction of fine images.
• High bit / high sampling with 96KHz / 24bit audio D/A converter
With this 96KHz / 24bit linear Pulse Code Modulated signals, which constitute the highest specifications in the
DVD standards, you can enjoy faithfully reproduced sound in all of its various modes. To support 96KHz
sampling / 24bit sound, the shaping noise of this multi-level digital sigma type of D/A converter is kept flat up to
44KHz, thus preventing the important audio signals from being affected.
• Coaxial, Optical digital output (PCM, Dolby Digital, dts)
You can enjoy high-level digital audio by connecting with amp embedded with Dolby Digital / dts decoder.
• Built-in Dolby Digital decoder (DVD)
• Analog audio 2-channels output for DOWNMIX (x1)
• Composite video out (x1)
• S-Video out (x1)
DVD-Video(USA)_DV6T811N-LT 02.4.16 2:37 PM ˘`5

6
• Slow Forward / reverse (DVD) playback
• Fast Forward / reverse playback
• Search of title, chapter, and time in DVD disc, and search of track and time in VCD and CD
• Various TV aspect (DVD)
4:3 for Pan and Scan, 4:3 for Letter Box, and 16:9 for Wide
• Repeat playback (title and chapter for DVD, track and disc for VCD/CD)
• Bookmark function (DVD)
Playback position can be made to remember up to 3 positions for speedy search.
• Selective Play (DVD/VCD/CD)
You can select and play the desired title / chapter of DVD and track of Video CD/CD in STOP mode.
• 3 languages OSD (On Screen Display) function (DVD)
You can select and display OSD in 3 languages. (English, French, Spanish)
• Parental Lock function (DVD)
This function can prevent playback of software that may be unsuitable for children.
• Multi Audio function (DVD)
The audio soundtrack can be heard in up to 8 languages. In the case of SVCD or CVD, it depends on the disc.
(The number of audio languages depends on the software.)
• Multi Subtitle function (DVD)
The subtitle can be seen in up to 32 languages. In the case of SVCD or CVD, it depends on the disc. (The
number of subtitle languages depends on the software.)
• Multi Angle function (DVD)
This function allows you to choose the viewing angle of scenes which were shot from a number of different
angles. (The number of angles depends on the software.)
• Screen zoom function (DVD/VCD)
• Thumbnail view function (in VCD with inactivated PBC)
DVD-Video(USA)_DV6T811N-LT 02.4.16 2:37 PM ˘`6

Product Information
7
Read Carefully before Using
Cautions in use of DVD-Video player are described below.
Please read carefully before using a DVD-Video player.
✔Installation place and handling
• When you place this player near other devices, they may affect poorly together.
• When you place DVD-Video player and TV in the upper and lower sides, it may cause flickering of pictures
or failure (tape is not ejected).
• When you place this player near strong magnetic materials, it may affect image or voice poorly or damage
recording.
• Do not spill volatile liquids like insect spray over the player. Do not leave rubber or plastic products in contact
with the player for a long time. They will cause deterioration or paint peel-off.
✔Not in use
• When the unit is not in use, be sure to remove the disc or tape and turn off the power.
• If you do not use the unit for a long period, remove batteries in REMOTE to prevent leakage.
• In case you don’t use the unit for a long time, the unit may not function properly in the future. Turn on and
use the player occasionally.
✔Moving
• Repack the unit as it was originally packed at the factory. Alternatively, pack this product with towel not to be
damaged.
• Eject any videotape.
✔Cleaning
• Dust off dirt in cabinet or control panel part smoothly with a soft cloth.
• For heavy dirt, soak the cloth in a weak detergent solution, wring it well and wipe. Use a dry cloth to wipe it
out.
• Follow instructions in using chemical cleaners.
• Do not use any type of solvent such as gasoline or benzene, as they may cause deterioration or paint peel-off.
✔Checking
• Video is a high precision device. To obtain a clear screen, we recommend regular inspection and
maintenance every 1,000 hours of use by technical engineers.
• For checking, contact your dealer or your nearest service center.
✔Checking and Replacement of Antenna
• Antenna is subject to change in its direction or damage by wind and rain. For clean screen, contact and
consult your nearest service center about checking and replacement.
DVD-Video(USA)_DV6T811N-LT 02.4.16 2:37 PM ˘`7
8
✔In recording important screen
• Be sure to record the screen and check whether recording is performed properly. We beg you to understand
compensation of recording if recording is not performed by badness of used tape or video.
✔Copyright
• Do not use your recordings without permission of a copyrighter except personal usage.
✔Tape and Disc Handling
• Do not use any tape and disc below. Damage of video head or cut/coiling of tape may cause failure.
- Tape with mold
- Tape or disc stained with juice or attachments
- Tape having breakage connection
- Disassembled tape
- Disc with severe scratch
• Moisture condensation may occur in tape. Moisture condensation damages the tape. Please use the tape
after the moisture condensation is disappeared.
• After use, store tape vertically in a case to prevent loose.
• Do not store the following places.
- High temperature and humidity
- Subject generation of mold
- Subject to direct sunlight
- Much dirt or dust
- Near strong magnetic materials such as speaker
DVD-Video(USA)_DV6T811N-LT 02.4.16 2:37 PM ˘`8
Product Information
9
Contents
Important Safeguards .................................................................................................................. 1
Advantages of This Product Are .... ...........................................................................................5
Read Carefully before Using ...................................................................................................... 7
Contents ....................................................................................................................................... 9
Identification of Controls .......................................................................................................... 11
Remote Control ........................................................................................................................ 14
Connecting with TV.................................................................................................................. 16
Connecting with Cable Box ....................................................................................................18
Connecting with Other VCR or Camcorder .......................................................................... 20
Connecting with Audio ............................................................................................................ 22
Connecting TV with S-Video/Component Jack,
Amp with Digital Audio Out Jack .......................................................................................... 23
Clock Set .................................................................................................................................. 24
Output Select ............................................................................................................................ 25
DVD Playback .......................................................................................................................... 26
VCR Playback .......................................................................................................................... 27
Recording .................................................................................................................................. 29
VCR Operation
Memorizing TV Channels ...................................................................................................... 32
Timer Recordings .................................................................................................................... 36
Watching and Recording Cable TV ........................................................................................ 40
Using advanced features .......................................................................................................... 41
Indexing VISS Signals / Searching VISS Signals....................................................................... 43
Counter 0 Stop........................................................................................................................... 44
Displaying Clock/Counter ........................................................................................................ 45
Changing the on-screen menu language ............................................................................... 46
Hi-Fi Stereo Playback ............................................................................................................... 47
Recording Stereo or Secondary Audio Programs (SAP) ........................................................ 47
Product Information
Basic Operation
Installation
DVD-Video(USA)_DV6T811N-LT 02.4.16 2:37 PM ˘`9
10
Skipping from a current scene to a desired scene................................................................... 48
Confirming the current PLAY mode on screen ...................................................................... 55
Selecting an AUDIO language, SUBTITLE language and 3D AUDIO ................................ 56
Selecting ZOOM and Multi Angle .......................................................................................... 57
Memorizing a scene ................................................................................................................. 58
Displaying menus in a disc. .....................................................................................................59
Basic SETUP Mode ................................................................................................................... 60
LANGUAGE Setup.................................................................................................................... 61
VIDEO Setup ............................................................................................................................. 62
AUDIO Setup ........................................................................................................................... 63
Others Setup ............................................................................................................................. 65
About DVD................................................................................................................................ 67
Basic information about VCR and Videotape........................................................................ 70
Before doubting about troubles (DVD) ................................................................................... 72
Before doubting about troubles (VCR)..................................................................................... 74
Specifications ............................................................................................................................ 78
Region Code ............................................................................................................................ 79
Setup
DVD Operation
The others
DVD-Video(USA)_DV6T811N-LT 02.4.16 2:37 PM ˘`10
Product Information
11
Identification of Controls
Main body (front panel)
!
%& * ) 1 2 3 4567 8^
@#$
(
!
POWER (STANDBY/ON) button
Use to power the device on/off if AC power supply
is connected.
@
Place to insert videotape
#
COPY button
Use to copy contents of disc into a videotape.
$
Disc tray
%
VIDEO INPUT jack
^
AUDIO INPUT jack
&
EJECT button
*
RECORD button
(
CHANNEL Up/Down button
)
Operation Display Window
Display operation of device. For more information,
see “Operation Display Window” in the next page.
1
DVD operation display lamp
2
VCR operation display lamp
3
SELECT button
Use to change DVD mode to VCR mode, and vice
versa.
4
STOP button
Use to stop playing .
5
REWIND button
Use to rewind currently being played videotape or
disc; or to playback back rapidly.
6
Playback/PAUSE button
Playback videotape or disc.
Press this button to pause a screen.
7
FAST FORWARD button
Use to wind currently being played videotape or
disc; or to playback rapidly.
8
OPEN/CLOSE Tray button
DVD-Video(USA)_DV6T811N-LT 02.4.16 4:40 PM ˘`11
12
Operation Display Window
!@
#
%
^
*
(246
$& ) 1 3 5 7
!
VCR Operation
@
REC and TIMER REC display
: Recording ,
: TIMER Recording ,
: To be Timer-recorded,
: To be Timer-recorded state ERROR (No Tape
or Tape without tab)
#
Copying
Use to copy contents of disc into videotape.
$
Hi-Fi Videotape
%
AM/PM
^
Recording Speed
&
Parental (Lock)
When parental limit in “SETUP” menu is set except
“8 UNLOCK” and you set a password, it goes into
LOCK status ( ) and this indicator is lighted up.
This indicator disappears iif you doesn’t set a
password.
*
Title
This is displayed in VCD and CD disc.
(
Chapter
This is displayed in DVD disc.
)
Time, Counter and Current Operation
: Tray is opened
: Tray is closed
: Disc is loaded
: There is no disc in tray
: Disc has some error
: Menu screen is displayed
: Setup menu is displayed
: Power is ON
: Power is OFF
1
Dolby Digital Indicator
2
dts Disc Indicator
3
3D Sound Indicator
4
MP3 Disc Indicator
5
Disc Type Indicator
Currently loaded disc type (SVCD, VCD, DVD etc.)
is displayed.
6
Repeat Playback
It indicates repeat playback is on now. ONE, ALL,
and A-B mean repeat playback between a chapter
or track; title or whole contents of disc; and two
specific points respectively.
7
DVD Disc Operation
DVD-Video(USA)_DV6T811N-LT 02.4.16 2:37 PM ˘`12
Product Information
13
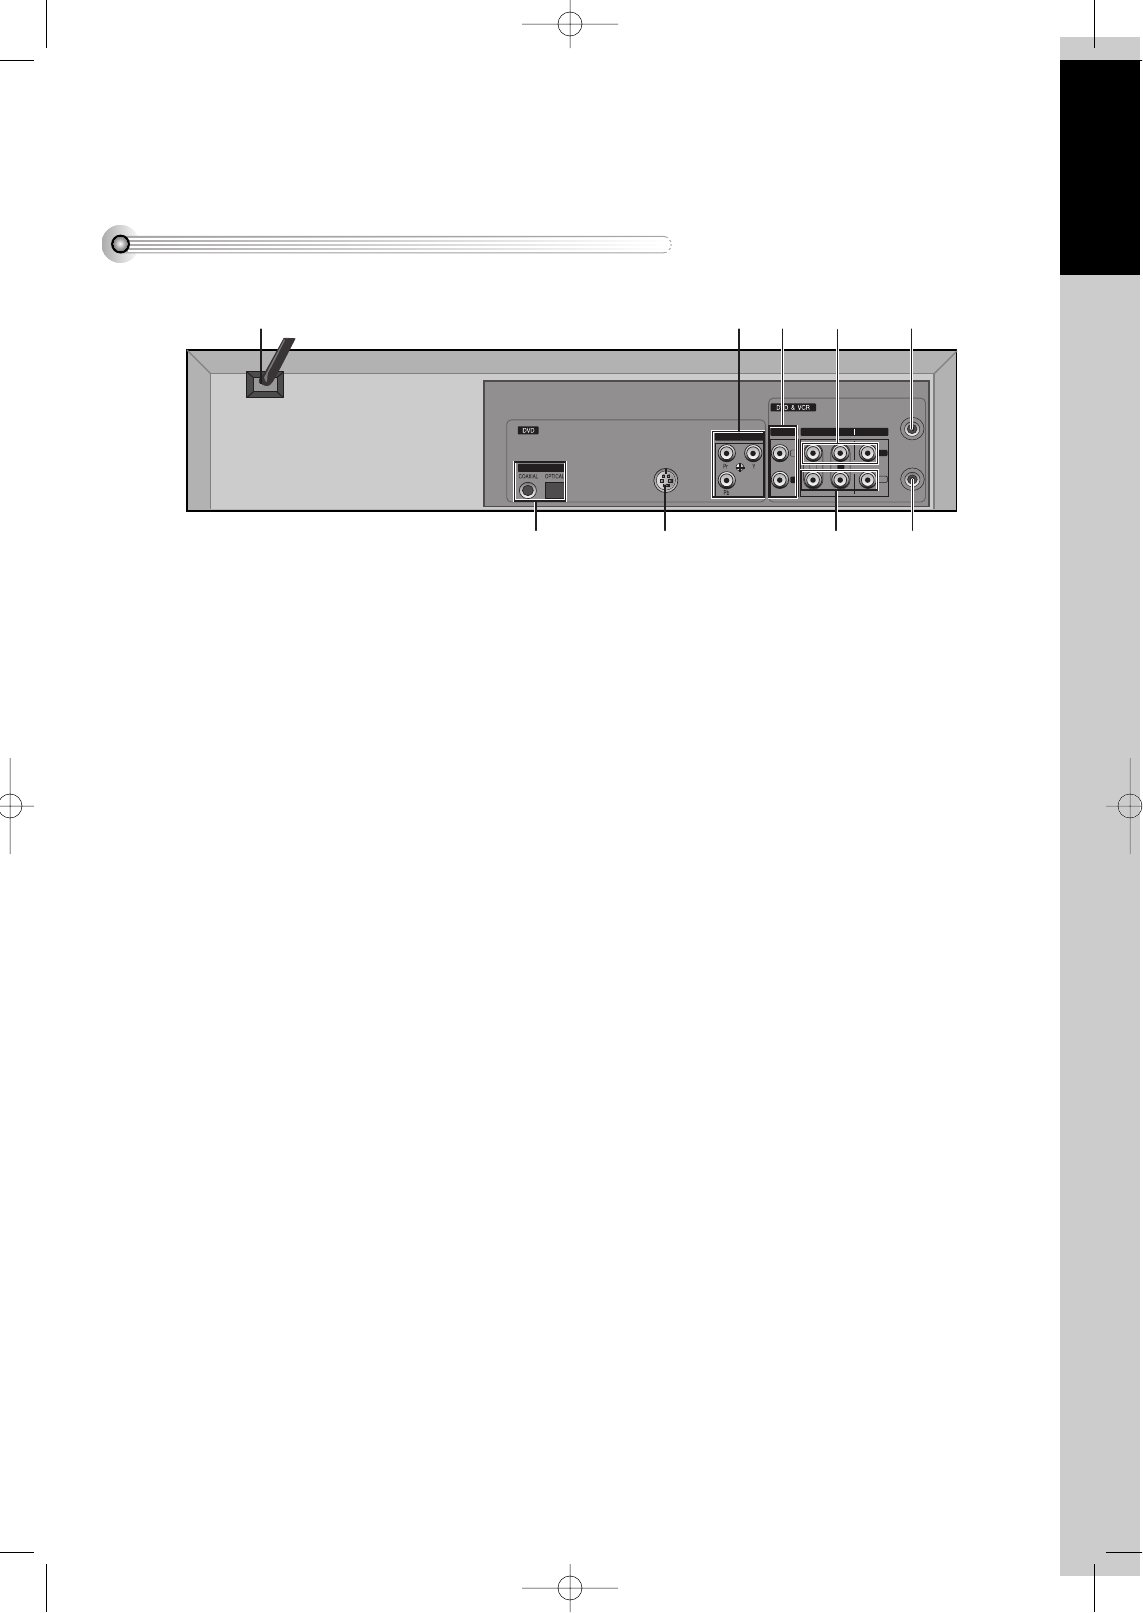
Main body (Rear Panel)
DIGITAL AUDIO OUT
COMPONENT OUT
AUDIO OUT
R
R
ANT.IN
RF OUT
LOUT
IN
L
AUDIO VIDEO
S-VIDEO OUT
!
(&#@
% *^$
!
POWER CORD
It is a jack for supplying power to the unit. Connect
to outlet in a wall.
@
DIGITAL OUTPUT (COAXIAL, OPTICAL)
Jack
To enjoy sound quality of theater level in home,
connect this jack with amp or unit embedded with
digital audio decoder.
#
S-VIDEO OUT Jack
To obtain better screen quality, connect and use the
unit to TV or monitor inputted from S-VIDEO.
$
COMPONENT OUT Jack
To obtain better screen quality, connect the unit to
TV or monitor with COMPONENT(480i) input.
%
AUDIO OUT Jack
^
A/V INPUT Jack
&
A/V OUTPUT Jack
*
Connection to ANTENNA Cable
(
Connection to TV
DVD-Video(USA)_DV6T811N-LT 02.4.16 2:37 PM ˘`13
14
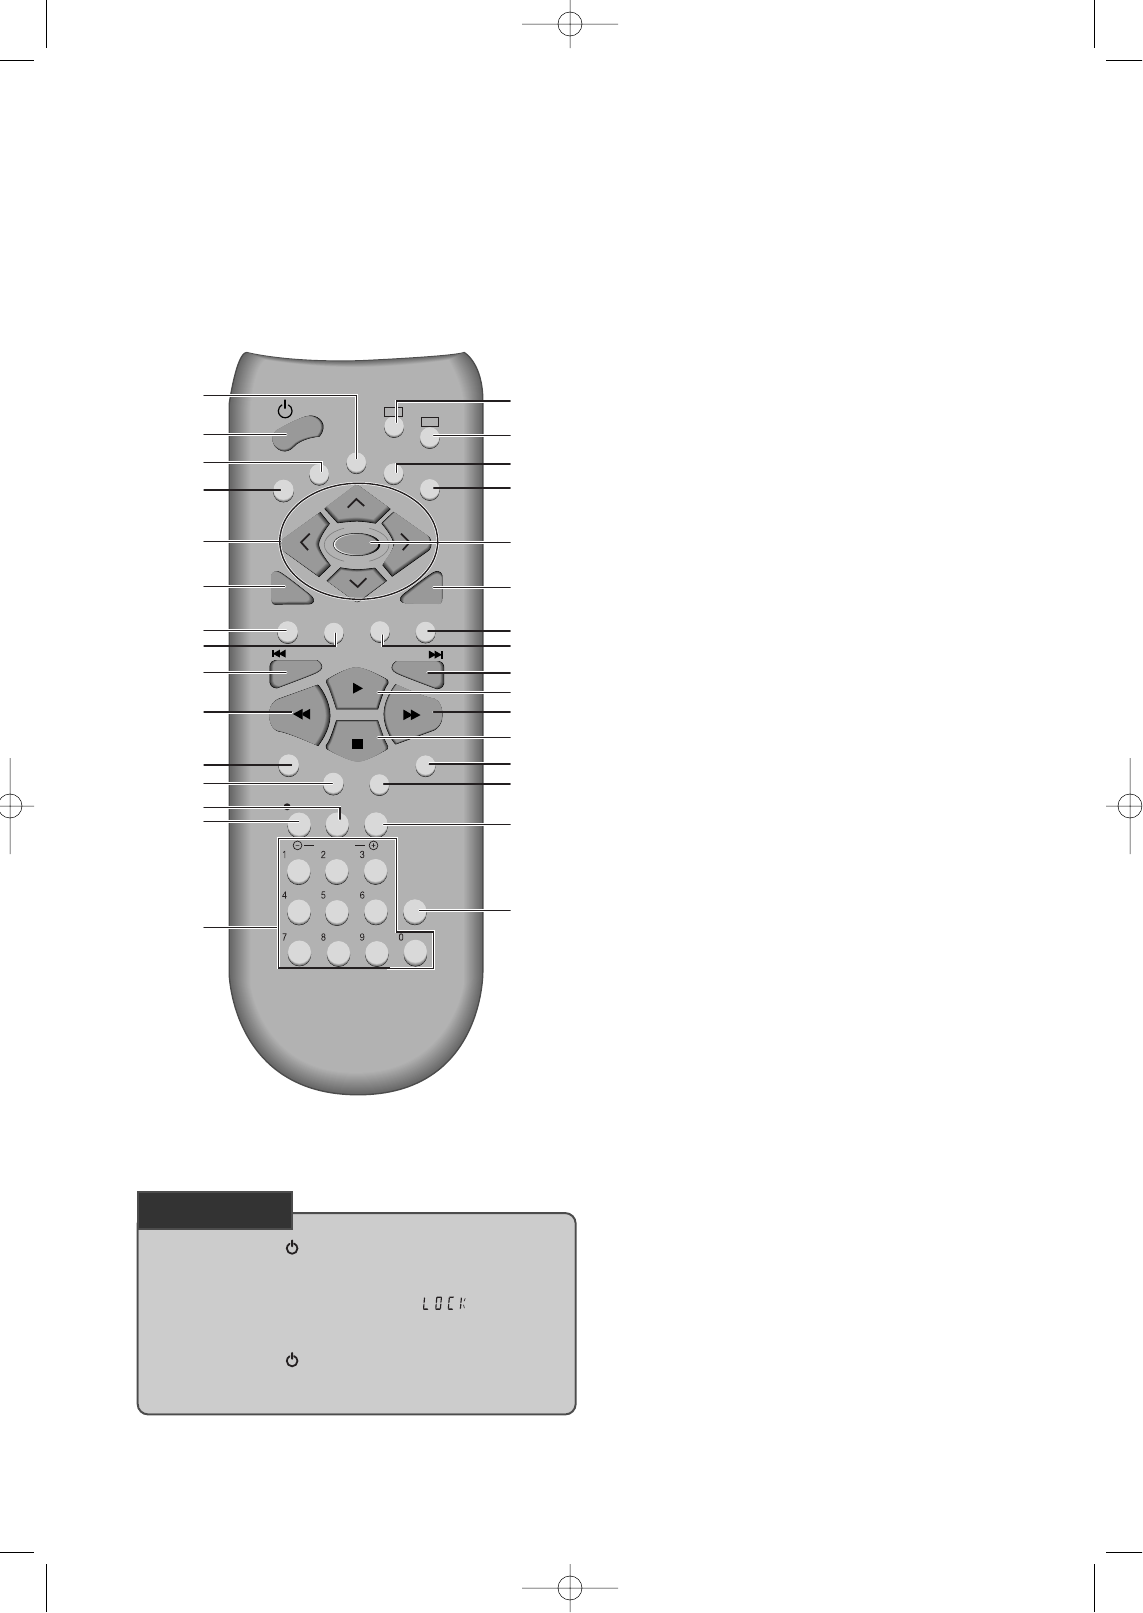
Remote Control
VCR
DVD
REPEAT
OPEN/CLOSE
DISPLAY
TITLE/PBC
MENU
CH
CH
OUTPUT
PREV.
REC
PROGRAM
CLK/CNT
SPEED/ANGLE
TRACKING
TV/VCR
MARK
SEARCH
100/SYSTEM
PLAY/PAUSE NEXT
ZOOM AUDIO SUBTITLE
RETURN
CLEAR/3D
SETUP
ENTER
/S-VHS
6
@
#
!
$
%
^
&
*
(
)
1
2
3
4
5
7
8
9
0
“
‘
+
=
Q
q
W
w
E
e
R
!
[DVD] MENU button
@
POWER button
#
[DVD] TITLE /PBC button
$
[DVD] OPEN/CLOSE button, [VCR] EJECT button
%
[DVD, VCR] MOVE/SELECT in OSD, [VCR] Channel
Up/Down button
^
RETURN button
&
[DVD] REPEAT Playback button
*
[DVD] ZOOM button
(
[DVD] PREVIOUS button (move into a previous
chapter or track)
)
REVERSE SEARCH button
1
[VCR] PROGRAM button
2
[DVD, VCR] CLOCK/COUNTER button
3
[DVD] ANGLE, [VCR] Record SPEED button
4
[VCR] Record button
5
[DVD, VCR] NUMBER button , [VCR] S-VHS Playback
button, [VCR] TRACKING -/+ button
6
DVD SELECT button
7
VCR SELECT button
8
[DVD, VCR] OSD DISPLAY button
9
OUTPUT Selection button
0
SETUP/ENTER button
“
CLEAR/3D button
‘
[DVD] SUBTITLE Select button
+
[DVD] AUDIO LANGUAGE Select, [VCR] AUDIO
Select button
=
[DVD] NEXT button (Move into a next chapter or
track) , [VCR] Frame Advance button in pause
mode
Q
PLAY/PAUSE button
q
FORWARD SEARCH button
W
STOP button
w
[DVD] Chapter/Title/Time SEARCH button
E
[DVD] BOOKMARK button
e
[DVD, VCR] TV/VCR button
R
[VCR] Number 100, [DVD] SYSTEM button (Select
Auto/NTSC/PAL)
Press the power [ ] button of the remote for about 8
seconds. No buttons of front panel and remote can be
operated now and Lock indicator (“ ”) will be
displayed on window display. To release child lock,
press the power [ ] button of the remote control for
about 8 seconds.
Child Lock!!!
DVD-Video(USA)_DV6T811N-LT 02.4.16 2:38 PM ˘`14
Product Information
15
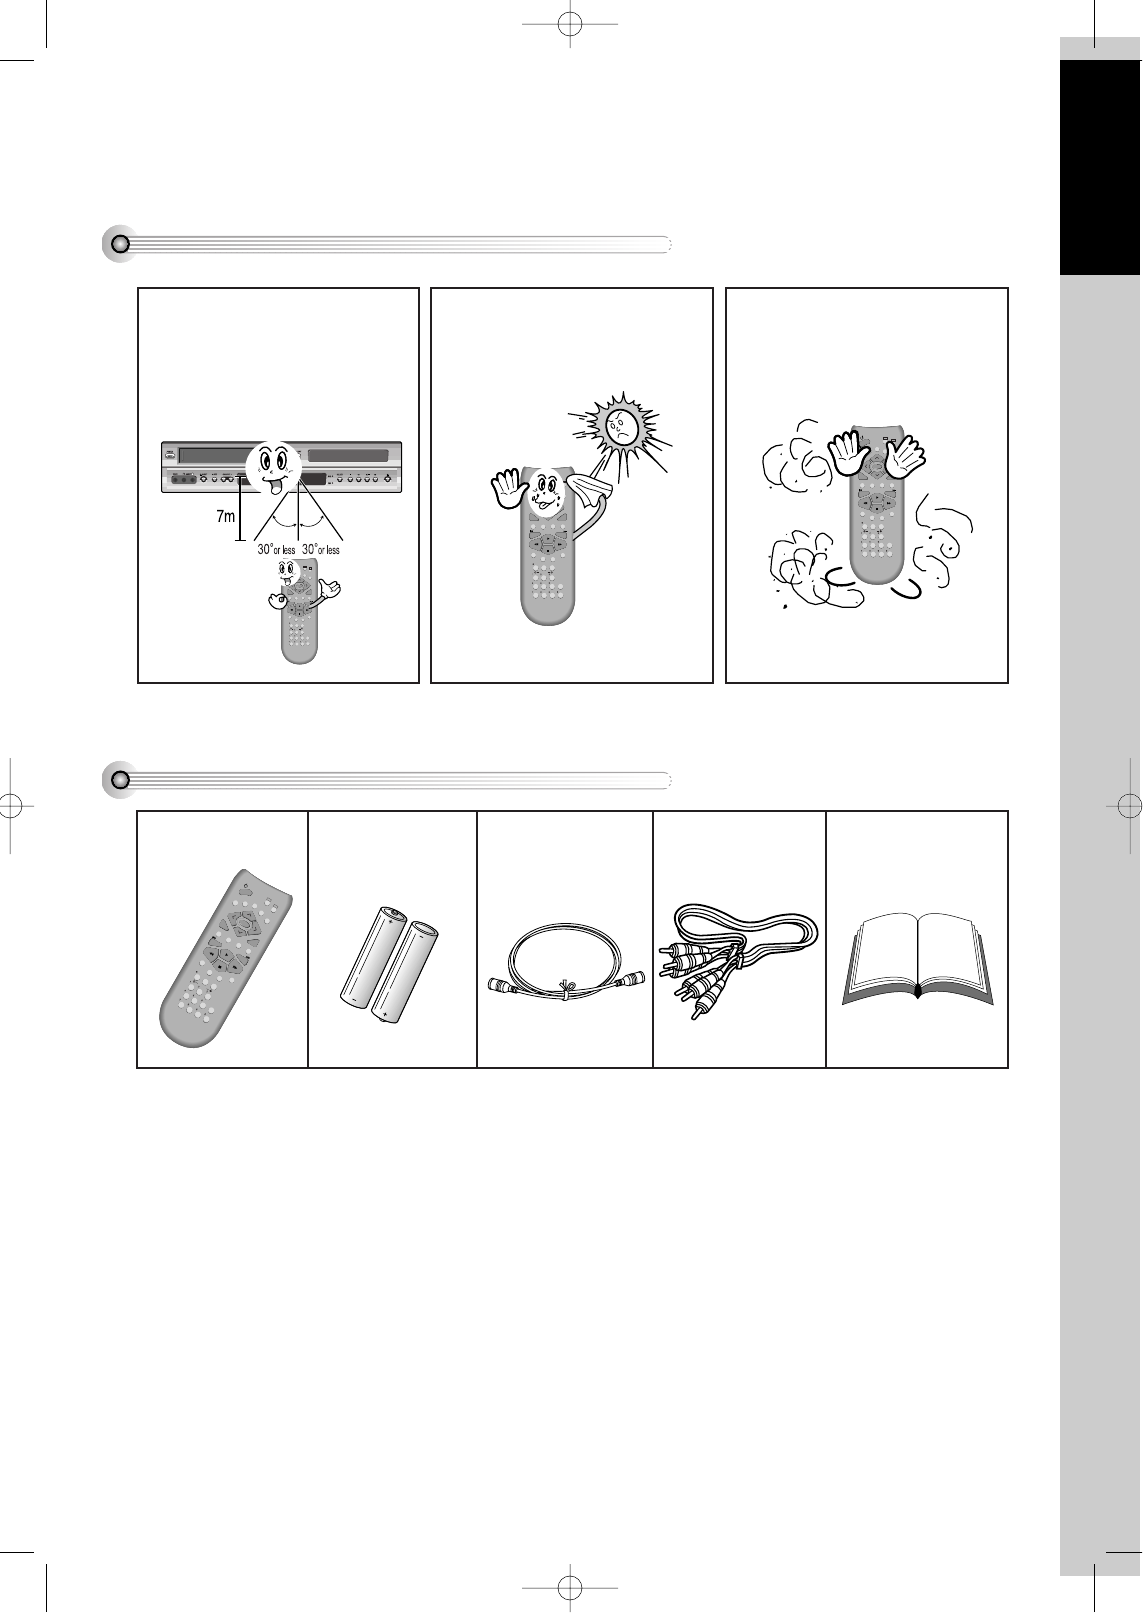
Instructions in Using REMOTE
Accessories
VCR
DVD
REPEAT
OPEN/CLOSE
DISPLAY
TITLE/PBC
MENU
CH
CH
OUTPUT
PREV.
REC
PROGRAM
CLK/CNT
SPEED/ANGLE
TRACKING
TV/VCR
MARK
SEARCH
100/SYSTEM
PLAY/PAUSE NEXT
ZOOM AUDIO SUBTITLE
RETURN
CLEAR/3D
SETUP
ENTER
/S-VHS
REMOTE 2 Batteries RF cable
Connecting cable to
Audio/Video jack
Owner’s Manual/
Warranty
• To purchase accessories or not supplied parts additionally, contact your nearest dealer or service center. But,
owner’s manual and warranty are not sold additionally.
VCR
DVD
REPEAT
OPEN/CLOSE
DISPLAY
TITLE/PBC
MENU
CH
CH
OUTPUT
PREV.
REC
PROGRAM
CLK/CNT
SPEED/ANGLE
TRACKING
TV/VCR
MARK
SEARCH
100/SYSTEM
PLAY/PAUSE NEXT
ZOOM AUDIO SUBTITLE
RETURN
CLEAR/3D
SETUP
ENTER
/S-VHS
• Operate REMOTE within 7m
from the unit.
• Do not press 2(two) buttons at
the same time.
• Do not light up sending part of
REMOTE.
• Do not keep in the place with
much dust and humidity.
VCR
DVD
REPEAT
OPEN/CLOSE
DISPLAY
TITLE/PBC
MENU
CH
CH
OUTPUT
PREV.
REC
PROGRAM
CLK/CNT
SPEED/ANGLE
TRACKING
TV/VCR
MARK
SEARCH
100/SYSTEM
PLAY/PAUSE NEXT
ZOOM AUDIO SUBTITLE
RETURN
CLEAR/3D
SETUP
ENTER
/S-VHS
VCR
DVD
REPEAT
OPEN/CLOSE
DISPLAY
TITLE/PBC
MENU
CH
CH
OUTPUT
PREV.
REC
PROGRAM
CLK/CNT
SPEED/ANGLE
TRACKING
TV/VCR
MARK
SEARCH
100/SYSTEM
PLAY/PAUSE NEXT
ZOOM AUDIO SUBTITLE
RETURN
CLEAR/3D
SETUP
ENTER
/S-VHS
DV6T811N-LT(GB) 02.4.16 5:10 PM ˘`15
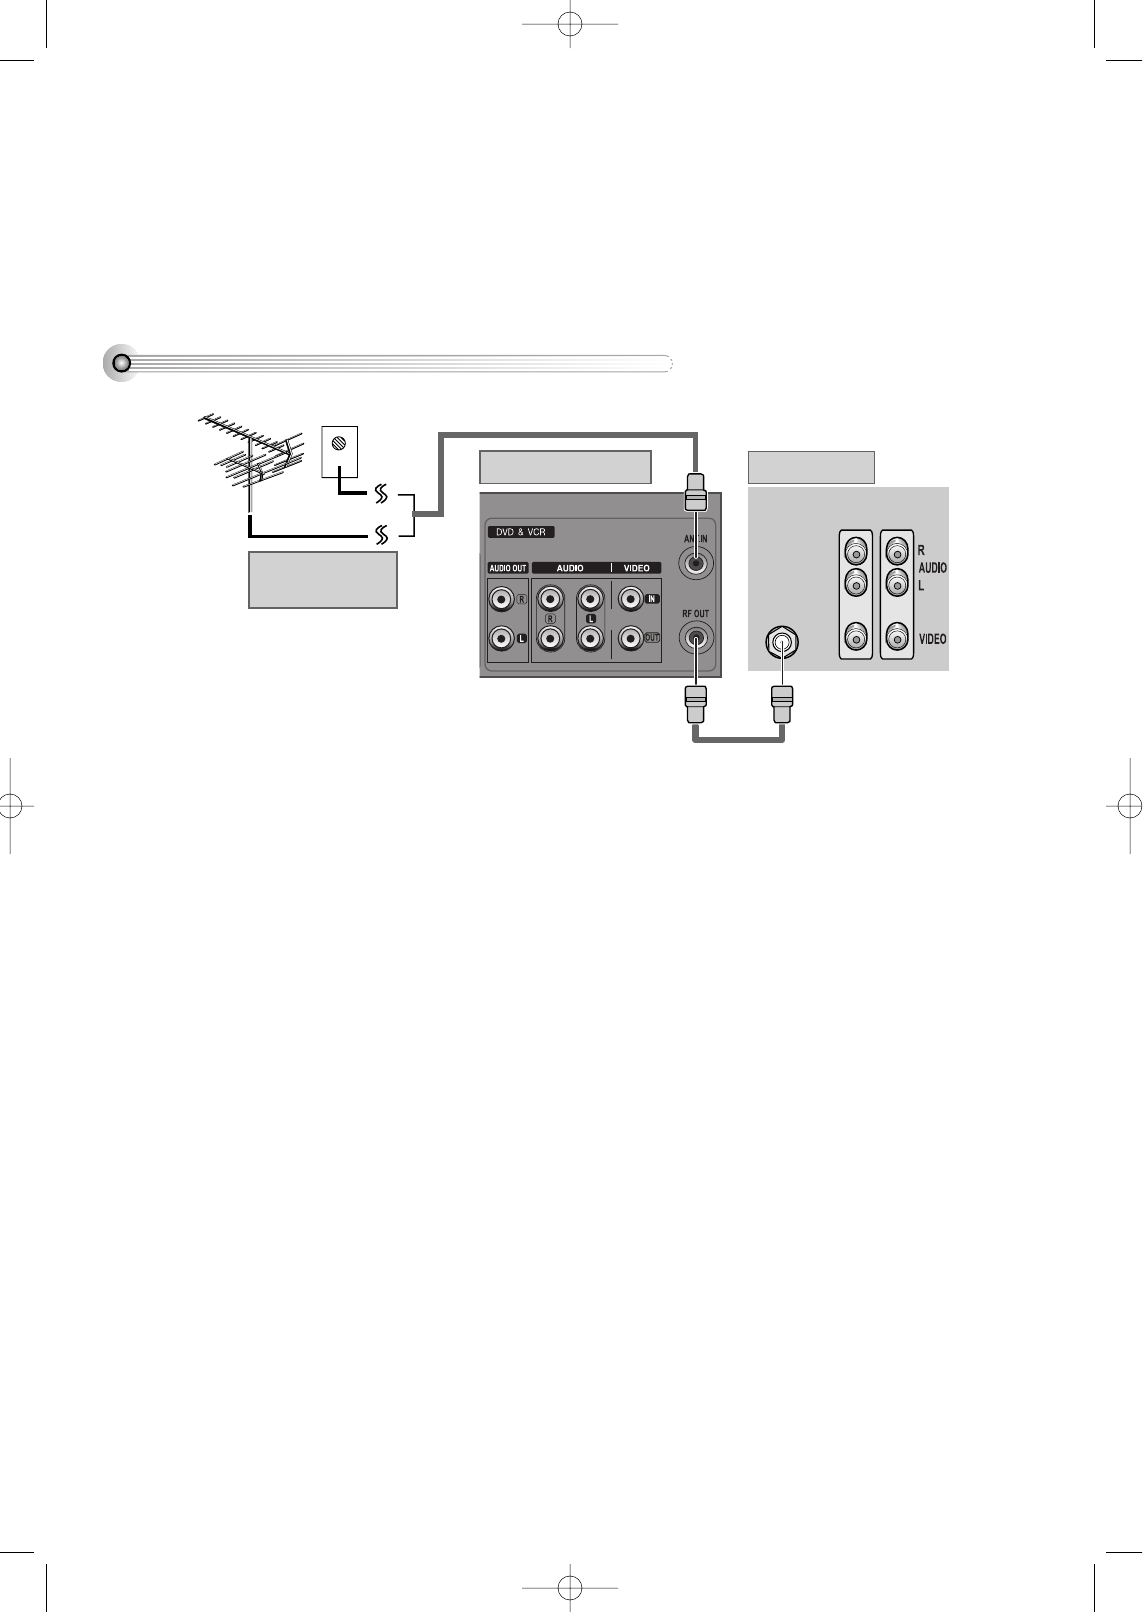
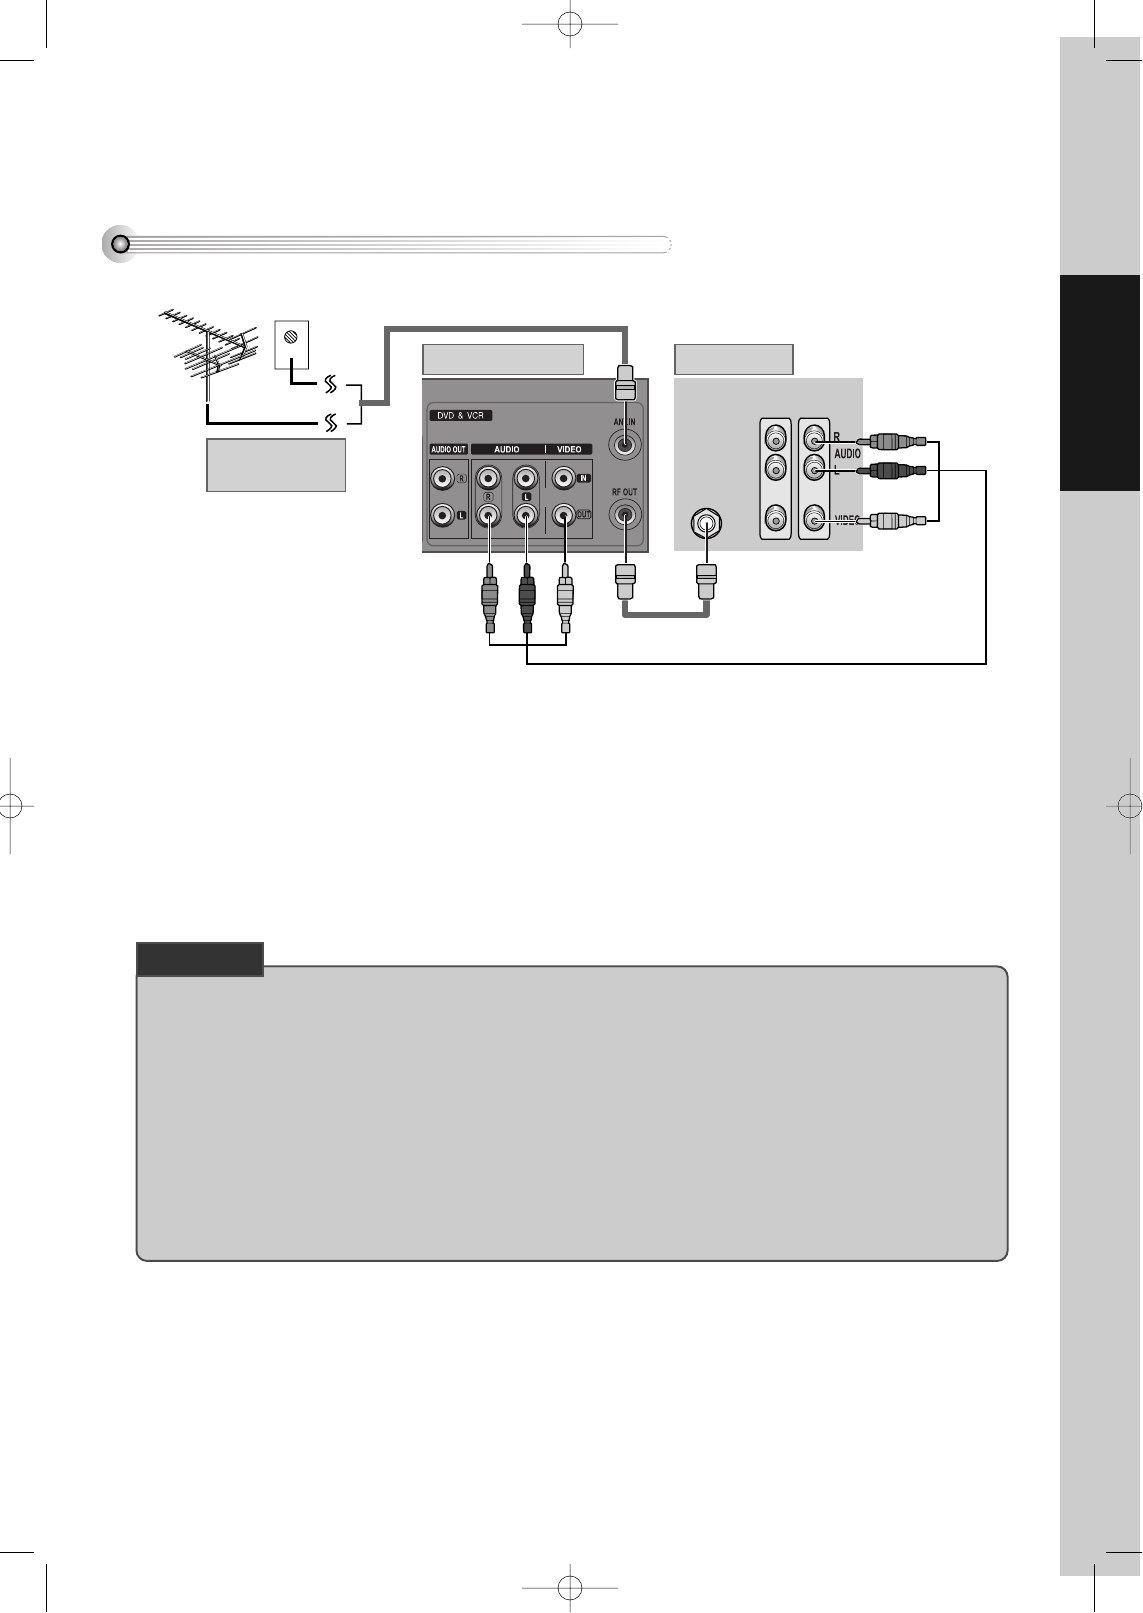
16
Connecting with TV
How to Connect with RF cable
INPUT 1
ANT IN
INPUT 2
REAR PANEL OF DVD-VIDEO
OUTSIDE ANTENNA OR
WALL ANTENNA OUTLET
REAR PANEL OF TV
RF CABLE
¡Remove circular cable (RF cable) (surplus cable) plugged in “ANT.IN” Jack in rear panel of TV. Connect the
cable to “ANT.IN” jack in rear panel of DVD-Video.
™Connect TV to DVD-Video. Connect “RF OUT” jack in DVD-Video with “ANT.IN” jack in TV with RF cable.
■In the initial SET, exclusive channel for video is set to CH 3. To change this setting, set again in “CHANNEL SET”
screen in VCR operation.
■In connecting RF cable to TV, set TV channel to CH3.
DVD-Video(USA)_DV6T811N-LT 02.4.16 2:38 PM ˘`16
Installation
17
How to Connect with Audio/Video jack
INPUT 1
ANT IN
INPUT 2
REAR PANEL OF DVD-VIDEO
OUTSIDE ANTENNA OR
WALL ANTENNA OUTLET
REAR PANEL OF TV
RF CABLE
AUDIO/VIDEO CABLE
£(If there is AUDIO/VIDEO INPUT jack in TV)
Connect VIDEO OUT jack in DVD-Video to VIDEO IN jack in TV, and AUDIO OUT jack in DVD-Video to
AUDIO IN jack in TV with connecting cable of Audio/Video jack.
Select VCR mode by pressing TV/INPUT button in TV, you can view more clear screen and sound than
connection with RF cable only.
• VHF: 2 ~13 channels of TV
• UHF: 14~69 channels of TV
• CATV: Broadcasting is transmitted with cable from broadcasting station by contract with the station and consumers. It
does not need any antenna.
• In/Out jack in Audio/Video terminal:
- In: A jack used to receive signal required in this unit from other units.
- Out: A jack used to send signal of this unit to other units.
• Connect with Audio/Video terminal, you can enjoy more clear video and audio.
(Use OUTPUT button in this REMOTE to select video mode.)
CHECK UP!
DVD-Video(USA)_DV6T811N-LT 02.4.16 2:38 PM ˘`17
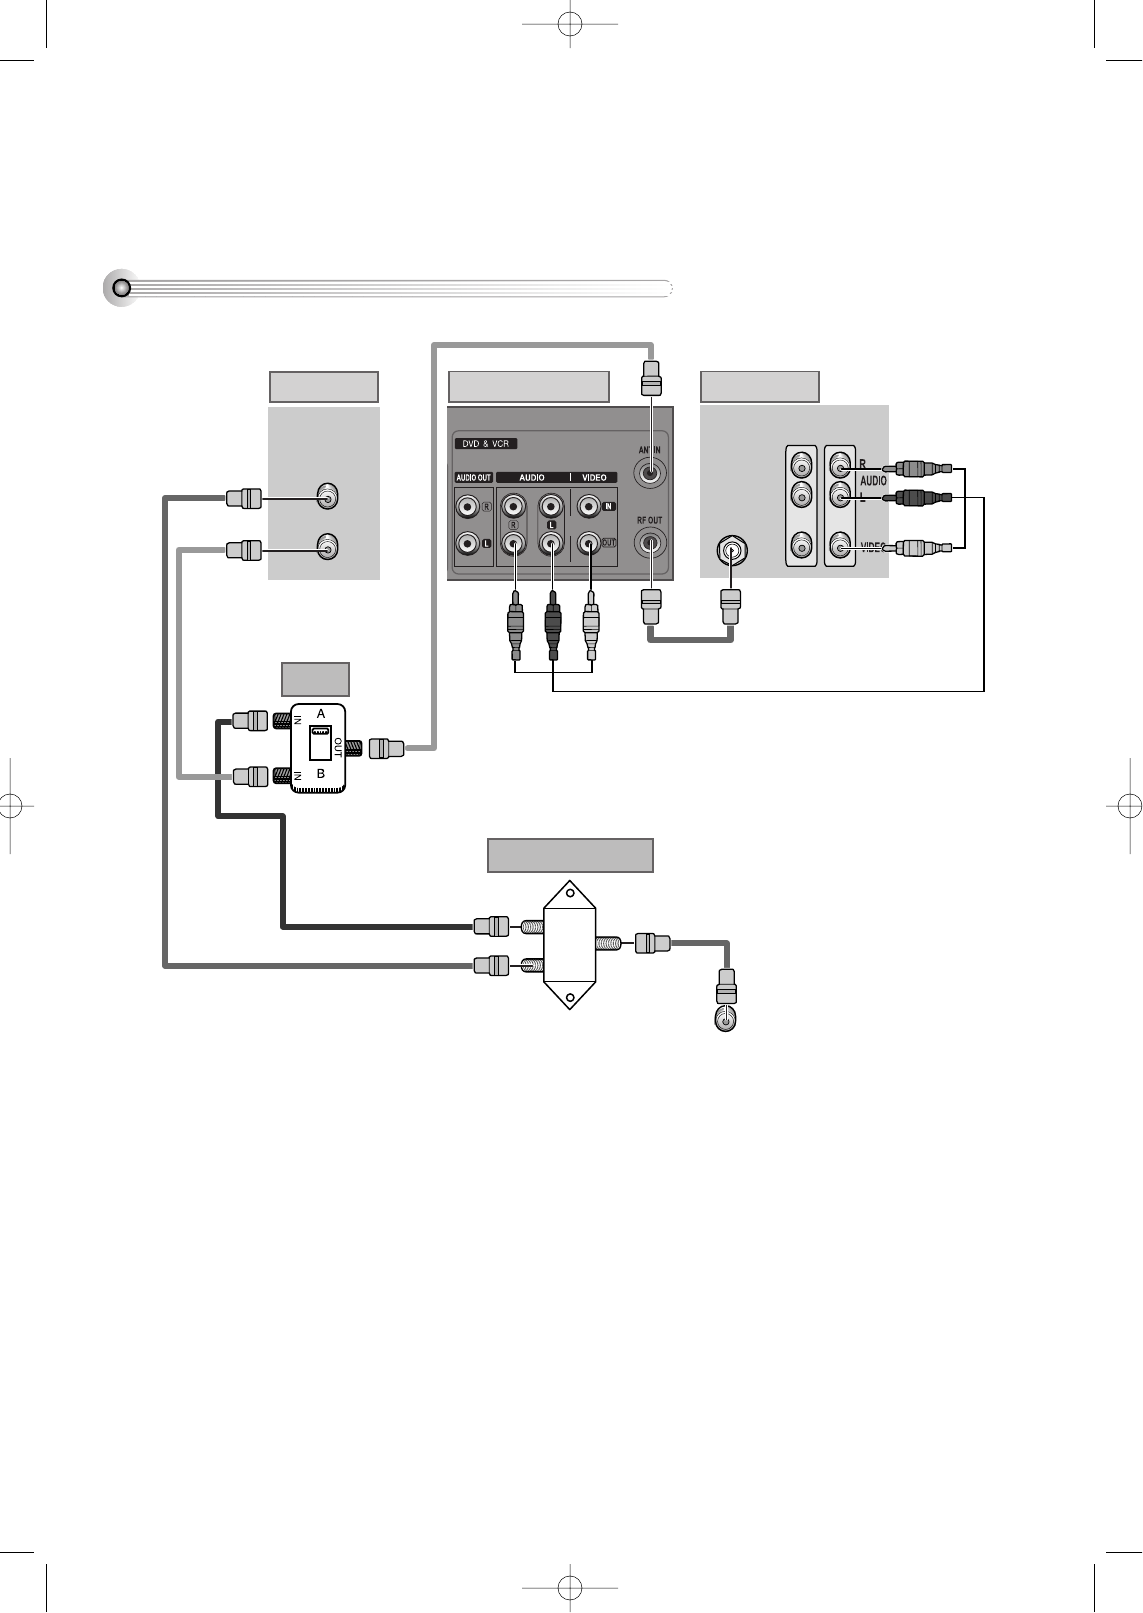
18
Connecting with Cable Box
How to connect
INPUT 1
IN
OUT ANT IN
INPUT 2
REAR PANEL OF DVD-VIDEO
CABLE ANTENNA
CONVERTER BOX REAR PANEL OF TV
SPLITTER (NOT SUPPORTED)
A/B Switch
RF CABLE
RF CABLE
RF CABLE
RF CABLE
OUT
OUT
IN
AUDIO/VIDEO CABLE
If your cable system only requires you to use a converter box for some channels
(i.e., pay-TV channels), follow these steps: Find the primary incoming RF cable. Plug this cable into a splitter
(available at your local electronics store.) Connect one RF cable between one OUT terminal on the splitter and the
IN terminal on the converter box.
Connect another RF cable between the other OUT terminal on the splitter and the A-IN terminal on an A/B switch
(available at your local electronics store.) Connect a third RF cable between the OUT terminal on the converter box
and the B-IN terminal on the A/B switch.
Connect a RF cable between the OUT terminal on the A/B switch and the ANT. IN on your DVD-VIDEO.
When the A/B switch is in the B position, use the converter box to change channels ; when the A/B switch is in the A
position, use the DVD-VIDEO to change channels.
■You should install a distributor additionally.
DVD-Video(USA)_DV6T811N-LT 02.4.16 2:38 PM ˘`18
Installation
19
How to watch general broadcasting with recording CATV
¡Set Channel Select switch of Converter Box to CH 3 or 4 as same as video exclusive channel. Press [SET] button
in [VCR] operation to set video exclusive channel in “CHANNEL SET” screen.
™Press channel button of Converter Box to select channel to be recorded. In this case, if you want to watch CATV
to be recorded, press [TV/INPUT] button of TV to select “Out(VCR)”.
£Press [REC] button in DVD-Video.
¢To watch general broadcasting, press channel button in TV to select the desired channel.
• For some types of TV, you should press [TV/INPUT] button in TV REMOTE and convert from Out 1( VCR 1) or Out
2(VCR 2) mode to Broadcasting Channel mode to change TV channel.
• Change channel selection of CATV receiver in recording, contents of recording is changed.
CHECK UP!
DVD-Video(USA)_DV6T811N-LT 02.4.16 2:38 PM ˘`19
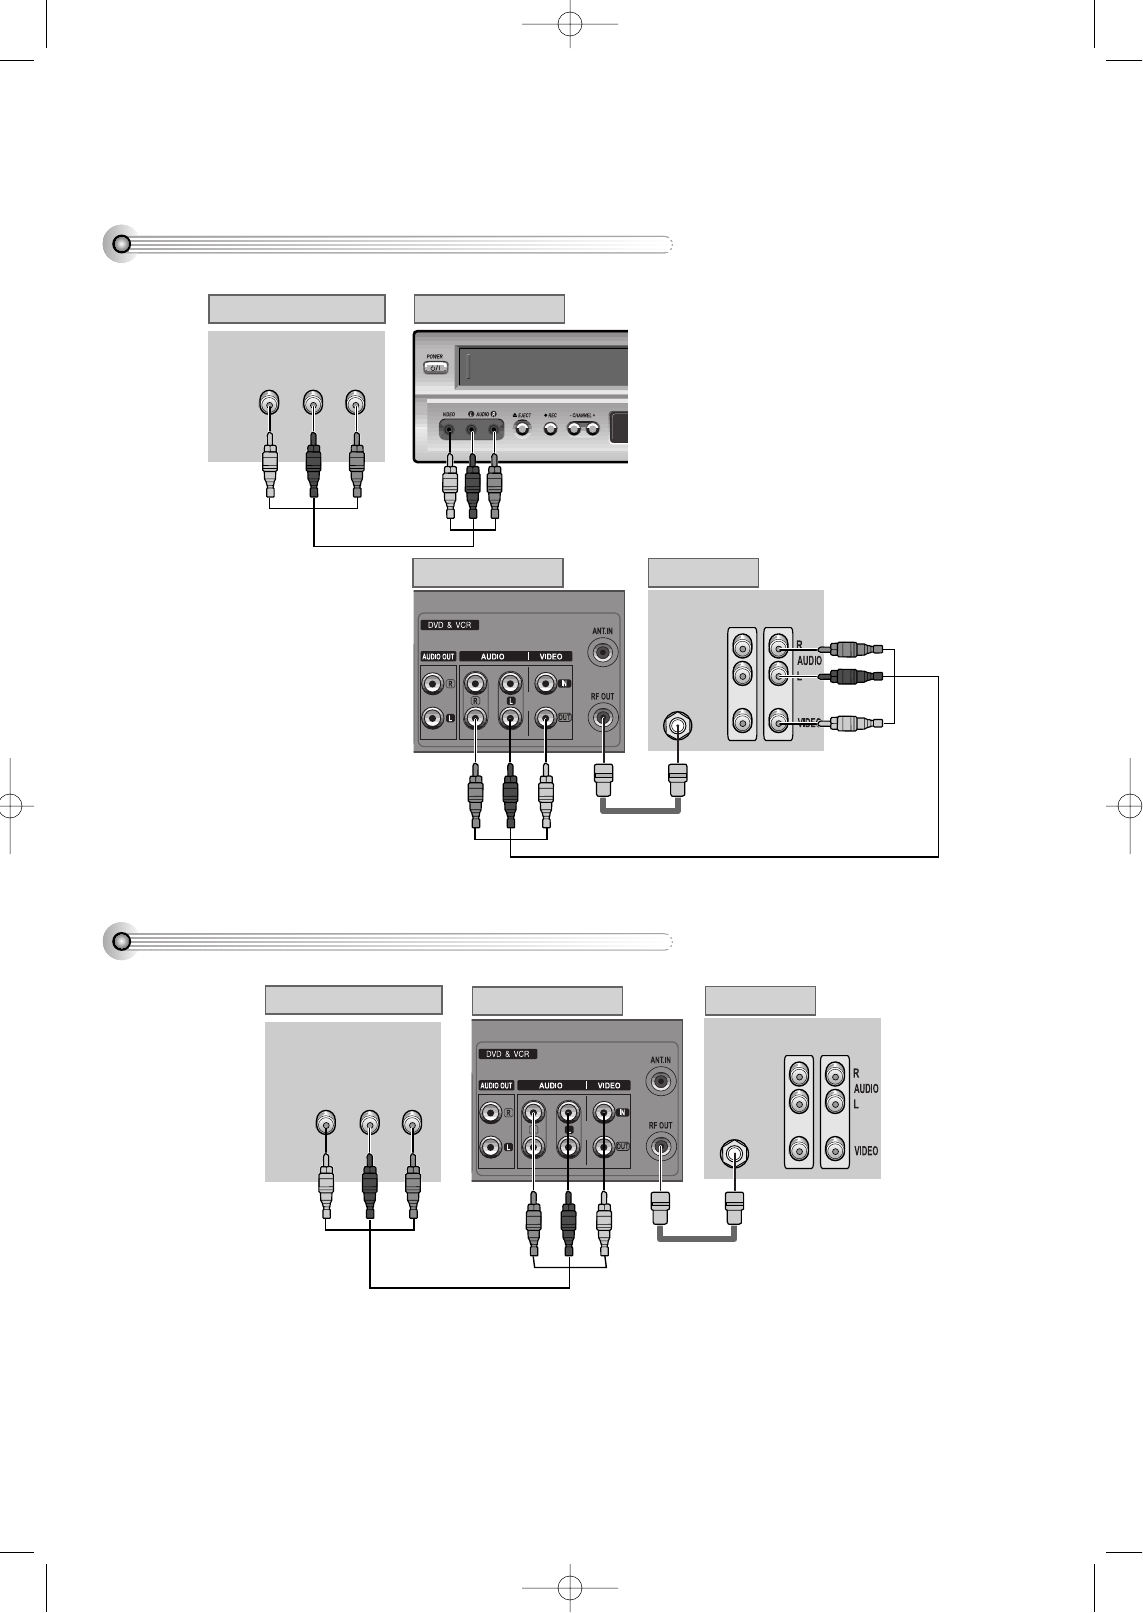
20
Connecting with Other VCR or Camcorder
How to Connect with Jack in Rear Panel
How to Connect with Jack in Front Panel
INPUT 1
OUT
VIDEO (L) AUDIO (R)
ANT IN
INPUT 2
REAR PANEL OF DVD-VIDEO
FRONT PANEL OF DVD-VIDEO
REAR PANEL OF PLAYBACK VCR(CAMCORDER)
REAR PANEL OF TV
RF CABLE
AUDIO/VIDEO CABLE
INPUT 1
OUT
VIDEO (L) AUDIO (R)
ANT IN
INPUT 2
REAR PANEL OF DVD-VIDEO
REAR PANEL OF PLAYBACK VCR(CAMCORDER)
REAR PANEL OF TV
AUDIO/VIDEO CABLE
RF CABLE
DV6T811N-LT(GB) 02.4.16 5:13 PM ˘`20
Installation
21
How to Copy(Edit) Tape with Other VCR or Camcorder
¡Connect AUDIO/VIDEO OUT jack in Camcorder(or playback video) to AUDIO/VIDEO IN jack in rear panel
(or front panel) of DVD-Video with connecting cable.
™Connect “ANT. IN” jack in TV to “RF.OUT” jack in DVD-Video with RF cable.
£To record contents of camcorder or playback video with DVD-Video, insert recording tape attached recording
tab in DVD-Video.
¡Turn on DVD-Video.
™Press [OUTPUT] button of remote control and adjust DVD-Video to display “External Input 1” or “External Input
2” in TV screen.
£Press [PLAY] button in Camcorder or playback video.
¢Press [REC] button in DVD-Video if you want to record contents of camcorder or playback video.
∞Press [Pause] button in DVD-Video when unnecessary or undesired scene is displayed in recording.
(Caution) Recording is released automatically after 5 minutes since pressing [PAUSE] button. Press [REC]
button if you want to record again.
How to Playback Chapter Photographed by Camcorder
¡Turn DVD-Video on.
™Press [OUTPUT] button of remote control and adjust DVD-Video to display “External Input 1” or “External Input
2” in TV screen.
£Insert tape in camcorder and playback it.
DVD-Video(USA)_DV6T811N-LT 02.4.16 2:38 PM ˘`21
22
Connecting with Audio
How to Connect with Stereo Unit such as Audio
(L) AUDIO (R)
REAR PANEL OF DVD-VIDEOREAR PANEL OF STEREO UNIT
AUDIO CABLE
¡Connect Audio jack. Connect AUDIO OUT in rear panel of DVD-Video to IN jack of stereo sound unit.
™For Input Select in stereo unit, Select “External Input” connected with DVD-Video.
£Playback DVD disc or Hi-Fi videotape, you can hear sound in speaker of stereo unit.
DVD-Video(USA)_DV6T811N-LT 02.4.16 2:38 PM ˘`22
Move: Select : Exit:Setup/Return
Installation
23
Connecting TV with S-Video/Component Jack, Amp with Digital Audio Out Jack
How to Connect
(L) AUDIO IN (R)
REAR PANEL OF DVD-VIDEO
AMPLIFIER OF DOLBY DIGITAL REAR PANEL OF TV
COMPONENT IN
CONNECTING CABLE
(NOT SUPPORTED)
¡Select either S-VIDEO IN or COMPONENT IN to connect to TV. You should
select “Video Out” type in DVD SET(see 62P) in advance.
™Select either COAXIAL or OPTICAL to connect to amp of Dolby Digital.
** If you want to know about “Dolby Digital”, please refer to [About DVD] in
68p.
£If screen is broken in connecting COMPONENT OUT to Pr, Pb, Y of TV
COMPONENT IN jack , connect to Cr, Cb, Y.
■Use in S-VIDEO or COMPONENT In jack attached in TV or amp supporting Dolby Digital.
Language Video Audio Others
TV Aspect 4:3 PS
TV Type NTSC
Video Out S-Video
Brightness Normal
Sharpness Normal
Component
S-Video
Manufactured under license from Dolby Laboratories.
“Dolby”, “Pro Logic”, and the double-D symbol are trademarks of Dolby Laboratories.
DVD-Video(USA)_DV6T811N-LT 02.4.16 2:38 PM ˘`23

24
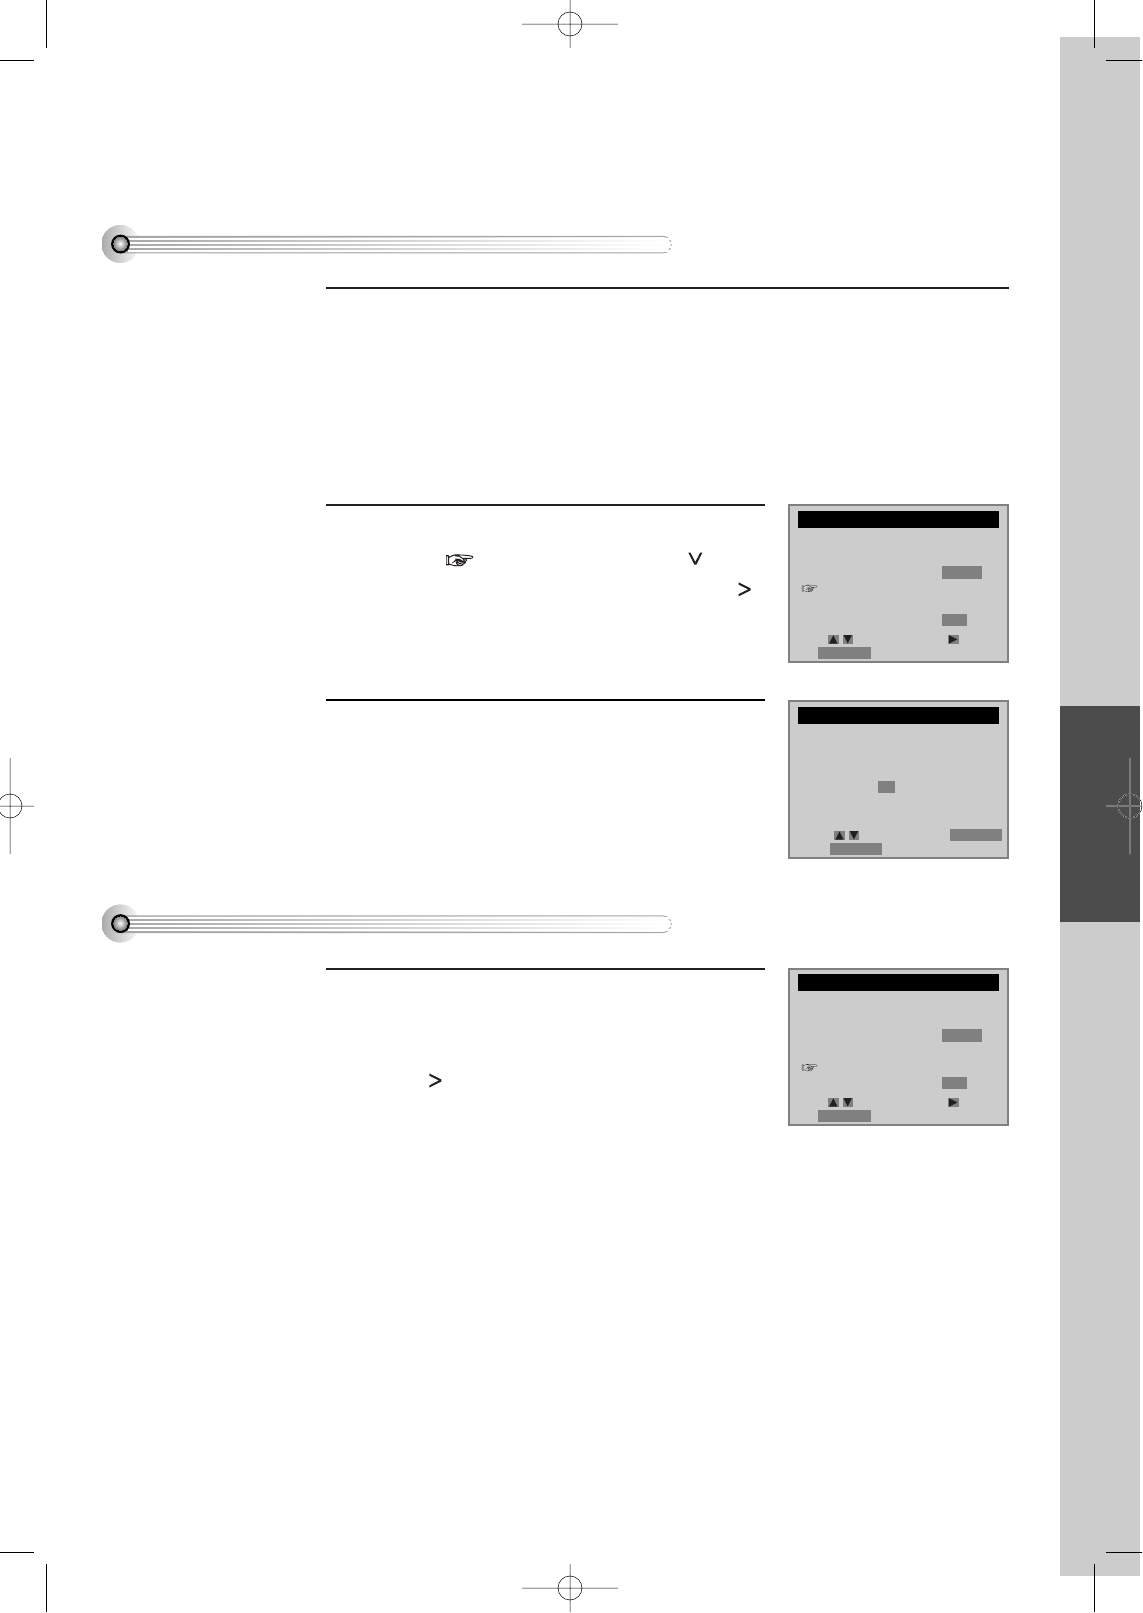
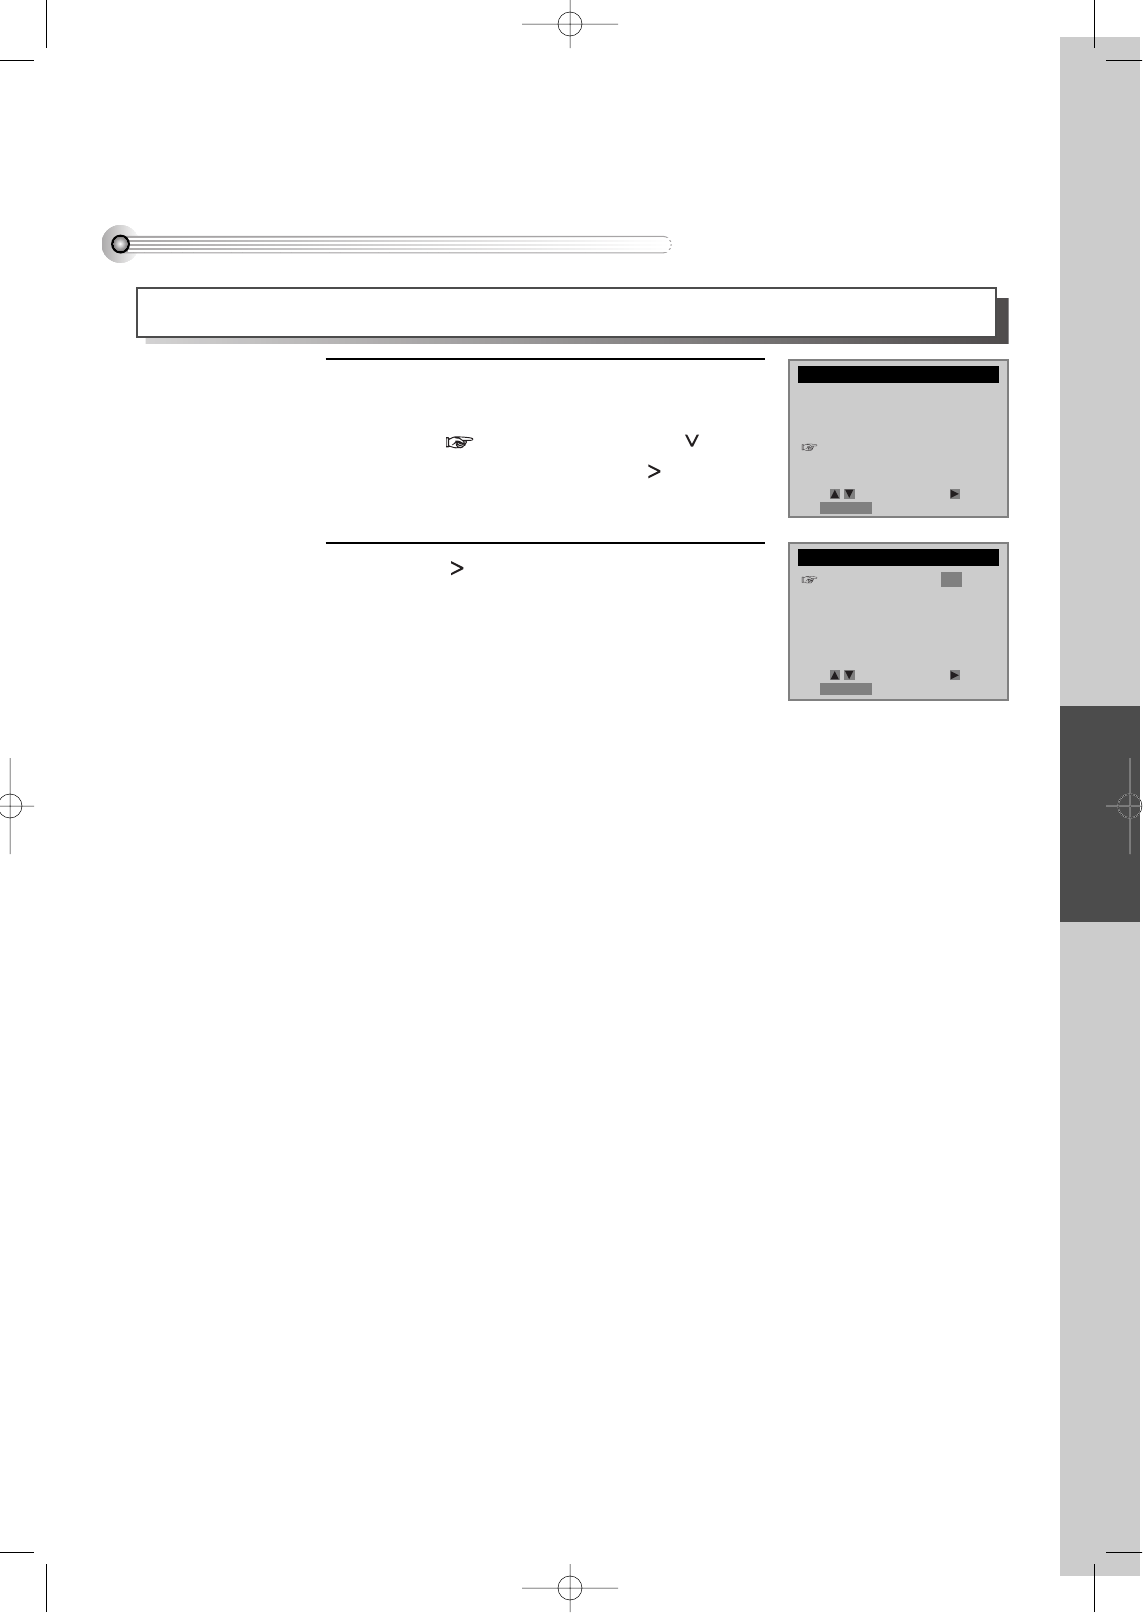
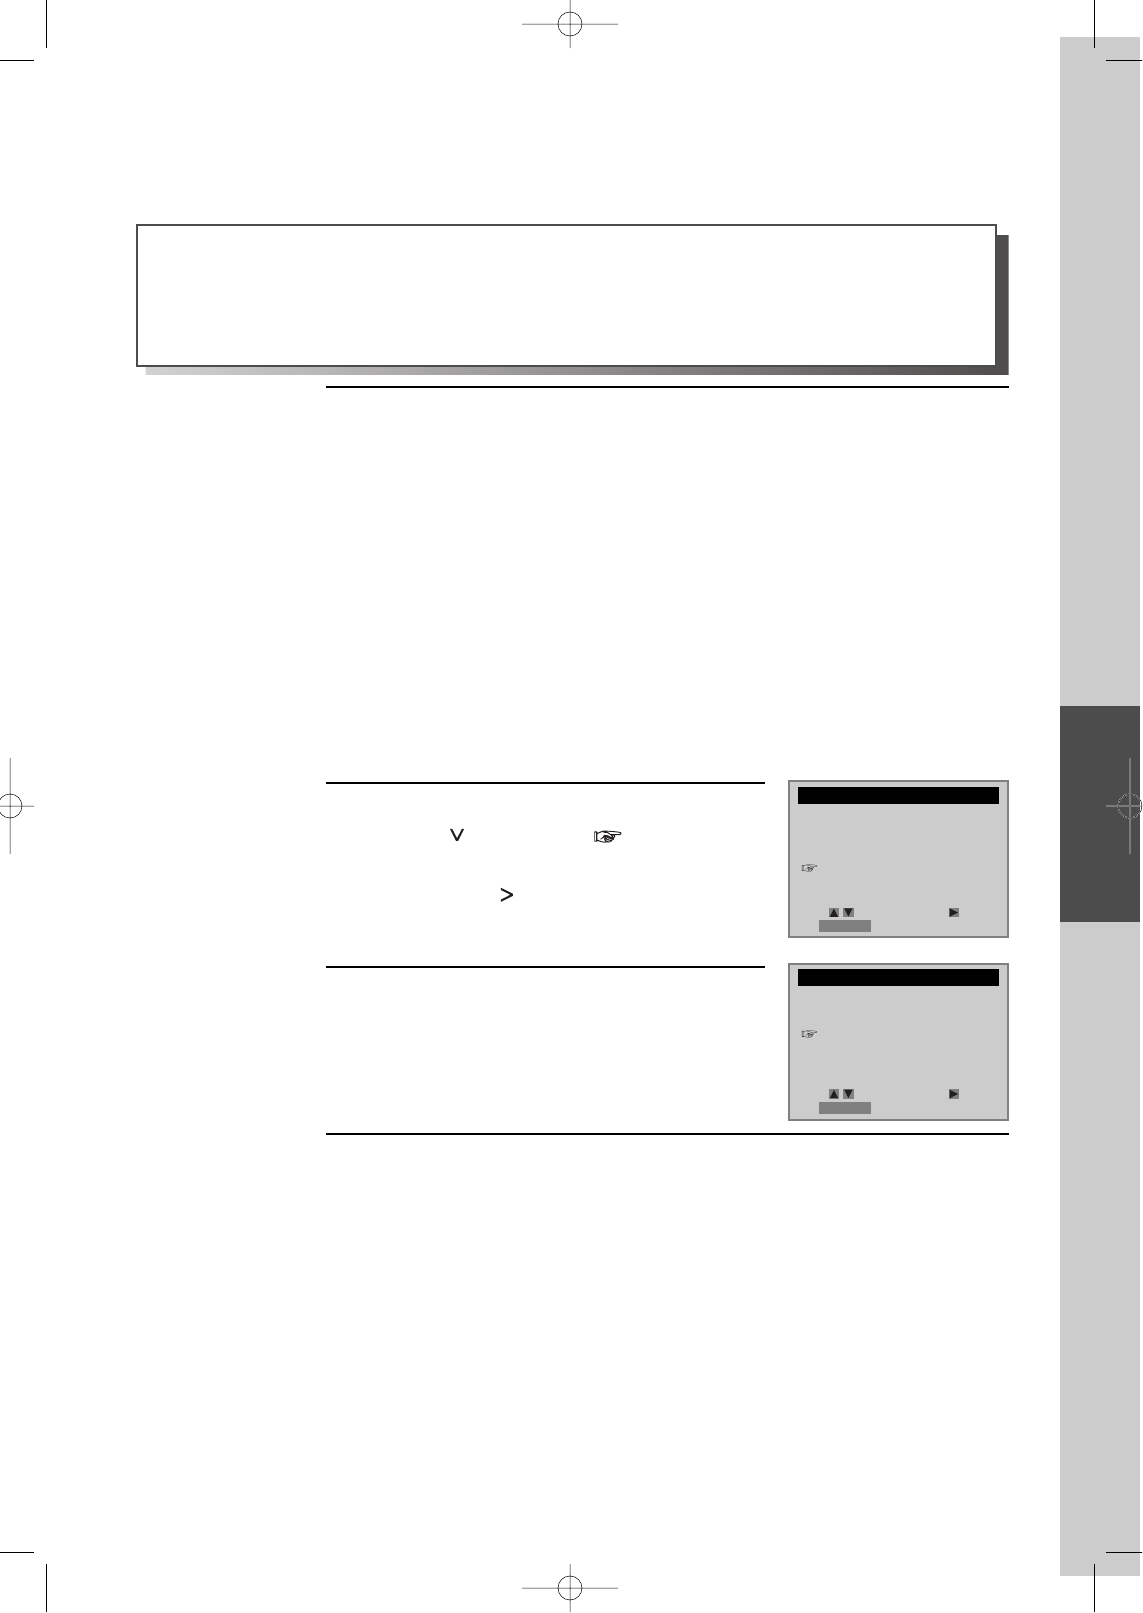
Clock Set
Press [SETUP/ENTER] button.
Press [>] button to select CLOCK SET.
Select Time and Date Set with [ ] button in
CLOCK SET screen.
■Set TV to CH 4 (or 3).
■Press [VCR] button on remote control to change into VCR Mode and follow the
procedure below.
Set the current date and time with [ , , ,
] button or [NUMBER] button.
For DATE SET, follow the order of
Month/Day/Year ; for TIME SET, follow the order
of Hour/Minute in CLOCK SET screen.
If CLOCK SET is completed, press
[RETURN] button.
1
2
3
REPEAT
CH
PREV.
REC
PROGRAM
CLK/CNT
SPEED/ANGLE
TRACKING
TV/VCR
MARK
SEARCH
100/SYSTEM
PLAY/PAUSE NEXT
ZOOM AUDIO SUBTITLE
RETURN
CLEAR/3D
SETUP
ENTER
/S-VHS
RETURN
NUMBER
SETUP/ENTER
SETUP
CLOCK SET
TIMER RECORDINGS
CHANNEL SET
FUNCTIONS
LANGUAGE SELECT
Move: Select:
End:RETURN
CLOCK SET
Time and Date Set
Auto DST : ON
TIME AND DATE SET
Time - - : - -
(hh:mm)
Date - - / - - / 2 0 - -
TIME AND DATE SET
Time 11 : 01 AM
Date 05 / 25 / 2002 (Sat)
(mm/dd/yy)
Move: Select:
End:RETURN
Move: Select:
End:RETURN
Move: Select:
End:RETURN
DVD-Video(USA)_DV6T811N-LT 02.4.16 3:42 PM ˘`24
Basic Operation
25
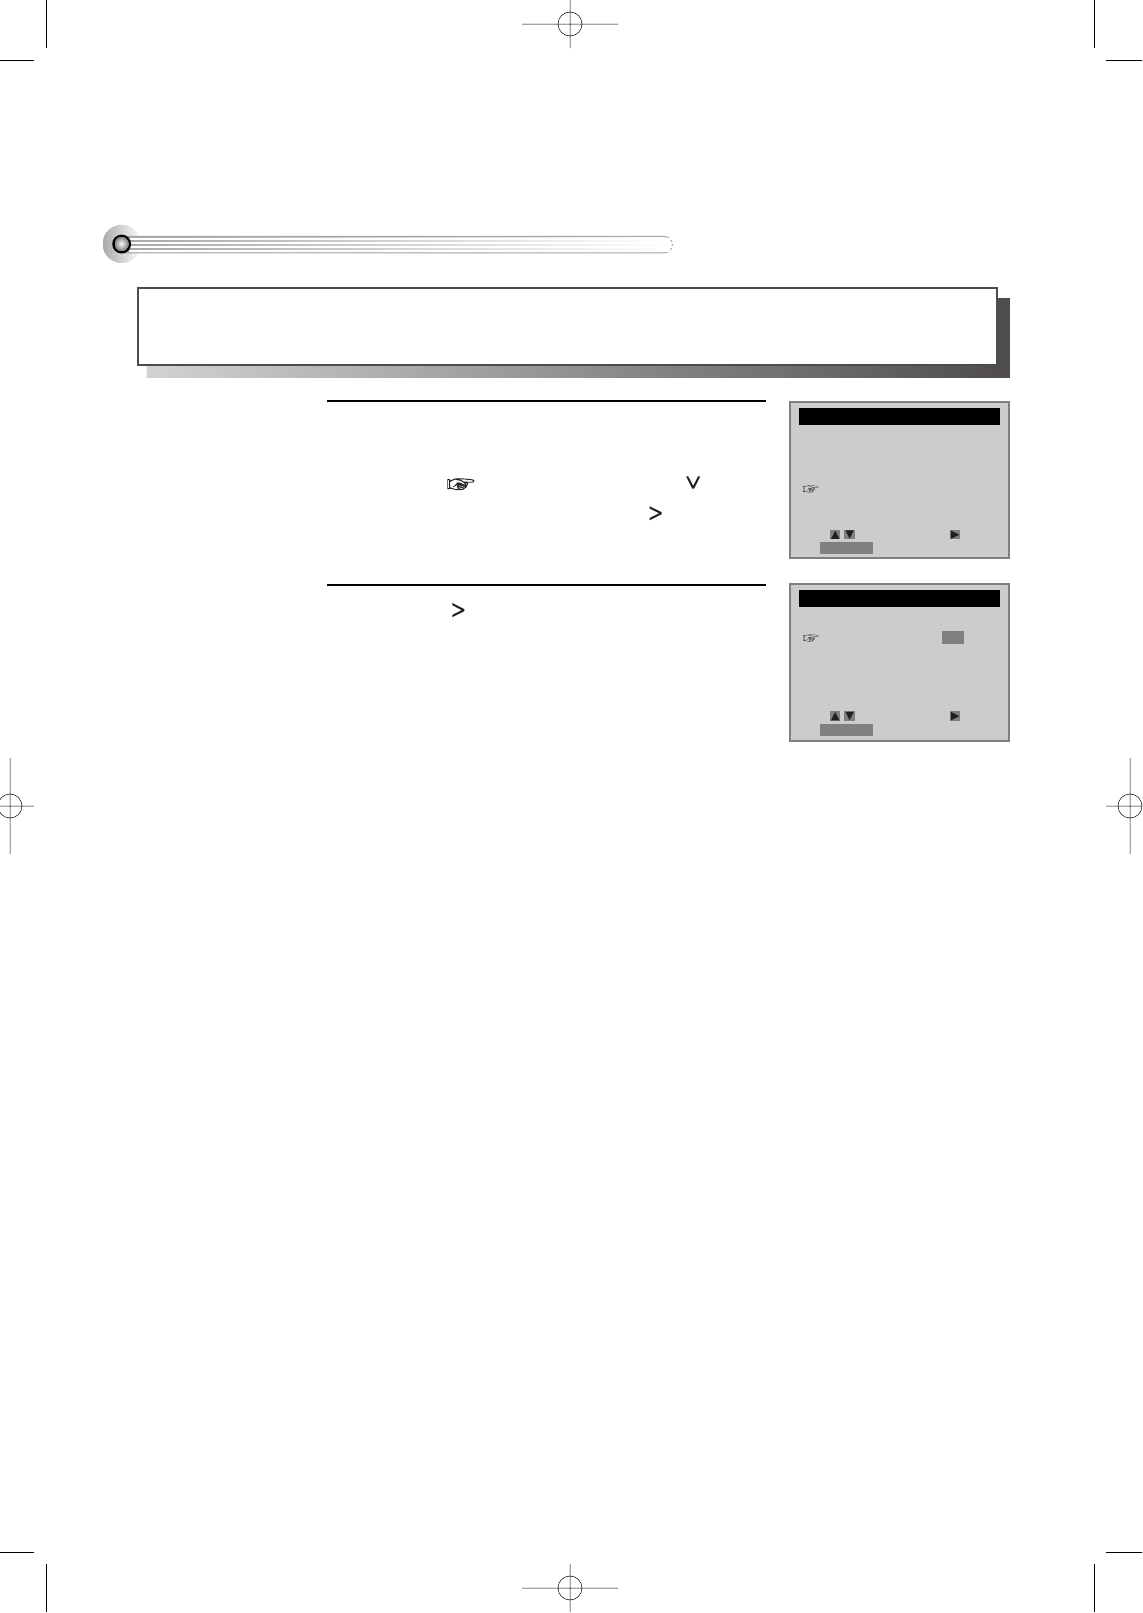
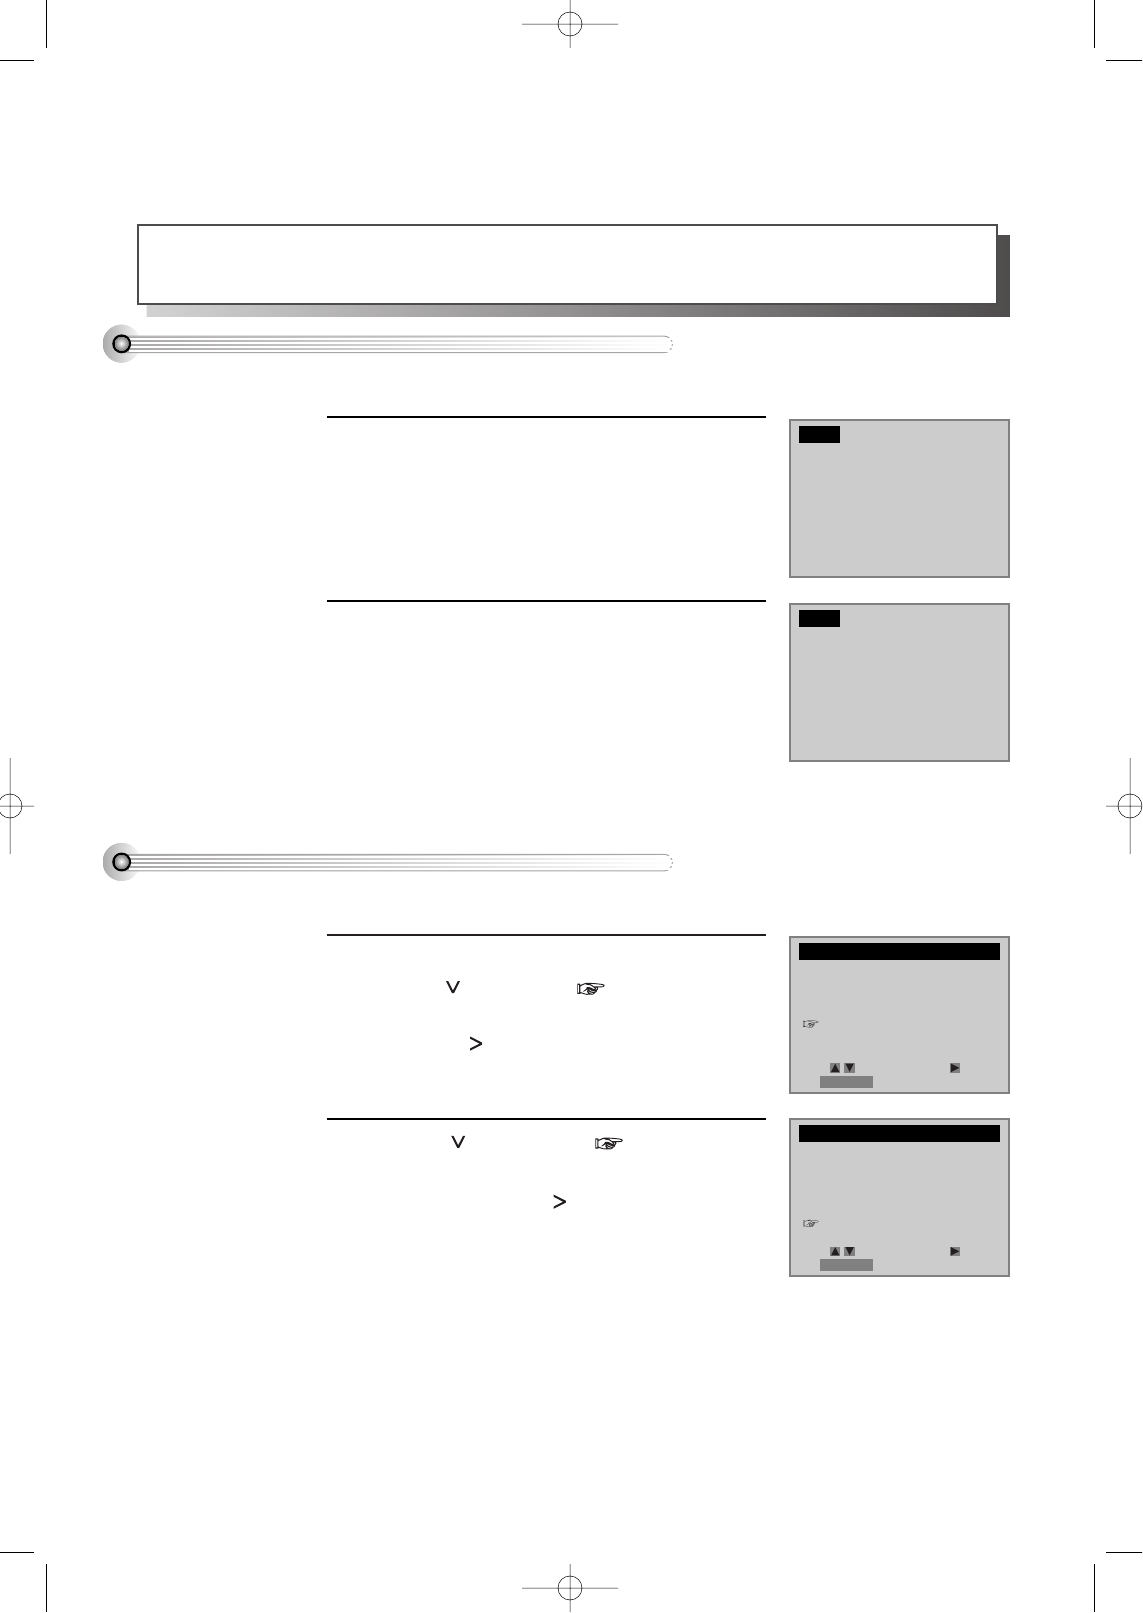
Output Select
Press [DVD] button.
If DVD mode is correctly selected, DVD on the operation display window is lighted.
Then, REMOTE button works as DVD function.
Press the [DVD] button, then the mode of DVD-Video Player becomes to the OPERATION mode.
To Select VCR
Press [VCR] button.
If VCR mode is correctly selected, VCR on the operation display window is lighted.
Then, REMOTE button works as VCR function.
Press the [VCR] button, then it becomes to the VCR OPERATION mode.
To Select Watch Modes or External Input
Press [OUTPUT] button.
Whenever you press [OUTPUT] button, DVD, VCR PLAYBACK,
BROADCASTING RECEPTION and EXTERNAL INPUT is selected in
order and the DISPLAY of DVD and VCR will be changed accordingly.
Timer Program Setting
Press [PROGRAM] button.
You can set the Timer Program.
Before timer program setting, clock should be set correctly (see page 24)
and video mode should be selected. (See screen #3 in page 36)
To Select DVD
VCR
DVD
REPEAT
OPEN/CLOSE
DISPLAY
TITLE/PBC
MENU
CH
CH
OUTPUT
PREV.
REC
PROGRAM
CLK/CNT
SPEED/ANGLE
TRACKING
TV/VCR
MARK
SEARCH
100/SYSTEM
PLAY/PAUSE NEXT
ZOOM AUDIO SUBTITLE
RETURN
CLEAR/3D
SETUP
ENTER
/S-VHS
DVD
VCR
OUTPUT SELECT
PROGRAM
DVD-Video(USA)_DV6T811N-LT 02.4.16 2:38 PM ˘`25
26
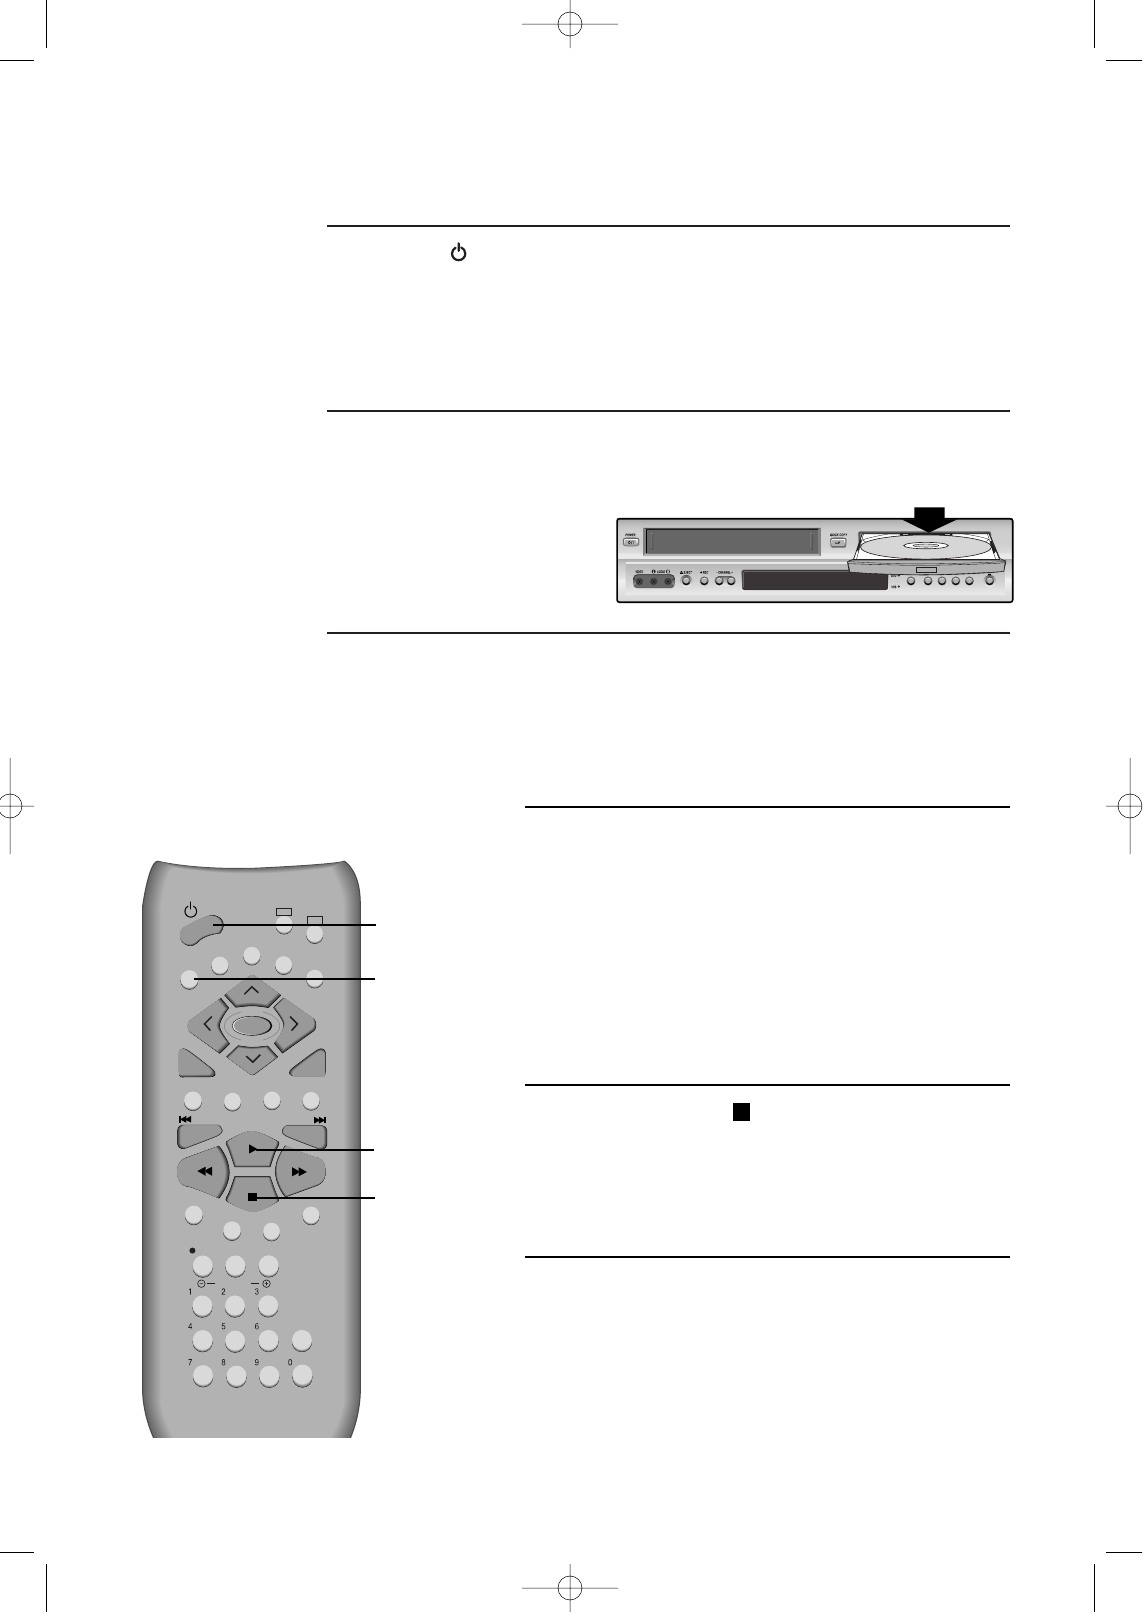
DVD Playback
Press [ ] button to power on.
Press [DVD] button of REMOTE to change into DVD mode.
Press [OPEN/CLOSE] button to open the disc tray.
Place a disc firmly on the disc tray, making its label look upward.
Insert the disc and press [OPEN/CLOSE] button to close the tray.
The disc tray is closed and after checking the disc’s condition, Playback or Stop
function starts to operate.
1
2
3
To playback it, press [PLAY/PAUSE] button.
• In the case of DVD,
DVD menus and titles are displayed on TV screen.
• In the case of S-VCD and VCD2.0
the menus are displayed on TV screen and it is
converted into PBC(Playback Back Control) mode.
• In the case of CD, VCD1.1 and MP3,
the disc plays in order of its track numbers.
4
To stop it, press [ ] button.
For pause, press [PLAY/PAUSE] button in playback
mode.
If you press this button once more, it starts playback
again.
5
Press [OPEN/CLOSE] button to remove the disc.
6
VCR
DVD
REPEAT
OPEN/CLOSE
DISPLAY
TITLE/PBC
MENU
CH
CH
OUTPUT
PREV.
REC
PROGRAM
CLK/CNT
SPEED/ANGLE
TRACKING
TV/VCR
MARK
SEARCH
100/SYSTEM
PLAY/PAUSE NEXT
ZOOM AUDIO SUBTITLE
RETURN
CLEAR/3D
SETUP
ENTER
/S-VHS
OPEN
/CLOSE
PLAYBACK
/PAUSE
STOP
POWER
DVD-Video(USA)_DV6T811N-LT 02.4.16 4:44 PM ˘`26
Basic Operation
27
VCR Playback
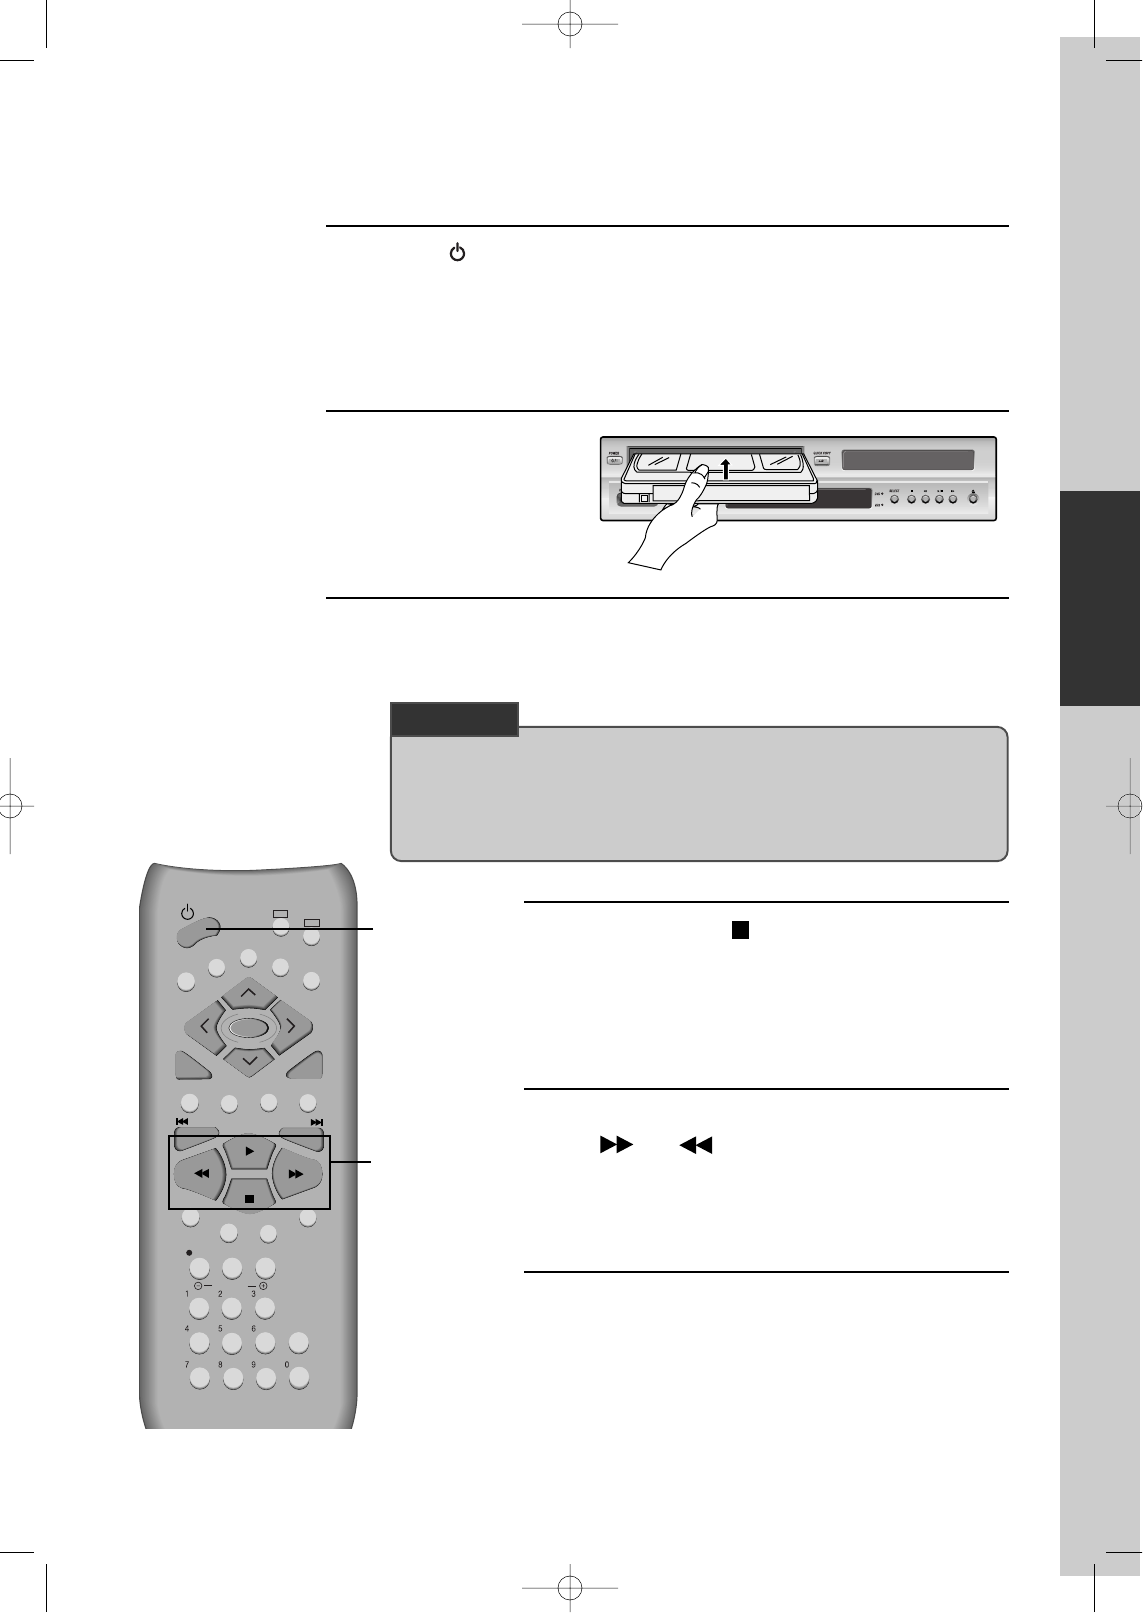
Press [ ] button to power on.
Press [VCR] button of remote control to change into VCR mode.
Insert the desired
tape.
If you want to playback it, press [PLAY/PAUSE] button.
When the operational status is flickering or poor, adjust it with [TRACKING +/-]
button.
1
2
3
To stop it, press [ ] button.
For pause, press [PLAY/PAUSE] button in playback
mode.
If you press this button once more, it starts playback
again.
4
To playback forward fast or to rewind it, press
[ ] or [ ] button, respectively.
5
Press [EJECT] button in the front part or
[OPEN/CLOSE] button on remote control to
remove the tape.
6
VCR
DVD
REPEAT
OPEN/CLOSE
DISPLAY
TITLE/PBC
MENU
CH
CH
OUTPUT
PREV.
REC
PROGRAM
CLK/CNT
SPEED/ANGLE
TRACKING
TV/VCR
MARK
SEARCH
100/SYSTEM
PLAY/PAUSE NEXT
ZOOM AUDIO SUBTITLE
RETURN
CLEAR/3D
SETUP
ENTER
/S-VHS
REWIND
PLAYBACK/PAUSE
FAST FORWARD
STOP
POWER
• If the product, which has a auto-detector, detects a contaminated head(s), it shows
the conditions to notice the contamination on screen.
* In case of the notice on screen, please rub the heads with a head-cleaner
followed by “How to use a head-cleaner”. (70P)
CHECK UP!
DVD-Video(USA)_DV6T811N-LT 02.4.16 4:44 PM ˘`27
28
To Adjust Display
Various Playback Methods
■If you want fast forward playback,
press [ ] button in Playback mode.
You can watch fast playing screen.
■If you want fast reverse playback,
press [ ] button in Playback mode.
You can watch fast rewinding screen.
■If you want Still picture,
press [PLAY/PAUSE] in Playback mode.
You can watch the desired screen in pause status.
■If you want slow-motion playback,
press [ ] or [ ] button in Pause mode.
You can watch the desired screen in the slow forward or slow reverse playback.
* NOTE: VCR doesn’t have Slow Reverse Playback function.
■If you want to watch a series of screens one by one,(FRAME ADVANCE)
press [NEXT ] button in Pause mode.
Each time you press this button, the picture advances one frame.
This product includes automatic Tracking function and enables users to enjoy clear picture without an additional
operation. Provided that the following problems can be solved by the manual adjustment, which improves display
quality. (During automatic display adjustment, “Adjusting Display” are displayed on TV screen.)
- If the screen is poor in Playback mode,
- If noises occur in the upper or lower part of
screen in slow playback mode,
- If paused picture vibrates up and down.
Use [TRACKING +/-] buttons of remote control
to adjust the display suitable for watching.
TRACKING
100/SYSTEM
• To playback the tape which is recorded or
manufactured with S-VHS type, press [PLAY]
button and then press [S-VHS] button.
/S-VHS
CHECK UP!
DVD-Video(USA)_DV6T811N-LT 02.4.16 2:38 PM ˘`28
Basic Operation
29
Recording
Press [ ] button to power on.
• Press [VCR] button of remote control to change into VCR mode.
• Power on TV and select Ch 3, or press [INPUT] button of TV set to select
External Input mode.
Insert a recordable tape.
Insert a tape with recording tab.
With [CHANNEL], [NUMBER] and [OUTPUT] buttons, select the desired
broadcasting channel or external input unit to record.
1
2
3
Select the desired speed (SP or SLP) with [SPEED]
button.
4
Press [REC] button.
Then, it starts recording.
5
If you want to pause recording, press [PAUSE]
button.
After pressing [PAUSE] button, if the pause status
continues for five minutes, the recording is released
automatically.
6
To exit recording, press [STOP] button.
7
VCR
DVD
REPEAT
OPEN/CLOSE
DISPLAY
TITLE/PBC
MENU
CH
CH
OUTPUT
PREV.
REC
PROGRAM
CLK/CNT
SPEED/ANGLE
TRACKING
TV/VCR
MARK
SEARCH
100/SYSTEM
PLAY/PAUSE NEXT
ZOOM AUDIO SUBTITLE
RETURN
CLEAR/3D
SETUP
ENTER
/S-VHS
PLAYBACK/PAUSE
NUMBER
STOP
REC SPEED
OUTPUT SELECT
POWER
CHANNEL
VCR
REC
To Record With VCR
DVD-Video(USA)_DV6T811N-LT 02.4.16 2:38 PM ˘`29
This product incorporates copyright protection technology that is protected by method claims of certain U.S
patents and other intellectual property rights owned by Macrovision Corporation and other rights owners.
Use of this copyright protection technology must be authorized by Macrovision Corporation, and is intended for
home and other limited viewing uses only unless otherwise authorized by Macrovision Corporation. Reverse
engineering or disassembly is prohibited.
30
To Copy From DVD To Videotape
If you want to watch another TV channel during recording with video,
press [TV/VCR] button.
It is available of changing into and watching another TV channel.
If you want to playback DVD during recording with video, insert a DVD
disc.
Place the desired DVD disc on DVD tray, press [DVD] button to convert
OUTPUT into DVD mode and press [PLAY] button. Then, you can watch DVD.
1
2
Insert the desired DVD disc.
When it is a DVD disc with copy protect function, you can’t copy it.
Insert a recordable tape.
Press [Q. COPY] button on the front panel.
DVD plays and VCR starts recording.
1
2
To exit copy, press [VCR] button and then
[ ] button.
If not, DVD plays again and video continues to
copy.
3
To Enjoy Another TV Channel or DVD during recording
To copy just
with buttons of remote
control, after playing
DVD, press [VCR]
button and then [REC]
button.
DVD-Video(USA)_DV6T811N-LT 02.4.16 2:38 PM ˘`30
Basic Operation
31
One Touch timer Recording (OTR)
First, follow the steps 1 to 4 in “Recording With VCR”.
Press [REC] button as much as you want.
See the “Recording Times Table” below.
To stop Recording mode, press [STOP] button more than 8 seconds.
1
2
3
Button Press Times .......... Operational Status
Once ..................................... continuous recording until you press STOP button
Twice .................................... recording for thirty minutes from current time
3(times).................................. recording for one hour
4 ............................................ recording for one hour and thirty minutes
5 ............................................ recording for two hours
6 ............................................ recording for two hours and thirty minutes
7 ............................................ recording for three hours
8 ............................................ recording for three hours and thirty minutes
9 ............................................ recording for four hours
10 .......................................... returning to the status of Once Press
When your urgent business happens suddenly in watching TV or you want to record the current TV program
for the desired time, follow the procedures below.
DVD-Video(USA)_DV6T811N-LT 02.4.16 2:38 PM ˘`31
32
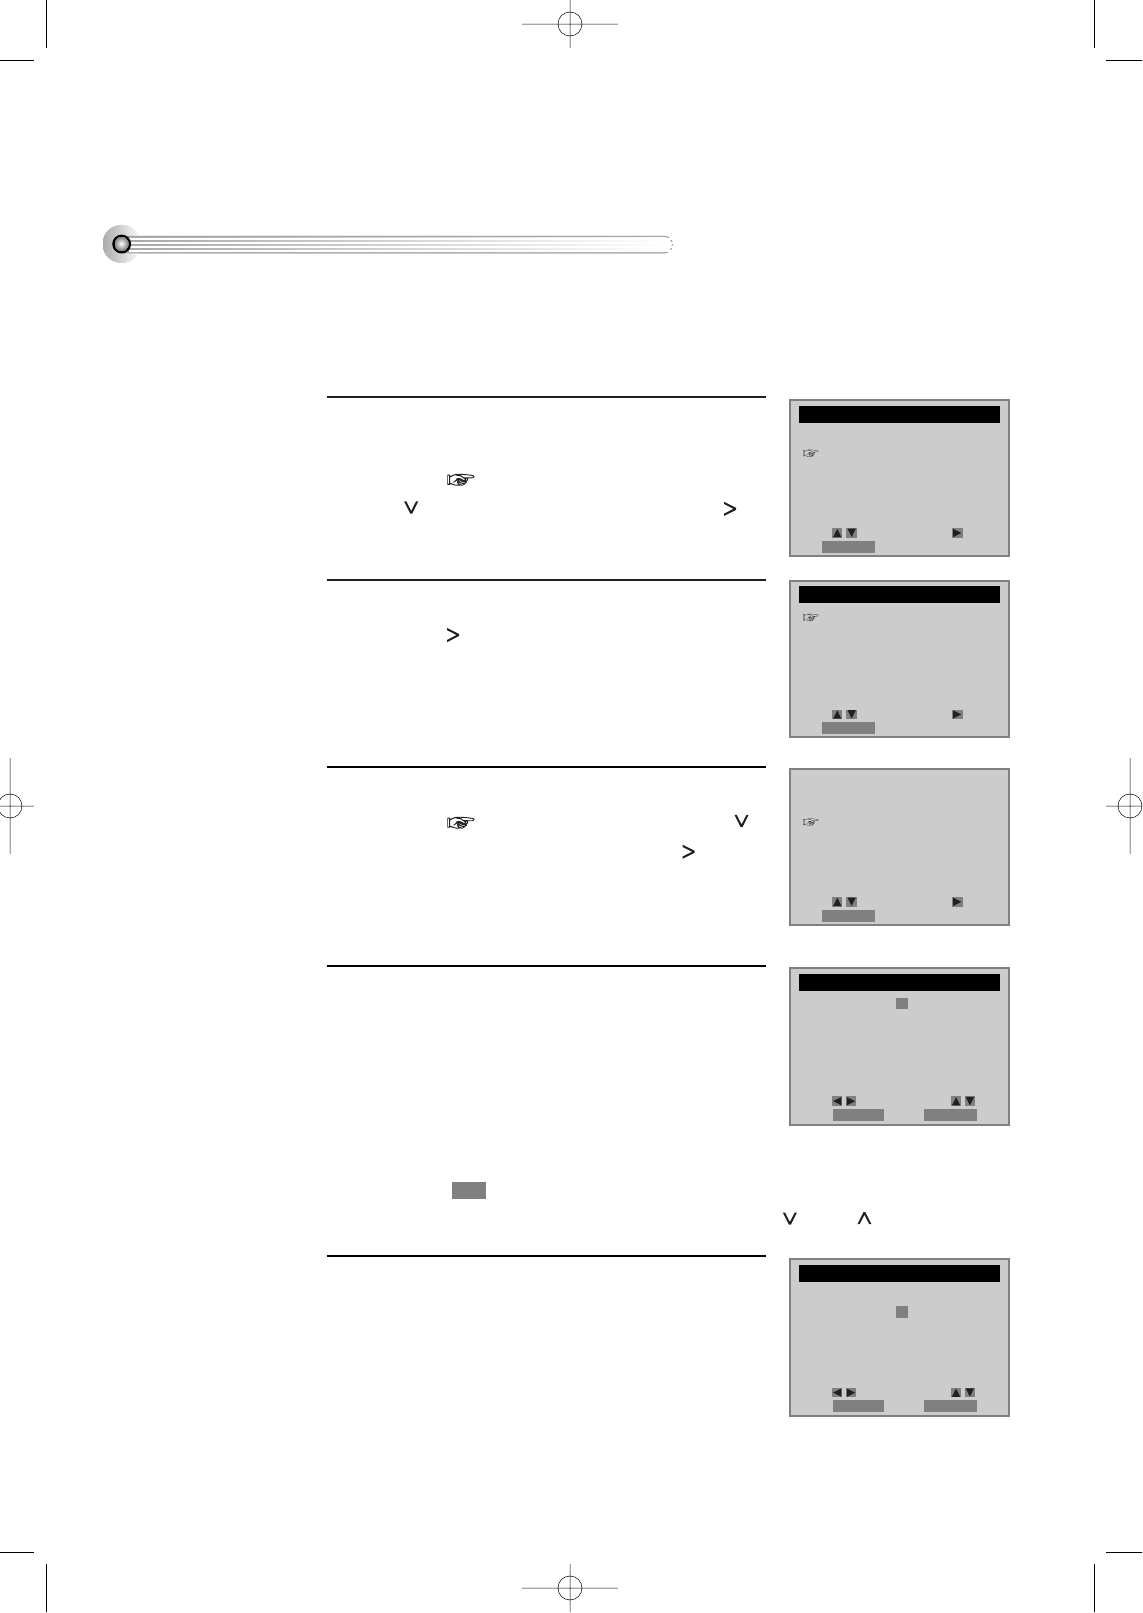
Memorizing TV Channels
Press [SETUP/ENTER] button.
Press [ ] button to move into CHANNEL
SET, and then select CHANNEL SET with [ ]
button.
■Set TV to Ch 3.
■Prior to the setting, press [VCR] button of your REMOTE to change into VCR mode.
Select “AUTO CHANNEL SEARCH”.
Press [ ] button in CHANNEL SET window to
select AUTO CHANNEL SEARCH.
Select “Detect Automatically”.
Press [ ] button in AUTO CHANNEL SEARCH
window to detect the channel automatically.
Channel number changes successively from 01
to 125, while only broadcasting channels are
memorized automatically. When memory
process is completed, the lowest number’s one of
memorized channels is displayed.
Please, check the memorized channels.
To check the memorized channels, press [CH] button on remote control.
1
2
3
To Memorize Automatically Channels
SETUP
CLOCK SET
TIMER RECORDINGS
CHANNEL SET
FUNCTIONS
LANGUAGE SELECT
AUTO CHANNEL SEARCH
What type of signal are
you using?
Cable TV
Antenna
Detect Automatically
AUTO CHANNEL SEARCH
Now scanning channel 011
Move: Select:
End:RETURN
Move: Select:
End:RETURN
End:RETURN
CHANNEL SET
Auto Channel Search
Add/Remove Channels
Signal Type: CABLE
Cable Box Setup
Output channel
selection: CH3
Move: Select:
End:RETURN
DVD-Video(USA)_DV6T811N-LT 02.4.16 3:42 PM ˘`32
VCR Operation
33
To Memorize Channels Manually
When the desired broadcasting finished or you want to add unmemorized channels owing to poor signals to
the memory, follow the procedures below.
After pressing [SETUP/ENTER] button, select “CHANNEL SET”.
Select “Add/Remove Channels”.
Move into “Add/Remove Channels” with
[ ] button and then, select the desired item
with [ ] button.
1
2
Select the desired channel and memorize it.
Press [NUMBER] button of remote control to
select the desired channel to memorize. When
[CLEAR] button is pressed, “REMOVED” under
channel number converts into “ADDED”.
3
Check the memorized channel.
To check the memorized channel, press [CH] button on remote control.
4
CHANNEL SET
Auto Channel Search
Add/Remove Channels
Signal Type: CABLE
Cable Box Setup
Output channel
selection: CH3
ADD/REMOVE CHANNELS
Channel 02
is now REMOVED.
Move: Select:
End:RETURN
Add: CLEAR
Select: End:RETURN
DVD-Video(USA)_DV6T811N-LT 02.4.16 2:38 PM ˘`33

34
To Delete Channels Manually
After memorizing automatically channels, when the same broadcasting is memorized in more than two
channels, or you want to delete badly displayed channels, follow the procedures below.
Press [SETUP/ENTER] button and select “CHANNEL SET”.
Select “Add/Remove Channels”.
Move into “Add/Remove Channels” with
[ ] button and then, select the desired item
with [ ] button.
1
2
Select the desired channel and delete it.
Press [NUMBER] button of remote control to
select the desired channel to delete. When
[CLEAR] button is pressed, “ADDED” under the
channel number converts into “REMOVED”.
3
Check the deleted channel.
To check the deleted channel, press [CH] button on remote control.
4
Selecting cable or antenna viewing
You must set the viewing mode for your VCR, choosing
either CABLE (cable system connection) or ANTENNA
(antenna connection). To set the viewing mode:
Press [>] to toggle the setting between CABLE and
ANTENNA in CHANNEL SET screen.
When the desired viewing mode is displayed, press
RETURN twice to exit.
ADD/REMOVE CHANNELS
Channel 02
is now ADDED.
CHANNEL SET
Auto Channel Search
Add/Remove Channels
Signal Type: CABLE
Cable Box Setup
Output channel
selection: CH3
Move: Select:
End:RETURN
Remove: CLEAR
Select: End:RETURN
CHANNEL SET
Auto Channel Search
Add/Remove Channels
Signal Type: CABLE
Cable Box Setup
Output channel
selection: CH3
Move: Select:
End:RETURN
DVD-Video(USA)_DV6T811N-LT 02.4.16 2:38 PM ˘`34
VCR Operation
35
To Set Cable Box
To Set Output Channel
Press [SETUP/ENTER] button and select
“CHANNEL SET” .
Select “Output channel selection”.
By pressing [ ] button, set the exclusive channel for
video on the desired one of 3CH or 4CH.
Press [SETUP/ENTER] button and select “CHANNEL SET”.
Select “Cable Box Setup”.
Move into Cable box setup with [ ]
button and then, select the desired item with [
] button.
1
2
Select “Cable Box Channel”.
Press the channel number which matches to the
output of the Cable Box to connect between
Cable Box and this unit.
3
CABLE BOX SETUP
On what channel do you
want to receive from
the cable box?
03
CHANNEL SET
Auto Channel Search
Add/Remove Channels
Signal Type: CABLE
Cable Box Setup
Output channel
selection: CH3
Move: Select:
End:RETURN
CHANNEL SET
Auto Channel Search
Add/Remove Channels
Signal Type: CABLE
Cable Box Setup
Output channel
selection: CH3
Move: Select:
End:RETURN
Select: End:RETURN
Video:OUTPUT
DVD-Video(USA)_DV6T811N-LT 02.4.16 2:38 PM ˘`35
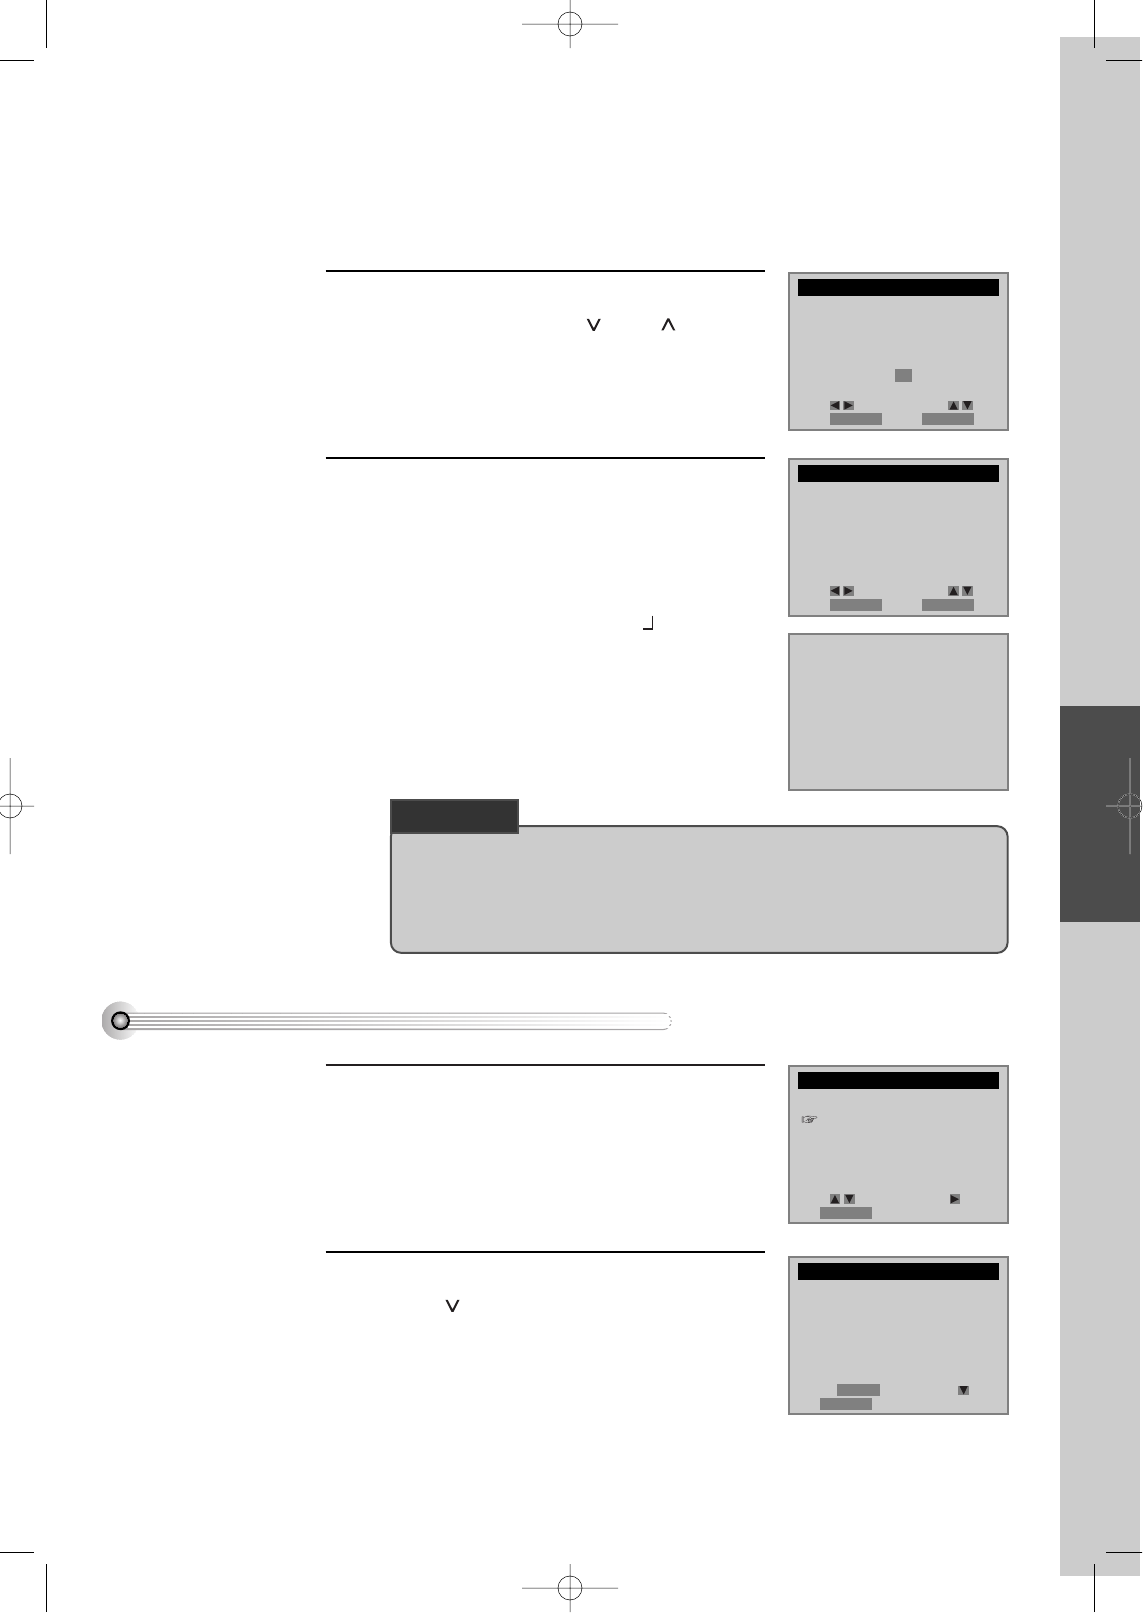
Timer Recordings
TIMER RECORDINGS
Press [SETUP/ENTER] button and select
“TIMER RECORDINGS”.
Move into “TIMER RECORDINGS” with
[ ] and then, select the desired one with [ ]
button.
Select “Make a New Program”.
Press [ ] button to select “Make a new
Program”.
1
2
Select “TIMER REC method”.
Move into desired recording type with [ ]
and then, select the desired one with [ ]
button.
For TIMER REC method details, see “Various
TIMER REC” in the next page.
3
Select “a broadcasting to record”.
Select the desired broadcasting channel with
[NUMBER] buttons.
**If Converter Box and video are connected to
Video/Audio terminal, set “EXTERNAL INPUT”
on TIMER REC CH by using “OUTPUT”
button.
4
Set “the date and time to record”.
Select the date, start time and end time to record
with [NUMBER] buttons.
5
■Power on TV.
■Make sure that current time is set correctly.
■Insert a recordable tape with recording tab.
■Prior to the setting, press [VCR] button to change to VCR mode.
When moves into (GENERAL BROADCASTING), select one of GENERAL
BROADCASTING/CABLE BROADCASTING with [ ] and [ ] buttons.
36
SETUP
CLOCK SET
TIMER RECORDINGS
CHANNEL SET
FUNCTIONS
LANGUAGE SELECT
TIMER RECORDINGS
Make a New Program
Review/Cancel Programs
PROGRAM (ONE TIME)
How often do you want
to record program?
One Time
Daily (Sun-Sat)
Weekdays (Mon-Fri)
Weekly (Once a Week)
Channel - - Cable
Start Date - - / - -
Start Time - - : - - AM
End Time - - : - - AM
Tape Speed SP
PROGRAM (ONE TIME)
Channel 104 Cable
Start Date - - / - -
Start Time - - : - - AM
End Time - - : - - AM
Tape Speed SP
Move: Select:
End:RETURN
Move: Select:
End:RETURN
Move: Select:
End:RETURN
Move: Select:
Video:OUTPUT End:RETURN
Move: Select:
Video:OUTPUT End:RETURN
DVD-Video(USA)_DV6T811N-LT 02.4.16 2:38 PM ˘`36
VCR Operation
37
Set proper “RECORDING SPEED”.
Select one of SP/EP with [ ] and [ ]buttons.
For more information on recording speed, see
“Types of Recording Speed” in the page 39.
6
Press [RETURN] button to complete the
setting.
“Program # has been saved. For program
recording, insert a cassette....” message is
displayed.
TIMER RECORDINGS indicator, is displayed
in the operation display window.
On the reserved time, TIMER RECORDINGS
starts to operate.
7
To Confirm or Cancel TIMER RECORDINGS
Select “Review/Cancel Programs”.
1
Confirm reservation-recording details in turn
with [ ] button and then, press [CLEAR]
button on the position of the detail(s) to
delete.
2
• If a recordable tape is not inserted in Stop mode under Power ON, “Waiting for
TIMER RECORDINGS. Insert a recordable tape” message is displayed in the
center of screen, for all changes or output conversions incurred during TIMER
RECORDINGS SET.
PROGRAM (ONE TIME)
Channel 104 Cable
Start Date 06 / 04
Start Time 10 : 10 AM
End Time 11 : 10 AM
Tape Speed SP
PROGRAM (ONE TIME)
Channel 104 Cable
Start Date 06 / 04
Start Time 10 : 10 AM
End Time 11 : 10 AM
Tape Speed SP
PROGRAM 1 (ONE TIME)
Channel 104 Cable
Start Date 06 / 04
Start Time 10 : 10 AM
End Time 11 : 10 AM
Tape Speed SP
PROGRAM 1 has been saved.
For program recording,
insert a cassette and
the program start time.
To leave your cable box
on and turnde to preset
channel.
TIMER RECORDINGS
Make a New Program
Review/Cancel Programs
Move: Select:
Video:OUTPUT End:RETURN
Move: Select:
Video:OUTPUT End:RETURN
Move: Select:
End:RETURN
Cancel:CLEAR Next:
End:RETURN
CHECK UP!
DVD-Video(USA)_DV6T811N-LT 02.4.16 2:38 PM ˘`37
38
Various TIMER RECORDINGS
■One Time TIMER RECORDINGS
It is available of TIMER RECORDINGS at the desired specified time.
■Daily TIMER RECORDINGS
Once you set TIMER RECORDINGS of the desired program telecasted at the
same time day after day, it is available of daily recordings. It is available of
TIMER RECORDINGS from Sunday to Saturday.
■Weekday TIMER RECORDINGS
It is similar to Daily TIMER RECORDINGS, but this TIMER RECORDINGS is
available from Monday to Friday.
■Weekly TIMER RECORDINGS
Once you select one day of the week, it is available of TIMER RECORDINGS in
the same day weekly.
PROGRAM (ONE TIME)
Channel - - Cable
Start Date - - / - -
Start Time - - : - - AM
End Time - - : - - AM
Tape Speed SP
PROGRAM (SUN-SAT)
Channel - - Cable
Start Date - - / - -
Start Time - - : - - AM
End Time - - : - - AM
Tape Speed SP
PROGRAM (MON-FRI)
Channel - - Cable
Start Date - - / - -
Start Time - - : - - AM
End Time - - : - - AM
Tape Speed SP
PROGRAM (WEEKLY)
Channel - - Cable
Start Date - - / - -
Start Time - - : - - AM
End Time - - : - - AM
Tape Speed SP
Move: Select:
Video:OUTPUT End:RETURN
Move: Select:
Video:OUTPUT End:RETURN
Move: Select:
Video:OUTPUT End:RETURN
Move: Select:
Video:OUTPUT End:RETURN
DVD-Video(USA)_DV6T811N-LT 02.4.16 2:38 PM ˘`38
VCR Operation
39
Using video cassettes
Before you play or record on a video cassette tape, be certain to read this information on the proper care and use of
video cassettes.
Only use video cassettes that bear the VHS mark: .
There are four types of video cassettes: T-60, T-90, T-120, and T-160. The amount you can record on a tape is
dependent upon the tape speed at which you record. The table below lists the recording time(hours:minutes) for
each tape type according to recording speed.
Tape SP Mode EP Mode
Type (Standard Play) (Extended Play)
T-60 1:00 3:00
T-90 1:30 4:30
T-120 2:00 6:00
T-160 2:40 8:00
Protecting video cassettes from accidental erasure
Cassettes have a safety tab to prevent erasure. Break off the safety tab with a screw driver. If
you wish to record on a cassette without a safety tab, cover the hole with cellophane tape.
Inserting video cassettes
Firmly insert the cassette into the cassette compartment with the label up. An inverted cassette cannot be inserted.
Removing video cassettes
Press [EJECT] on the front panel and the VCR will eject the tape. Pull the cassette out gently.
• Audio-visual material may include works of copyright which must not be recorded without authorization of the
copyright owner.
•If you insert a video cassette without a safety tab into the unit : After setting the timer recording program, “ ” will
blink on the display panel in the power off mode and the unit will automatically eject the cassette. In the power on
mode, the unit will playback automatically.
•If you insert a video cassette with a safety tab into the unit : After setting the timer recording program,the unit will be
stand-by mode in power off mode.
• Do not attempt to pull out the video cassette once the unit begins to load the video cassette.
• Do not insert fingers or any foreign object beyond the door flaps of the cassette compartment; this could lead to injury
or equipment damage.
• Do not attempt to insert a video cassette if the unit in unplugged.
CHECK UP!
DVD-Video(USA)_DV6T811N-LT 02.4.16 2:38 PM ˘`39
40
Watching and Recording Cable TV
To Watch and Record Promptly Cable TV
Power on converter and then,
set a channel to watch or to record.
Power on DVD-video and then,
set the channel of DVD-video to the converter-connected channel (one of
CH03/04/EXTERNAL INPUT).
Power on TV and then,
set the video-connected channel (one of CH03/04/VCR).
Simultaneous Recording and Watching
At this time, CH selected by the converter is displayed on TV screen.
Simultaneously, press REC button of DVD-Video to record the CH selected by the
converter, and press REC button more than two times to set on One Touch timer
Recording (OTR).
1
2
TIMER RECORDINGS of Cable TV
Reserve VCR.
According to TIMER REC procedures, select TIMER RECORDINGS SET window
and complete the settings. At this time, the video channel should be input in CH3
(or CH4, EXTERNAL INPUT) of the converter-connected channel. Enter date and
time of the cable program for TIMER RECORDINGS.
Adjust Converter.
Set converter to the cable TV channel to record.
e.g.) To record CH48,
Display CH48 with CONVERTER CHANNEL SELECT button.
If there is TIMER REC function of converter, it is available of reservation.
Complete Reservation.
If you power on converter, video powers on automatically and starts recording at
the reserved time.
**Home watching cable TV is unavailable of simultaneous recording function
(while recording NBC program, watching CNN program). (Owing to
mechanical features of converter, it is unavailable of simultaneous reception of
two channels.)
1
2
3
DVD-Video(USA)_DV6T811N-LT 02.4.16 2:38 PM ˘`40
VCR Operation
41
Using advanced features
Play the tape automatically
This feature allows the VCR to automatically start playing when you insert a tape with the safety tab removed.
Press [SETUP/ENTER] button and select
“FUNCTIONS”.
Move into “FUNCTIONS” with [ ] and
then, select the desired one with [ ] button.
Press [ ] to switch between ON and OFF.
- Select ON if you want a tape with its safety
tab removed to start playing automatically
when the tape is inserted.
- Select OFF if you do not want a tape with its
safety tab removed to start playing
automatically.
1
2
SETUP
CLOCK SET
TIMER RECORDINGS
CHANNEL SET
FUNCTIONS
LANGUAGE SELECT
FUNCTIONS
Auto Play: ON
Auto TV/VCR: ON
Viss +
Viss -
Counter 0 Stop
Move: Select:
End:RETURN
Move: Select:
End:RETURN
DVD-Video(USA)_DV6T811N-LT 02.4.16 2:38 PM ˘`41
42
Switch the VCR to TV or VCR mode automatically
This feature controls whether the TV/VCR switch changes automatically to the VCR mode when the VCR is turned
on.
Press [SETUP/ENTER] button and select
“FUNCTIONS”.
Move into “FUNCTIONS” with [ ] and
then, select the desired one with [ ] button.
Press [ ] to switch between ON and OFF.
- Select ON if you want the VCR to switch to
the VCR mode when the VCR is turned on or
a cassette is inserted. This only applies if you
connect the ANT.IN and RF OUT jacks of
your VCR and TV and watch your VCR on
channel 3 of your TV.
- Select OFF if you want the VCR to remain in
the TV mode. This is useful if you watch your
VCR on the TV’s video input and you don’t
want your antenna/cable signal interrupted
by the VCR.
1
2
SETUP
CLOCK SET
TIMER RECORDINGS
CHANNEL SET
FUNCTIONS
LANGUAGE SELECT
FUNCTIONS
Auto Play: ON
Auto TV/VCR: ON
Viss +
Viss -
Counter 0 Stop
Move: Select:
End:RETURN
Move: Select:
End:RETURN
DVD-Video(USA)_DV6T811N-LT 02.4.16 2:38 PM ˘`42
VCR Operation
43
Indexing VISS Signals
VISS signal will be indexed automatically while starting any TIMER
RECORDINGS including programmed and/or preselected recording.
** The program for VISS function should be over 5-minutes length
** Note that if the tape to be recorded is fully rewinded, it must be rolled a little before
recording, for which the device might not index in the first of it (transparent part).
What’s VISS?
VISS is a quick and convenient search system for a recorded program by means of the program’s address
indexed in the beginning of the recorded program. Provided that there are various recorded programs in a tape,
VISS must be a typical function in searching for a preferred program.
Searching VISS Signals
Please press [SETUP/ENTER] button.
Press [ ] button until is located in
“FUNCTIONS”, then select “FUNCTIONS”
by pressing [ ] button.
1
In the menu, please select “VISS +” or
“VISS-”.
If your search is forward direction, select “VISS
+”. If reverse direction, select “VISS -”.
2
VISS searching motion
• Searching, whether it forward or reverse, starts from the current position to the
selected direction in serial order for VISS-indexed parts (first recorded parts) of
which contents are played in 5 seconds.
• If a purposed part is found from the 5 seconds playing, please playback it with
your “PLAY” button.
3
■First, please press [VCR] button on your REMOTE for VCR mode, then manage it.
■Inject your VISS-indexed tape.
SETUP
CLOCK SET
TIMER RECORDINGS
CHANNEL SET
FUNCTIONS
LANGUAGE SELECT
FUNCTIONS
Auto Play: ON
Auto TV/VCR: ON
Viss +
Viss -
Counter 0 Stop
Move: Select:
End:RETURN
Move: Select:
End:RETURN
DVD-Video(USA)_DV6T811N-LT 02.4.16 2:38 PM ˘`43
44
Counter 0 Stop
The function is to search any scene that you wish to watch again more easily by indexing while playing or
recording it.
Please press [DISPLAY] button twice.
The counter appears in screen and the operation
display window.
1
In the moment, please press [CLEAR] button
to make the counter 0:00:00.
2
■Please press [VCR] button on your REMOTE for VCR mode, then manage it.
Memorizing a desired scene
Please press [SETUP/ENTER] button.
Press [ ] button until is located in
“FUNCTIONS”, then select “FUNCTIONS” by
pressing [ ] button.
1
Press [ ] button until is located in
“Counter 0 Stop”, then select “ Counter 0
Stop” by pressing [ ] button.
The tape’s counter returns to 0:00:00 and stops.
2
■Please press [VCR] button on your REMOTE for VCR mode, then manage it.
Searching a memorized scene
SETUP
CLOCK SET
TIMER RECORDINGS
CHANNEL SET
FUNCTIONS
LANGUAGE SELECT
1:22:33
0:00:00
FUNCTIONS
Auto Play: ON
Auto TV/VCR: ON
Viss +
Viss -
Counter 0 Stop
Move: Select:
End:RETURN
Move: Select:
End:RETURN
DVD-Video(USA)_DV6T811N-LT 02.4.16 2:38 PM ˘`44
VCR Operation
45
Displaying Clock/Counter
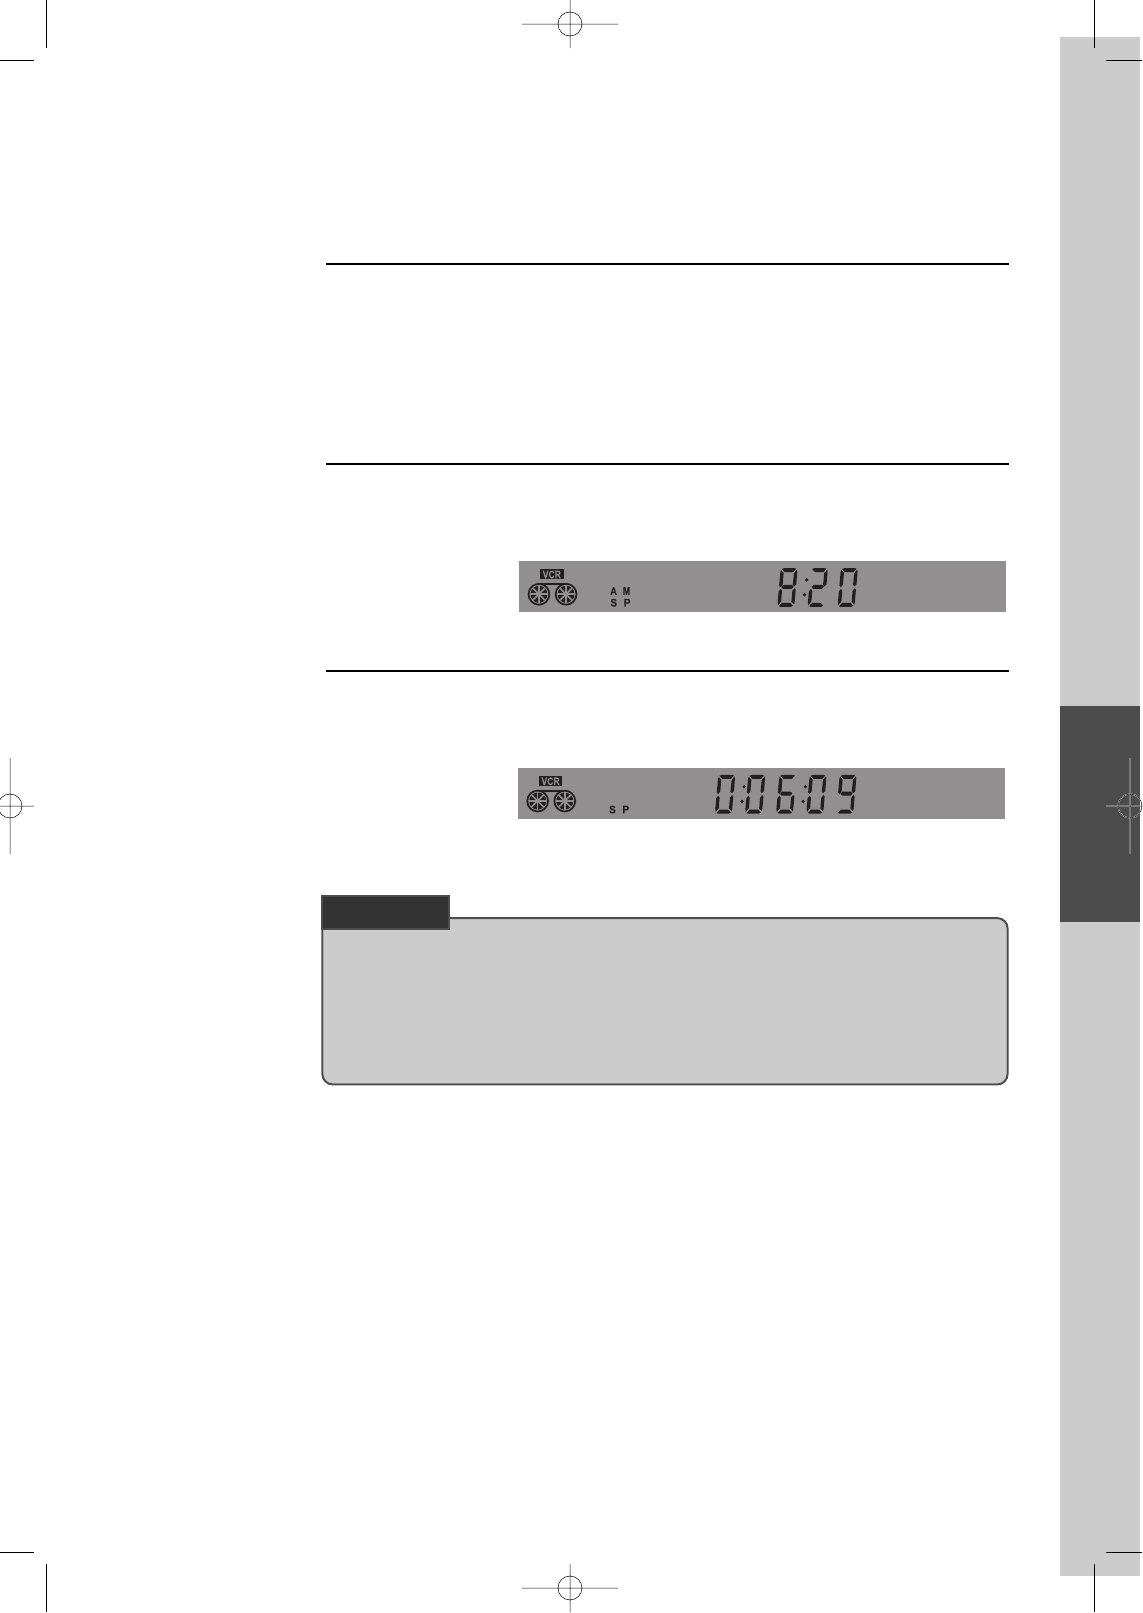
Press [CLK/CNT] button.
Each time you press this button, “CLOCK” and “COUNTER” are displayed in
serial order.
1
“CLOCK” is displayed.
Current time is displayed.
2
Real-time “COUNTER” is displayed.
Current position of the video is displayed as hour, minute and even second by
counter.
3
■Above all, press [VCR] button of remote control and follow the procedure below.
• In addition, it is available of grasping current position of DVD.
First, prior to the beginning, press [DVD] button of remote control to change into DVD
mode.
If you press [CLK/CNT] button, current position of DVD is displayed as hour, minute and
even second by counter.
CHECK UP!
DVD-Video(USA)_DV6T811N-LT 02.4.16 2:38 PM ˘`45
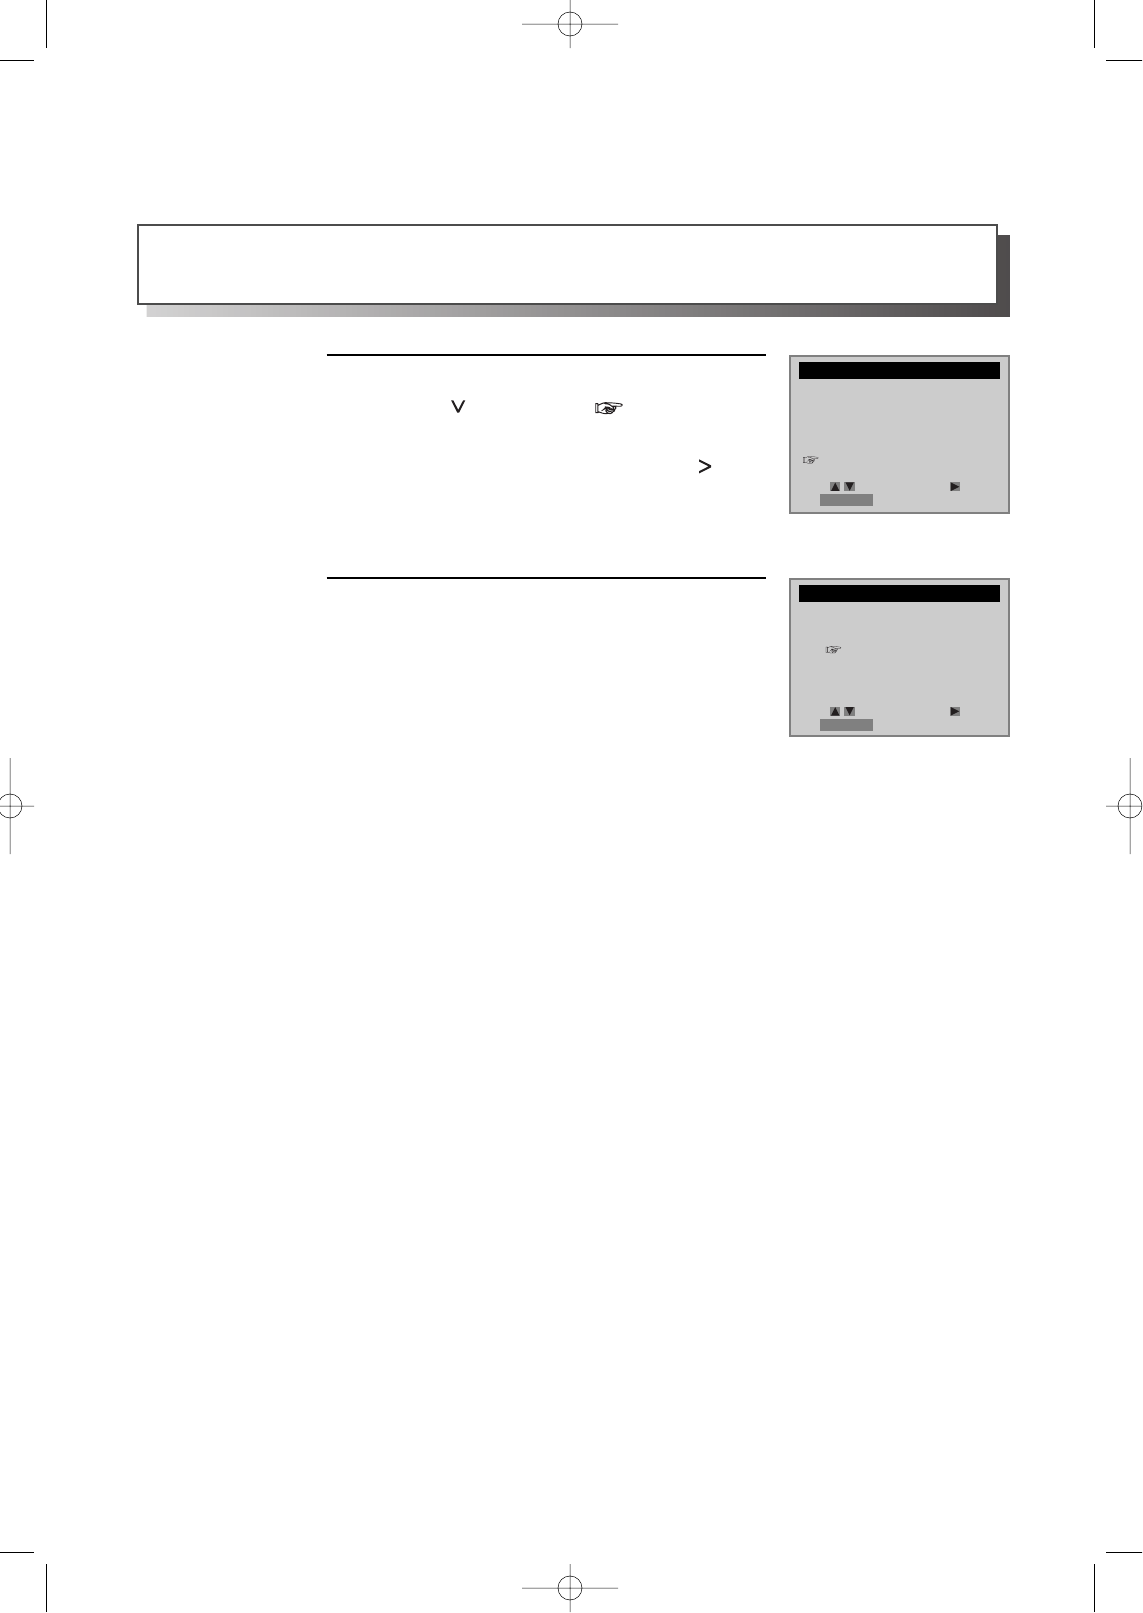
46
Changing the on-screen menu language
Please press [SETUP/ENTER] button.
Press [ ] button until is located in
“LANGUAGE SELECT”, then select
“LANGUAGE SELECT” by pressing [ ]
button.
1
Select the language among English, Spanish
or French.
2
You may select the language in which you would like the VCR’s menu to be displayed: English, Spanish, or
French.
SETUP
CLOCK SET
TIMER RECORDINGS
CHANNEL SET
FUNCTIONS
LANGUAGE SELECT
LANGUAGE SELECT
Select a language.
English
Spanish
French
Move: Select:
End:RETURN
Move: Select:
End:RETURN
DVD-Video(USA)_DV6T811N-LT 02.4.16 2:38 PM ˘`46

VCR Operation
47
Hi-Fi Stereo Playback
Playing a tape in Hi-Fi high-quality
• “Hi-Fi” signal lights up in the top of a screen.
• Pressing [AUDIO] button changes menus one by one.
If there are some noises made in recording, please “Linear” to reduce them.
Forced Mono
• In some cases, while receiving a stereo or SAP (Secondary Audio Programs), receiving condition may be poor,
which may cause the stereo or SAP broadcasting to be interfered frequently or its volume to be uncontrollable.
Just pressing [AUDIO] in stereo or SAP forces to fix the condition into mono sound.
• To return it, you have two choices, pressing [AUDIO] button again or picking up the channel again.
Recording Stereo Broadcast
• Stereo : It separates sounds into dual signals and transfers them in order to achieve presence in a broadcasting
station.
Hi-Fi LINEAR MIX
STEREO MONO SAP
• While recording in stereo signal, it is recorded in Hi-Fi.
• SAP is available only in its service areas from stations.
• Programs are broadcast in mono or stereo audio, or with a SAP.
• Pressing [AUDIO] button changes STEREO, MONO, SAP one by one.
• The following guidelines will help you decide on the best method for recording programs. Choose:
- Stereo reception for normal recording and to record broadcast stereo television.
- Mono reception if the stereo signal is weak and sound is too “ noisy.”
- SAP reception to record a second audio program. An example of a SAP is a program that is broadcast in English, but
has a Spanish SAP.
•You can only record stereo and SAPs if the program is a broadcast in stereo or with a SAP. Consult a television guide for
program broadcast information.
Recording Stereo or Secondary Audio Programs (SAP)
Hi-Fi
CHECK UP!
CHECK UP!
DVD-Video(USA)_DV6T811N-LT 02.4.16 2:38 PM ˘`47
48
Skipping from a current scene to a desired scene
To skip chapter in a DVD
To move to next chapter, press [NEXT ] button.
The current chapter moves to the next chapter.
1
Press [ PREV] button.
It moves to the first part of current chapter.
If pressing it again, it moves to the prior chapter.
2
To play it fast
Press [ ] button to start fast-play in playing.
Every time you press the button, play speed changes like the below orders
x 2 x 4 x 8 x 20 x 2 ....
Also you can return to normal speed by pressing [ ] button.
1
Press [ ] button to start reverse fast-play in playing.
Every time you press the button, reverse play speed changes like the below orders
x 2 x 4 x 8 x 20 x 2 ....
Also you can return to normal speed by pressing [ ] button.
2
■Before setting it, you should change into DVD mode by pressing [DVD] button on
remote control.
■Before setting it, you should change into DVD mode by pressing [DVD] button on
remote control.
DVD-Video(USA)_DV6T811N-LT 02.4.16 2:38 PM ˘`48
DVD Operation
49
To play it slow
Press [ ] button to play it slow in PAUSE.
Every time you press the button, slow play speed changes like the below orders.
1/2 1/4 1/8 1/2 ....
Also you can return to normal speed by pressing [ ] button.
*For the case of SVCD or VCD, Slow playback is available.
1
Press [ ] button to reverse-play it slow in PAUSE.
Every time you press the button, slow reverse-play speed changes like the below
orders.
1/2 1/4 1/8 1/2 ....
Also you can return to normal speed by pressing [ ] button.
2
■Before setting it, you should change into DVD mode by pressing [DVD] button on
remote control.
DVD-Video(USA)_DV6T811N-LT 02.4.16 2:38 PM ˘`49

Playing a programmed order
RANDOM PLAY
50
While STOP or RESUME STOP, press
[REPEAT] button.
While the right figure appearing, please input
desired Title(T) and Chapter(C) number with
NUMBER buttons.
* In case of VCD and CD, please input TRACK
Number.
1
While STOP or RESUME STOP, press
[REPEAT] button twice.
While the right picture appearing, please press
[SETUP/ENTER] button.
Regardless of titles or track numbers, it plays in
random.
1
If completing setting, press [SETUP/ENTER]
button after moving a cursor to “Play Program”.
Then, titles and chapters (track) are played in the
above-programmed order.
2
■Before setting it, you should change into DVD mode by pressing [DVD] button on
remote control.
■Available only in STOP.
■Before setting it, you should change into DVD mode by pressing [DVD] button on
remote control.
Mode1 DVD
Program
Title - - Chapter --
T C T C T C T C
1 - - - - 4 - - - - 7 - - - - 10 - - - -
2 - - - - 5 - - - - 8 - - - - 11 - - - -
3 - - - - 6 - - - - 9 - - - - 12 - - - -
Clear ALL Play Program
Mode1 DVD
Program
Title - - Chapter --
T C T C T C T C
1 01 05 4 - - - - 7 - - - - 10 - - - -
2 01 08 5 - - - - 8 - - - - 11 - - - -
3 01 12 6 - - - - 9 - - - - 12 - - - -
Clear ALL Play Program
Mode 2 DVD
Shuffle
DVD-Video(USA)_DV6T811N-LT 02.4.16 2:38 PM ˘`50
DVD Operation
51
Repeating a defined period (DVD)
You may repeat a desired chapter or track.
While in playing, press [REPEAT] button.
In REPEAT mode, you may see the right figure.
Press [SETUP/ENTER] button in the position
to repeat.
The beginning of REPEAT position (A) is set in the
right figure.
1
Mode DVD
Repeat
A-B Chapter Title Off
Mode DVD
Repeat
A- Chapter Title Off
Mode DVD
Repeat
A-B Chapter Title Off
Mode DVD
Repeat
A-B Chapter Title Off
Mode DVD
Repeat
A-B Chapter Title Off
Press [REPEAT] button again
Move a cursor to “Chapter” with [>] button, then
if the right figure appears, press [SETUP/ENTER]
button.
Then, the current chapter is repeated.
2
Press [REPEAT] button one more time.
Move a cursor to “Title” with [>] button, then if
the right figure appears, press [SETUP/ENTER]
button.
Then, the current title is repeated.
3
Press [REPEAT] button one more time.
Move a cursor to “Off” with [>] button, then if the
right figure appears, press [SETUP/ENTER]
button.
REPEAT mode is off.
4
■Before setting it, you should change into DVD mode by pressing [DVD] button on
remote control.
Press [SETUP/ENTER] button again in the position to quit a repeat
The end of REPEAT period (B) is set and played repeatedly.
* If you want to stop REPEAT and return to normal condition, please press
[SETUP/ENTER] button in “A-B” or “Off” in the below step 4.
A certain disc
may not be repeated.
DVD-Video(USA)_DV6T811N-LT 02.4.16 2:38 PM ˘`51
52
Repeating a defined period (VCD, CD)
While in playing, press [REPEAT] button.
In REPEAT mode, you may see the right figure.
Press [SETUP/ENTER] button in the position
to repeat.
The beginning of REPEAT position (A) is set in the
right figure.
1
Press [REPEAT] button again
Move a cursor to “Track” with [>] button, then if
the right figure appears, press [SETUP/ENTER]
button.
Then, the current track is repeated.
2
Press [REPEAT] button one more time.
Move a cursor to “Disc” with [>] button, then if
the right figure appears, press [SETUP/ENTER]
button.
Then, the current disc is repeated.
* Repeat playback of disc is only available in PBC
OFF mode.
3
Press [REPEAT] button one more time.
Move a cursor to “Off” with [>] button, then if the
right figure appears, press [SETUP/ENTER]
button.
REPEAT mode is off.
4
Mode VCD
Repeat
A-B Track Disc Off
Mode VCD
Repeat
A- Track Disc Off
Mode VCD
Repeat
A-B Track Disc Off
Mode VCD
Repeat
A-B Track Disc Off
Mode VCD
Repeat
A-B Track Disc Off
Press [SETUP/ENTER] button again in the position to quit a repeat
The end of REPEAT period (B) is set and played repeatedly.
* If you want to stop REPEAT and return to normal condition, please press
[SETUP/ENTER] button in “A-B” or “Off” in the below step 4.
DVD-Video(USA)_DV6T811N-LT 02.4.16 2:38 PM ˘`52
DVD Operation
53
SEARCH DVD (with a Title, Chapter number)
While in playing, press [SEARCH] button.
“Search 1” screen like the right figure appears.
It shows total title numbers and chapter numbers.
Please enter anew title and chapter number to
search with [NUMBER] buttons.
1
Search1 DVD
Title --- 1-2 Chapter --- 1-8
In completing entering, please press
[SETUP/ENTER] button.
PLAY starts from the selected position.
2
Search1 DVD
Title --- 1-2 Chapter 006 1-8
■Before setting it, you should change into DVD mode by pressing [DVD] button on
remote control.
SEARCH DVD (with time)
While in playing, press [SEARCH] button
twice.
“Search 2” screen like the right figure appears.
It shows total hours
Please enter anew hours to search with
[NUMBER] buttons.
1
Search2 DVD
Time - - : - - : - - 02:03:25
In completing entering, please press
[SETUP/ENTER] button.
PLAY starts from the selected position.
2
Search2 DVD
Time 01:00:00 02:03:25
■Before setting it, you should change into DVD mode by pressing [DVD] button on
remote control.
DVD-Video(USA)_DV6T811N-LT 02.4.16 2:38 PM ˘`53
54
SEARCH VCD and CD (with a track number)
While in playing, press [SEARCH] button.
“Search 1” screen like the right figure appears.
(In case of PBC OFF)
Total track numbers appear.
Please enter a new track numbers to search with
[NUMBER] button.
* If it is PBC ON, “Search 1” screen does not
appear.
1
Search1 VCD
Track - - - 1-12
Search1 VCD
Track 009 1-12
In completing entering, please press
[SETUP/ENTER].
PLAY starts from the selected position.
2
■Before setting it, you should change into DVD mode by pressing [DVD] button on
remote control.
SEARCH VCD and CD (with time)
While in playing, press [SEARCH] button
twice.
“Search 2” screen like the right figure appears.
(In case of PBC OFF)
It shows current track’s time and the whole disc’s
hours.
Please enter a new hours to search with
[NUMBER] button.
* If it is PBC OFF, only the track’s time appears.
1
Search2 VCD
Track Time - -:- -:- - 00:03:20
Disc Time - -:- -:- - 00:48:31
In completing entering, please press
[SETUP/ENTER] button.
PLAY starts from the selected position.
2
Search2 VCD
Track Time 00:01:20 00:03:20
Disc Time - -:- -:- - 00:48:31
■Before setting it, you should change into DVD mode by pressing [DVD] button on
remote control.
DVD-Video(USA)_DV6T811N-LT 02.4.16 2:38 PM ˘`54
DVD Operation
55
confirming the current disc mode
Confirming the current PLAY mode on screen
While in playing, press [DISPLAY] button.
It shows a disc type, the current title, chapter
number, time elapsed and REPEAT mode.
1
■Before setting it, you should change into DVD mode by pressing [DVD] button on
remote control.
Display DVD
Title1/2 Chapter 5/8 TIme 00:45:00
Repeat Off
While in playing, press [DISPLAY] button.
It shows a disc type, the current track, time
elapsed and REPEAT mode.
2
Display VCD
Track 2/12 TIme 00:45:00
Repeat Off
DVD-Video(USA)_DV6T811N-LT 02.4.16 2:38 PM ˘`55
56
Selecting an audio language
Selecting an AUDIO language, SUBTITLE language and 3D AUDIO
A user may select an audio language and subtitle language if a disc includes Multi-language.
Keep pressing [AUDIO] button till a user’s preferred
language appears.
If DVD disc includes audio information, every time a user
presses [AUDIO] button, English (ENG), Spanish (SPA),
French (FRE) and others appear one by one.
Audio 1/3 Digital 5.1-CH ENG
Selecting a subtitle language
Keep pressing [SUBTITLE] button till a user’s
preferred language appears.
If a DVD disc includes subtitle information, every time a
user presses [SUBTITLE] button, English (ENG), Spanish
(SPA), French (FRE) and others appear one by one.
If a user presses [Off] button, subtitle does not appear on
screen.
Subtitle 1/3 ENG
■Before setting it, you should change into DVD mode by pressing [DVD] button on
remote control.
■Before setting it, you should change into DVD mode by pressing [DVD] button on
remote control.
Selecting 3D Audio
Please press [CLEAR/3D] button.
If pressing the button twice, a user can select a 3D audio.
** In setting data, “CLEAR/3D” means “clear”.
■Before setting it, you should change into DVD mode by pressing [DVD] button on
remote control.
■Available in PLAY mode only.
A certain disc
may not support
audio select or subtitle
select.
DVD-Video(USA)_DV6T811N-LT 02.4.16 2:38 PM ˘`56
DVD Operation
57
Selecting ZOOM and Multi Angle
Using a zoom function
A user can enlarge the current screen about 1.3, 1.5 or 2 times.
Keep pressing [ZOOM] button till the preferred
zoom appears.
Every time a user presses [ZOOM] button, a zoom
magnification changes 1.3 times (X1.3) 1.5 times
(X1.5) 2 times (X2) OFF 1.3 times (X1.3)
... one by one.
A base point to be enlarged is center and the point can be
changed with the operation of [ , , , ] button.
■Before setting it, you should change into DVD mode by pressing [DVD] button on
remote control.
X1.3
Multi Angle
If a disc includes multi angle information, a user can watch a screen in multi angles. The function is limited to a
DVD disc supporting multi angle information.
Keep pressing [ANGLE] button till the preferred
angle appears.
Every time a user presses [ANGLE] button, an angle
changes in a consecutive order.
■Before setting it, you should change into DVD mode by pressing [DVD] button on
remote control.
1/3
When “TV
ASPECT” item is set to
“4:3 PS” in setup
screen, or with certain
discs, 2 times Zoom
may not function
properly.
DVD-Video(USA)_DV6T811N-LT 02.4.16 2:38 PM ˘`57

58
Memorizing a scene
To memorize a scene
Once memorizing a scene, a user may watch it anytime.
■Before setting it, you should change into DVD mode by pressing [DVD] button on
remote control.
■For VCD playback, set to “PBC OFF” mode by pressing the [PBC] button.
While playing, press [MARK] button.
The right figure appears.
Then press [SETUP/ENTER] button and the
current scene is memorized in “A”.
1
If you want to memorize another preferred
scene, press [>] button.
The right figure appears.
Then press [SETUP/ENTER] button and the
current scene is memorized in “B”.
** A user may memorize “C” continuously with
the same method.
2
Playing a memorized scene
Press [MARK] button.
Memorized bookmark appears on screen.
1
Move it to preferred bookmark by pressing [
> ] button.
moves to the bookmark position.
In the moment, press [SETUP/ENTER] button to
play it.
2
Bookmark DVD
A01:30:10 B01:40:00 C
--:--:--
Bookmark DVD
A--:--:-- B--:--:-- C--:--:--
Bookmark DVD
A01:30:10 B--:--:-- C--:--:--
Bookmark DVD
A01:30:10 B01:40:00 C
--:--:--
“BOOKMARK”
function during the
disc playback of
SVCD or VCD2.0 is
only available in “PBC
OFF” mode. Select
“PBC OFF” mode by
pressing [TITLE/PBC]
button.
“BOOKMARK”
function during the
disc playback of
SVCD or VCD2.0 is
only available in “PBC
OFF” mode. Select
“PBC OFF” mode by
pressing [TITLE/PBC]
button.
DVD-Video(USA)_DV6T811N-LT 02.4.16 2:38 PM ˘`58
DVD Operation
59
Displaying menus in a disc
To display menus in a disc
If a disc includes menus, a user may use them.
■Before setting it, you should change into DVD mode by pressing [DVD] button on
remote control.
DVD) Press [MENU] or [TITLE/PBC] button.
It shows menus in the disc. Also they are different according to discs.
If the disc has title menu, it is operated with [TITLE/PBC] button.
VCD2.0) Press [TITLE/PBC] button.
Every time pressing [TITLE/PBC] button, PBC function turns ON and OFF over and
over.
Menu screen only appears when selecting “PBC ON”.
• CD and VCD1.1 do not support the function.
1
DVD) Move a cursor to a relative item with arrow buttons of [ , , ,
] button and select one with [SETUP/ENTER] button or [PLAY] button.
VCD2.0) Select a number of menu screen and press [SETUP/ENTER]
button.
* If you watch a movie without menu screen, select “PBC OFF” mode by pressing
[TITLE/PBC] button.
2
DVD-Video(USA)_DV6T811N-LT 02.4.16 2:38 PM ˘`59
Move: Select : Exit:Setup/Return
60
Basic SETUP mode
■Before setting it, you should change into DVD mode by pressing [DVD] button on
remote control.
While STOP or RESUME STOP, press
[SETUP/ENTER] button.
• A screen to set various menus like the right
figure appears.
• By using [<] and [>] , a set menu changes
from Language, which is covered with “
”, to Video, Audio and Others.
• If “ ” is on Language, press [ ] or [ ]
to display submenus
• Press [ ] and [ ] for the movement
among menus and press [<] and [>] for the
select of a menu.
1
In completing settings, press [RETURN] button or [SETUP/ENTER] button.
2
While STOP or RESUME STOP, press [SETUP/ENTER] button to set menus.
Language Video Audio Others
OSD Language English
Audio English
Subtitle English
Disc Menu English
English
French
Spanish
DVD-Video(USA)_DV6T811N-LT 02.4.16 2:39 PM ˘`60
Move: Select : Exit:Setup/Return
Move: Select : Exit:Setup/Return
Move: Select : Exit:Setup/Return
Move: Select : Exit:Setup/Return
Setup
61
LANGUAGE Setup
■Before setting it, you should change into DVD mode by pressing [DVD] button on
remote control.
While STOP or RESUME STOP, press [SETUP/ENTER] button.
1
Selecting a OSD language.
Please select a language to be displayed on DVD
screen.
** “OSD” means “On Screen Display”.
2
Selecting Audio language.
Set it as the preferred audio language. In case the
audio language is set and recorded in the DISC, it
is automatically played in the set language in
every playing. For example, English is set and
recorded as audio language in the DISC, it is
played in English.
3
Selecting Subtitle language.
Please set it as the preferred language. In case the
subtitle language is set and recorded in the DISC,
it is automatically played in the set language in
every playing. For example, English is set and
recorded as subtitle language in the DISC, it is
played in English.
4
Selecting DISC MENU language.
Please set it as the preferred DISC MENU
language. In case the DISC MENU language is
set and recorded in the DISC, it is automatically
played in the set language in every playing. For
example, English is set and recorded as a DISC
MENU language in the DISC, it is played in
English.
5
A user can set OSD language, Audio, Subtitle and Disc Menu.
Language Video Audio Others
OSD Language English
Audio English
Subtitle English
Disc Menu English
English
French
Spanish
Language Video Audio Others
OSD Language English
Audio English
Subtitle English
Disc Menu English
English
French
Spanish
Portuguese
Chinese
Language Video Audio Others
OSD Language English
Audio English
Subtitle English
Disc Menu English
English
French
Spanish
Portuguese
Chinese
Language Video Audio Others
OSD Language English
Audio English
Subtitle English
Disc Menu English
English
French
Spanish
Portuguese
Chinese
In case a disc
does not include
setting languages
information, the
selected language
does not appear.
DVD-Video(USA)_DV6T811N-LT 02.4.16 2:39 PM ˘`61
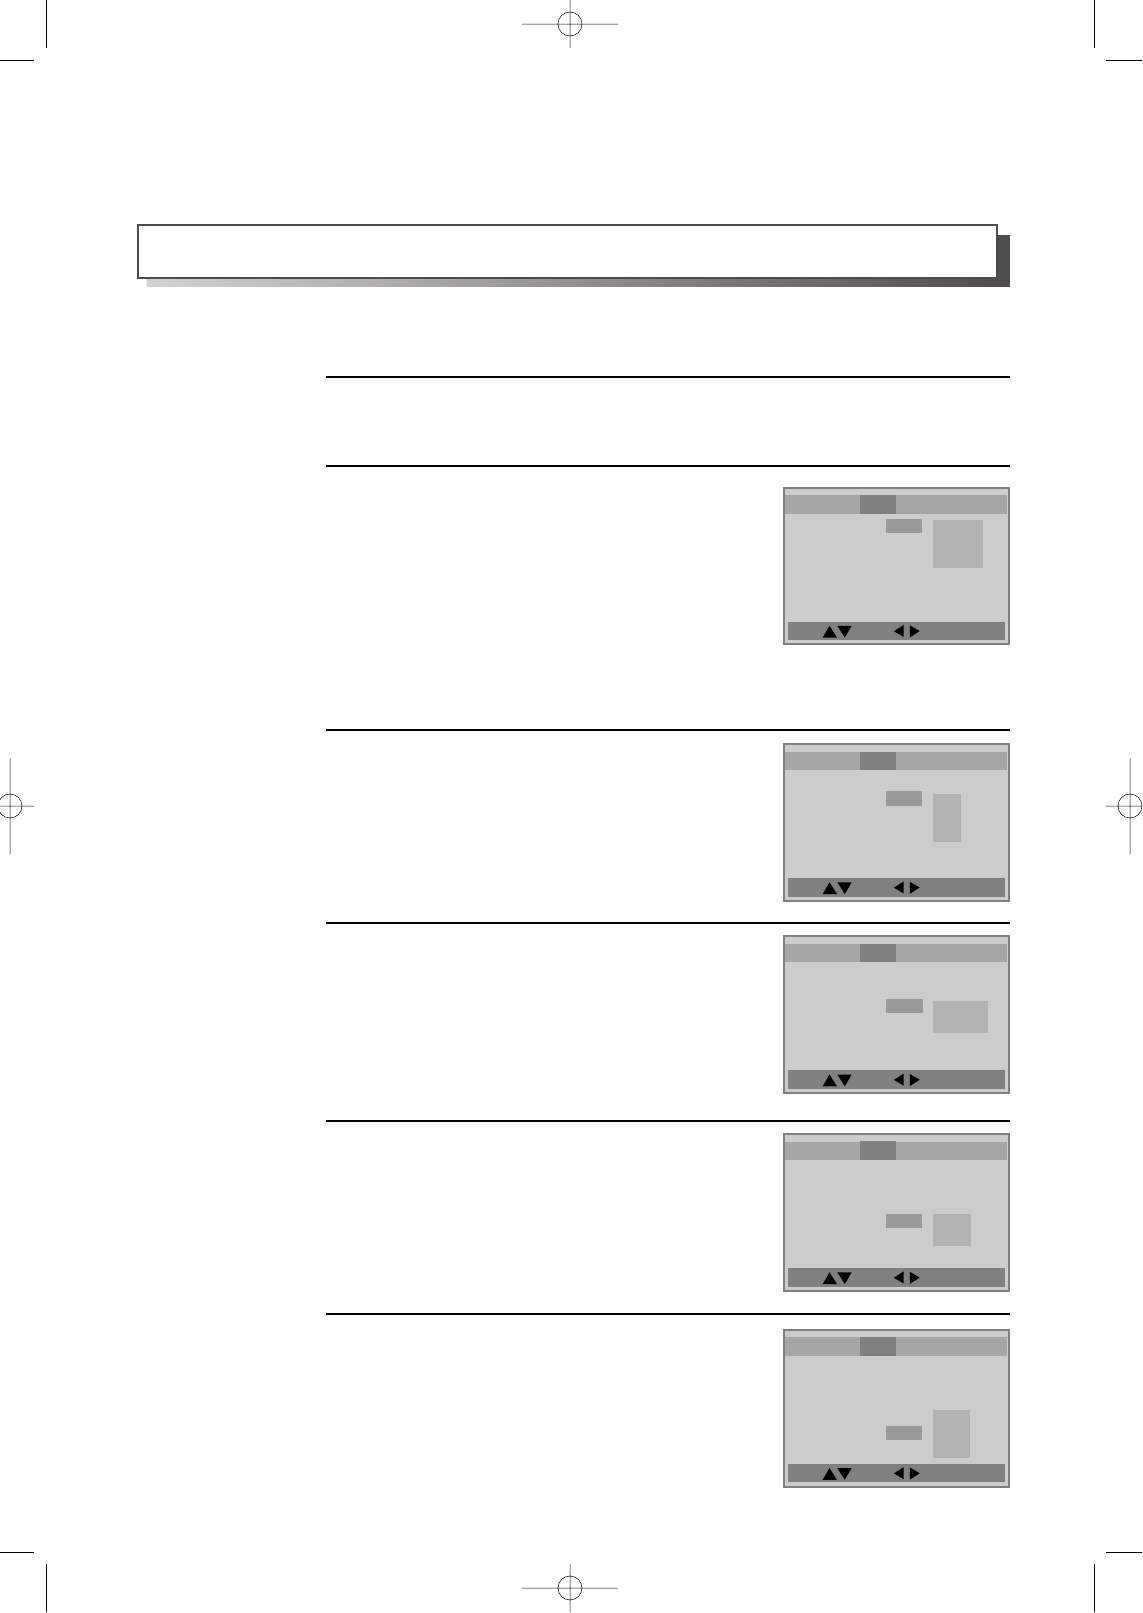
Move: Select : Exit:Setup/Return
Move: Select : Exit:Setup/Return
Move: Select : Exit:Setup/Return
Move: Select : Exit:Setup/Return
Move: Select : Exit:Setup/Return
62
VIDEO Setup
■Before setting it, you should change into DVD mode by pressing [DVD] button on
remote control.
While STOP or RESUME STOP, press [SETUP/ENTER] button.
Selecting TV Aspect.
If a user selects “4:3 PS”, the user can watch only
a center of the original scene of “16:9”.
If a user selects “4:3 LB”, the user can watch the
original scene of “16:9”, but the top and bottom
of the screen look black color.
If a disc size is originally recorded in 4:3, a user
cannot watch it in a wide screen though a user
sets a size as “16:9 Wide”.
2
1
Selecting TV type.
A user may select a TV type.
A user may select a type among NTSC, PAL or
Auto. For example, NTSC type is used in North
America.
3
A user can set up a connected TV condition and screen.
Selecting Video Out.
A user may select a Video Out between
Component and S-Video.
4
Selecting Brightness.
A user may select a brightness of a screen. There
are two choices of Normal and Bright.
5
Selecting Sharpness.
A user may select a sharpness of a screen. There
are three of choices, Normal, Soft and Sharp.
6
Language Video Audio Others
TV Aspect 4:3 PS
TV Type NTSC
Video Out S-Video
Brightness Normal
Sharpness Normal
4:3 PS
4:3 LB
16:9 Wide
Language Video Audio Others
TV Aspect 4:3 PS
TV Type NTSC
Video Out S-Video
Brightness Normal
Sharpness Normal
Auto
NTSC
PAL
Language Video Audio Others
TV Aspect 4:3 PS
TV Type NTSC
Video Out S-Video
Brightness Normal
Sharpness Normal
Component
S-Video
Language Video Audio Others
TV Aspect 4:3 PS
TV Type NTSC
Video Out S-Video
Brightness Normal
Sharpness Normal
Normal
Bright
Language Video Audio Others
TV Aspect 4:3 PS
TV Type NTSC
Video Out S-Video
Brightness Normal
Sharpness Normal Normal
Soft
Sharp
DVD-Video(USA)_DV6T811N-LT 02.4.16 2:39 PM ˘`62
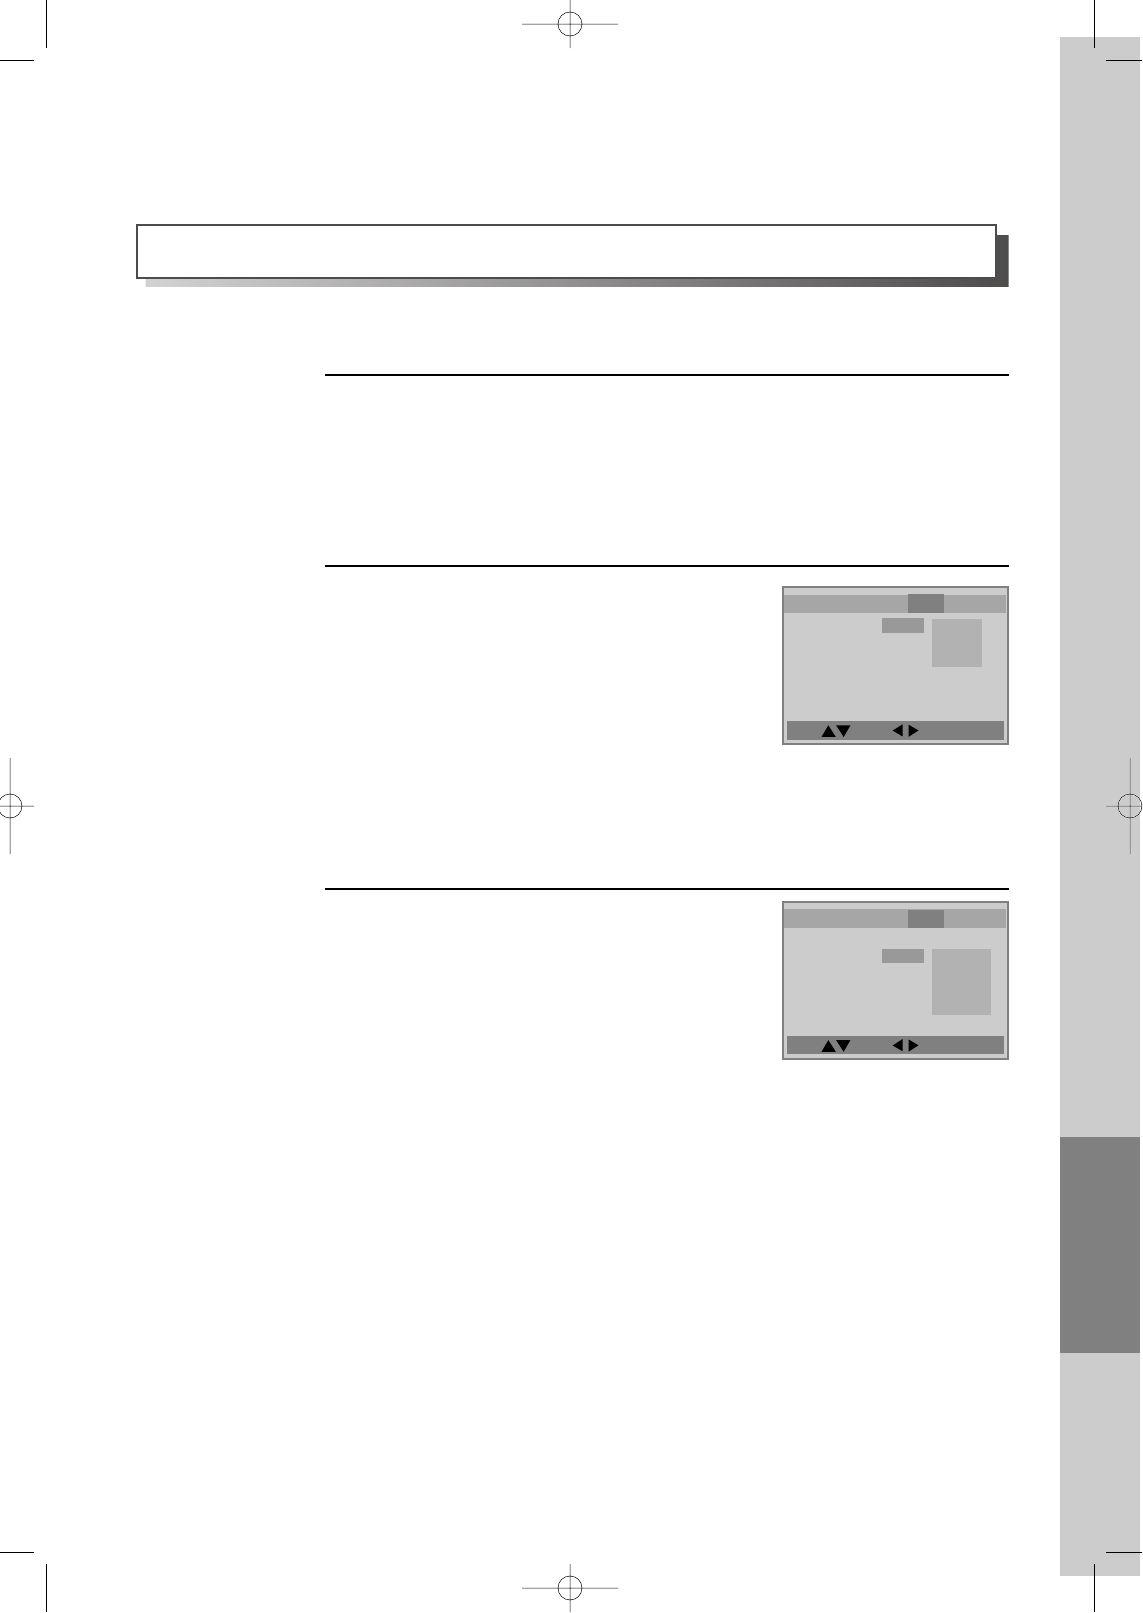
Setup
63
AUDIO Setup
Move: Select : Exit:Setup/Return
Move: Select : Exit:Setup/Return
■Before setting it, you should change status into DVD by pressing [DVD] button on the
remote control.
Select a digital output.
Set output conditions to coaxial or optical
terminal. You can set following three(3) values of
digital output;
•Bitstream: The same signal as audio signal
recorded in disc goes to digital audio output
terminal.
•PCM: Decoded audio signal goes to digital
output terminal.
•Off: Not any output goes to digital audio
output terminal.
2
Select Dual Mono.
Dual Mono means 2 individual mono channels.
Dual Mono is mainly used to apply 2
different languages to one program. This
function is similar to multichannel sound
function supported in TV or VCR. 2 mono
channels can be combined into total 4 values;
Stereo, L- Mono, R- Mono and Mixed Mono.
3
A user may select audio menu according to a user’s speaker set.
While STOP or Resume STOP, press [SETUP/ENTER] button.
1
• Stereo: outputs left channel and right channel to left speaker and right
speaker respectively.
• L- Mono: outputs left channel to left speaker and right speaker.
• R-Mono: outputs right channel to left speaker and right speaker.
• Mixed Mono: mixes 2 mono channels and outputs the mixed channel to left
and right speaker at the same time.
Language Video Audio Others
Digital Out Bitstream
Dual Mono Stereo
Dynamic Range Off
Bitstream
PCM
Off
Language Video Audio Others
Digital Out Bitstream
Dual Mono Stereo
Dynamic Range Off Stereo
L-Mono
R-Mono
Mixed Mono
DVD-Video(USA)_DV6T811N-LT 02.4.16 2:39 PM ˘`63

64
Move: Select : Exit:Setup/Return
Select a Dynamic Range.
Dynamic range can differs by users and their
watching environment. High-density
audio programs like movies have wide dynamic
range. In the dynamic range, explosion
sounds 20dB higher and rustle of leaves sounds
50dB less than conversation. Sometimes,
depending on watching environment, loud
sound should be heard louder while soft sound
should be heard softer. Likewise, very soft sound
is not audible and viewers should
raise the sound level.
Set "Off" to view a program in the dynamic
range as recorded in disc. If you hear
loud sound softer and soft sound louder, set a
suitable value below "Full".
4
Language Video Audio Others
Digital Out Bitstream
Dual Mono Stereo
Dynamic Range Off Full
3/4
2/4
1/4
Off
DVD-Video(USA)_DV6T811N-LT 02.4.16 2:39 PM ˘`64
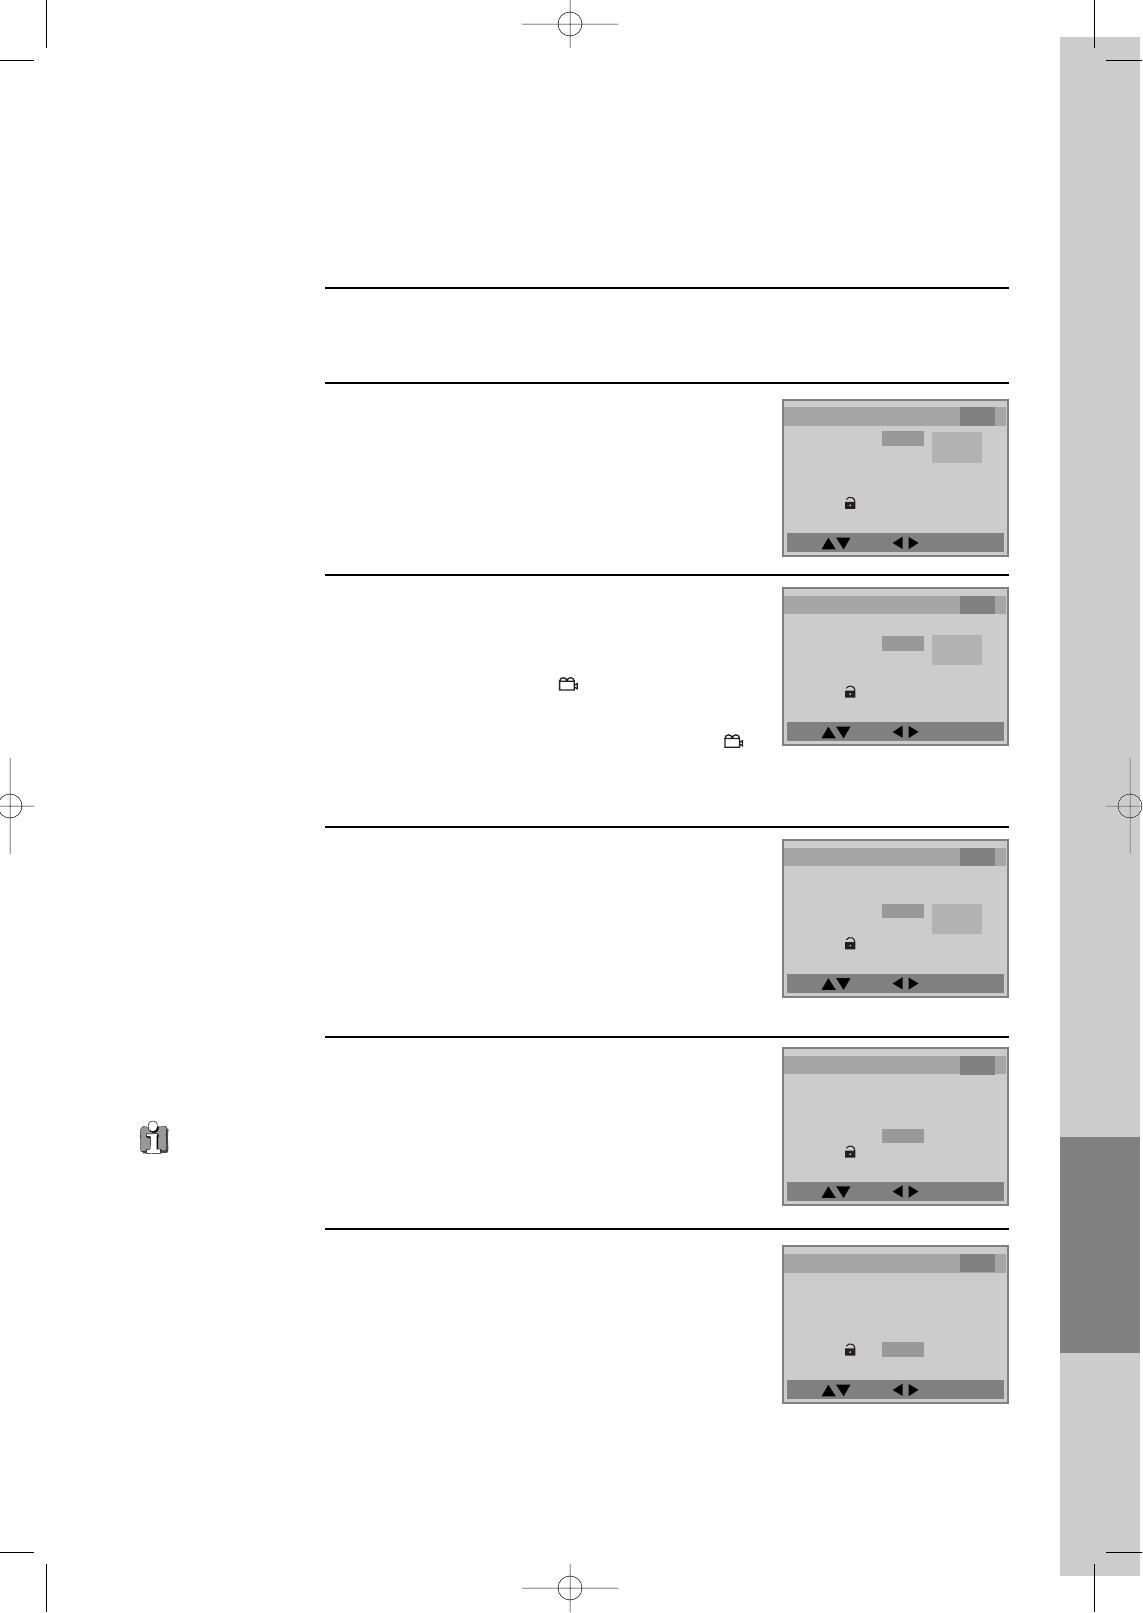
Setup
65
Move: Select : Exit:Setup/Return
Move: Select : Exit:Setup/Return
Move: Select : Exit:Setup/Return
Move: Select : Exit:Setup/Return
Move: Select : Exit:Setup/Return
Others Setup
■Before setting it, you should change into DVD mode by pressing [DVD] button on
remote control.
Select OSD (On Screen Display).
Select "On" to make OSD(On Screen Display)
language displayed in screen.
2
Select Angle Mark.
Different angle screens up to 9 screens can be
saved in DVD. You can set with this menu
whether angle mark ( )is displayed in the
screen during playing the multiple- angle-
recorded disc. Select "On", the angle mark ( )
is displayed in the screen if multiple angles are
recorded in the currently played disc.
3
Select Screen Saver.
If bright scenes continue to be displayed in
screen, TV can be damaged. Set the screensaver
to "On", the screensaver functions automatically
and DVD logo moves continuously if the
resume stop, stop or open mode is maintained
for about 5 minutes.
4
Select Defaults.
If you select defaults, every function set returns to
FACTORY defaults except PARENTAL.
5
Select PARENTAL.
It consists of 8 levels of violence, sexual scene,
strong sexual scene and others to protect children
from watching those scenes.
6
Language Video Audio Others
OSD On
Angle Mark On
Screensaver On
Defaults Reset
Parental 8 Unlock
On
Off
Language Video Audio Others
OSD On
Angle Mark On
Screensaver On
Defaults Reset
Parental 8 Unlock
On
Off
Language Video Audio Others
OSD On
Angle Mark On
Screensaver On
Defaults Reset
Parental 8 Unlock
On
Off
Language Video Audio Others
OSD On
Angle Mark On
Screensaver On
Defaults Reset
Parental 8 Unlock
Language Video Audio Others
OSD On
Angle Mark On
Screensaver On
Defaults Reset
Parental 8 Unlock
While STOP or RESUME STOP, press [SETUP/ENTER] button.
1
“Parental Lock”
activates only if you
set a password and
the unit goes into
Lock status. When the
disc has no parental
function even if the
disc for adult only,
Parental Lock doesn’t
activate.
DVD-Video(USA)_DV6T811N-LT 02.4.16 2:39 PM ˘`65
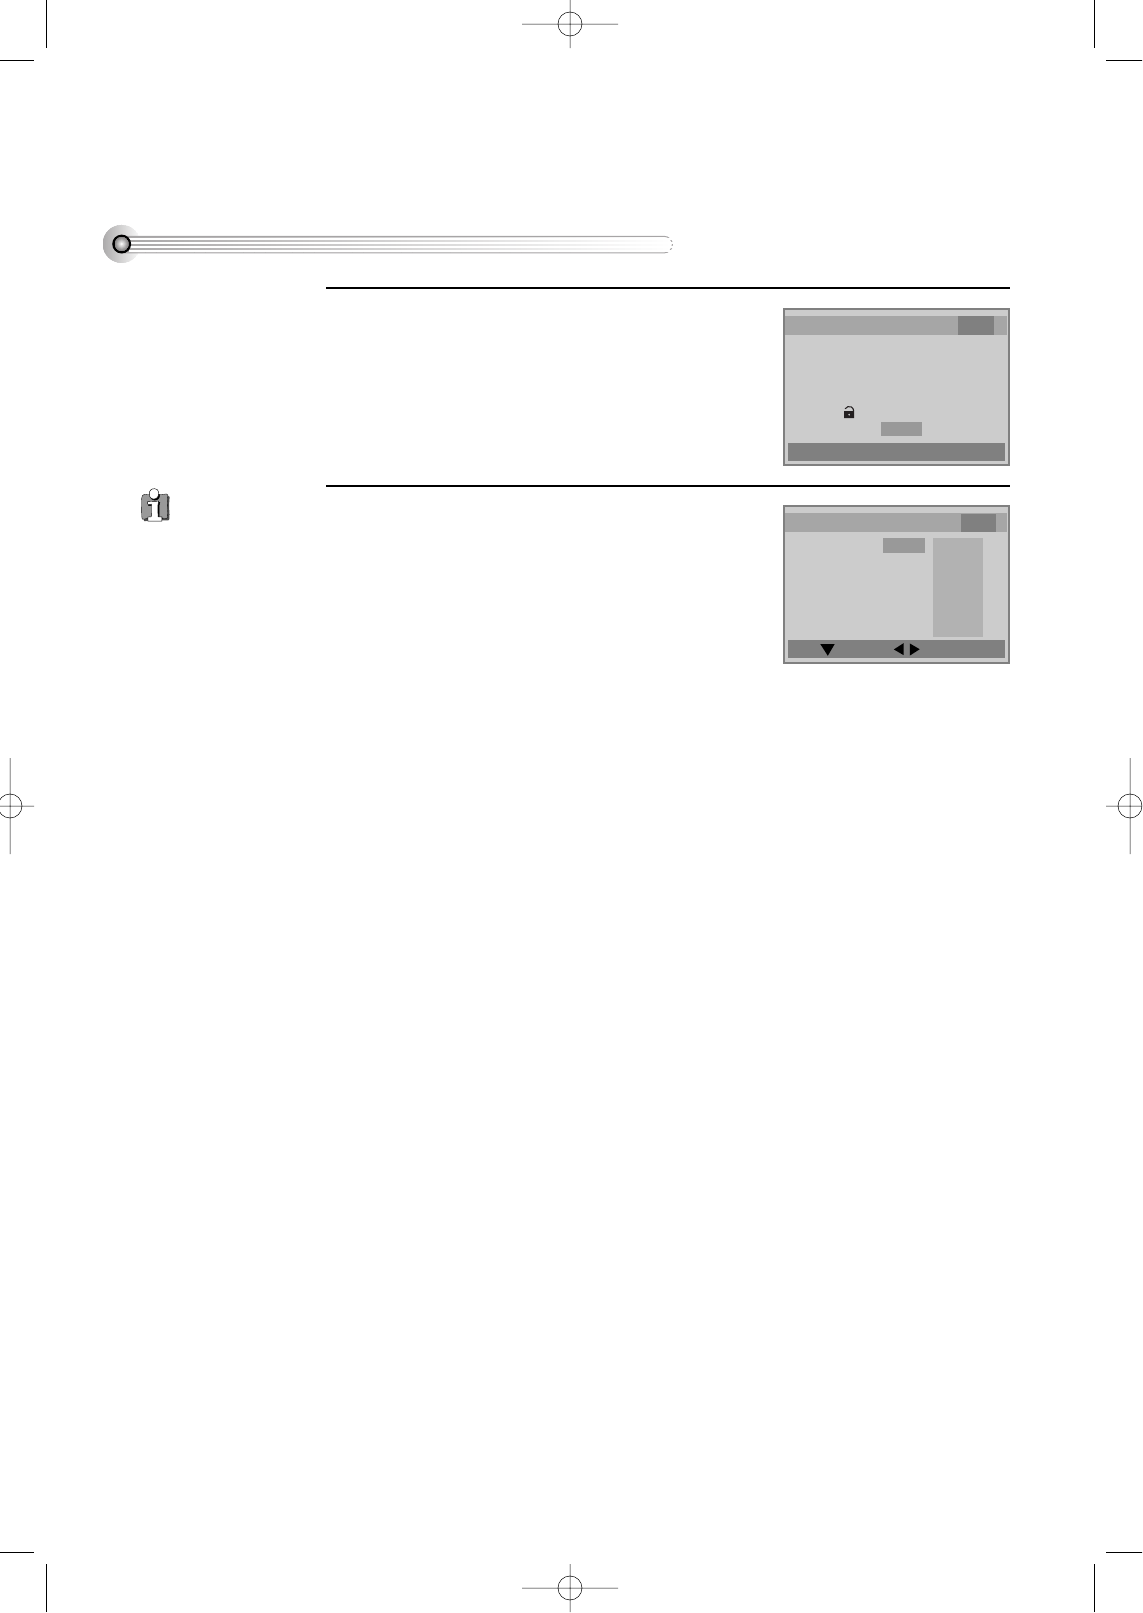
66
Move: Select : Exit:Setup/Return
Input Password Exit:Setup/Return
Settling a user’s PARENTAL
Entering a password.
If selecting “PARENTAL” by moving [>], a
password display appears.
Then entering a user’s password, a user can
resettle a user’s PARENTAL.
1
Resettling a user’s PARENTAL.
Set your desired level in PARENTAL display.
As the number is higher, it means the film gets
close to an adult film.
It, however, operates only when a DVD disc
includes PARENTAL information.
For example, if a user settles the 6th level, 7th or
8th level disc cannot be played.
For the change of a user’s password, please move
to “CHANGE PASSWORD” and enter new
password.
2
Language Video Audio Others
OSD On
Angle Mark On
Screensaver On
Defaults Reset
Parental 8 Unlock
Password - - - -
Language Video Audio Others
Parental 8 Unlock
Change Password - - - -
1 Kids Safe
2 G
3 PG
4 PG-13
5 PG-R
6 R
7 NC-17
8 Unlock
The initial
password is 3308. In
case you forget newly-
input password, you
can use 3308 as a
password.
DVD-Video(USA)_DV6T811N-LT 02.4.16 2:39 PM ˘`66
Setup The others
67
About DVD
Playable Disc
• DVD, Video CD(Version 1.1, 2.0), S-VCD and Audio CD
Disc type Playable Restriction
DVD Possible Region number 1 or Region number All
Video CD Possible Version 1.0/1.1/2.0, SVCD/CVD
CD Possible PCM or dts
CD-G Possible Only Audio playback
CD-ROM Possible MP3 File, 200 Files in maximum
CD-R Possible Video-CD/CD/CD-ROM (MP3 File)
CD-RW Possible Video-CD/CD/CD-ROM (MP3 File)
DVD-R Possible DVD Video
DVD-ROM Impossible
DVD-RAM Impossible
DVD+RW Impossible
Photo CD Impossible
REGION MANAGEMENT INFORMATION
This unit is designed and manufactured to respond to the Region Management information that is recorded
on a DVD disc. The region number of this player is “1”. If the region number described on the DVD discs
does not correspond to the Region number of this player, the player will not play this disc. This player will
play DVD discs made for “ALL” regions. Therefore, this player will play DVD discs marked with labels
containing the region number “1” or “ALL”.
(Region 1) (Region ALL)
1
ALL
DVD-Video(USA)_DV6T811N-LT 02.4.16 2:39 PM ˘`67

68
Terms related with DVD
DVD A DVD (abbreviation of Digital Versatile Disc or Digital Video Disc) can include 135 minutes of
video information. And for audio, it can hold up to 8 kinds of languages and 32 kinds of subtitle
languages. By using MPEG-2 video compression and digital 3D surround sound, DVD realizes high-
defined screen and quality sound like a movie theater.
CDDA A CDDA (abbreviation of Compact disc digital audio) is a music disc that is currently used.
MP3 Audio compression format that enables audio files to be stored and transferred on a computer with a
relatively small file size. It enables you to enjoy CD quality music. (Short for MPEG-1 Layer 3)
PBC This is recorded on a Video CD 2.0, Video CD 3.0, SVCD and CVD. The scenes or information to be
viewed (or listened to) can be selected interactively with the TV monitor by looking at the menu
shown on the TV monitor. It stands for PlayBack Control.
CHAPTER It means the information recorded in a DVD. A title in a DVD is divided into many tracks, of which a
track is called as a chapter. A certain scene of a screen can be quickly searched with the chapter
number.
TITLE It means the information recorded in a DVD. A DVD can be divided into may titles.
TRACK It means the information recorded in a video CD and audio CD. A disc consists of many a track, for
which a user can search a certain position.
dts Digital Theatre System is a 5.1 -channel surround sound system, which is widely used in movie
theatres around the world. It enables the bit rate to be increased to provide good sound quality.
Multi Angle Some DVD discs contain the various scenes that have been simultaneously shot from a number of
different angles.
PCM Linear PCM is a signal-recording format used in a CD, while CD is recorded in 44.1kHz/16bit, a
DVD is recorded in 48KHz/16bit up to 96KHz/24bit.
Dolby Digital Dolby Digital enables the delivery of mono through 5.1-channel audio at data rates from 32 kbps to
640 kbps, thus offering flexibility and economical performance as well as uncompromised sound
quality.
Dolby Pro-Logic
You will get the full benefit of Pro Logic from the same DVD discs that provide full 5.1 channel Dolby
Digital soundtracks, if you have a Dolby Pro Logic Surround decoder.
Bitstream Digital audio data that is decoded into an analog signal for subsequent output to speakers.
DVD-Video(USA)_DV6T811N-LT 02.4.16 2:39 PM ˘`68
The others
69
Handling Disc
• To keep a disc clean condition, please do not touch a side containing play information.
• Do not attach a bit of paper or sticky tape on it.
• Do not expose a disc to a direct sunlight or electric heating systems.
• After using it, please keep a disc in a case.
Cleaning Disc
• Before using it, please rub it from center toward outside with clean clothes.
• Do not use any type of solvent such as thinner, benzol (benzene), commercial
cleaning goods or antistatic sprays.
Lt/Rt It indicates L/R of Dolby Digital 2CH Downmix output.
L/R/C/SW/LS/RS
In Dolby Digital and dts, a total 6 channels are used. 3 channels for front, 2 channels for surround
and 1 channel for subwoofer. They are a front left, a front right, a center, a subwoofer, a rear left and a
rear right. L stands for front left, R for front right, C for center, SW for subwoofer, LS for rear left
surround and RS for rear right surround.
Downmix DOWNMIX is reproducing the proper audio when audio format recorded on a disc differs from the
output audio channel configuration. For example, with just one stereo speaker system you can hear
full 5.1 channel audio.
S-VIDEO The S-VIDEO output separates the color (C) and luminance (Y) signals before transmitting them to the
TV set in order to achieve a sharper picture. So this must be selected from the menu to enable the S-
VIDEO output to function.
COMPONENT
It is called color difference signal and is a technology to divide and transmit a color signal (C) into B-
Y and R-Y color difference signal. This technology supplies clearer and more vivid picture than
composite video type .
DVD-Video(USA)_DV6T811N-LT 02.4.16 2:39 PM ˘`69
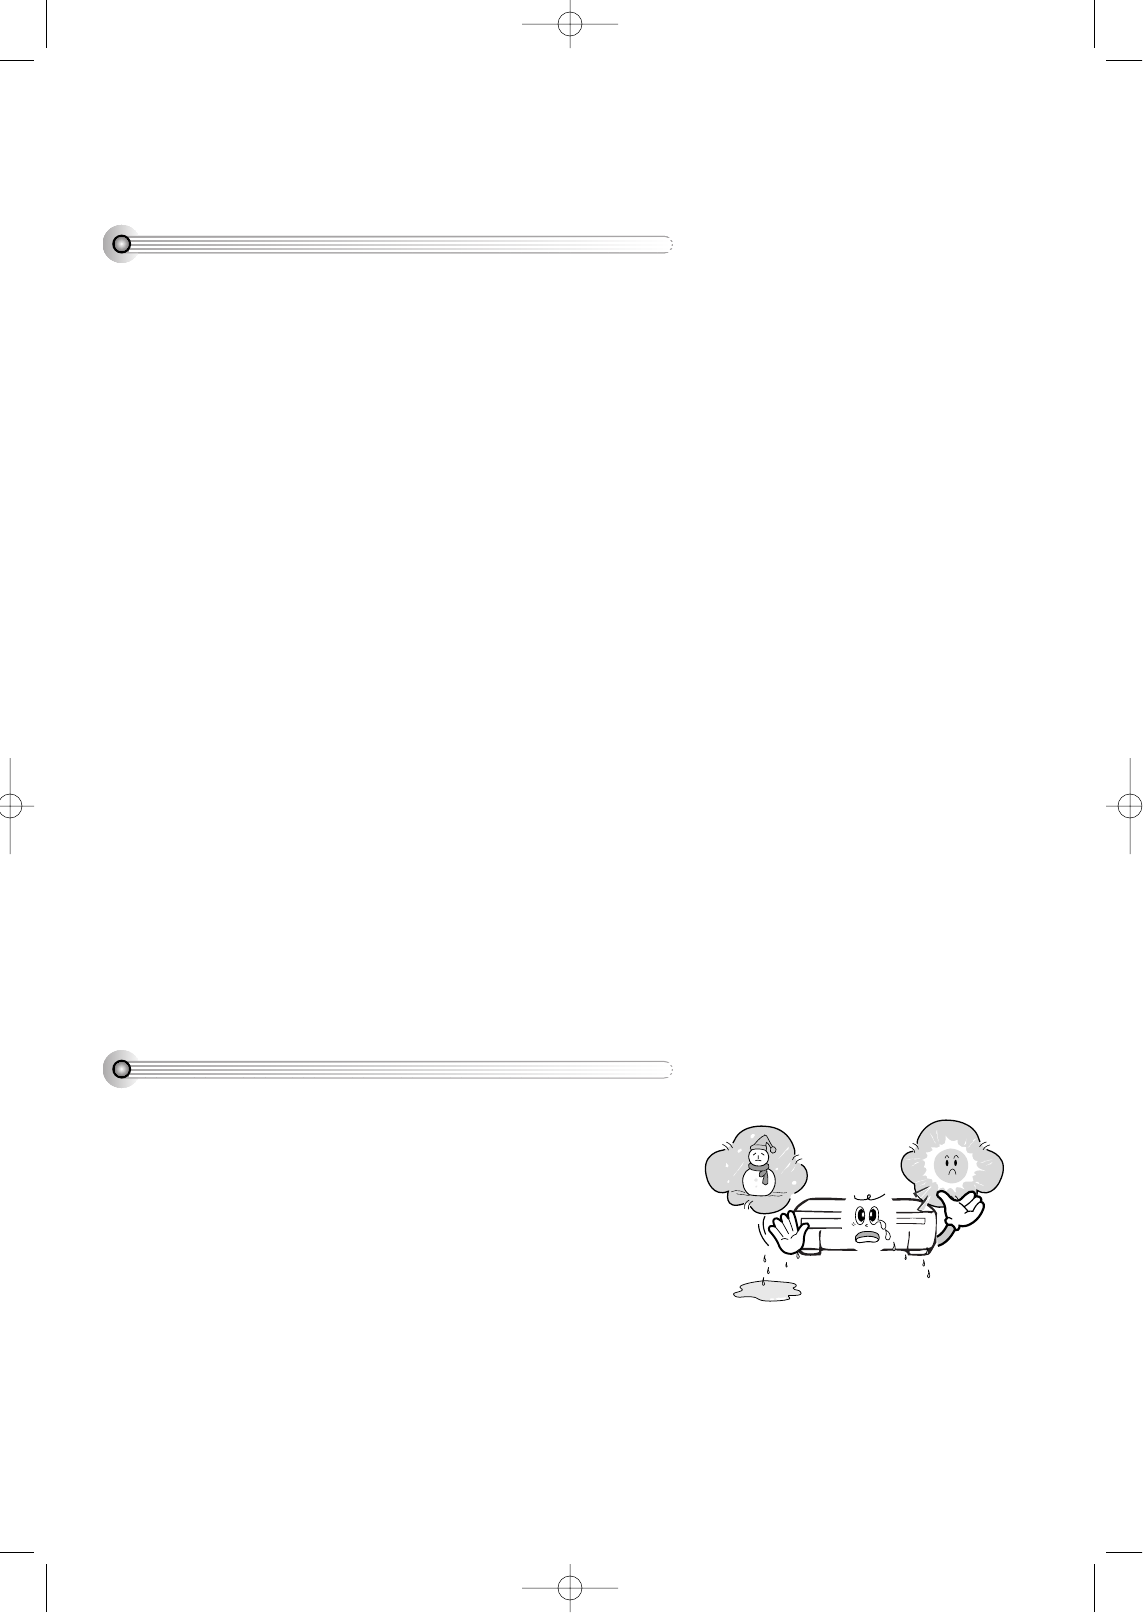
70
Basic information about VCR and Videotape
What is dew condensation symptom?
• If a VCR is moved from a cool place to a warm and damp place or a
place facing a direct cool wind from air-conditioner...and others,
temperature varies sharply, which makes dew on head drums of VCR.
If dew condensation occurs,
1 First, turn it on for one or two hours before using it.
2 Do not use it because it may develop troubles of a VCR or videotape.
Terms related with VCR
AFT Automatic fine tuning, a circuit that automatically adjusts TV reception to optimum condition.
CABLE Cable television.
EP Extended play, the slowest recording speed. Designed to store the maximum amount of program
material on a single video cassette. There is some degradation in picture/audio quality.
Index Search A feature of this VCR that automatically records an index each time recording begins. It helps you
locate a particular segment of the tape quickly and easily.
LP Long Play, an intermediate tape recording speed that combines most of the picture/audio quality
obtainable at the standard recording speed with some of the tape economy of Extended Play (EP).
OSD On-screen display of information pertinent to the features of the VCR.
OTR One-touch recording, a feature that allows you to record the program you’re watching by pressing the
REC key. Each press of the key increases the recording time by 30 minutes, up to four hours.
RF Radio frequency, the composite audio/video signal supplied to a TV receiver (or other video
component) by an antenna or cable system.
Safety tab The plastic tab at the back of a video tape cassette which, when removed, prevents accidental erasure
of a recording.
SP Standard play, the recording speed to use when the best picture quality is of prime importance (and
when total recording time is not).
DVD-Video(USA)_DV6T811N-LT 02.4.16 2:39 PM ˘`70
The others
71
Noise
• Noise means poor screen conditions of VCR such as interruption or
trembles in the top of bottom of a screen.
• If a noise occurs, please adjust a screen by operating “TRACKING”
buttons .
• Adjustment may not improve quality screen if the tape is originally
recorded mixed with some noise or kept in poor conditions.
• If some noise remains after adjusting it, VCR heads may be
contaminated or worn.
• In case VCR heads are contaminated, please rub them cleanly.
Auto-detect the contamination of VCR heads
• If the product, which has a auto-detector, detects a contaminated
head(s), it shows the conditions to notice the contamination on
screen.
* In case of the notice on screen, please rub the heads with a head-
cleaner followed by “How to use a head-cleaner”.
How to use a head cleaner
• In case of a old or contaminated videotape, screen may not be clean from the contamination of VCR heads.
Please remove contaminants using a head-cleaner like below order.
1 Insert a head-cleaner into VCR
2 Press “PLAY” for 5 seconds, and then press “FF” for about 10 seconds.
3 Eject a head-cleaner from VCR
• If the screen is not clean yet, please repeat the above 2 or 3 times more.
• A head-cleaner is not for sale. Please ask it for the nearest agent.
• In case a user ask the removal of contaminants of us, the user should pay extra charges.
PLAY (5secs)
FF (10secs)
What is a record tab of a videotape?
• The tab on a videotape enables a user to record and prevents the
recorded area from rerecording.
• To record it, a user should use a videotape with a tab.
• If a user input a videotape without a tab to record, the videotape is
ejected automatically.
• In order to avoid a recorded area to be rerecorded, a tab should be
removed.
• To rerecord a recorded videotape, please scotch-tape on the removed
tab position.
safety tab
DVD-Video(USA)_DV6T811N-LT 02.4.16 2:39 PM ˘`71
72
Before doubting about troubles (DVD)
• The recorder does not play.
• No sound comes through.
• A disc is playing but screen does
not appear or poor screen appears.
• Sound is irregular
• REMOTE does not work.
• Dolby Digital sound does not work
• “AUDIO” or “SUBTITLE” button
does not work.
Checks
Symptom
➤If a DVD is from overseas, it may not be played. Please check a
DVD’s region code whether it has the relative region code 1 or All.
➤Please check whether a DVD is inserted in a right direction.
➤If it is a CD-ROM for PC or DVD-ROM, it does not work.
➤Play mode may be “SLOW” or “PAUSE”(In abnormal speed
play, no sound comes through)
➤Did you connect the parts in right way?
➤Please check the operative condition of TV or amplifier.
➤From SETUP, please check “AUDIO” items.
➤Did you turn on your TV sets?
➤Did you connect the parts in right way?
➤The play may be in “PAUSE”.
➤A disc may have some contaminants or be damaged.
➤A disc may be bad one.
➤Please check the connection with Dolby Digital amplifier.
➤Please check the plugs are connected with one another tightly.
➤Some contaminants may be remained in connection terminal.
➤Please check the degree of remote control, distance or any
interruption.
➤Battery may be weak or exhausted.
➤When you operate DVD, use it by pressing [DVD] button.
➤Dolby Digital sound can be worked in the Dolby Digital
amplifier only.
➤Please check “Dolby Digital ” mark on your DVD.
➤In case of playing it through digital output, while pressing
“STOP”, please check whether “DIGITAL OUTPUT” is
“BITSTREAM” by pressing “SETUP/ENTER”.
➤Please check the connection is correct.
➤If a DVD does not include language information, it does not
support the function.
DVD-Video(USA)_DV6T811N-LT 02.4.16 2:39 PM ˘`72
The others
73
• “ANGLE” button does not work
while a DVD is playing.
• “MENU” does not appear while a
DVD is playing.
• Screen shakes or appears only in
black and white. (or Subtitle
shakes)
Checks
Symptom
➤“ANGLE” is supported only in a DVD contains multi angle
scenes. Also a user can confirm the support with the “ANGLE”
mark on screen.
➤Please check the degree of remote control, distance or any
interruption.
➤Please check a battery in remote control whether it is exhausted
or not.
➤A DVD may not contain menu information.
➤The recorder may not coincide with your TV system. Please
press “SYSTEM” to match to NTSC system.
➤A disc may have some contaminants or be damaged.
➤If you playback a DVD disc of PAL system whose region code is
“ALL”, the playback screen may shake.
DVD-Video(USA)_DV6T811N-LT 02.4.16 2:39 PM ˘`73
74
Before doubting about troubles (VCR)
• “Power On” does not work.
• It does not work even in “Power
On”.
Checks
Symptom
■Power
➤Please check whether a power plug is inserted in an electric outlet.
➤Please check whether a videotape is inserted in.
➤Try to insert a plug again.
• A channel on video and a play
screen does not appear.
• Noise (screen noise) appears on
screen.
■Screen and noise
➤Please check your antenna’s connection.
➤TV channel should be fixed on video channel (3 or 4).
➤Please check your antenna’s signal whether it may be weak. In
case of its weakness, please use a frequency amplifier connected
with the device.
➤Press “TV/VCR” and then let “VCR” is displayed on the display
panel.
➤While in no use of VCR, was it turned on?
➤While in recording a program, do you watch another channel?
➤Select TV by pressing [TV/VCR] button on remote control.
• A videotape is not inputted in.
• On inputting a videotape, the tape
is re-ejected.
• A videotape is not ejected.
■Input and ejection
➤Please check whether a power plug is inserted in an electric outlet.
➤Please check whether a videotape is in.
➤Please check whether a videotape is inserted in a right direction
(a side of transparent window should be on the upside)
➤Have you inputted a videotape again just after the tape was
ejected? Please try it again after fully ejecting it.
➤When a videotape forces to be ejected, the tape may not be
inputted. In the case, please pull out an outlet, and then push the
tape smoothly.
➤That’s why a safe mode to protect a videotape is operated
automatically. Please pull out the tape and input it again.
➤In case the product is used for a long time, a videotape may not be
ejected for a film inside may be stretched. In the case, please pull
out a power plug for about 10mins and then press “EJECT” button.
DVD-Video(USA)_DV6T811N-LT 02.4.16 2:39 PM ˘`74
The others
75
• Noise appears on screen after
recording.
• While in playing, noise appears.
• Sound and screen are irregular.
• Sound comes out but screen does
not appear.
• Screen is irregular and stripes appears.
• "Screen Error" message is displayed
in a screen.
• While recording and playing, the
top of screen extremely waves.
Checks
Symptom
➤While in playing a videotape, there may happen some noise or
blot in the part of the beginning of a videotape or resuming
“PAUSE”, which are not breakdown.
➤Please press “TRACKING” for better screen. Videotape may be
poor. Try to change it to another one.
➤Please use a head-cleaner to clean VCR heads. VCR heads may
be contaminated.
➤Since VCR Play signals are not stable like a TV signals, screen
may be unstable or curved while in playing. To fix the problem,
please horizontal adjustment.
• A screen is not clear.
• A screen at pause is trembling or
slow screen is not clear.
■Play
➤In case videotape is the one recorded by other products or old
one, stripe may appear on the screen.
➤Try to adjust the screen by [TRACKING+/-] button
➤Try to use a head-cleaner.
➤Try to use a head-cleaner.
➤Try to adjust the screen by [TRACKING+/-] button.
■Recording
• Recording a TV program is
impossible.
➤For recording, you should use videotape with a tab.
➤Please check whether a channel is fixed on video. If not, you
have to turn it into “TV” by pressing “OUTPUT” button.
➤Please check whether the timer recording info is right.
➤Are RF cables inputted antenna connection terminal correctly?
➤Does a CH number selected in display section appear?
➤Please check a tab on a tape whether it is broken or not. (If it was
broken, please scotch-tape it)
DVD-Video(USA)_DV6T811N-LT 02.4.16 2:39 PM ˘`75
76
• Recording a TV program is
impossible.
• Once pressing “REC”, a videotape
is ejected automatically.
• Timer recording of Cable TV does
not work.
• In spite of pressing “CHANNEL”, a
channel can not be set.
• While duplicating, screen is not
clean and distorted.
➤Check whether a tape attached with a recording tap is inserted.
➤Check whether the screen is displayed in VCR Only Channel.
Press [OUTPUT] button in this remote controller to adjust in
"General Broadcast" condition.
➤Is the rounded line (RF cable) connected in "ANT.IN" terminal?
➤Is the selected channel number shown in Display?
➤Is a tab of cassette tape broken? (Please cover a tab hole with
cellophane adhesive tape (Scotch tape).)
➤Please check whether the clock is right.
➤Does the display on your video show “ ” (Ready to timer
recording)? Please make it out.
➤Please check whether the timer recording info is right.
➤Please check a tab on a tape whether it is broke or not. (If it was
broken, please scotch-tape it)
➤Was a cable data output code connected correctly?
➤Were a converter manufacturer setup and output channel right?
➤Did you enter a password? (Please cancel it.)
➤Did you turn off your player? (Please turn it on.)
➤You may not memorize channels.
➤Please check your channel setting or press a number button.
➤Some tapes or discs distributed in the market for lending is set to
prevent copy in manufacturing. These tapes cannot be
duplicated in a good condition.
Checks
Symptom
• remote control does not work.
• Buttons on remote control do not
work.
■REMOTE
➤Battery may be weak or exhausted.
➤A receiver of remote control may be different with a sender.
➤In case a videotape is positioned in the beginning, “VISS REW”
and “REW” do not work.
➤In case a videotape is positioned in the end, “FF”, “VISS FF”,
“PLAY” and “REC” do not work.
➤Please check whether another button is pressed.
DVD-Video(USA)_DV6T811N-LT 02.4.16 2:39 PM ˘`76
The others
77
Checks
Symptom
• VISS index search does not work.
• Cable broadcasting can not be
selected.
■Others
➤Are you playing a tape that is not recorded in this recorder? (Try
to record it with the recorder.)
➤You may start recording it in “REC-PAUSE”. Please start recording
it from stop condition.
➤Please select “CABLE” not “NETWORK” from the “CHANNEL
SETTING”.
DVD-Video(USA)_DV6T811N-LT 02.4.16 2:39 PM ˘`77
78
DVD Audio output standards
Specifications
Power AC 120V, 60Hz
Consumed electricity 24W (supplementary 2.5W)
Weight 5.7kg
Dimension (WxHxD) 430mmx91mmx355.5mm
Operative temperature +5°C~35°C
Installation condition Horizontal / Relative humidity under 80%
Received channels VHF: 2-13 CH / UHF: 14-69 CH / Cable: 1-125
Signal type NTSC COLOR
Antenna Input/output U/V-mixed: 75½ unbalanced
VIDEO input 1.0 Vp-p unbalanced, RCA JACK
AUDIO input -8.8dBm, RCA JACK
VHF output 3 or 4 CH
VIDEO output (
common use of DVD and VCR
) VIDEO output terminal, 1.0 Vp-p unbalanced, RCA JACK
VIDEO output (DVD only) S-VIDEO output (75½In load Y: 1.0Vp-p, C:0.286Vp-p)
COMPONENT output (75½In load Y: 1.0Vp-p, Pb:0.7Vp-p, Pr:0.7Vp-p)
AUDIO output (
common use of DVD and VCR
)
Audio output terminal (2 kinds): -8.8dBm(VCR), 2.0Vrms(DVD), RCA JACK
AUDIO output (DVD only) Analogue AUDIO output (2 CH): 2.0Vrms
Digital audio output (OPTICAL, COAXIAL)
Playable tape Very high dense tapes with VHS marks
Playable disc DVD, VIDEO-CD, CD (12mm), CD (8mm), MP3, CD-R, CD-RW
Tape speed Standard: 33.35mm/s, 3 times: 11.12mm/s
Playtime Standard: 2hrs, 3 times: 6hrs (use of T120tape)
Clock display 12 hrs AM/PM
Time Recording 8 programs a year
Persistence in power failure 1min
VIDEO S/N (VCR) Over 45dB(Standard recording)
Resolution VCR Over 220 lines (Standard recording)
DVD 500 lines (DVD Disc PLAY)
AUDIO (VCR) Over 69dB(Hi-Fi), over 40dB(Mono)
AUDIO (DVD) 90dB
AUDIO dynamic range 90dB
Disc type
DVD VIDEO-CD CD
Analogue Audio output 48/96KHz sampling 44.1KHz sampling 44.1KHz sampling
Digital Audio output 48KHz sampling 44.1KHz sampling 44.1KHz sampling
Optical digital audio output 48KHz sampling 44.1KHz sampling 44.1KHz sampling
Output
DVD-Video(USA)_DV6T811N-LT 02.4.16 2:39 PM ˘`78
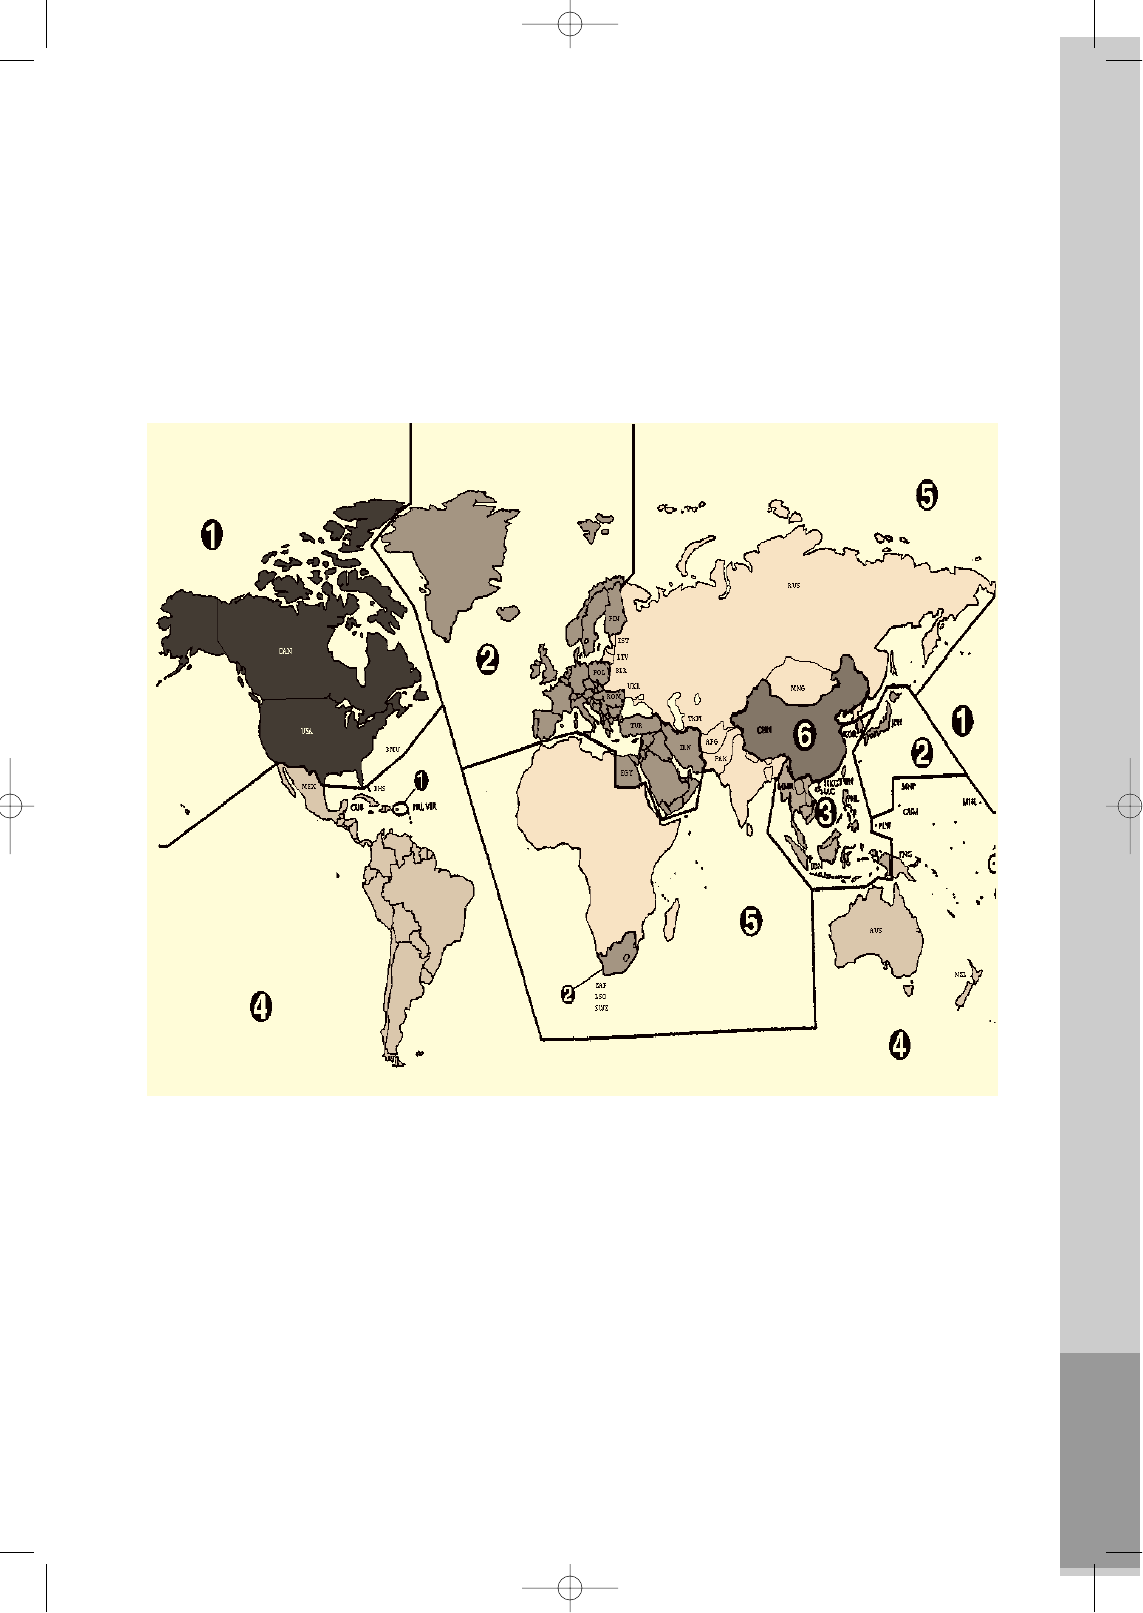
The others
79
Region Code
The product and all DVD disc have region codes. So if both codes are not coincided each other, it does not work.
Legion codes are like the below.
DVD-Video(USA)_DV6T811N-LT 02.4.16 2:39 PM ˘`79
Warranty
Daewoo Electronics Corporation of America warrants each new electronic product manufactured by it to be free
from defective material and workmanship and agrees to remedy any such defect or to furnish a new part (at the
Company’s option) in exchange for any part of any unit of its manufacture which under normal installation, use
and service disclosed such defect, provided the unit is delivered by the owner to us or to our authorized distributor
from whom purchased or authorized service station intact, for our examination with all transportation charges
prepaid to our factory. To establish and receive warranty service at our factory or authorized service facilities, proof
of purchase/dated sales invoice is required. Written authorization must be obtained before any merchandise is
returned to the factory.
This warranty does not extend to any of our electronic products which have been subjected to misuse, neglect,
accident, incorrect wiring not our own, improper installation, unauthorized modification, or used in violation of
instructions furnished by us, nor units which have been repaired or altered outside of our factory, nor to cases
where the serial number thereof has been removed, defaced or changed.
This warranty is in lieu of all warranties expressed or implied and no representative or person is authorized to
assume for us any other liability in connection with the sale of our electronic products.
Over-the-counter exchange of initially defective units
A unit is described as initially defective when the dealer opens the unit and finds that it is inoperative or a
customer opening a new unit finds that it is initially defective. This unit may be returned to the factory by the
dealer for exchange. Under no circumstances will a customer be permitted to return an initially defective unit
directly to the factory.
Model Parts Labor
DV6T811N 1 Year 3 months
This instrument is listed by Underwriter’s Laboratories, Inc. It is
designed and manufactured to meet rigid U.L. safety standards
against X-radiation, fire, casualty and electrical hazards.
Daewoo Electronics
Corporation of America
120 Chubb Avenue
Lyndhurst, NJ 07071
For more information about this or other
Daewoo products, call 1-800-DAEWOO8.
DVD-Video(USA)_DV6T811N-LT 02.4.16 3:41 PM ˘`80