Wacom Co PTKW Digitizer User Manual Intuos4 User s Manual for Windows Macintosh
Wacom Co Ltd Digitizer Intuos4 User s Manual for Windows Macintosh
Wacom Co >
Contents
- 1. Users manual-1
- 2. Users manual-2
- 3. Users manual -1
- 4. Users manual -2
Users manual-2


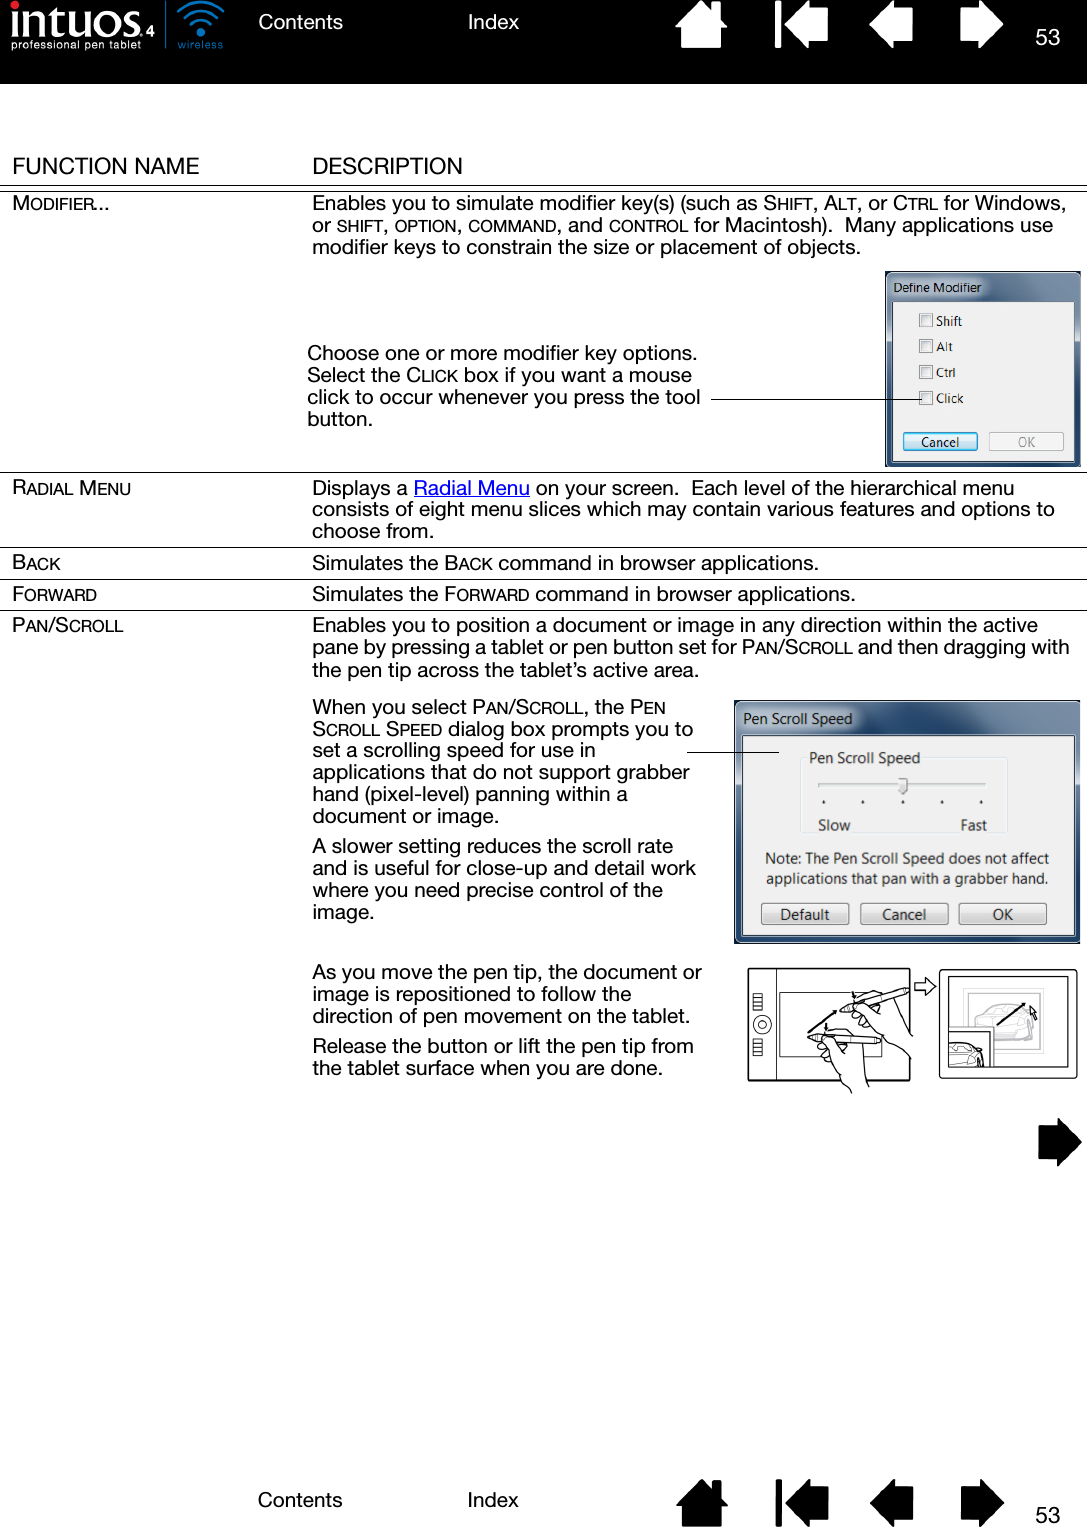


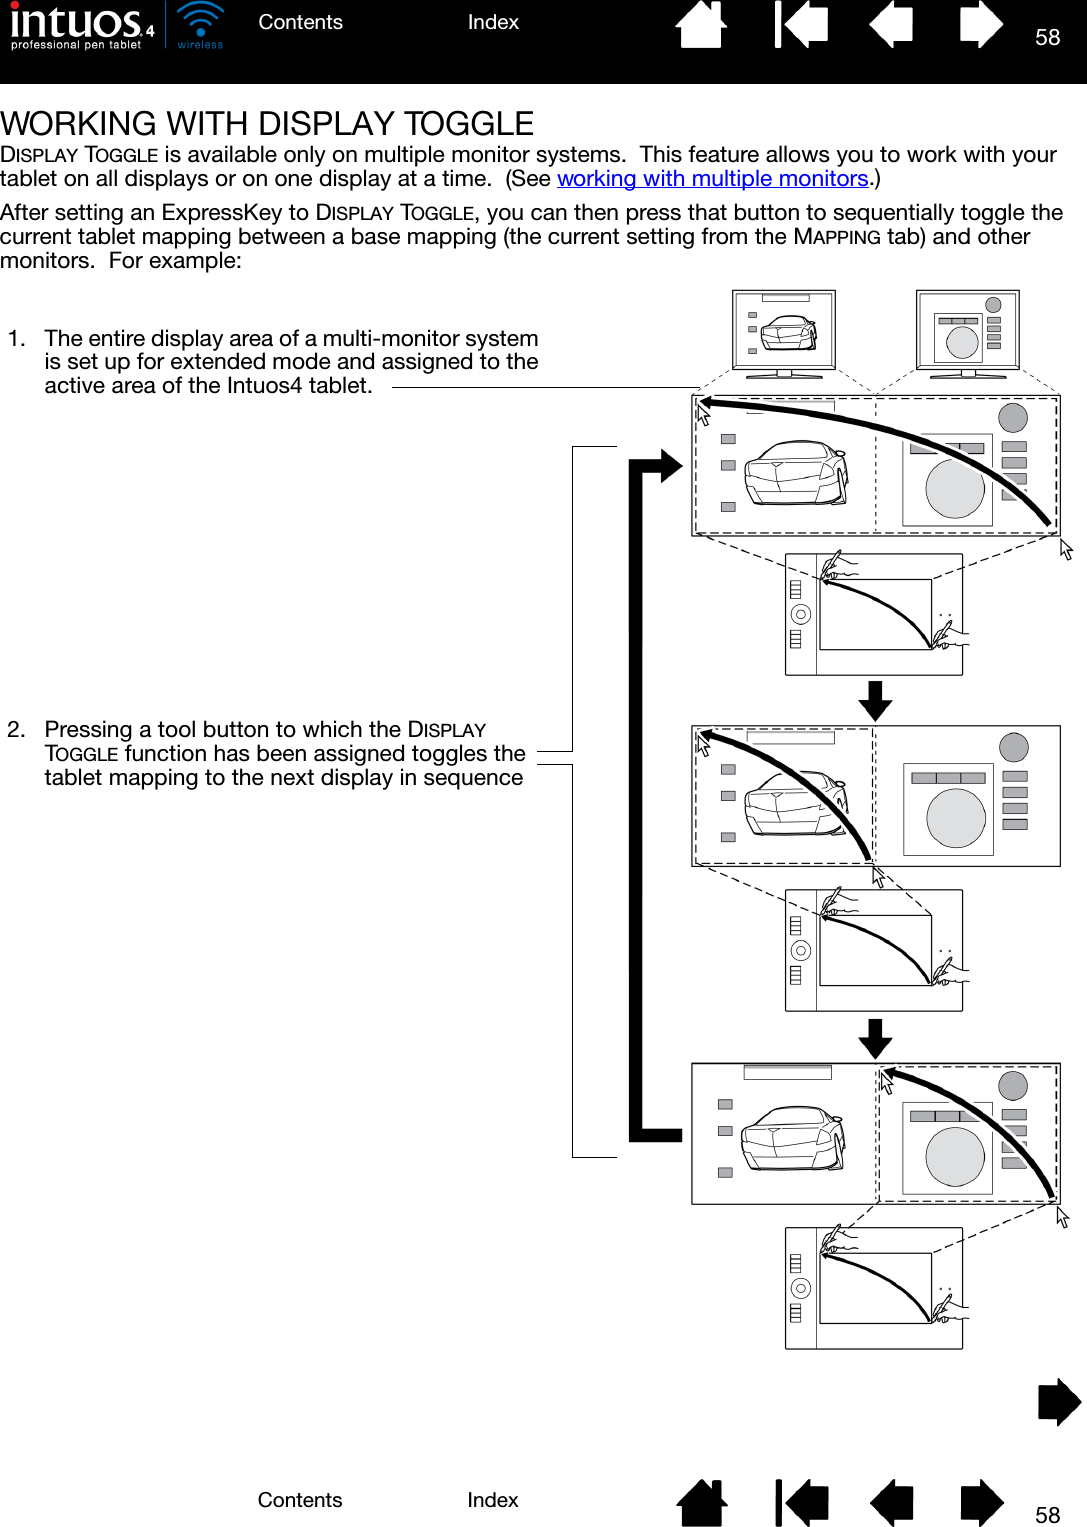
![60IndexContents60IndexContentsWORKING WITH MULTIPLE TOOLSThe Wacom Tablet control panel is designed to help you customize and keep track of the settings for your Intuos4 tools. The tool you use to open the control panel is automatically selected, and the appropriate tabs for that tool are displayed.To add a different tool to the control panel’s TOOL list, simply use the tool on your Intuos4 tablet.• When you select a tool that has been added to the TOOL list, the appropriate tab settings for that tool are displayed. Any changes you make to the tab settings will then apply to that tool. Your changes take effect immediately.• Identical tools will use the same settings.To remove a selected tool from the TOOL list, click on the TOOL list’s [ – ] button. In the dialog box that appears, click DELETE to confirm your selection. The selected tool is removed from the list, along with any custom settings you may have created for it. (A removed tool can be added back to the TOOL list by placing it back onto the tablet.)All Intuos4 pens have a unique Tool ID. In supporting applications, such as Corel Painter, you can assign different tools to different pens and then change between them by switching the pen in your hand.Select a tool to change its settings.Removes the selected tool. The button is inactive when there is only one item in the list.The FUNCTIONS icon cannot be deleted.The TOOL list displays an icon for the tablet FUNCTIONS and the different tools that have been used on the tablet.If application-specific settings have not been added, the ALL icon is displayed and the tool settings apply to all applications. Tab settings apply only to the selected tool and application.](https://usermanual.wiki/Wacom-Co/PTKW.Users-manual-2/User-Guide-1219299-Page-15.png)

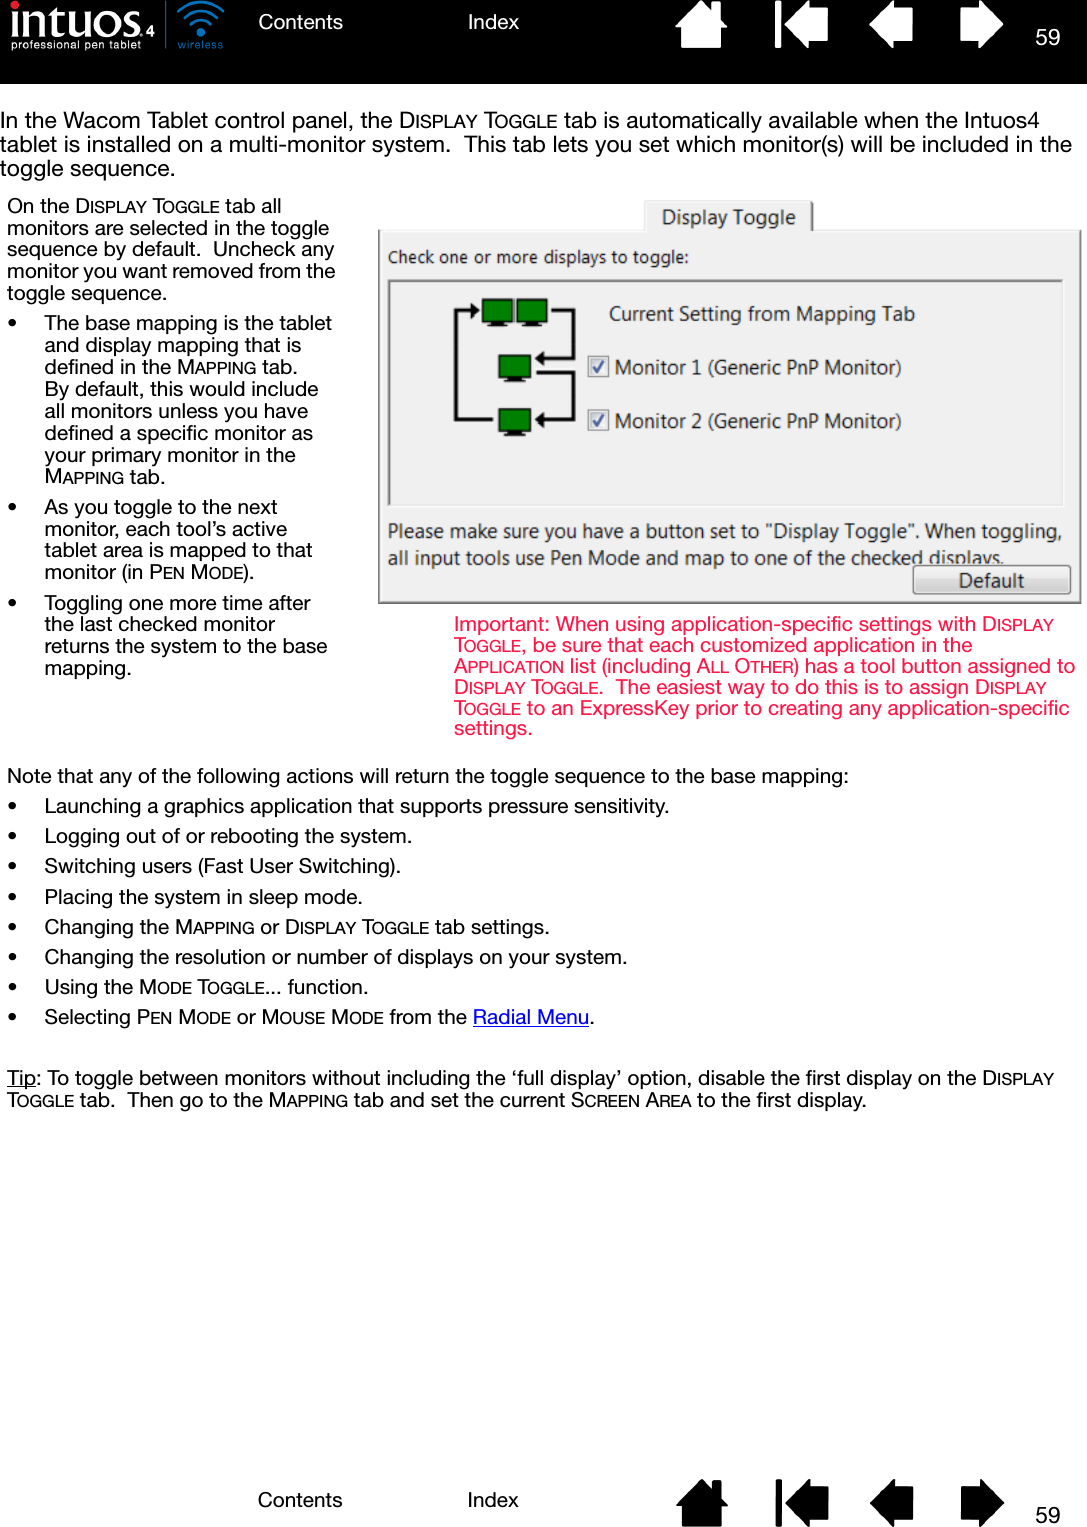
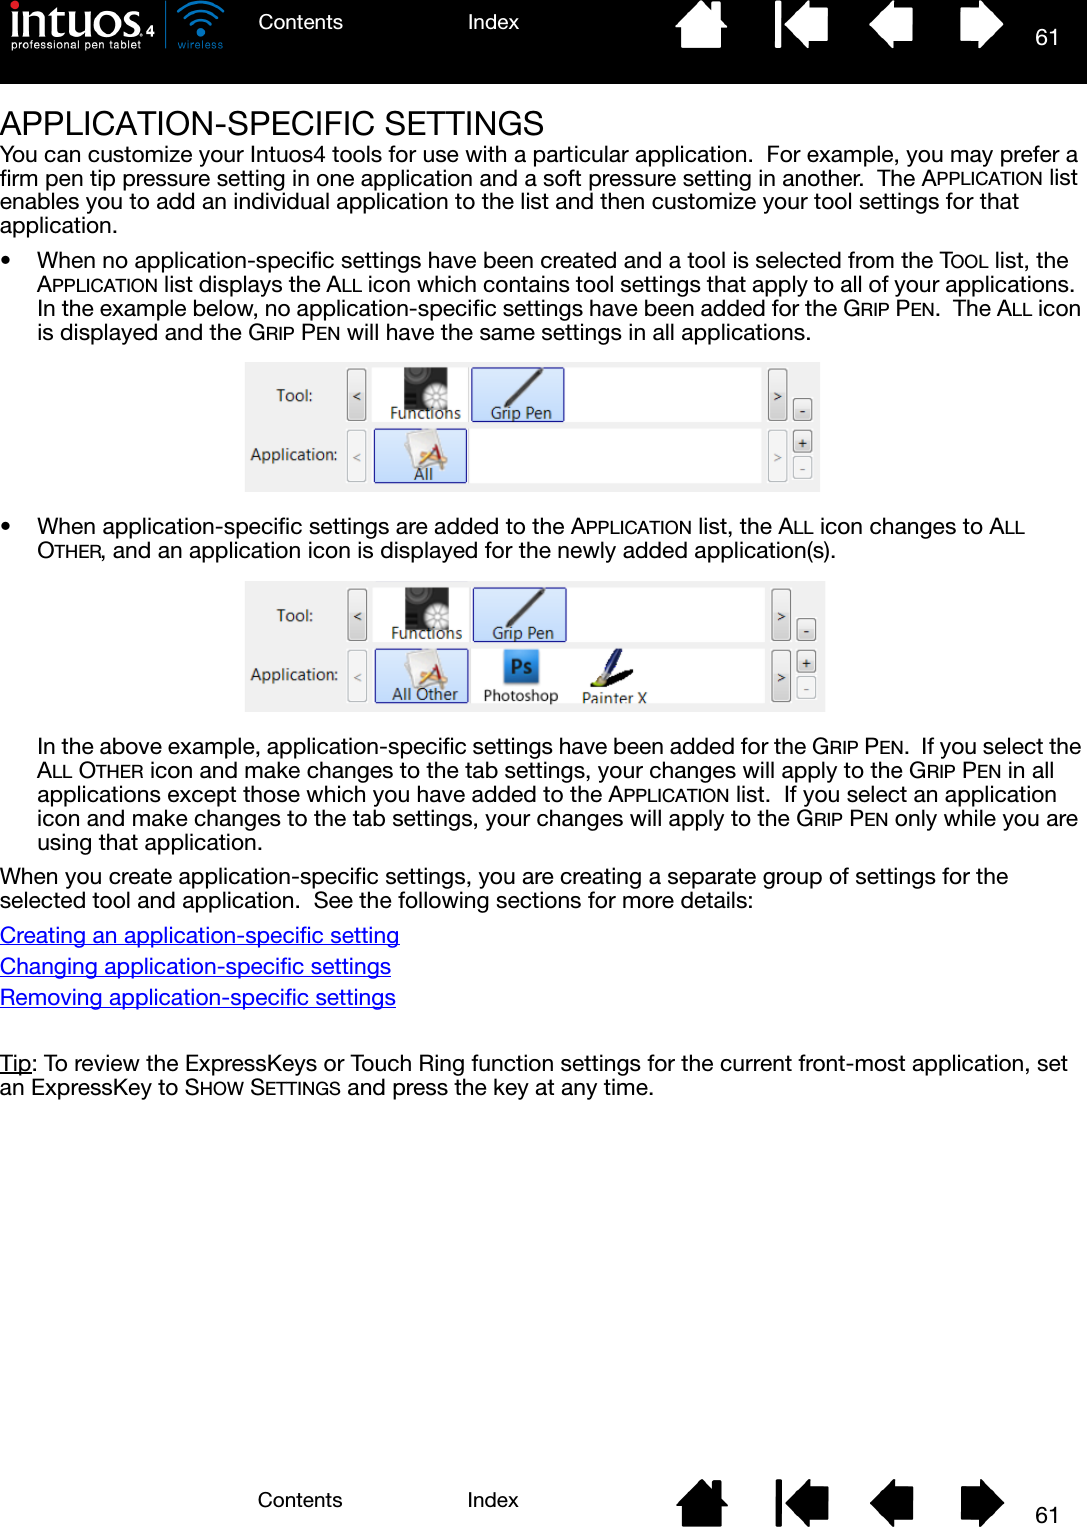
![62IndexContents62IndexContentsCREATING AN APPLICATION-SPECIFIC SETTINGFirst choose the tablet and tool for which you want to create an application-specific setting. Then click on the APPLICATION list’s [ + ] button to display the ADD APPLICATION FOR CUSTOM SETTINGS dialog box.After adding an application, its icon appears in the APPLICATION list whenever the respective tool is selected in the TOOL list. Select the application and then customize the control panel tab settings for your tool and the selected application.Once you have created application-specific settings, applications that have not been customized in this manner will use the tool settings for ALL OTHER.Tip: First customize settings for one application. When you feel comfortable with the process, you can create more application-specific settings.CHANGING APPLICATION-SPECIFIC SETTINGSTo change tool settings for a specific application, select the tool and the application and then customize the control panel tab settings.REMOVING APPLICATION-SPECIFIC SETTINGSTo remove an application-specific setting:1. In the TOOL list, select the tool from which you want to remove the application-specific setting. Then, in the APPLICATION list select the application you want to remove.2. Click on the APPLICATION list’s [ – ] button. In the dialog box that appears, click DELETE to confirm your selection. The selected application is removed from the list, along with any custom tool settings that you may have created for it.Tip: To quickly remove all application-specific settings from a tool, remove the tool from the TOOL list. Then place the tool back on the tablet. The tool will be added back to the TOOL list using the default settings.Choose from one of two methods to select an application:• Open the application for which you want to create custom settings, and then select that application from the CURRENTLY OPEN APPLICATIONS box.•BROWSE to select the executable file of any application installed on your computer.Your selection is added to the SELECTED APPLICATION box where the name of the selected application is displayed.Click OK to complete the process.Note: If two programs have the same executable file name, they will share the same customized settings.](https://usermanual.wiki/Wacom-Co/PTKW.Users-manual-2/User-Guide-1219299-Page-17.png)

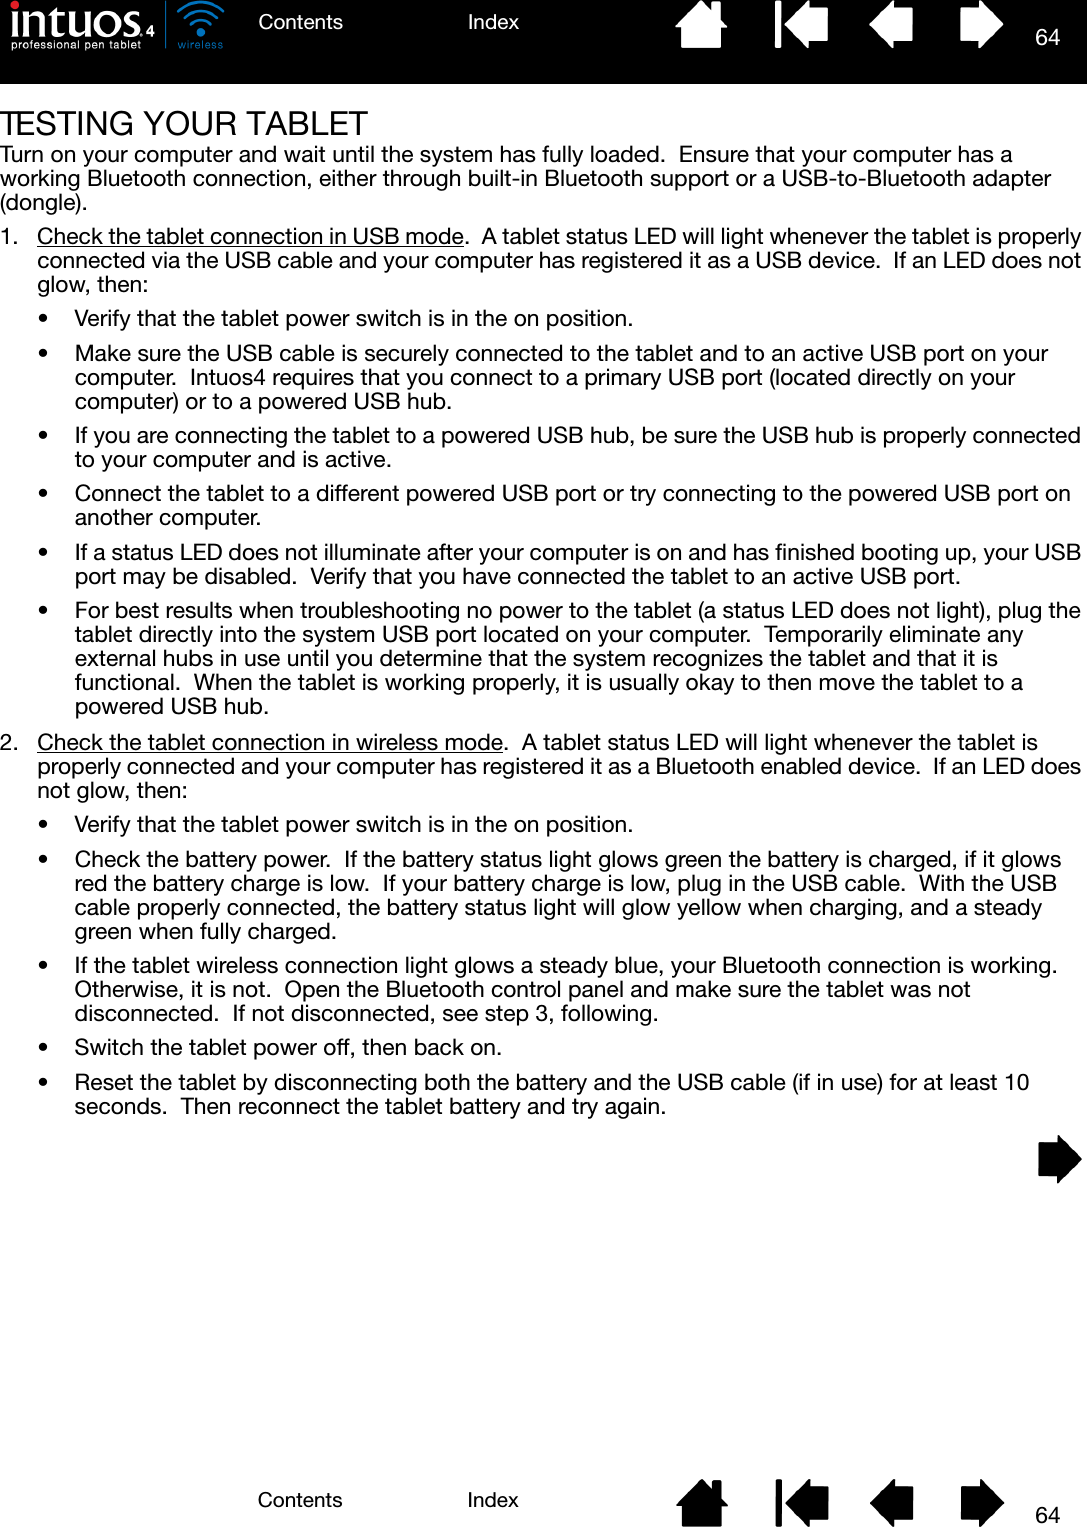

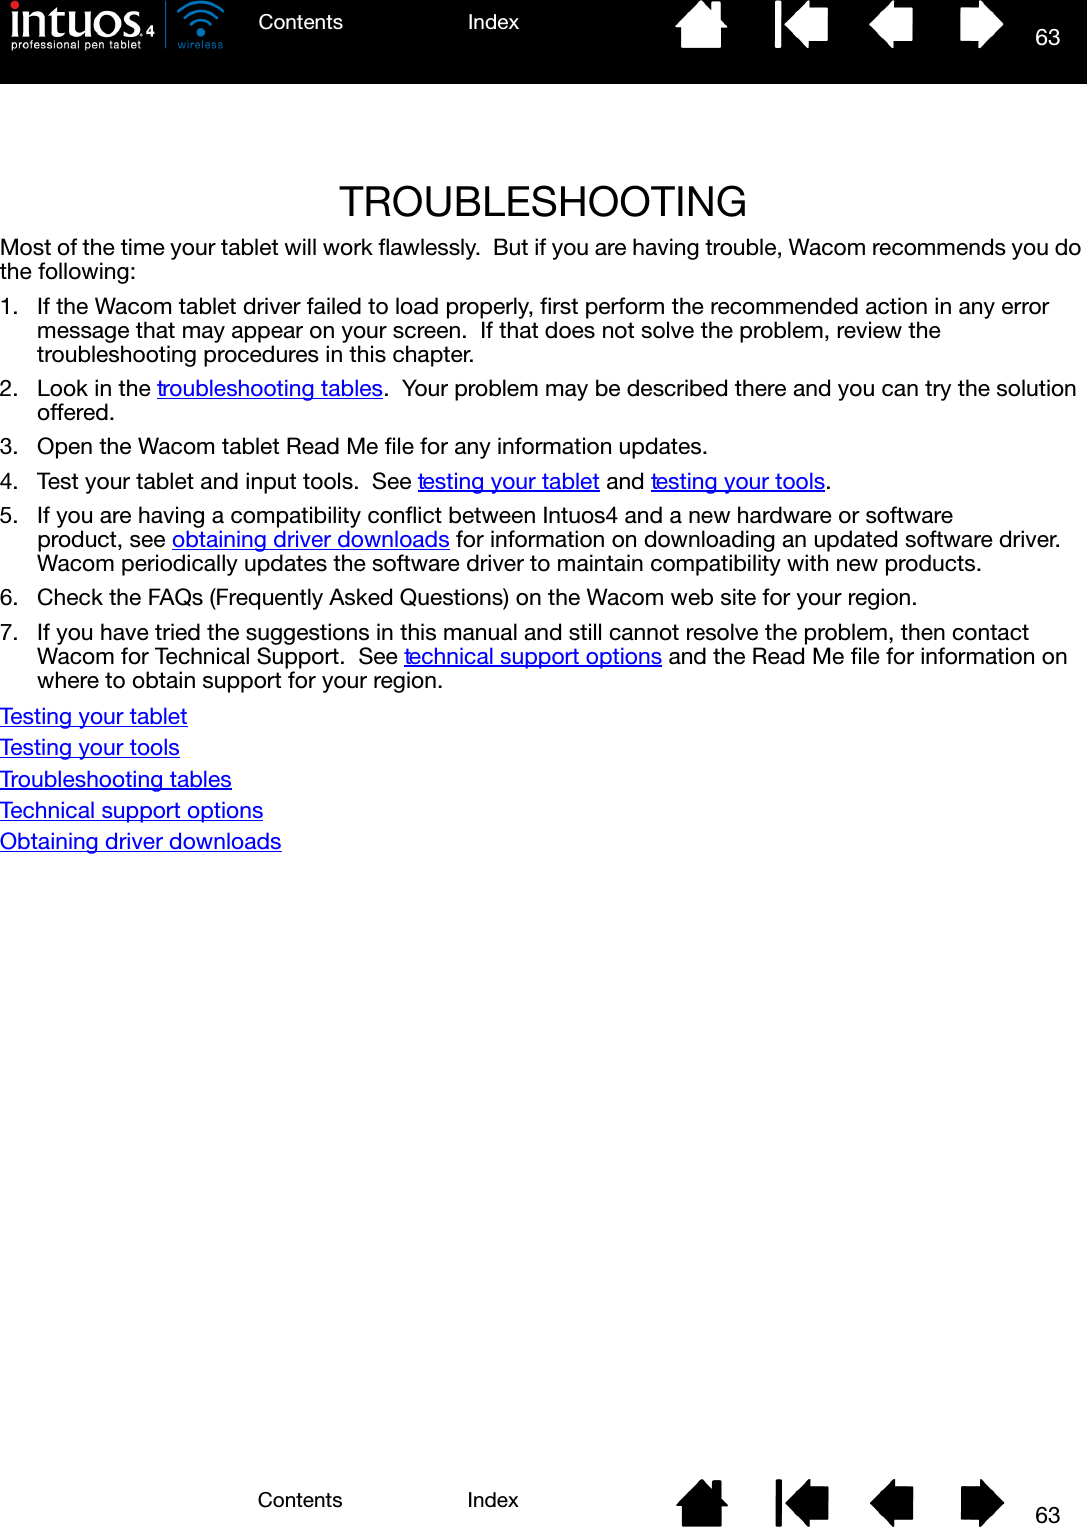
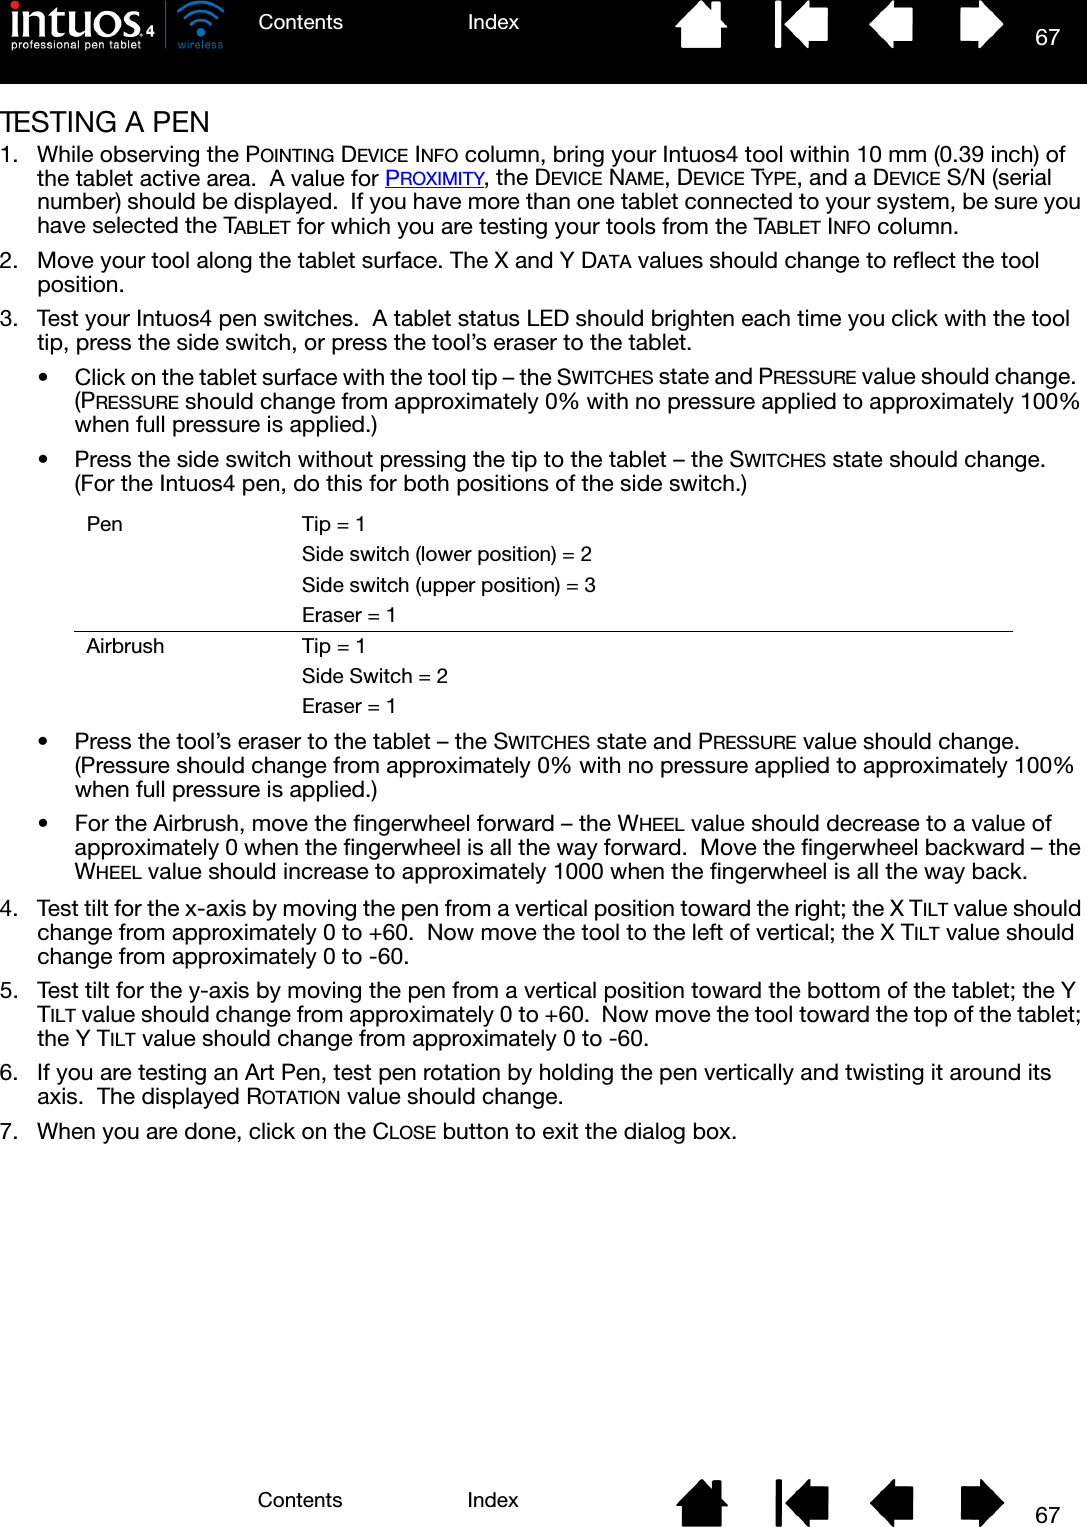
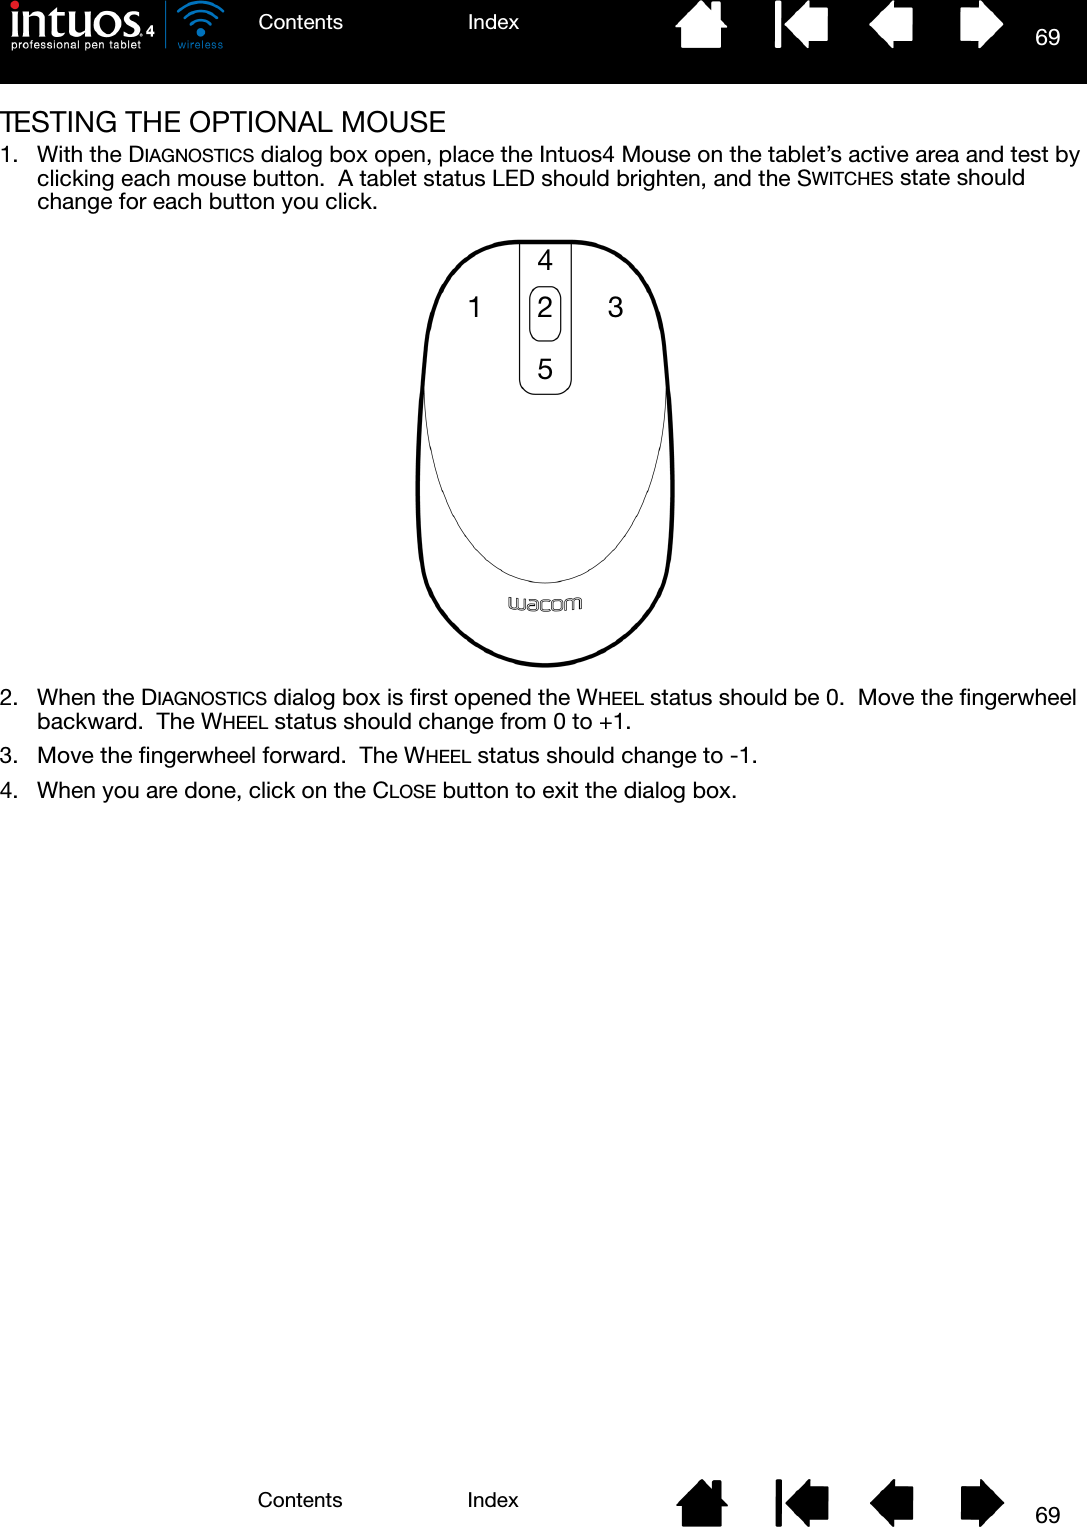
![66IndexContents66IndexContentsTESTING YOUR TOOLSIf an input tool does not work as you expect, first open the Wacom Tablet control panel and check the assigned functions or reset the tool to its default condition.To quickly return a tool to the default settings, remove it from the TOOL list by clicking on the control panel list’s [ – ] button. After the tool has been removed, place it back onto the tablet. The tool will be added back to the TOOL list with its default settings.To test your input tools:• In the Wacom Tablet control panel, click on the ABOUT button. In the dialog box that appears, click on the DIAGNOSE... button. The DIAGNOSTICS dialog box displays to show dynamic information about the tablet hardware and pointing devices, including the battery status of the currently selected tablet.• If you have more than one tablet connected to your system, in the TABLET INFO column select the tablet for which you are testing your tool.• Use the information presented in the DIAGNOSTICS dialog box when testing your tablet and tools.Note: When testing your tool buttons, if a button is set to RADIAL MENU or OPEN/RUN..., that function will occur when the button is pressed. In this case you may want to change that button function before testing.Testing a penTesting the Touch RingTesting the ExpressKeysTesting the optional mouse](https://usermanual.wiki/Wacom-Co/PTKW.Users-manual-2/User-Guide-1219299-Page-21.png)

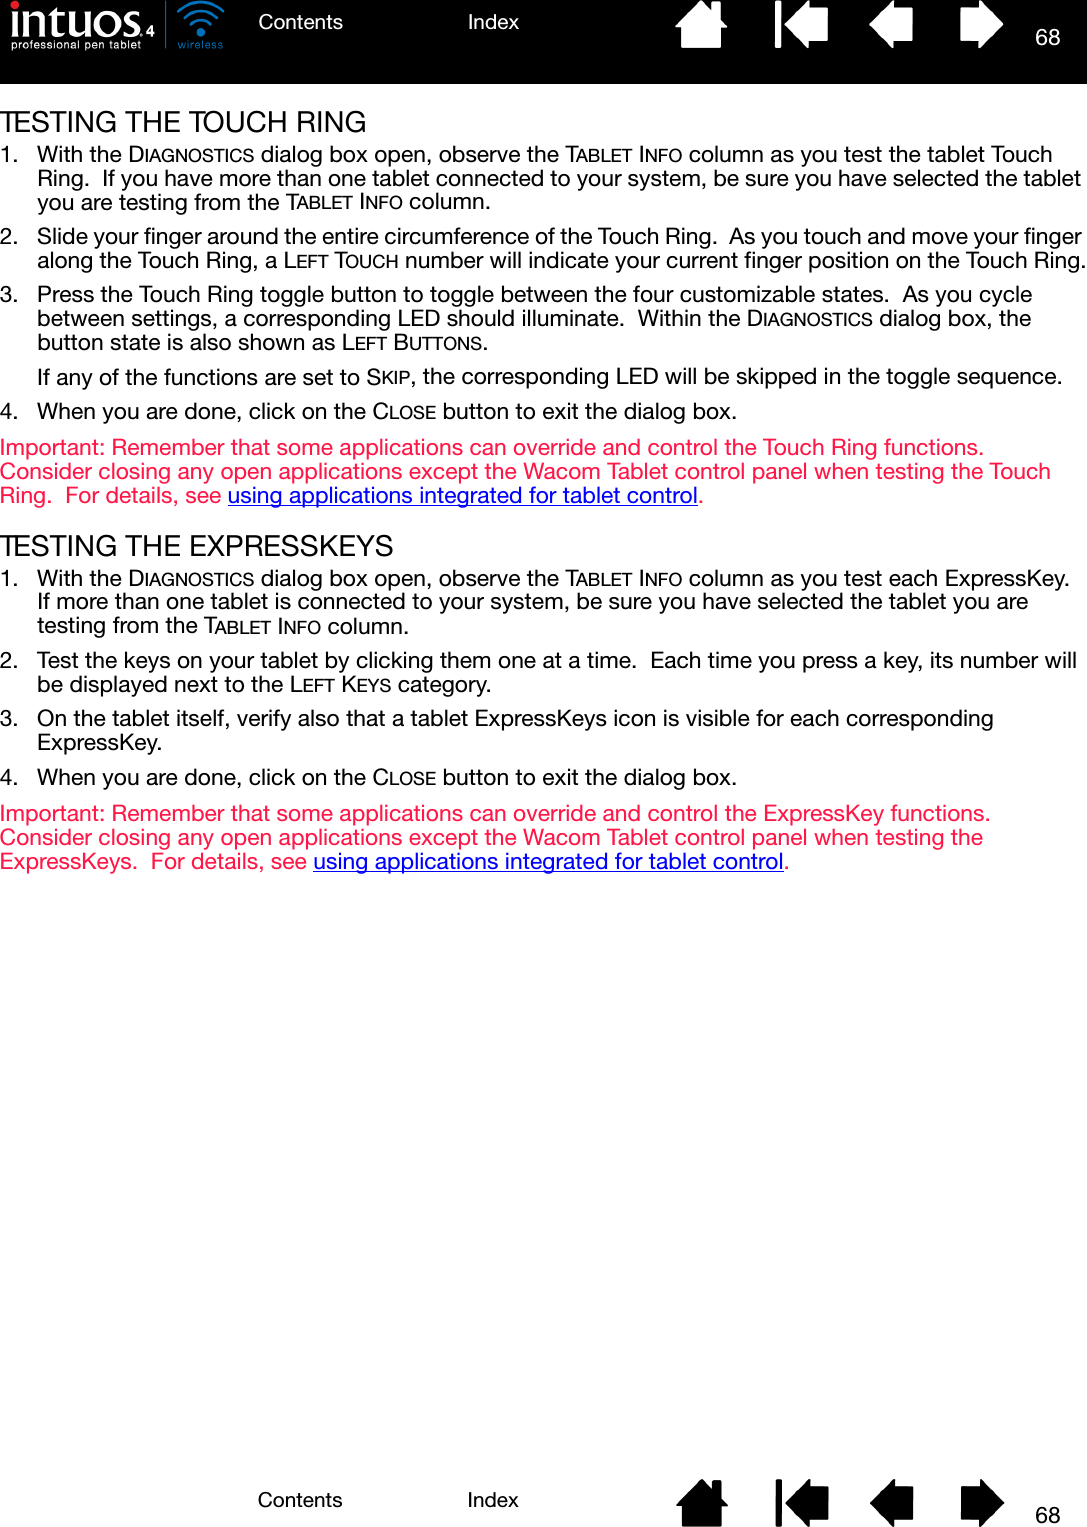


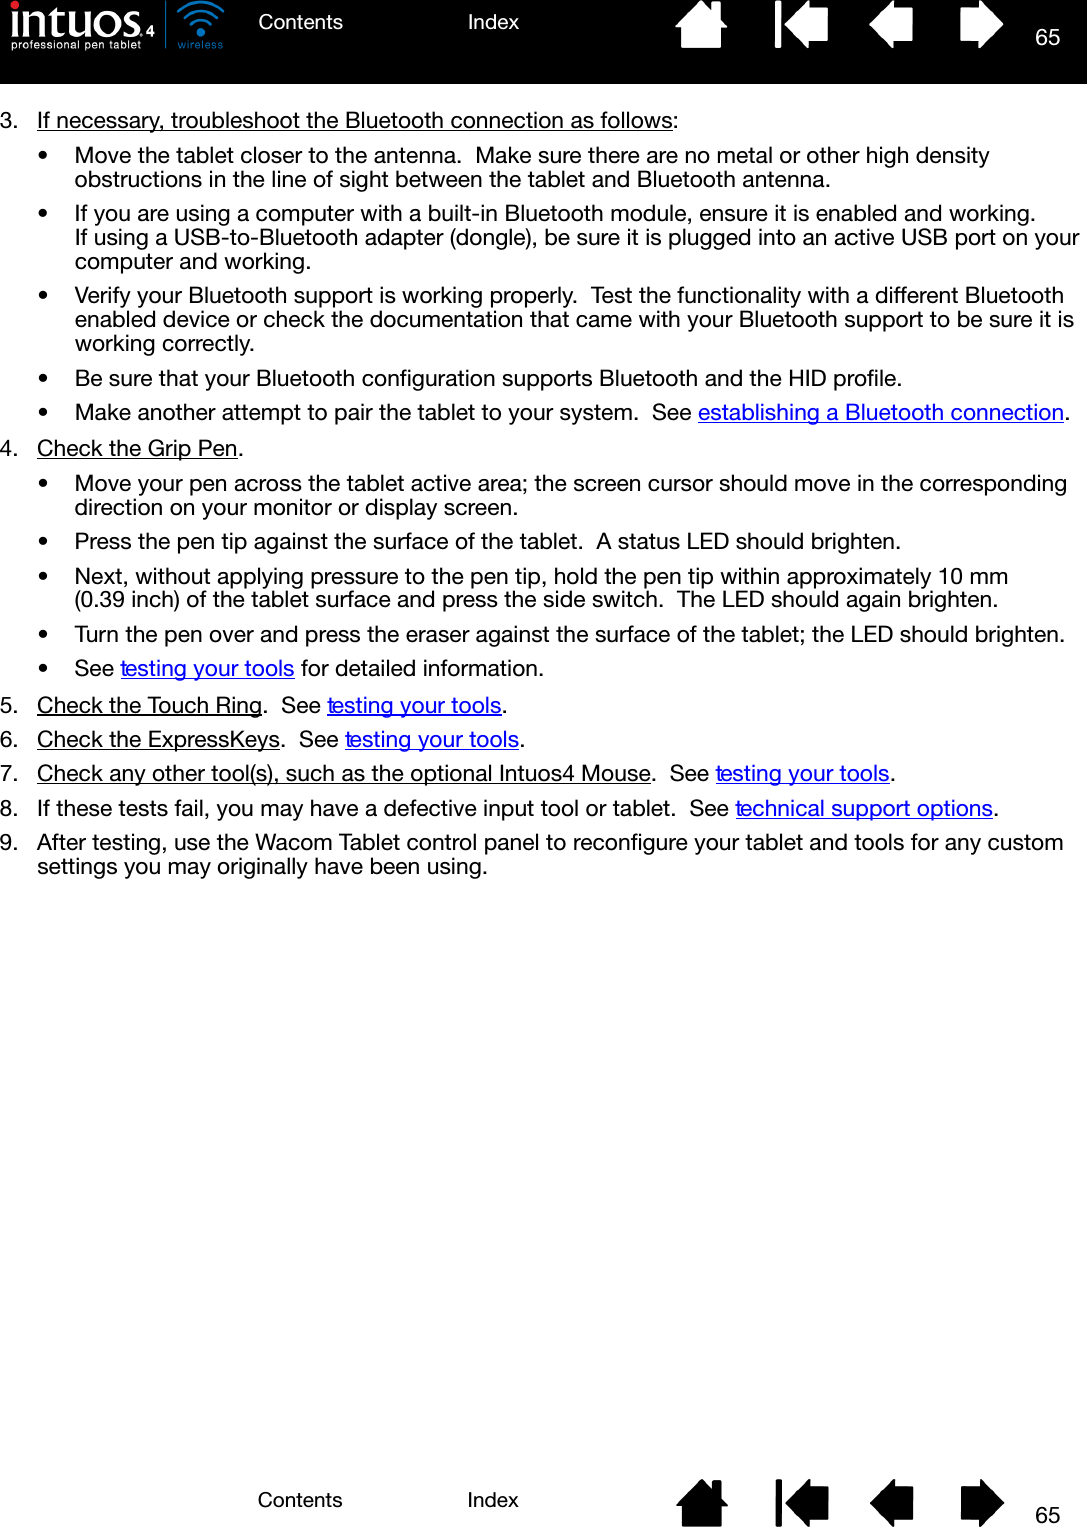
![86IndexContents86IndexContentsCHANGING THE TABLET MODE OPTIONSWithin the control panel’s TABLET list, double-click on the tablet icon to display the TABLET dialog box. The TABLET mode settings apply to all tools and applications.INSTALLING MULTIPLE TABLETSThe TABLET list displays an icon for any supported tablet that has been detected on your system, and allows you to select the tablet for which your changes will apply.To add a new tablet, connect it to your computer. The system will automatically find the tablet and initialize it. An icon for the tablet will then appear in the control panel.Important: When installing additional tablets on Windows systems, please note that the eraser function may not work in some applications when using the additional tablet(s). The eraser function will continue to work correctly using the first tablet that was added to the control panel.To remove one of multiple tablets from the driver, in the Wacom Tablet control panel select the tablet to be removed and click on the [ – ] button next to the TABLET list. • A tablet cannot be deleted from the control panel list unless it is attached to the computer.• Note that you will need to restart your computer before you can again add the tablet to the driver.STANDARD MODE is recommended for graphics applications, and is the default condition.Choose RECOGNITION MODE for the maximum data rate. Required by some handwriting recognition software. Supported only on Bluetooth Specification v2.0 or later connections that support the EDR (Enhanced Data Rate) protocol.If desired, enter a new name to be used for the tablet icon.Select a tablet icon for which to customize tool and application settings.• The control panel will not launch unless a supported tablet is connected to the computer.• Settings can only be viewed or changed for an attached tablet.](https://usermanual.wiki/Wacom-Co/PTKW.Users-manual-2/User-Guide-1219299-Page-41.png)


Users manual -2


![60IndexContents60IndexContentsWORKING WITH MULTIPLE TOOLSThe Wacom Tablet control panel is designed to help you customize and keep track of the settings for your Intuos4 tools. The tool you use to open the control panel is automatically selected, and the appropriate tabs for that tool are displayed.To add a different tool to the control panel’s TOOL list, simply use the tool on your Intuos4 tablet.• When you select a tool that has been added to the TOOL list, the appropriate tab settings for that tool are displayed. Any changes you make to the tab settings will then apply to that tool. Your changes take effect immediately.• Identical tools will use the same settings.To remove a selected tool from the TOOL list, click on the TOOL list’s [ – ] button. In the dialog box that appears, click DELETE to confirm your selection. The selected tool is removed from the list, along with any custom settings you may have created for it. (A removed tool can be added back to the TOOL list by placing it back onto the tablet.)All Intuos4 pens have a unique Tool ID. In supporting applications, such as Corel Painter, you can assign different tools to different pens and then change between them by switching the pen in your hand.Select a tool to change its settings.Removes the selected tool. The button is inactive when there is only one item in the list.The FUNCTIONS icon cannot be deleted.The TOOL list displays an icon for the tablet FUNCTIONS and the different tools that have been used on the tablet.If application-specific settings have not been added, the ALL icon is displayed and the tool settings apply to all applications. Tab settings apply only to the selected tool and application.](https://usermanual.wiki/Wacom-Co/PTKW.Users-manual-2/User-Guide-1219351-Page-15.png)
![62IndexContents62IndexContentsCREATING AN APPLICATION-SPECIFIC SETTINGFirst choose the tablet and tool for which you want to create an application-specific setting. Then click on the APPLICATION list’s [ + ] button to display the ADD APPLICATION FOR CUSTOM SETTINGS dialog box.After adding an application, its icon appears in the APPLICATION list whenever the respective tool is selected in the TOOL list. Select the application and then customize the control panel tab settings for your tool and the selected application.Once you have created application-specific settings, applications that have not been customized in this manner will use the tool settings for ALL OTHER.Tip: First customize settings for one application. When you feel comfortable with the process, you can create more application-specific settings.CHANGING APPLICATION-SPECIFIC SETTINGSTo change tool settings for a specific application, select the tool and the application and then customize the control panel tab settings.REMOVING APPLICATION-SPECIFIC SETTINGSTo remove an application-specific setting:1. In the TOOL list, select the tool from which you want to remove the application-specific setting. Then, in the APPLICATION list select the application you want to remove.2. Click on the APPLICATION list’s [ – ] button. In the dialog box that appears, click DELETE to confirm your selection. The selected application is removed from the list, along with any custom tool settings that you may have created for it.Tip: To quickly remove all application-specific settings from a tool, remove the tool from the TOOL list. Then place the tool back on the tablet. The tool will be added back to the TOOL list using the default settings.Choose from one of two methods to select an application:• Open the application for which you want to create custom settings, and then select that application from the CURRENTLY OPEN APPLICATIONS box.•BROWSE to select the executable file of any application installed on your computer.Your selection is added to the SELECTED APPLICATION box where the name of the selected application is displayed.Click OK to complete the process.Note: If two programs have the same executable file name, they will share the same customized settings.](https://usermanual.wiki/Wacom-Co/PTKW.Users-manual-2/User-Guide-1219351-Page-17.png)

![66IndexContents66IndexContentsTESTING YOUR TOOLSIf an input tool does not work as you expect, first open the Wacom Tablet control panel and check the assigned functions or reset the tool to its default condition.To quickly return a tool to the default settings, remove it from the TOOL list by clicking on the control panel list’s [ – ] button. After the tool has been removed, place it back onto the tablet. The tool will be added back to the TOOL list with its default settings.To test your input tools:• In the Wacom Tablet control panel, click on the ABOUT button. In the dialog box that appears, click on the DIAGNOSE... button. The DIAGNOSTICS dialog box displays to show dynamic information about the tablet hardware and pointing devices, including the battery status of the currently selected tablet.• If you have more than one tablet connected to your system, in the TABLET INFO column select the tablet for which you are testing your tool.• Use the information presented in the DIAGNOSTICS dialog box when testing your tablet and tools.Note: When testing your tool buttons, if a button is set to RADIAL MENU or OPEN/RUN..., that function will occur when the button is pressed. In this case you may want to change that button function before testing.Testing a penTesting the Touch RingTesting the ExpressKeysTesting the optional mouse](https://usermanual.wiki/Wacom-Co/PTKW.Users-manual-2/User-Guide-1219351-Page-21.png)


![86IndexContents86IndexContentsCHANGING THE TABLET MODE OPTIONSWithin the control panel’s TABLET list, double-click on the tablet icon to display the TABLET dialog box. The TABLET mode settings apply to all tools and applications.INSTALLING MULTIPLE TABLETSThe TABLET list displays an icon for any supported tablet that has been detected on your system, and allows you to select the tablet for which your changes will apply.To add a new tablet, connect it to your computer. The system will automatically find the tablet and initialize it. An icon for the tablet will then appear in the control panel.Important: When installing additional tablets on Windows systems, please note that the eraser function may not work in some applications when using the additional tablet(s). The eraser function will continue to work correctly using the first tablet that was added to the control panel.To remove one of multiple tablets from the driver, in the Wacom Tablet control panel select the tablet to be removed and click on the [ – ] button next to the TABLET list. • A tablet cannot be deleted from the control panel list unless it is attached to the computer.• Note that you will need to restart your computer before you can again add the tablet to the driver.STANDARD MODE is recommended for graphics applications, and is the default condition.Choose RECOGNITION MODE for the maximum data rate. Required by some handwriting recognition software. Supported only on Bluetooth Specification v2.0 or later connections that support the EDR (Enhanced Data Rate) protocol.If desired, enter a new name to be used for the tablet icon.Select a tablet icon for which to customize tool and application settings.• The control panel will not launch unless a supported tablet is connected to the computer.• Settings can only be viewed or changed for an attached tablet.](https://usermanual.wiki/Wacom-Co/PTKW.Users-manual-2/User-Guide-1219351-Page-41.png)