Wavetec FZCO WT-TDU TDU Lite User Manual Wavesphere Management POrtal
Wavetec FZCO TDU Lite Wavesphere Management POrtal
UserManual.wiki
>
Wavetec FZCO
>
WT TDU User Manual
Users Manual
Navigation menu
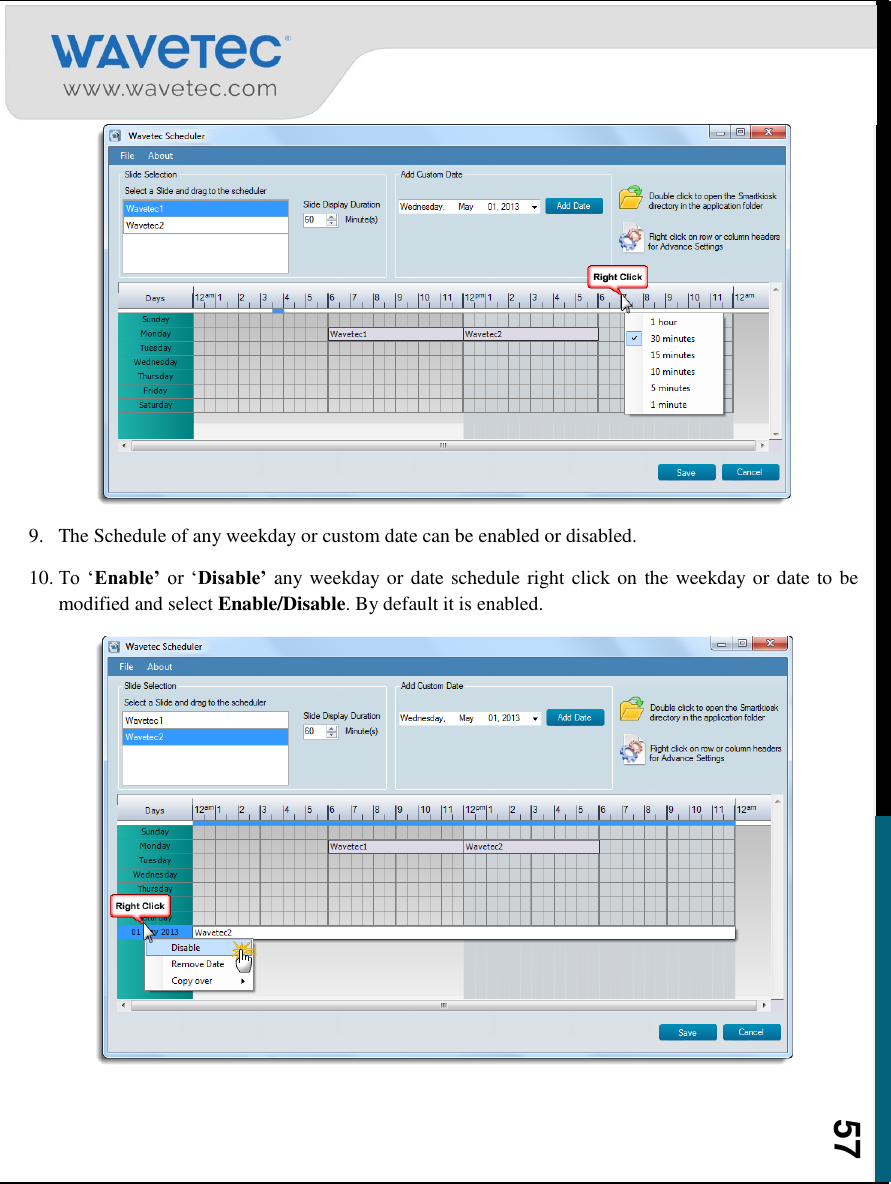
Upload a User Manual
Namespaces
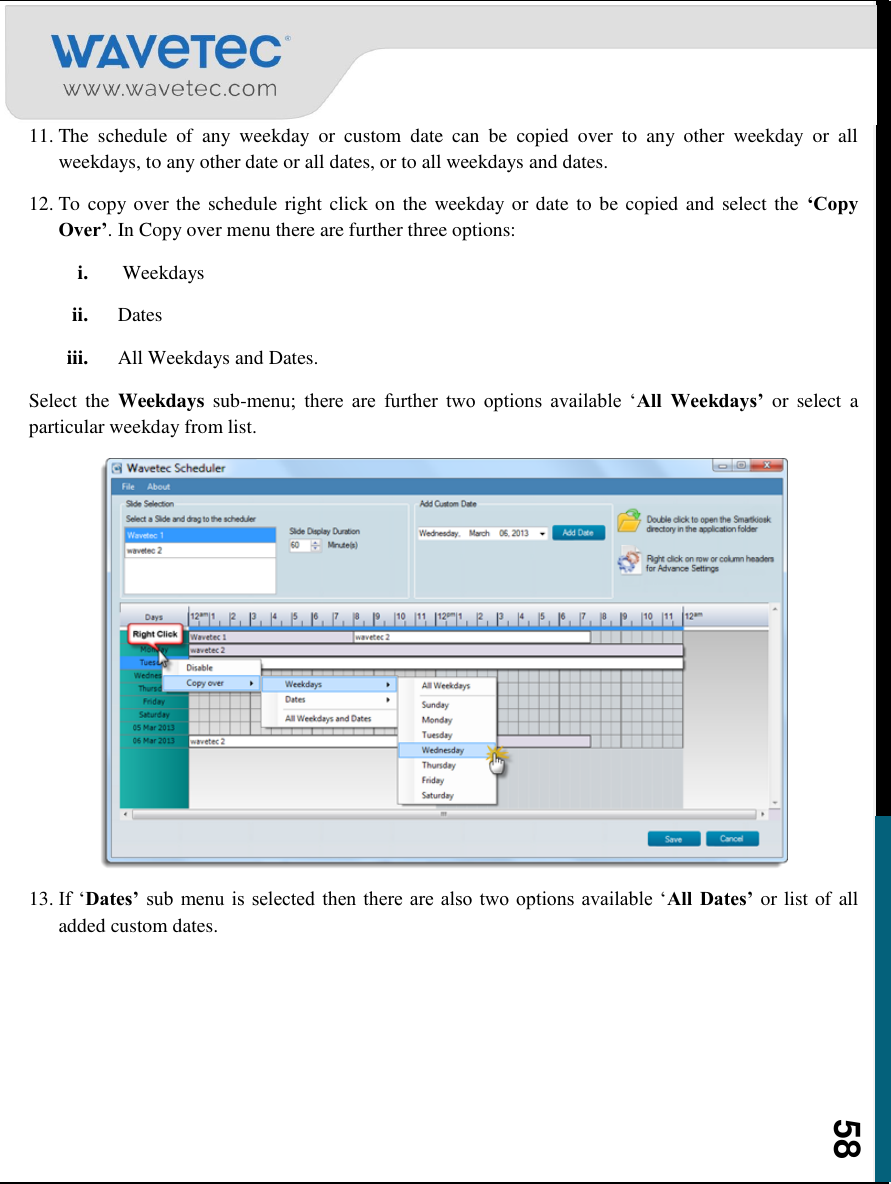
Wiki Guide
HTML
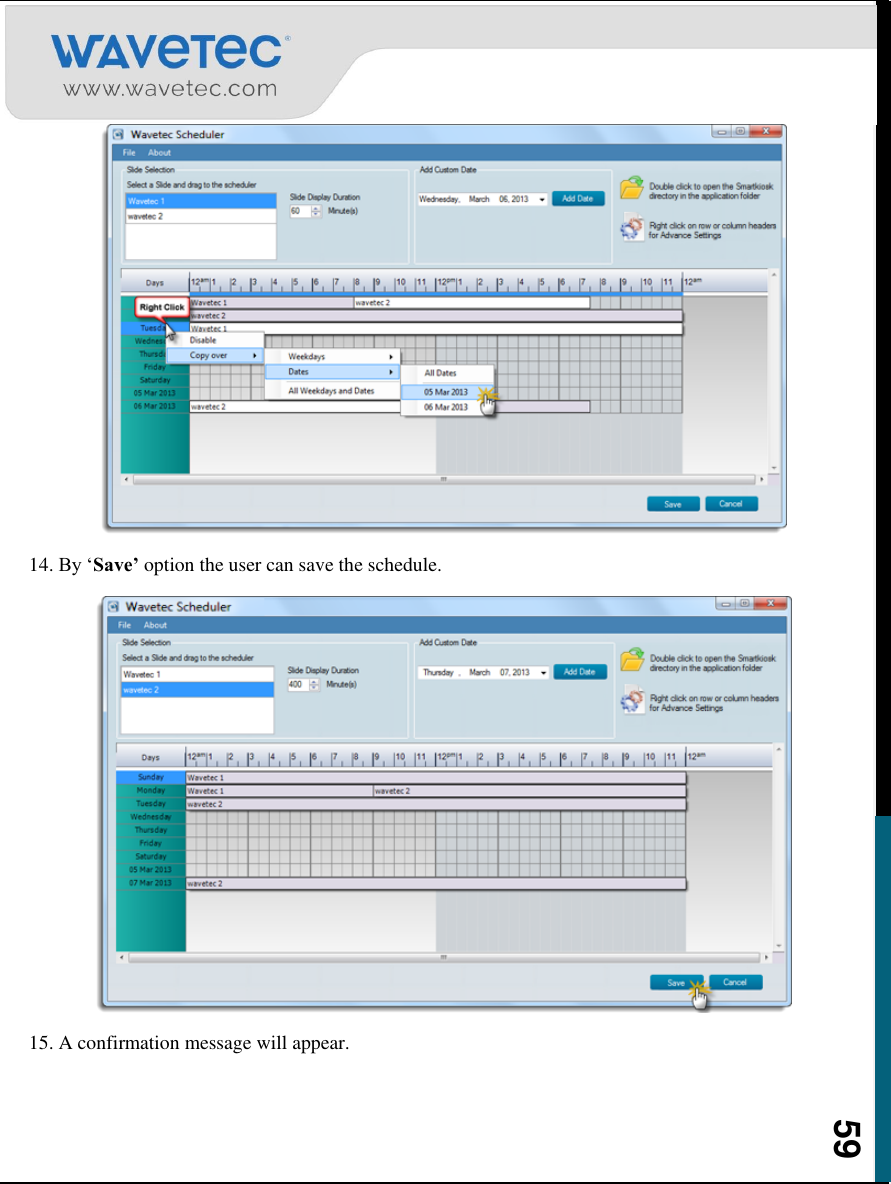
PDF
Info
Views
User Manual
Discussion / Help
Navigation

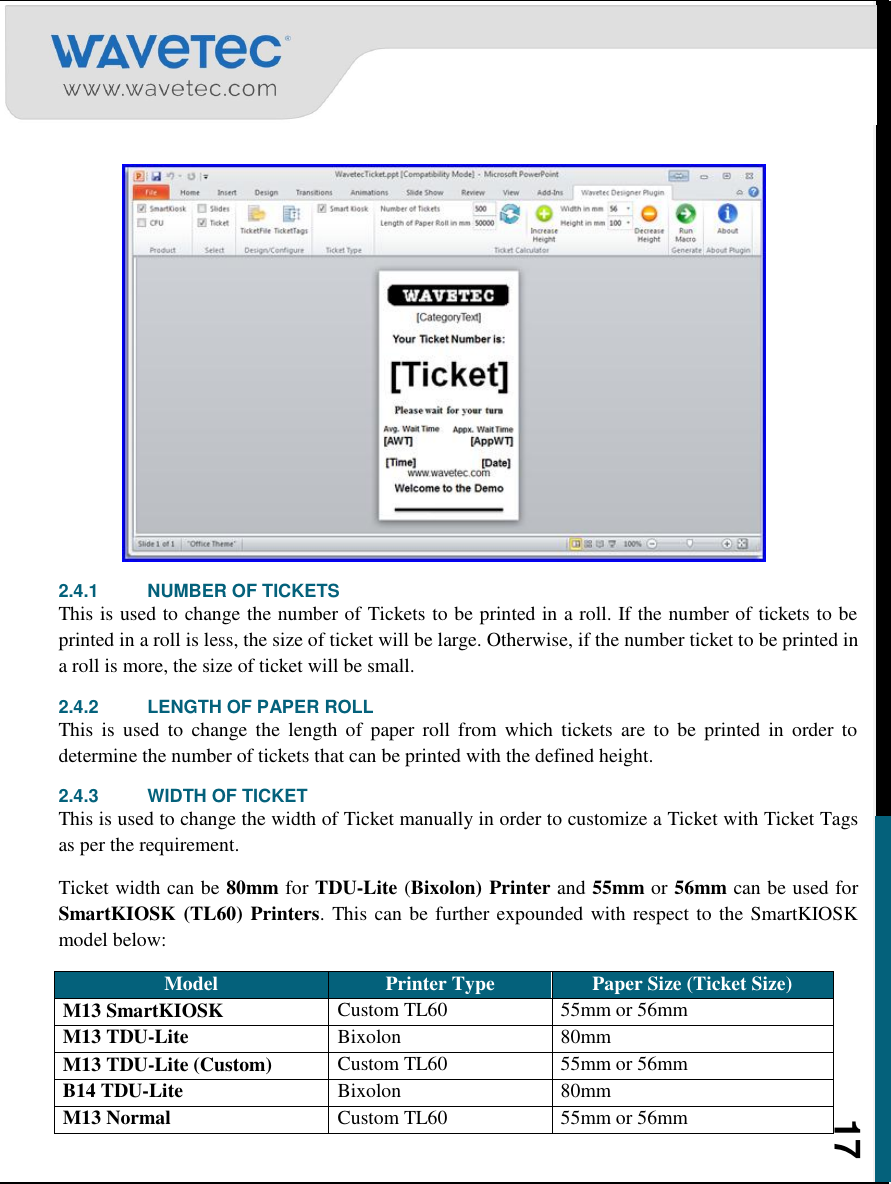
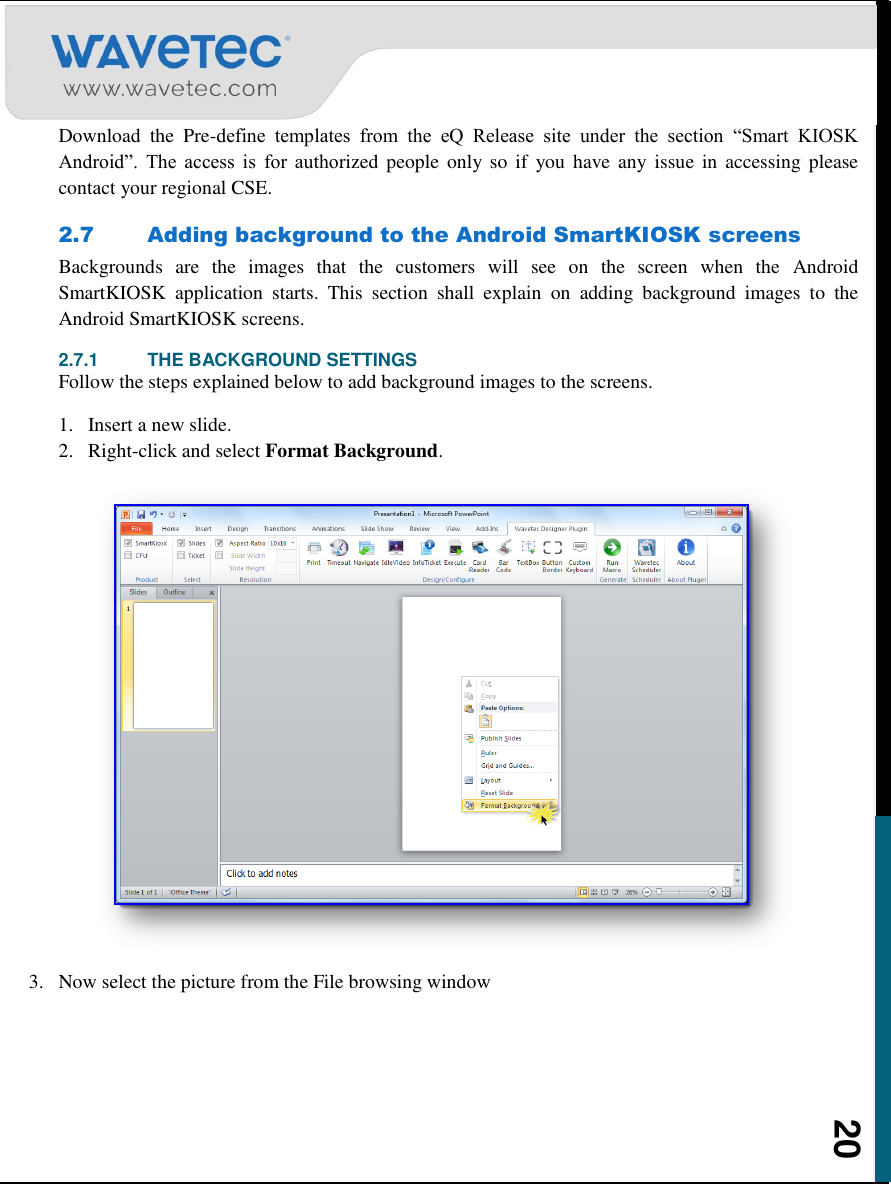
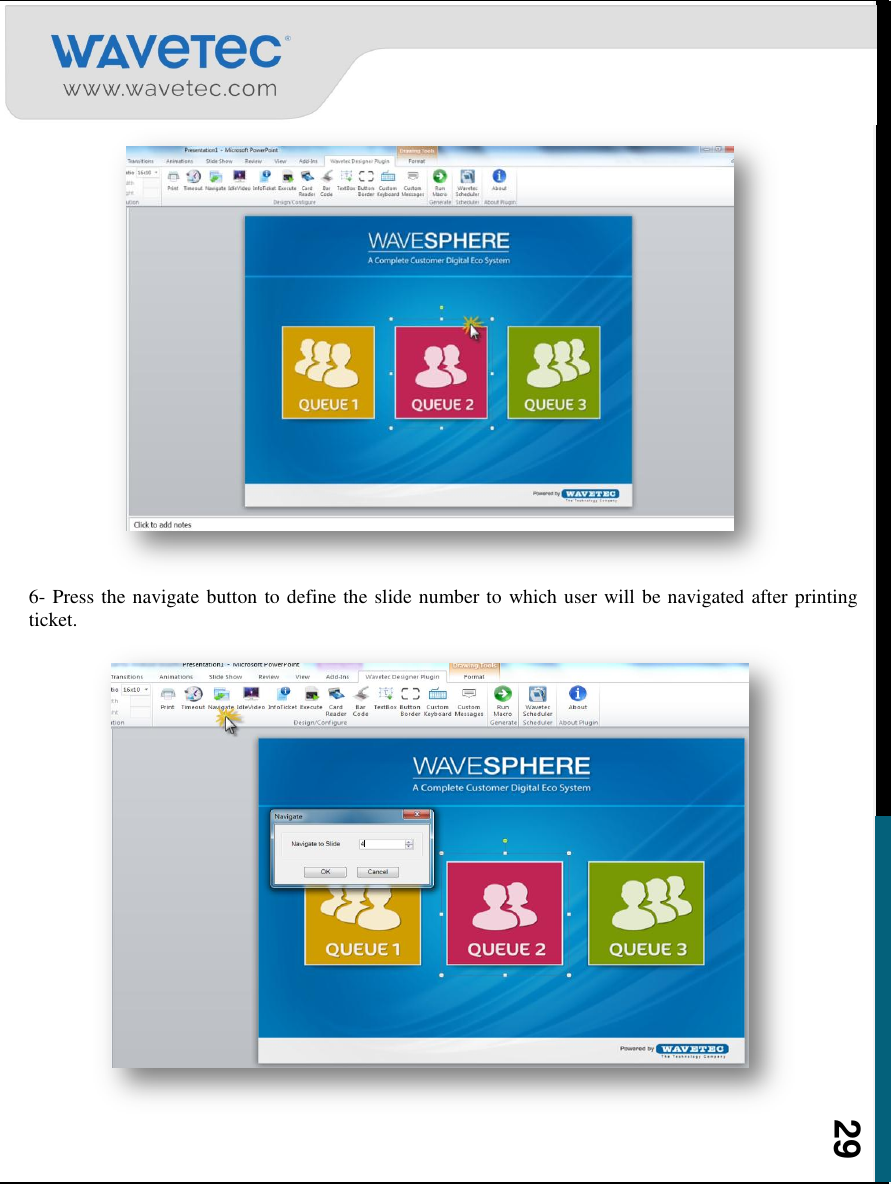
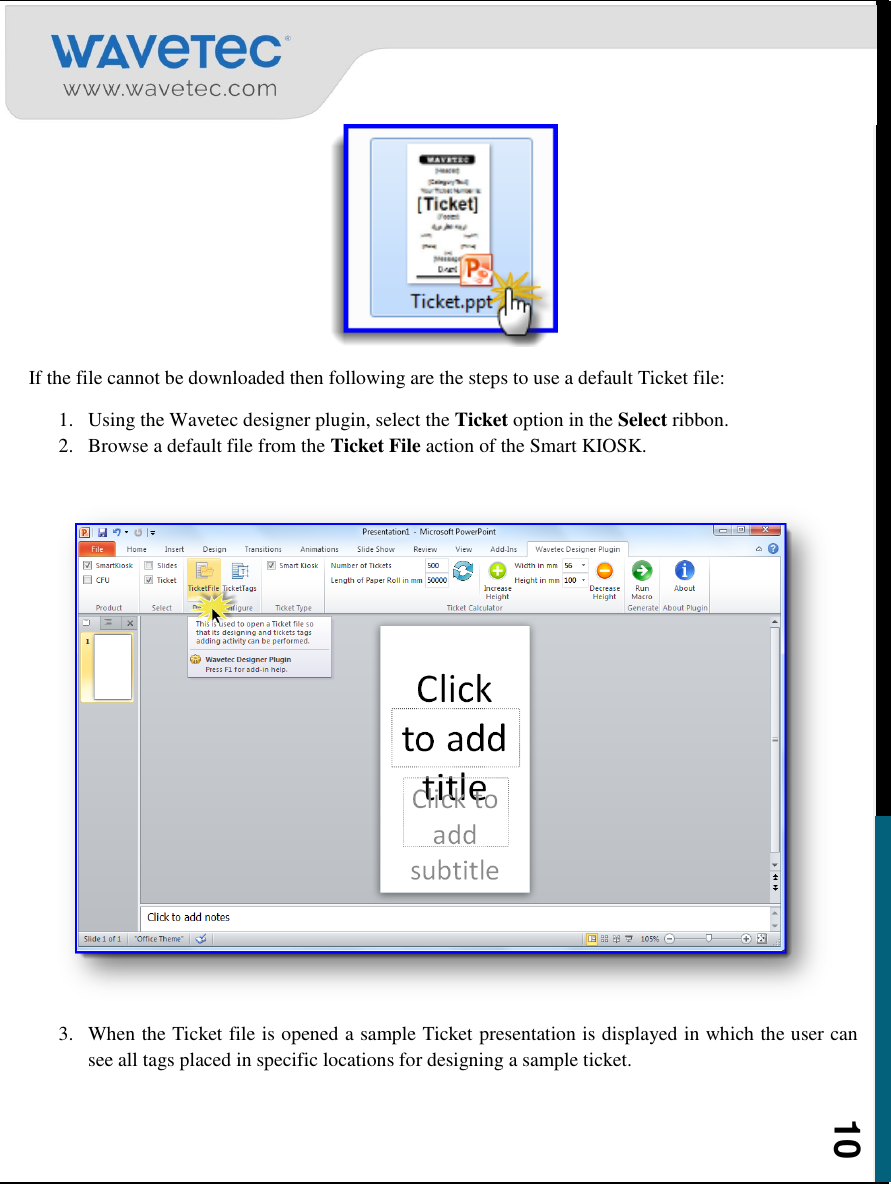
![9 5. A new tab titled "Wavetec Designer Plugin" will be added to your PowerPoint ribbon on the far right (see screenshot below). Make sure you have selected SmartKIOSK in Product section and Slides in Select section. 2.3 Designing a Ticket for the Android SmartKIOSK Application Tickets are also designed using Microsoft Power Point plugin of Wavetec. A default presentation file is provided for the users which can be edited to create their own ticket. This default template can be found in the Templates folder which is available on your PC when you download the complete Installation package from the Smart KIOSK – Android section on “eQ product release site” which is being shared by product division with all CSEs. *Note: The wavetec designer plugin doesn’t support SCMT 2460 Printer model. so if you have this model, please download it’s ticket from the following link: After downloading, only you can change the background of that ticket. If you want to add or remove any tag then please contact to Wavetec product development department. 2.3.1 DESIGNING NEW TICKETS First access the template made for the ticket. This template can be found in the Templates folder which can be downloaded from the eQ release site and from the section Smart Kiosk – Android. It is vital that this template will be used for making any new ticket as it has all the parameters that can be placed on a ticket. Once the download is complete, open the Ticket.ppt file. Comment [DZ1]: ?](https://usermanual.wiki/Wavetec-FZCO/WT-TDU/User-Guide-2907638-Page-10.png)
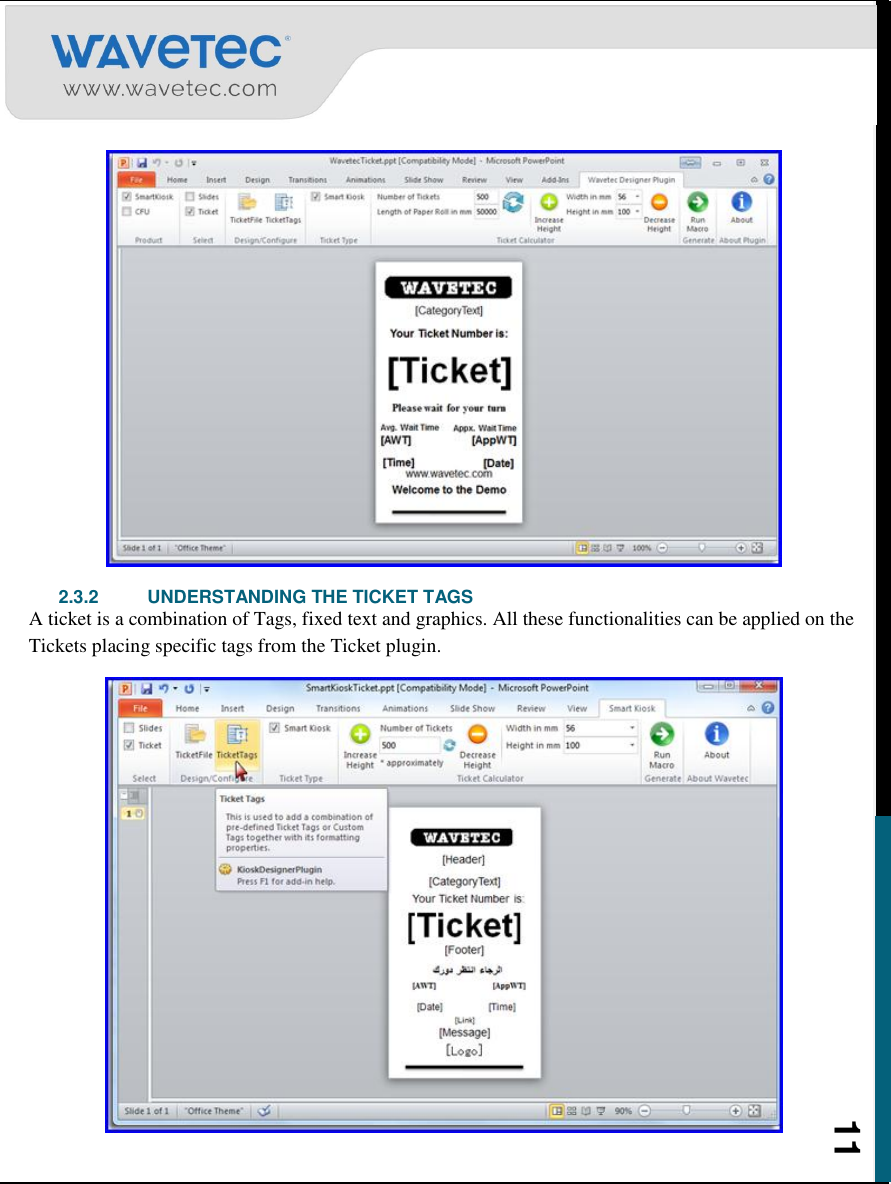
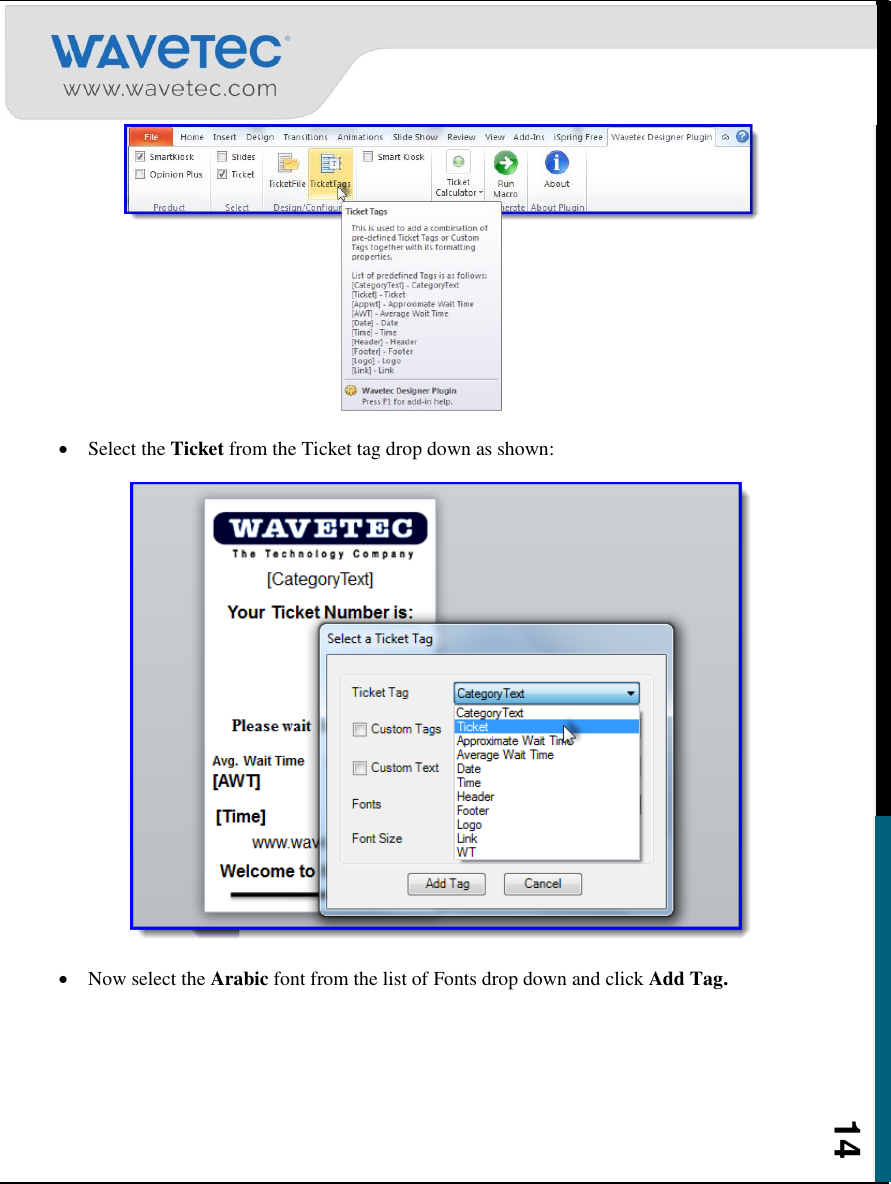
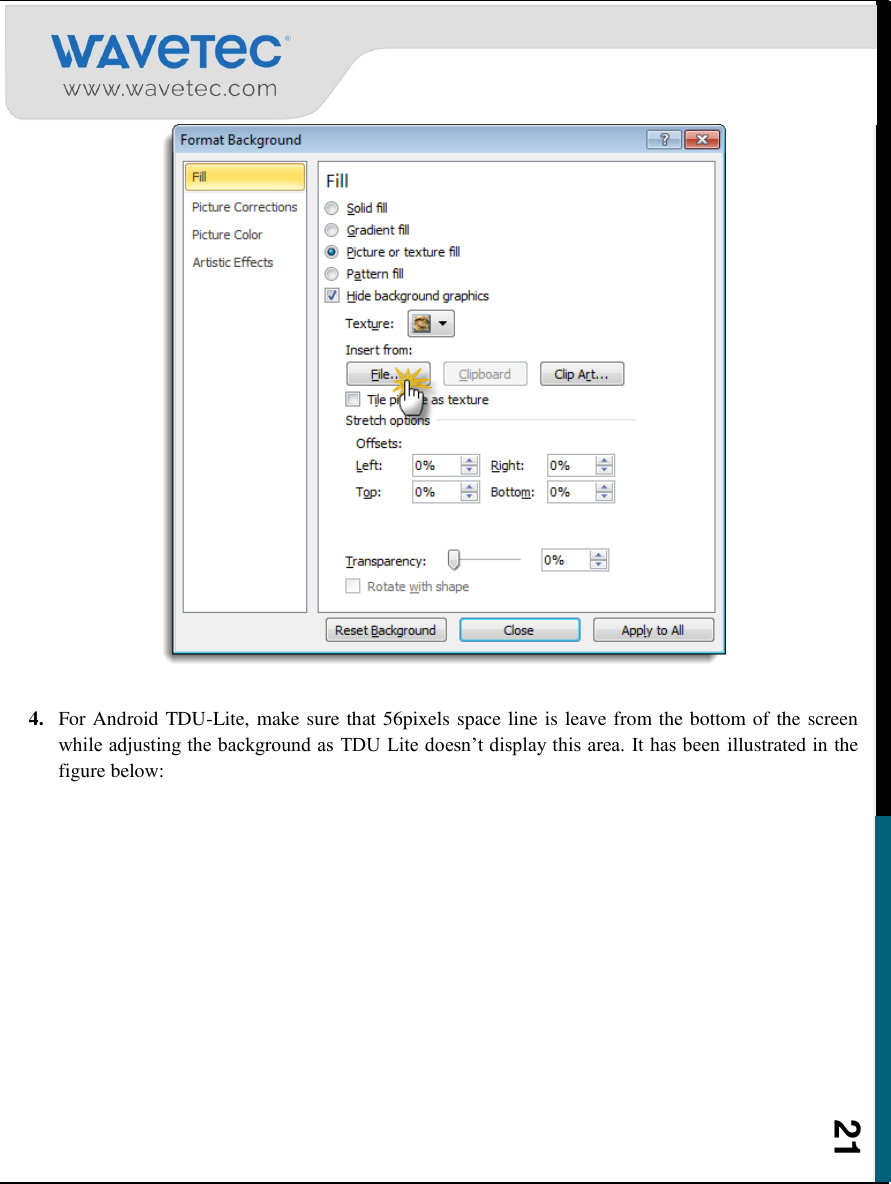
![12 Select the Ticket Tags action from the Design/Configure ribbon. A Tag selection window will open. From here user can select tags or apply custom tags, customize their font‟s style and size. 2.3.3 TICKET TAGS DETAILS The Ticket tags are the variables that are understandable to Android SmartKIOSK application and are replaced by the actual content as the physical ticket is being generated for printing. The following actions can be performed for each tag: 1. Change the placement of the tags by dragging them on the slide. 2. Remove the tag from the ticket. 3. Change the font style of any tag. Following tags can be defined on the ticket. 1. [Header] – This is the heading of the ticket. Contents such as name of customer‟s branch can be displayed here. 2. [CategoryText] – Name of the category as selected by the customer shall appear here. 3. [Ticket] – Ticket number shall appear here. 4. [Footer] – This is the footer for the ticket. Contents such as contact information can be displayed here. 5. [AWT] – Average wait time of the customers shall appear here. 6. [AppWT] – Approximate wait time of the customer shall appear here.](https://usermanual.wiki/Wavetec-FZCO/WT-TDU/User-Guide-2907638-Page-13.png)
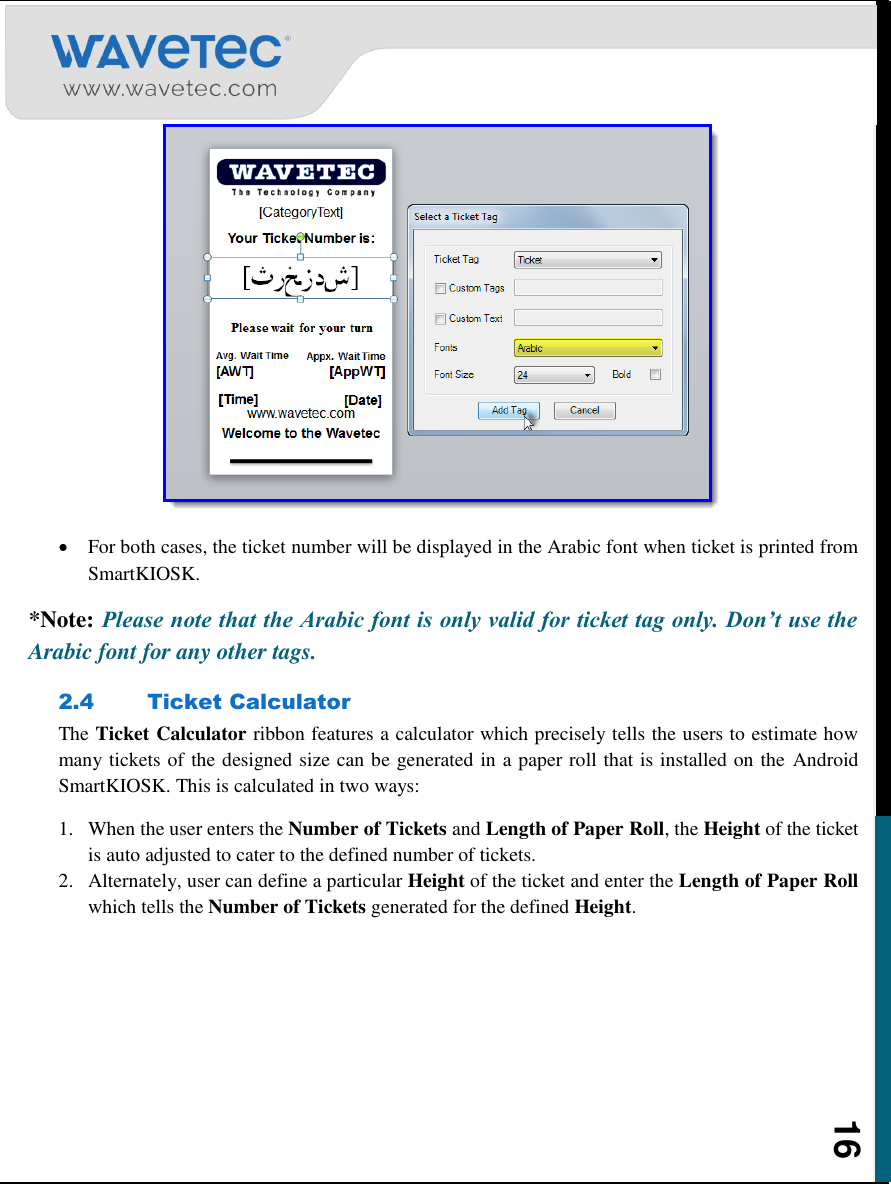
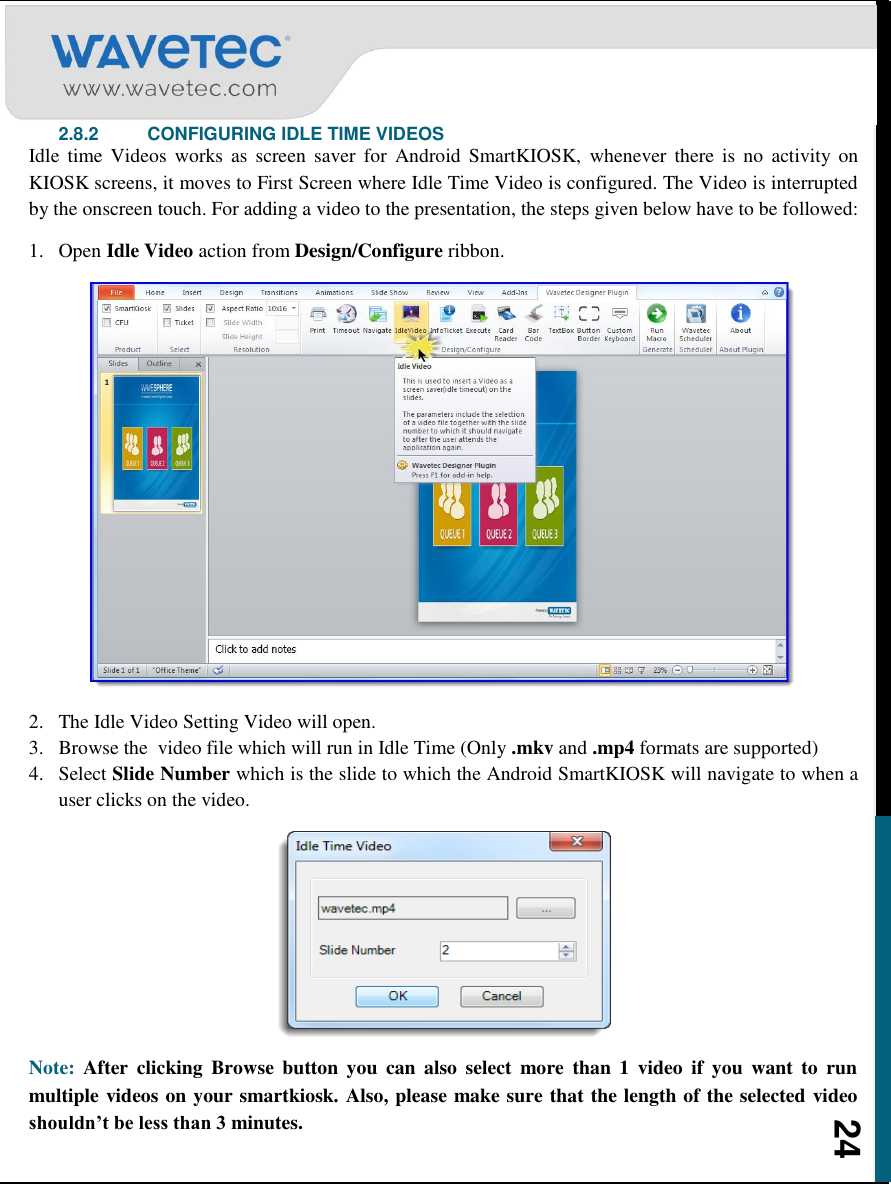
![13 7. [Date] – Current date of the eQ Controller shall appear here. 8. [Time] – Current time of the eQ Controller shall appear here. 9. [Link] – URL of the customer‟s website shall appear here. 10. [Message] – Any message that customer wants to appear on the ticket shall appear here. 11. [Logo] – Customer‟s logo shall be displayed here. 12. [WT] – This tag will show the number of customers waiting in that category. This tag cannot be used with AppWT tag 2.3.3.1 Fixed Text and Graphics Fixed text and graphics can be drawn to give an eye-catching look to the ticket. Any text or picture can be added to the Ticket to make it look better. Typically for this purpose background images, lines, rectangles are be added on the ticket. 2.3.4 ADDING TICKET NUMBER IN ARABIC The user is allowed to add the tag for ticket number on the ticket in Arabic font as well. In order to design, select the Ticket Tags from the Design/configure ribbon as shown. Notes: 1. Do not edit any tag. Editing any tag will convert it into plain text. 2. If you are creating an info ticket, then do not specify tags on it. It primarily consists of textual instructions to guide the users.](https://usermanual.wiki/Wavetec-FZCO/WT-TDU/User-Guide-2907638-Page-14.png)