Wayne Dalton 0001715 TORQUE MASTER i-DRIVE PRO User Manual INSTALLATION GUIDE 4
Wayne Dalton Corporation TORQUE MASTER i-DRIVE PRO INSTALLATION GUIDE 4
Contents
- 1. INSTALLATION GUIDE 1
- 2. INSTALLATION GUIDE 2
- 3. INSTALLATION GUIDE 3
- 4. INSTALLATION GUIDE 4
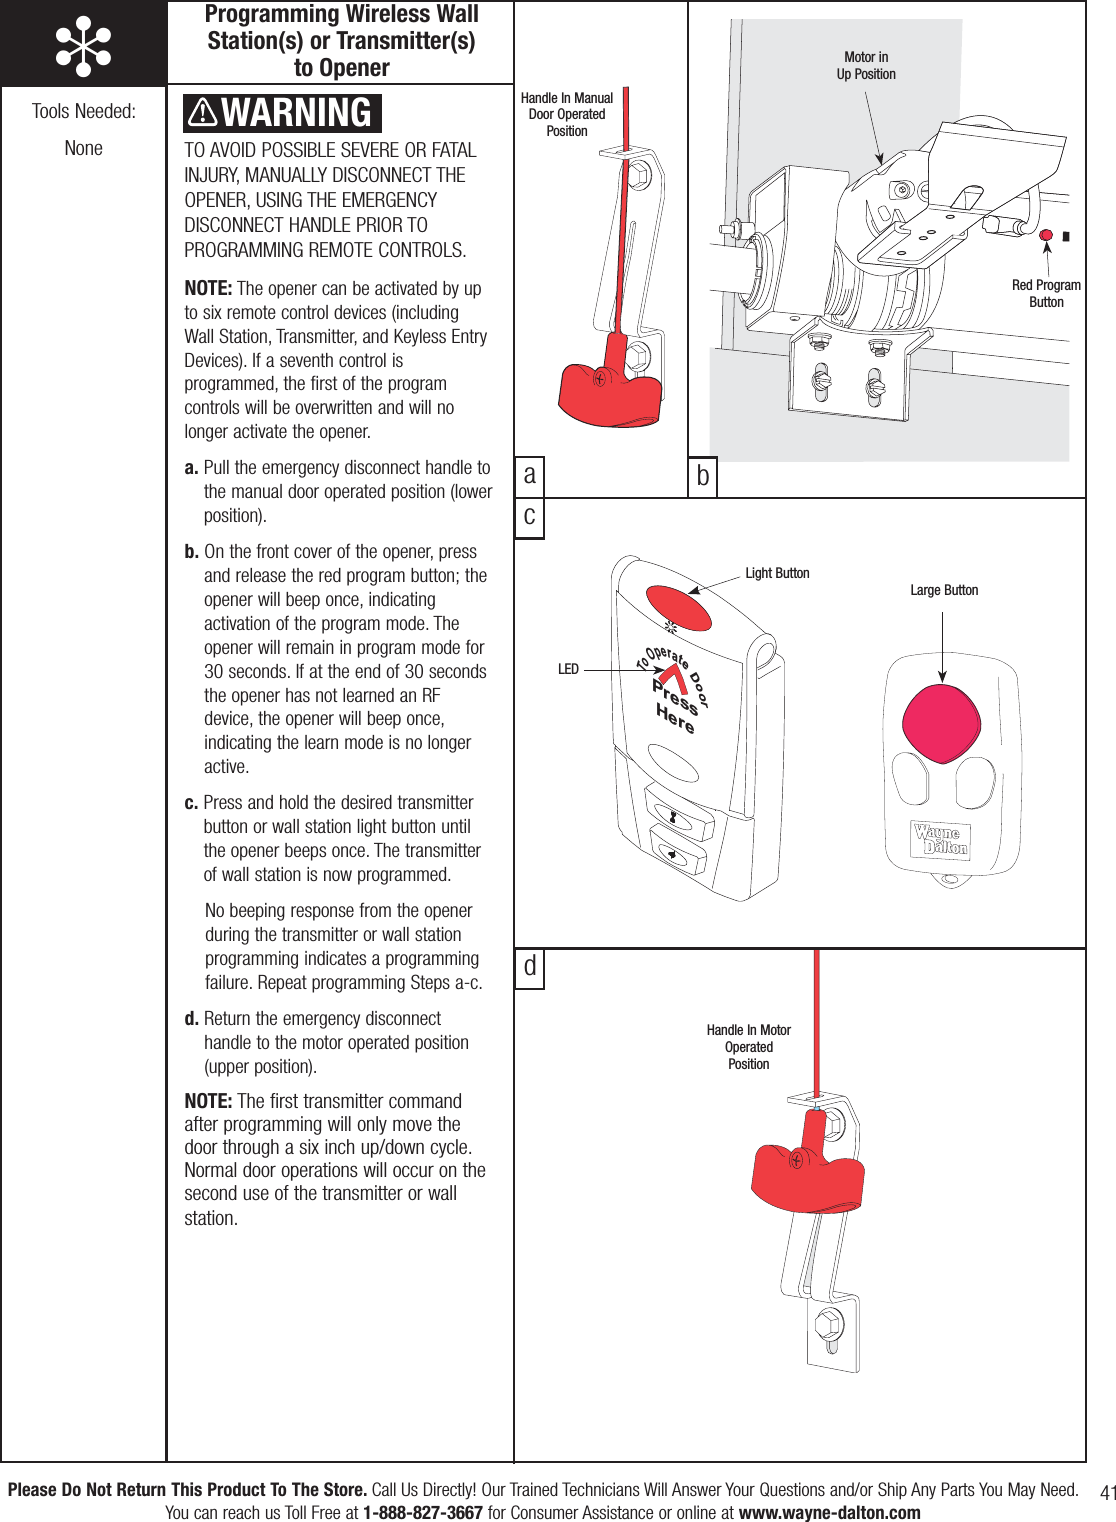
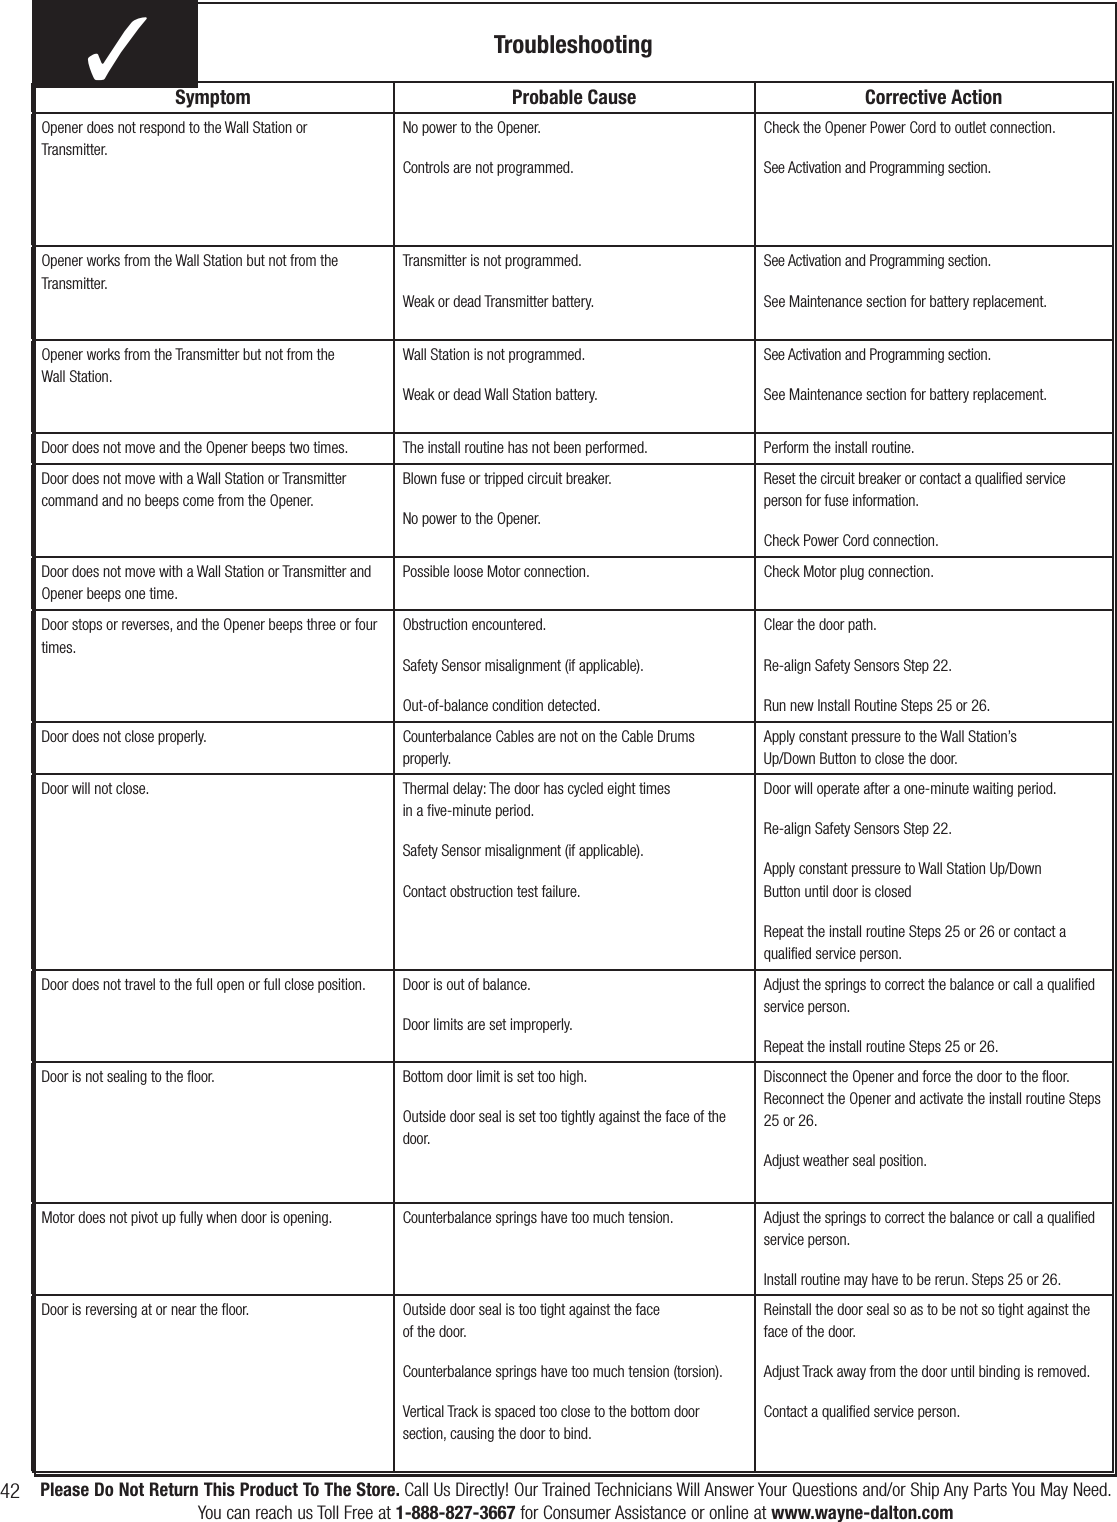
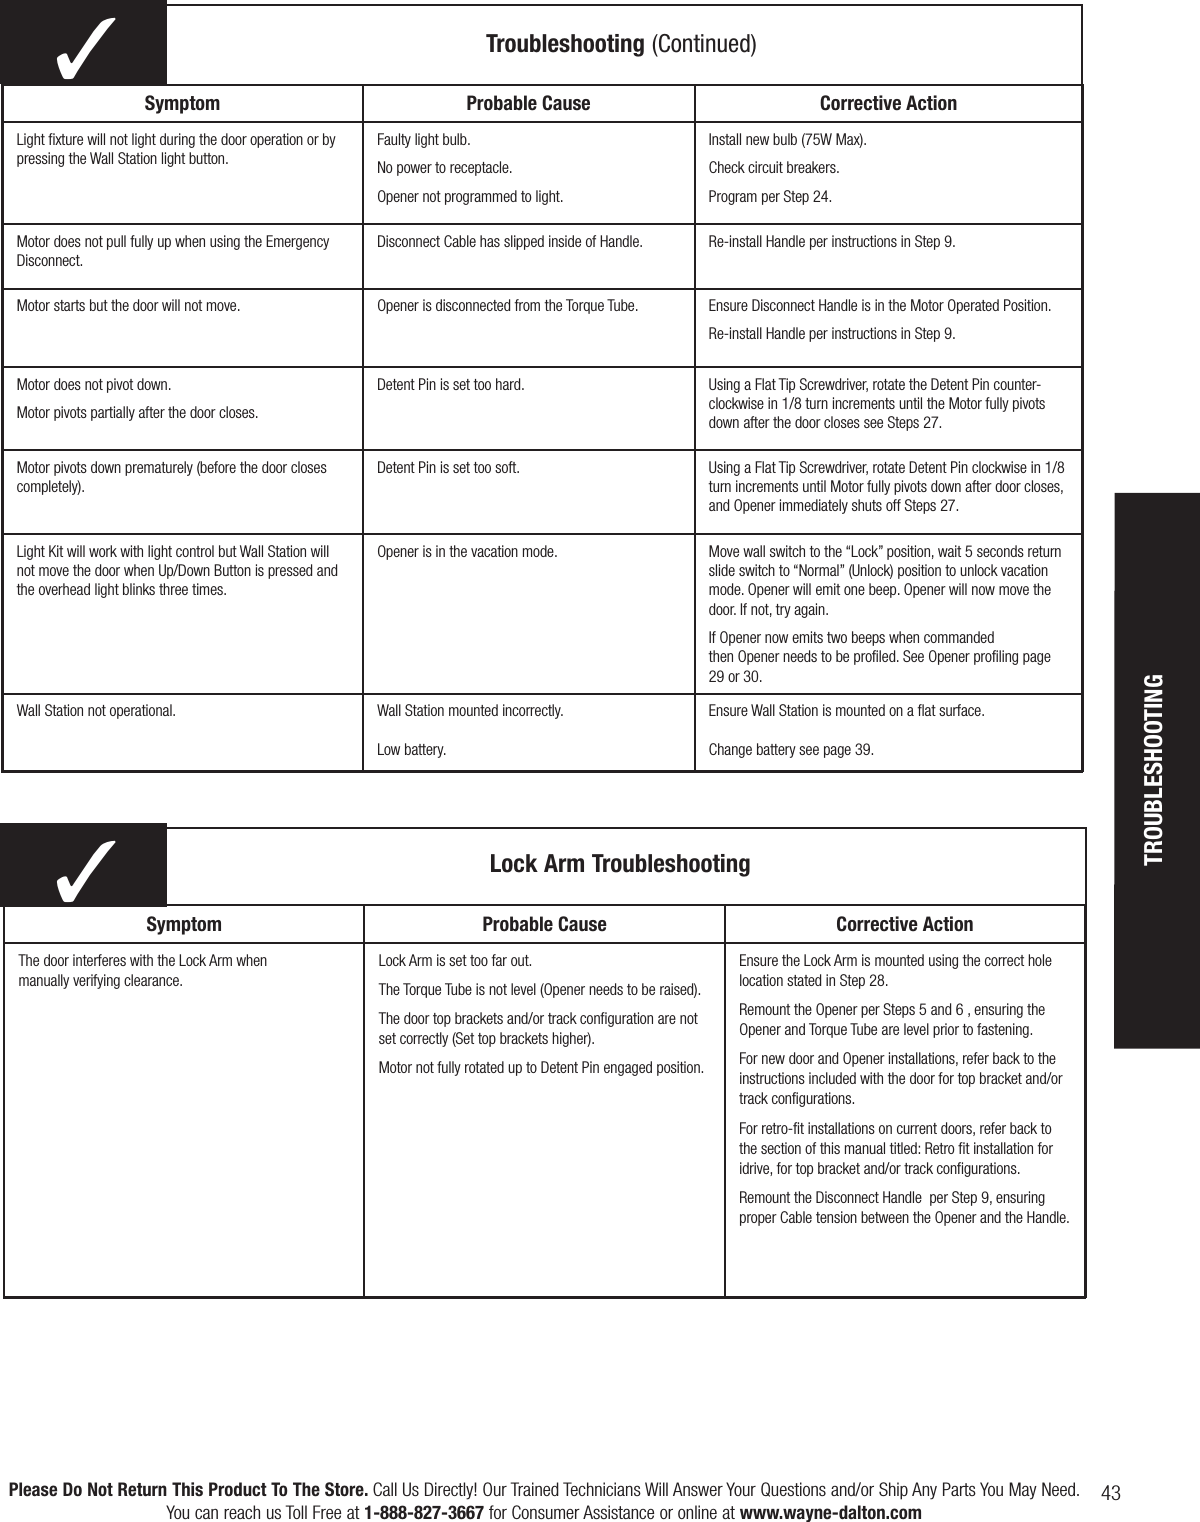
INSTALLATION GUIDE 4