Wayne Dalton TID372R2 GARAGE DOOR OPENER W/ RF LIGHT KIT User Manual 03 0263Manual
Wayne Dalton Corporation GARAGE DOOR OPENER W/ RF LIGHT KIT 03 0263Manual
UserManual.wiki
>
Wayne Dalton
>
TID372R2 User Manual
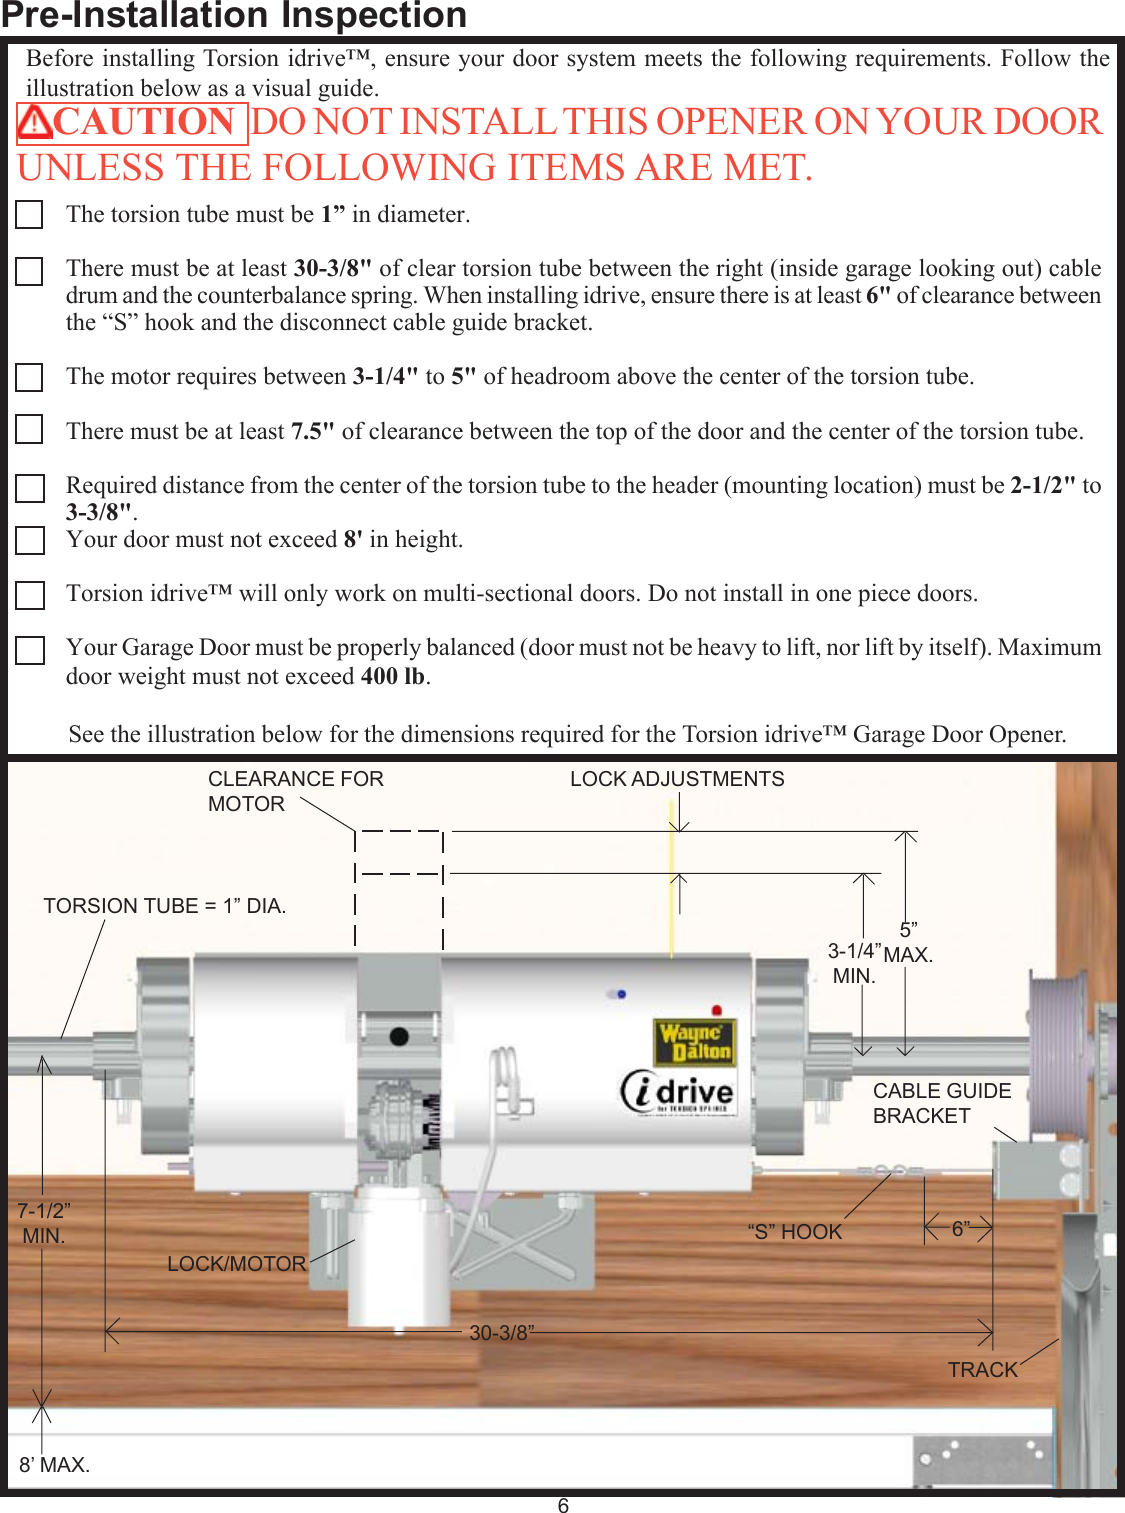
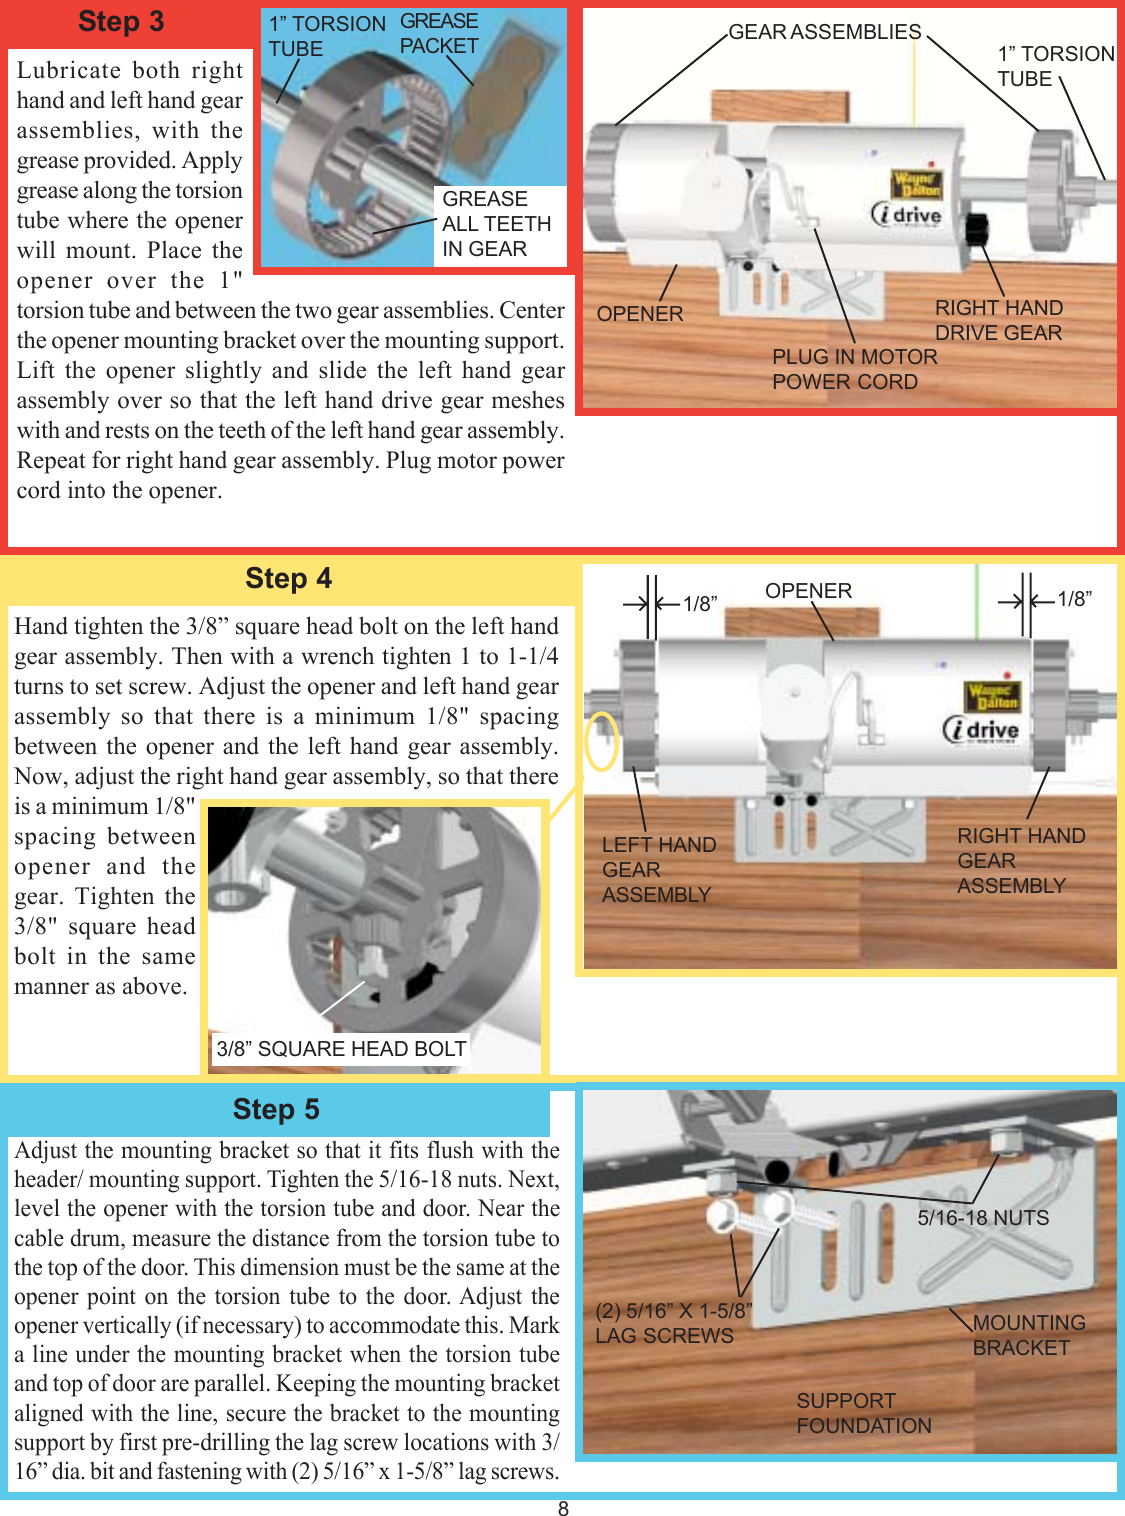
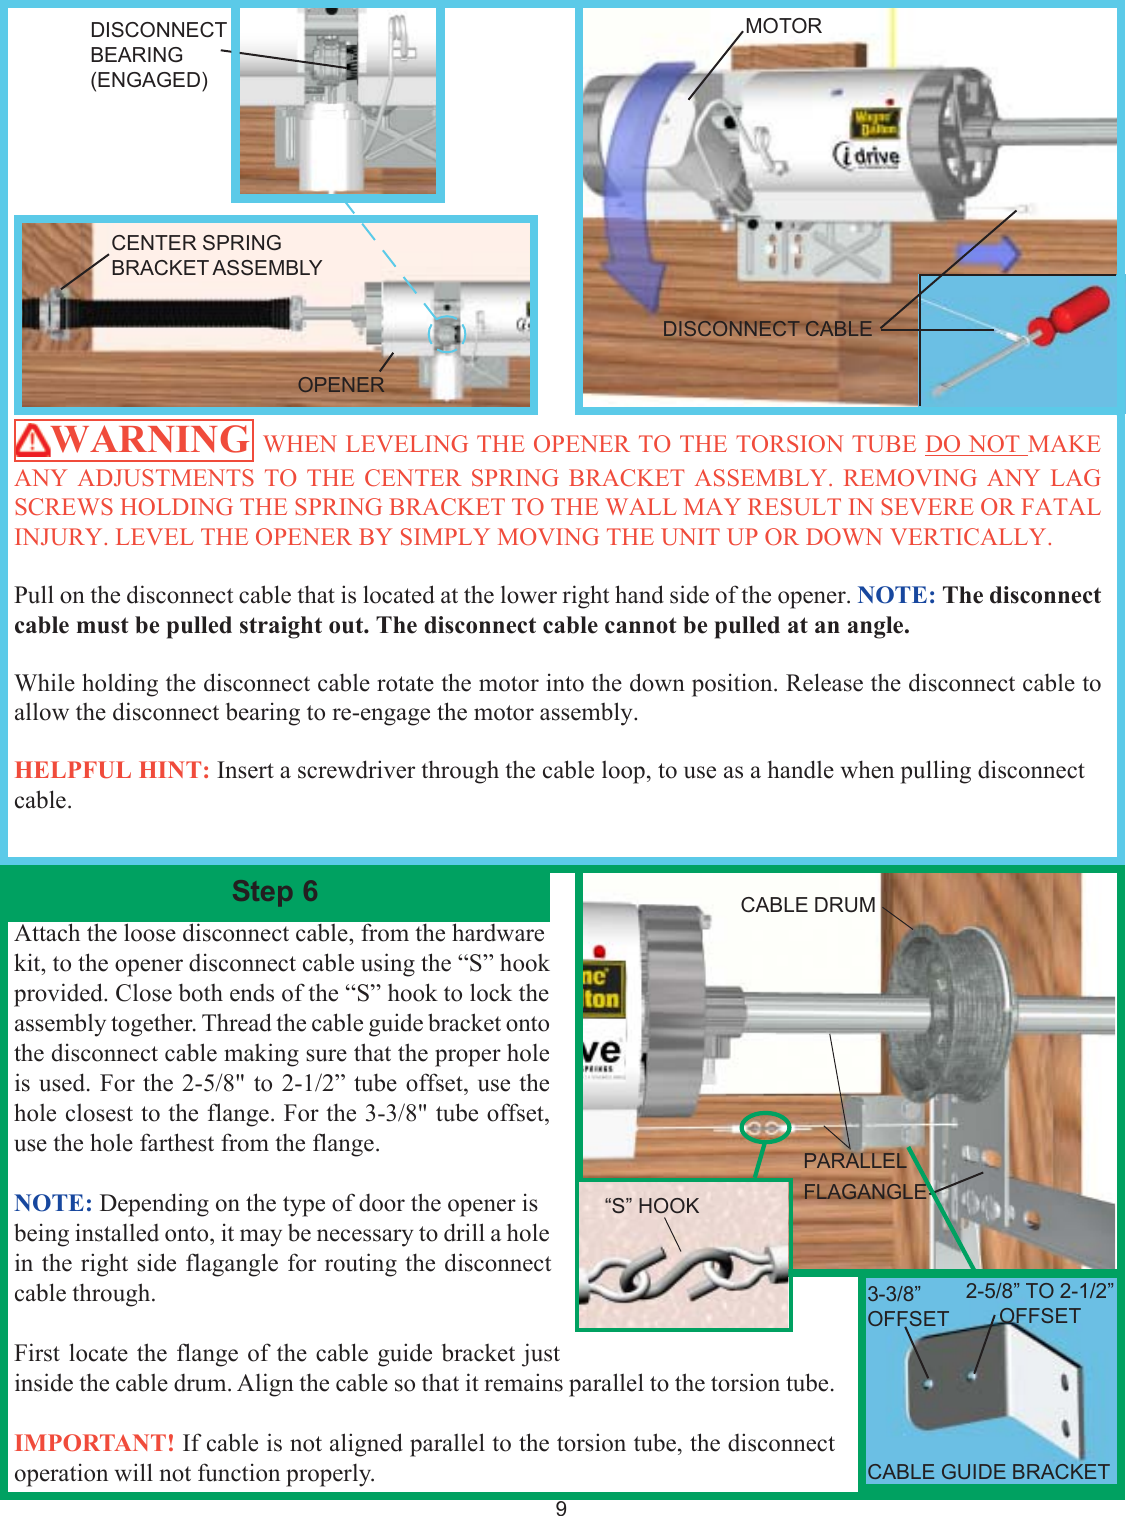
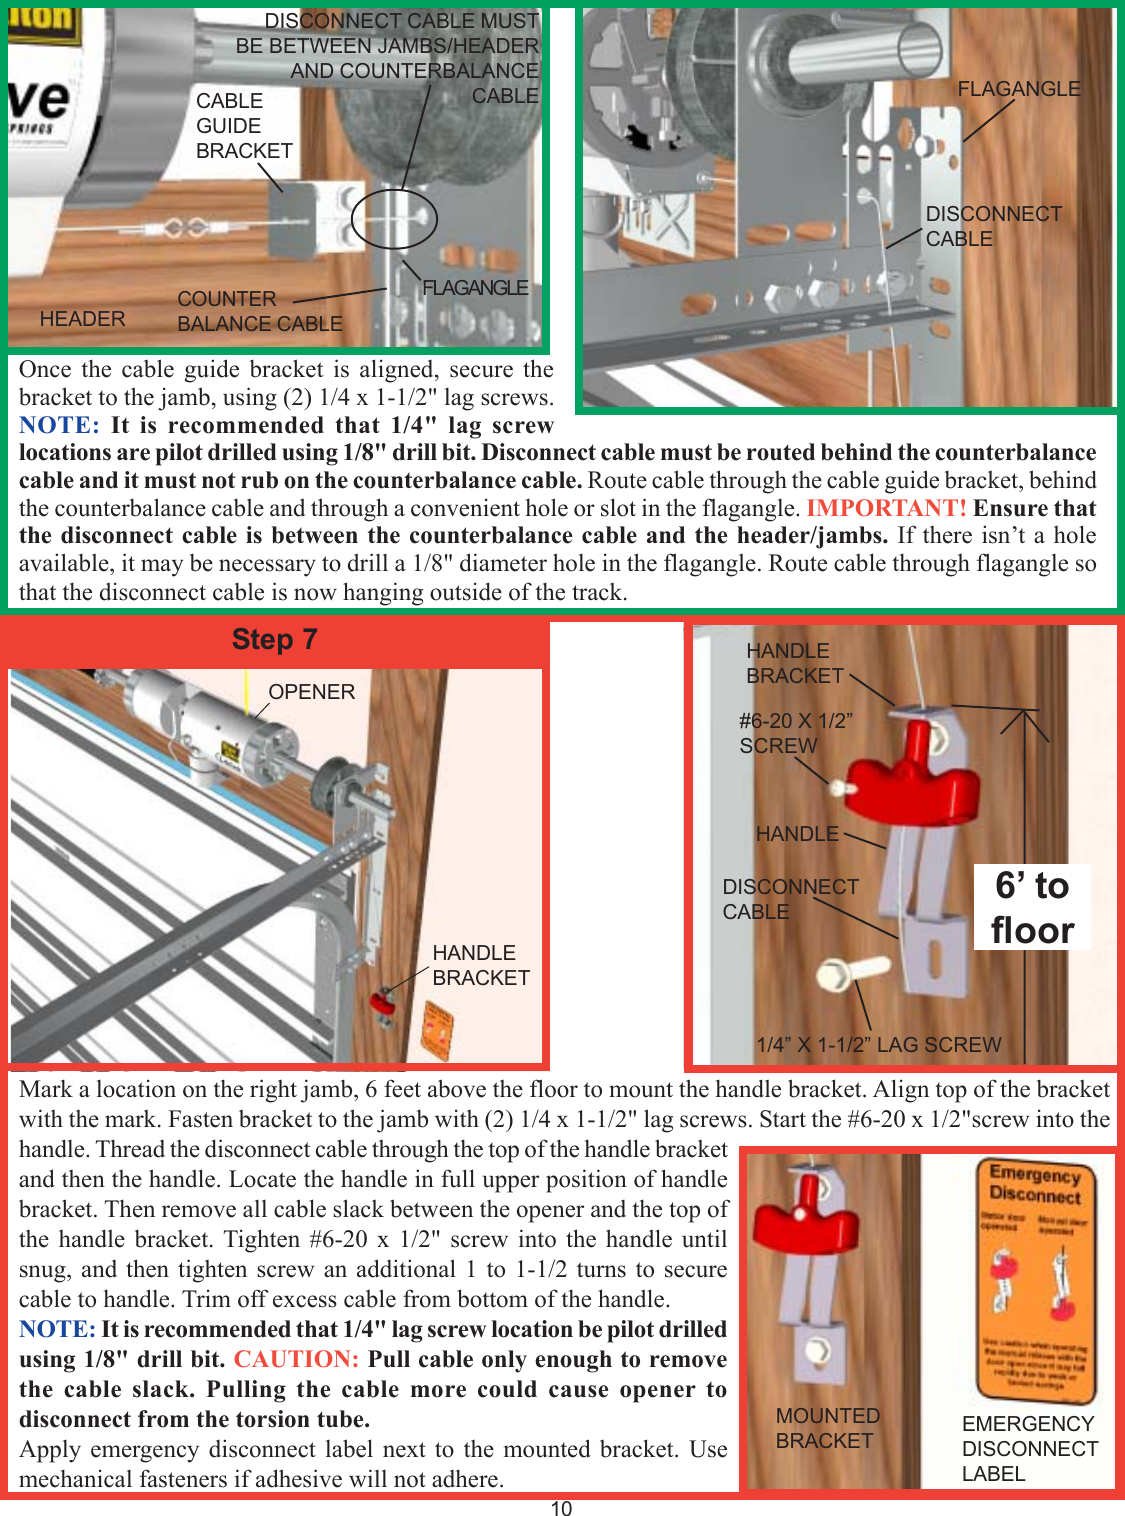
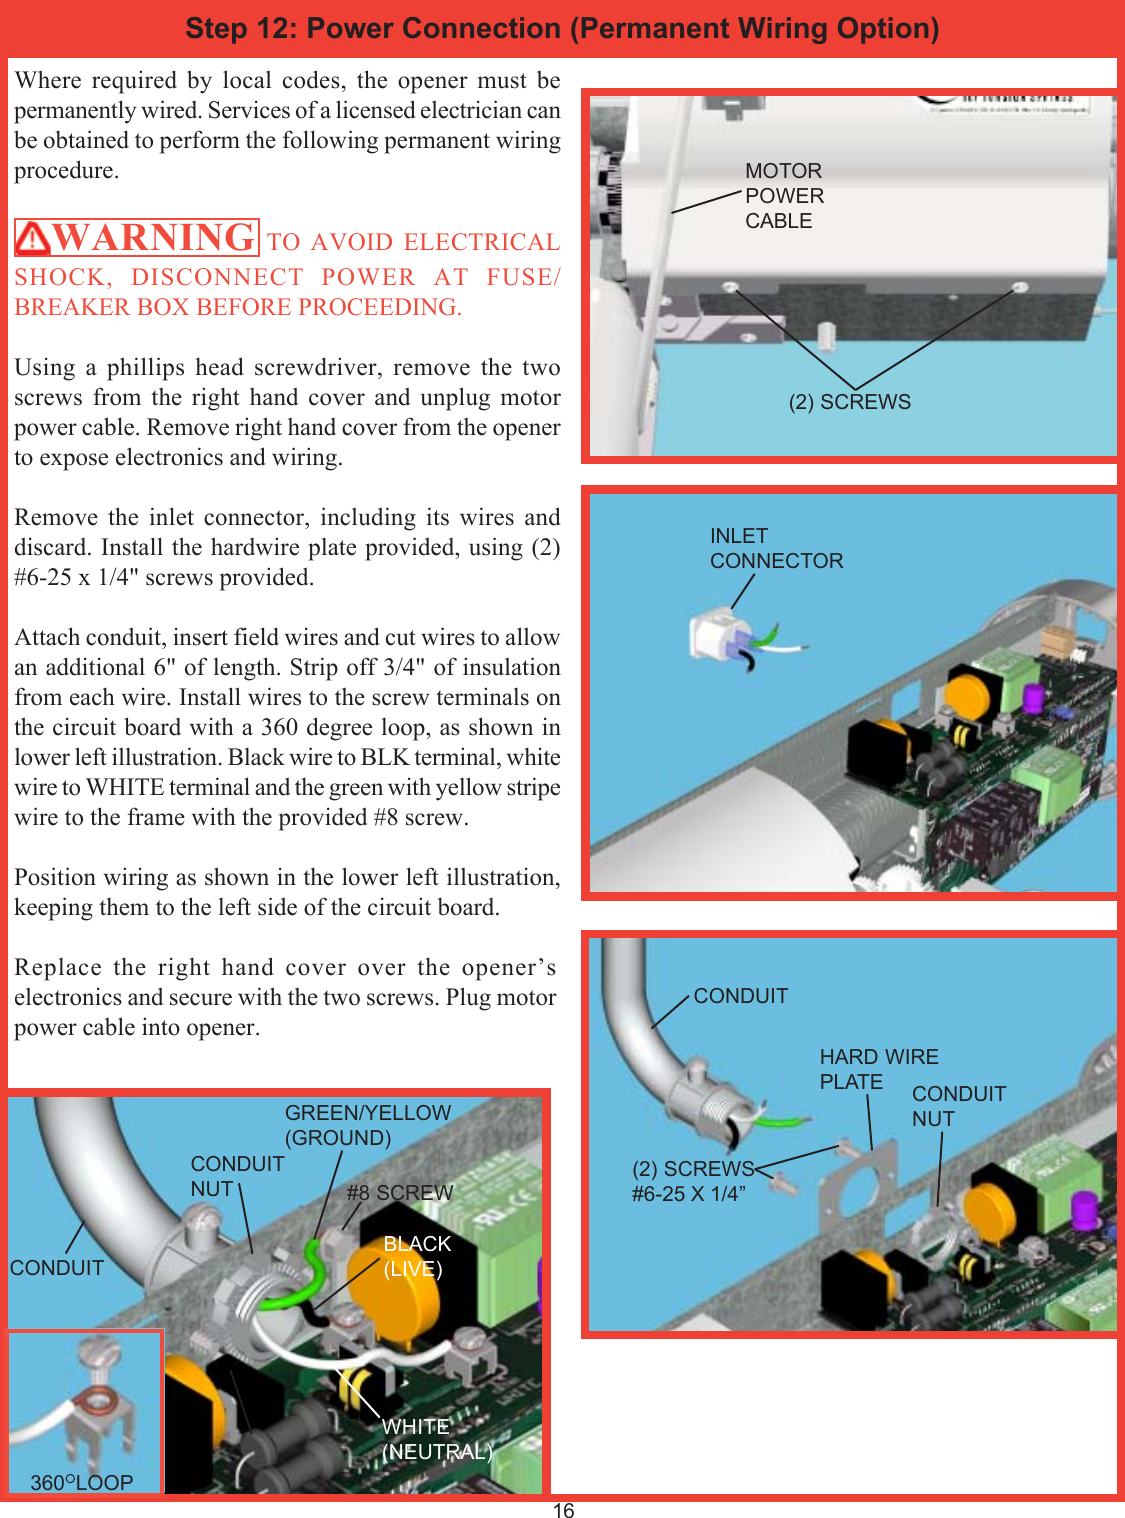
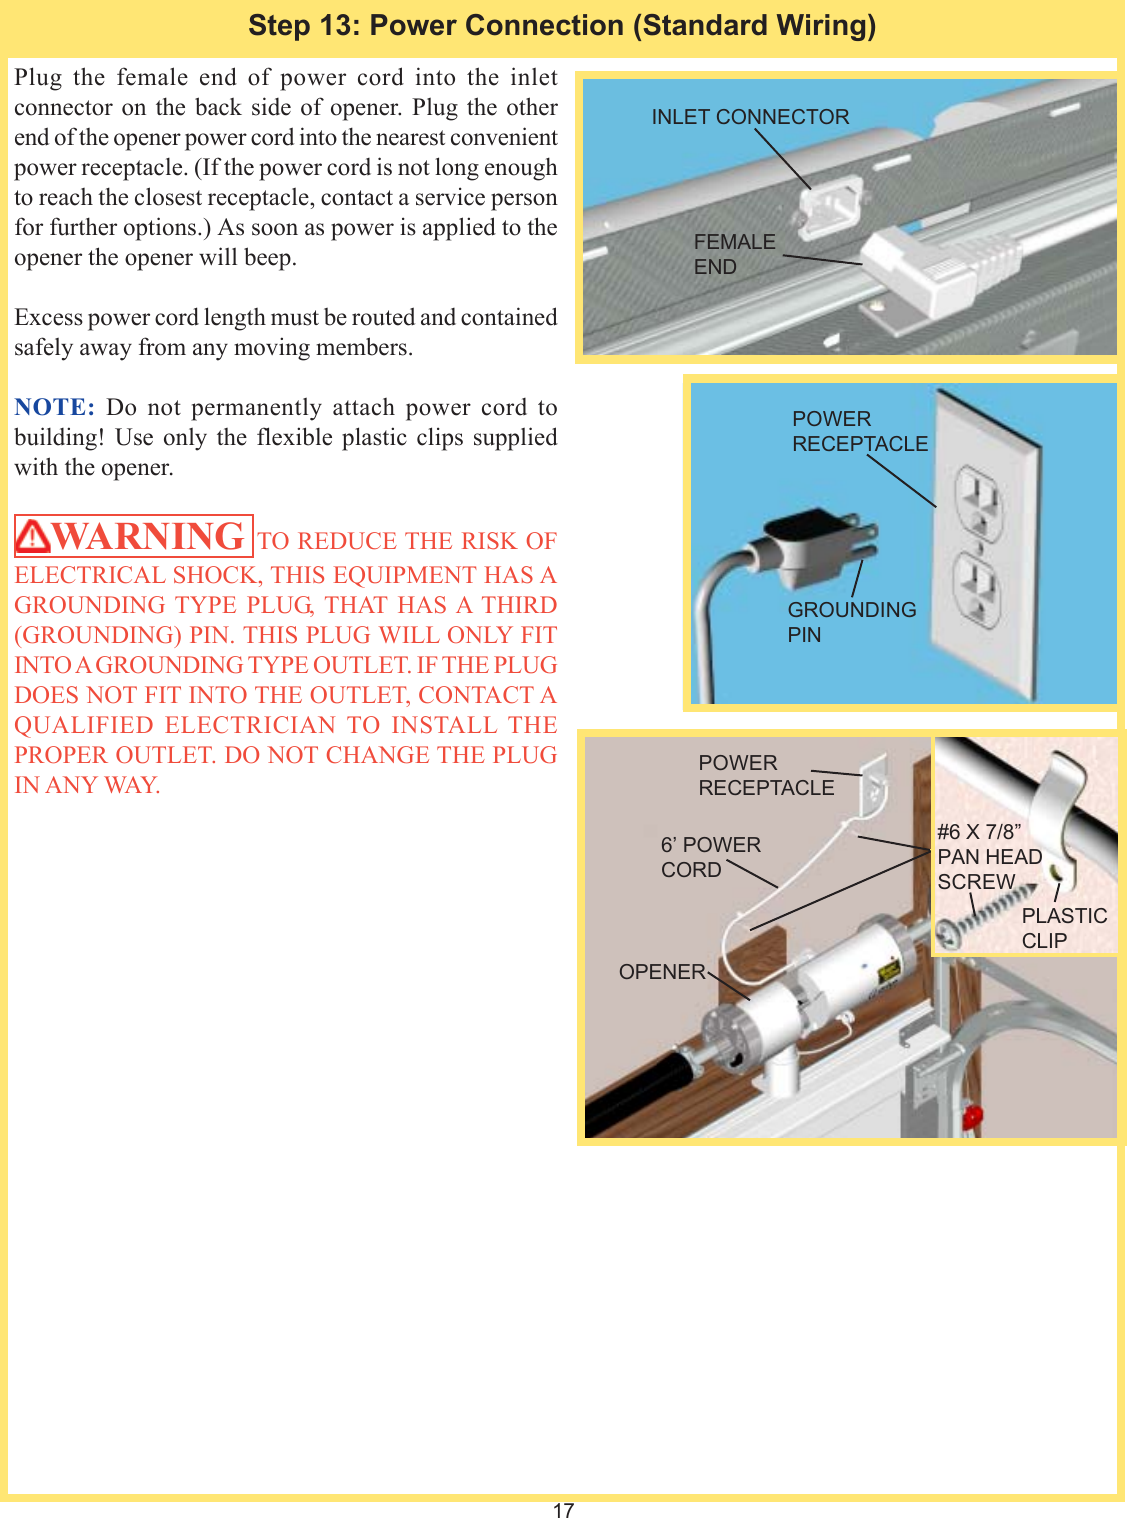
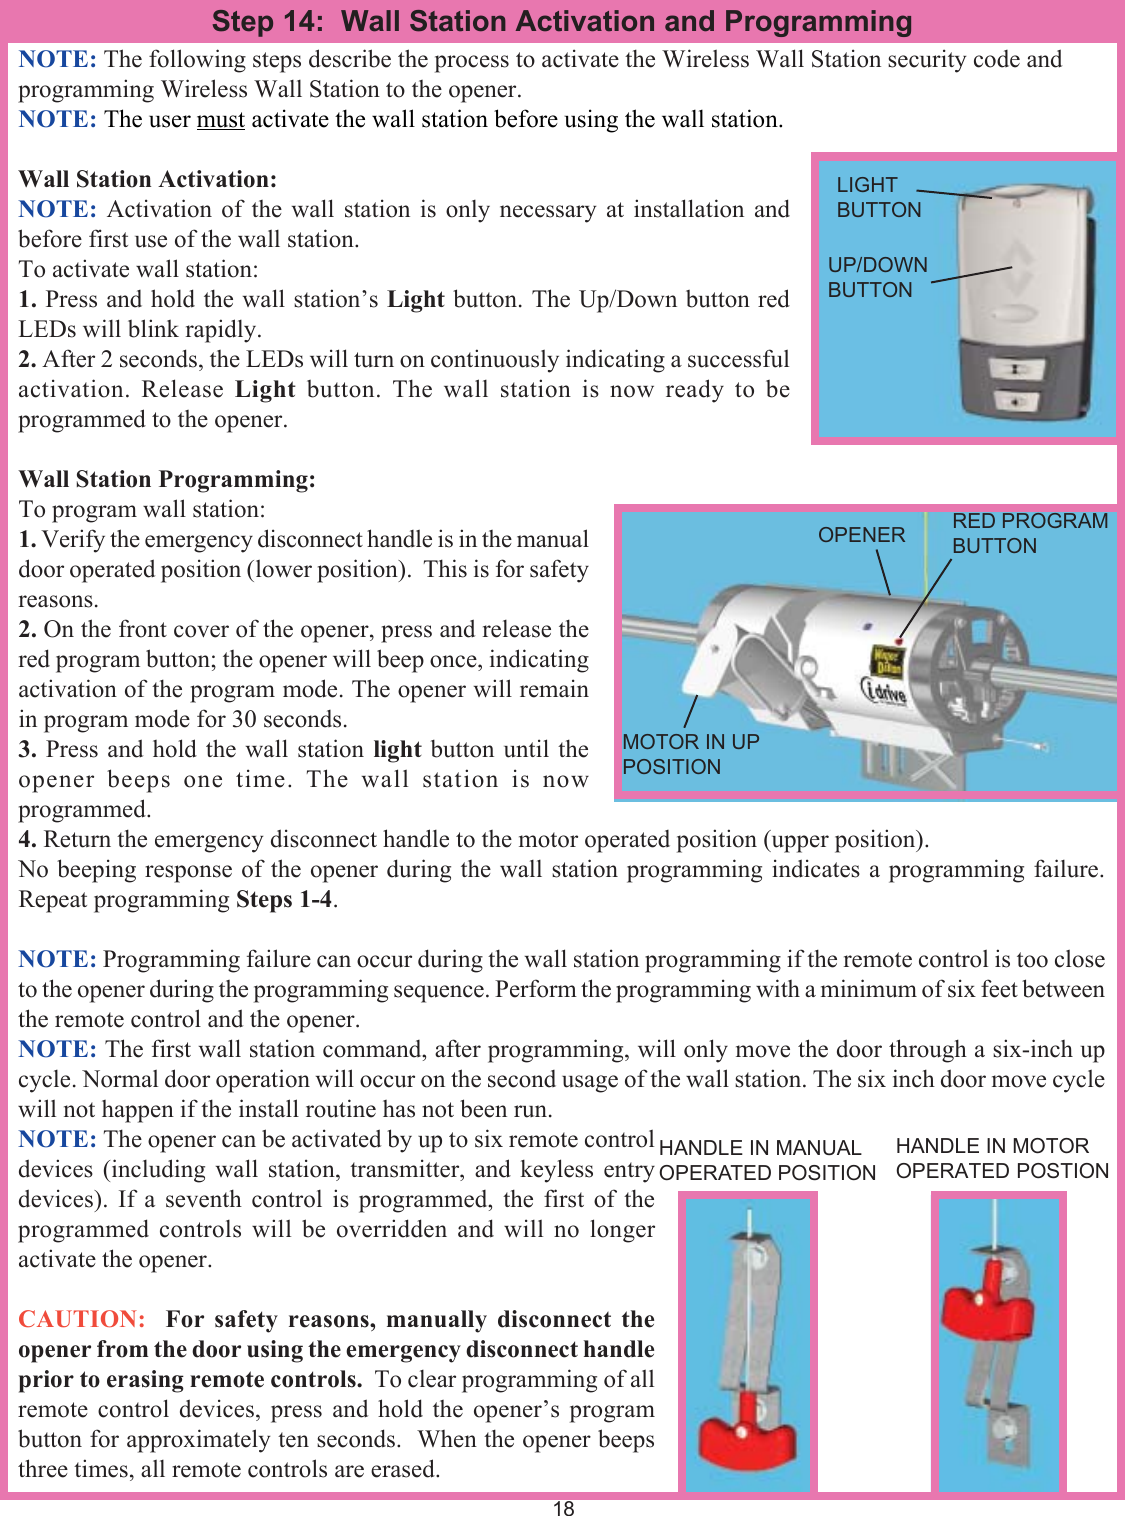
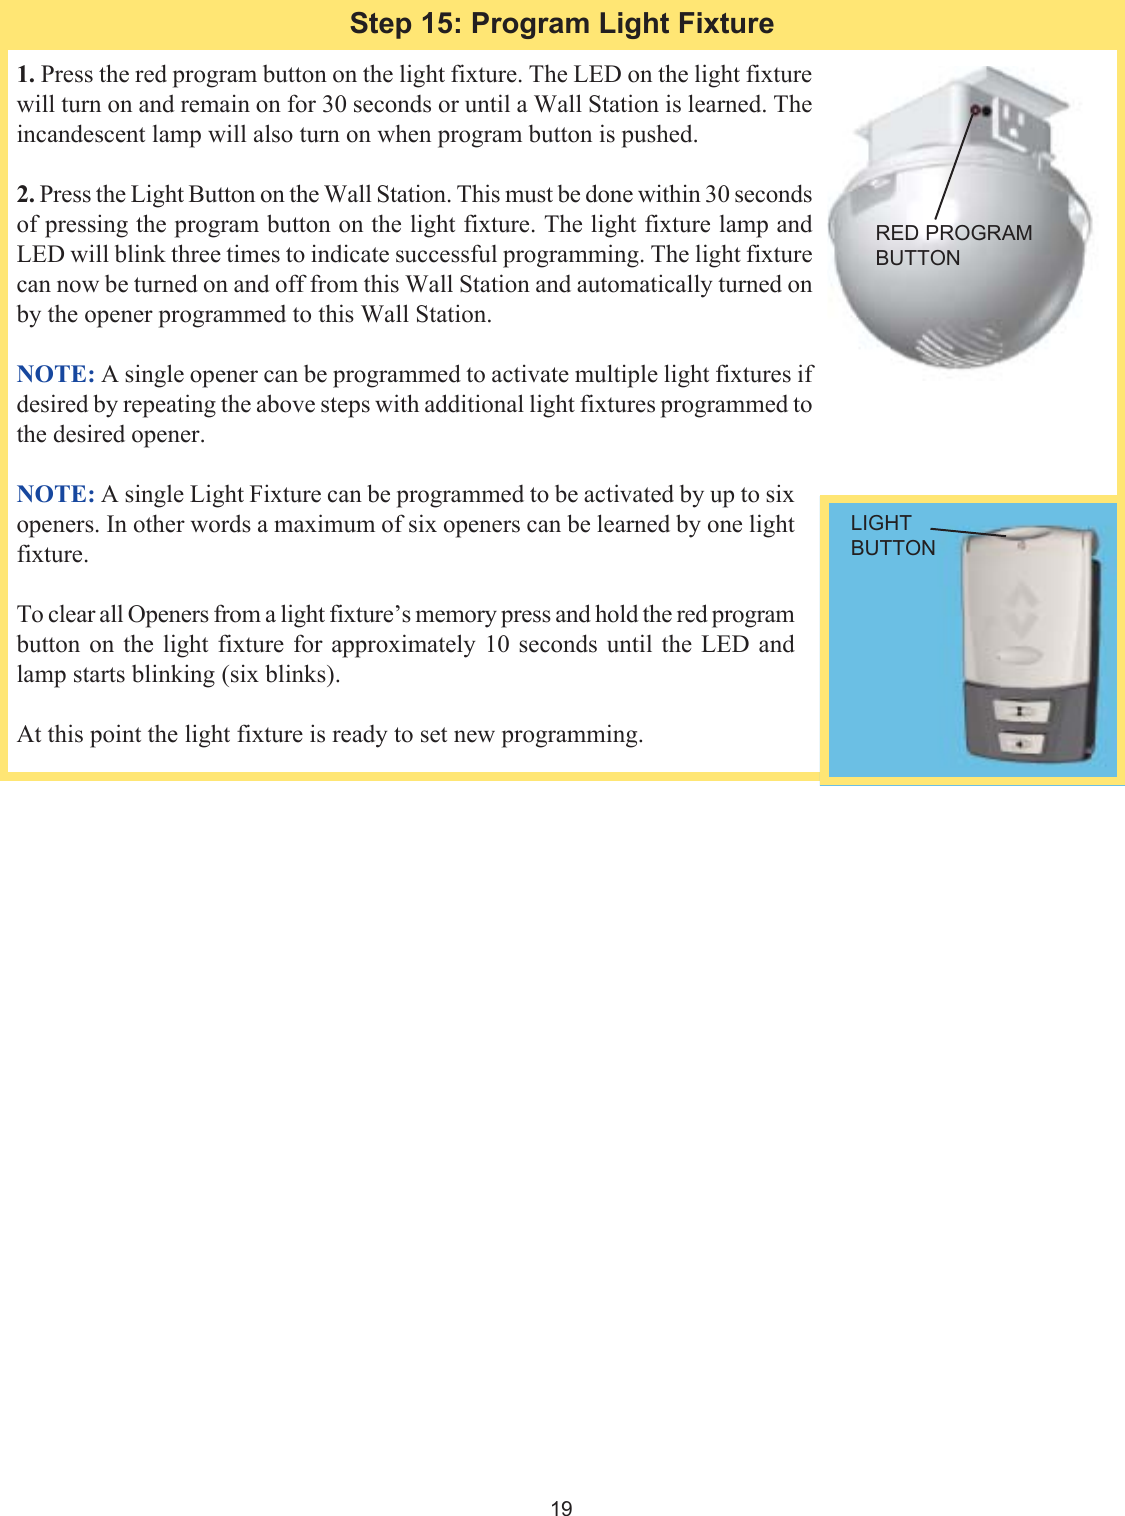
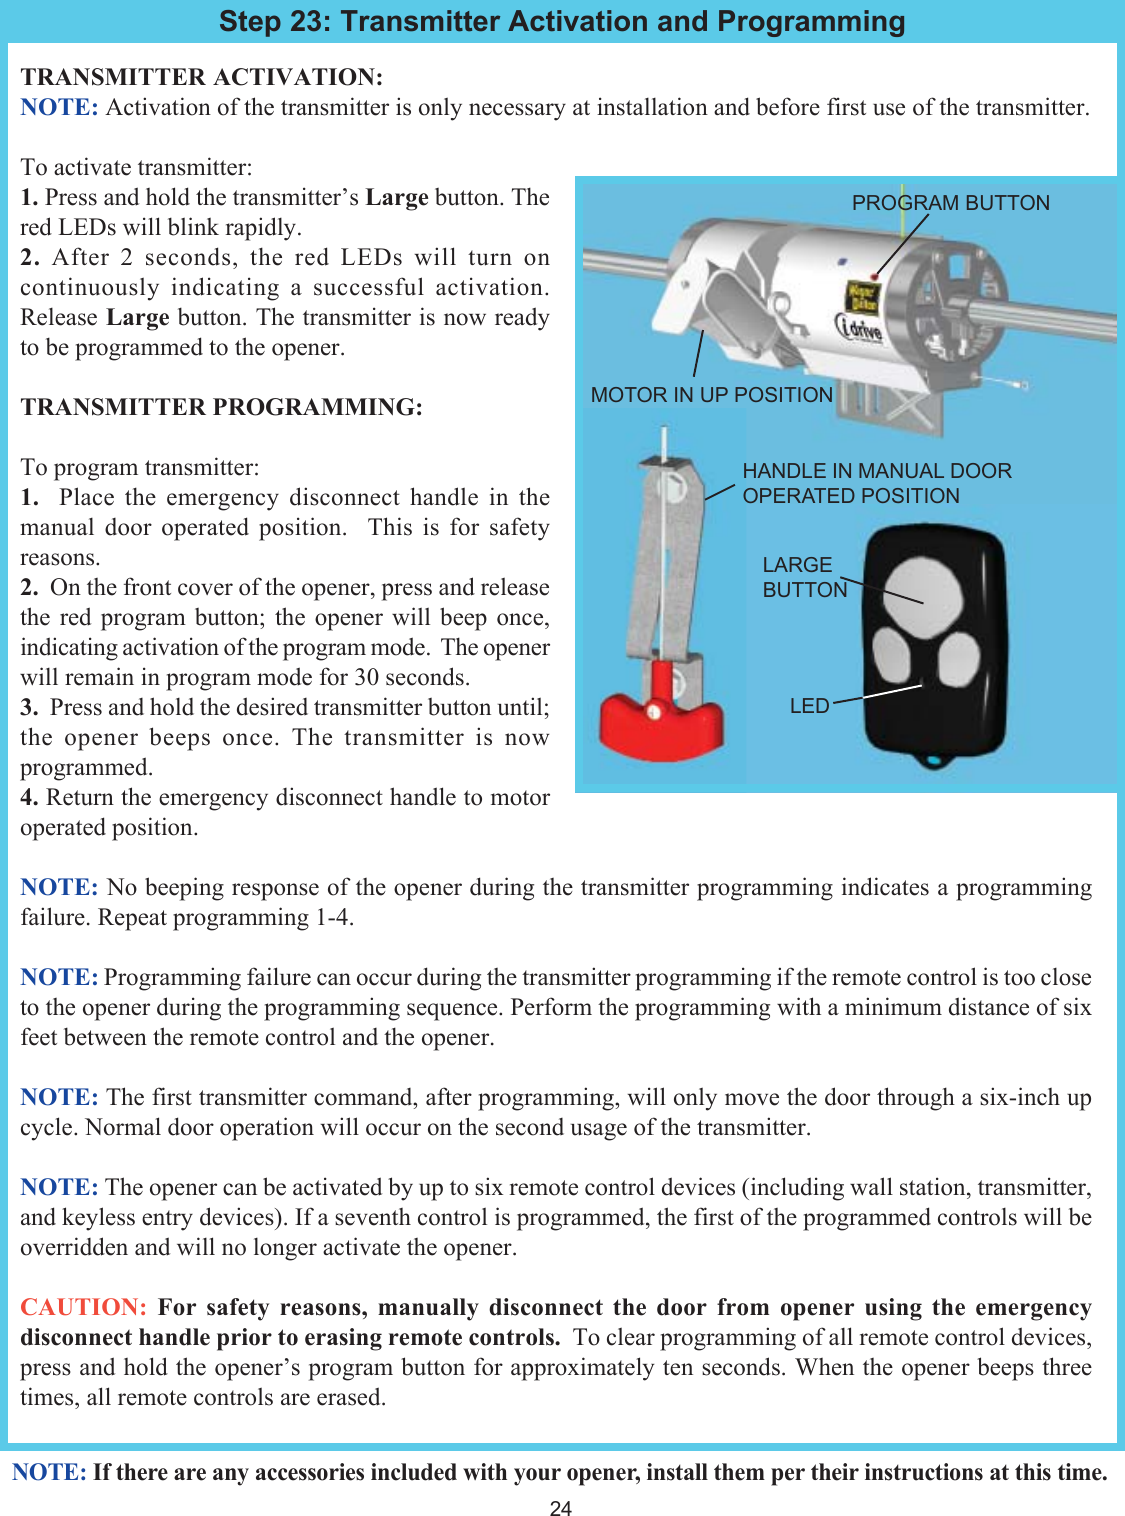
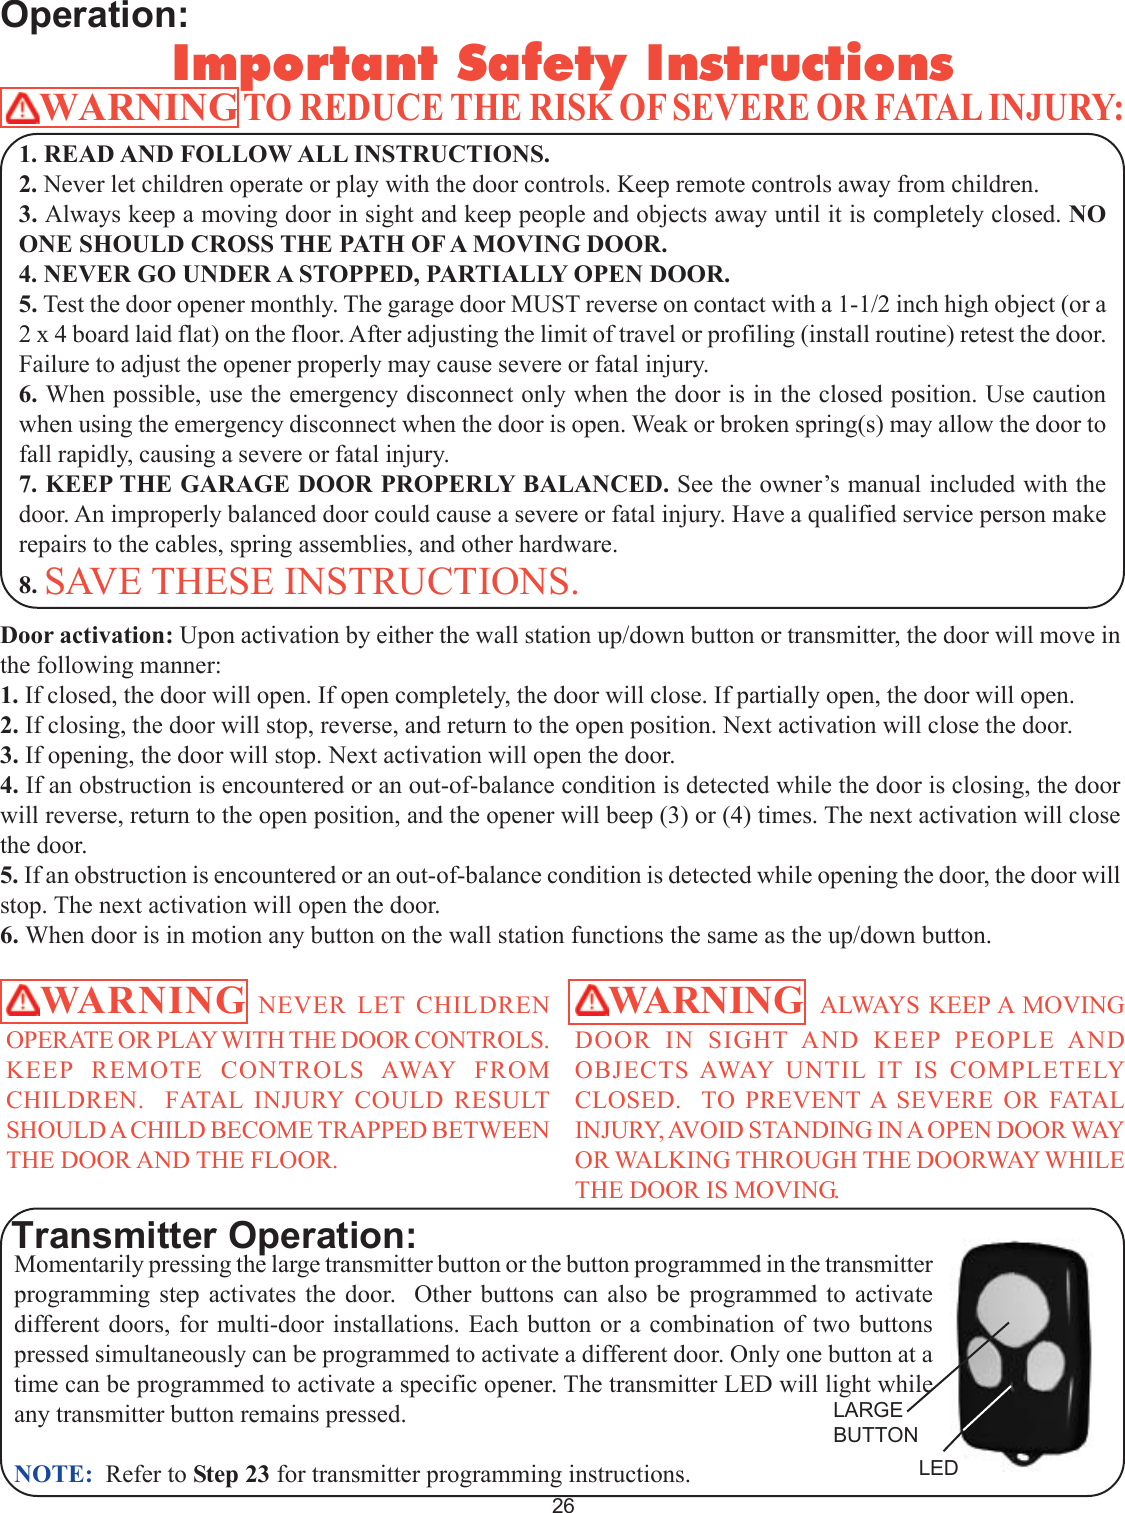
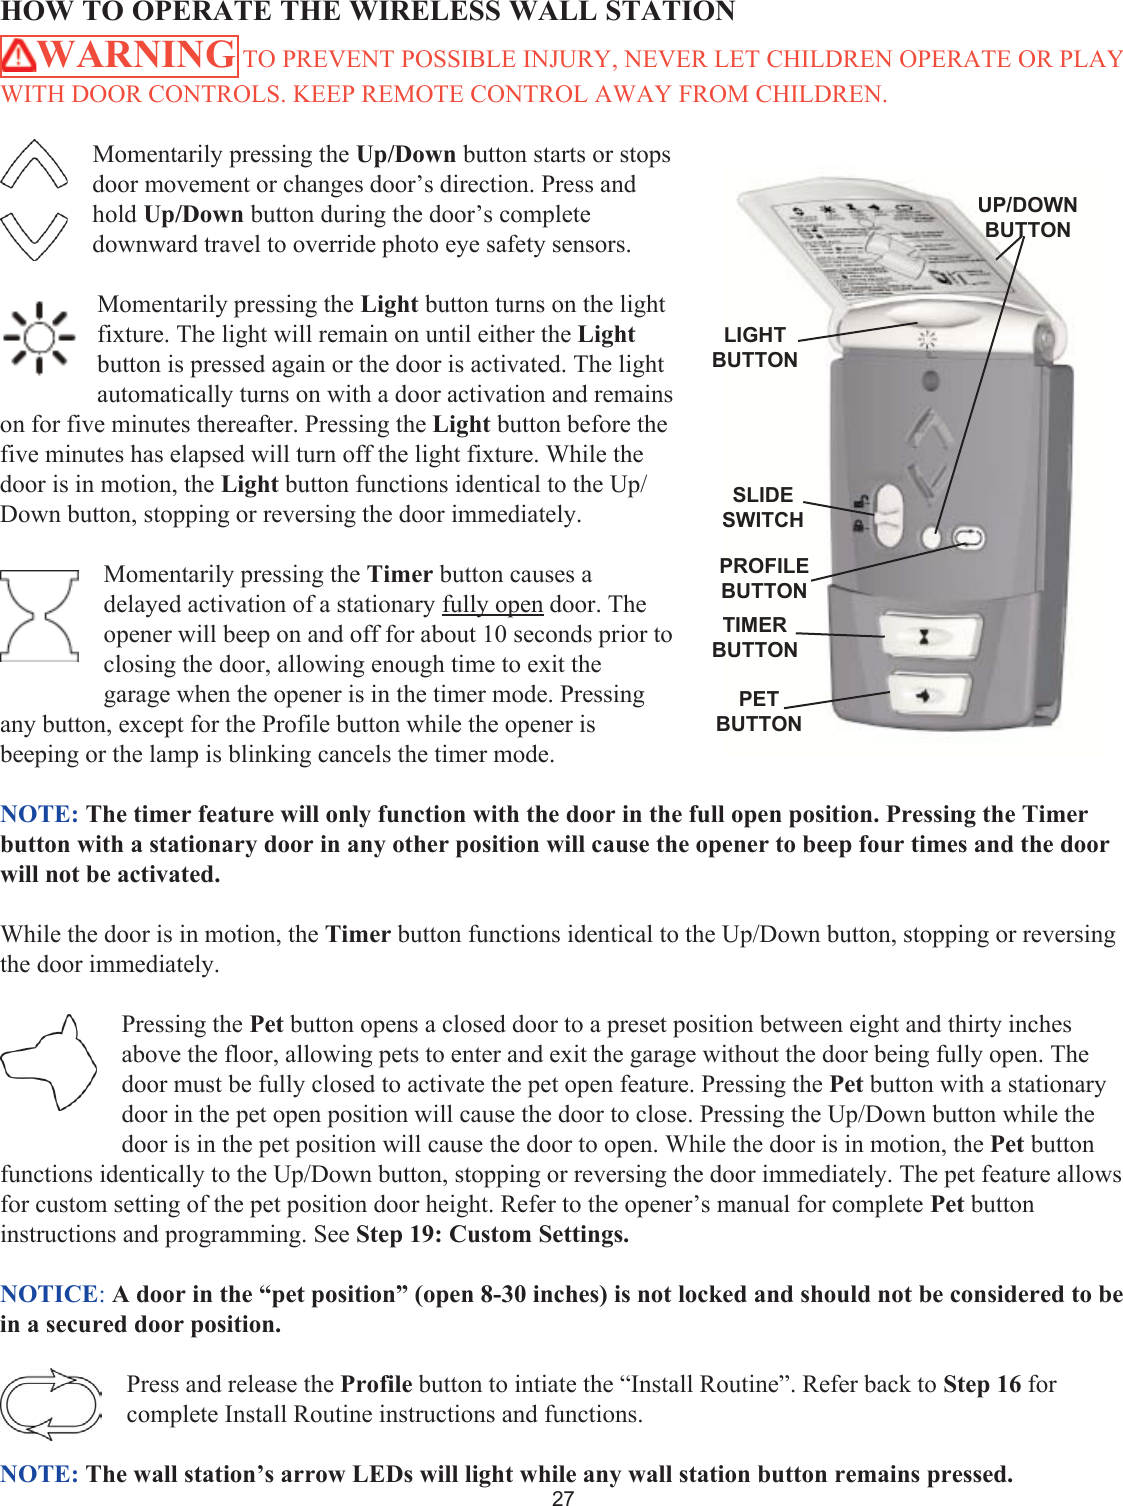
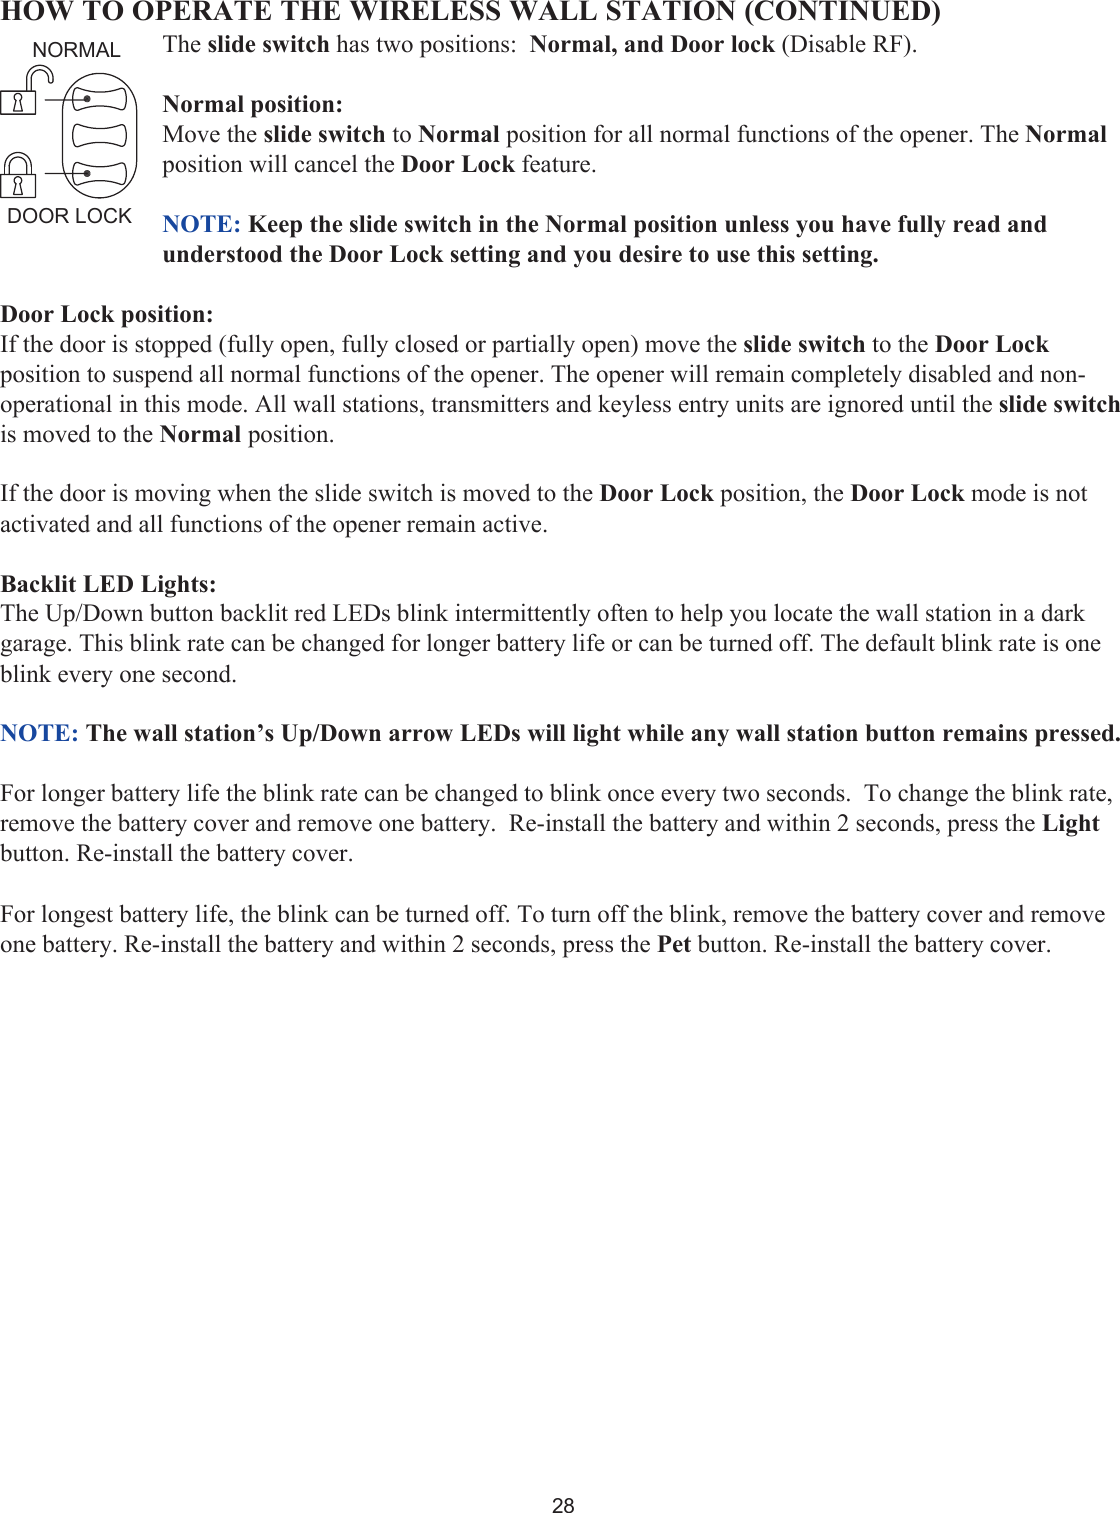
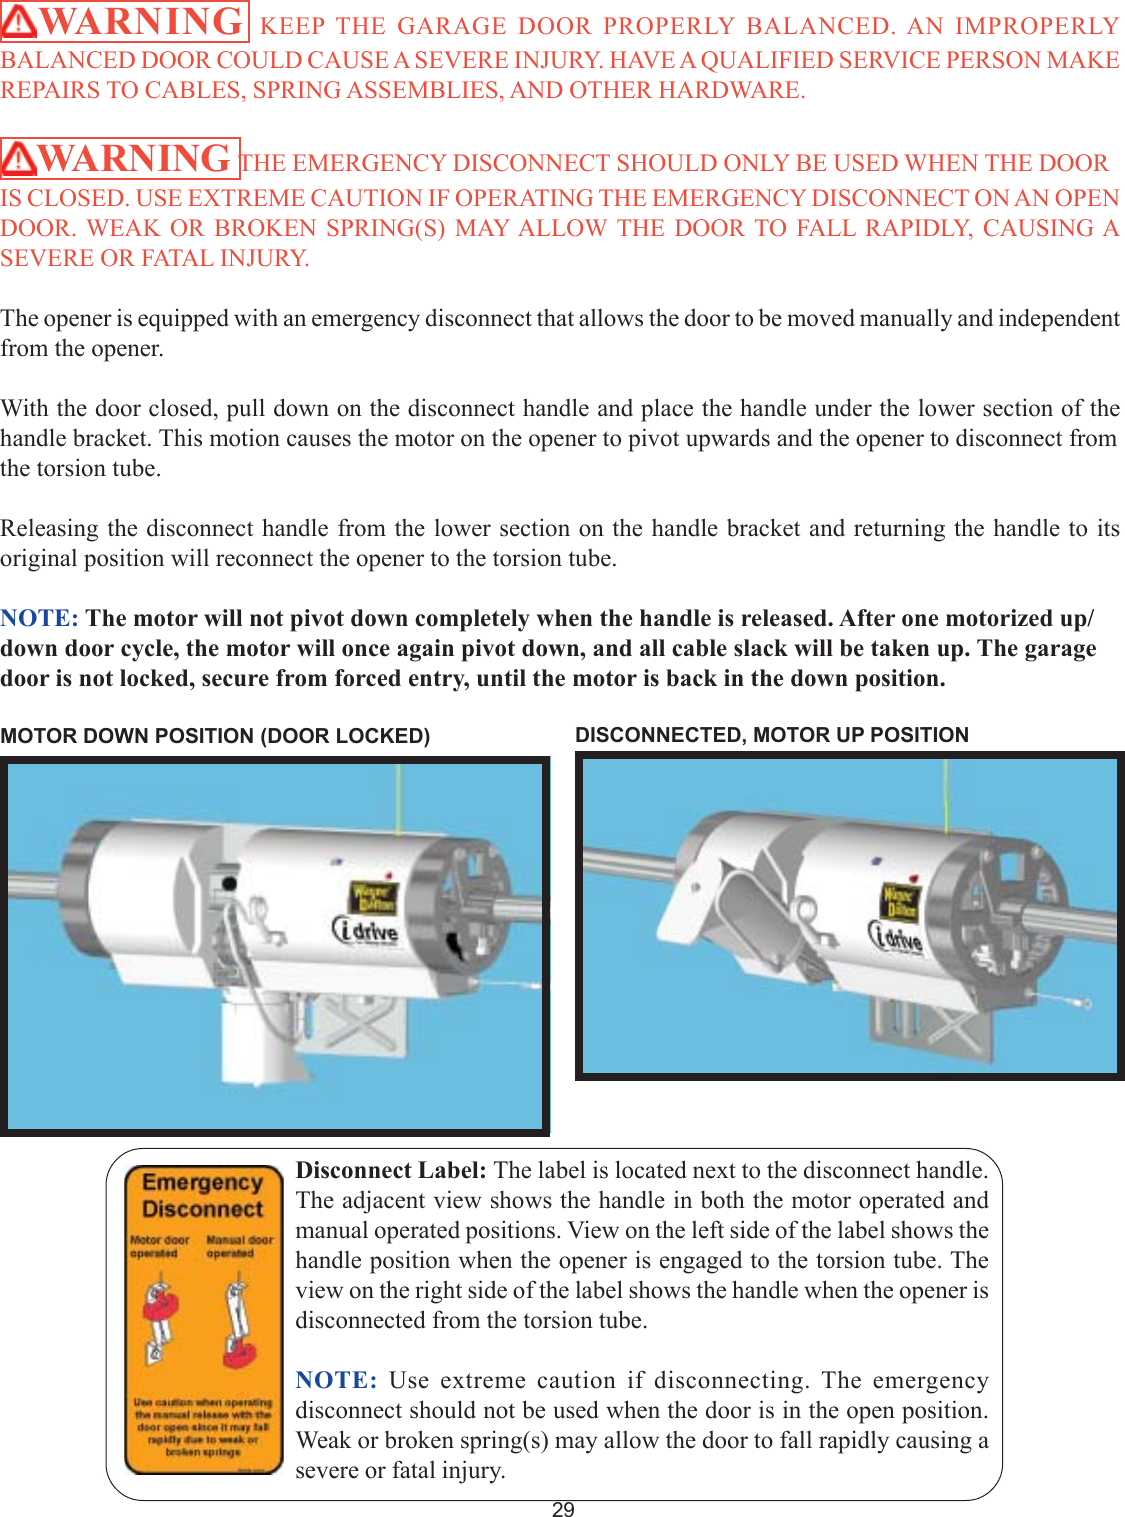
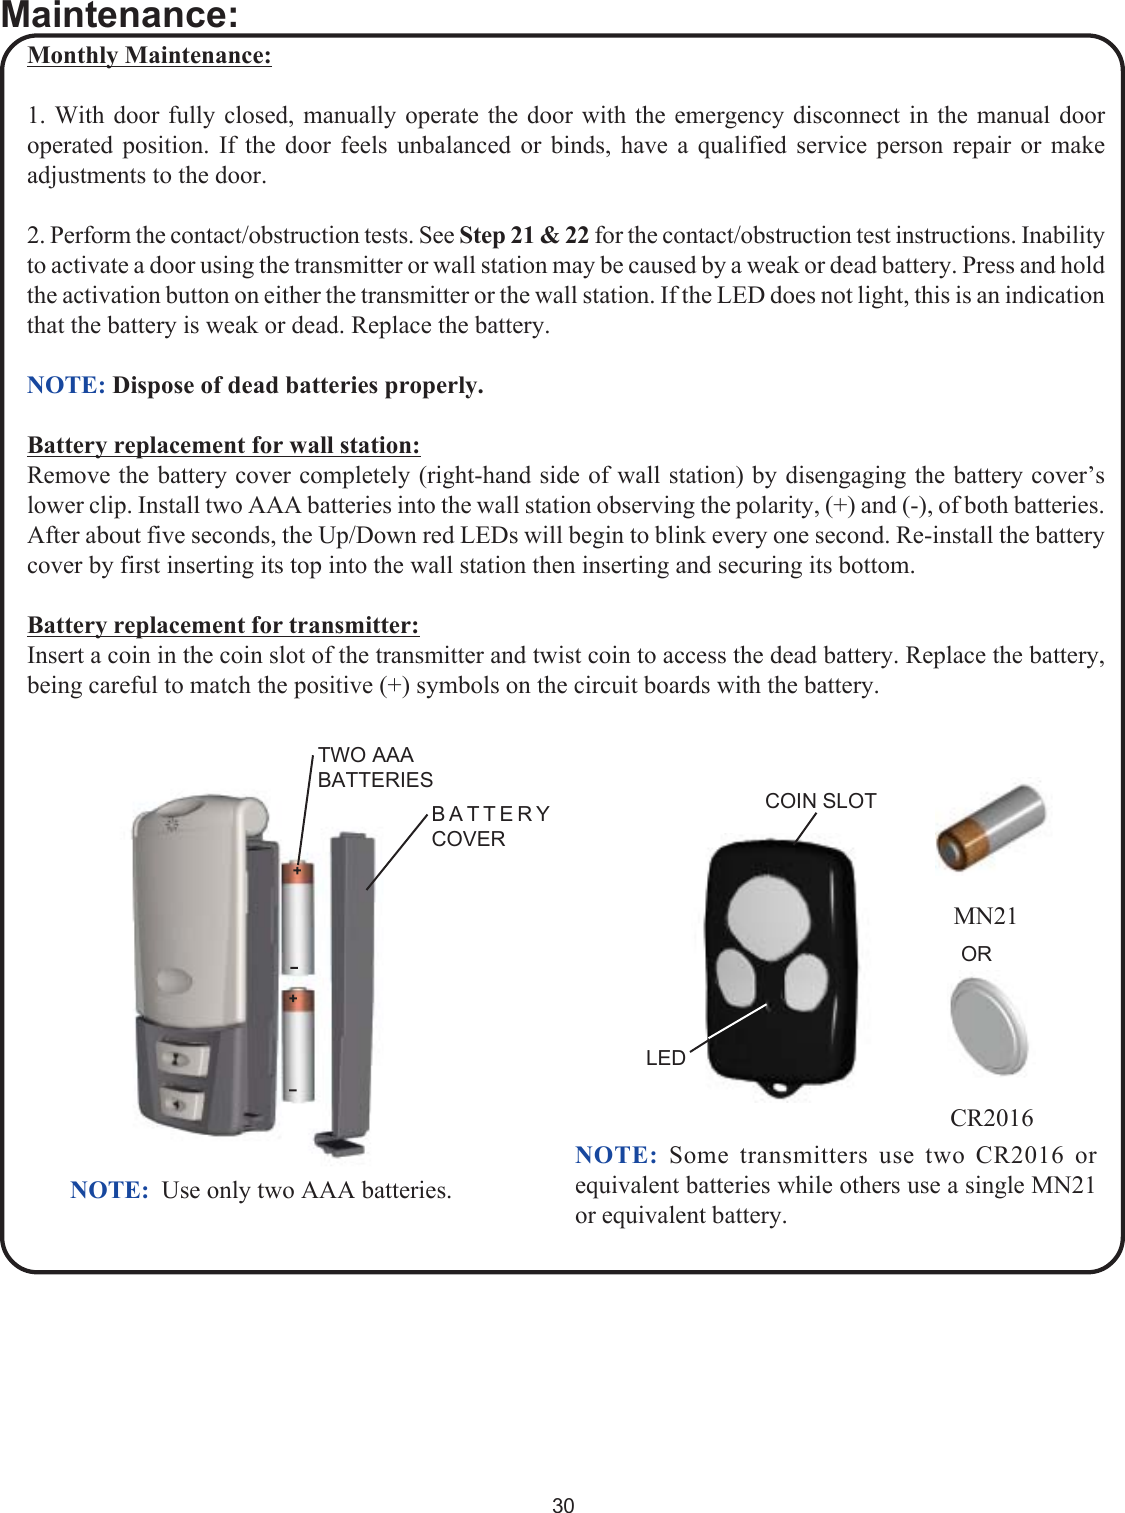
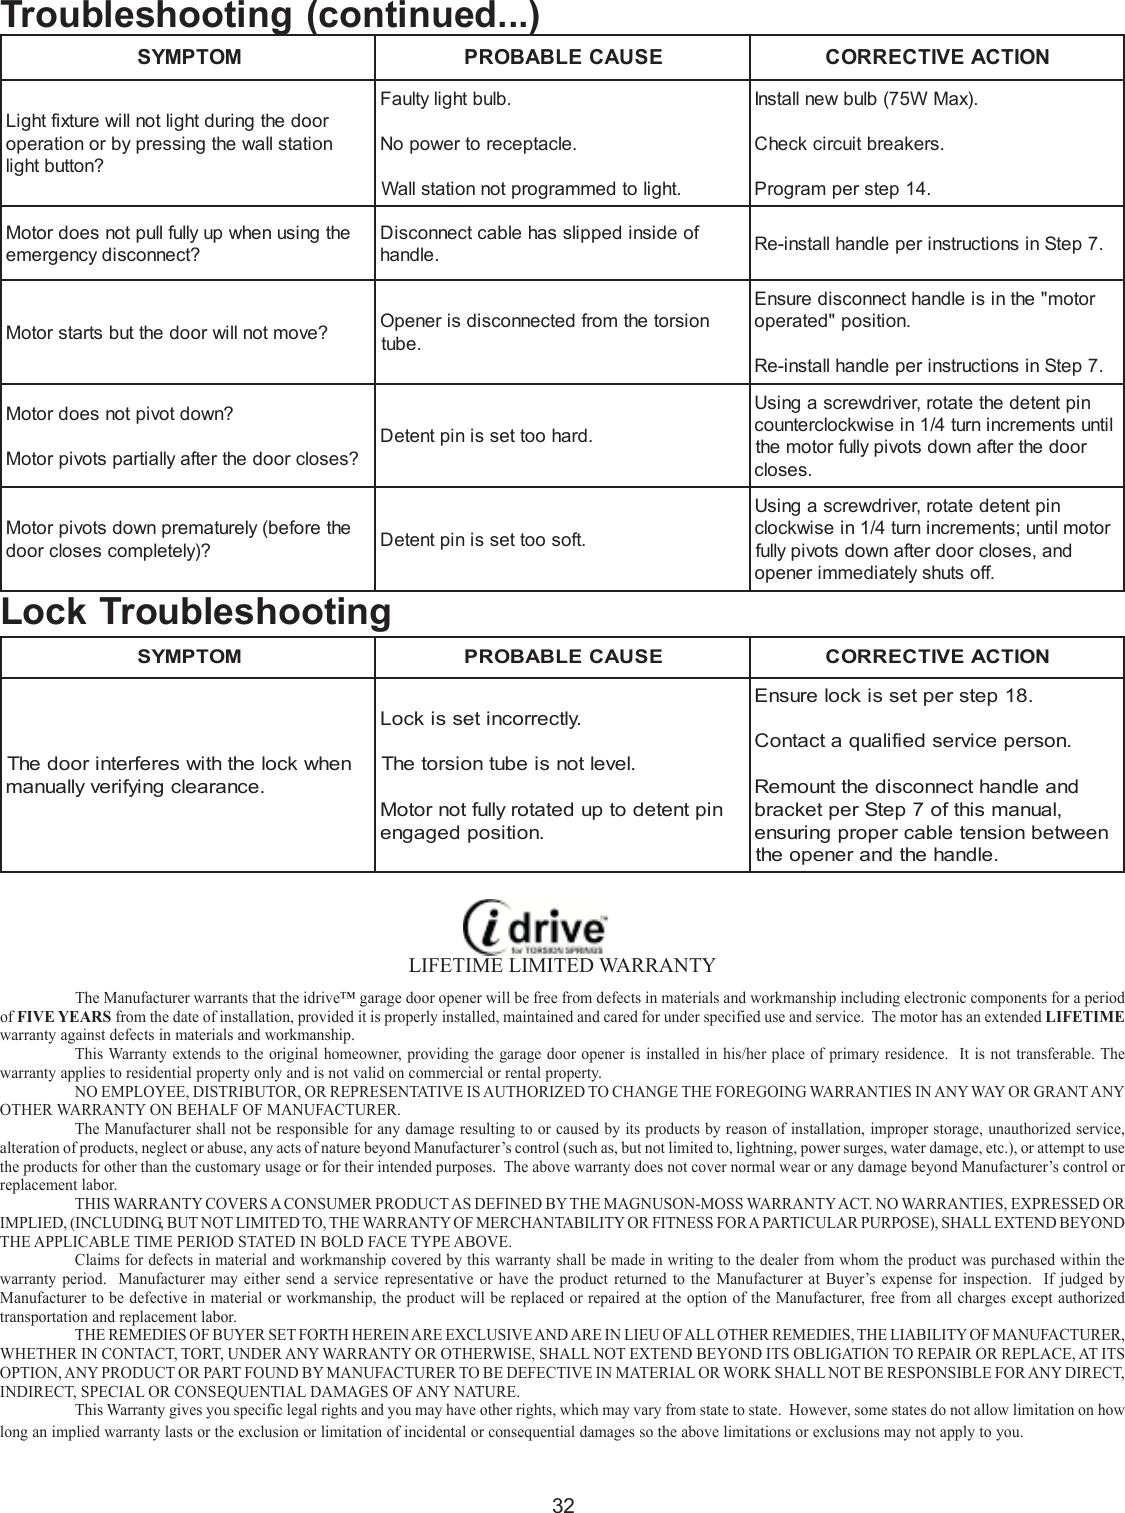
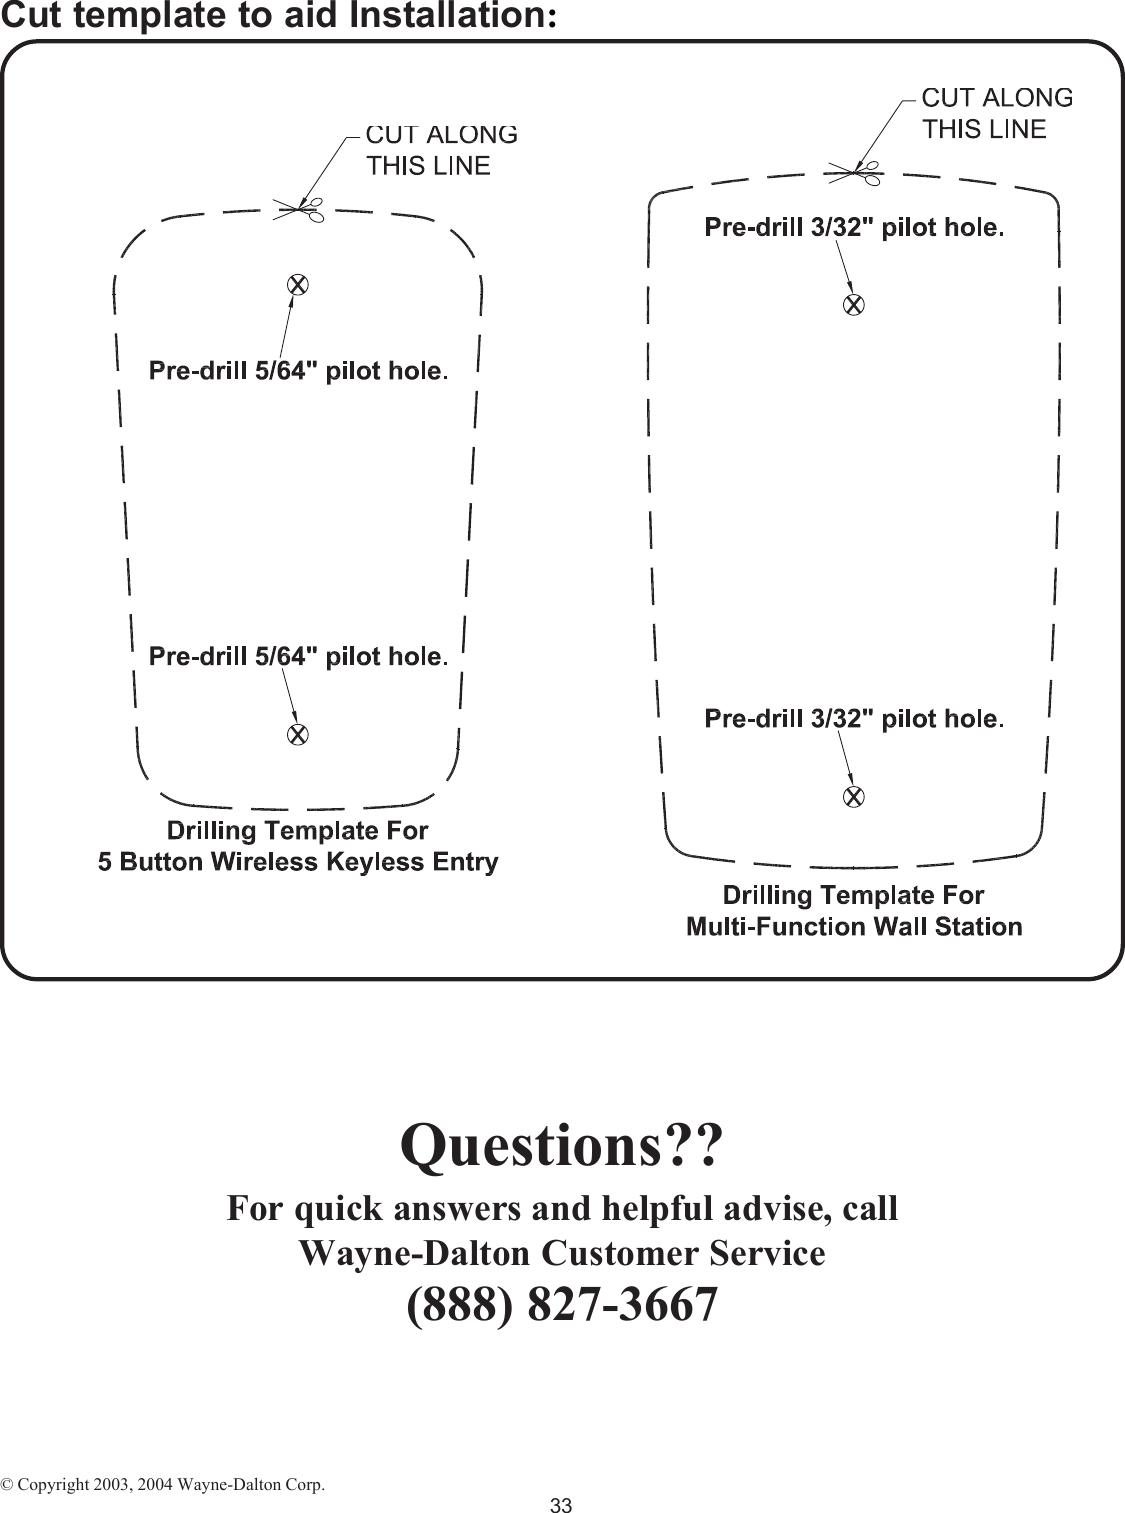
OWNERS MANUAL
Navigation menu
Upload a User Manual
Namespaces
Wiki Guide
HTML
PDF
Info
Views
User Manual
Discussion / Help
Navigation