Whirlpool Microwave Development GH7208X Microwave Oven User Manual
Whirlpool Microwave Products Development Limited. Microwave Oven Users Manual
UserManual.wiki
>
Whirlpool Microwave Development
>
GH7208X User Manual
Users Manual
Navigation menu
Upload a User Manual
Namespaces
Wiki Guide
HTML
PDF
Info
Views
User Manual
Discussion / Help
Navigation
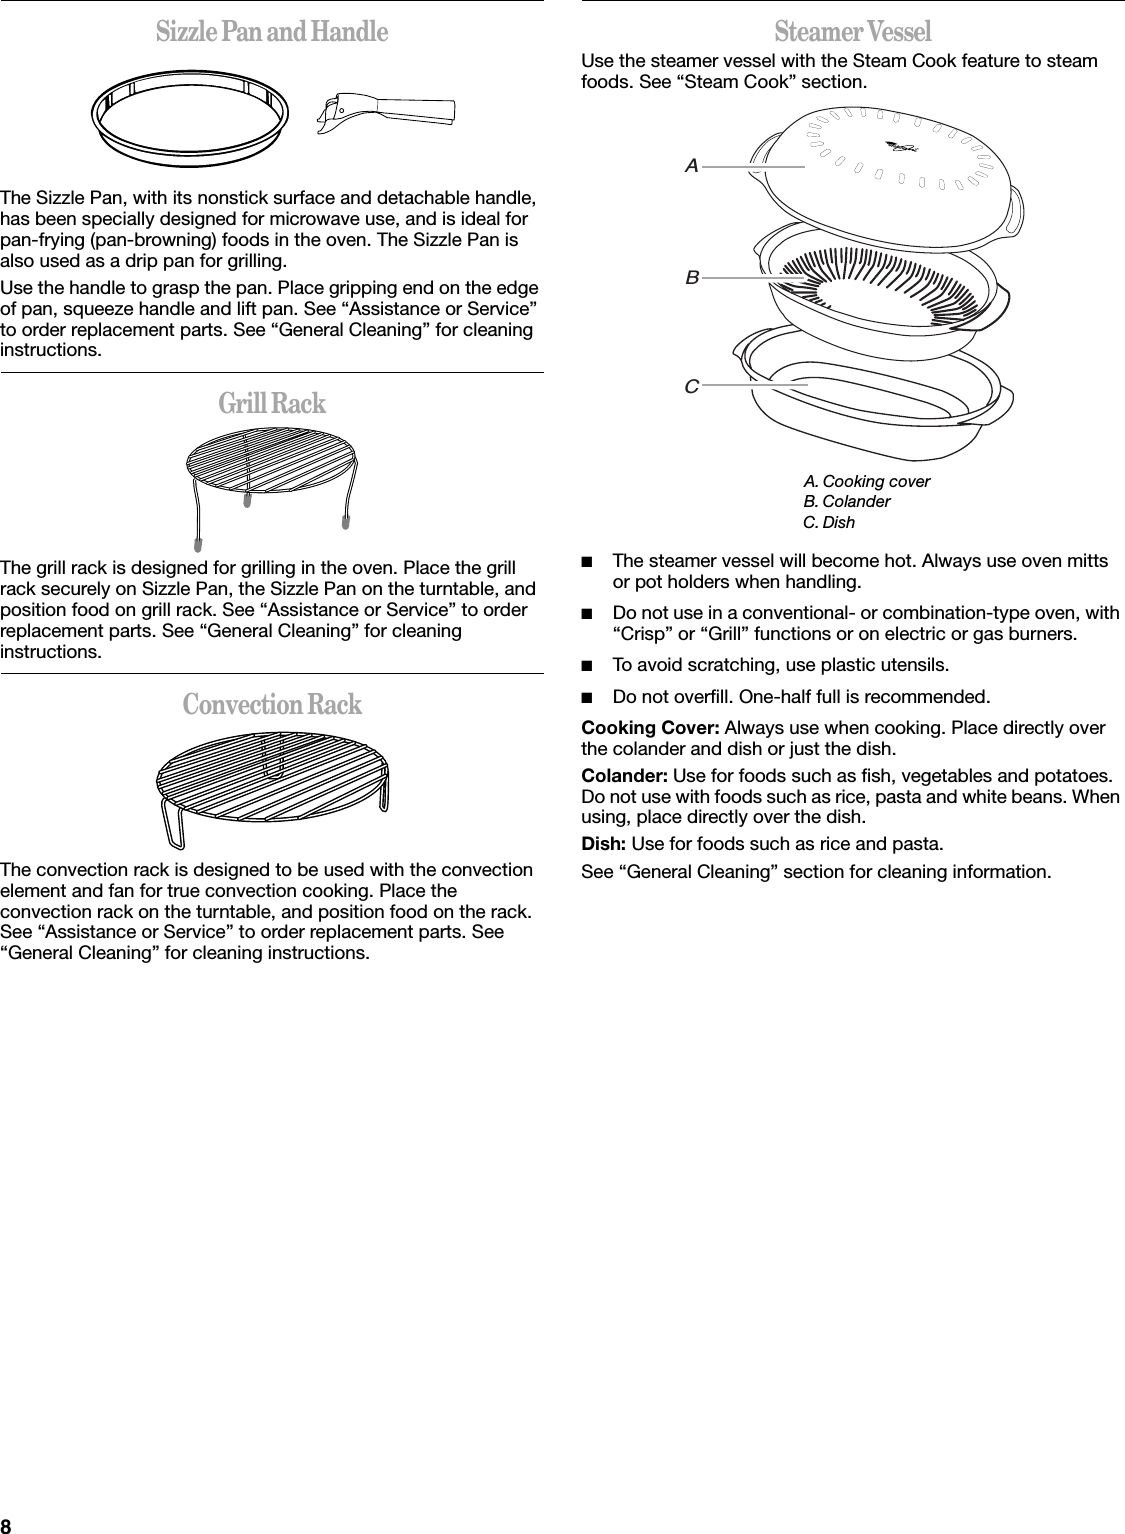

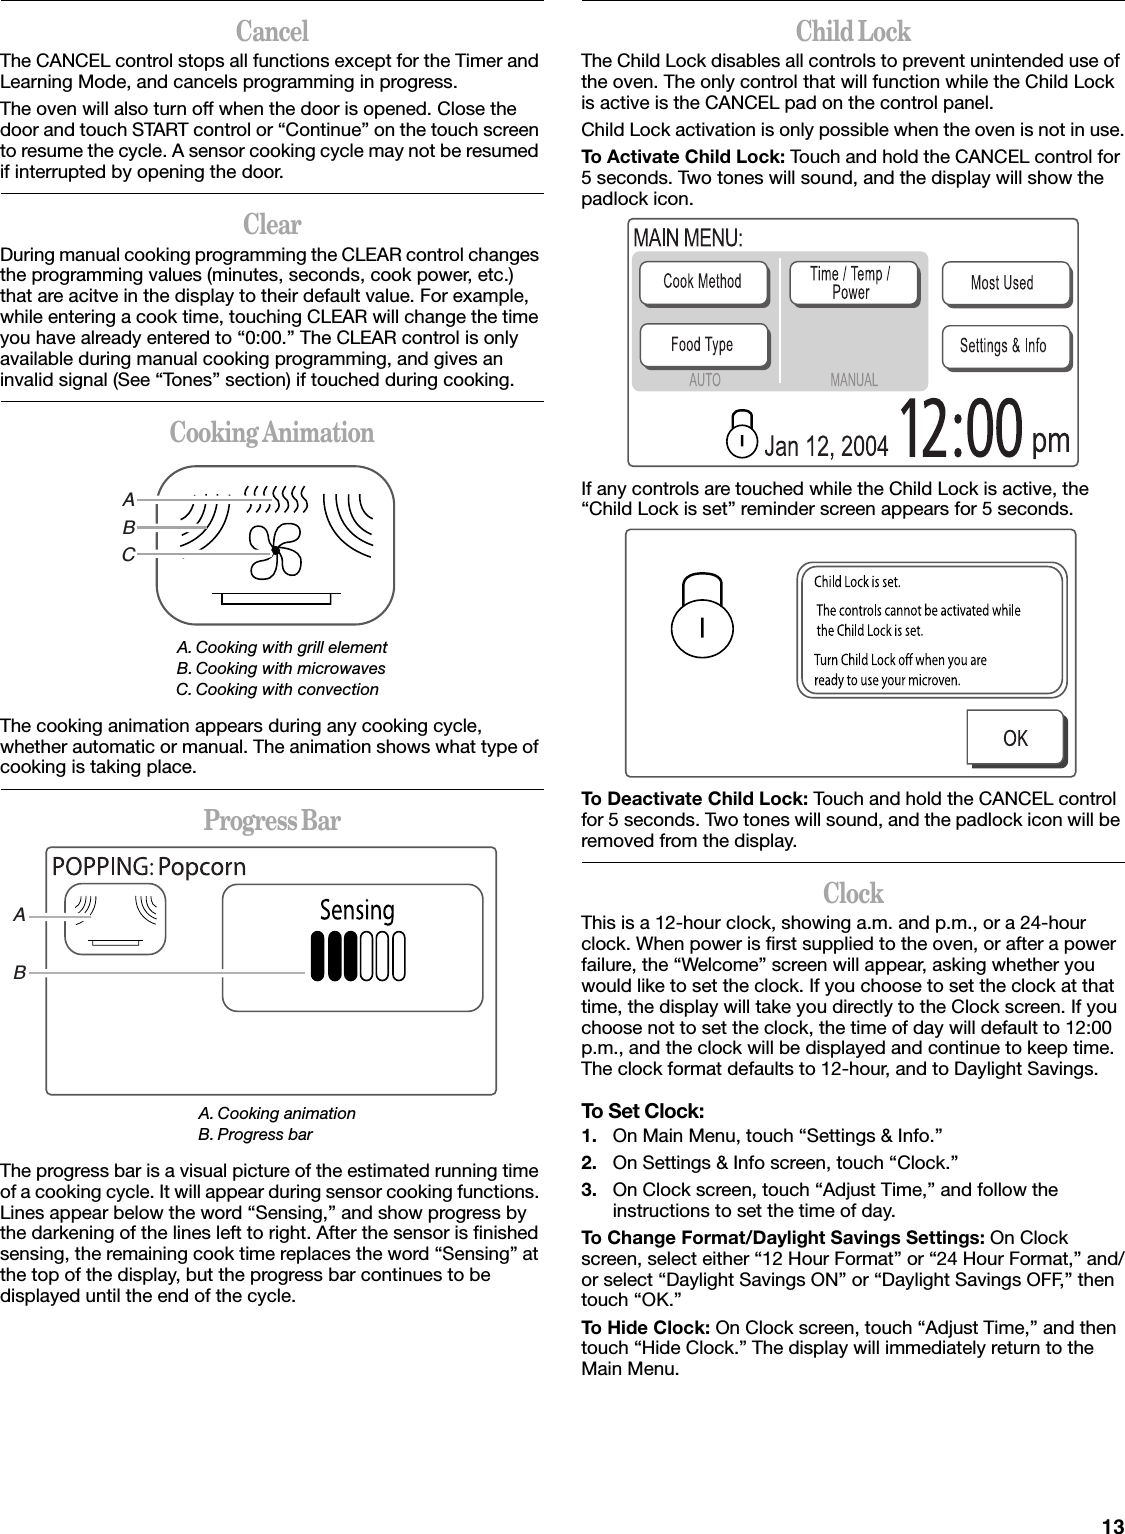
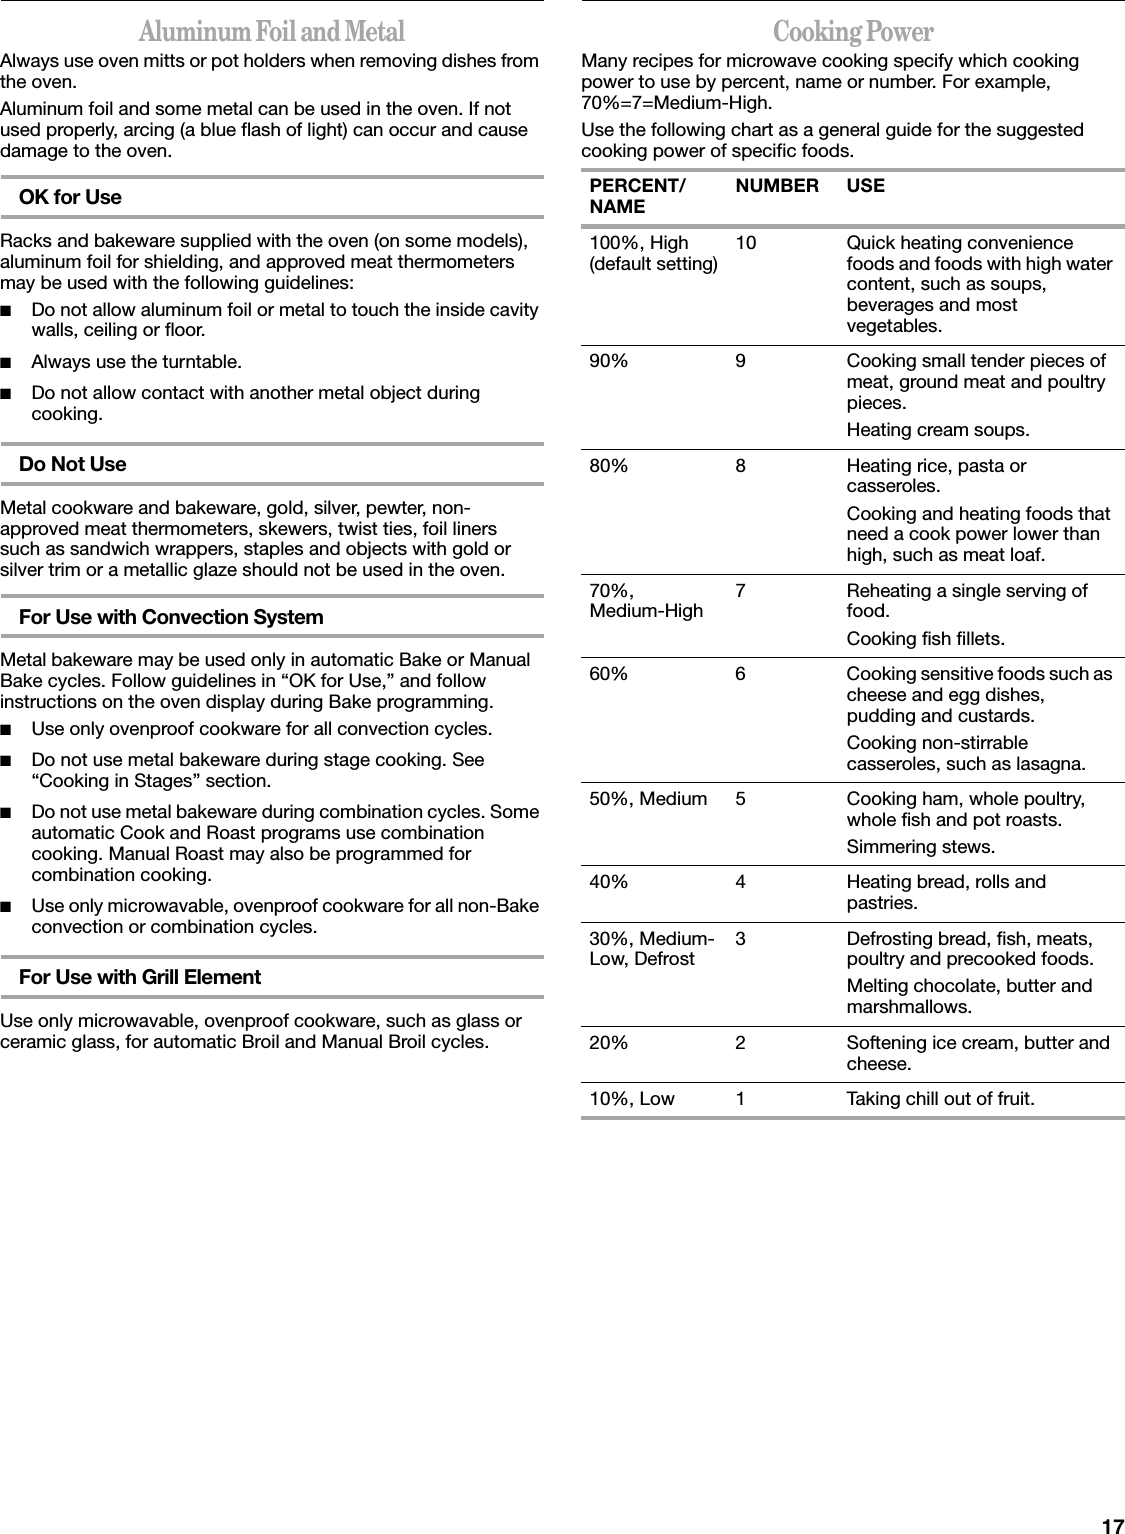

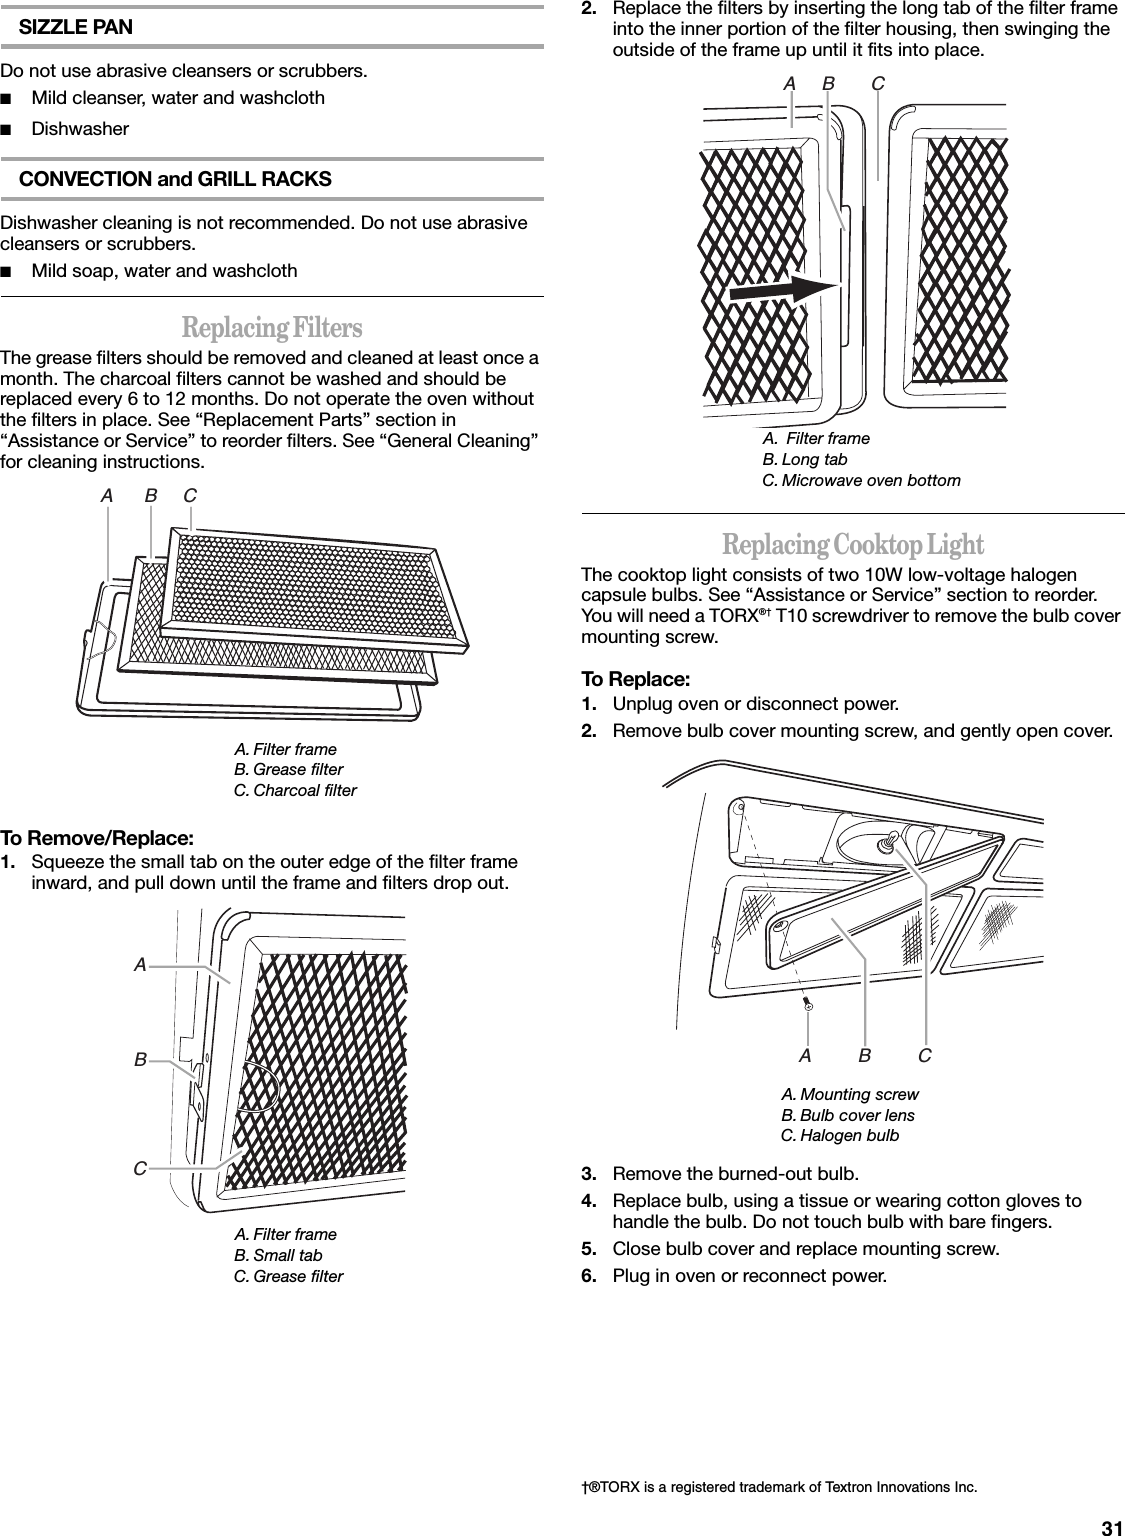
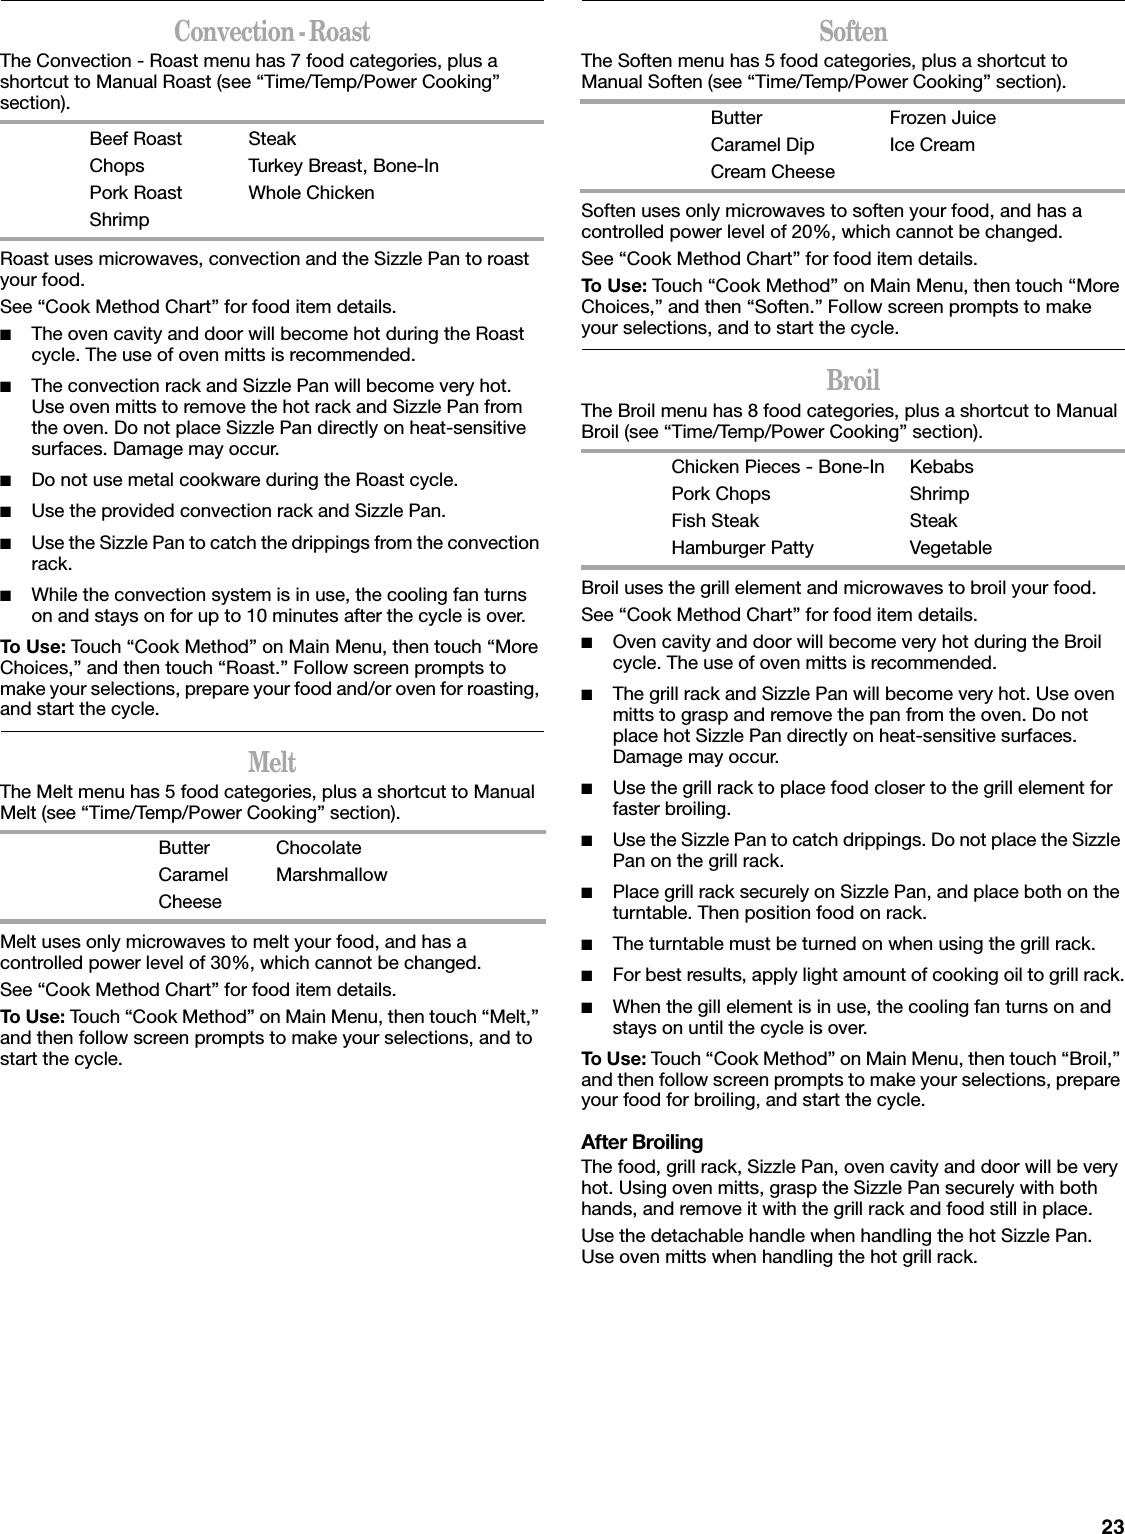
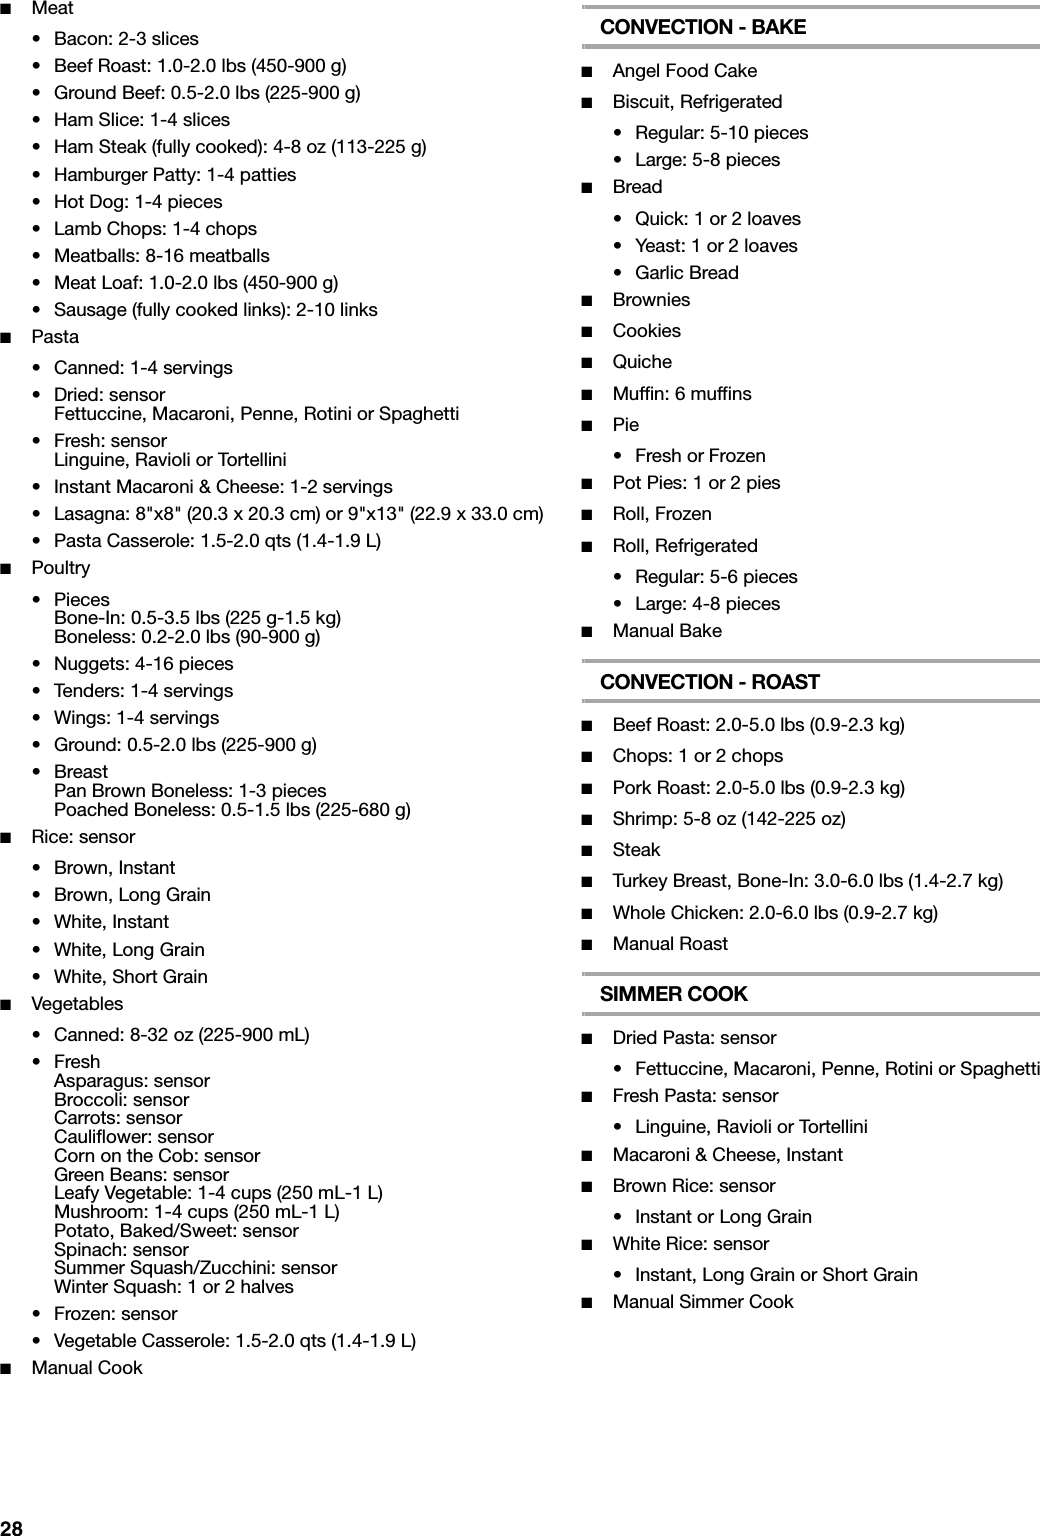
![21PreheatingPreheating is programmed in some automatic convection and/or combination cycles. Preheating may be skipped after it has started by touching “Skip Preheat” on the touch screen. However, for optimum results, we recommend completing the preheating phase of each cycle in which preheating is programmed.DonenessDoneness for food items may be adjusted for most automatic cycles. Before starting a cycle, touch “Doneness” on the touch screen, and adjust the doneness with “+” (more done) or “-” (less done) controls. The “+” control adds to, and the “-” control subtracts from the recommended default cook time.The more done and less done settings in most foods for which doneness may be adjusted are equal. That is, the same amount of time may be added to or subtracted from the cycle. Meat cycles have fewer less done settings than more done settings.Quick Touch MenuThe Quick Touch Menu is a shortcut to 10 common program cycles. Unlike the Most Used menu, this list of preset cycles cannot be updated. These programs are microwave-only cycles.Menu programsTo Use Quick Touch Menu: Touch QUICK TOUCH MENU control, and then follow the screen prompts.Popcorn SensorPopcorn is a sensor function. The sensor determines the appropriate popping time of commercially packaged microwavable popcorn.The sensor will determine accurate popping times for bag sizes: Regular (3.0-3.5 oz [85-99 g]) and Snack (1.5-1.75 oz [43-50 g]).■Do not place bag on convection rack or grill rack.■Do not use regular paper bags or glassware.■Pop only 1 package of popcorn at a time.■Follow manufacturer’s instructions when using a microwave popcorn popper.■Listen for popping to slow to 1 pop every 1 to 2 seconds, then stop the cycle. Do not try to pop unpopped kernels.■Use fresh bags of popcorn for optimal results.■Cooking results may vary by brand and fat content.To Use Popcorn Sensor:1. Place popcorn bag on the turntable and close the door.2. Touch POPCORN SENSOR control.The oven will start automatically. The display will show when the oven is sensing, and will start counting down the time when sensing has finished.When the cycle ends, the end-of-cycle tones will sound, followed by reminder tones.3. Touch CANCEL control or open the door to stop reminder tones. The display will return to the Main Menu after CANCEL control is touched.Using Cook MethodThe Cook Method menu has 12 methods from which to choose.This menu allows you to start with the type of cooking you want, and then choose your specific food item. All food items are available through this menu.See each method’s respective section in this manual for method details.See “Cook Method Chart” for all of the programmed cycles.See “Main Menu” section for an example of how using the Cook Method menu works.To Use: Touch “Cook Method” on Main Menu, select your desired method, and then follow the screen prompts to select your food item and to start the cycle.Using Food TypeThe Food Type menu has 12 methods from which to choose.This menu allows you to choose what specific food item you want to cook, and then choose how you would like to cook it. All cook methods are available through this menu.See “Food Type Chart” in this manual, or review your Quick Reference Guide for all of the food items and programmed cycles.See “Main Menu” section for an example of how using the Food Type menu works.To Use: Touch “Food Type” on Main Menu, select your food category, and then follow the screen prompts to select your specific food item and cook method, and to start the cycle.Baked Potato (sensor) Canned VegetableBeverage Fresh Vegetable (sensor)Leftover Casserole Frozen Vegetable (sensor)Dinner Plate (sensor) Spaghetti (sensor)Frozen Entrée (sensor) White Rice Instant (sensor)Pizza LeftoverReheatDefrostCookBakeBroilMeltRoastSimmer CookSizzle PanSoftenSteam CookKids MenuBeverage & SoupBreadBreakfast FoodCasseroleDessertFish/SeafoodFrozen FoodGrains/Pasta/RiceMeatPoultryVegetablesMiscellaneous](https://usermanual.wiki/Whirlpool-Microwave-Development/GH7208X/User-Guide-574046-Page-21.png)
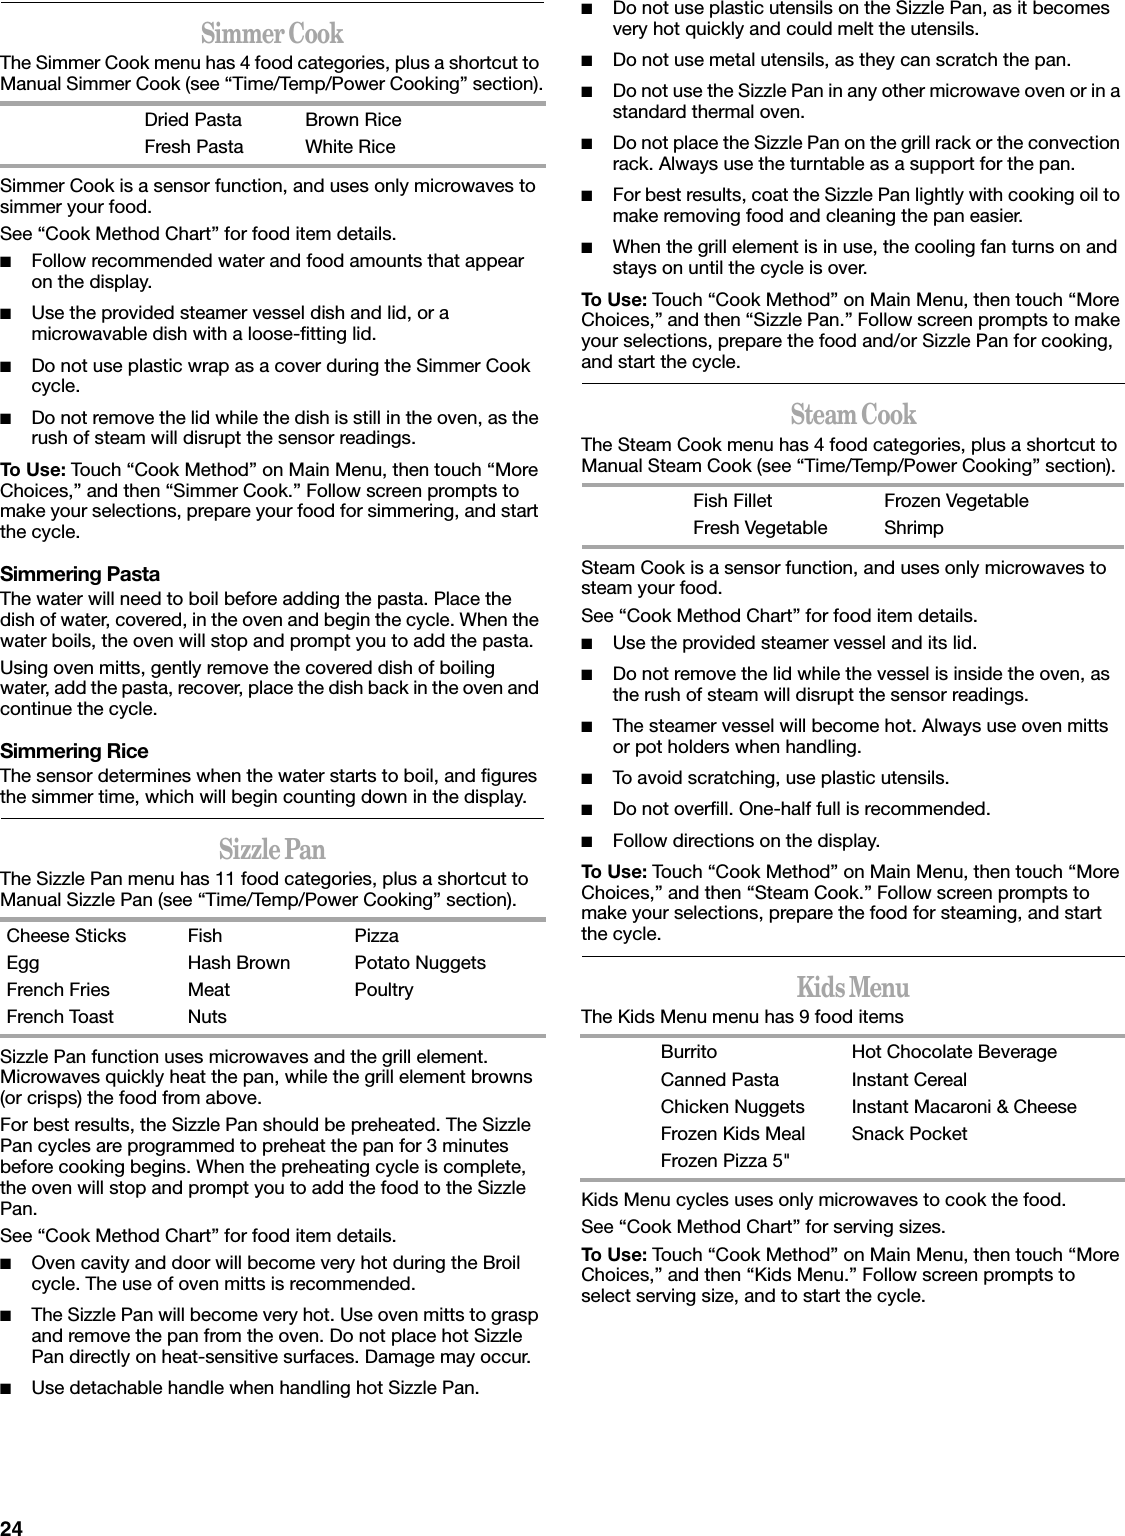

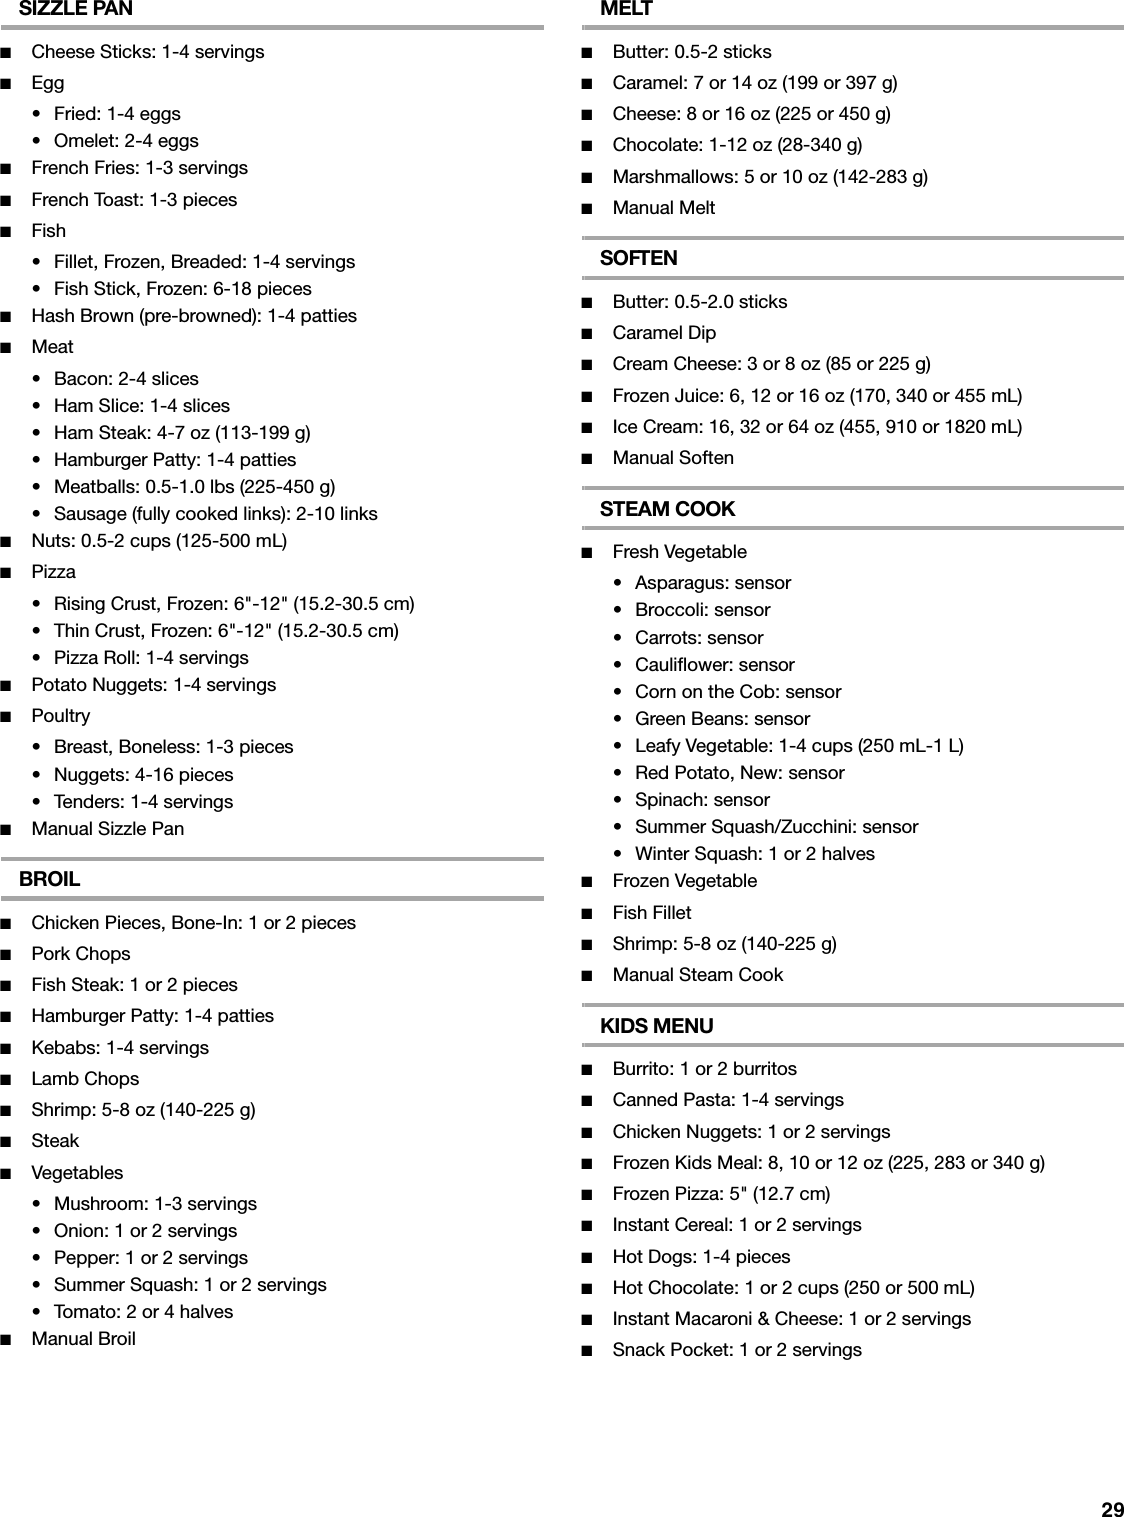
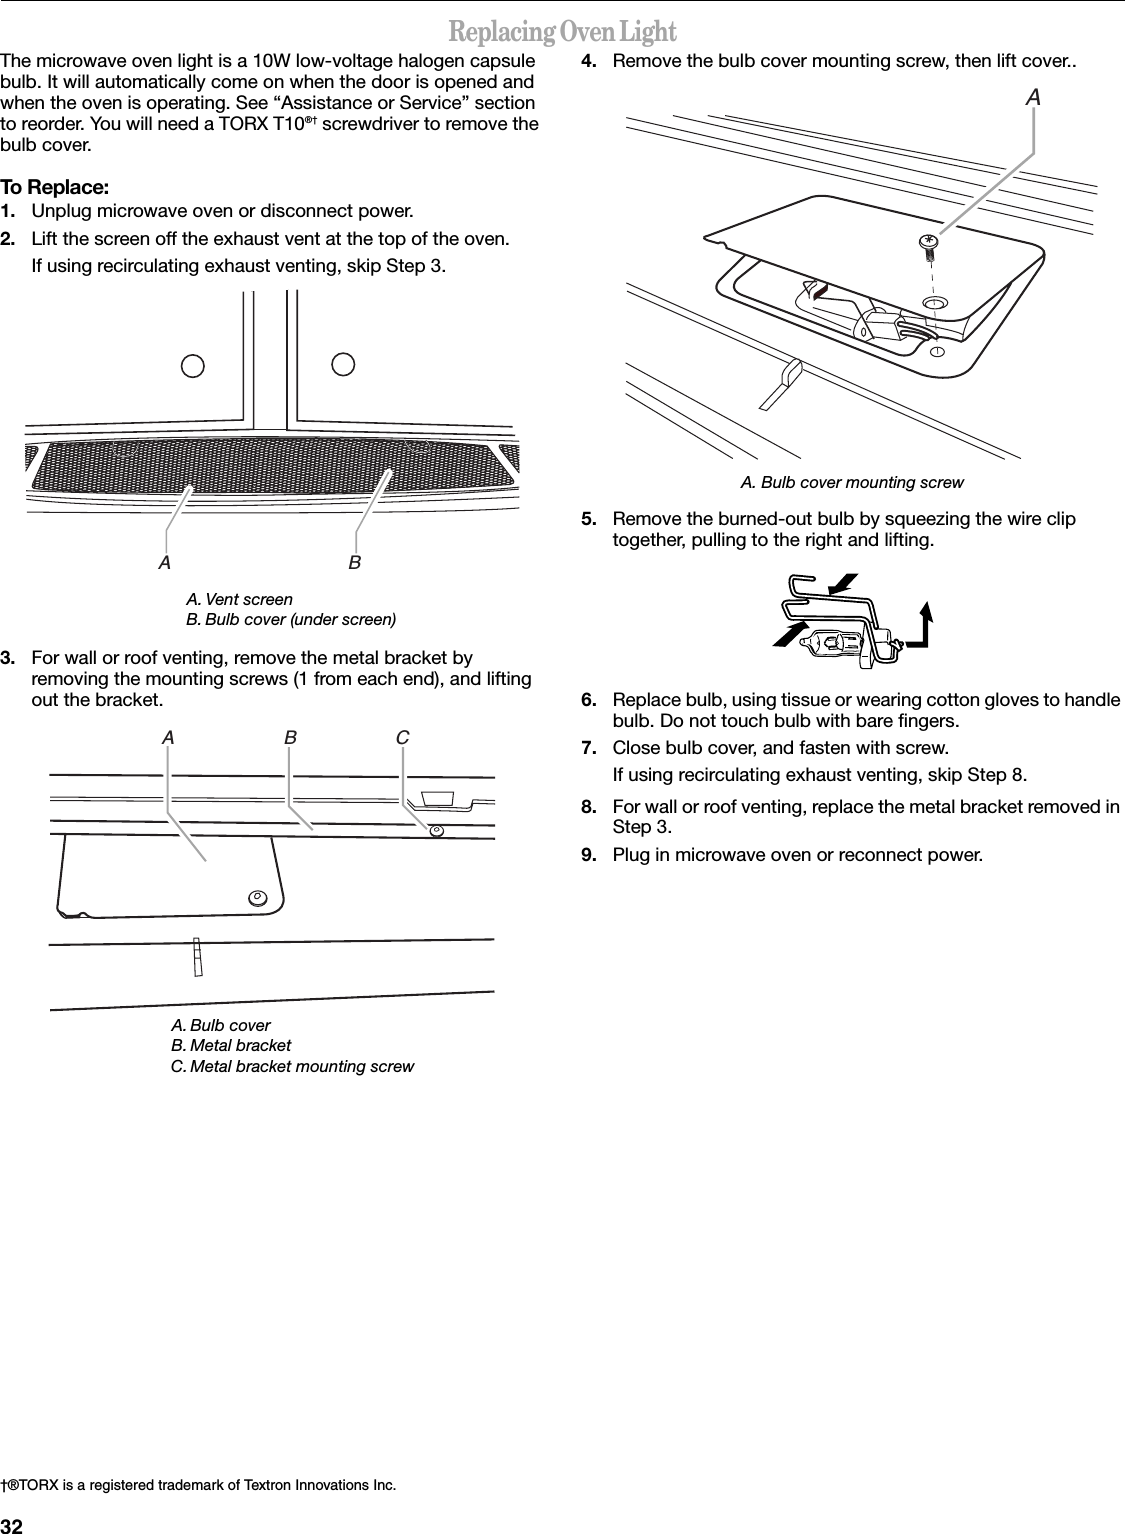
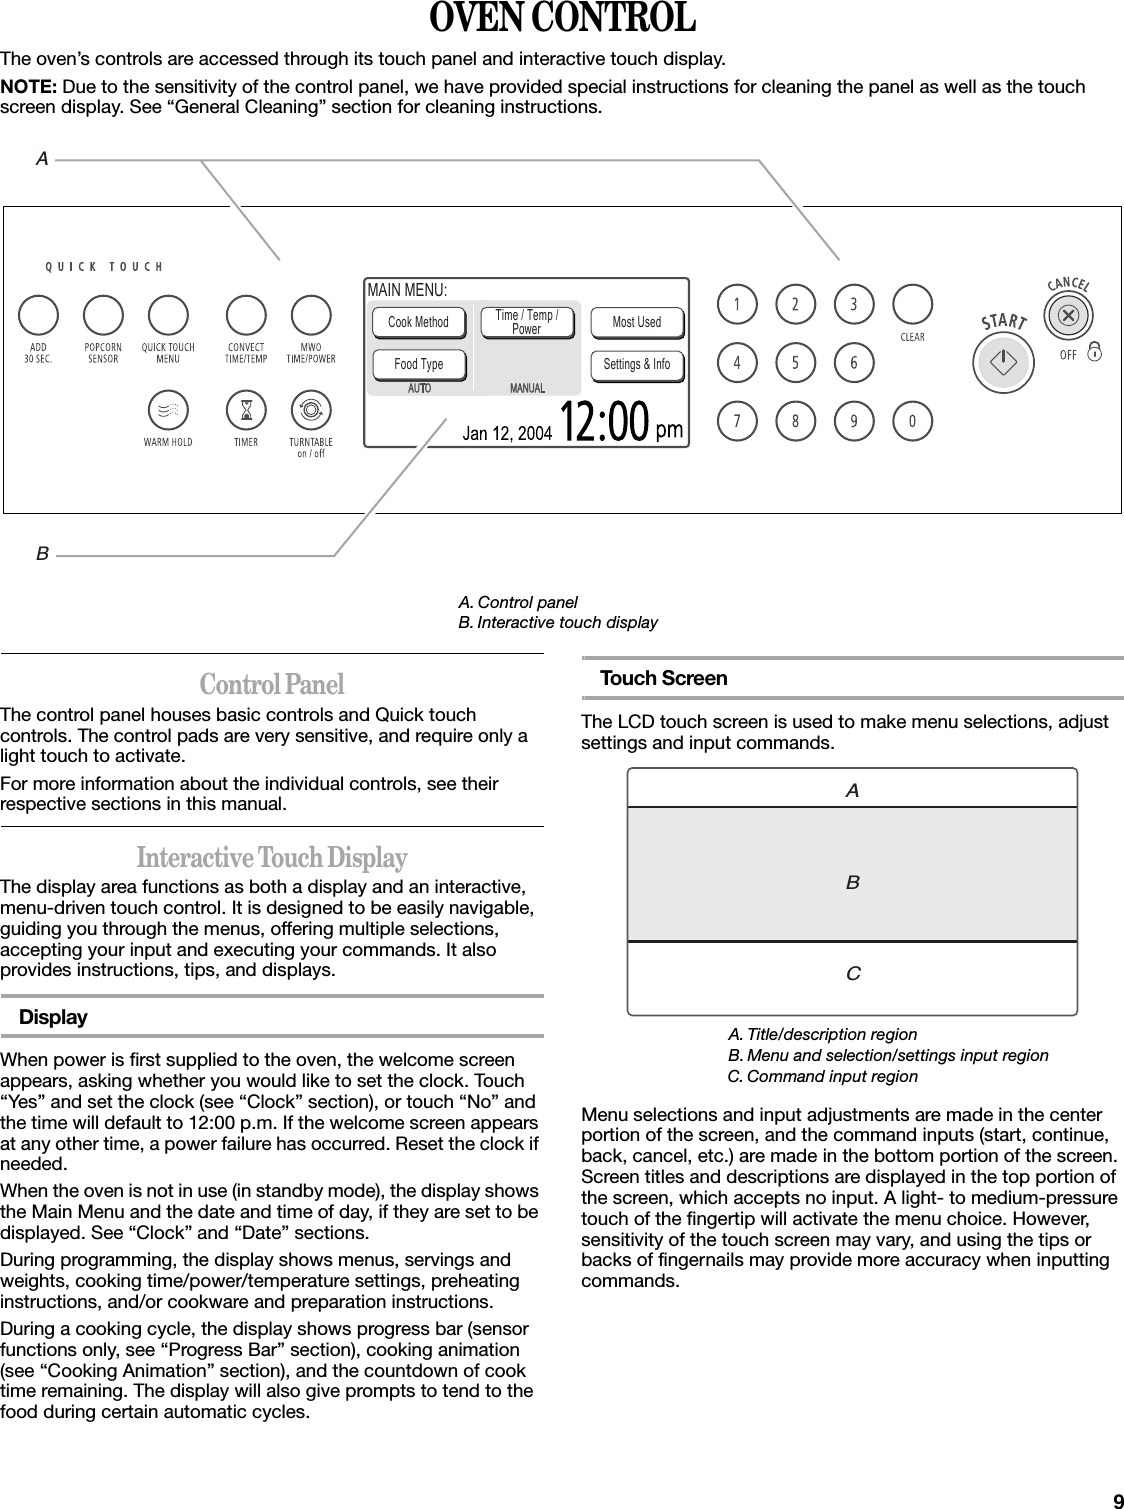
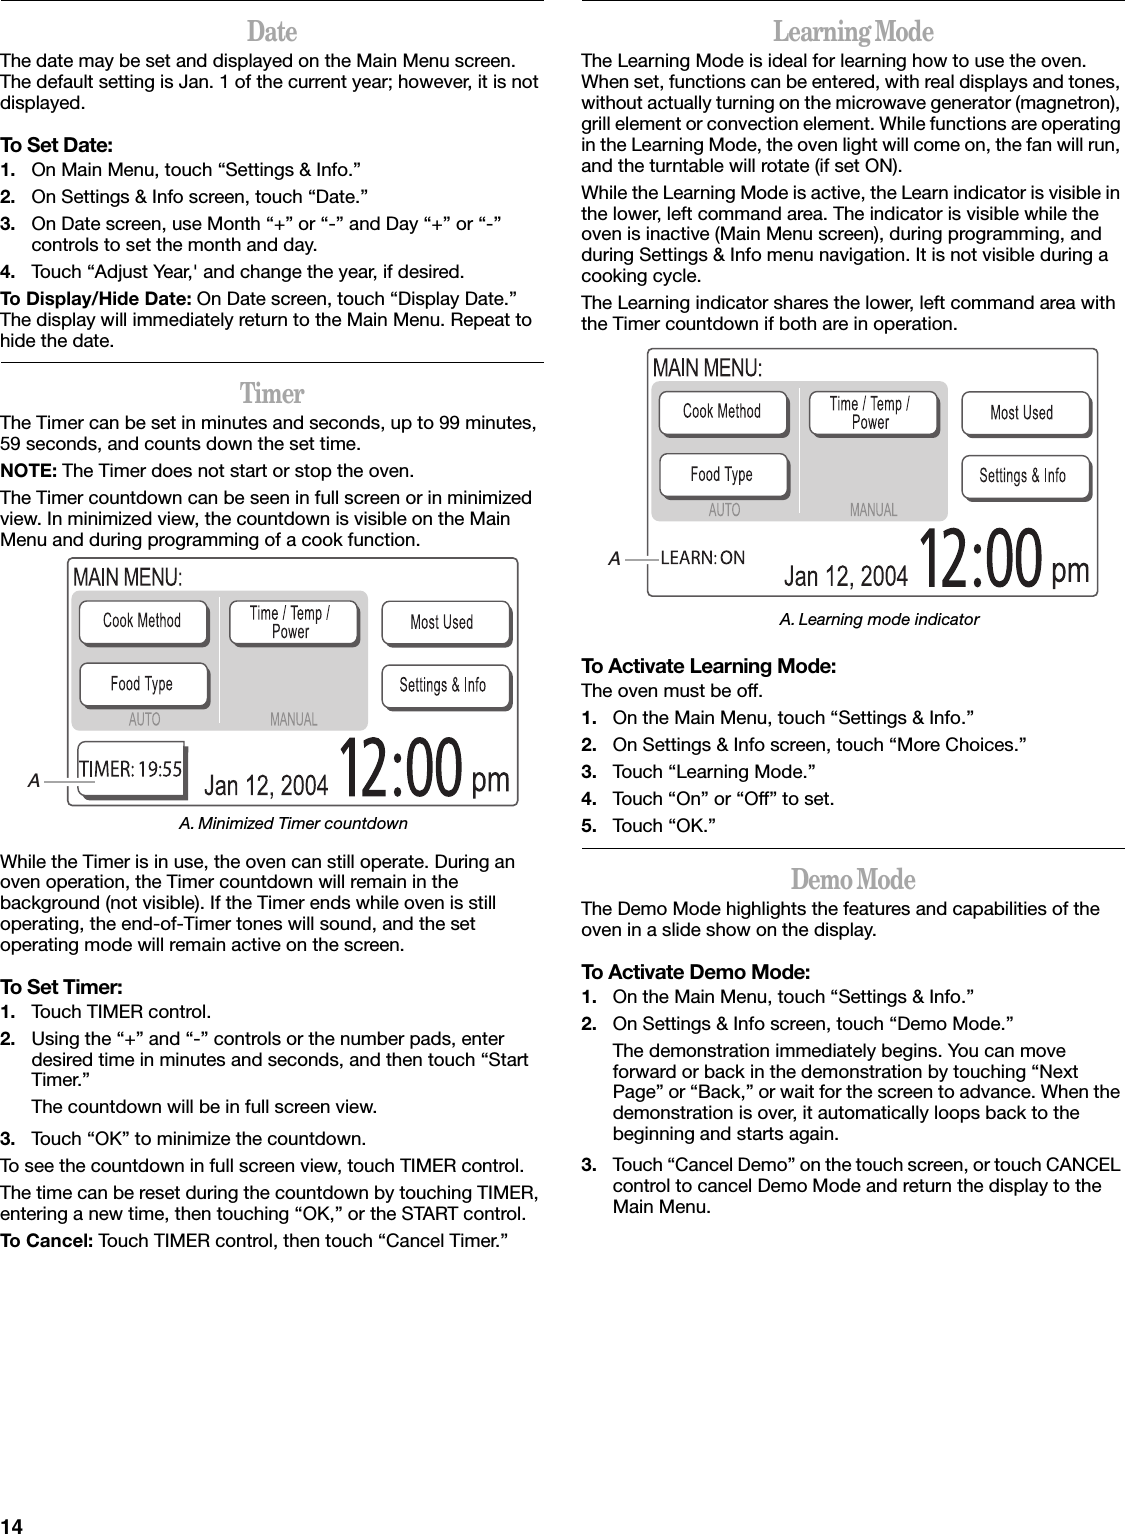
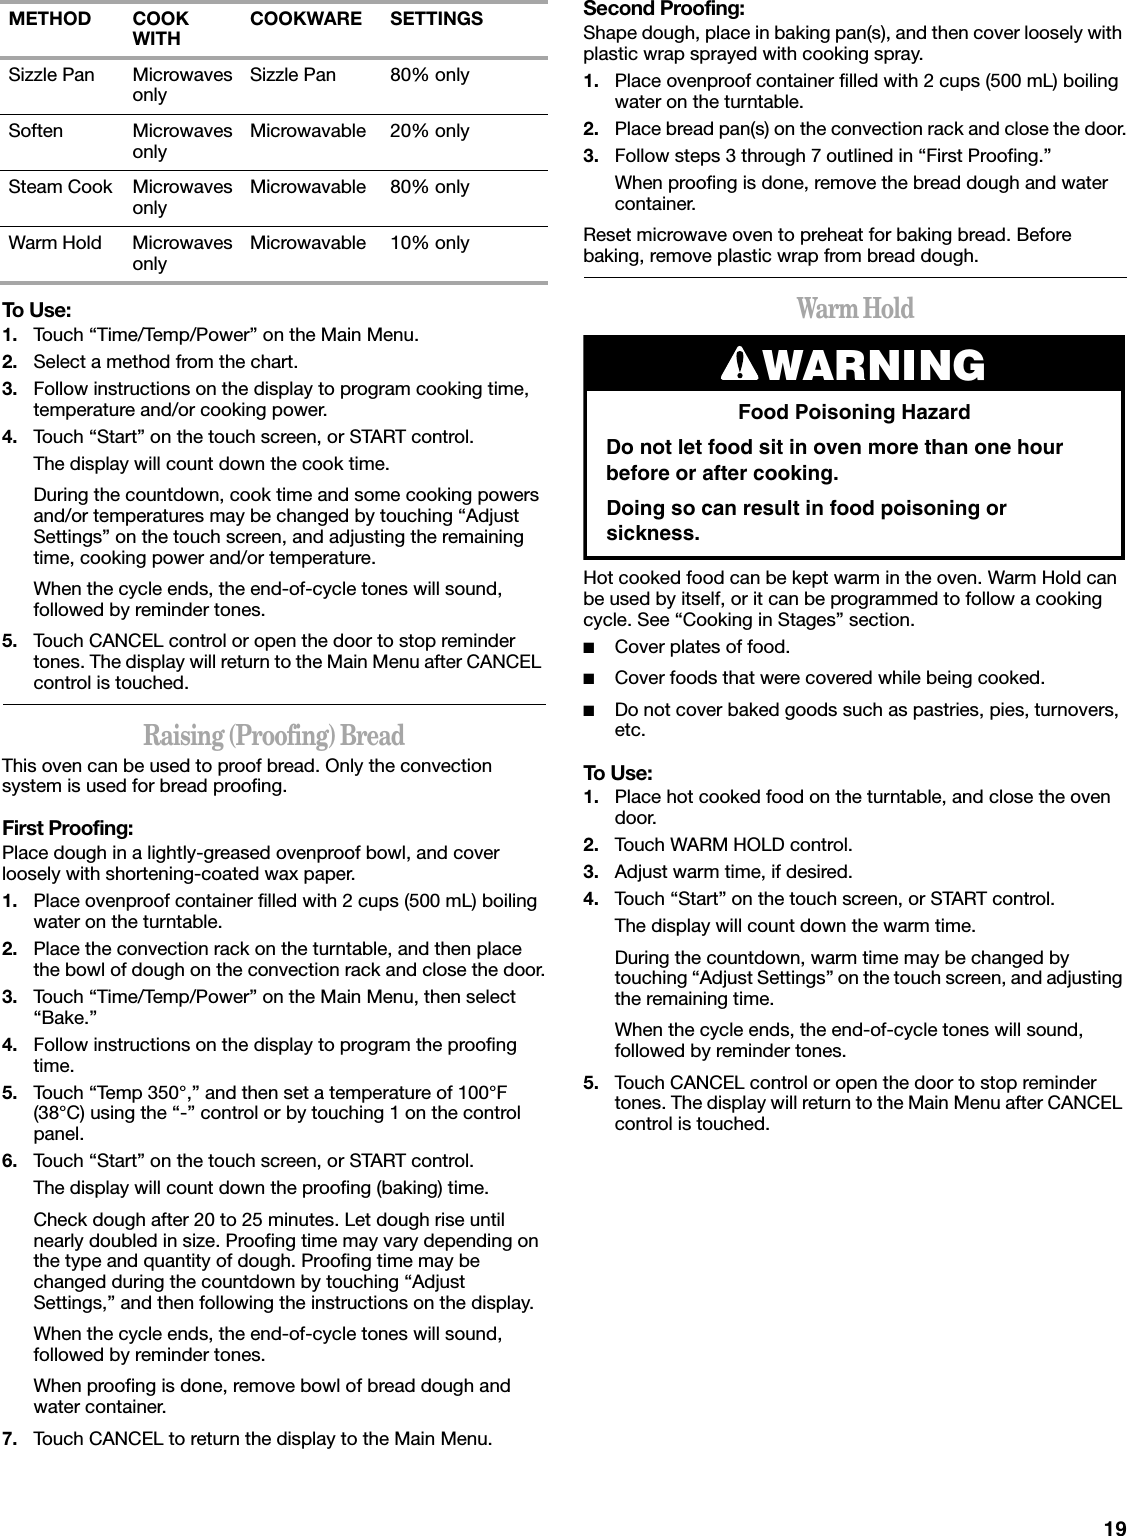
![30OVEN CAREGeneral CleaningIMPORTANT: Before cleaning, make sure all controls are off and the oven is cool. Always follow label instructions on cleaning products.Soap, water and a soft cloth or sponge are suggested first unless otherwise noted.GREASE FILTERSDo not use ammonia or corrosive cleaning agents such as lye-based oven cleaners.■Hot water and mild detergent:Soak filters, then scrub and swish to remove embedded dirt and grease. Rinse well and shake to dry.■Dishwasher:Wash separately, not with dirty dishes, because food can be trapped in the filters.OVEN CAVITYThe gray finish inside the oven cavity is a durable, nonstick coating that makes soils easier to remove.Do not use metal or sharp utensils or scrapers, soap-filled scouring pads, abrasive cleaners, steel-wool pads, gritty washcloths or some recycled paper towels. Damage may occur.The area where the oven door and frame touch when closed should be kept clean.Average soil■Mild, nonabrasive soaps and detergents:Rinse with clean water and dry with soft, lint-free cloth.Heavy soil■Mild, nonabrasive soaps and detergents:Heat 1 cup (250 mL) of water for 2 to 5 minutes in oven. Steam will soften soil. Rinse with clean water and dry with soft, lint-free cloth.Odors■Lemon juice or vinegar:Heat 1 cup (250 mL) of water with 1 tbs (15 mL) of either lemon juice or vinegar for 2 to 5 minutes in oven.Microwave Inlet CoverThe microwave inlet cover (see “Parts and Features”) should be kept clean to avoid arcing and oven damage.■Wipe with wet cloth.Grill Element■Wipe with wet cloth.Convection Screen■Wipe with wet cloth.CONTROL PANELUnplug oven or disconnect power to avoid touch screen activation during cleaning.Do not use abrasive cleaners, steel-wool pads or gritty washcloths. Damage may occur.Use gentle pressure when wiping the touch screen.■Glass cleaner and soft cloth:Apply glass cleaner to soft cloth, not directly on panel.■Mild soap, water and soft washclothOVEN DOOR AND EXTERIORThe area where the oven door and frame touch when closed should be kept clean.■Mild, nonabrasive soaps and detergents:Rinse with clean water and dry with soft, lint-free cloth.■Glass cleaner and paper towels or nonabrasive plastic scrubbing pad:Apply glass cleaner to towel, not directly to surface.Stainless Steel (on some models)Do not use soap-filled scouring pads, abrasive cleaners, steel-wool pads, gritty washcloths or some paper towels. Damage may occur.Rub in direction of grain to avoid damaging.■Stainless Steel Cleaner & Polish (not included):See “Assistance or Service” section to order.■Liquid detergent or all-purpose cleaner:Rinse with clean water and dry with soft, lint-free cloth.■Vinegar for hard water spotsSTEAMER VESSEL■Soft brush, if necessary, to clean holes.■DishwasherStubborn StainsTo remove stains such as tomato sauce, use a nonabrasive cleanser, a no-scratch pad, or a solution of dishwasher detergent and water (1/4 cup [60 mL] detergent to 1 cup [250 mL] warm water).TURNTABLEReplace turntable immediately after cleaning. Do not operate the microwave oven without the turntable in place.■Mild cleanser and scouring pad■Dishwasher](https://usermanual.wiki/Whirlpool-Microwave-Development/GH7208X/User-Guide-574046-Page-30.png)