Win Accord PD121INCH 12” Digital Photo Frame User Manual
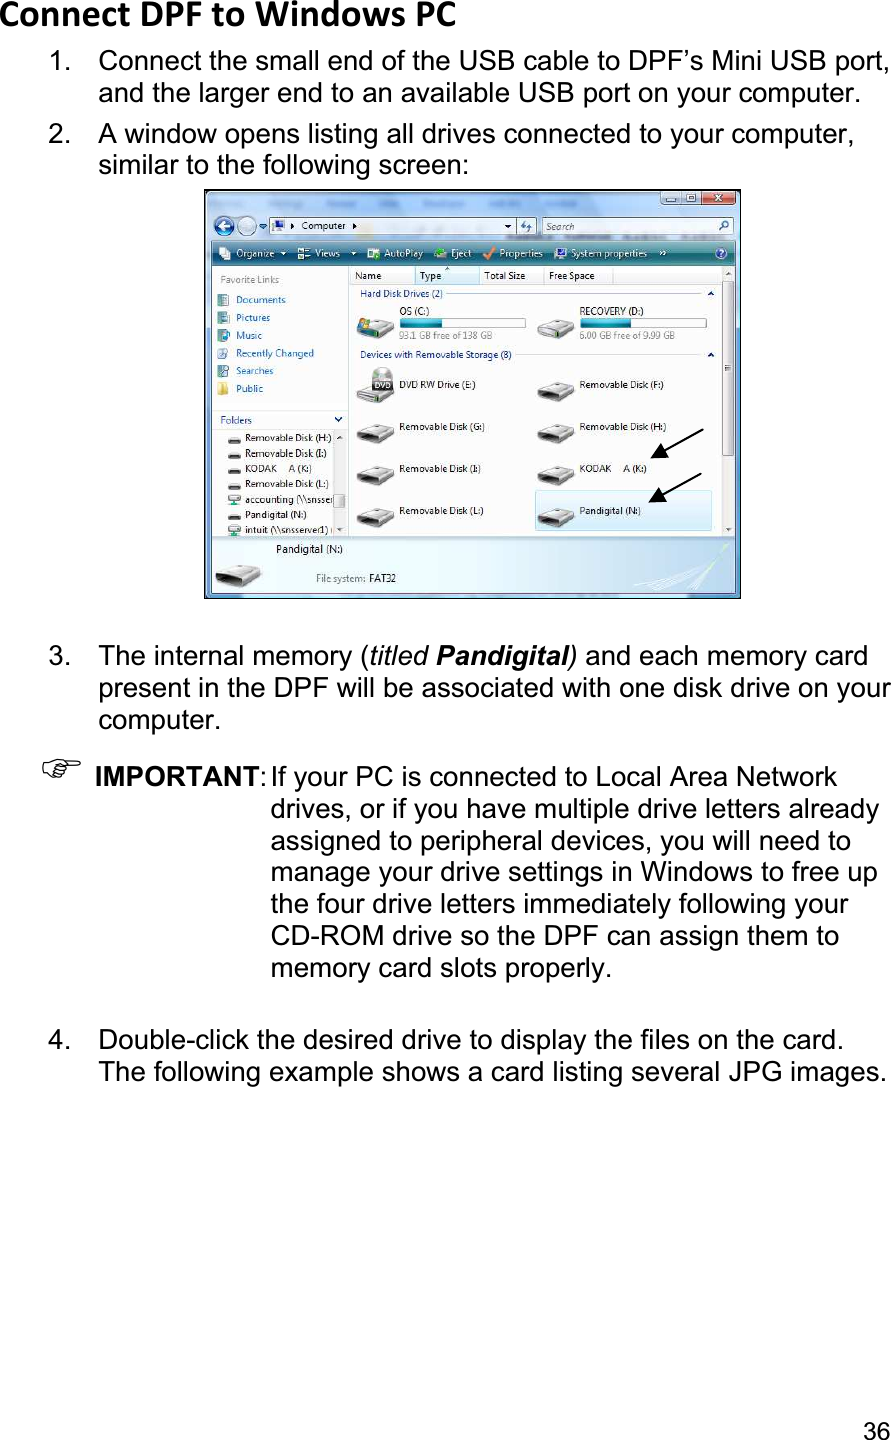
WIN ACCORD LTD., 12” Digital Photo Frame
UserManual.wiki
>
Win Accord
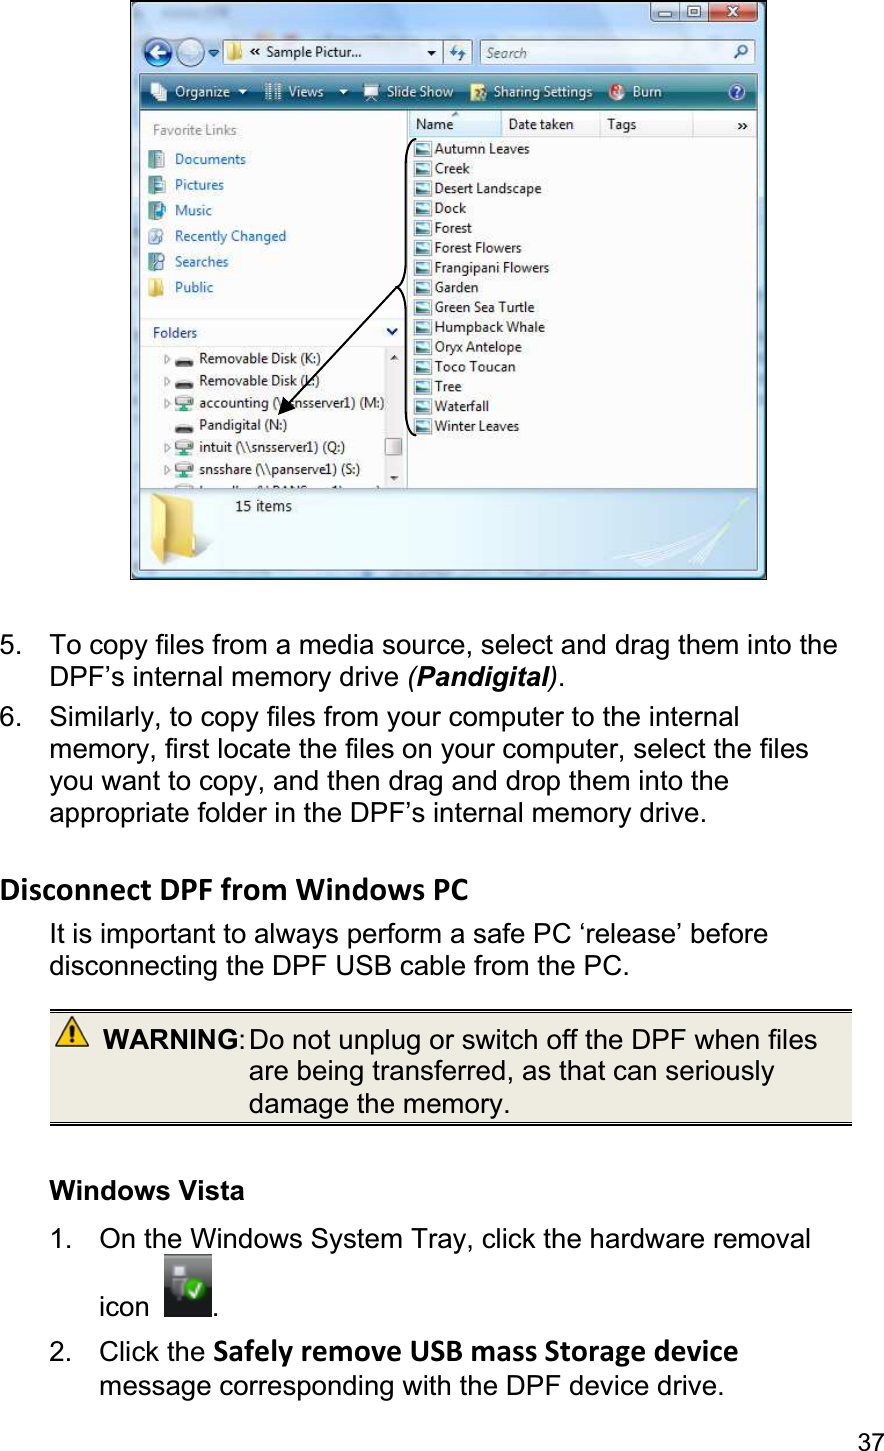
>
PD121INCH User Manual
user manual
Navigation menu
Upload a User Manual
Namespaces
Wiki Guide
HTML
PDF
Info
Views
User Manual
Discussion / Help
Navigation


![9Control Buttons on DPF You can perform many (but not all) of the DPF functions by using the control buttons located on the back of the DPF. Their basic functions are the same no matter when you use them. Button Action Scroll left ENTER Select the highlighted option, start a Slideshow, Play and PauseScroll right EXIT Exit the current display, or go back a screen MENU Access the SETUP Menu screen TIP: The instructions throughout this User Guide reference the use of the PanTouch interface and the Remote Control. However, you could also use the frame control buttons when the ,ENTER,EXIT, and MENU buttons are referenced. About Selecting Options Throughout this User Guide, when you are instructed to simply ‘touch’ or ‘select’ a function option or button, do the following: Touch the upper right corner of the mat to activate the PanTouch interface and then touch the desired option button, or use the arrows to highlight [the referenced option], and then touch ENTER to select (unless otherwise instructed).Use to highlight [the referenced option], and then press ENTER to select (unless otherwise instructed).](https://usermanual.wiki/Win-Accord/PD121INCH/User-Guide-1137794-Page-10.png)