Wintecronics TR53B Remote Control Transceiver User Manual
Wintecronics Ltd Remote Control Transceiver Users Manual
UserManual.wiki
>
Wintecronics
>
TR53B User Manual
User Manual
Navigation menu
Upload a User Manual
Namespaces
Wiki Guide
HTML
PDF
Info
Views
User Manual
Discussion / Help
Navigation
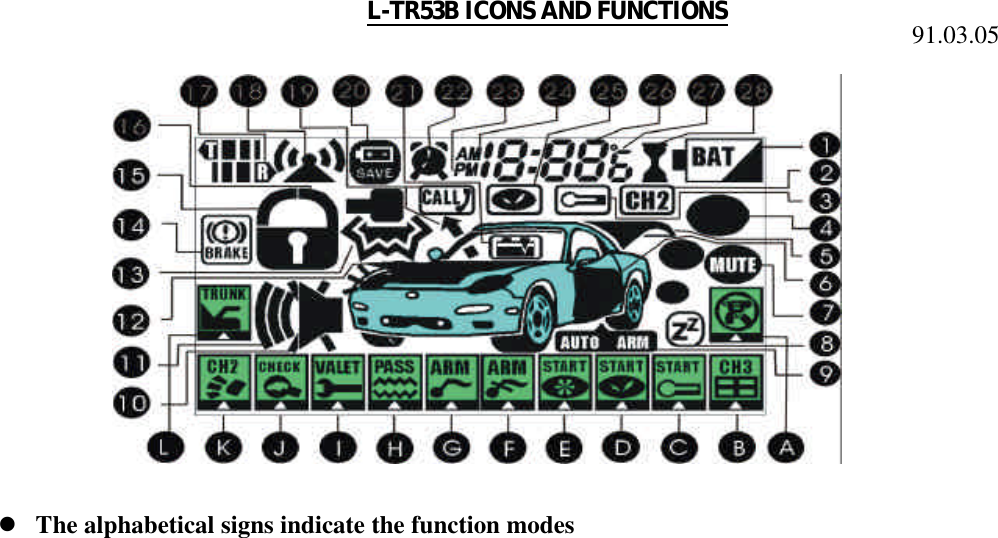
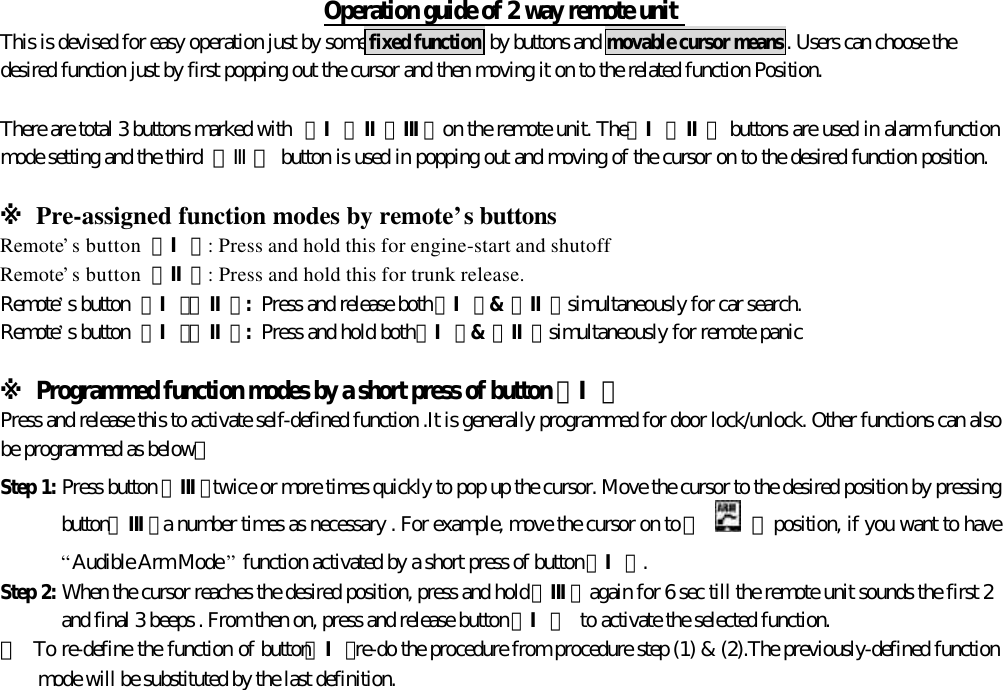
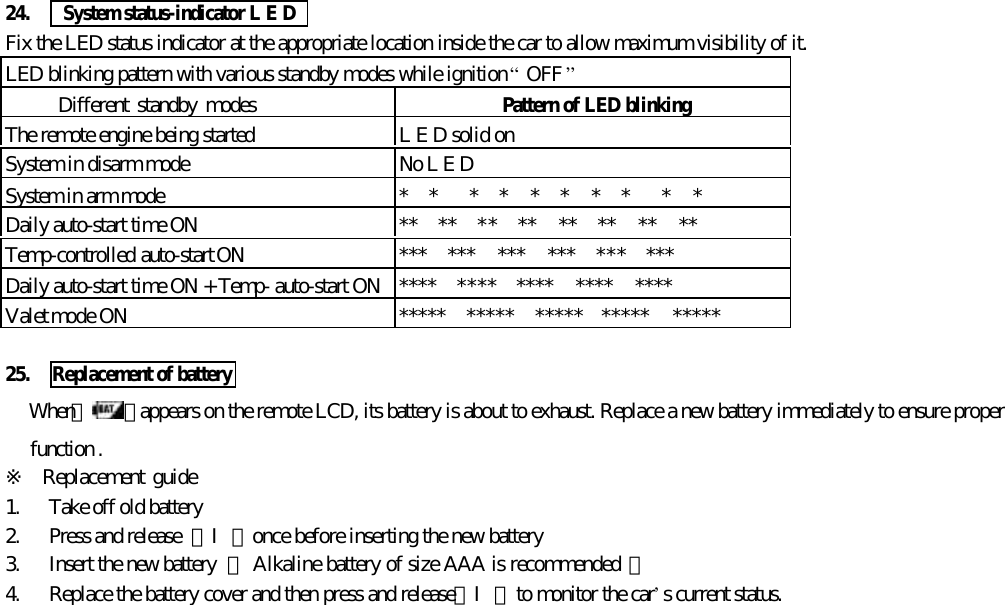
![(c)、The remote start run time can be programmed as required [RF program table]. When the preset run time expires, the enginewill automatically shut off.[ The remote unit displays 『r 01』 when the last one min begins its countdown ]. The 『r 00』displays on the remote unit at the moment of engine shut-off and then disappears.(d)、Remote engine start cannot be done under such abnormal conditions. (1).The gear is not in its neutral position, (2) Ignitionkey is turned ON , (3) Hood is opened ,(4) Hand break is depressed .Only under normal condition, the system can beremote-started for the pre-set runtime. A maximum of 4 start efforts will be made in case of failure of engine-start in thepreceding trials. If engine gets started in any stage of trials , no second attempt will be made.l When the system fails engine start after the 4th unsuccessful start effort, the remote unit sounds 4 beeps and its LCDdisplays 『SP』 .5. Remote change of engine run time(a)、After the engine gets started by the remote unit(b) 、Press Ⅲ button quickly twice or more the to pop up the cursor and more the cursor onto the 【 】column.(c) 、Press and release 【Ⅱ】button. Each time press on this button can add up 5 min run time and additional pressing can getup to the maximum run time of 20 min. The LCD on the remote unit displays the current run time acquired. The 『r 15』onthe LCD means the current run time you have gained is 15 min.Note:The function of run time change is only accessible only when the engine is running.6. Remote engine shutoff(a)、The engine is running by remote unit.(b)、Press and hold 【Ⅰ】; the engine shuts off with 2 siren chirps and 2 parking light flashes.l The 『 』disappears from the remote unit’s screen .The car’s status is displayed on the remote unit and melody isheard .](https://usermanual.wiki/Wintecronics/TR53B/User-Guide-244690-Page-9.png)
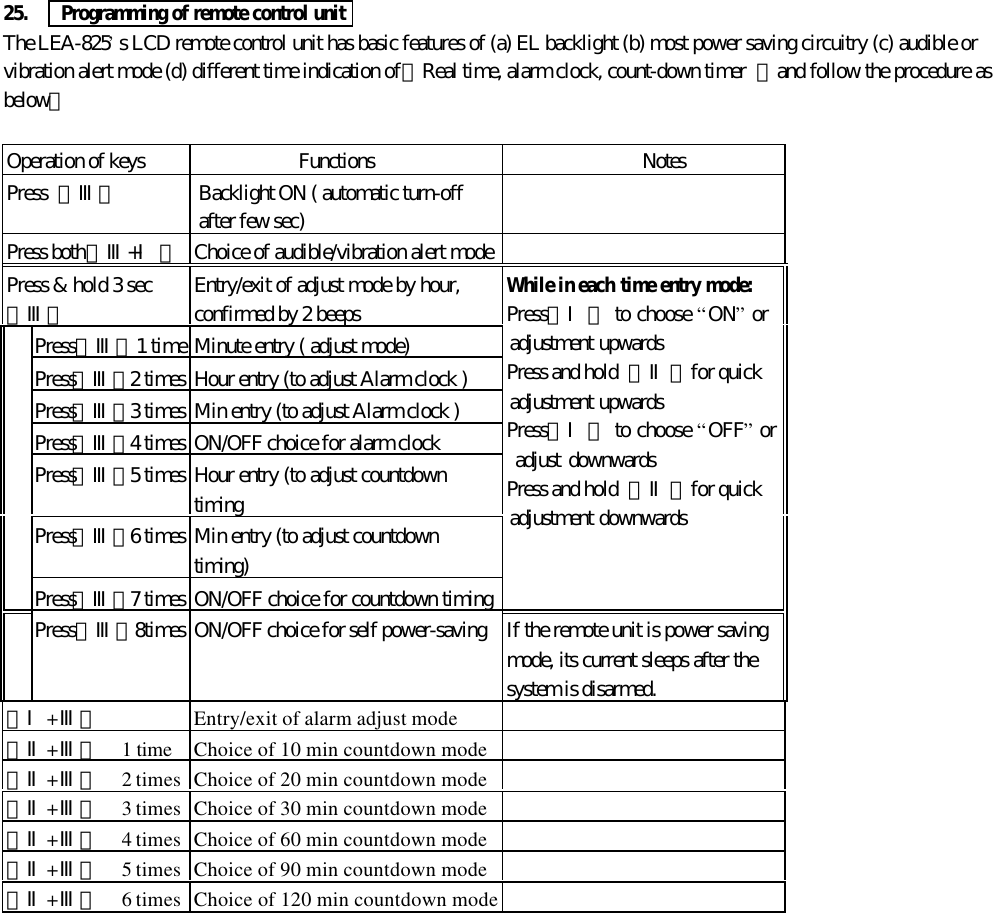
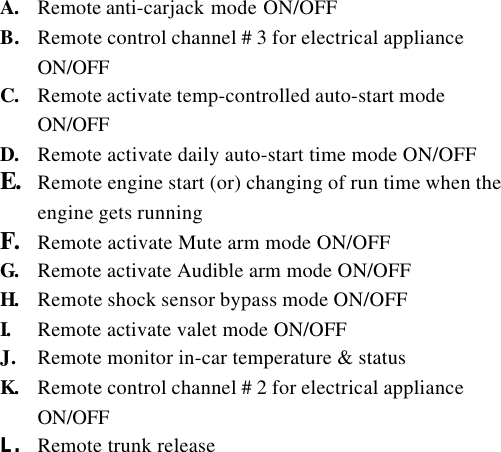
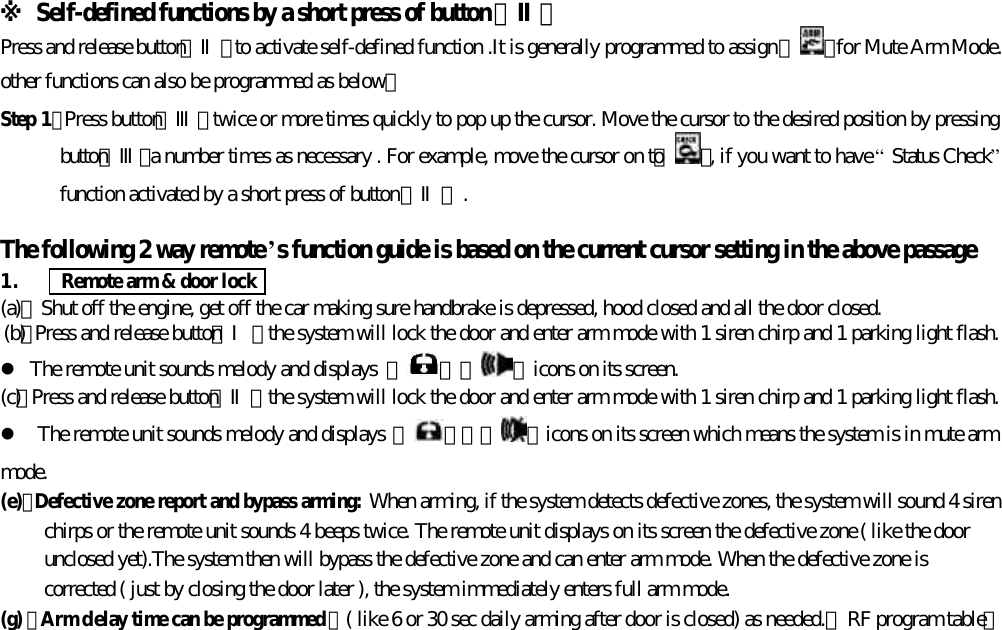
![9. Remote monitor temperature/status check(a)、Press quickly【Ⅲ】2 or more times to pop up the cursor and then move it onto【 】(b)、Press and release【Ⅱ】to monitor in-car temperature and the status of the car. Parking light flashes 3 times.l The remote unit displays on its screen the in-car temperature with car’s security status and will sound melody. For example,the 『 』on the LCD describes the interior temperature of the car is at 23 degree centigrade.l The temperature modes on the LCD can be selected to show Celsius or Fahrenheit as needed.[RF program table].10. Remote trunk release (The car must have electric motor for trunk release )(a)、Regardless of the main system in lock/arm or unlock/disarm modes, remote trunk release can be done .(b)、Press and hold 【Ⅱ】for remote trunk release. Siren chirps 3 times with 3 parking light lashes.l The remote unit displays『 』on its screen along with the current status and sounds melody.Note: The remote LCD displays『 』when the main system bypasses the shock sensor at the moment the remote hood open isoperated by the remote unit.11. Remote audible /mute arm(a)、Move the cursor onto【 】,then press and release 【Ⅱ】to choose audible arm mode.(b)、Move the cursor onto【 】,then press and release 【Ⅱ】to choose mute arm mode.l The remote unit will response as below:(d)、When the system enters audible arm mode , the remote unit displays『 』with melody sound.(e)、When the system enters mute arm mode , the remote unit displays『 』with melody sound.(f)、Even the system is mute arm mode , the siren will blurt when remote panic or remote anti-carjack is activated(g)、Programmable for choice of Siren or Horn 【RF program table】](https://usermanual.wiki/Wintecronics/TR53B/User-Guide-244690-Page-11.png)
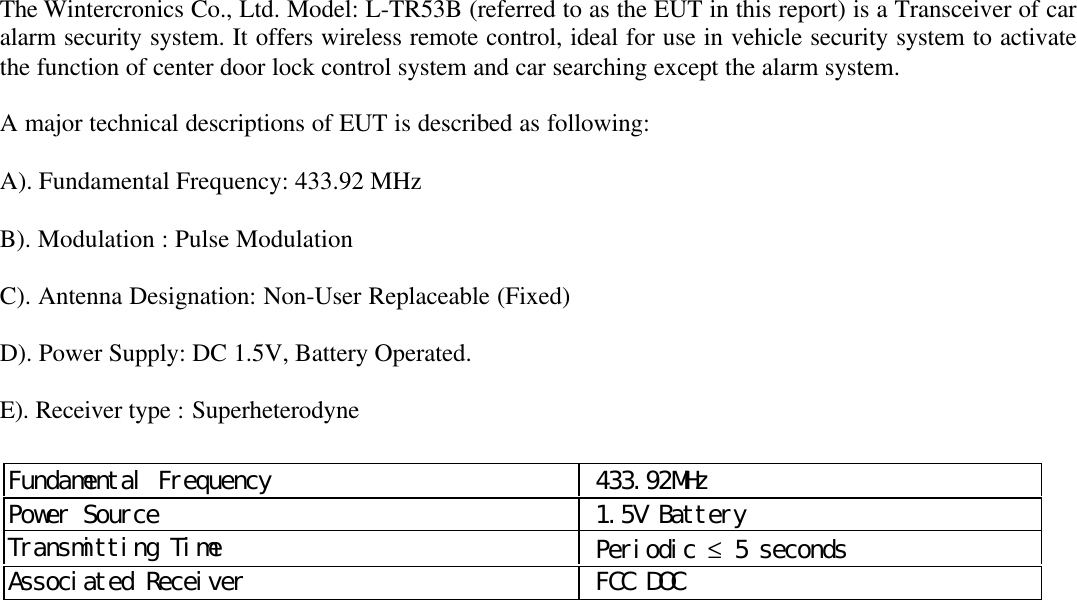
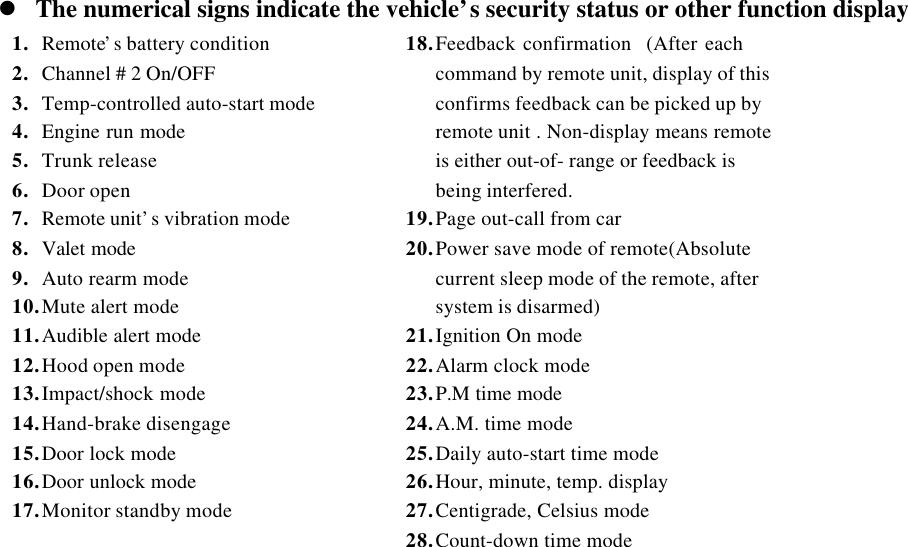
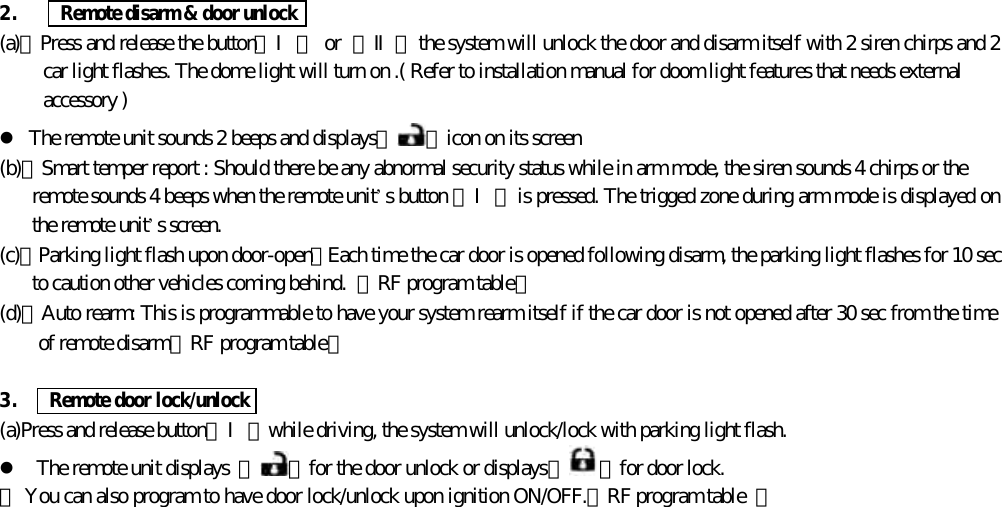
![12. Remote Active channel # 2 (for example use of headlight auto turn-on )(a)、This function can be for remotely controlled regardless of the main system in arm or disarm modes. ( an additionalaccessory is required and can be programmed for any desired remote control function ). For example:to turn headlight ONfor 30 sec by remote unit and automatically turns off.(2)、Press quickly【Ⅲ】2 or more times to pop up the cursor and move it on to【 】(3)、Then press and release 【Ⅱ】. The parking light flashes 2 times and headlight turns on for 30 sec before automatic turn-off.l The remote unit displays the 『 』on its screen and sounds melody.* This can be programmed in accordance with function you require.[RF program table]。13. Car locator/search(a)、Press and release both【Ⅰ+Ⅱ】 simultaneously; siren chirps 6 times with 6 parking light flashes.l The remote unit displays the car’s current status on its screen and sounds melody.14. Remote Shock sensor bypass(a)、You can use this function to avoid false alarm especially when the car is parked in an area near a rail-line or where trucksfrequently passes by.(b)、Press quickly【Ⅱ】2 or more times to pop up the cursor and move it onto 【 】(c)、Then press and release【Ⅱ】to have remote shock sensor bypass during which shock sensor becomes ineffective but theother security functions like lock/arm mode are still effective.l The remote unit displays 『 』 and 『 』on its screen with one beep alert.* If the shock sensor is triggered for 8 consecutive times during arm mode, the system will ignore shock sensor trigger andbypass it.15. Alarm mode & warn away(a)、In arm mode; if the car detects any impact , the shock sensor’s first stage alert is triggered. The siren chirps 3 times with 2parking light flashes.](https://usermanual.wiki/Wintecronics/TR53B/User-Guide-244690-Page-12.png)

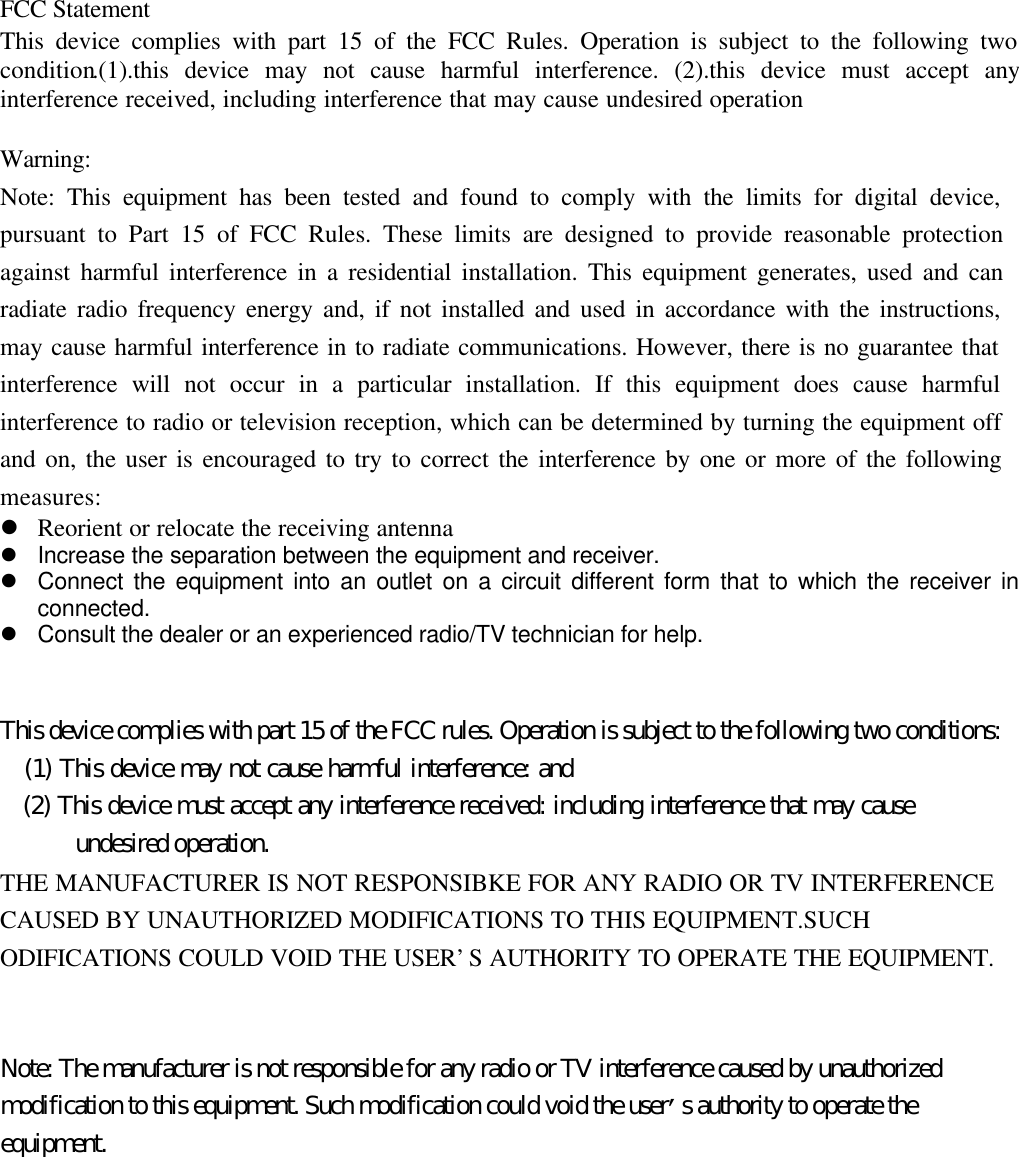
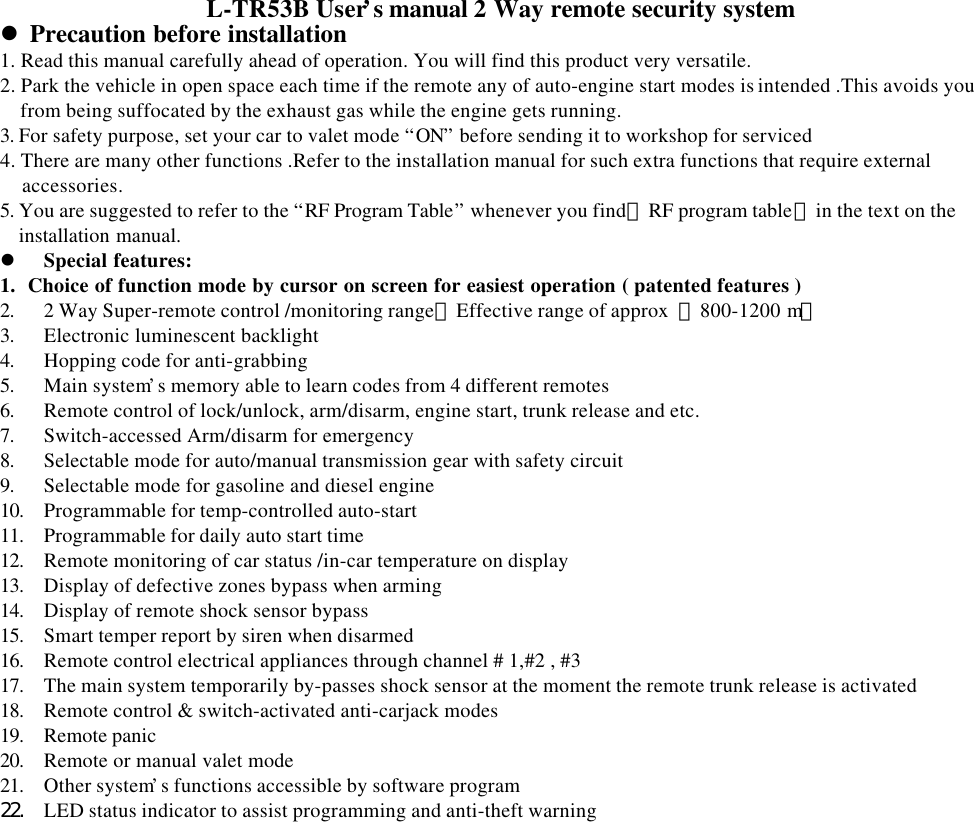
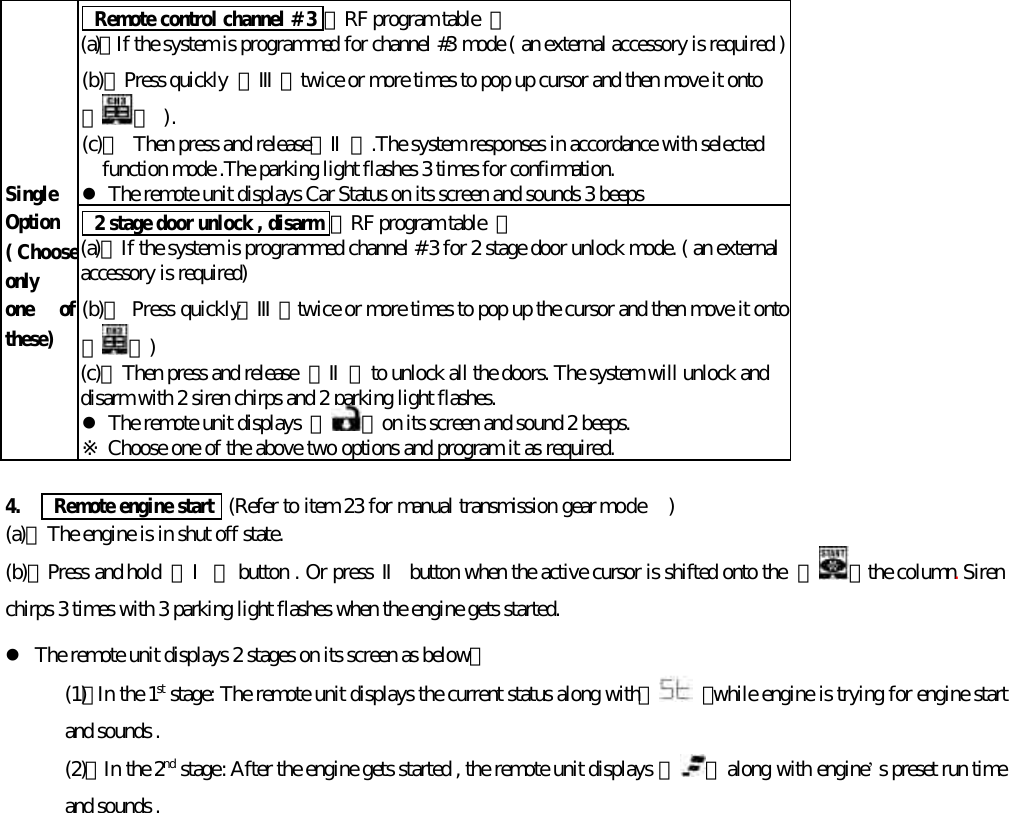
![20. Programmable functions by over-ride switchThe L-TR53B model’s functions 【valet, daily auto-start time ,temperature-controlled auto start 】can be programmed forON/OFF modes by means of over-ride switch in the following procedure.(a)、Turn the ignition OFF(b)、Press and release the over-ride switch for assigned number of times to acquire desired mode settings [ 3 times for valetchange mode setting ],[ 4 times for daily auto-start time setting],[5 times for temperature-controlled auto-start setting]. Thenumber of siren’s chirps follow the equal number press on the over-ride switch to confirm the current mode setting .(c)、Turn the ignition ON when the desired mode setting is reached. ( But engine must not be running)(d)、To choose the ON and OFF in each mode, setting, press again the over-ride switch 1 or 2 times. The factory default settingis marked with shaded description like OFF.Manual features program tableNo of presses on over-ride switch VS active modesetting Single press Double presses3 times to enter valet mode setting ON OFF4 times to enter daily auto-start time mode setting ON{see note below } OFF5 times to get temp-controlled auto start time modesetting ON OFFSiren and L E D indicator 1 2Note: If the daily auto-start time ON is programmed, the engine will be running immediately when the ignition key is turnedOFF .( Use the remote LCD unit to shut off the engine in this case.)19. Page-out call from carIf page-out call button on vehicle-base antenna case is pressed。l The remote unit displays 『 』on the screen and sounds melody21. Manual Arm and Disarm ( In case the remote transmitter is lost)Manual Arm Mode(a) Turn the ignition key to ON position (But engine must not be running)(b) Press and release the over-ride switch 8 times(d) Turn the ignition key to OFF position (siren chirps 1 time with 1 parking light flash ).After 20 sec, the main system willenter Arm mode .](https://usermanual.wiki/Wintecronics/TR53B/User-Guide-244690-Page-15.png)
![Manual Disarm Mode(a) Turn the ignition key to ON position. (But engine must not be running)(b) Press and release the over-ride switch 4 times(c) Turn the ignition key to OFF position {siren chirps 2 times with 2 flashes of parking light}. The system will enter Disarmmode.Note:(a)Under manual Arm mode; if the system is triggered, the system will enter initial alert mode ( siren chirps 3 times with 3parking light flashes). 20 sec later , the system enters Alarm and Warn Away Mode. [The alert triggering at this stagecan be terminated by the car owner]。(b)Under manual Arm or Disarm modes, all the system’s features can still be operated by the remote unit.23. Procedures of remote start for manual transmission gear (1)、While engine is running by ignition key, pull up the hand brake.(2)、Press and release 【Ⅰ】and try to complete steps (c) and (d) within 30 sec.(3)、Turn the ignition OFF while the engine is still running.( Engine is running at this stage)(4)、Open the car door, get off and re-close the door ( Engine will automatically shut off at this stage).The engine start isoperable remotely afterwards. If there is any mistake in the procedures, the engine start by remote unit is disabled.Note:For safety purpose each time when remote engine-start on the manual transmission car is desired, definitely follow theabove procedures.24. Procedures for Code learning of remote unitsThe L-TR53B main system can memorize transmitter’s coding ( from up to 4 different remote units)(1) Turn the ignition key to “ON” (But engine must not be running)Press and hold the over-ride switch for 6 sec and release it after the siren chirps 4 times which confirms the system hasentered active learning mode.(2) Press and hold【Ⅰ+Ⅱ】simultaneously till the siren chirps 1 time ,confirming code learning is completed.Follow the same step (2) with other remote transmitters ,one after another, to allow the main system learn coding of eachtransmitter.( Maximum 4 remotes can be learned by the L-TR53B) .The system will automatically jump out of learningmode if no signal is received within 6 sec. from the last signal.* (a)The pre-memorized coding will be erased each time the learning mode is activated. Re-do the code learning in this case. (b) If more than one remotes are used in remote-operating the same system, the car status will be displayed on the singleremote which sends the latest signal.](https://usermanual.wiki/Wintecronics/TR53B/User-Guide-244690-Page-16.png)