Wistron NeWeb DRUA WLAN 802.11G USB ADAPTER User Manual DRUA Manual Eng FCC
Wistron NeWeb Corporation WLAN 802.11G USB ADAPTER DRUA Manual Eng FCC
Contents
- 1. Manual Pt1
- 2. Manual Pt2
Manual Pt1
WLAN 802.11G USB ADAPTER
User’s Guide
Version: 1.0 — Sep 2004
1
Copyright Statement
No part of this publication may be reproduced, stored in a retrieval system, or
transmitted in any form or by any means, whether electronic, mechanical,
photocopying, recording or otherwise without the prior writing of the publisher.
Windows™ 2000/XP are trademarks of Microsoft® Corp.
Atheros is a registered trademark of Atheros Communications, Inc.
All copyright reserved.
2
Regulatory Information
Federal Communication Commission Interference Statement
This equipment has been tested and found to comply with the limits for a Class B digital device,
pursuant to Part 15 of the FCC Rules. These limits are designed to provide reasonable
protection against harmful interference in a residential installation. This equipment generates,
uses and can radiate radio frequency energy and, if not installed and used in accordance with
the instructions, may cause harmful interference to radio communications. However, there is
no guarantee that interference will not occur in a particular installation. If this equipment does
cause harmful interference to radio or television reception, which can be determined by turning
the equipment off and on, the user is encouraged to try to correct the interference by one of the
following measures:
- Reorient or relocate the receiving antenna.
- Increase the separation between the equipment and receiver.
- Connect the equipment into an outlet on a circuit different from that
to which the receiver is connected.
- Consult the dealer or an experienced radio/TV technician for help.
This device complies with Part 15 of the FCC Rules. Operation is subject to the following two
conditions: (1) This device may not cause harmful interference, and (2) this device must
accept any interference received, including interference that may cause undesired operation.
FCC Caution: Any changes or modifications not expressly approved by the party responsible
for compliance could void the user's authority to operate this equipment.
IMPORTANT NOTE: FCC Radiation Exposure Statement:
This equipment complies with FCC radiation exposure limits set forth for an uncontrolled
environment. End users must follow the specific operating instructions for satisfying RF
exposure compliance. To maintain compliance with FCC RF exposure compliance
requirements, please avoid direct contact to the transmitting antenna during transmitting.
This transmitter must not be co-located or operating in conjunction with any other antenna or
transmitter.
We declare that the product is limited in CH1~CH11 by specified firmware controlled in the
USA
3
Table of Contents
REGULATORY INFORMATION.............................................................................................................2
1. WELCOME...............................................................................................................................................5
1.1 KIT CONTENTS......................................................................................................................................5
1.2 MAIN FEATURES OF 802.11G USB 2.0 ADAPTER................................................................................5
1.3 WIRELESS NETWORKING SCENARIOS..................................................................................................6
2. QUICK START TO WIRELESS NETWORKING ............................................................................8
2.1 INSTALLATION.......................................................................................................................................8
2.2 CONNECTING TO AN EXISTING NETWORK...........................................................................................9
3. STEP-BY-STEP INSTRUCTIONS......................................................................................................10
3.1 INSTALLATION.....................................................................................................................................10
3.2 CONNECTING TO A NETWORK.............................................................................................................15
3.3 CREATING AN AD HOC NETWORK .....................................................................................................19
3.4 REMOVING YOUR 802.11G USB 2.0 ADAPTER..................................................................................21
3.5 UNINSTALLATION................................................................................................................................22
4. USING THE UTILITY..........................................................................................................................24
4.1 CURRENT STATUS ...............................................................................................................................24
4.2 DIAGNOSTICS ......................................................................................................................................25
4.3 PROFILE MANAGEMENT.....................................................................................................................28
4.3.1 Creating or Modifying a Configuration Profile......................................................................28
4.3.2 Removing a Profile....................................................................................................................32
4.3.3 Profile Auto Selection................................................................................................................32
4.3.4 Switching Profiles......................................................................................................................33
4.4 SECURITY............................................................................................................................................34
4.4.1 Using EAP-TLS Security...........................................................................................................34
4.4.2 Enabling EAP-TLS Security......................................................................................................34
4.4.3 Using EAP-TTLS Security.........................................................................................................34
4.4.4 Enabling EAP-TTLS Security...................................................................................................35
4.4.5 Using PEAP(EAP-GTC) Security.............................................................................................36
4.4.6 Enabling PEAP(EAP-GTC) Security.......................................................................................36
4.4.7 Using PEAP-MSCHAP V2 Security.........................................................................................37
4.4.8 Enabling PEAP- MSCHAP V2 Security...................................................................................37
4.4.9 Using LEAP Security.................................................................................................................38
4.4.10 Configuring LEAP...................................................................................................................39
4
4.4.11 Using WPA Passphrase Security.............................................................................................40
4.4.12 Using Pre-Shared Key (Static WEP) Security.......................................................................40
4.5 DISPLAY SETTINGS .............................................................................................................................41
4.6 ACTIONS TOOLS ..................................................................................................................................42
4.7 ABOUT UTILITY VERSION ..................................................................................................................42
5. RIGHT CLICKING THE TRAY ICON .............................................................................................43
6. NETWORK APPLICATION................................................................................................................44
6.1 SURVEYING THE NETWORK NEIGHBORHOOD....................................................................................44
6.2 FILE SHARING.....................................................................................................................................45
6.3 USING THE SHARED FOLDER..............................................................................................................46
7. Product Specifications……………………………………………………………47

5
1. Welcome
Thank you for purchasing our 802.11g USB 2.0 Adapter, and welcome to Wireless
LAN—the easy way to wireless networking.
This user’s guide introduces to you the 802.11g USB 2.0 Adapter and describes the
most common configurations, which will help you connect to your network easily.
Please read this manual to get familiar with the IEEE802.11g Wireless LAN. This
manual contains detailed instructions in operation of this product. Please keep this
manual for future reference.
1.1 Kit Contents
n One 802.11g USB 2.0 Adapter
n One Software CD:
(1) Utility & Driver Installation Software
(2) User Manual PDF File
n Quick Start Guide
1.2 Main Features of 802.11g USB 2.0 Adapter
Status LED
n Off: Power Off.
n Blinking: The USB adapter is powered on but no wireless connection is made
yet.
n Steady Green: Wireless connection is linked.
802.11g USB 2.0 Adapter features
n High-speed wireless connection, up to 54 Mbps
n IEEE802.11g (DSSS) standard for 2.4 GHz Wireless LAN
n Plug-and-Play installation
n Solid design with an integrated antenna
n Full mobility and seamless cell-to-cell roaming
n Automatic scale back at per packet level
n Super GTM (up to 108 Mbps data rate) and eXtended Range (XR) Technology
802.11g USB 2.0 Adapter supports
n Automatic load balancing for optimized bandwidth
6
n Advanced power management
n Windows® 2000 and XP
1.3 Wireless Networking Scenarios
As our 802.11g USB 2.0 Adapter is interoperable and compatible with other IEEE
802.11g compliant products from other manufacturers, it offers you the most freedom
to establish your ideal wireless network. Therefore, after installing 802.11g USB 2.0
Adapter, you can connect your computer to:
n A Peer-to-Peer Workgroup of 802.11g compliant wireless devices.
n A LAN (Local Area Network) constructed by Access Point(s) or other 802.11g
compliant systems.
n Share your Internet access by using just one connection, share printers and other
peripheral devices, share data and image files between networked PCs, play
multi-player games, and use other network enabled sharing resources.
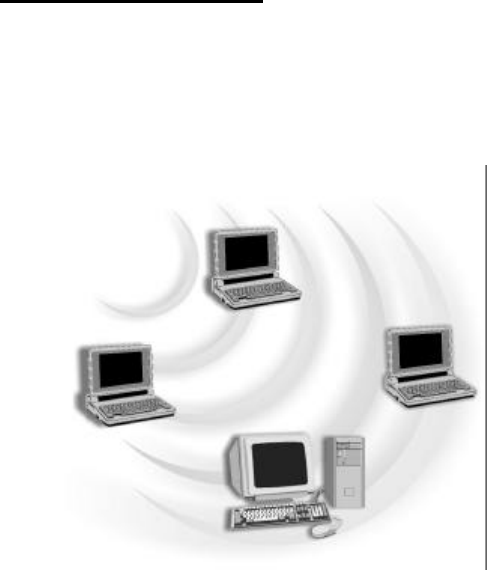
Peer-to-Peer Networking:
An Ad Hoc Network could be easily set up with some PCs and this 802.11g USB
2.0 Adapter or our other WLAN devices. Therefore, it is very suitable to build a
network for temporary use, such as for demonstration in exhibition, for new sales
point/branch use and alike.
7
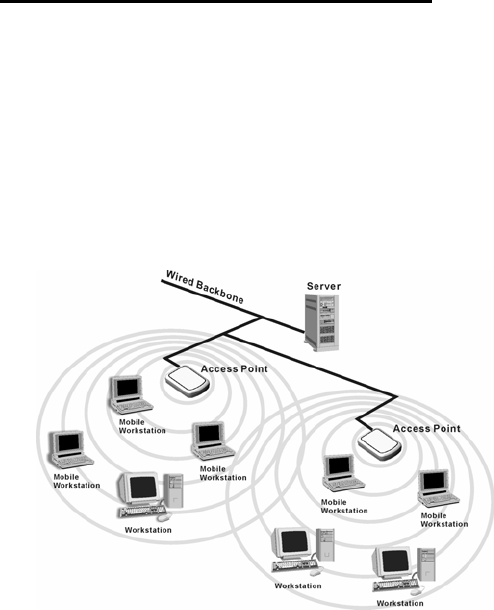
Cooperate LAN (Local Area Networking):
With some 802.11g USB 2.0 Adapters and Access Points, it is easy to construct a
LAN with access to Internet for enterprise use.
The construction is quite easy that the 802.11g USB 2.0 Adapter and Access Point
will automatically work at the most suitable frequency when Access Point is set
within the proper range.
In addition, commonly manufacturers will bundle the Site-Survey tool for users to
check the communication quality.

8
2. Quick Start to Wireless Networking
2.1 Installation
1. Insert the installation CD. It automatically starts the setup program for software
installation.
2. Follow the installation wizard to complete the software installation process and
restart your computer if necessary.
3. Connect the WLAN 802.11g USB 2.0 Adapter to your laptop PC/desktop PC.
4. Restart your PC.
NOTE! Select “Cancel” when Found New Hardware window appears.
NOTE! In Windows XP, it is recommended that you use the WLAN 802.11g USB2.0
Utility.
9
2.2 Connecting to an Existing Network
After restarting your PC, the adapter automatically connects to an unsecured network
that has the best signal strength (if there’s any). Go to windows Start > Programs >
WLAN 802.11g USB2.0 Adapter > WLAN 802.11g USB2.0 Adapter Utility to open
the utility. Profile Name shows default.
You may also manually assign a network to connect with. Follow the steps below:
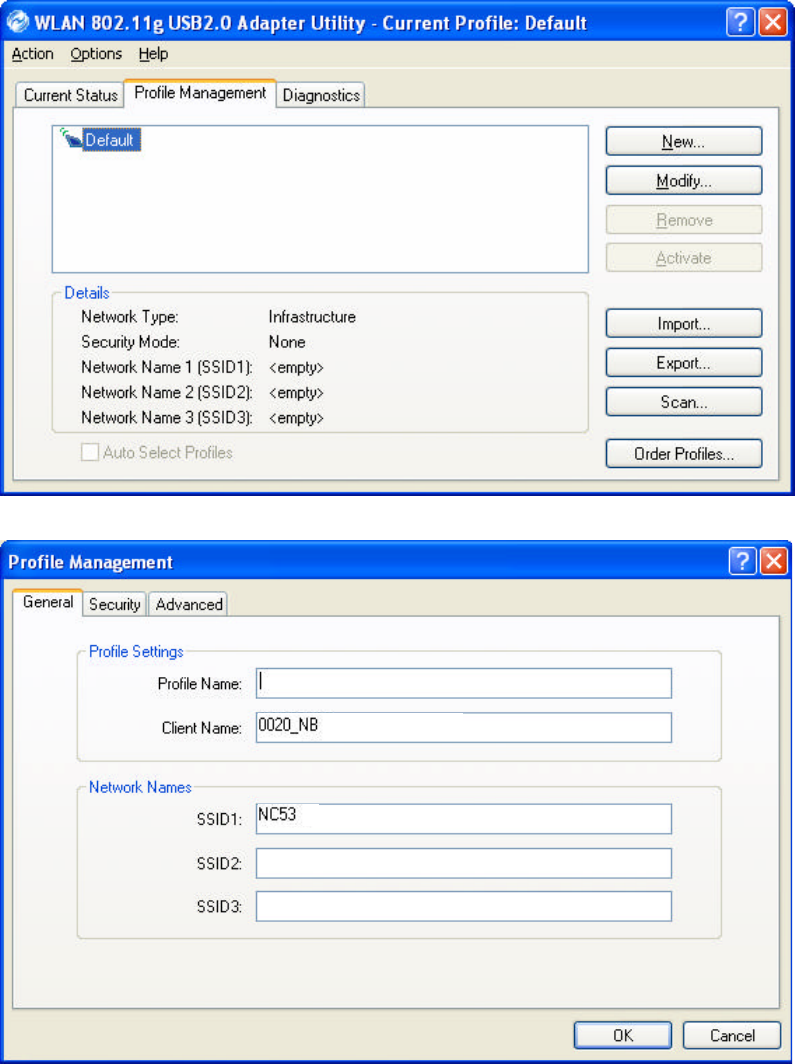
1. Click Profile Management tab.
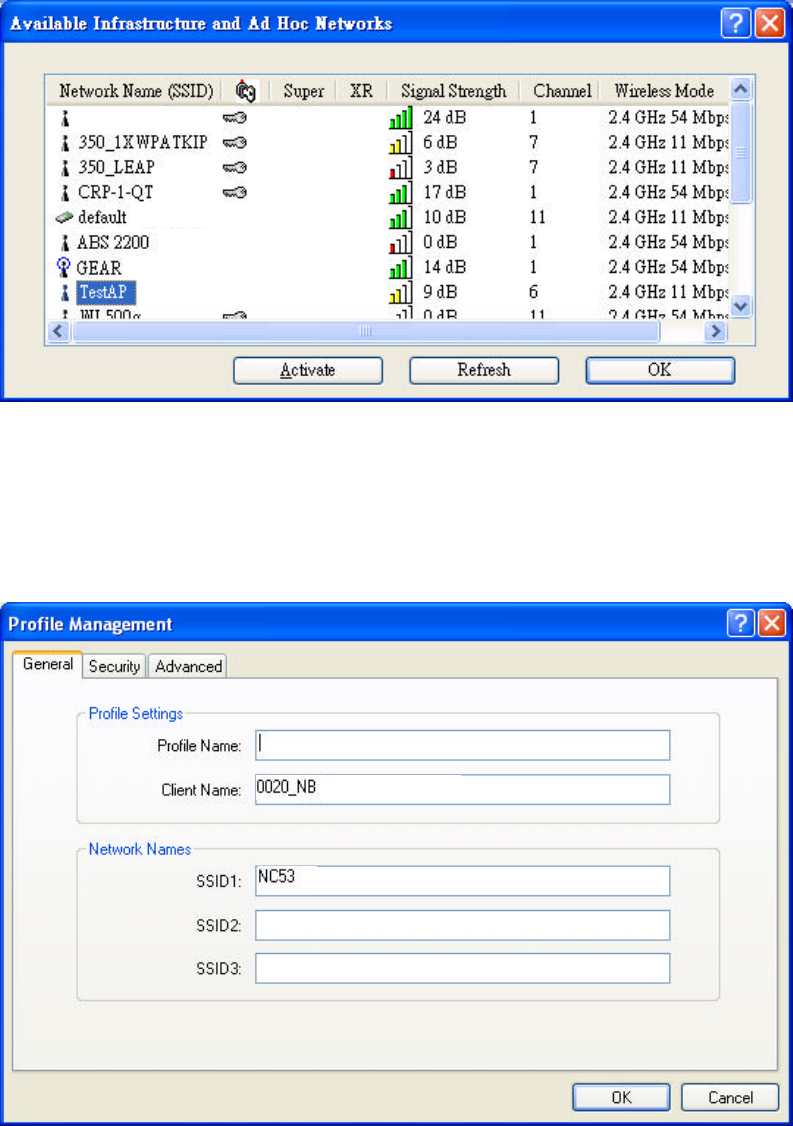
2. Click Scan, and Available Infrastructure and Ad Hoc Networks list appears.
3. Click the desired network SSID and click Activate.
4. Contact the network administrator for Profile Settings: General, Security and
Advanced.
5. Once connected, the configuration icon in the Windows System Tray appears .
You can click Current Status tab to check the connection status.
6. For details of each tab in WLAN 802.11g USB2.0 Adapter Utility, please read
Chapter 4.
10
3. Step-by-Step Instructions
3.1 Installation
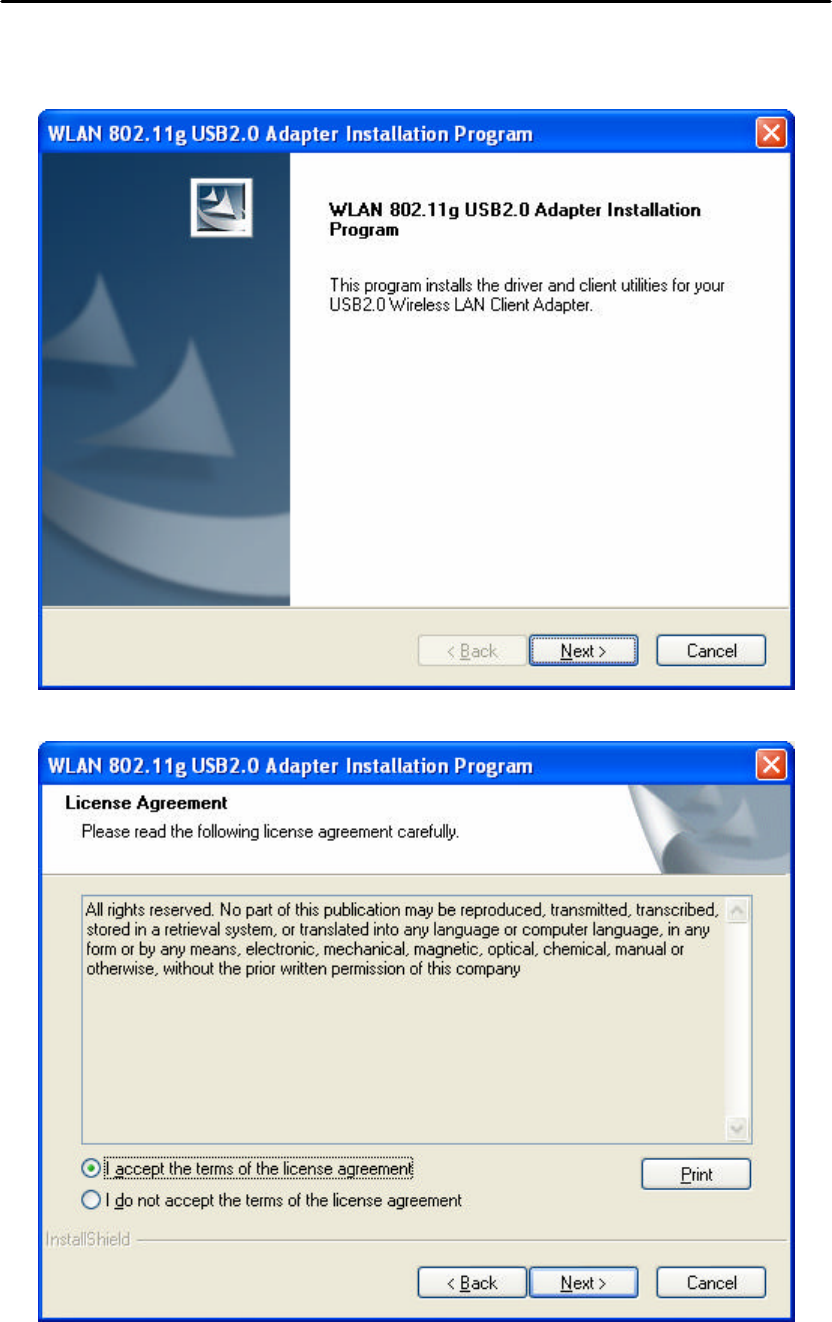
1. Insert the installation CD into your CD-ROM drive. Click Next.
2. Select “I accept the terms of the license agreement” and click Next.
11
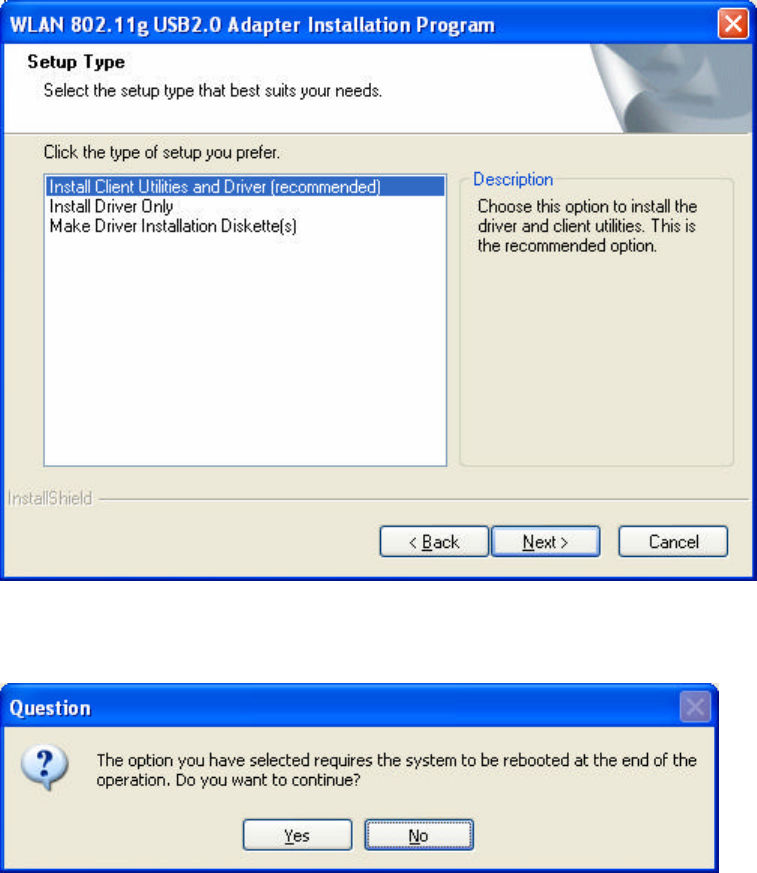
3. Click Next. You can highlight different items to choose different setup.
4. Click Yes. System reminds you the reboot step.
12
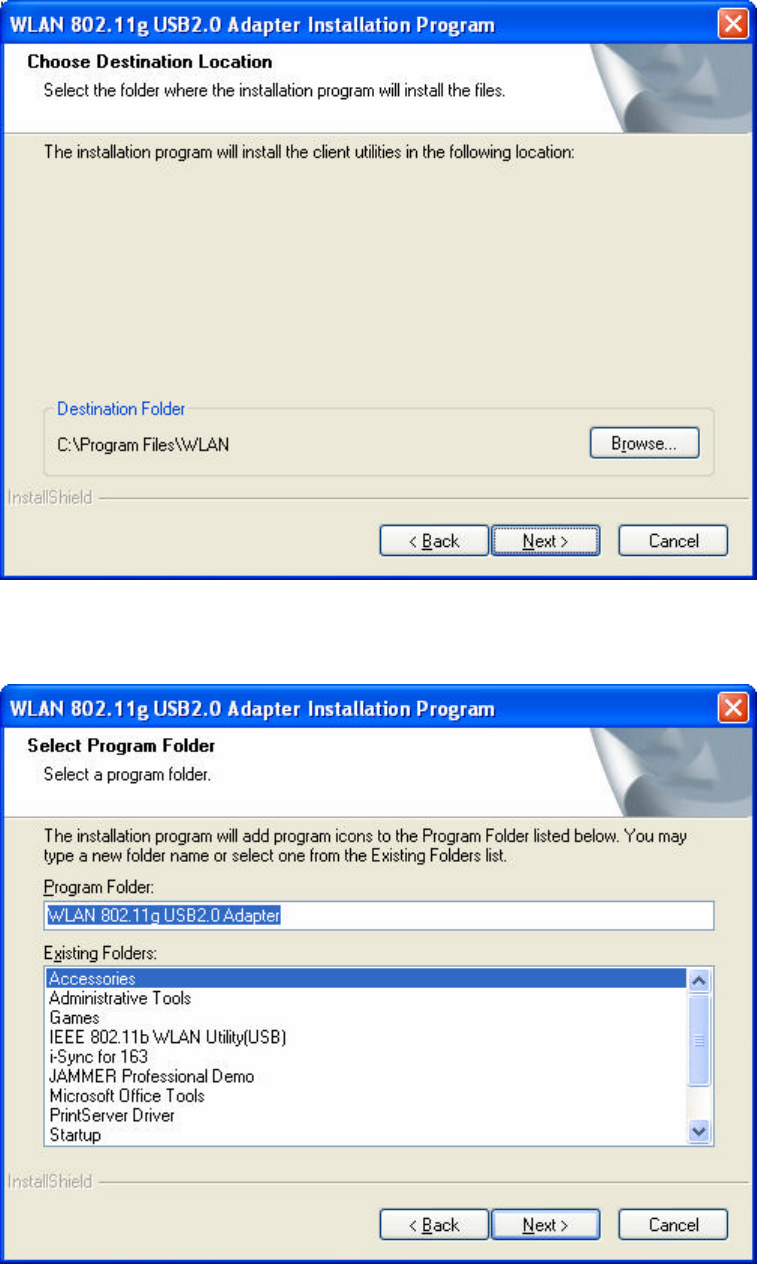
5. Click Next. Or click Browse to select the destination folder you prefer.
6. Click Next. Edit the Program Folder name if necessary.

13
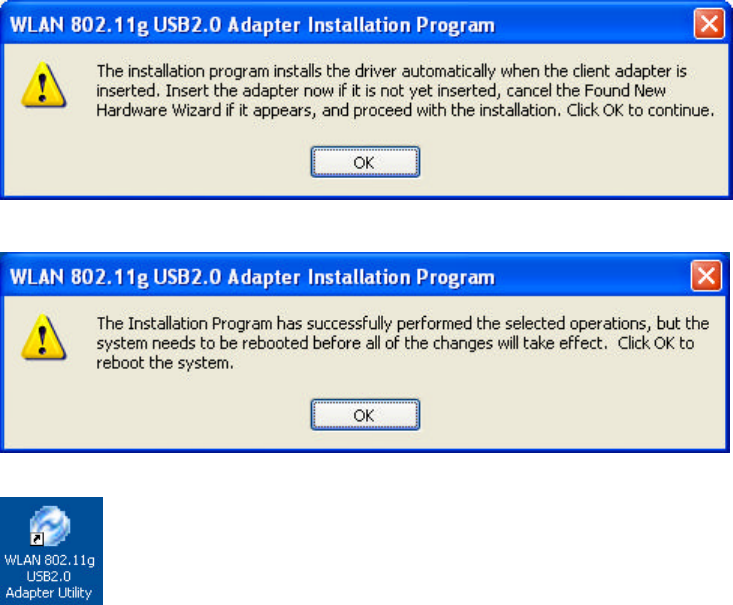
7. Read the notice and click Next.
8. Click Next. WLAN 802.11g USB2.0 Adapter Utility is recommended.
14
9. Insert the adapter and click OK.
10. Click OK and your PC will restart.
11. A short-cut icon appears on the desktop of your PC.
NOTE! Select “Cancel” when Found New Hardware window appears.
NOTE! In Windows XP, it is recommended that you use the WLAN 802.11g USB2.0
Utility.
15
3.2 Connecting to a network
NOTE! For details of Utility Configuration, please refer to Chapter 4.
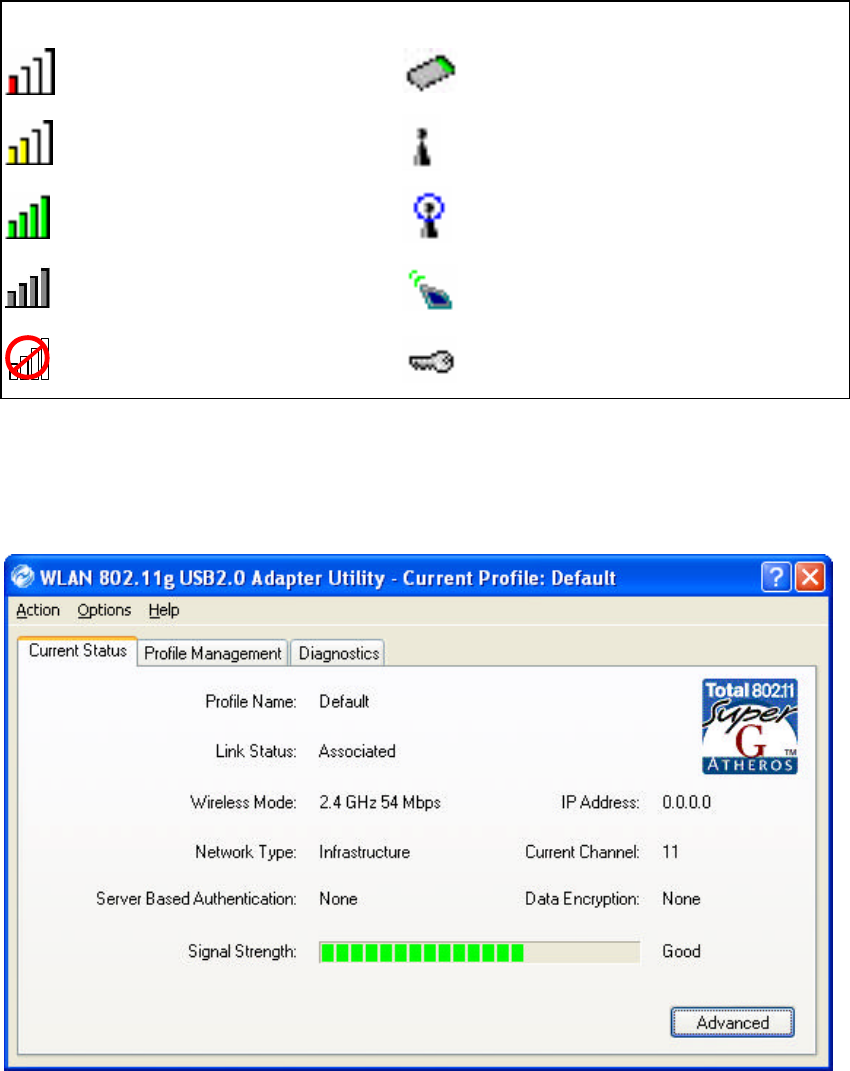
Status Icons
: Low Signal Strength
: Ad Hoc Network
: Medium Signal Strength : Infrastructure Network
: High Signal Strength : Infrastructure Network Connected
: No Signal Strength : Profile Activated
: Radio Off : Secured
After restarting your PC, the adapter automatically connects to an unsecured network
that has the best signal strength (if there’s any). Profile Name shows Default.
You may also manually assign a network to connect with. Follow the steps below:

16
1. Open WLAN 802.11g USB 2.0 Adapter Utility (by double-clicking on the
shortcut icon on the desktop), and click Profile Management tab.
2. Click Scan, and Available Infrastructure and Ad Hoc Networks list appears.
17
3. Click the desired network SSID and click Activate.
4. Contact the network administrator for Profile Settings: General, Security and
Advanced.
General Tab: Enter a Profile Name and SSID.

18
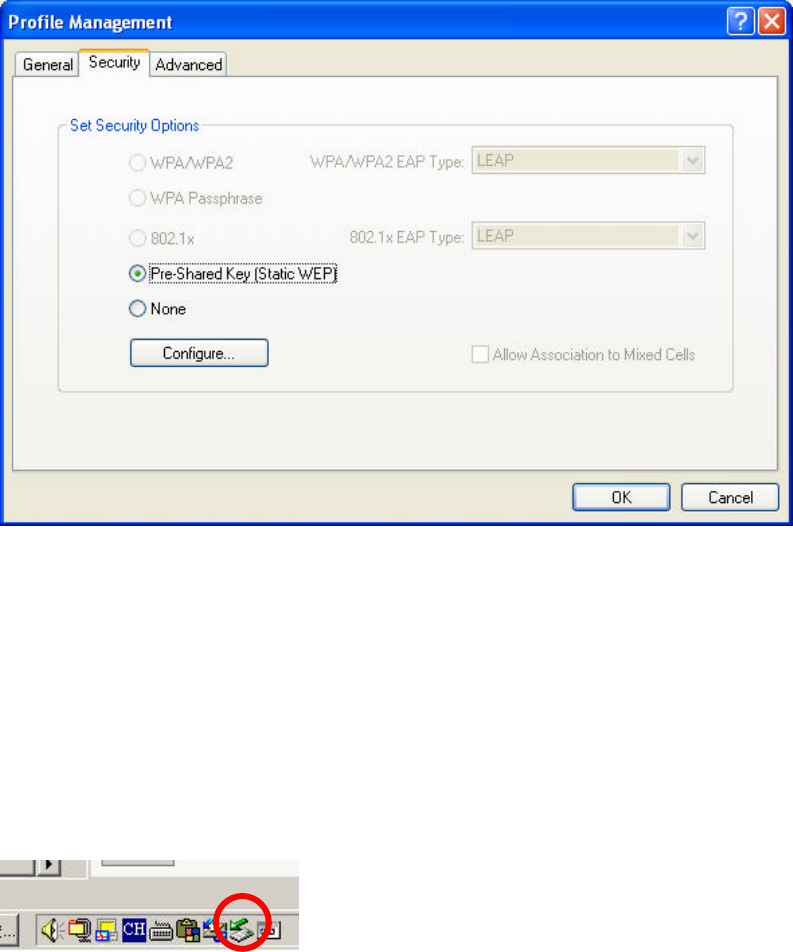
Security Tab: If the connected network is secured, contact the network
administrator for Security Settings.
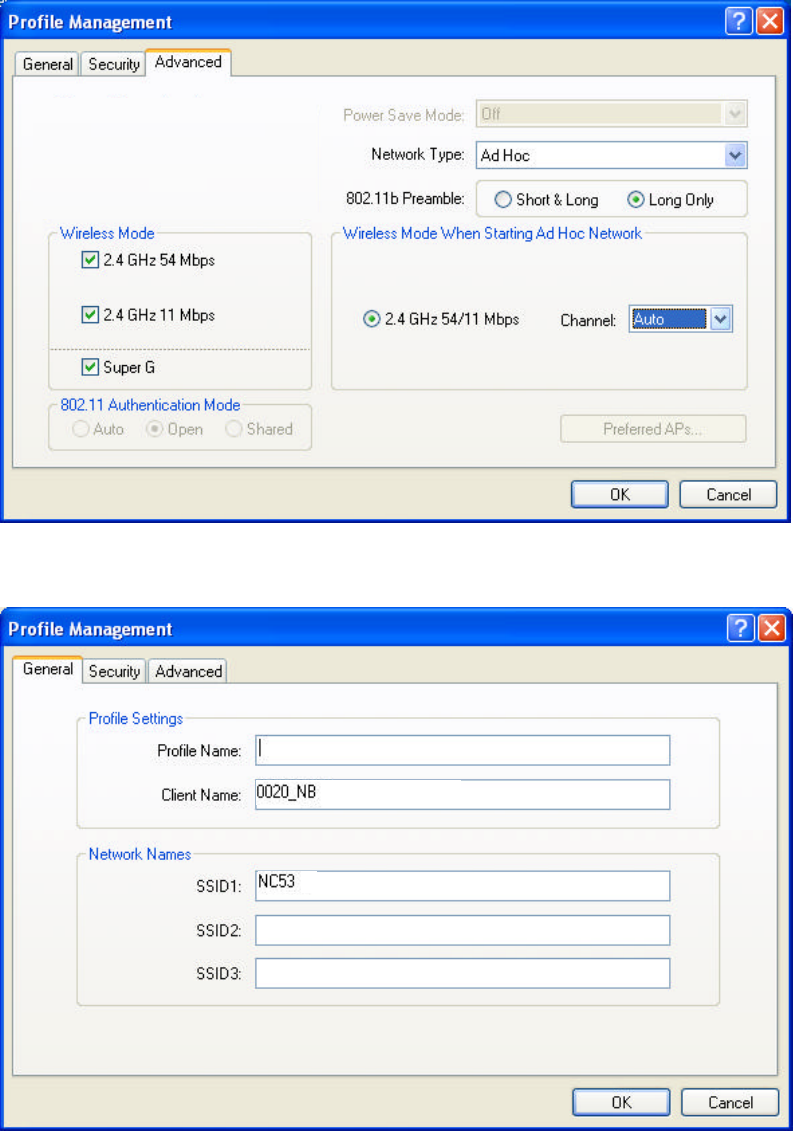
Advanced Tab: Click Advanced for other network settings.
5. Once connected, the status icon in the Windows System Tray appears. You
can click Current Status tab to check the connection status.
19
3.3 Creating an Ad Hoc Network
If you have more computers and only want to place them in a local area network, or
you want to communicate directly without using an Access Point or any connection to
a wired network, you can create a new Ad Hoc Network.
1. In Profile Management tab, click New button to create a profile.
20
2. Click Advanced to switch Network Type to Ad Hoc.
3. Click General to edit the Profile and SSID1 names.
21
4. Click Security to configure security options.
5. Click OK button.
3.4 Removing your 802.11g USB 2.0 Adapter
You can remove the device after you finished the action with the device. Please follow
the safe removal procedure. You can find a safe removal icon in your computer’s
notification area.
1. Double click the Safely Remove Hardware icon.
2. The “Safely Remove Hardware” window will pop up. You can select the device
you want to remove. Then, click the “Stop” button.
NOTE! When removing the WLAN 802.11g USB 2.0 Adapter, you will lose your
connection to the network. Make sure you have closed all files and network
applications (such as e-mail) before removing the WLAN 802.11g USB 2.0
Adapter.

22
3.5 Uninstallation
1. Make sure the Utility is closed.
2. Go to Star → Programs → WLAN 802.11g USB2.0 Adapter → Uninstall Utility.
3. Choose “Uninstall the previous installation” and click Next.
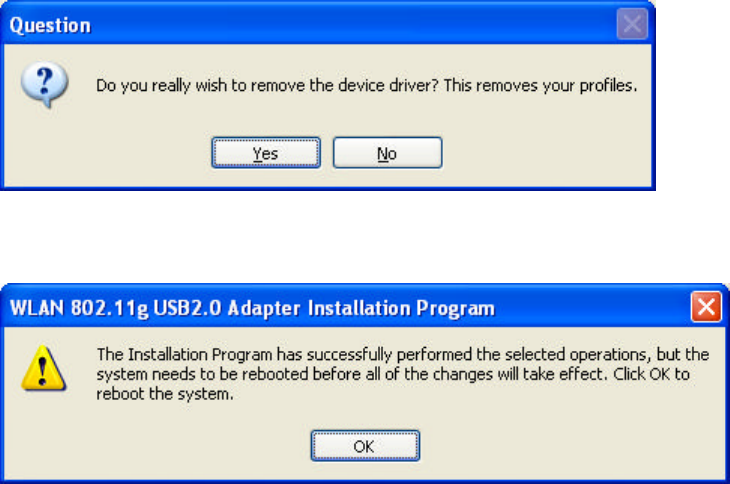
4. Click Yes.
5. Click OK.
23
6. Click Yes.
7. Click OK, and your PC will restart. Uninstallation is finished.
24
4. Using the Utility
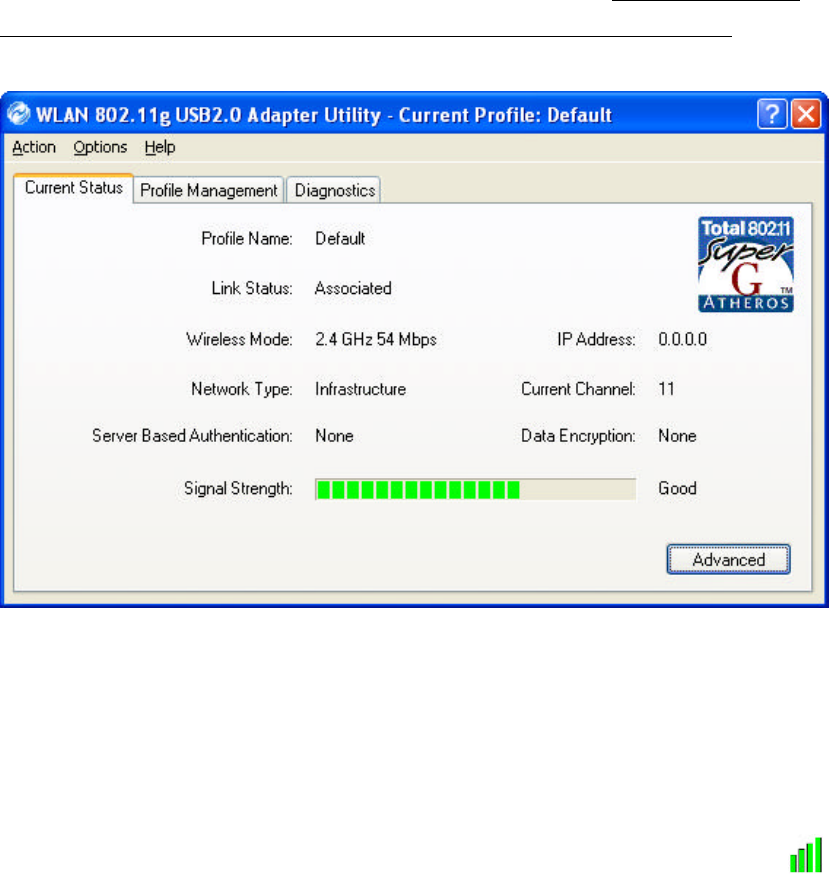
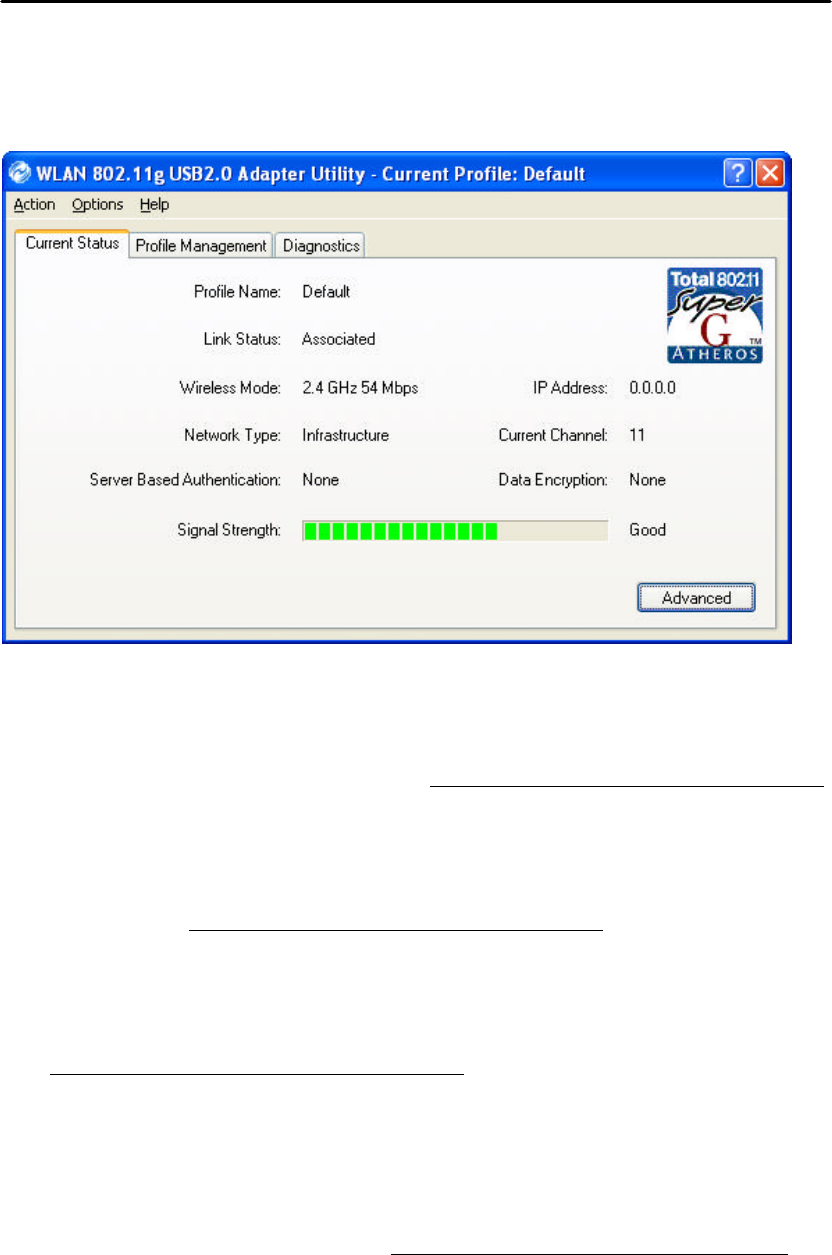
4.1 Current Status
The Current Status tab contains general information about the program and its
operations.
n Profile Name: The name of the current selected configuration profile. If you see
Default in Profile Name, it is because you do not assign a specific SSID, and the
adapter automatically searches and connects to the most suitable network. You
can configure the profile name through Profile Management gModifygGeneral.
n Link Status: Shows whether or not the station is associated to the wireless
network.
n Wireless Mode: Displays the wireless mode. You can configure the wireless
mode through Profile Management gModifygAdvanced.
n IP Address: Displays the computer's IP address.
n Network Type: The type of network the station is connected to. The options
include infrastructure and Ad Hoc. You can configure the network type through
Profile Management gModifygAdvanced.
n Current Channel: Shows the currently connected channel.
n Server Based Authentication: Shows whether server based authentication is
used.
n Data Encryption: Displays the encryption type the driver is using. You can
configure Data Encryption through Profile Management gModifygSecurity.
n Signal Strength: Shows the strength of the signal.