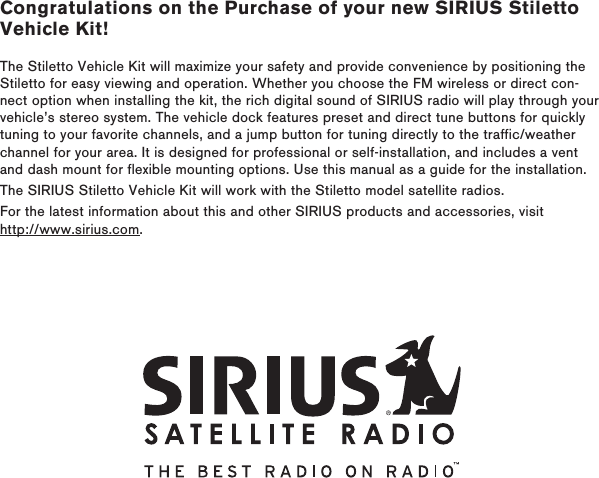
Wistron NeWeb UWASLV1 Satellite Radio Receiver Car Dock User Manual
Wistron NeWeb Corporation Satellite Radio Receiver Car Dock Users Manual
UserManual.wiki
>
Wistron NeWeb
>
UWASLV1 User Manual
Users Manual
Navigation menu
Upload a User Manual
Namespaces
Wiki Guide
HTML
PDF
Info
Views
User Manual
Discussion / Help
Navigation
![[ Table of Contents ] 3Table of ContentsTABLE OF CONTENTS . . . . . . . . . . . . . . . . . . . . . . . . . . . . . . 3WARNING AND SAFETY INFORMATION . . . . . . . . . . . . . . . . . . . . . . 4FCC Caution . . . . . . . . . . . . . . . . . . . . . . . . . . . . . . . . . . 4Safety Precautions . . . . . . . . . . . . . . . . . . . . . . . . . . . . . . . . 4Warnings . . . . . . . . . . . . . . . . . . . . . . . . . . . . . . . . . . . 5PACKAGE CONTENTS . . . . . . . . . . . . . . . . . . . . . . . . . . . . . . 6CONTROLS . . . . . . . . . . . . . . . . . . . . . . . . . . . . . . . . . . 7Vehicle Dock . . . . . . . . . . . . . . . . . . . . . . . . . . . . . . . . . . 7Remote Control Reference Guide . . . . . . . . . . . . . . . . . . . . . . . . . . 9Remote Control Battery Installation . . . . . . . . . . . . . . . . . . . . . . . 13INSTALLATION . . . . . . . . . . . . . . . . . . . . . . . . . . . . . . . . 14Installing the Vehicle Kit . . . . . . . . . . . . . . . . . . . . . . . . . . . . . 14Installing the Antenna . . . . . . . . . . . . . . . . . . . . . . . . . . . . . 19Connecting the Cigarette Lighter Adapter . . . . . . . . . . . . . . . . . . . . . 22Docking and Un-docking the Stiletto . . . . . . . . . . . . . . . . . . . . . . . 22Maximizing Audio Quality From Your Stiletto Radio . . . . . . . . . . . . . . . . . . 24Wireless Connection . . . . . . . . . . . . . . . . . . . . . . . . . . . . 24Direct Connections . . . . . . . . . . . . . . . . . . . . . . . . . . . . . 26Subscribing to the SIRIUS Service . . . . . . . . . . . . . . . . . . . . . . . . 29OPERATION . . . . . . . . . . . . . . . . . . . . . . . . . . . . . . . . . 30Presets . . . . . . . . . . . . . . . . . . . . . . . . . . . . . . . . . . . 30Direct Channel Tuning . . . . . . . . . . . . . . . . . . . . . . . . . . . . . 31Jump Feature . . . . . . . . . . . . . . . . . . . . . . . . . . . . . . . . . 32TROUBLESHOOTING . . . . . . . . . . . . . . . . . . . . . . . . . . . . . 33OPTIONAL ACCESSORIES . . . . . . . . . . . . . . . . . . . . . . . . . . . 34WARRANTY . . . . . . . . . . . . . . . . . . . . . . . . . . . . . . . . . 35SPECIFICATIONS . . . . . . . . . . . . . . . . . . . . . . . . . . . . . . . 36COPYRIGHTS & TRADEMARKS . . . . . . . . . . . . . . . . . . . . . . . . 37SIRIUS ID . . . . . . . . . . . . . . . . . . . . . . . . . . . . . . . . . . 38](https://usermanual.wiki/Wistron-NeWeb/UWASLV1/User-Guide-706205-Page-3.png)
![[ Warning and Safety Information ]4Warning and Safety InformationFCC CautionAny changes or modifications not expressly approved by the party responsible for compliance could void the user’s authority to operate this equipment.This device complies with part 15 of the FCC Rules.Operation is subject to the following two conditions:This device may not cause harmful interference, andThis device must accept any interference received, including interference that may cause undesired operation.This transmitter must not be co-located or operating in conjunction with any other antenna or transmitter.Safety PrecautionsBe sure to observe the following warnings. Failure to follow these safety instructions and warnings may result in a serious accident and/or personal injury.Installation must be performed according to this installation guide. SIRIUS is not respon-sible for issues arising from installations not performed according to the procedures in this guide.Do not operate the SIRIUS radio in a way that might divert your attention from driving safely. As a driver, you alone are responsible for safely operating your vehicle in accor-dance with traffic safety laws at all times.Do not install the unit where it may obstruct your view through the windshield, or of your vehicle’s indicator displays.1.2.•••](https://usermanual.wiki/Wistron-NeWeb/UWASLV1/User-Guide-706205-Page-5.png)
![[ Warning and Safety Information ] 5Before attaching the suction cup mount to your windshield, you should check your state and local laws for regulations regarding mounting this device on your windshield.Do not install the unit where it may hinder the function of safety devices such as an airbag. Doing so may prevent the airbag from functioning properly in the event of an accident.To avoid short circuits, do not open the unit, and never put or leave any metallic objects (coins, tools, etc.) inside the unit.If the unit emits smoke or unusual odors, turn the power off immediately, and disconnect the unit from any power source.Do not drop the unit or subject it to strong shocks.The installation and use suggestions contained in this installation manual are subject to any restrictions or limitations that may be imposed by applicable law. The purchaser should check applicable law for any restrictions or limitations before installing and/or operating this unit.WarningsOperating TemperatureThe SIRIUS Cigarette Lighter Adapter is designed to operate between -20° to +85° C (-4° to +185° F). Avoid leaving it in a vehicle or elsewhere where the temperature may fall outside this range.Cleaning and MaintenanceIf the vehicle dock becomes dirty, turn the power off and wipe it clean with a soft cloth. Do not use hard cloths, strong cleaning fluids, paint thinner, alcohol, or other volatile solvents to clean. These may cause damage to the unit.Cigarette Lighter AdapterThe vehicle dock cannot be powered directly from a vehicle’s 12 VDC power system. It must be powered using the included Cigarette Lighter Adapter only. Connecting the vehicle dock directly to the vehicle’s 12 VDC power system may result in damage to the vehicle dock or SIRIUS radio, or both.••••••](https://usermanual.wiki/Wistron-NeWeb/UWASLV1/User-Guide-706205-Page-6.png)
![[ Package Contents ]6Package ContentsThe following items are included with your purchase of the SIRIUS Stiletto Plug and Play Ve-hicle Kit. Unpack the kit carefully and make sure that everything shown is present. If anything is missing or damaged, or if the kit fails to operate properly, notify your dealer immediately. It is recommended that you retain the original carton and packing materials in case you need to ship your kit in the future.1preset tune jump 2 3 4 567 8 9 01 2 3+4 5 67 8 9jumppresetoptions displayback homemutetuneFM0Vehicle Dock Finger GripVehicle Dock Finger GripRemote ControlRemote ControlVehicle DockVehicle Dock Vehicle MountsVehicle MountsMagnetic AntennaMagnetic AntennaAlcohol SwabAlcohol SwabCigarette Lighter AdapterCigarette Lighter AdapterAntenna Cover/TailAntenna Cover/TailMounting ScrewsMounting Screws](https://usermanual.wiki/Wistron-NeWeb/UWASLV1/User-Guide-706205-Page-7.png)
![[ Controls ] 7ControlsVehicle DockFigure 1 and the table following identify and describe the buttons, connectors, and features of the vehicle dock.1preset tune jump 2 3 4 567 8 9 0FMlockDirect Entry Tune/Preset ButtonsPresetTuneDC5VLINE OUTFMLockJumpIR RemoteSensorPreset Mode IndicatorTune Mode IndicatorFM OUTANTFigure 1Figure 1](https://usermanual.wiki/Wistron-NeWeb/UWASLV1/User-Guide-706205-Page-8.png)
![[ Controls ]8Vehicle Dock Button and Connector DescriptionsButton/ Connector Action Description0 – 9 PressIn Tune Mode: Directly selects the channel indicted by the num-bers which were pressedIn Preset Mode: Selects presets 0 – 9tune Press Changes to the direct tuning mode where channel numbers may be enteredpreset PressChanges to the preset mode and displays the list of preset channelsThe second and subsequent press cycles through the preset banks, A, B, and Cjump Press Jumps to a preselected traffic/weather channelA second press returns to the previous channel or song/showFM PressDisplays the FM Frequency screen where the FM transmitter frequency can be selected, or an FM preset selected using the 0 – 9 buttonsLock Toggle Secures the Stiletto in the vehicle dockFM OUT This connection is used for the optional FM Direct Adapter which con-nects to the vehicle’s FM radio antenna inputDC 5V Connection for the Cigarette Lighter AdapterLINE OUT Audio output for connection to the vehicle’s audio system. An audio cable (not supplied) is required to utilize this connectionANT Connection for the Magnetic Antenna](https://usermanual.wiki/Wistron-NeWeb/UWASLV1/User-Guide-706205-Page-9.png)
![[ Controls ] 9Remote Control Reference GuideFigure 2 and the table following identify and describe the buttons of the remote control. The remote control works when the Stiletto is in the vehicle dock.1 2 3+4 5 67 8 9jumppresetoptions displayback homemutetuneFM0SelectFMJumpPresetTuneMedia Dial (CCW)Media Dial (CW)PowerLoveBackOptionsRewindRewindVolumeNumericKeypadFast-ForwardFast-ForwardDisplayHomeMutePlay/PauseFigure 2Figure 2](https://usermanual.wiki/Wistron-NeWeb/UWASLV1/User-Guide-706205-Page-10.png)
![[ Controls ]10Remote Control Button DescriptionsButton Action Satellite Radio EnvironmentInternet Radio EnvironmentReplay/Library EnvironmentPowerPress Turns the Stiletto On/OffMute Press Mutes (or un-mutes) the audioUp/Down PressPressing Up is equivalent to turning the Media Dial counter-clockwisePressing Down is equivalent to turning the Media Dial clockwiseIf listening, displays channel or category listIf in a list, menu, or prompt, scrolls to next or previous itemLeft/RightPress Pressing Right is equivalent to Fast-ForwardPressing Left is equivalent to Rewind SelectPress Selects highlighted items in a list, menu, or prompt backPress Returns back to the screen displayed just prior to the currently displayed screen homePress First press returns to the Home screenAdditional press returns to the Now Playing screen optionsPress Displays available options for the currently displayed screenIf no options are available, nothing is displayed](https://usermanual.wiki/Wistron-NeWeb/UWASLV1/User-Guide-706205-Page-11.png)
![[ Controls ] 11Remote Control Button Descriptions ContinuedButton Action Satellite Radio EnvironmentInternet Radio EnvironmentReplay/Library Environment displayPressCycles between 3-channel display mode, 6-channel display mode, artist name, and song title when in the channel browsing mode Play/PausePressPauses a broadcast or resumes playing a paused broadcastIf playing, mutes audioIf muted, resumes playingPauses or resumes playing the current song or show RewindPressIf listening, rewinds a broadcast to the previous song or showIf in a channel or preset list, moves through categories or preset banksIf listening and muted, resumes playingIf in a channel or category list, moves through channel categoriesSkips to the begin-ning of the song or showHold If listening, rewinds through a broadcastRewinds through song or show Fast-ForwardPressIf listening, fast-for-wards in the replay buffer to the next song or showIf in a channel or preset list, moves through categories or preset banksIf listening and muted, resumes playingIf in a channel or category list, moves through channel categoriesSkips to the next song or showHoldFast-Forwards through the replay bufferFast-Forwards through song or show](https://usermanual.wiki/Wistron-NeWeb/UWASLV1/User-Guide-706205-Page-12.png)
![[ Controls ]12Remote Control Button Descriptions ContinuedButton Action Satellite Radio EnvironmentInternet Radio EnvironmentReplay/Library Environment LovePressSaves the song or show if possible, or adds to favorites when song/show cannot be savedWhile recording, prompts to stop recording Adds the artist/song to the favorites listHoldDisplays recording setup screenWhile recording, prompts to stop recording+/–VolumePress + increases the audio volume— decreases the audio volumepreset PressChanges to the preset mode and displays the list of preset chan-nelsA second and subsequent press cycles through the preset banks, A, B, and Ctune Press Changes to the direct tuning mode where channel numbers may be entered0 - 9 PressIn Tune Mode: Directly selects the channel indicted by the num-bers which are pressedIn Preset Mode: Selects presets 0 – 9](https://usermanual.wiki/Wistron-NeWeb/UWASLV1/User-Guide-706205-Page-13.png)
![[ Controls ] 13Remote Control Button Descriptions ContinuedButton Action Satellite Radio EnvironmentInternet Radio EnvironmentReplay/Library Environmentjump Press Jumps to a preselected traffic/weather channelA second press returns to the previous channel or song/show FMPressDisplays the FM Frequency screen where the FM transmitter frequency can be selected for use when wirelessly connecting to an FM receiverRemote ContRol BatteRy InstallatIonTo install the remote control battery, locate the battery drawer on the bottom edge. Open the battery drawer by holding the latch tab to the right and sliding the drawer out as shown in Figure 3. Place the battery in drawer with the + side of the battery facing up and slide the drawer back into the remote control.Latch TabLatch Tab+Figure 3Figure 3](https://usermanual.wiki/Wistron-NeWeb/UWASLV1/User-Guide-706205-Page-14.png)
![[ Installation ]14InstallationSIRIUS suggests professional installation of this product in your vehicle. Professional instal-lation provides an experienced technician to install this product in your vehicle, advice for selecting a suitable mounting location, installation of the antenna, and routing all the neces-sary wires and cables. An installer will have the necessary audio connection accessories to provide optimal audio output of the SIRIUS radio directly to your vehicle’s audio system. Ask your SIRIUS retailer if they provide professional installation services, or can recommend a professional installation service.Installing the Vehicle KitWhen installing the vehicle dock, choose a location in your vehicle where the radio will not block your vision, interfere with the vehicle controls, or obstruct the air bag. The location should be easily accessible and provide good visibility of the display, and should not be located where it will be in direct sunlight which will affect the visibility of the display screen. The left side of the vehicle dock which has the FM button and the locking button should also not be obstructed.The mounting accessories necessary to install the vehicle dock in a vehicle are provided. Figure 4 shows two examples of the Stiletto mounted in a vehicle: A is the console mount method using the adhesive mount, and B is the vent mount method.](https://usermanual.wiki/Wistron-NeWeb/UWASLV1/User-Guide-706205-Page-15.png)
![[ Installation ] 1523451optionsdisplaybackhome78906presettunejumpA.B.23451optionsdisplaybackhome78906presettunejumpDepending upon the mounting method you select, the mount should be assembled as described in one of the following two sections. In choosing a mounting location, be sure that position chosen will not block access to the Lock and FM FM buttons on the side of the vehicle dock.Console Mount Method (A)To assemble and mount the vehicle dock for the console mount method A as shown in Figure 4:Attach the adhesive foot to the vehicle dock using the provided screws, placing the finger grip between the adhesive foot and the vehicle dock. (Figure 5)Before adhering the mount to the console, be sure to select your mounting position care-fully because once the mount has been adhered to a surface, it will not be possible to remove it and adhere it again.Clean the selected mounting surface area in the vehicle with the alcohol swab.Unscrew the adhesive foot from the mounting bracket. Peel the protective material off the adhesive on the foot and press the foot firmly against the vehicle surface.The adhesive mount should then be allowed to adhere for a minimum of 2-4 hours before use. Best adhesion occurs after 24 hours. When the adhesive foot has achieved suf-ficient adhesion, reattach the vehicle dock to the foot.1.2.3.4.5.Figure 4Figure 4](https://usermanual.wiki/Wistron-NeWeb/UWASLV1/User-Guide-706205-Page-16.png)
![[ Installation ]16MountingBracketVehicleDockFingerGrip FMlockAdhesiveFootFMlockFigure 5Figure 5](https://usermanual.wiki/Wistron-NeWeb/UWASLV1/User-Guide-706205-Page-17.png)
![[ Installation ] 17Vent Mount Method (B)To assemble and mount the vehicle dock for the vent mount method B as shown in Figure 4:Assemble the vent mount clip as shown in Figure 6. Note that the lower arm may be at-tached in two different positions. You should assemble the vent clip in the configuration that works best in your particular vehicle. Figure 6 illustrates both possible configura-tions of the vent clip. Attach the vent clip to the vehicle dock using the provided screws, placing the finger grip between the vent clip and the vehicle dock. (Figure 7)Slide the vent clip portion of the mount into a vent in your vehicle, insuring that one of the vent louvers slides between the upper and lower portions of the two clip arms, and hooks the rear of the louver.1.2.3.Figure 6Figure 6](https://usermanual.wiki/Wistron-NeWeb/UWASLV1/User-Guide-706205-Page-18.png)
![[ Installation ]18Vent ClipClip ArmsVehicleDockFingerGrip FMlockFMlockFigure 7Figure 7](https://usermanual.wiki/Wistron-NeWeb/UWASLV1/User-Guide-706205-Page-19.png)
![[ Installation ] 19Installing the AntennaThe optimum mounting location for the magnetic antenna is on the roof of the vehicle, with a minimum unobstructed area of 12 inches by 12 inches, and exactly 6½ inches from the rear roof edge of the vehicle (the length of the rubber antenna cable cover/tail). It is important to avoid any obstructions that will block the SIRIUS signal, obstructions such as a roof rack, a sunroof, roof mounted cargo containers, or other antennas. For convertible vehicles, the antenna should be installed on the trunk lid.For best performance, it is recommended that the antenna be installed with the rubber antenna cable cover/tail. This rubber antenna cable cover/tail provides two benefits: first, it positions the antenna the recommended distance from the rear window, rear door/hatch, or trunk edge to give the antenna the best view of the sky. Secondly, it conceals and protects the exposed antenna cable. The rubber antenna cable cover/tail has adhesive strips that hold it securely in place.The following illustrations show the recommended mounting locations of the antenna for several types of vehicles. (Figure 8) Follow these recommendations for best performance from the antenna.Sedan/Coupe. Mount the antenna along the rear center-line of the vehicle roof, located at the rear of the roof near the rear window.Pickup Truck. Mount the antenna along the rear center-line of the cab roof, located at the rear of the roof near the rear window.SUV/Mini-Van. Mount the antenna along the rear center-line of the vehicle roof, located at the rear of the roof near the rear door/hatch.Figure 8Figure 8](https://usermanual.wiki/Wistron-NeWeb/UWASLV1/User-Guide-706205-Page-20.png)
![[ Installation ]20Convertible. Mount the antenna along the center-line of the trunk lid, with the rubber antenna cable cover/tail directed toward the rear window.When you have selected a suitable mounting location, clean the area where the antenna and rubber antenna cable cover/tail will be mounted with the supplied alcohol swab.Rubber AntennaCover/TailProtectiveStripsAdhesiveStrainReliefCableConnect the rubber antenna cable cover/tail to the antenna cable, making sure that the strain-relief on the antenna sits into the rubber antenna cable cover/tail groove. (Figure 9) Route the antenna cable through the wire channel in the rubber antenna cable cover/tail. Do not remove the protective strips yet.Temporarily position the antenna and rubber antenna cable cover/tail in the selected mounting area and route the cable from the antenna to the vehicle’s interior by tucking it underneath the rubber molding around rear window, as shown in Figure 10.Route the cable from the lowest point of the rear window into the trunk. Take advantage of any existing cable channels or wiring conduits. For SUVs, mini-vans and 5-door vehicles, bring the cable into the vehicle under the rubber molding for the tailgate, and continue under the interior trim.From the trunk, or rear of the vehicle, route the cable around the passenger compartment and to the front of the vehicle, to the radio. Take care not pull the cable across sharp edges that could damage it, and keep it away from areas where it might entangle feet. Coil any excess Figure 9Figure 9Figure 10Figure 10](https://usermanual.wiki/Wistron-NeWeb/UWASLV1/User-Guide-706205-Page-21.png)
![[ Installation ] 21antenna cable in a location where it can be hidden. Connect the antenna cable to the ANT connection at the rear of the vehicle dock. (Refer to Figure 12 on page 22 for the location of this connector.)Once the antenna cable is routed through the vehicle, and you are satisfied with the cable routing, peel the protective material from the adhesive strips and press the rubber antenna cable cover/tail firmly into place on the vehicle. Double check that the location of the antenna and rubber antenna cable cover/tail are correct, and continue to press firmly down on rub-ber antenna cable cover/tail for another 30 seconds. (Figure 11) At room temperature (68 degrees), maximum adhesion usually occurs within 72 hours. During this period, avoid car washes and other contact with the antenna and rubber antenna cable cover/tail.Figure 11Figure 11](https://usermanual.wiki/Wistron-NeWeb/UWASLV1/User-Guide-706205-Page-22.png)
![[ Installation ]22Connecting the Cigarette Lighter AdapterConnect the provided cigarette lighter adapter to the DC5V connection at the rear of the vehicle dock. (Figure 12)DC5VLINE OUTFM OUTANTDo not use any other power adapter for the Stiletto, or connect it directly to the vehicle’s power. Doing so will damage the Stiletto. Using anything other than the supplied cigarette lighter adapter to power the vehicle dock will void the warranty.Docking and Un-docking the StilettoWhen docking the Stiletto be sure the Lock button of the vehicle dock is in the unlocked posi-tion. (Refer to Figure 1 on page 7 for the location of the Lock button.) Grasp the vehicle dock with your free hand and place the Stiletto into the vehicle dock, as shown in Figure 13, and slide it down until it is fully seated. Place the Lock button into the locked position to secure the Stiletto in the vehicle dock.To remove the Stiletto from the vehicle dock place the Lock button in the unlocked position. Grasp the vehicle dock with your free hand and pull the Stiletto up until it disengages from the vehicle dock.Figure 12Figure 12](https://usermanual.wiki/Wistron-NeWeb/UWASLV1/User-Guide-706205-Page-23.png)
![[ Installation ] 23back homedisplayoptions1preset tune jump 2 3 4 567 8 9 0Satellite RadioInternet RadioLibraryFigure 13Figure 13](https://usermanual.wiki/Wistron-NeWeb/UWASLV1/User-Guide-706205-Page-24.png)
![[ Installation ]24Maximizing Audio Quality From Your Stiletto RadioThere are two primary ways to connect your SIRIUS satellite radio to your vehicle radio: direct connect or wireless. The following sections will help you obtain the best performance. For the latest information go to http://www.sirius.com/vehicleinstallation.WIReless ConneCtIonYour SIRIUS radio contains an FM transmitter. The FM transmitter sends the audio from your SIRIUS radio to your vehicle radio. (Figure 14)90.1To tune your transmitter:Turn off your SIRIUS radio and tune through the FM channels on your vehicle radio to locate an FM channel that is not broadcasting in your area. If you use an FM channel that is being used by a local broadcaster, it will interfere with the performance of your SIRIUS radio. Once you have located an FM channel that is not broadcasting in your area, save it as a preset on your vehicle radio. This will become your SIRIUS preset.Power the Stiletto on. When it is completely powered up, press the FM FM button on the left side of the vehicle dock or press the FM button on the remote control.Use the Media Dial or the buttons on the remote control to select a new FM channel (Figure 15) and press the Select button. The Stiletto will now transmit on the selected FM frequency.1.2.3.Figure 14Figure 14](https://usermanual.wiki/Wistron-NeWeb/UWASLV1/User-Guide-706205-Page-25.png)
![[ Installation ] 2591.7FM TransmitTurn the Media Dial tochange the frequency.Use the number keys torecall or assign FM presets103.9 FM4FM TransmitTurn the Media Dial tochange the frequency.Use the number keys torecall or assign FM presets To assign FM channels for the FM presets:Press the FM FM button on the left side of the vehicle dock or press the FM button on the remote control.Use the Media Dial or the buttons on the remote control to select an FM channel.Press and hold the preset number (0—9) in which you want to store the selected FM channel. (Figure 16) Repeat steps 2 and 3 to assign additional FM presets.Press the Select button to exit and transmit on the selected FM channel, or press the FM FM button to simply exit.If you’re not sure which FM channels are not broadcasting in your home or travel cities, you can also go to http://sirius.com/fmchannel and search for a suggested FM channel based on your zip code.1.2.3.4.Figure 15Figure 15Figure 16Figure 16Note: The FM transmitter in your SIRIUS radio is automatically set to FM channel 88.1. This may not be the best channel in your area.Tip: If you regularly travel between cities with different active FM channels, you may need to find channels that are not broadcasting in each city. Several SIRIUS radio models can store multiple FM transmit channels, so you can easily switch to the best FM channel for each city. You will also want to set the FM channels that are not broadcasting in each city as presets on your vehicle radio.Note: The FM transmitter in your SIRIUS radio is automatically set to FM channel 88.1. This may not be the best channel in your area.Tip: If you regularly travel between cities with different active FM channels, you may need to find channels that are not broadcasting in each city. Several SIRIUS radio models can store multiple FM transmit channels, so you can easily switch to the best FM channel for each city. You will also want to set the FM channels that are not broadcasting in each city as presets on your vehicle radio.](https://usermanual.wiki/Wistron-NeWeb/UWASLV1/User-Guide-706205-Page-26.png)
![[ Installation ]26DIReCt ConneCtIonsDirect connection provides better audio performance than a wireless connection and removes the possibility of interference from local FM broadcasters. There are several ways to directly connect your Stiletto which are explained in the following sections. Direct Wired Audio ConnectionIf your vehicle radio offers an “AUX IN” or “LINE IN” connection, it is the best audio connec-tion available. If the “AUX IN” or “LINE IN” connector is located on the front of your vehicle radio, this is also the easiest connection. (Figure 17)Purchase an audio cable that matches the connection type of your vehicle radio and your SIRIUS radio at your local electronics retailer. Your SIRIUS radio requires a 1/8” stereo male connector. Your local electronics retailer can help you determine the proper con-nection for your car radio.Plug one end of the cable into the LINE OUT jack on your SIRIUS radio. (Refer to Figure 12 on page 22.) Plug the other end into your “AUX IN” or “LINE IN” jack on your vehicle radio.FMOFF 1.2.Tip: Depending on the model of radio in your vehicle and your level of comfort with in-car installations, a direct connection may require professional installation assistance. Ask your retailer or contact SIRIUS customer support for recommended installers in your area.Tip: Depending on the model of radio in your vehicle and your level of comfort with in-car installations, a direct connection may require professional installation assistance. Ask your retailer or contact SIRIUS customer support for recommended installers in your area.Figure 17Figure 17Note: Refer to your vehicle radio manufacturer’s guidelines for correct installation.Note: If the “AUX IN” or “LINE IN” connection is on the back of your vehicle radio, you may want to consider professional installation. (Figure 18)Note: Refer to your vehicle radio manufacturer’s guidelines for correct installation.Note: If the “AUX IN” or “LINE IN” connection is on the back of your vehicle radio, you may want to consider professional installation. (Figure 18)](https://usermanual.wiki/Wistron-NeWeb/UWASLV1/User-Guide-706205-Page-27.png)
![[ Installation ] 27FMOFFCassette Adapter If your vehicle radio has a cassette player:Purchase a Cassette Adapter at your local electronics retailer.Connect the adapter between the LINE OUT on your SIRIUS radio (refer to Figure 12 on page 22) and the vehicle radio’s cassette slot. (Figure 19)FMOFF1.2.Figure 18Figure 18Note: Refer to the cassette adapter manufacturer’s guidelines for correct use.Note: Refer to the cassette adapter manufacturer’s guidelines for correct use.Figure 19Figure 19](https://usermanual.wiki/Wistron-NeWeb/UWASLV1/User-Guide-706205-Page-28.png)
![[ Installation ]28SIRIUS FM Direct AdapterIf your vehicle radio does not have an “AUX IN” or “LINE IN” jack, the SIRIUS FM Direct Adaptor provides a wired connection between your SIRIUS radio and your vehicle radio, eliminating the outside static and interference you sometimes experience when using a wireless FM connection. (Figure 20) Professional installation may be required. See your local SIRIUS retailer. (The SIRIUS FM Direct Adapter is available at your local SIRIUS retailer or at http://shop.sirius.com).90.1FMDIRECTADAPTER Figure 20Figure 20](https://usermanual.wiki/Wistron-NeWeb/UWASLV1/User-Guide-706205-Page-29.png)
![[ Installation ] 29Subscribing to the SIRIUS ServiceBefore you can listen to the SIRIUS service, you need to activate your subscription. To sub-scribe, do the following:To activate your Stiletto, first be sure the battery is fully charged. Attach the antenna headphones and position yourself so that your Stiletto is receiving a good SIRIUS signal, as described in the previous section.Select Satellite Radio All Channels and tune to channel 184. The SIRIUS channel line-up will begin updating. Wait until the channel updates have completed before press-ing any buttons.Once the channels have been updated, the display will change to Call 1-888-539-SIRIUS to Subscribe. You should be able to hear audio from channel 184, the SIRIUS Weather and Emergency channel.Use the Media Dial to tune to channel 0 to display the Stiletto’s unique 12-digit SIRIUS ID Number (SID). (Figure 21) The SID number is also available on the Stiletto’s packaging, and may also be accessed by selecting Settings Device Sirius ID. Write the SID number down in the space provided near the end of this user guide.Have your credit card handy and contact SIRIUS on the Internet at: https://activate.siriusradio.com/ and follow the prompts to activate your subscription. You can also call SIRIUS toll-free at: 1-888-539-SIRIUS (1-888-539-7474).When you have successfully subscribed to the SIRIUS service, and the Stiletto has been updated with your subscription information, an alert will be displayed. To continue, press the Select button.You are now ready to begin enjoying Sirius Satellite Radio’s digital entertainment, and can tune to other channels!00112233445566SIDSatellite1.2.3.4.5.6.Figure 21Figure 21](https://usermanual.wiki/Wistron-NeWeb/UWASLV1/User-Guide-706205-Page-30.png)
![[ Operation ]30OperationPresetsChannel presets may be selected using the vehicle dock to tune to a channel by pushing the 0—9 buttons when the vehicle dock is in the preset mode. The Stiletto must be in the Satellite Radio mode to select presets. To select to a preset:Press the preset Preset button on the vehicle dock. The preset mode indicator light will indicate that the preset mode is active.Select the desired preset band (A, B, or C) by repeatedly pressing the preset Preset but-ton until the desired preset band is displayed. (Figure 22)Press one of the 0—9 buttons to select the desired preset. OR Use the Media Dial to highlight a preset and press the Select button. (Figure 23)Presets (B)MargaritavilleEverywhereTim McGrawB1 31B2 Sirius Disorder24 Cure For LoveBonnie RaittB3 Roadhouse62 Honky Tonk SongWebb PierceBPresets1.2.3.Figure 23Figure 23Figure 22Figure 22](https://usermanual.wiki/Wistron-NeWeb/UWASLV1/User-Guide-706205-Page-31.png)
![[ Operation ] 31Direct Channel TuningChannels may be tuned directly by entering the channel number using the 0—9 buttons on the vehicle dock when the vehicle dock is in the tune mode. The Stiletto must be in the Satellite Radio mode to select channels. To directly tune a channel:Press the tune Tune button on the vehicle dock. (Figure 24) The tune mode indicator light will indicate that the tune mode is active.Enter the channel number of the desired channel. If a 3-digit channel number is entered, the channel will be tuned immediately. If only one or two digits are entered, the channel will be tuned after a slight pause. (Figure 25)DirectTune 26Enter channel #1.2.Figure 25Figure 25Figure 24Figure 24](https://usermanual.wiki/Wistron-NeWeb/UWASLV1/User-Guide-706205-Page-32.png)
![[ Operation ]32Jump FeatureThe jump Jump button on the vehicle dock allows you to jump to a pre-selected traffic/weather report for your location. The Stiletto must be in the Satellite Radio mode to use the jump feature.When the jump Jump button is pressed, the traffic/weather report will be tuned. (Figures 26 & 27) If the traffic/weather report for your location is not immediately available, the Waiting for local report message will be displayed to indicate a jump is active. Once your local report is ready, the Stiletto will automatically begin playing the traffic/weather report.Pressing the jump Jump button while the traffic/weather report is pending will cancel the search. Pressing the jump Jump button after the radio has tuned to your traffic report will return back to the channel to which you had been listening immediately prior to pressing the jump Jump button.The traffic/weather report for your location is associated with the jump Jump button using the Settings menu. If you press the jump Jump button but have not yet selected a traf-fic/weather location, you will be prompted to select a location from a list of available cities. (Figure 28)148SatelliteNY TrafficTraffic &WeatherTraffic & WeatherAtlantaBaltimoreBoston ChicagoDallas / Fort WorthDetroitFigure 26Figure 26Figure 28Figure 28Figure 27Figure 27](https://usermanual.wiki/Wistron-NeWeb/UWASLV1/User-Guide-706205-Page-33.png)
![[ Troubleshooting ] 33TroubleshootingSymptom SolutionSIRIUS radio does not power onBlown fuse, or the vehicle dock does not have power or is not properly connected. Check the cigarette lighter adapter connection. Refer to the vehicle’s owners manual for the location of the vehicle’s fuse panel and check for a blown fuse.SIRIUS radio displays: Antenna Not DetectedThe satellite antenna is not connected to the vehicle dock. Check the satellite antenna connection to the vehicle dock.SIRIUS radio displays: Acquiring SignalThe Stiletto is searching for a satellite signal. Check for obstacles over or around the satellite antenna. Change the vehicle location to eliminate nearby obstacles (bridges, overpasses, tress, buildings, etc).Audio static or loss of clarityThe FM frequency contains static. Locate a unused FM channel on your vehicle radio and set the FM transmitter frequency of the SIRIUS radio to match. If using a direct connection, check the cable connections. Refer to the section, Maximizing Audio Quality From Your Stiletto Radio.No sound The vehicle dock is not connected or is incorrectly connected to the vehicle’s sound system. Refer to the section Maximizing Audio Quality From Your Stiletto Radio and follow the instruc-tions carefully.](https://usermanual.wiki/Wistron-NeWeb/UWASLV1/User-Guide-706205-Page-34.png)
![[ Optional Accessories ]34Optional AccessoriesThe following optional accessories are available for purchase from your SIRIUS retailer to maximize your SIRIUS Stiletto experience:Home Kit (Model SLH1)The Stiletto Home Kit is a compact home dock that provides everything you need to use the Stiletto in your home or office. The sleek home dock pro-vides a convenient way to charge your Stiletto’s battery along with an extra slot for charging a spare battery. The included indoor/outdoor antenna provides improved reception, while audio cables enable you to connect the Stiletto to amplified speakers or a home entertainment system.The kit includes a compact tabletop/desktop home dock with FM output for wireless con-nectivity, a remote control, audio cables, an adjustable indoor/outdoor windowsill antenna with 20’ of cable, and an AC Adapter. Detailed installation instructions are included with the kit.Executive Sound System (Model SLEX1)The Stiletto Executive Sound System is a portable docking station and audio system for use with the Stiletto radio. With the built-in amplifier and speakers, the system delivers rich, powerful sound indoors or outdoors, and features an auxiliary input for other audio devices. Included with the system is an adjustable indoor/outdoor windowsill antenna with 20’ of cable and an AC adapter.FM Direct Adapter (Product No. 14100)The FM Direct Adapter directly connects the FM signal from your SIRIUS radio to your vehicle’s AM/FM radio, reducing any interference which might be present from FM radio sta-tion broadcasts. When the SIRIUS radio is turned off, the vehicle’s FM antenna is automati-cally connected back to the vehicle’s AM/FM radio. The adapter connects directly in-line with the vehicle’s existing AM/FM antenna input. SIRIUS recommends professional installation of this product.](https://usermanual.wiki/Wistron-NeWeb/UWASLV1/User-Guide-706205-Page-35.png)
![[ Warranty ] 35Warranty12 Month WarrantySIRIUS Satellite Radio Inc. (the “Company”) warrants to the original retail purchaser of this product that should this product or any part thereof, under normal use and conditions, be proven defective in material or workmanship within 12 months from the date of original purchase, such defect(s) will be repaired or replaced with new or reconditioned product (at the Company’s option) without charge for parts and repair labor. To obtain repair or replacement within the terms of this Warranty, the product is to be delivered with proof of warranty coverage (e.g. dated bill of sale), specification of defect(s), transportation prepaid, to the location shown below under WARRANTY RETURN. This Warranty does not extend to the elimination of externally generated static or noise, to correction of antenna problems, to costs incurred for installation, removal or reinstallation of the product, or to damage to tapes, compact discs, speakers, accessories, or vehicle electrical systems. This Warranty does not apply to any product or part thereof which, in the opinion of the Company, has suffered or been damaged through alteration, improper installation, mishandling, misuse, neglect, accident, or by removal or defacement of the factory serial number/bar code label(s). THE EXTENT OF THE COMPANY’S LIABILITY UNDER THIS WARRANTY IS LIMITED TO THE REPAIR OR REPLACEMENT PROVIDED ABOVE AND, IN NO EVENT, SHALL THE COMPANY’S LIABILITY EXCEED THE PURCHASE PRICE PAID BY PURCHASER FOR THE PRODUCT. This Warranty is in lieu of all other express warranties or liabilities. ANY IMPLIED WARRANTIES, IN-CLUDING ANY IMPLIED WARRANTY OF MERCHANTABILITY, SHALL BE LIMITED TO THE DURA-TION OF THIS WRITTEN WARRANTY. ANY ACTION FOR BREACH OF ANY WARRANTY HERE-UNDER INCLUDING ANY IMPLIED WARRANTY OF MERCHANTABILITY MUST BE BROUGHT WITHIN A PERIOD OF 48 MONTHS FROM DATE OF ORIGINAL PURCHASE. IN NO CASE SHALL THE COMPANY BE LIABLE FOR ANY CONSEQUENTIAL OR INCIDENTAL DAMAGES FOR BREACH OF THIS OR ANY OTHER WARRANTY, EXPRESS OR IMPLIED, WHATSOEVER. No person or representative is authorized to assume for the Company any liability other than expressed herein in connection with the sale of this product. Some states do not allow limitations on how long an implied warranty lasts or the exclusion or limitation of incidental or consequential damage so the above limitations or exclusions may not apply to you. This Warranty gives you specific legal rights and you may also have other rights which vary from state to state.WARRANTY RETURN: To obtain repair or replacement within the terms of this Warranty, please re-turn product to an authorized retailer or call Customer Service at 1-800-869-5187; proof of purchase and description of defect are required. Products to be returned to an approved warranty station must be shipped freight prepaid.](https://usermanual.wiki/Wistron-NeWeb/UWASLV1/User-Guide-706205-Page-36.png)
![[ Specifications ]36SpecificationsCigarette Lighter Adapter Fuse Requirement . . . . . . . . . . . . . . . . . . . . . . . . . . . . 2A Slow Blow Cigarette Lighter Adapter Cable Length . . . . . . . . . . . . . . . . . . . . . . . . . . . . . . . . . . . 1.8m (6ft.)Cigarette Lighter Adapter Operating Temperature . . . . . . . . . . -20° to +85° C (-4° to +185° F)Vehicle Dock Power Requirements . . . . . . . . . . . . . . . . . . . .10-16 Volts, Negative Ground, DCAntenna Type................................................Low Profile MagneticAntenna Cable Length . . . . . . . . . . . . . . . . . . . . . . . . . . . . . . . . . . . . . . 21’ (single micro-cable)Connector Type ................................................ SMB (right-angle)Audio Interface...........................................1/8” / 3.5mm Stereo Jack](https://usermanual.wiki/Wistron-NeWeb/UWASLV1/User-Guide-706205-Page-37.png)
![[ Copyrights & Trademarks ] 37Copyrights & Trademarks© 2006 Sirius Satellite Radio Inc. All Rights Reserved.® “SIRIUS”, the SIRIUS dog logo, channel names and logos are trademarks of Sirius Satellite Radio Inc. All Rights Reserved.™ “Stiletto” is a trademark of Sirius Satellite Radio.Hardware, subscription, and activation fee required. For full Terms & Conditions, visit http://sirius.com. Prices and programming are subject to change. Not available in HI and AK. Equipment and subscription sold separately. Installation required with some equipment.](https://usermanual.wiki/Wistron-NeWeb/UWASLV1/User-Guide-706205-Page-38.png)
![[ SIRIUS ID ]38SIRIUS IDWrite down the SIRIUS ID (SID) of your Stiletto in the space provided below.SID: _______________________________________](https://usermanual.wiki/Wistron-NeWeb/UWASLV1/User-Guide-706205-Page-39.png)