Wistron 2008MMAPER6 GPS Handheld Device User Manual 604 0046 001 A UM 4200
Wistron Corporation GPS Handheld Device 604 0046 001 A UM 4200
UserManual.wiki
>
Wistron
>
2008MMAPER6 User Manual
User manual
Navigation menu
Upload a User Manual
Namespaces
Wiki Guide
HTML
PDF
Info
Views
User Manual
Discussion / Help
Navigation

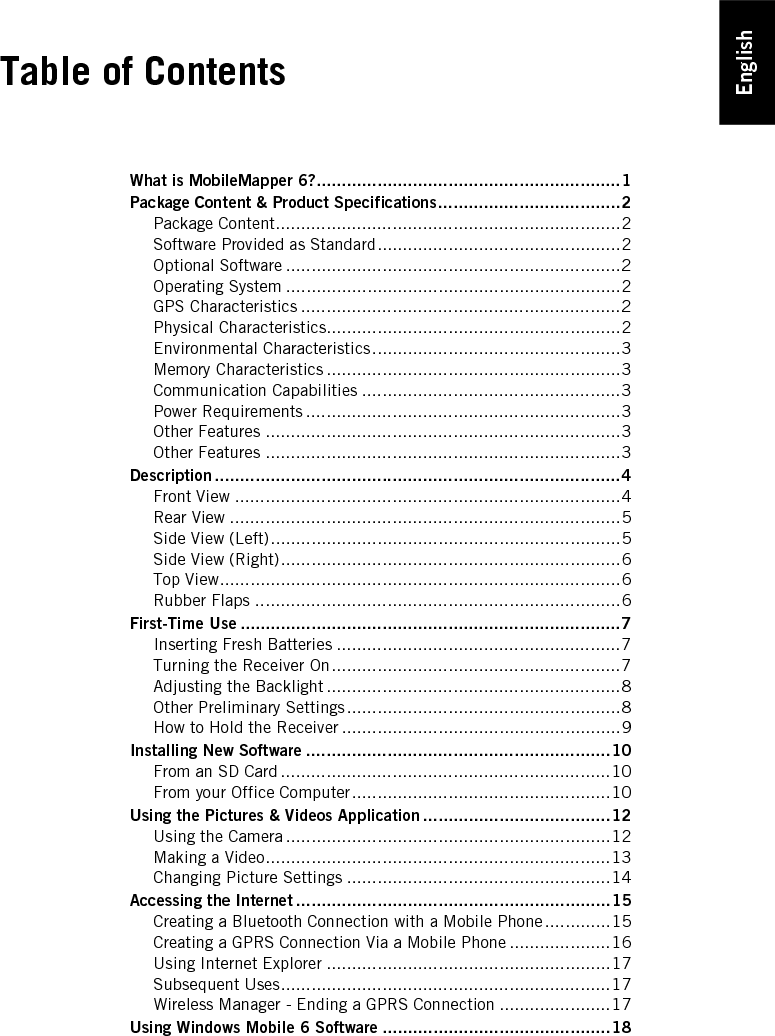
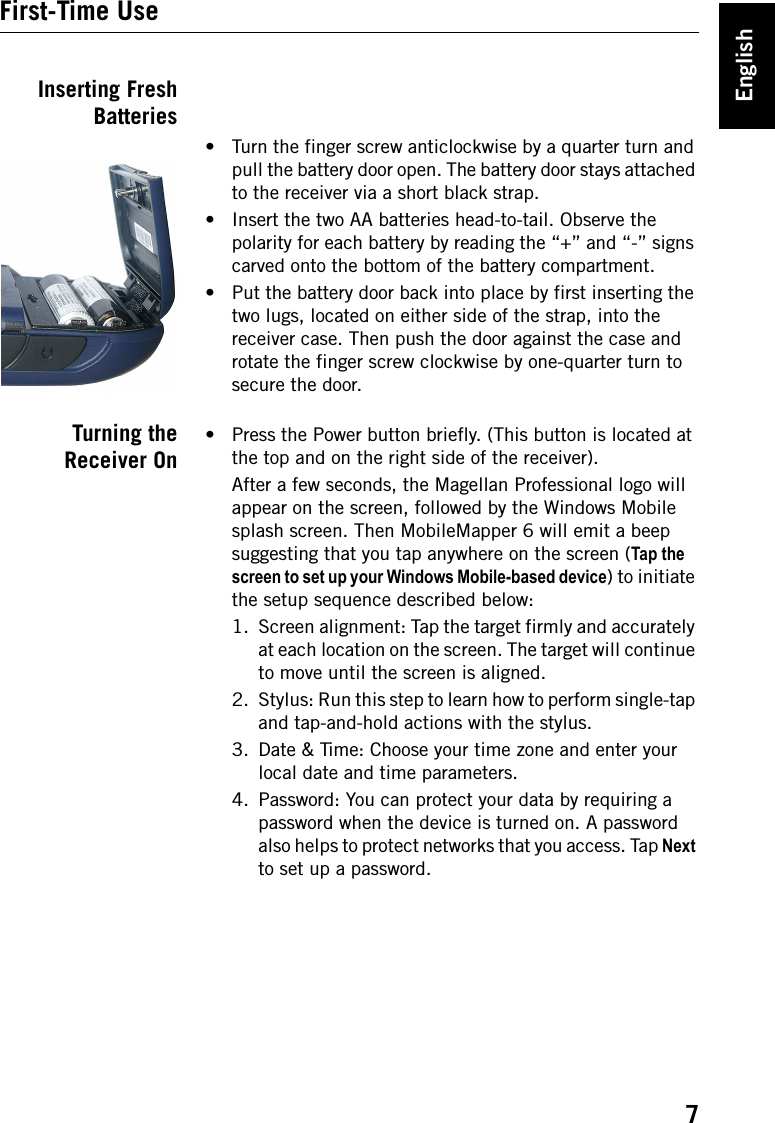
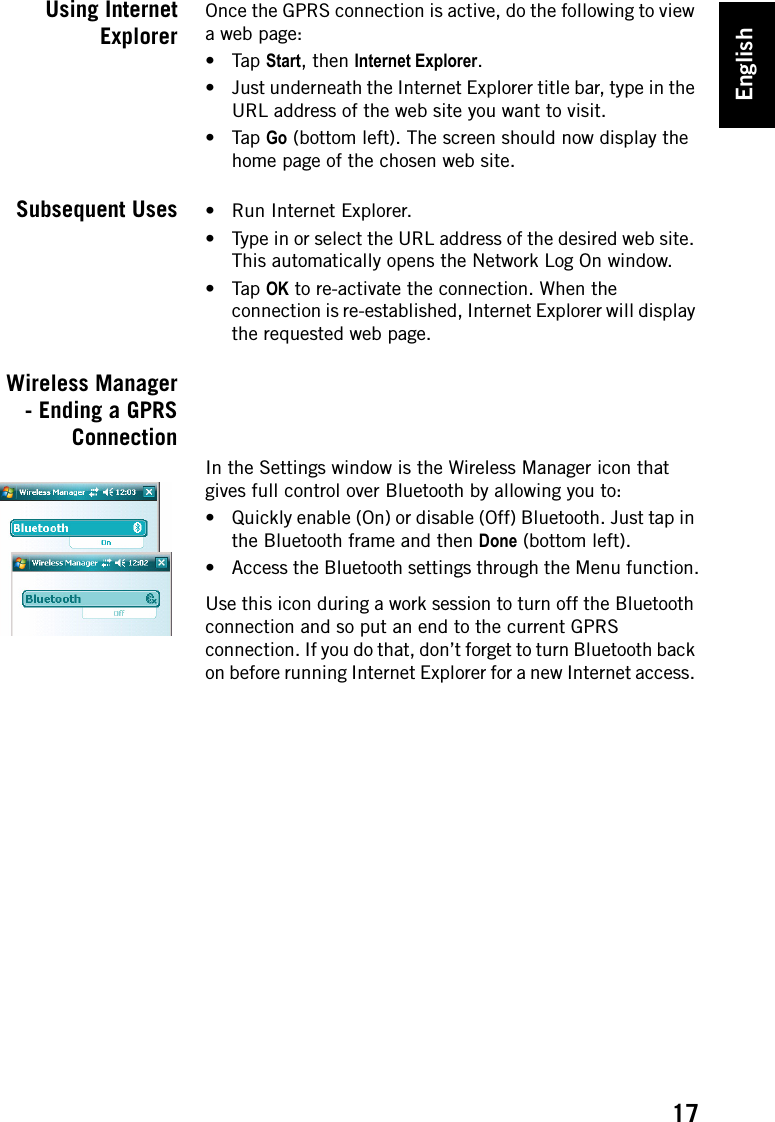
![English4DescriptionFront ViewDisplay ScreenThe display screen [1] is a large 2.7-inch QVGA color touch screen.Keypad, Scroll and Enter ButtonsThe keypad [2] consists of the following items: • ZOOM+ and ZOOM-: Use these buttons to adjust the scale of the map displayed on the screen (only applicable to software displaying maps).• LOG, MENU, ESC buttons: These buttons are specific to software applications designed to use these buttons. They have no effect with the standard Windows Mobile utilities, except for the ESC button in some cases. The Enter button [3] is used to accept highlighted input and initiate various functions.The Scroll button [4] is the ring around the Enter button. It is used to move the cursor on the screen, from a data field to the next on a parameter screen, from an option to another in a menu, from a geographical location to another on a map screen. Pressing the ring has an effect only in the up, down, left and right directions.Stylus and Stylus HolderThe stylus [5] is a short plastic stick, which you can use to work directly from the touch screen. When not used, the stylus can conveniently be stored in the receiver by inserting it into the dedicated holder [5]. Built-in AntennaThe MobileMapper 6 incorporates a built-in antenna [6]. Because of the presence of a built-in antenna, the receiver should be held properly to optimize satellite reception. MicrophoneA microphone is used by the voice recorder. Keep the small aperture [7] clear when recording a vocal comment. [6][7][2][1][5] [3] [4]](https://usermanual.wiki/Wistron/2008MMAPER6/User-Guide-898075-Page-6.png)
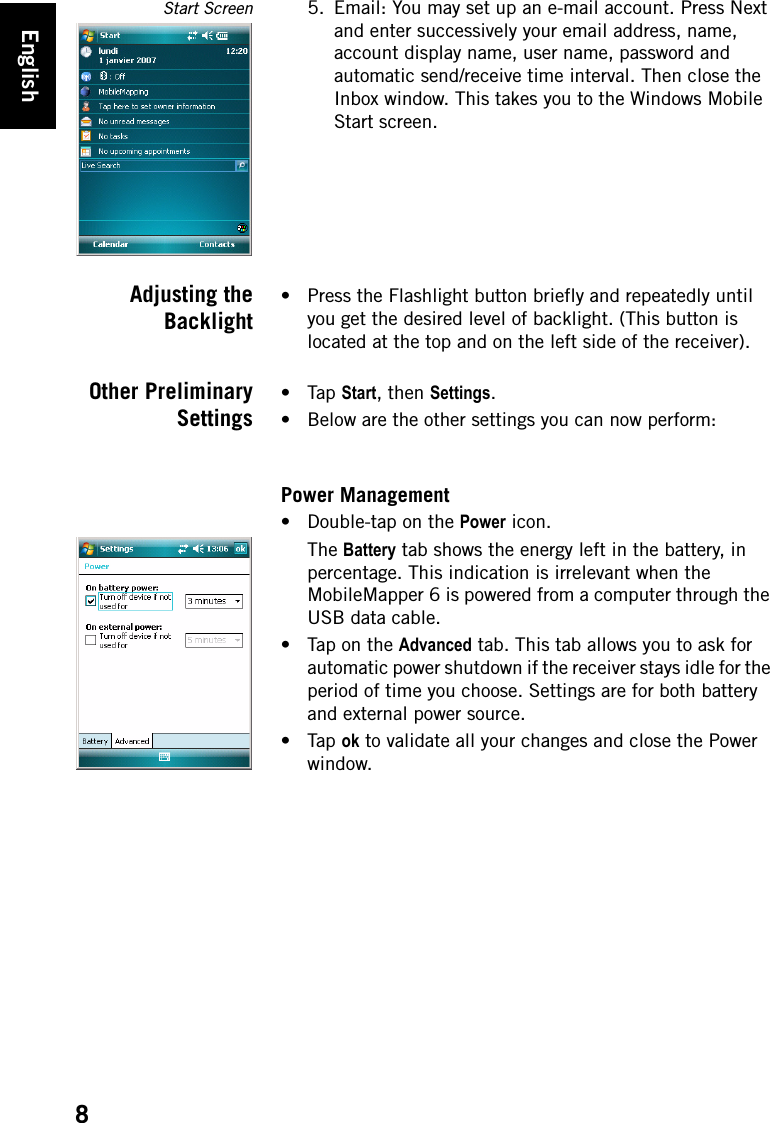
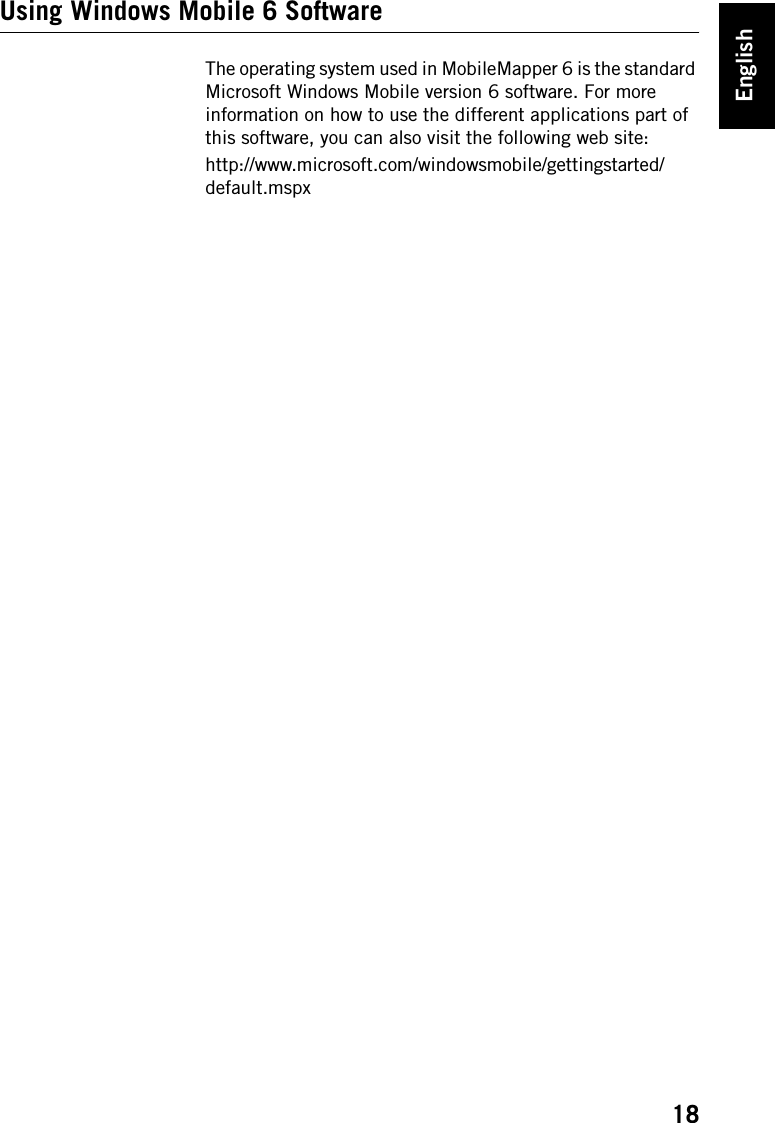
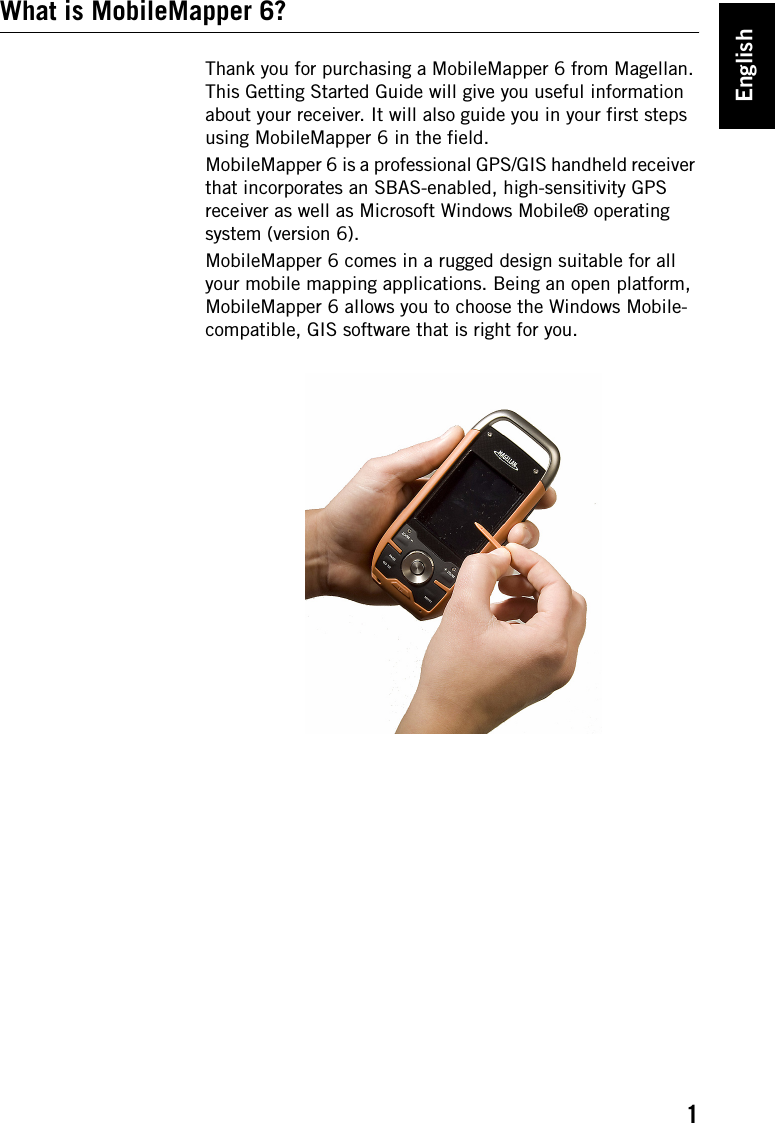
![English5Rear ViewCamera LensKeep the camera lens [8] clear when taking pictures or recording videos. LoudspeakerAs a multi-media device, MobileMapper includes a high-quality loudspeaker [9] used by any voice-based software application.USB Data ConnectorUse this connector [10] to secure the Magellan USB Data cable onto the receiver. The MobileMapper 6’s USB port is used exclusively for a connection to a computer via Microsoft ActiveSync. Battery CompartmentThe receiver uses two standard AA batteries, whether rechargeable or not. To access the battery compartment [11], loosen the quarter-turn finger screw [12].Side View (Left) Flashlight ButtonThe flashlight button [13] has two functions: • Screen backlight: Press the button shortly to change the screen backlight setting. There are five different backlight levels (off, low, medium, high, very high). Each new short press on the button allows you to select the next backlight level.• Flashlight: A long press on this button (about two seconds) will indefinitely turn on the flashlight. Orientate the receiver accordingly to use the flashlight. To turn it off, hold the button pressed until it goes out.Hold Slide SwitchSetting the Hold slide switch [14]* to “HOLD” freezes the screen and makes the stylus and buttons unusable. Use this button to suspend the use of the receiver and protect it from any accidental action.External Antenna InputUse the external antenna input [15]* to connect an external antenna to the receiver. When an external antenna is connected, the built-in antenna is automatically disconnected from the receiver input.[8][11][10] [12][9][13][14][15]](https://usermanual.wiki/Wistron/2008MMAPER6/User-Guide-898075-Page-7.png)
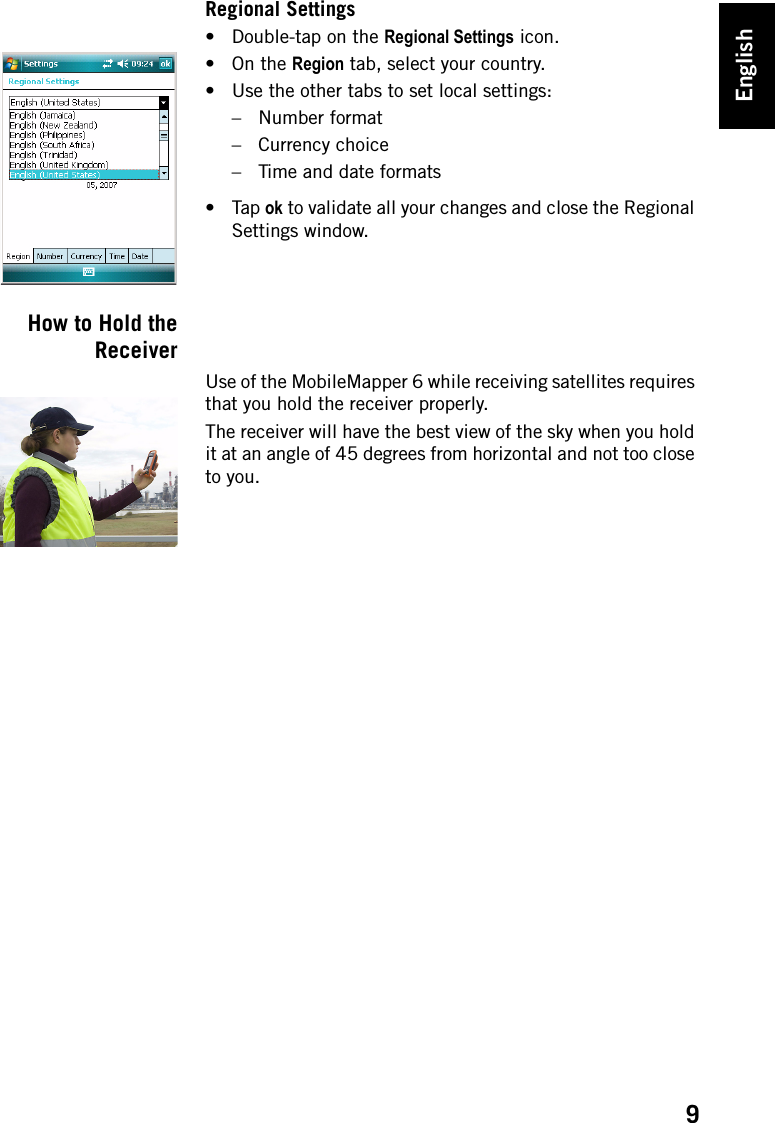
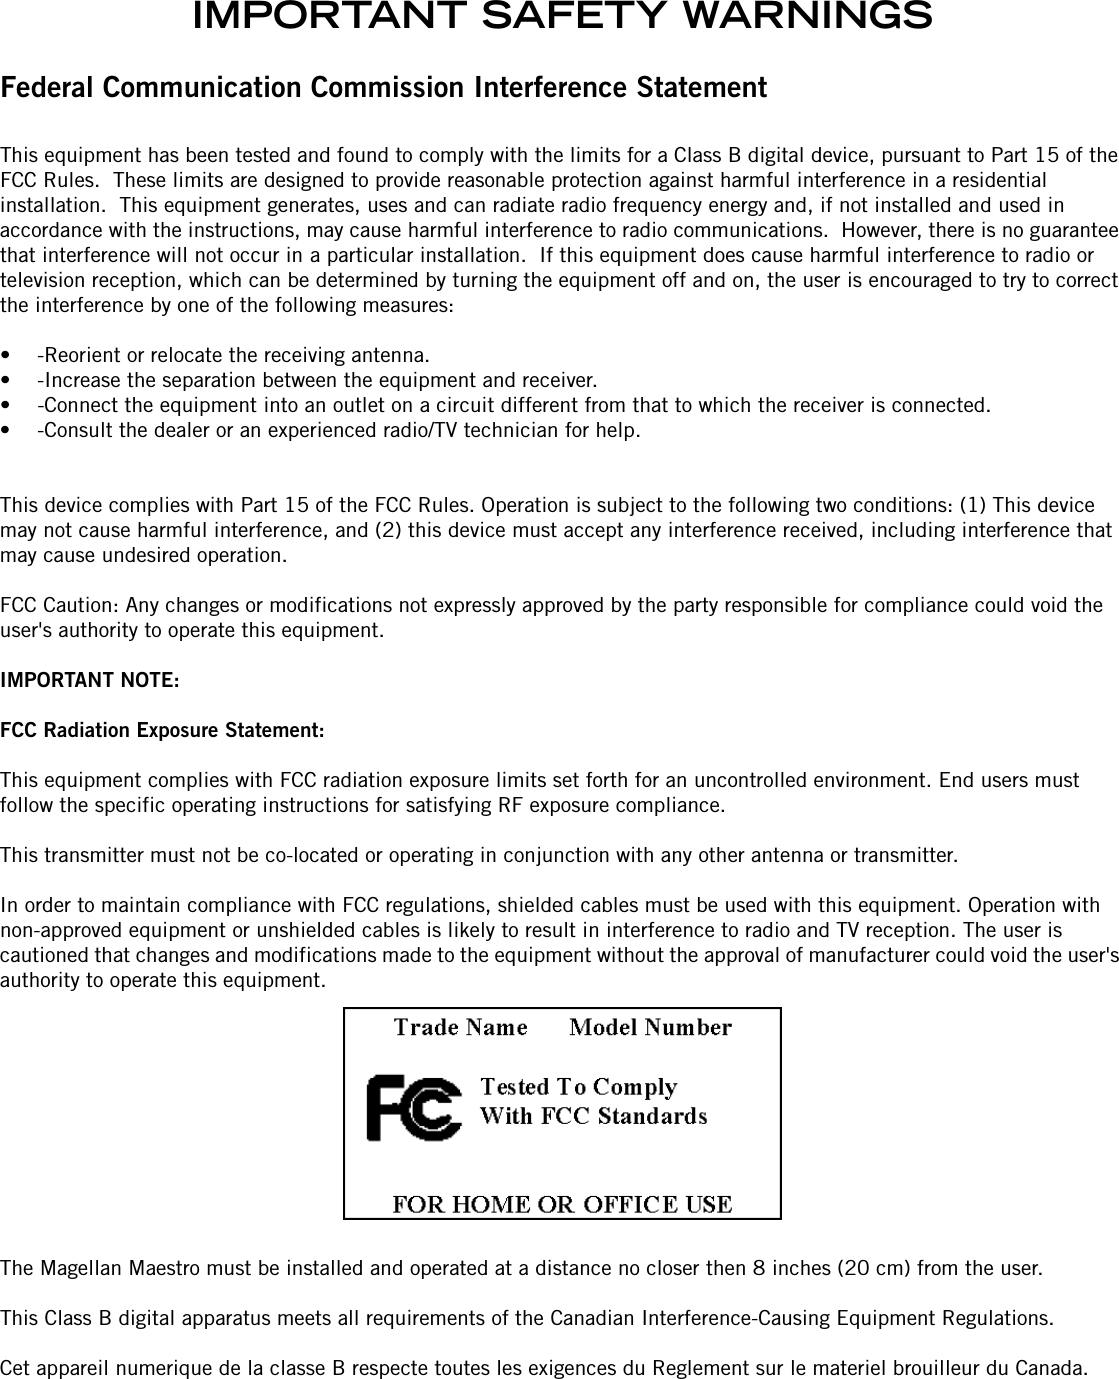
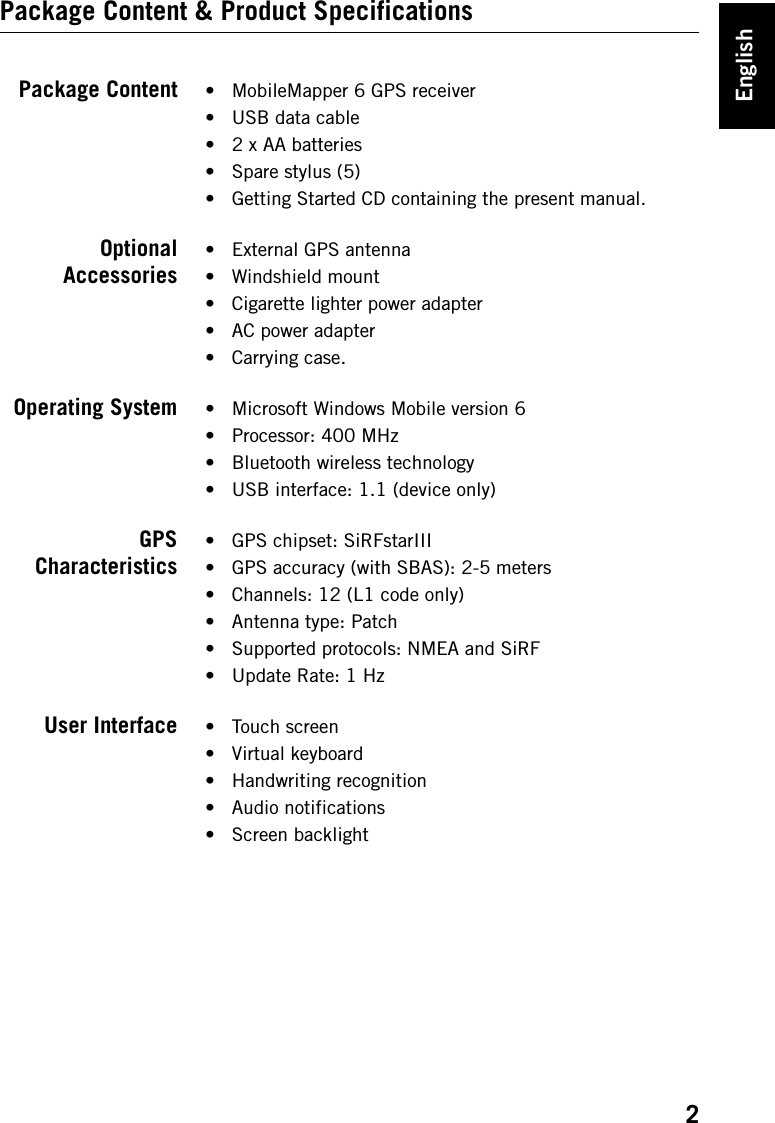
![English6Side View (Right) Power ButtonUse the Power button [16] to turn on or off the MobileMapper 6. In both cases, a short press is enough to turn on or off the receiver.Rather than actually turning off the MobileMapper 6, the Power button in fact puts the receiver in suspend mode. This means that when you next turn it on, the receiver will restore the context in which it was when you last turned it off.Only complete removal of the internal battery, disconnection of the external AC adapter or a reset action will actually shut down the receiver. SD Card SlotGives access to a slot [17]* where you can insert or extract an SD card. Earphone OutputA 1/4-inch jack (TRS connector) [18]* used to connect an earphone to the MobileMapper 6. Top ViewThree-LED FlashlightThis is a powerful white flashlight [19] that can advantageously be used in dim light conditions. Using MobileMapper 6 as a flashlight may however be incompatible with GPS reception, i.e. in the way you hold the receiver. Reset buttonPress the Reset button [20] using the stylus when you need to perform a software reset. This will re-boot the Windows Mobile Operating System. Rubber FlapsItems [14], [15], [17] and [18] presented above are all marked with a “*” symbol indicating that a black rubber flap is used to protect each of them.To access one of these items, just insert a nail underneath the flap and pull it open.[16][17][18][20][19]](https://usermanual.wiki/Wistron/2008MMAPER6/User-Guide-898075-Page-8.png)