Wistron MPCI3A-20R Wireless LAN Built in Acer Notebook User Manual TM100 e
Wistron Corporation Wireless LAN Built in Acer Notebook TM100 e
UserManual.wiki
>
Wistron
>
MPCI3A-20R User Manual
>
Manua 3
Contents
1.
Manual 1
2.
Manua 2
3.
Manua 3
4.
Manua 4
Manua 3
Navigation menu
Upload a User Manual
Namespaces
Wiki Guide
HTML
PDF
Info
Views
User Manual
Discussion / Help
Navigation
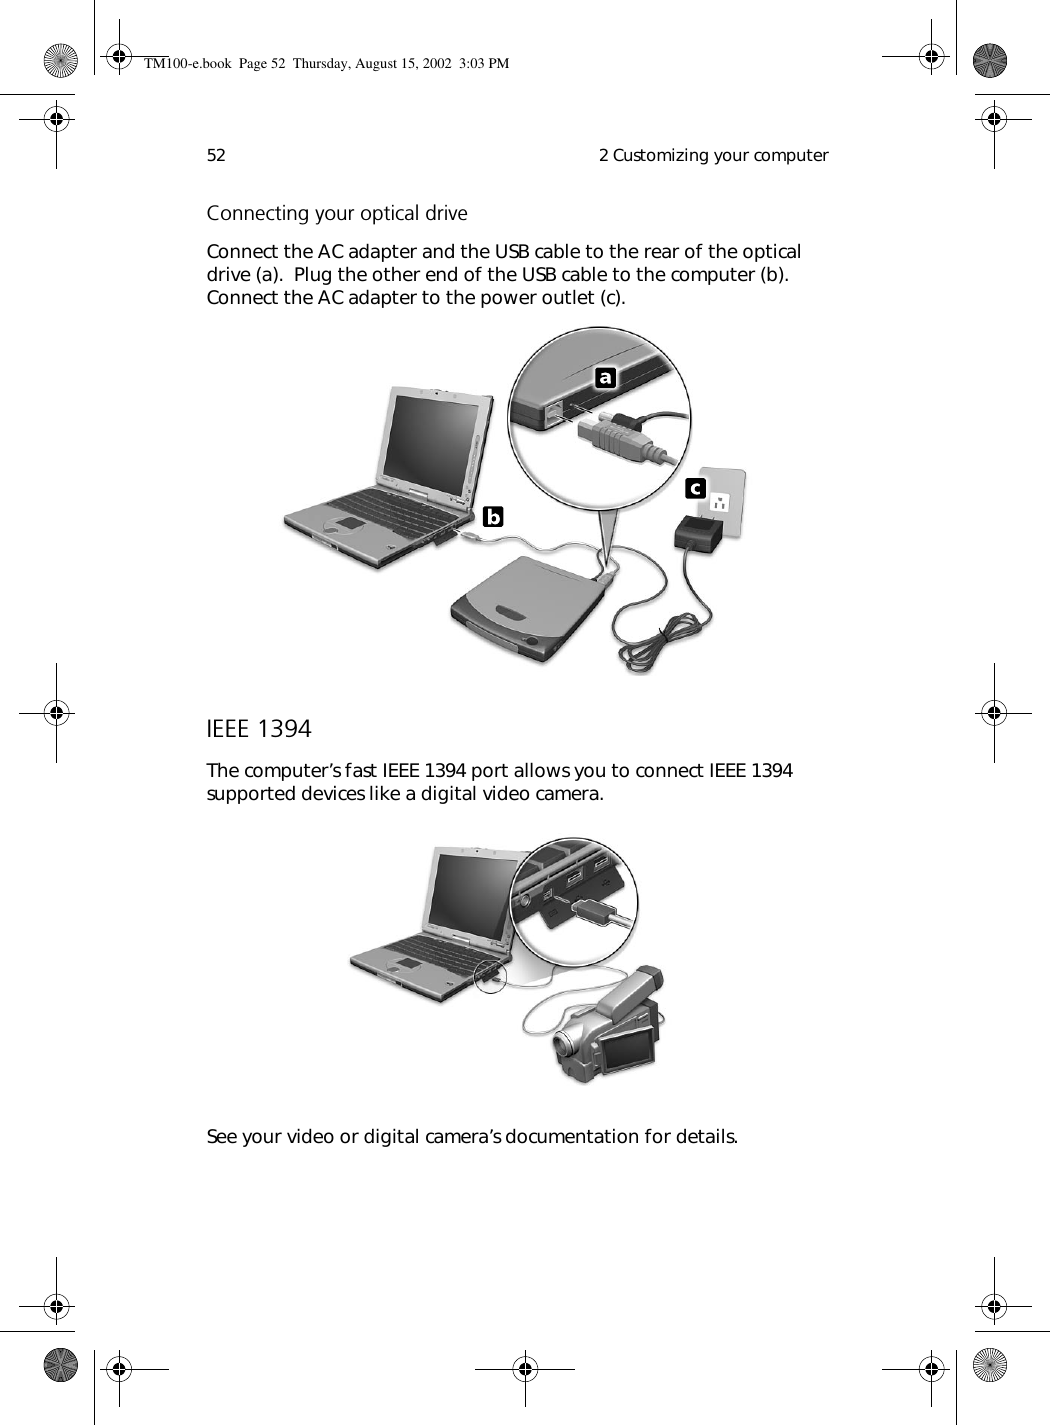
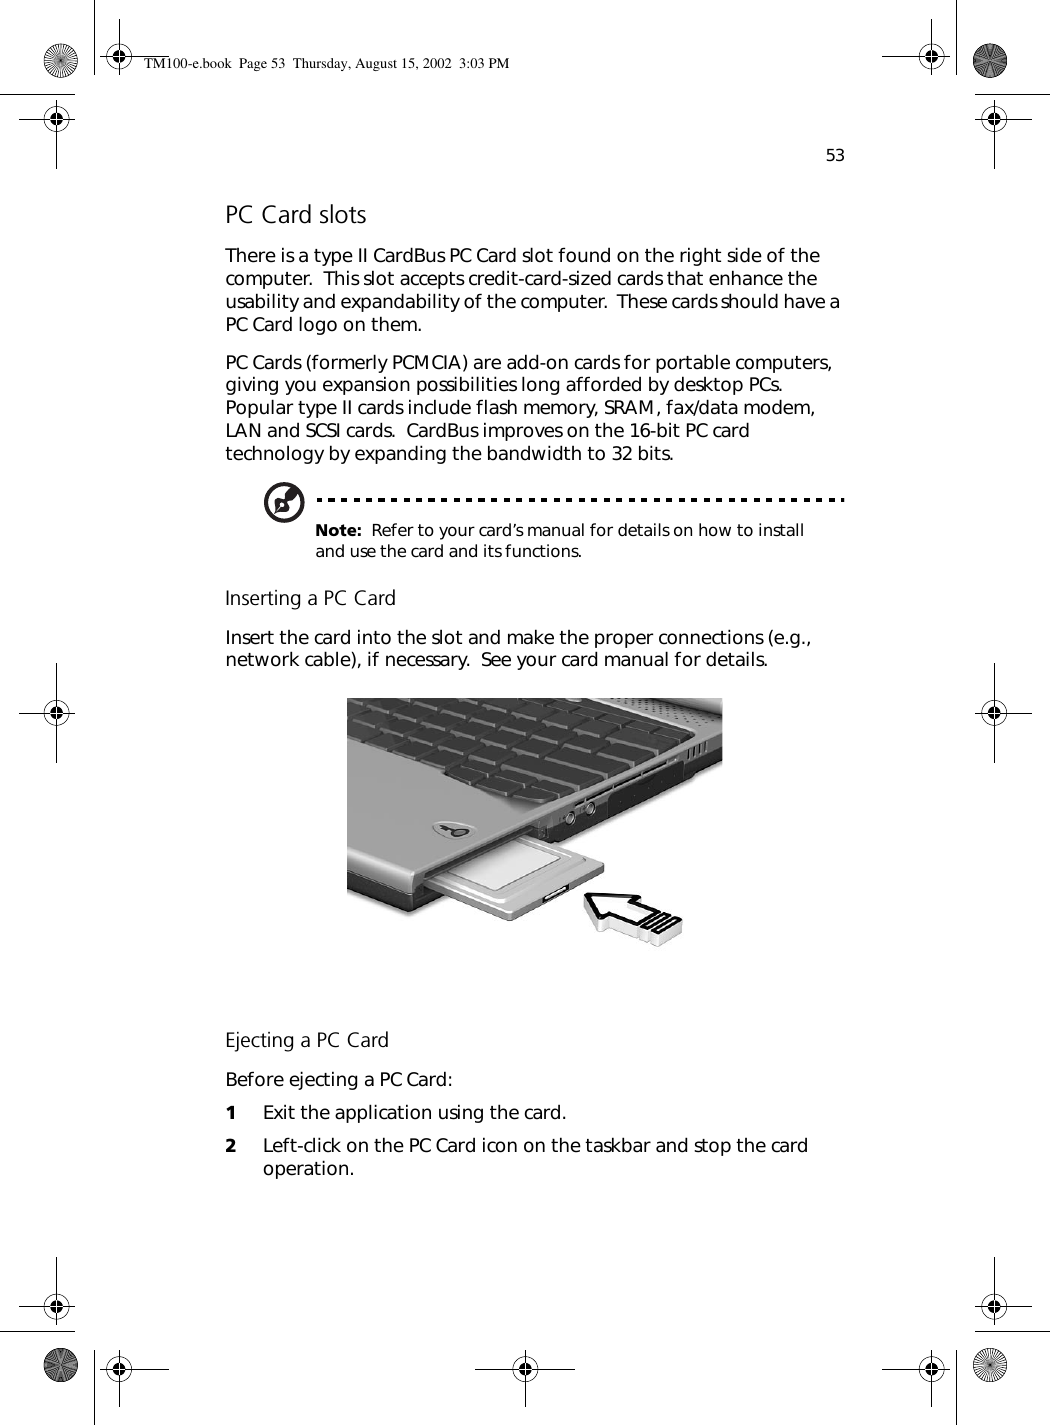
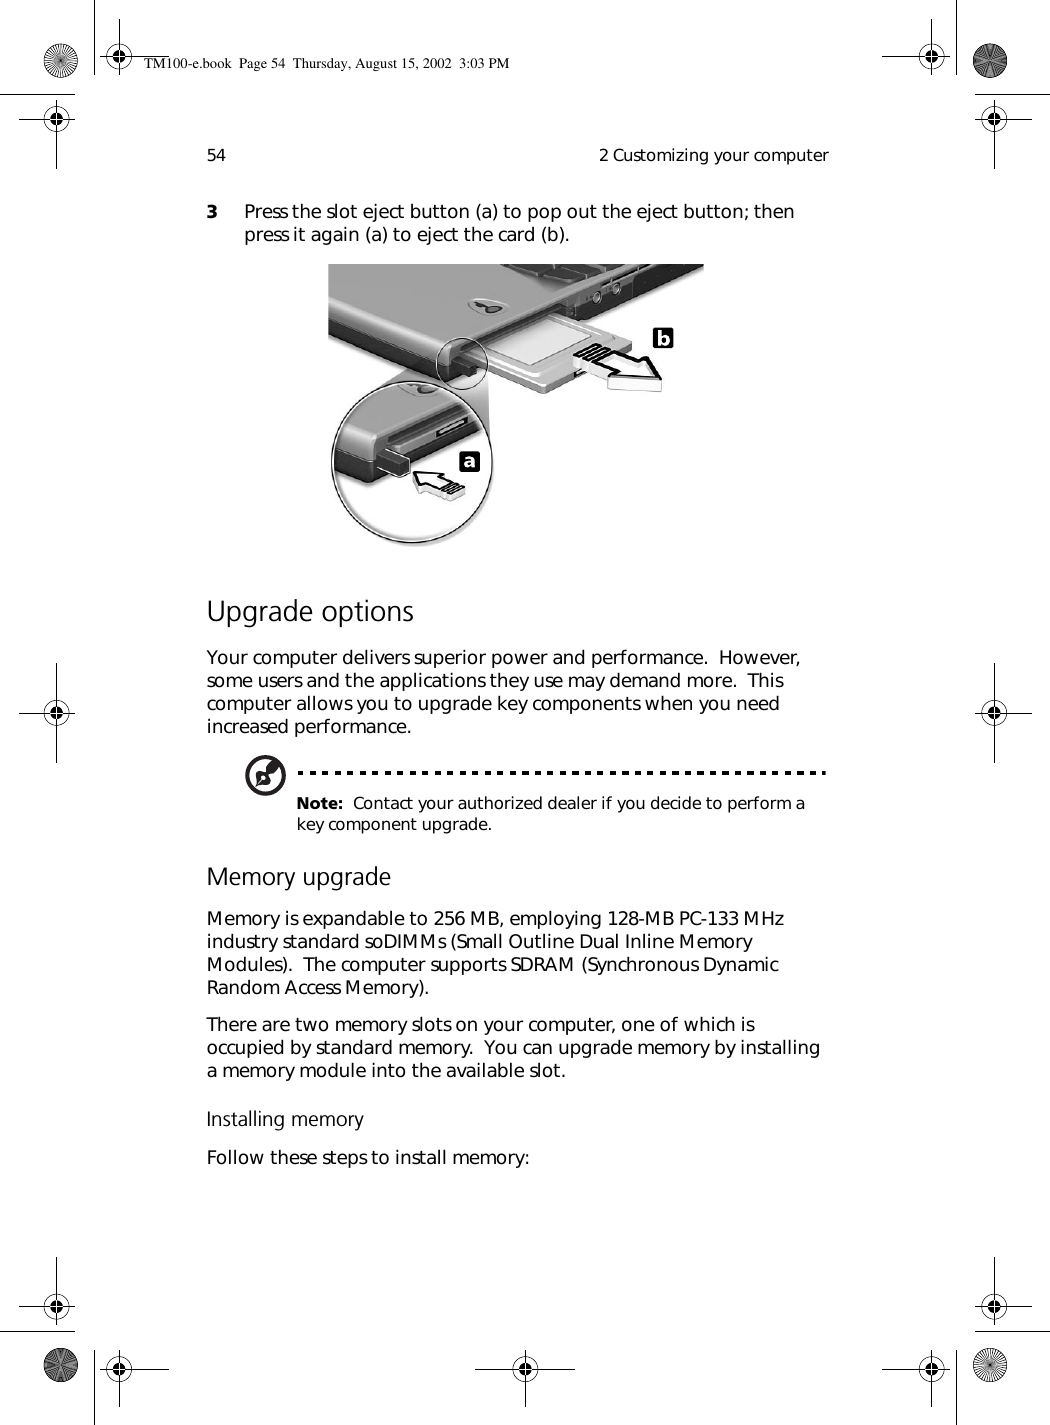
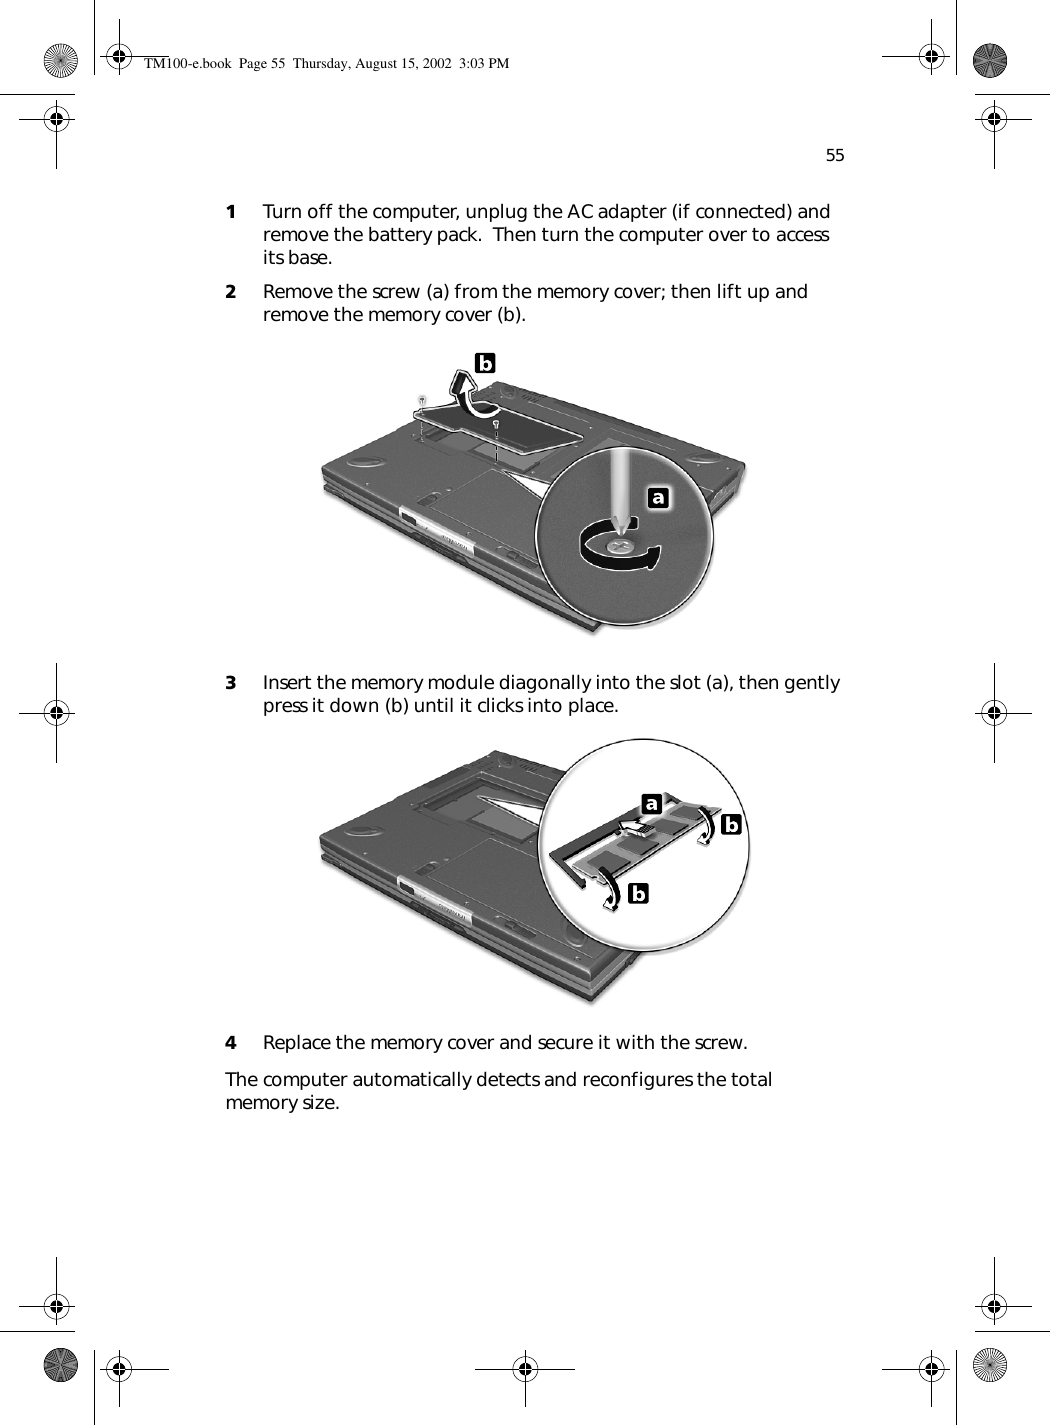

![Appendix B Notices78Notice: Canadian usersThis Class B digital apparatus meets all requirements of the Canadian Interference-Causing Equipment Regulations.Remarque à l’intention des utilisateurs canadiensCet appareil numérique de la classe B respected toutes les exigences du Règlement sur le matériel brouilleur du Canada.Modem noticesFCCThis equipment complies with Part 68 of the FCC rules. Located on the bottom side of the modem is a label that contains, among other information, the FCC Registration Number and Ringer Equivalence Number (REN) for this equipment. Upon request, you must provide this information to your telephone company.If your telephone equipment causes harm to the telephone network, the telephone company may discontinue your service temporarily. If possible, they will notify you in advance. But, if advance notice is not practical, you will be notified as soon as possible. You will also be informed of your right to file a complaint with the FCC.Your telephone company may make changes in its facilities, equipment, operations, or procedures that could affect the proper functioning of your equipment. If they do, you will be notified in advance to give you an opportunity to maintain uninterrupted telephone service.If this equipment should fail to operate properly, disconnect the equipment from the phone line to determine if it is causing the problem. If the problem is with the equipment, discontinue use and contact your dealer or vendor.TBR 21This equipment has been approved [Council Decision 98/482/EC - “TBR 21”] for pan-European single terminal connection to the Public Switched Telephone Network (PSTN). However, due to differences between the individual PSTNs provided in different countries, the approval does not, of itself, give an unconditional assurance of successful operation on every PSTN termination point. In the event of problems, you should contact your equipment supplier in the first instance.Important safety instructionsRead these instructions carefully. Save these instructions for future reference.TM100-e.book Page 78 Thursday, August 15, 2002 3:03 PM](https://usermanual.wiki/Wistron/MPCI3A-20R.Manua-3/User-Guide-288339-Page-31.png)