Wooyoung Telecom HLM151XAR 15" Color LCD Monitor User Manual HLM151XAR Users manual
Wooyoung Telecom Co., Ltd. 15" Color LCD Monitor HLM151XAR Users manual
UserManual.wiki
>
Wooyoung Telecom
>
HLM151XAR User Manual
User Manual
Navigation menu
Upload a User Manual
Namespaces
Wiki Guide
HTML
PDF
Info
Views
User Manual
Discussion / Help
Navigation

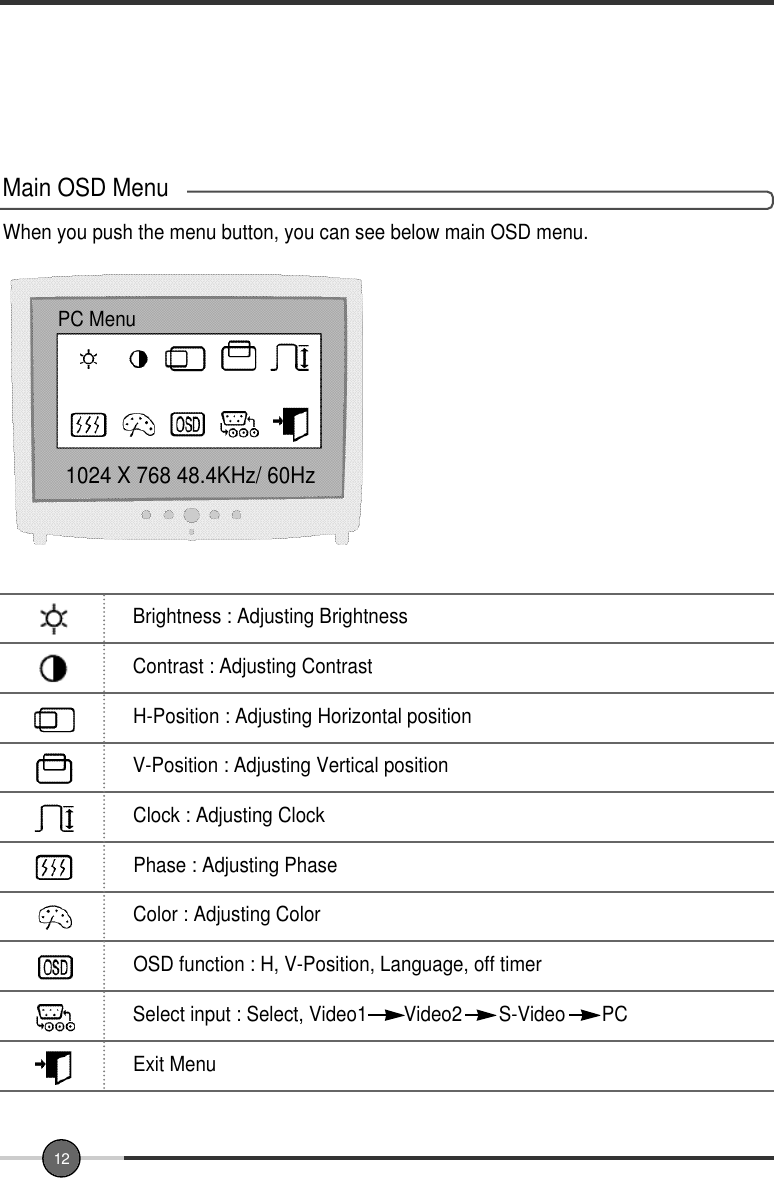
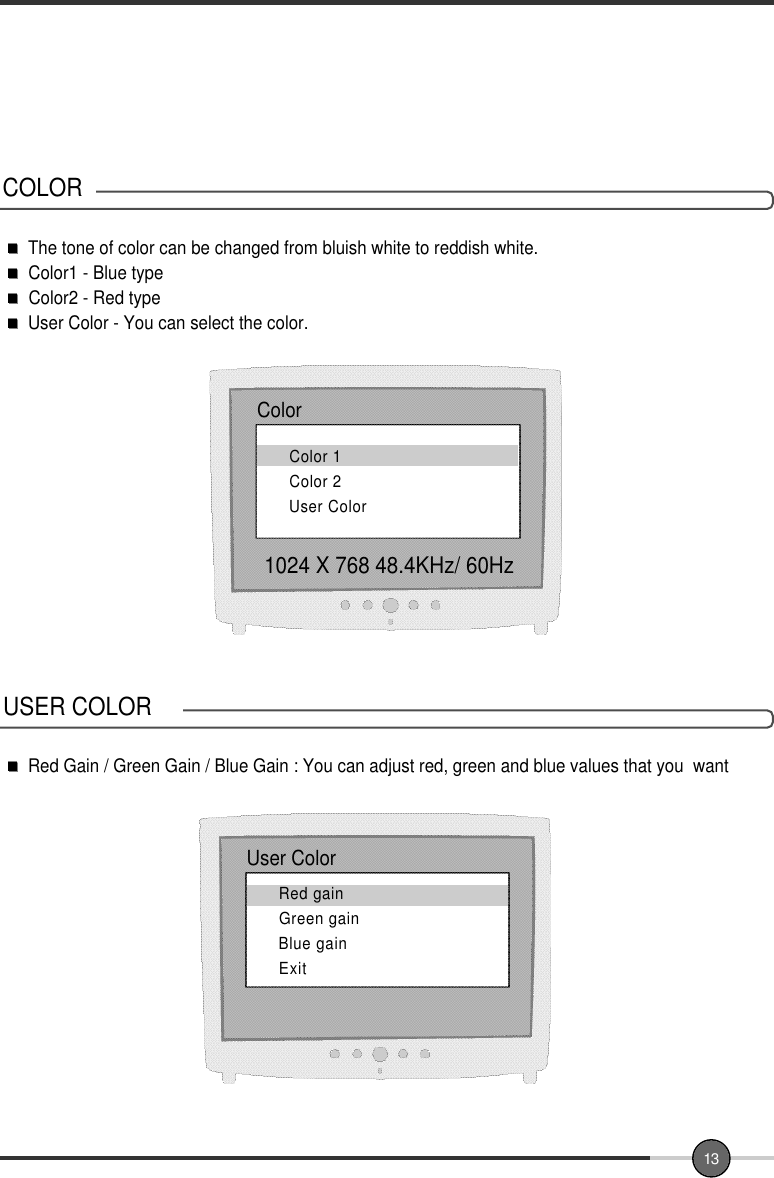
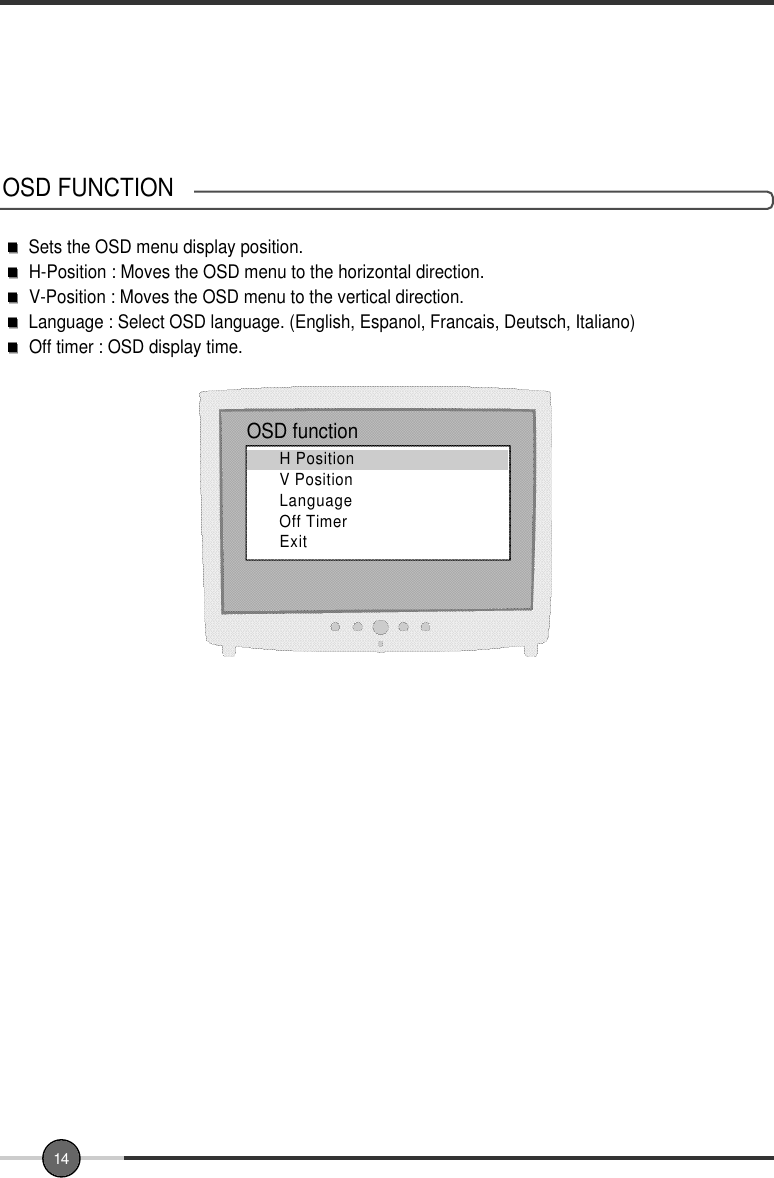
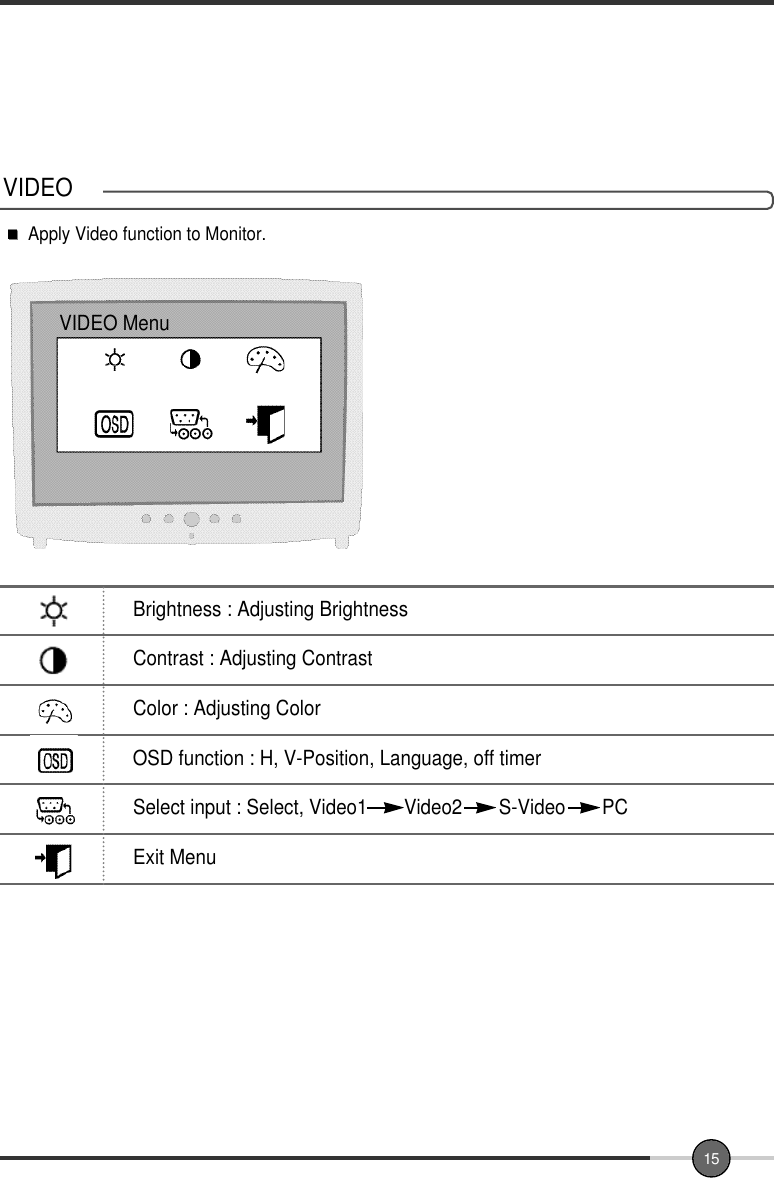
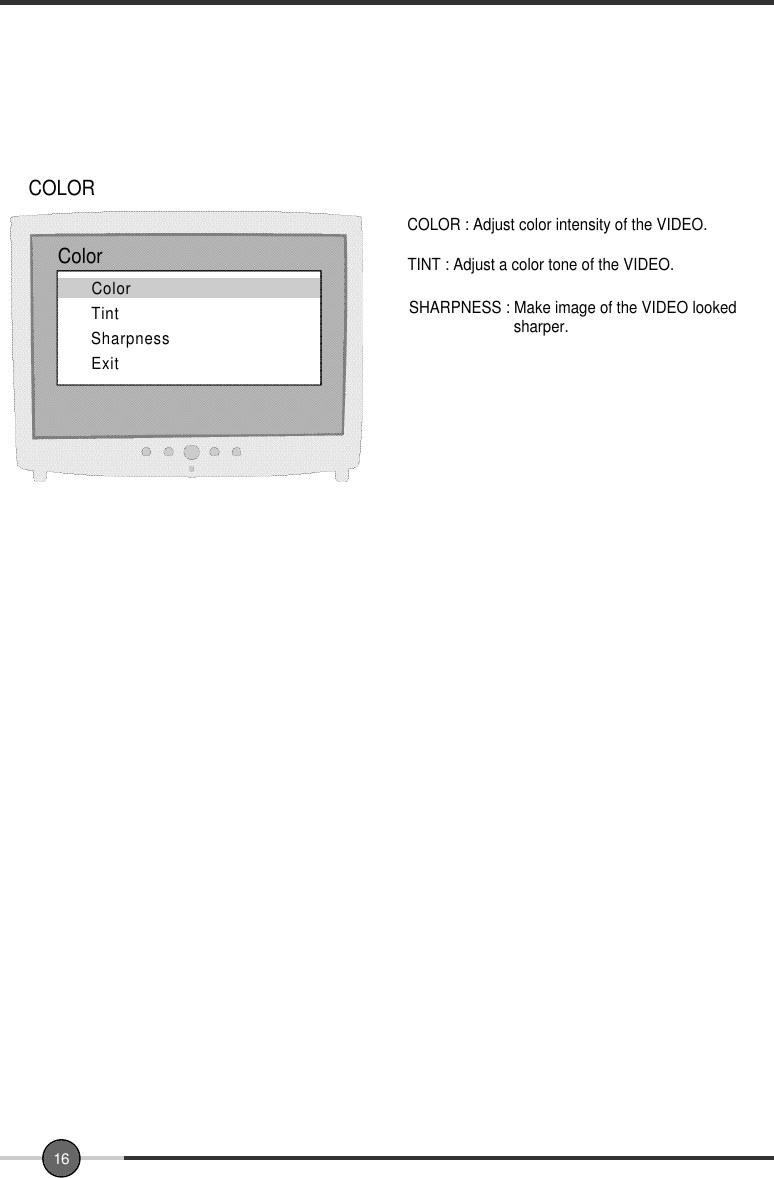
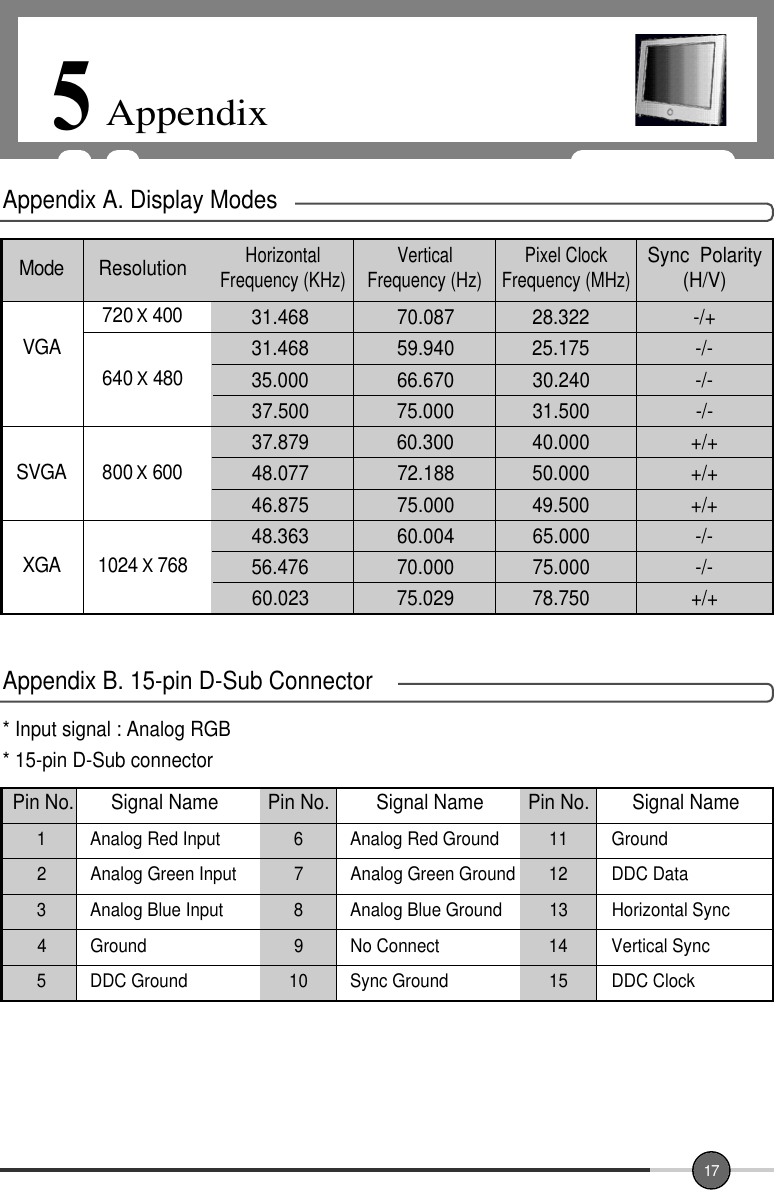
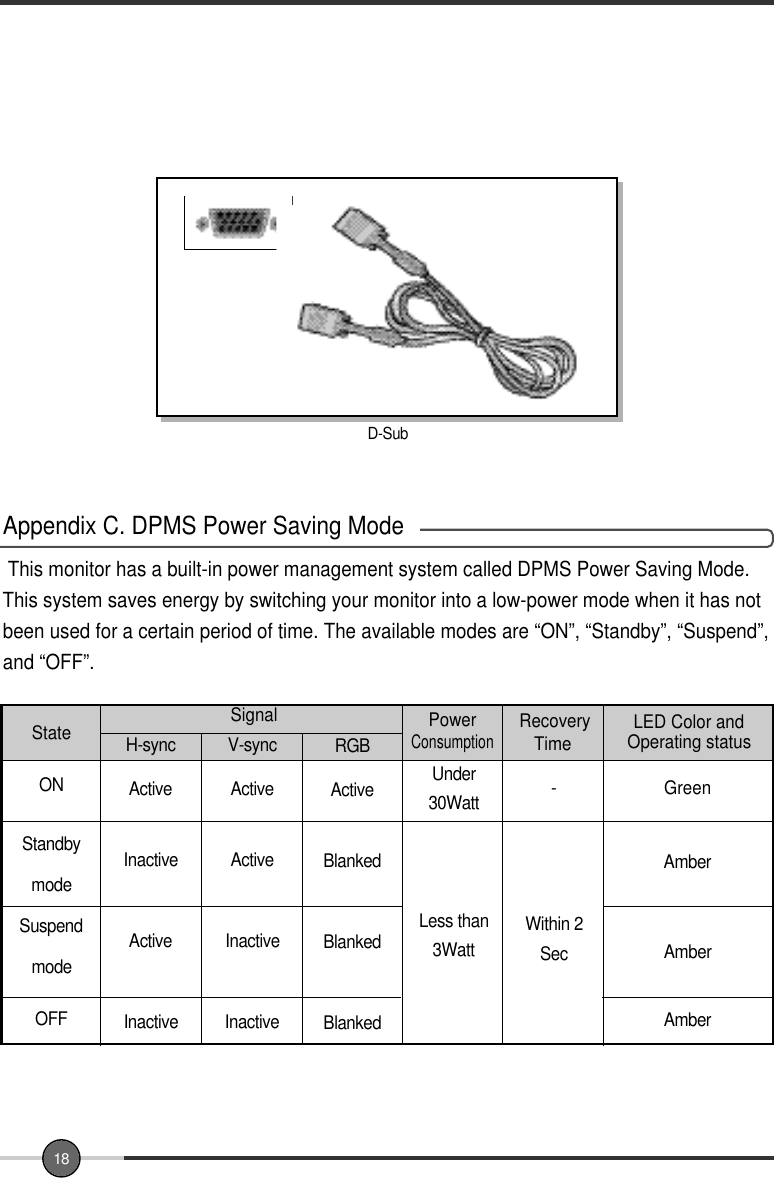
![1Before Setting up3This is 15 inch TFT-LCD monitor. Before Setting up the LCD Monitor, Please this manualread help your understanding ok.Resolution : 15 inch XGA (1024 X 768 @60Hz)Color display : 16,777,216 colorsDPMS (Display Power Management Signaling) OSD (On Screen Display) Auto Configuration : Hot keyDDC 1/2B : Plug & Play Speaker : Max 4W [2W X 2W] Brief Specification of LCD MonitorAccording to PC system, DDC 1/2B may not be supported. If you meet Display Errormessage, check your video card which compatibility with DDC. If you want to knowmore information, please contact our service center.Notice](https://usermanual.wiki/Wooyoung-Telecom/HLM151XAR/User-Guide-274607-Page-5.png)