Wooyoung WTN-15B2 LCD/TV Monitor User Manual WTN 17WE2 UsrMan
Wooyoung Co., Ltd. LCD/TV Monitor WTN 17WE2 UsrMan
Wooyoung >
Contents
- 1. User Manual 1 of 2
- 2. User Manual 2 of 2
User Manual 2 of 2
11
CONNECTIONS
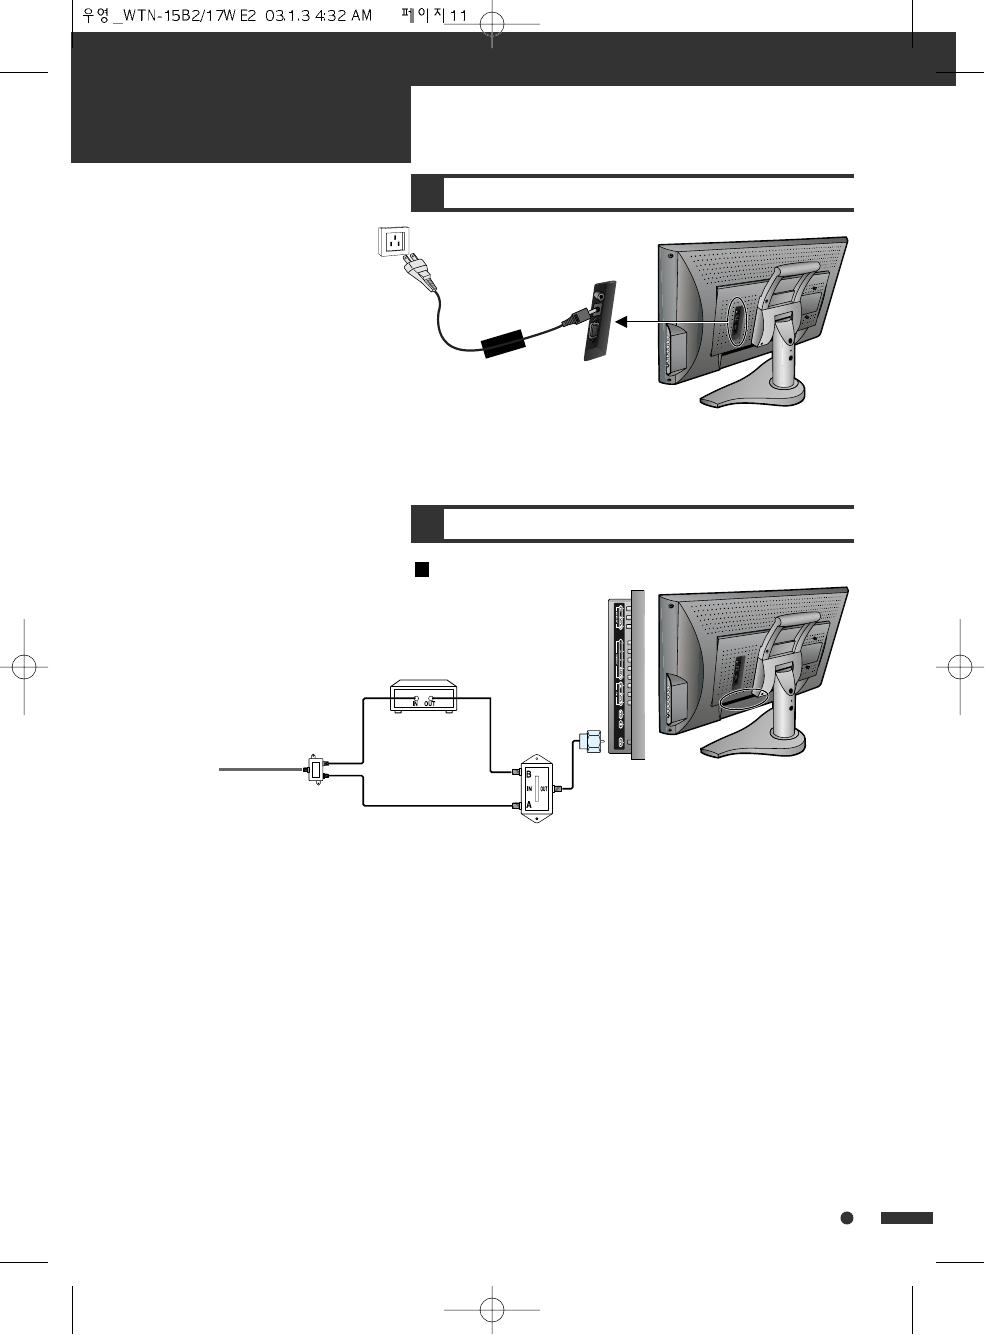
MAINS CONNECTION
Plug the mains cable into the power socket with 100V - 240V
AC, 50/60Hz .
TO CABLE TV (CATV)
ANTENNA CONNECTION
• A 75-ohm coaxial cable connector is built into the set for
easy hookup.When connecting the 75- ohm coaxial cable to
the set,screw the 75-ohm cable to the ANT.terminal.
• Some cable TV companies offer “premium pay channels”.
Since the signals of these premium pay channels are
scrambled, a cable TV converter/descrambler is generally
provided to the subscriber by the cable TV company. This
converter/descrambler is necessary for normal viewing of
the scrambled channels. (Set your TV to channel 3 or 4,
typically one of these channels is used. If this is unknown,
consult your cable TV company.) For more specific
instructions on installing cable TV, consult your cable TV
company. One possible method of utilizing the
converter/descrambler provided by your cable TV company
is explained next page. Please note: An RF switch provided
with two inputs (A and B) is required (not supplied).
Incoming cable
RF Switch
Two-set signal
SPLITTER
Cable TV Converter/
Descrambler
connections
12
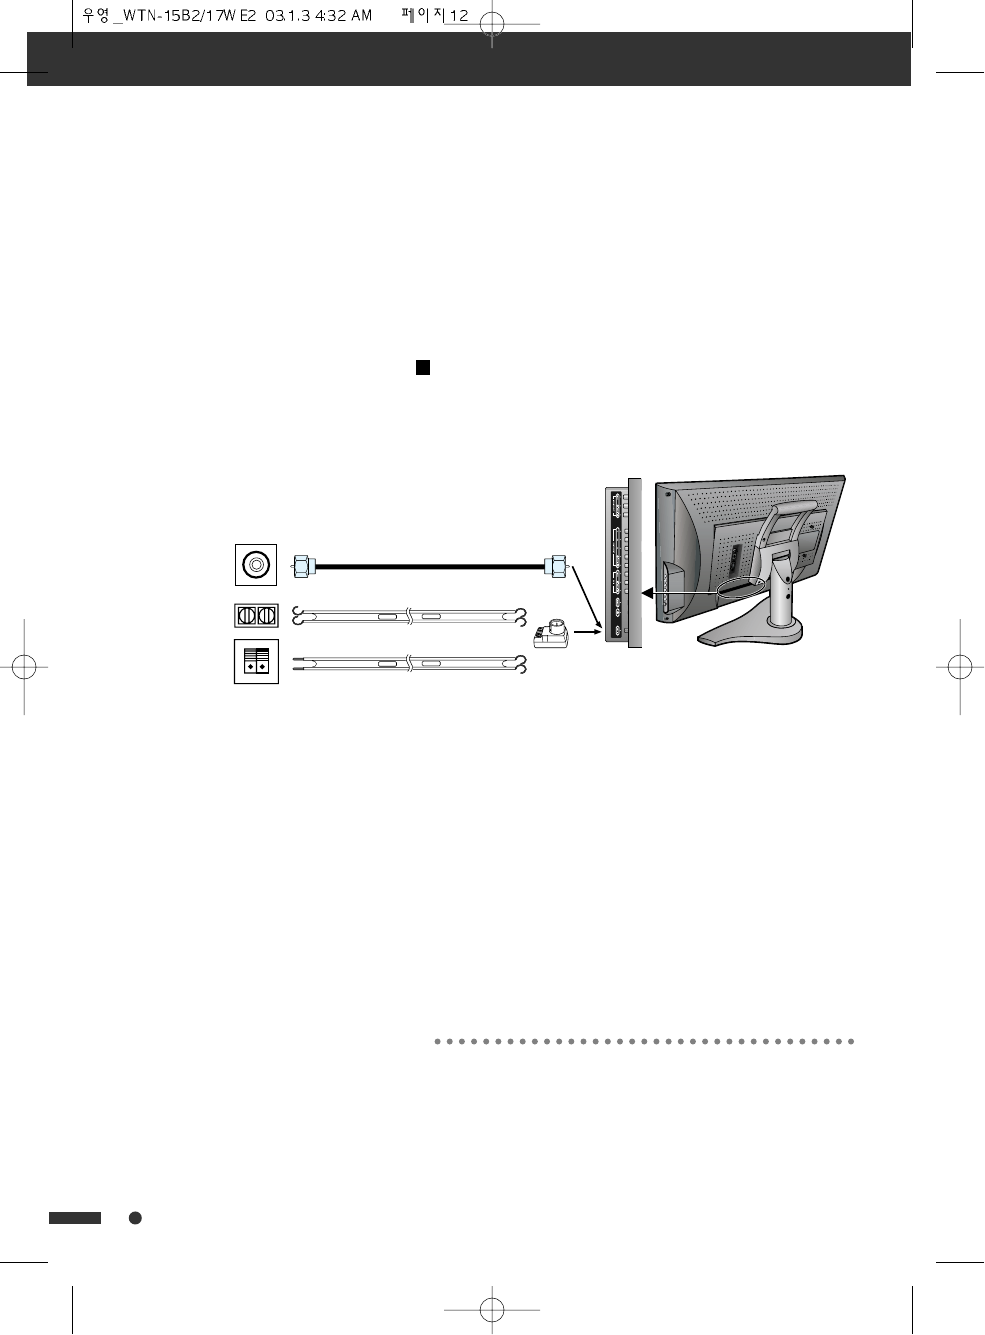
TO WALL ANTENNA SOCKET
If there is a wall antenna socket in apartment house, connect
the antenna cable as shown below. (Use the correct type of
antenna cable to the type of wall antenna socket.)
The antenna requirements for good color television reception
are more important than those for black &white television
reception.For this reason,a good quality outdoor antenna is
strongly recommended.
The following is a brief explanation of the type of connections
that are provided with the various antenna systems.
1. A 75-ohm system is generally a round cable with F-type
connector that can easily be attached to a terminal without
tools (not supplied).
2. A 300-ohm system is a flat “twin-lead ” cable that can be
attached to a 75-ohm terminal through a 300-75-ohm
adapter (not supplied).
“A ” position on the RF switch (not supplied) : You can
view all unscrambled channels by using the TV ’s channel
keys.
“B ” position on the RF switch (not supplied) : You can
view the scrambled channels via the converter/ descrambler
by using the converter ’s channel keys.
• If you have a 75Ωround cable, insert the bronze wire and then
tighten the connecting nut. And if you have a 300Ωflat cable,
connect the twisted wire to the antenna converter and then connect
the converter to the antenna input port.
• When using 75Ωround cable, do not bend bronze. It may cause
poor picture quality.
Turn clock arise to
tighten.
bronze wire
antenna
converter
75Ωround cable
300Ωflat cable
wall connecting port
connections
13
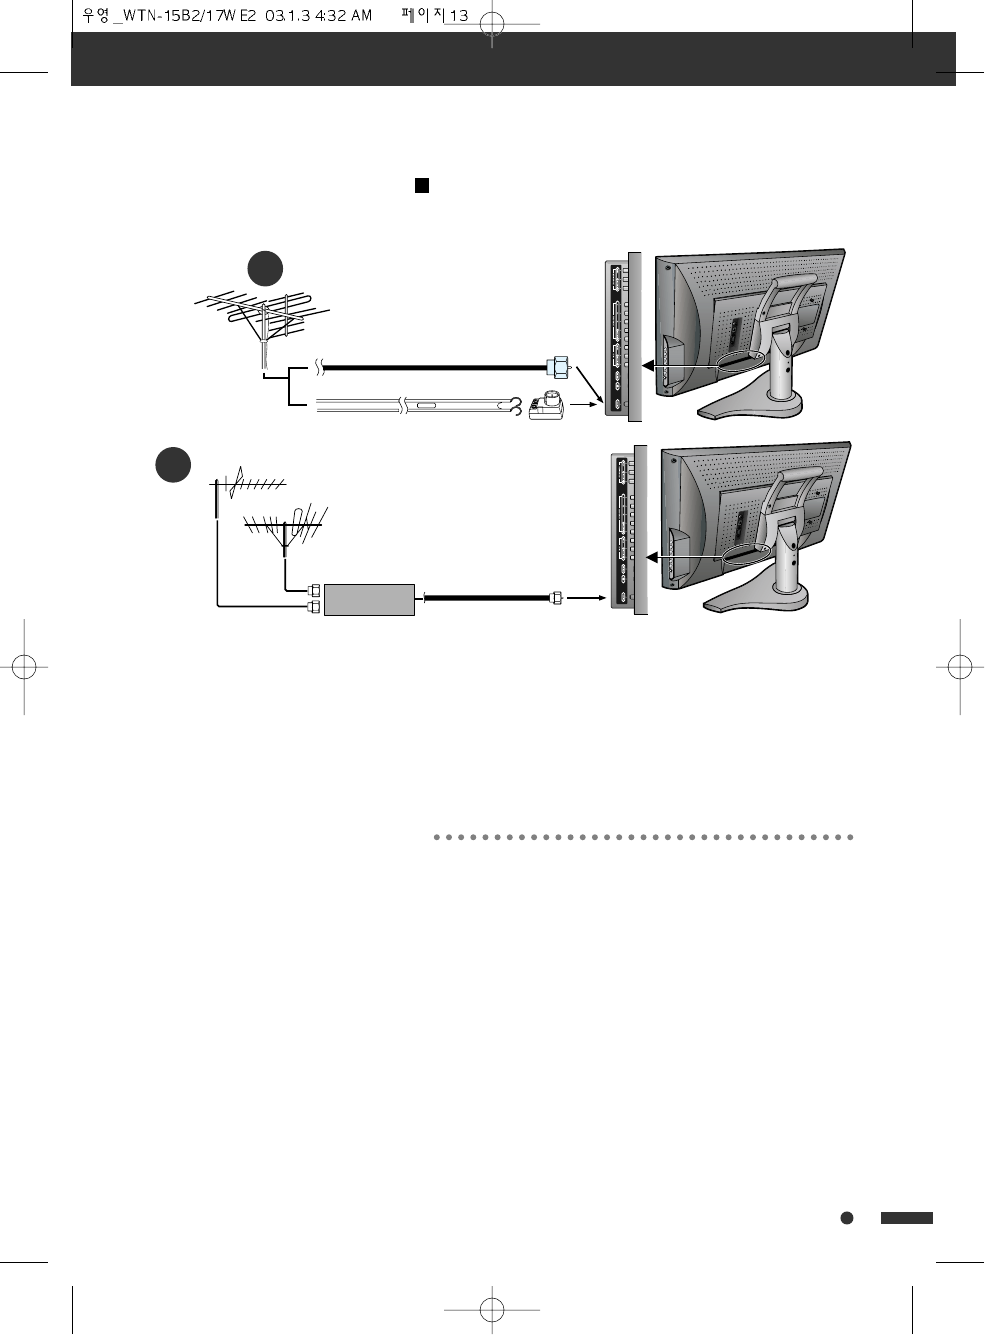
TO OUTDOOR ANTENNA
• Use one of the following two diagrams if you connect an
outdoor antenna.
A : Using a VHF/UHF combination outdoor antenna.
B : Using separate VHF and/or UHF outdoor antennas.
• Connect the outdoor antenna cable lead-in to the
ANT.terminal on the rear of the TV set.
This type of antenna is usually used at common private house.
%
$
• In a poor signal area, you can get better picture quality if you
install the antenna like the figure as “B”.
• If an antenna is divided to two TV sets, use “signal divider” for
connecting.
Combination VHF/UHF
Antenna
75Ωround cable
Turn clock arise to
tighten.
bronze wire
antenna
converter
300Ωflat cable
UHF
VHF
Signal Amplifier
3&$8',2
'&9
3&5*%
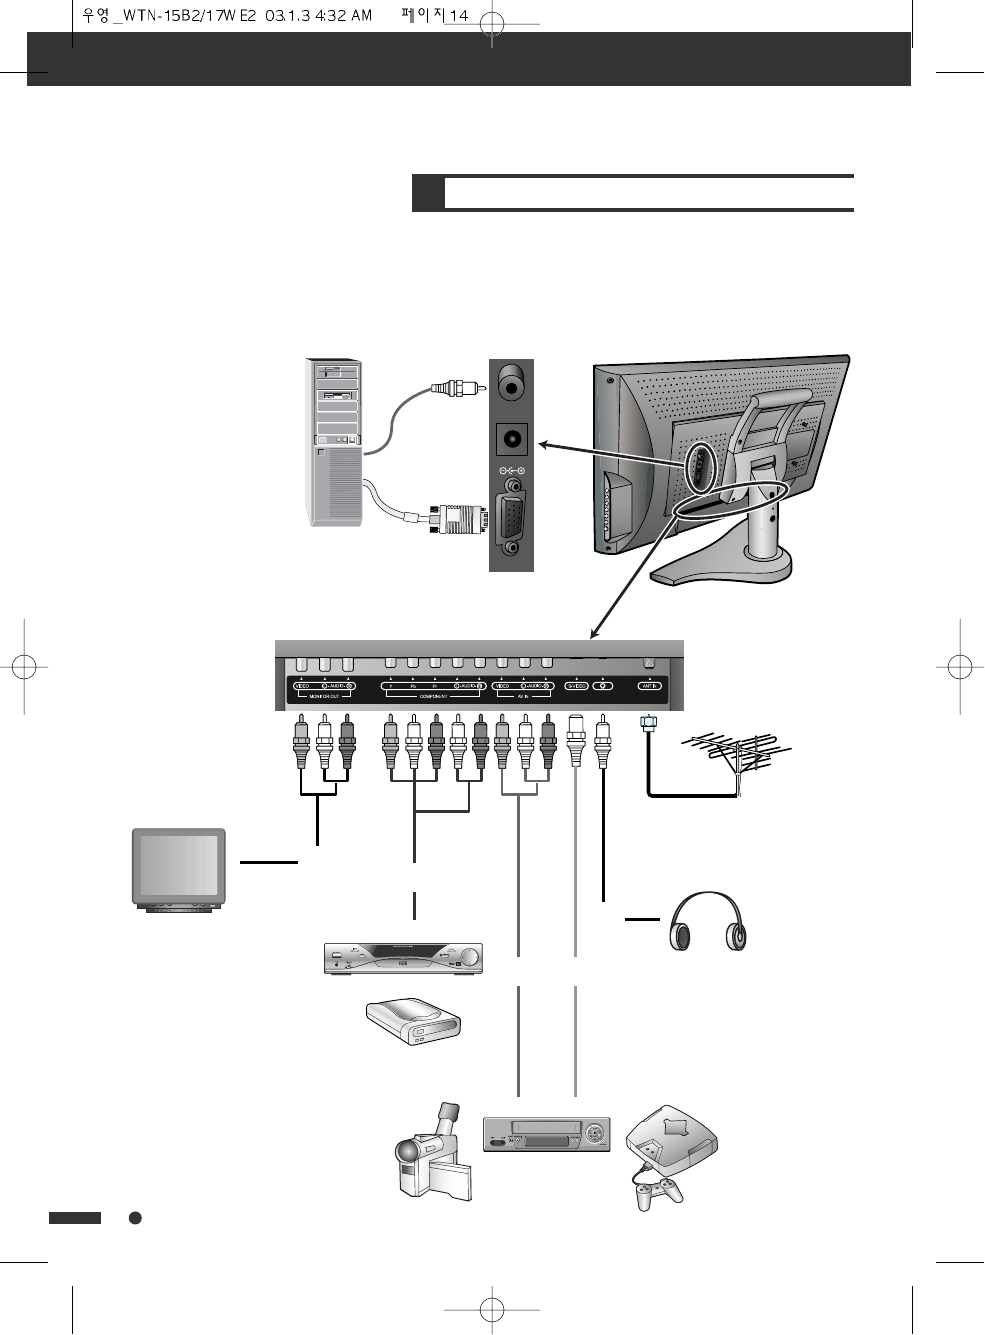
CONNECTING EXTERNAL EQUIPMENT
You can enjoy picture and sound by connecting a VCR or a
home video game system to the terminals located on the rear
of the TV set.
When connecting an external device, turn off the power on the
local control unit first to prevent any possible damage.
connections
14
TV Monitor
DVD
Settop box
Camcorder
VCR Video game
Headphone
@
#$
%
!
Personal Computer
^
connections
15
!
TV Output Jack
This jack has TV, VIDEO/AUDIO outputs. This jack is used to
connect a TV Monitor.
@
Component Input Jack (COMPONENT)
This jack has Y/Pb(Cb)/Pr(Cr) inputs and AUDIO inputs. This
jack is used to connect a DVD player, STB.
#
AV Input Jack
This jack has VIDEO/AUDIO inputs. The jack is used to
connect a Camcorder, VCR, Video game.
$
S-video Input Jack (S-VIDEO)
This jack has Y/C inputs. This jack is used to connect a S-
Video Camcorder, S-VIDEO VCR.
%
Headphone Jack
Insert the headphone plug(3.5 mm ) into this jack. The
sound from the speaker will be automatically cut off. You
can control the headphone sound with the LEFT/RIGHT (œ /
√) button.
* Headphones are not included in the supplied accessories.
^
PC In
Connect the D-sub 15 pin cable and the audio cable with
personal computer using it as a computer monitor.
VIDEO and S-VIDEO in AV IN jacks are
shared with AUDIO input jacks. So, it
can’t be used at same time.
Whenever you connect external equipment system to TV, make sure
that all elements are switched off. Refer to the documentation
supplied with your equipment for detailed connection instructions and
associated safety precautions.
BASIC
OPERATIONS
1
SWITCHING ON/OFF
SWITCHING ON
1. If the indicator is not lit, then the TV set is powered off.
You must press the POWER button on the TV set.
The TV set will switch to TV on mode and the indicator
illuminates in green.
2. Press the POWER button on the remote controller, or any
button on the local control unit of TV set when the indicator
illuminates in red. The TV set will be switched on and then
the Indicator will be changed to Green.
SWITCHING OFF
1. To return the TV set to its stand-by mode, press the POWER
button on the remote controller. The Indicator will
illuminate in Red.
2. Press the POWER button to switch the TV set off completely.
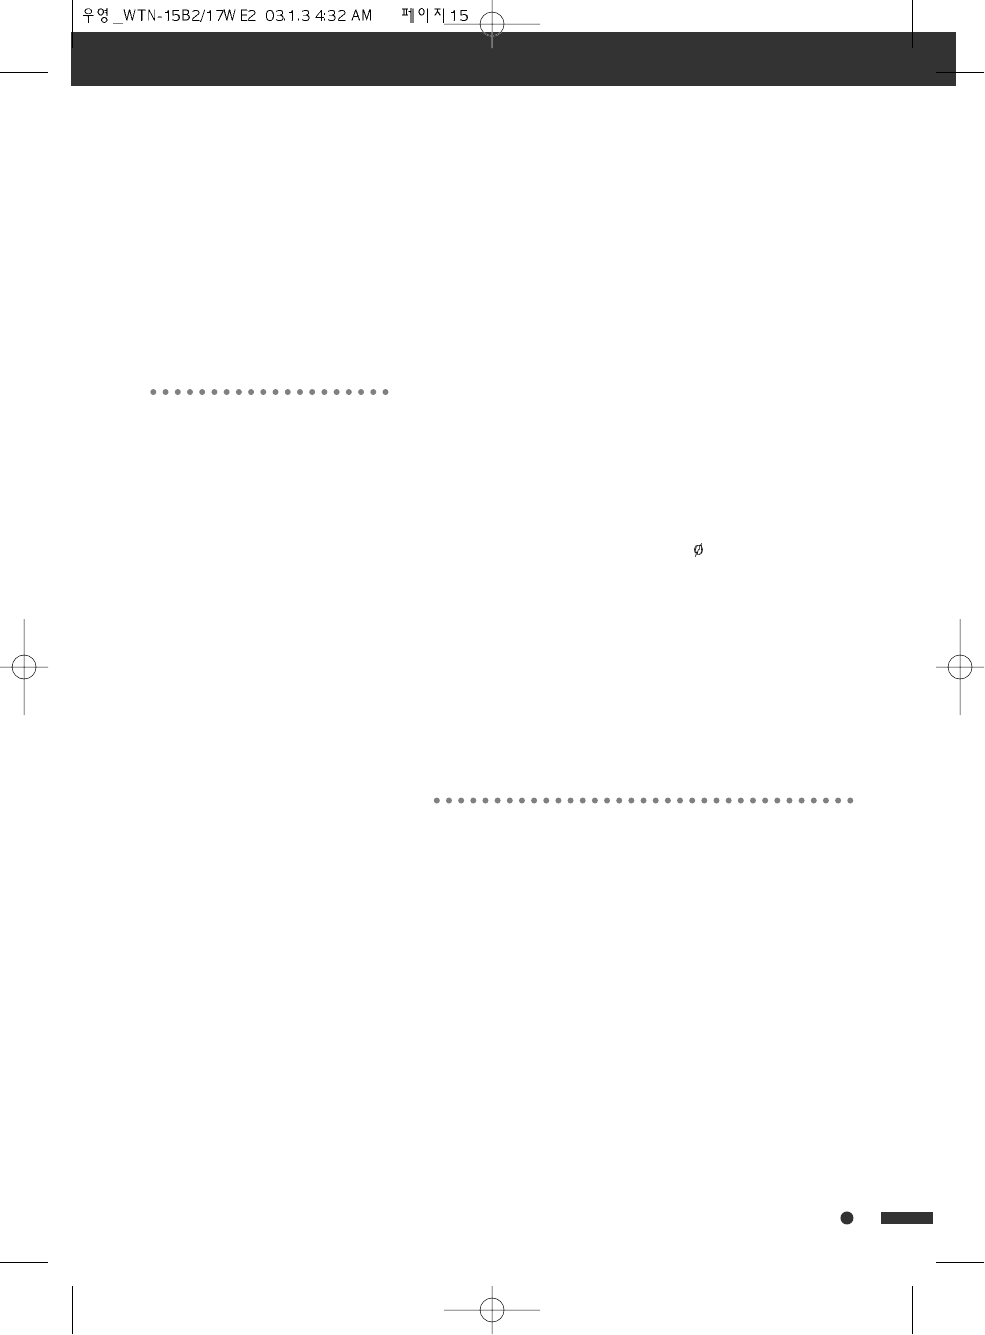
When the TV is initially powered on,
it goes automatically to AUTO SEARCH √√√ menu item. Make
sure that the antenna is connected to TV. Press VOL UP (√)
button, then wait for a few minutes until AUTO SEARCH ends.
AUTO SEARCH performs channel searching from AIR2 to AIR69
and from CATV1 to CATV125.
16
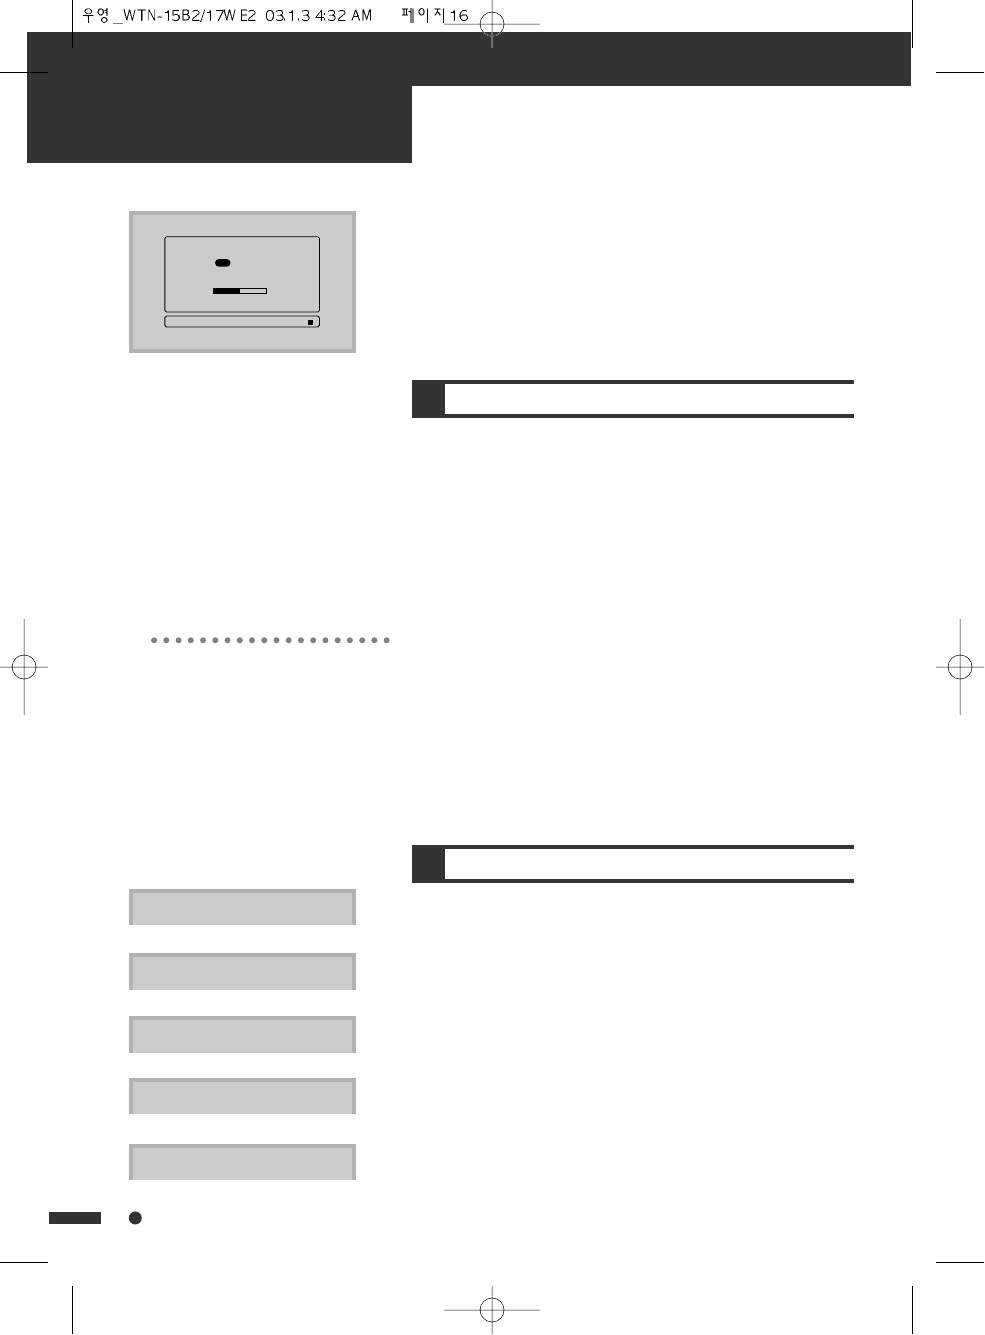
With the remote controller, you can select the mode as below.
• TV/VIDEO button : Selection for TV/VIDEO/S-VIDEO input
mode.
• PC button : Selection for PC monitor input mode.
• COMPONENT button : Selection for Component input mode.
COMPONENT
-COMPONENT mode-
PC
-PC mode-
If you don't use the set for extended
periods of time, turn it off with POWER
button.
2
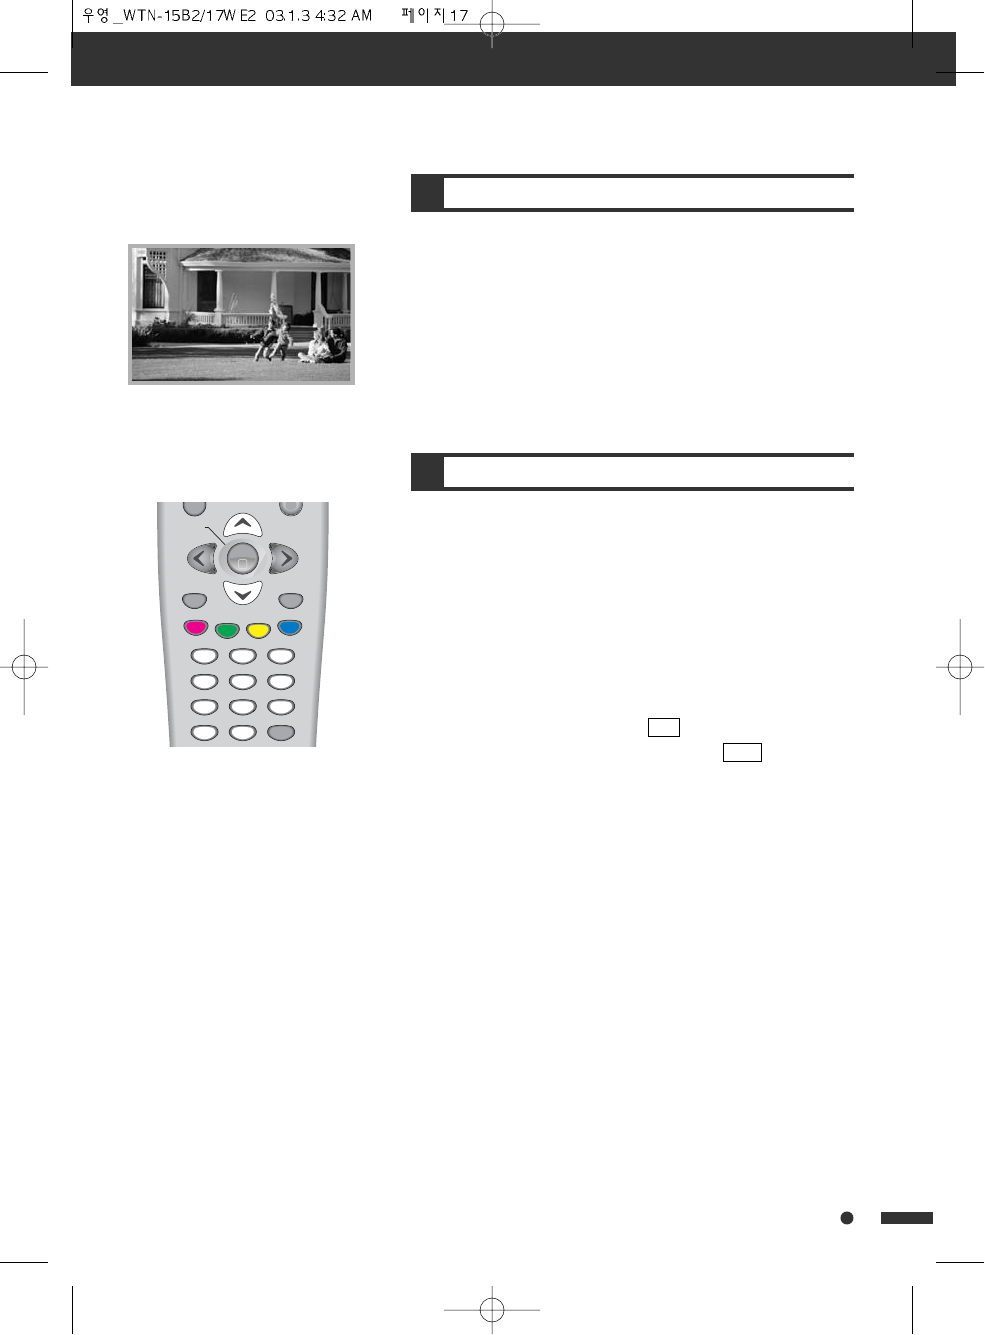
TV/AV MODE SELECTION
As the TV/VIDEO button on the local control unit is pressed,
the mode will be changed as follows:
TV ➔VIDEO ➔S-VIDEO ➔COMPONENT ➔PC ➔ TV ➔ ....
TV
-TV mode-
VIDEO
-AV mode-
S-VIDEO
-S-VIDEO mode-
&+$11(/$8726($5&+
$,5
6($5&+,1*
67236($5&+,1*
3
VOLUME CONTROL
Adjust the volume with the VOL (œ /√) buttons.
TO MUTE THE SOUND
Press the MUTE button to turns the sound off. The MUTE will
be displayed. The sound returns if the button is pressed once
more, or pressed the VOL (œ /√) buttons.
4
CHANNEL SELECTION
The set has 125 channel numbers, CH01..CH125. [AIR02-69,
CATV01-125]
DIRECT SELECTION
The NUMBER buttons are used for direct channel selection.
To select two-digit channel, press the second numbered button
within 2 seconds.
In case of selecting channels from 14 to 69 with Number
buttons, the channel will go to AIR channel in first. If you
press the same button again, then it goes to CATV channel.
UP/DOWN SELECTION
You can also select a channel by pressing step by step the CH
(…/†) buttons.
basic operations
17
MUTE
0(18
087(
799,'(2
6/((3
&$37,21
3&
&20321(17
3,&02'(
&+
&+
92/
92/
MENU
ADJUSTMENT
1
CHANNEL ADJUSTMENT
(ONLY IN TV MODE)
Press MENU ( ) button to display the MENU screen.
Select “CHANNEL” by pressing VOL (œ /√) buttons, then press
CH down (†) button to enter into below items. The color of
selected items becomes yellow.
CURRENT CHANNEL NUMBER SELECTION
1 Move to “CURRENT CHANNEL” by pressing CH (…/†)
buttons.
2 Press VOL (œ /√) buttons to select a current channel
number you want.
FINE TUNING
If you are unable to get a good picture or sound because of a
poor broadcast signal, it is possible to adjust the channel with
FINE TUNE.
1 Move to “FINE TUNE” by pressing CH (…/†) buttons.
2 Press VOL (œ /√) buttons to tune for a better picture and
sound. The change is stored automatically.
ADD OR DELETE CHANNEL
You can add weak or additional channels or erase unwanted
channels from TV memory.
1 Move to “CHANNEL ADD/DEL” by pressing CH (…/†) buttons.
2 By pressing VOL (œ /√) buttons, select ADD for adding the
current selected channel to the TV’s memory or select DEL
for erasing the channel from the TV’s memory.
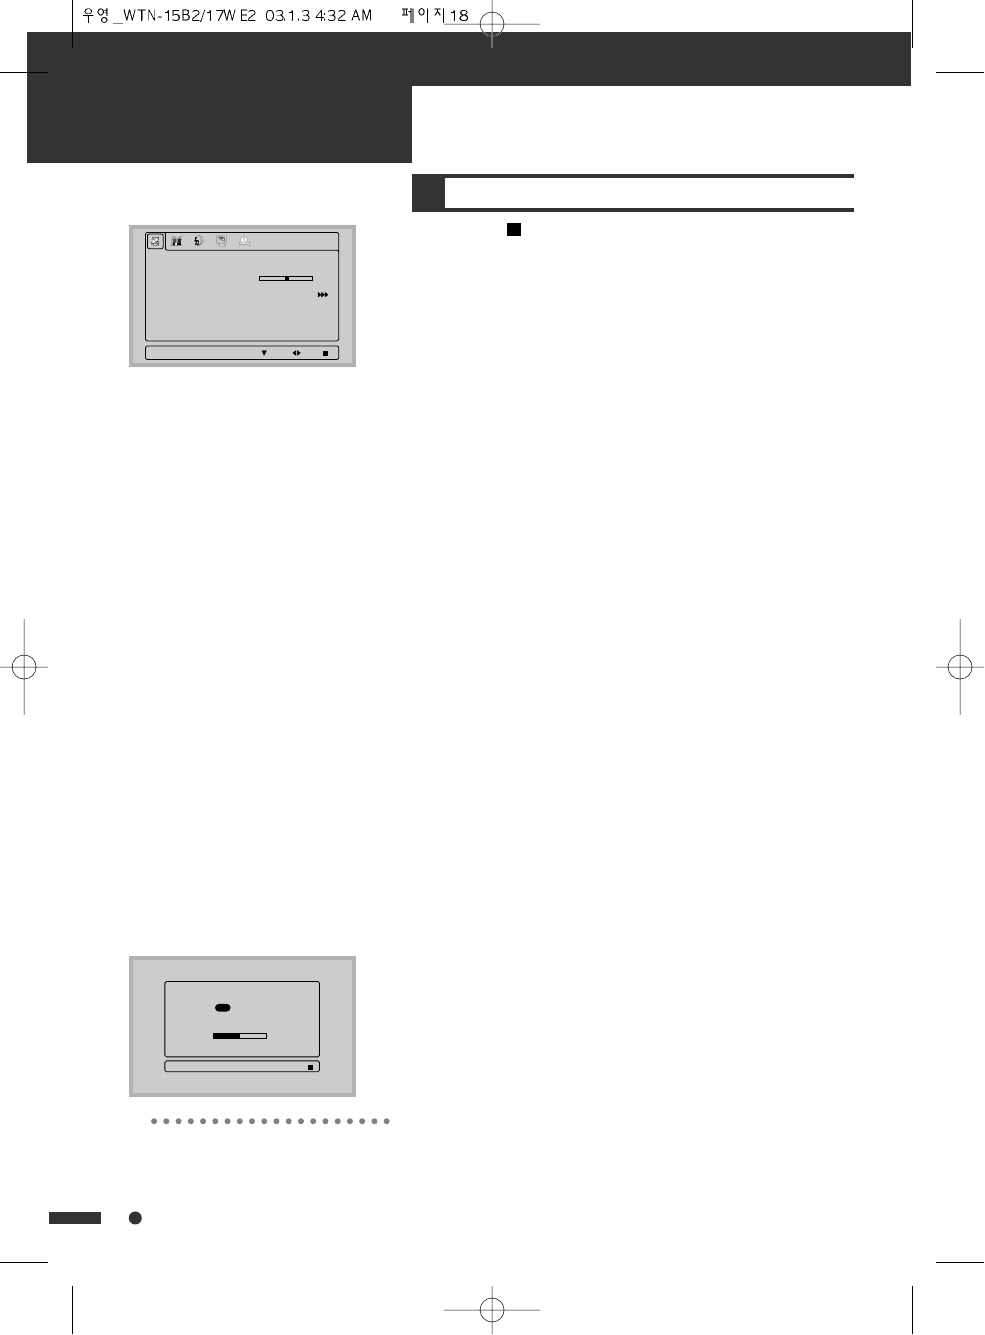
CHANNEL AUTO SEARCH
CHANNEL AUTO SEARCH function memorizes all the received
channels of terristrial TV signals (AIR 2CH-69CH) and cable TV
signals (CATV 1CH-125CH).
1 Move to “AUTO SEARCH” by pressing CH (…/†) buttons.
2 Press √button. The tuner will search through all available
channels in your area and store them to the TV’s memory.
18
&+$11(/
&855(17&+$11(/
),1(781(
&+$11(/$'''(/
$8726($5&+
$,5
$''
(17(5 029( (;,7
&+$11(/$8726($5&+
$,5
6($5&+,1*
67236($5&+,1*
To interrupt AUTO SEARCH, press MENU
button. SEARCH will stop at the current
channel and will not add any higher channels.

2
PICTURE ADJUSTMENT
Press MENU ( ) button to display the MENU screen.
Select “PICTURE” by pressing VOL (œ /√) buttons, then press
CH down (†) button to enter into below items.
CONTRAST
1 Move to “CONTRAST” by pressing CH (…/†) buttons.
2 Press VOL (œ /√) buttons to adjust the picture contrast.
BRIGHTNESS
1 Move to “BRIGHTNESS” by pressing CH (…/†) buttons.
2 Press VOL (œ /√) buttons to adjust picture brightness.
COLOR
1 Move to “COLOR” by pressing CH (…/†) buttons.
2 Press VOL (œ /√) buttons to adjust color intensity.
TINT
1 Move to “TINT” by pressing CH (…/†) buttons.
2 Press VOL (œ /√) buttons to adjust skin color to a more
natural tone.
SHARPNESS
1 Move to “SHARPNESS” by pressing CH (…/†) buttons.
2 Press VOL (œ /√) buttons to adjust picture sharpness.
MENU adjustment
19
3,&785(
&2175$67
%5,*+71(66
&2/25
7,17
6+$531(66
12,6(5('8&7,21
35(6(7
+,*+
86(5
(17(5 029( (;,7
For PC or COMPONENT mode, only
“CONTRAST” and “ BRIGHTNESS” can be
selected.
←For less contrast For more contrast
←
←For less brightness For more brightness
←
←
Skin tones become purplish Skin tones become greenish
←
←
For less color intensity For more color intensity
←
←For less sharpness For more sharpness
←
NOISE REDUCTION
This function is to reduce the noise remains in the background
picture.
1 Move to “NOISE REDUCTION” by pressing CH (…/†)
buttons.
2 Press VOL (œ /√) buttons to select among HIGH, LOW or OFF.
• OFF : Off this function.
• LOW : Reduce the picture noise more or less.
• HIGH : Reduce the picture noise a little more.
PRESET
1 Move to “PRESET” by pressing CH (…/†) buttons.
2 Press VOL (œ /√) buttons to select preset picture mode
among VIVID, USER, SOFT or NORMAL.
• VIVID : Proper mode in bright indoor.
• USER : The mode which is set by the user
• SOFT : Proper mode in dark indoor.
• NORMAL : Proper mode in normal indoor.
MENU adjustment
20
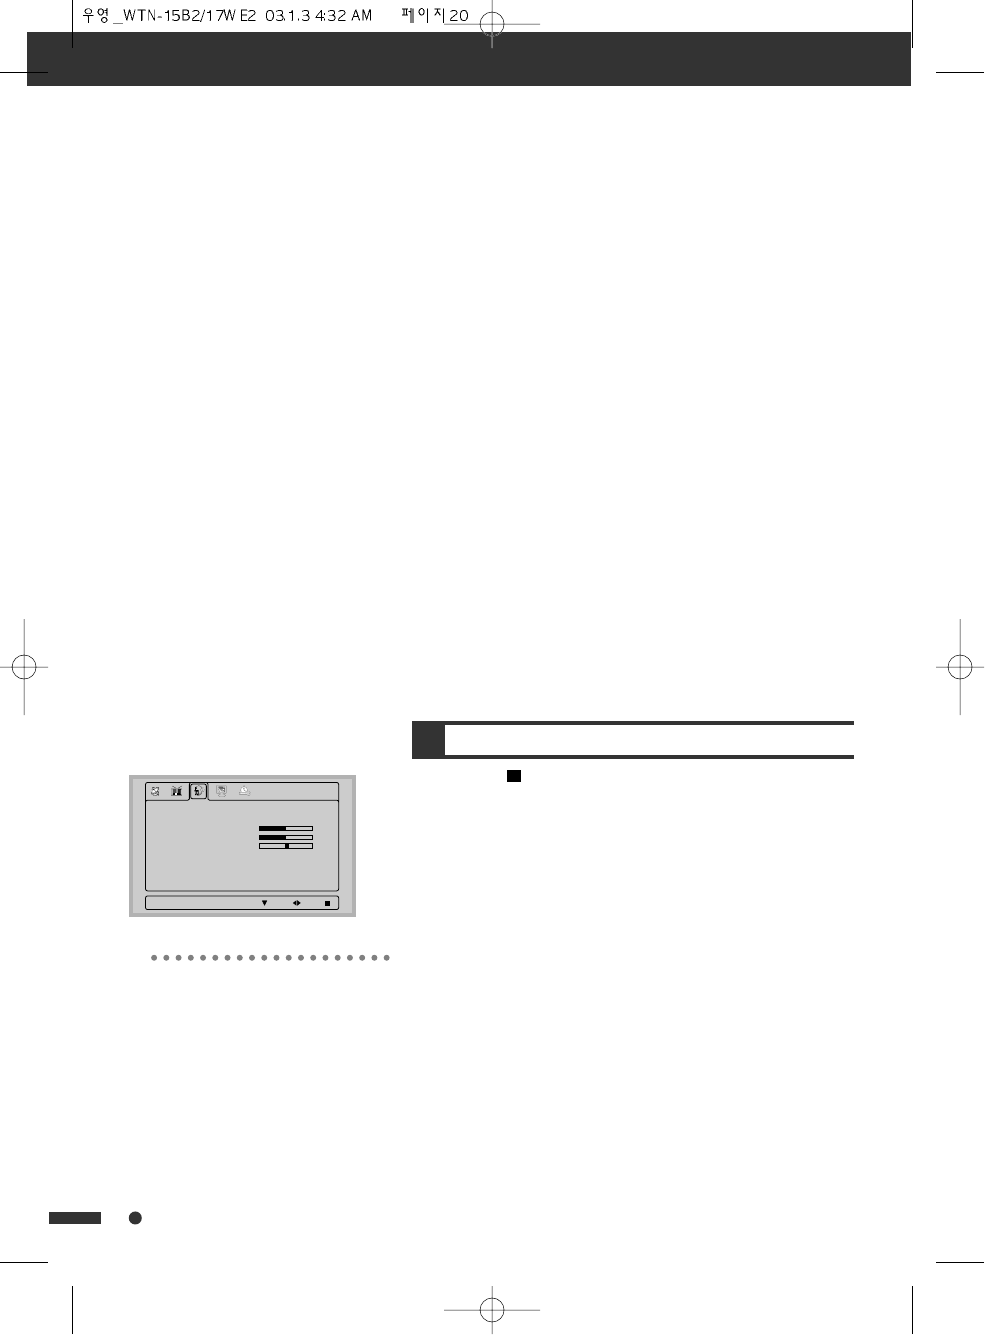
3
SOUND ADJUSTMENT
Press MENU ( ) button to display the MENU screen.
Select “SOUND” by pressing VOL (œ /√) buttons, then press
CH down (†) button to enter into below items.
MTS
The System has a feature that allows reception of sound other
than the main audio for the program. This feature is called
Multi-channel Television Sound (MTS). The System with MTS
can receive mono sound, stereo sound and Secondary Audio
Programs (SAP). The SAP feature allows a TV station to
broadcast other information, which could be audio in another
language or something completely different like weather
information. You can enjoy Hi-Fi stereo sound or SAP
broadcasts where available. If stereo sound is difficult to hear,
select MONO.
1 Move to “MTS” by pressing CH (…/†) buttons.
2 Press VOL (œ /√) buttons to select among STEREO, SAP or
MONO.
6281'
076
%$66
75(%/(
%$/$1&(
6281'6285&(
35(6(7
0212
0$,1
86(5
(17(5 029( (;,7
• MTS item can be activated only when
TV mode is selected.
• “MONO” mode is selected, the sound
remains mono even if the System
receives a stereo broadcast. You must
switch the mode to “STEREO” if you
want to hear stereo sound.
• If some strange sound is heard on
stereo mode in poor signal area, or if
in non-dual signal service area, make
sure to select MONO mode.
• STEREO broadcasts : View programs like live sporting
events, shows and concerts in dynamic stereo sound.
• SAP broadcasts : Listen to second language, supplementary
commentary and other information. (SAP is mono sound.)
• MONO : Obtain a clearer sound by manually switching to
fixed mono-sound mode.
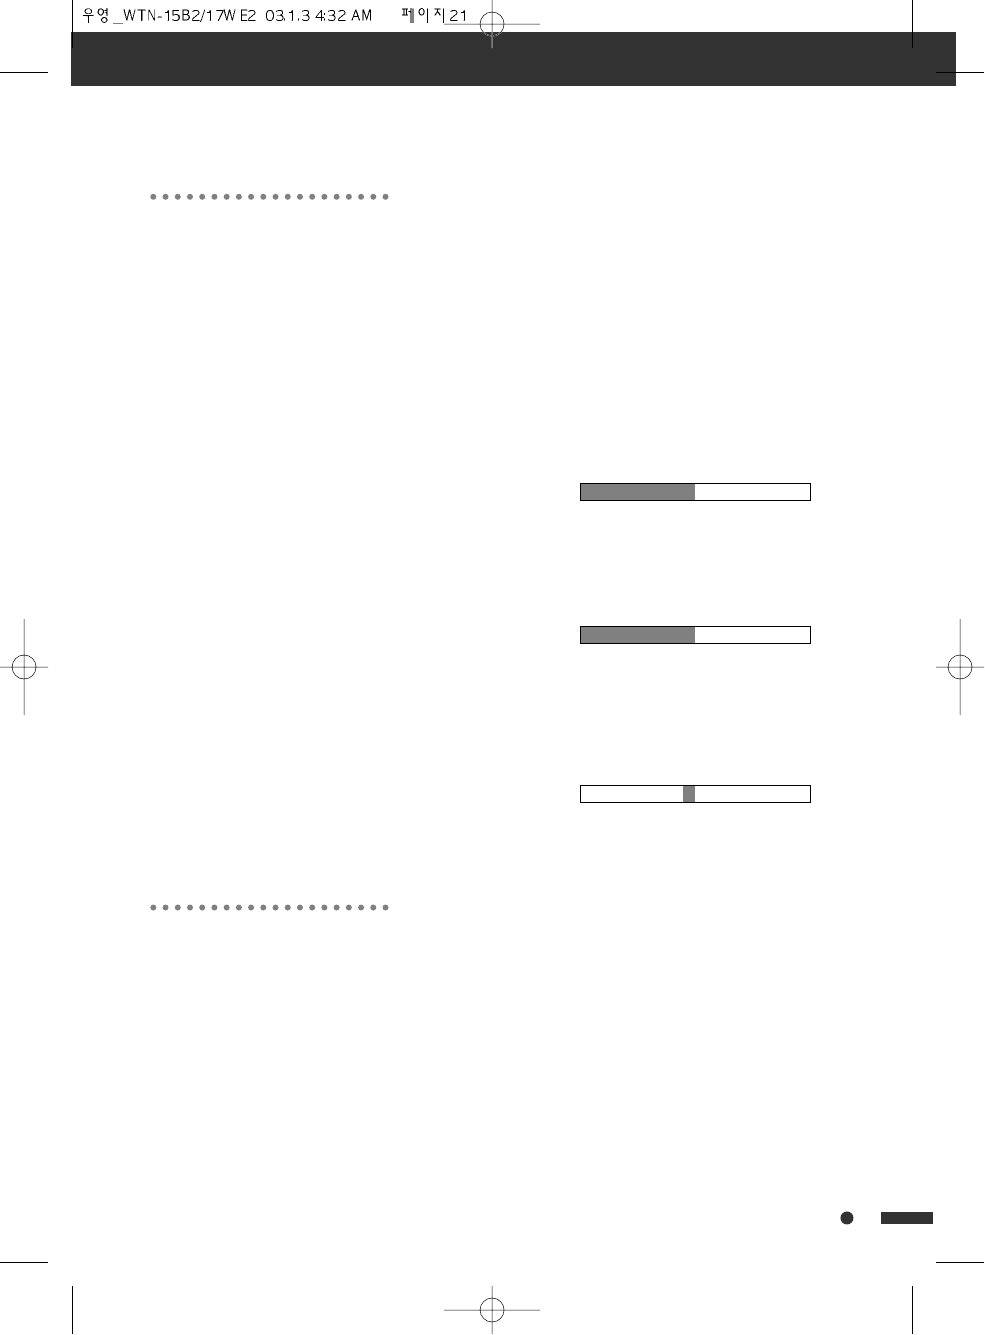
TREBLE
To stress high frequency sound
1 Move to “TREBLE” by pressing CH (…/†) buttons.
2 Press VOL (œ /√) buttons to adjust the treble weaker or
stronger.
BASS
1 Move to “BASS” by pressing CH (…/†) buttons.
2 Press VOL (œ /√) buttons to adjust the bass weaker or
stronger.
BALANCE
1 Move to “BALANCE” by pressing CH (…/†) buttons.
2 Press VOL (œ /√) buttons to adjust audio output between
left and right speakers.
SOUND SOURCE
Select sound output between Main Picture Sound and PIP
Picture sound.
1 Move to “SOUND SOURCE” by pressing CH (…/†) buttons.
2 Press VOL (œ /√) buttons to select.
PRESET
This function is to select the sound appropriate to your TV
program.
1 Move to “PRESET” by pressing CH (…/†) buttons.
2 Press VOL (œ /√) buttons to select among USER, NEWS,
MOVIE and MUSIC.
MENU adjustment
21
←For weaker treble For stronger treble
←
←For weaker bass For stronger bass
←
←Decrease audio from the
right speaker
Decrease audio from
the left speaker
←
This item is available while PIP picture
exists.
• Bilingual (dual language) signal
- This contains the secondary language
signal in addition to the primary.
- There are the primary and secondary
language and stereo modes in
bilingual signal.
• STEREO or SAP mode can be available
only when broadcasting signal contains
the data.
4
PC ADJUSTMENT
(ONLY IN PC MODE)
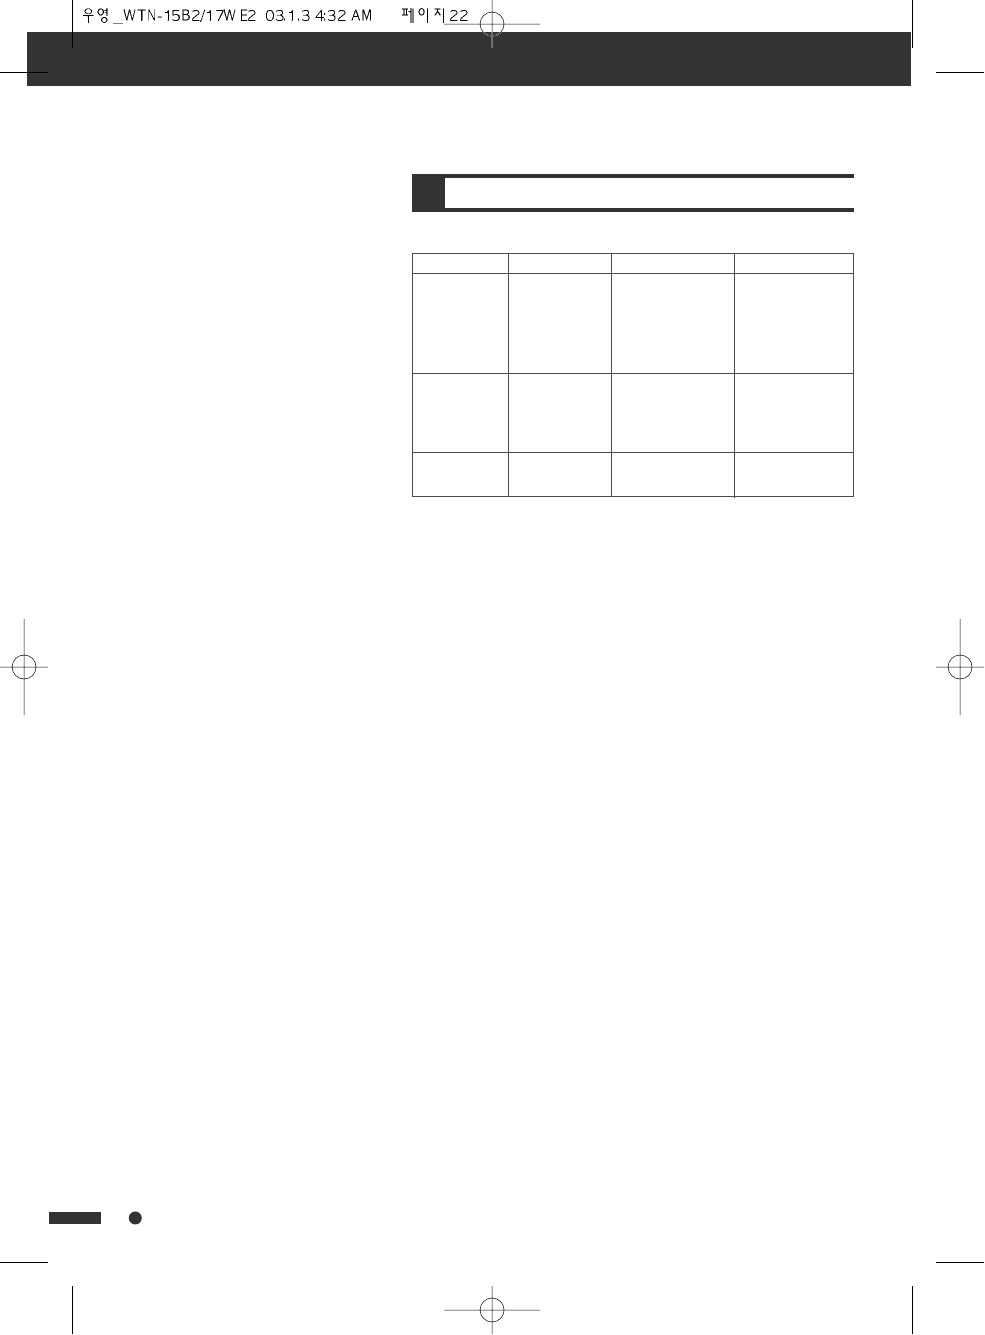
PC mode input format
Resolution V freq. (Hz) H freq. (KHz)
640*480 60 31.5
640*480 72 37.9
640*480 75 37.5
640*480 85 43.3
720*400 70 31.5
800*600 60 37.9
800*600 72 48.1
800*600 75 46.9
800*600 85 53.3
1024*768 60 48.4
1024*768 70 56.5
VGA
SVGA
XGA
In case inputting the PC signal other than above signals, “OUT
OF RANGE” will appear on screen.
Before adjustment, please setup your PC software...
Even if your actual display-settings screens look different from
the below windows, the basic setup methods will apply in
almost all cases.
1 First, click on “Settings” on the Windows Start menu.
While “Settings” is selected, move the cursor to submenu
“Control Panel”.
2 When the control panel screen appears, click on “Display”
and a display dialog box will appear.
3 Navigate to the “Settings” tab on the display dialog-box.
The correct setting of size (resolution) is “1024 x 768
pixels”.
If a vertical-frequency option exists on your display settings
dialog box, the correct value is “60” or “60Hz”.
Otherwise, just click “OK” and exit the dialog box.
22
23
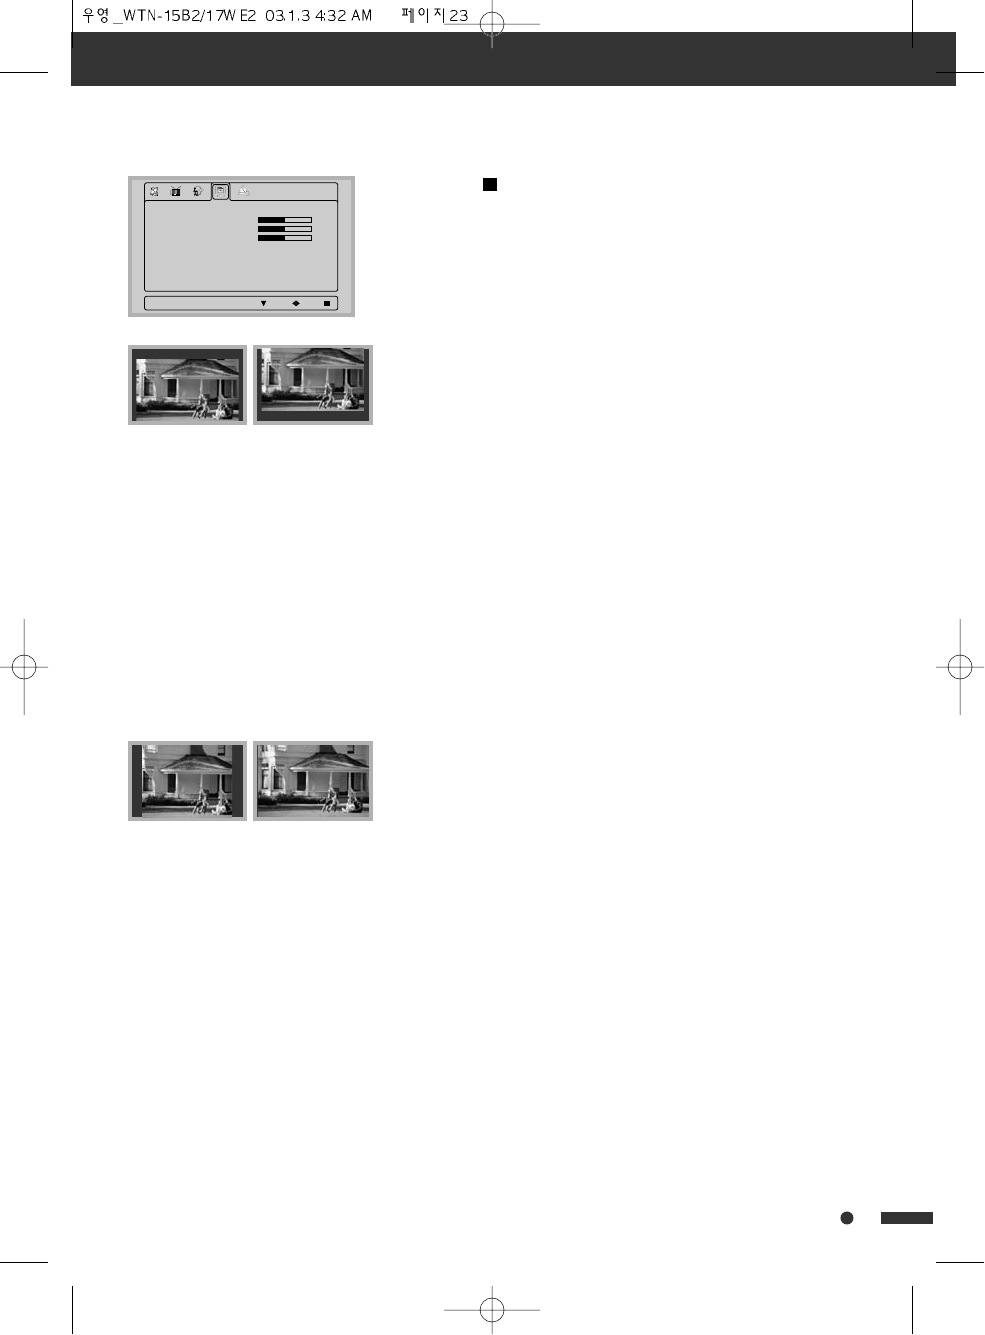
Press MENU ( ) button to display the MENU screen.
Select “PC” by pressing VOL (œ /√) buttons, then press CH down
(†) button to enter into below items.
H-POSITION
1 Move to “H-POSITION” by pressing CH (…/†) buttons.
2 Press VOL (œ /√) buttons to adjust the horizontal position of
the displayed image.
H-SIZE
1 Move to “H-SIZE” by pressing CH (…/†) buttons.
2 Press VOL (œ /√) buttons to adjust the horizontal size of the
displayed image.
PHASE
(Fine image adjustment in PC monitor mode)
1 Move to “PHASE” by pressing CH (…/†) buttons.
2 Press VOL (œ /√) buttons to adjust the phase to get more
clear picture.
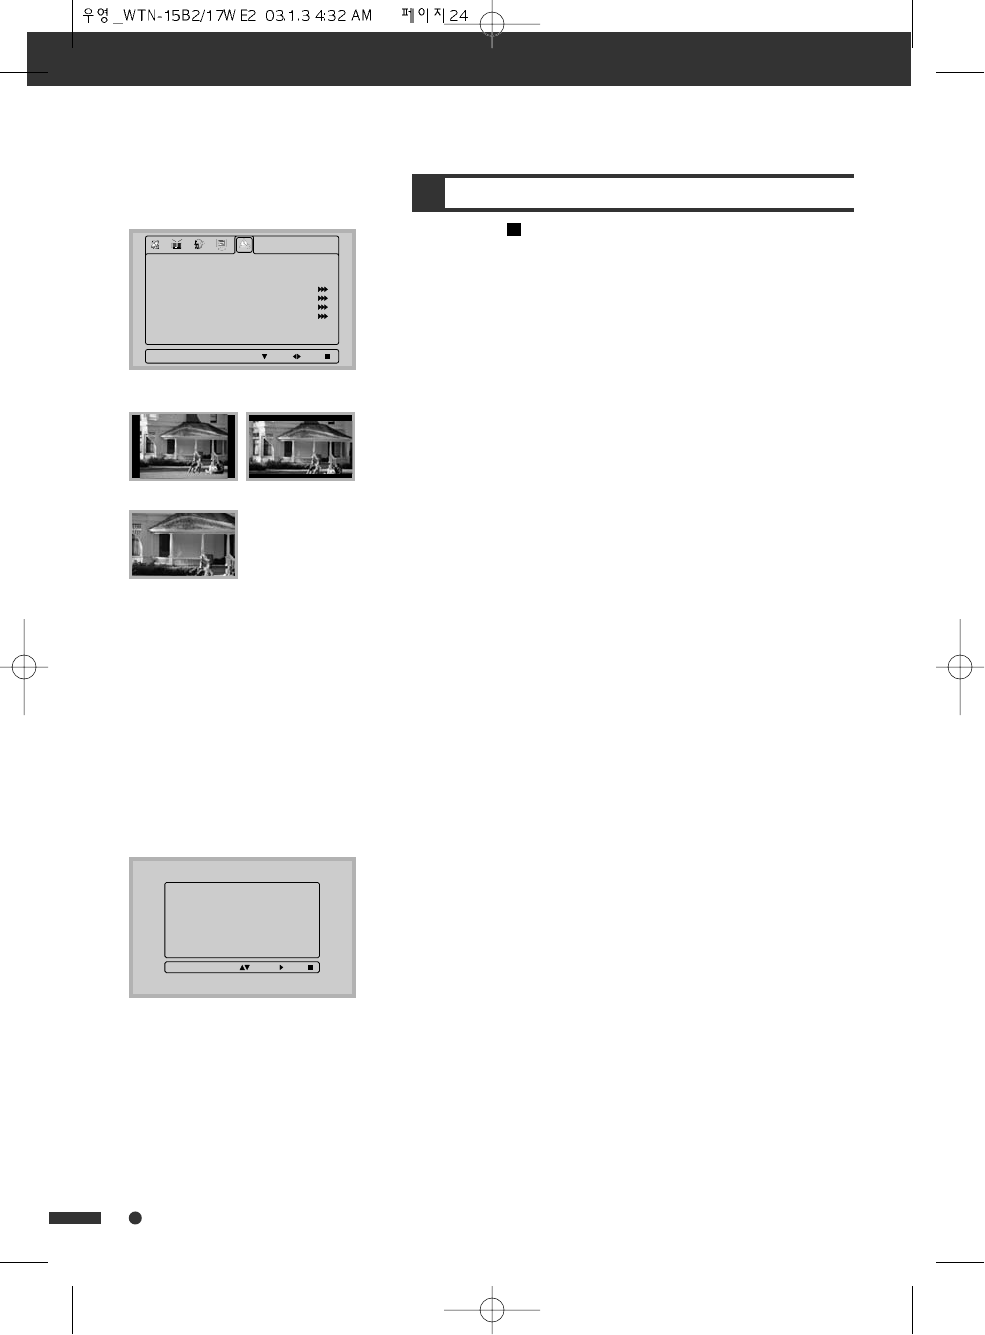
SCREEN EXPAND
1 Move to “SCREEN EXPAND” by pressing CH (…/†) buttons.
2 Press VOL (œ /√) buttons to select screen expand type. You
can sequentially select a Screen Expand that has its own
aspect ratio.
menu adjustment
3&
+326,7,21
+6,=(
3+$6(
6&5((1(;3$1'
2))
(17(5 029( (;,7
before adjustment after adjustment
before adjustment after adjustment
24
Press MENU ( ) button to display the MENU screen.
Select “FUNCTION” by pressing VOL (œ /√) buttons, then
press CH down (†) to enter into below items.
PICTURE SIZE
1 Move to “PICTURE SIZE” by pressing CH (…/†) buttons.
2 Press VOL (œ /√) buttons to select the picture size among
NORMAL, WIDE and 4:3.
NORMAL : Suitable for viewing conventional 4:3 programs
in their normal format.
WIDE : Displays a 16:9 squeeze image without distortion.
(15” model)
4:3 : The picture is expanded in the horizontal and vertical
direction, maintaining the original proportions. (17” wide
model)
LANGUAGE
You can also select a language from the FUNCTION menu.
Select from among 3 languages: English, French and Spanish.
1 Move to “LANGUAGE” by pressing CH (…/†) buttons.
2 Press VOL (œ /√) buttons to select the displayed language
among ENGLISH, FRENCH and SPANISH.
TIME
1 Move to “TIME” by pressing CH (…/†) buttons.
2 Press VOL right (√) button. TIME screen will be displayed.
You can confirm current time.
3 Select and adjust the below items as you want with
UP/DOWN, LEFT/RIGHT buttons.
• ON TIME : You can turn on the TV at desired time.
• OFF TIME : You can turn off the TV at desired time.
• ON TIME CHANNEL : You can set the channel number when
the TV turns on.
• ON TIME VOLUME : You can set the sound volume when the
TV turns on.
menu adjustment
5
FUNCTION ADJUSTMENT
)81&7,21
3,&785(6,=(
/$1*8$*(
7,0(
3,3
&/26('&$37,21
9&+,3
(1*/,*+
(17(5 029( (;,7
7,0(
7,0(
217,0(
23)7,0(
6/((37,0(5
$0
2))$0
2))$0
2))
029( (17(5 (;,7
NORMAL WIDE
4:3
25
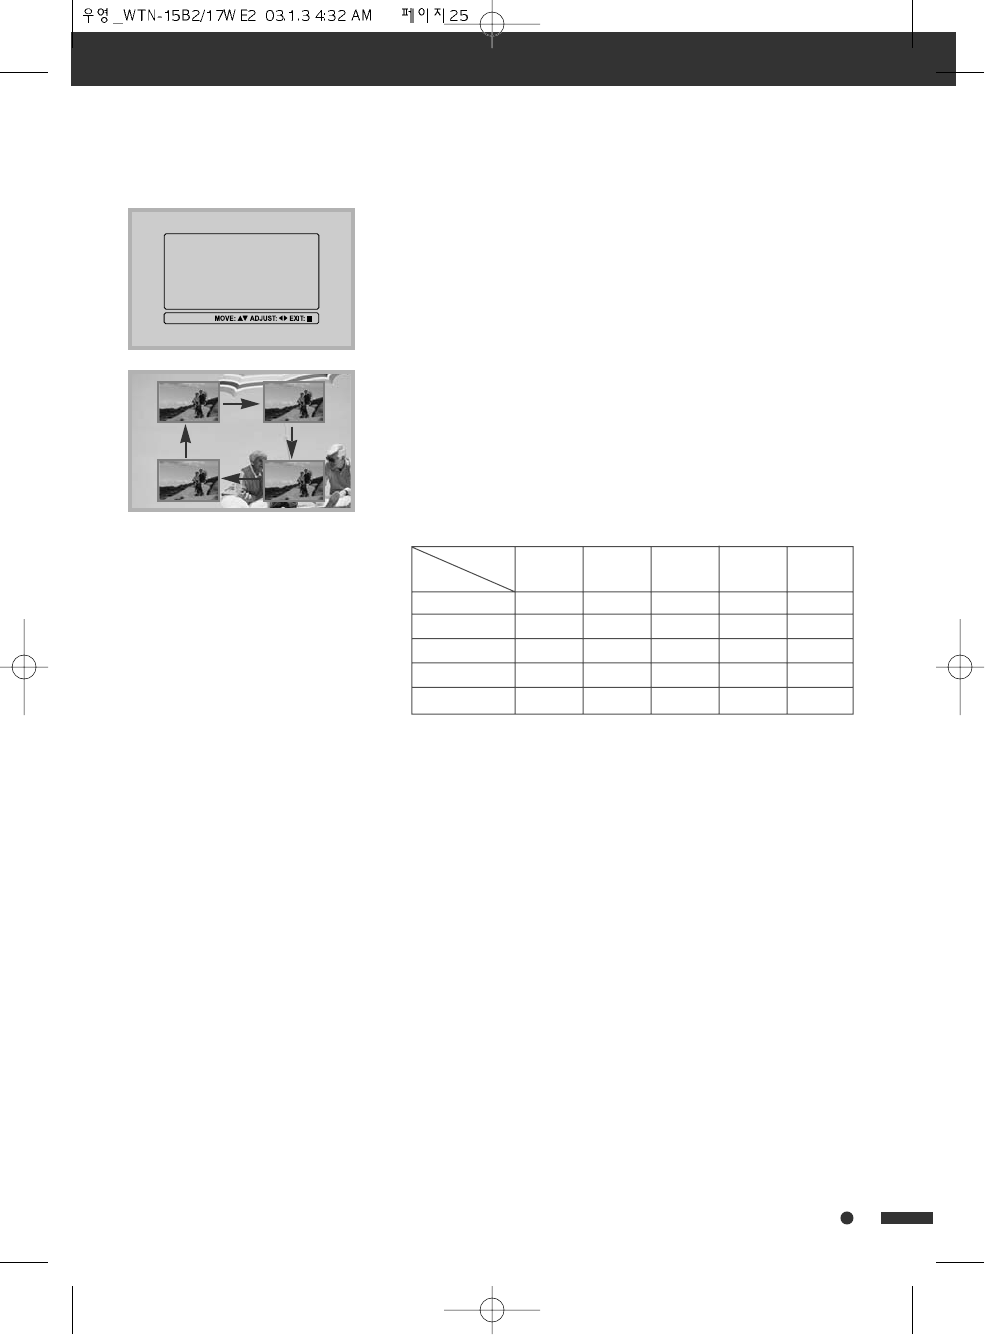
PIP
Allows you to display two pictures on the screen at one time.
1 Move to “PIP” by pressing CH (…/†) buttons.
2 Press VOL right ( √) button. PIP screen will be displayed.
• PIP : Turn PIP mode on or off. PIP picture will appear when
you set PIP mode to ON.
• INPUT : Select the PIP input signal among TV, VIDEO or S-
VIDEO.
• POSITION : Select the picture position among R-BOTTOM, L-
BOTTOM, R-TOP or L-TOP.
• CHANNEL : Select the channel of PIP picture when PIP
input is TV.
* Not available 480i COMPONENT signal.
menu adjustment
3,3
3,3
,1387
326,7,21
&+$11(/
2))
79
5%27720
$,5
Available PIP picture setting mode
PIP picture
TV VIDEO S-VIDEO
COMPONENT
PC
MAIN picture
TV X X X X X
VIDEO X X X X X
S-VIDEO X X X X X
*COMPONENT O O O X X
PC O O O X X
- PIP POSITION-
26
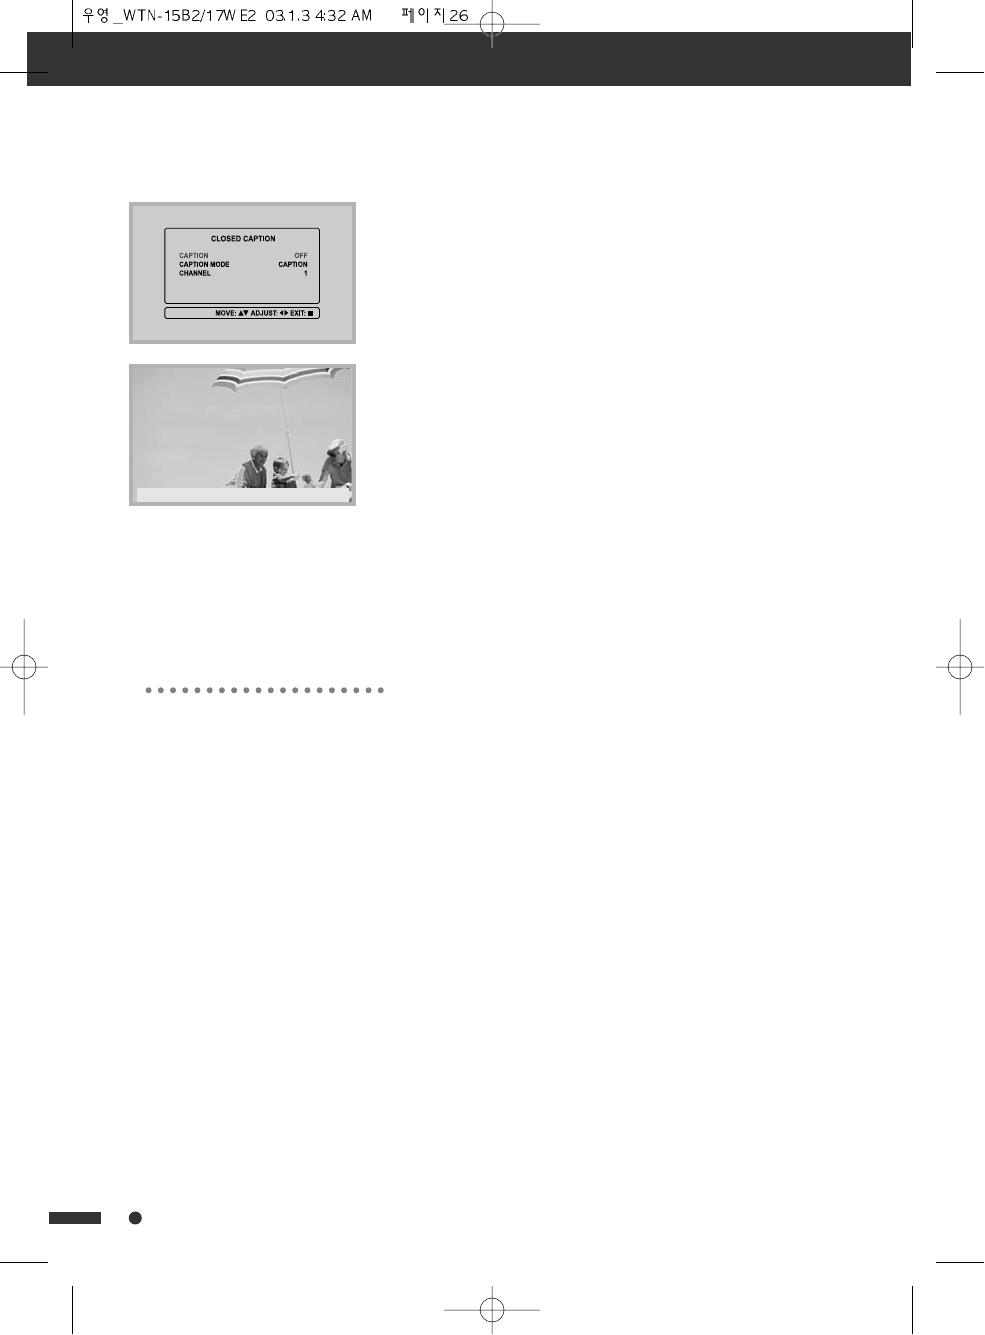
CLOSED CAPTION
• This TV set is equipped with an internal closed caption
decoder. Closed caption is the system which allows you to
view conversations, narration, and sound effects in TV
programs and home videos as subtitles on your Display.
• Not all programs and videos offer closed caption. Please
look for the “CC” symbol to ensure that captions will be
shown.
• “CC1” or “CC2” displays subtitles of TV dramas and news
programs while allowing a full view of the picture.
• “T1” or “T2” superimposes on the picture other information
(e.g. TV guide, weather) that is independent of the TV in
progress.
1 Move to “CLOSED CAPTION” by pressing CH (…/†) buttons.
2 Press VOL right (√) button. CLOSED CAPTION screen will be
displayed.
3 Select and adjust the below items as you want with CH
(…/†), VOL (œ /√) buttons.
• CAPTION : Turn CAPTION mode ON or OFF.
• CAPTION MODE : Select the CAPTION MODE in CAPTION or
TEXT.
• CHANNEL : For each caption mode, two channels are
availabel ; 1&2.
• The TV may not receive CLOSED CAPTION signals normally in
the following situations.
!Poor reception conditions.
@As old, bad or illegally recorded tape is played.
#Strong, random signals from a car interface with the TV
signal.
$The program wasn’t captioned when it was produced,
transmitted or taped.
menu adjustment
You want some bread?
• In the event you receive a poor signal,
an empty black box may appear, even
when the TEXT mode is selected. This is
normal function in such an event.
27
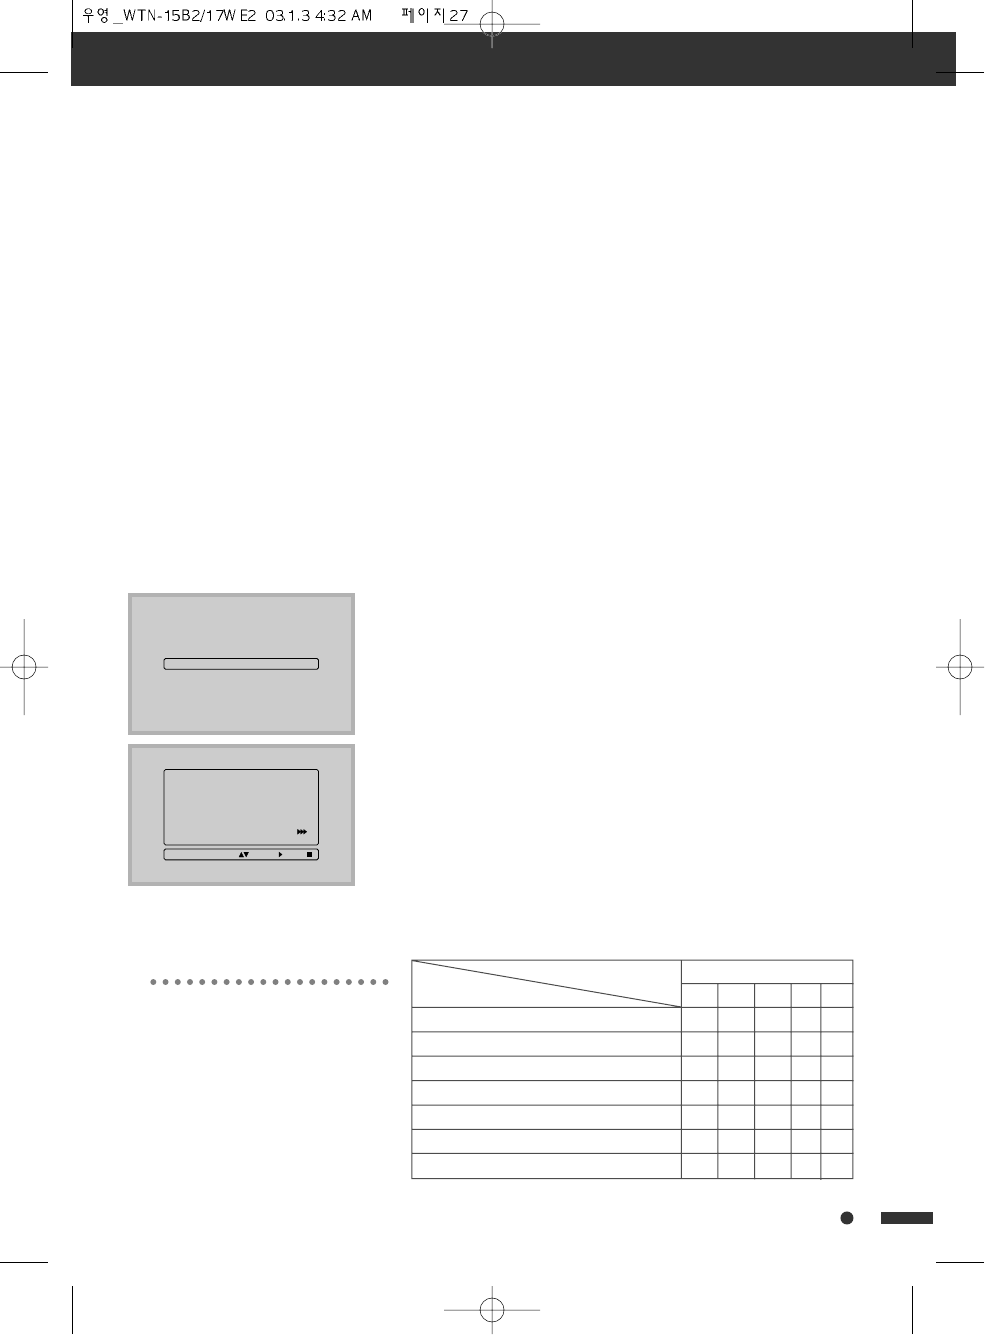
V-CHIP (Parental control)
V-CHIP is an electronic filtering device built into your System.
This tool gives parents a great degree of control over
broadcasts accessed by their children. It allows parents to
select programs judged suitable for child viewing while
blocking ones judged not suitable. It does so automatically
once you activate the V-CHIP feature in your LCD Television.
“V-Chip” will not be selectable from the menu if you do not
first configure your secret number.
• The U.S. has two rating systems for viewing content: TV
Parental Guidelines and movie ratings.
• The TV Parental Guidelines work in conjunction with the V-
CHIP to help parents screen out inappropriate television
shows from their children.
• Movie ratings are used for original movies rated by the
Motion Picture Association of America (MPAA) as watched
on cable TV and not edited for television. The V-CHIP can
also be set to block MPAA-rated movies
1 Move to “V-CHIP” by pressing CH (…/†) buttons.
2 Press VOL right ( √) button. PASSWORD screen will be
displayed as left figure. Enter your 4-digit secret number.
3 V-CHIP screen will be displayed.
4 TV RATING : Select the desired TV Rating among UNBLOCK,
TV-Y, TV-Y7, TV Y7 FV, TV-G, TV-PG, TV-14 and TV-MA.
5 CONTENTS : Adjust each TV Rating with detailed contents.
See below table for details of TV RATING and CONTENTS.
menu adjustment
(17(53$66:25'
9&+,3
9&+,3
795$7,1*
&21(176
03$$5$7,1*
&+$1*(3$66:25'
2))
81/2&.
'/69
81%/2&.
029( (17(5 (;,7
TV Parental Guidelines
Rating Content
Suggested age FV V S L D
TV-Y (All children)
TV-Y7 (Directed to older children)
TV-Y7 FV (Directed to older children) X
TV-G (General audience)
TV-PG (Parental Guidance suggested) X X X X
TV-14 (Parents strongly cautioned) X X X X
TV-MA (Mature audience only) X X X
FV : Fantasy violence
V : Violence
S : Sexual situation
L : Adult language
D : Sexually suggestive dialog
*X: Content rating can be set.
28
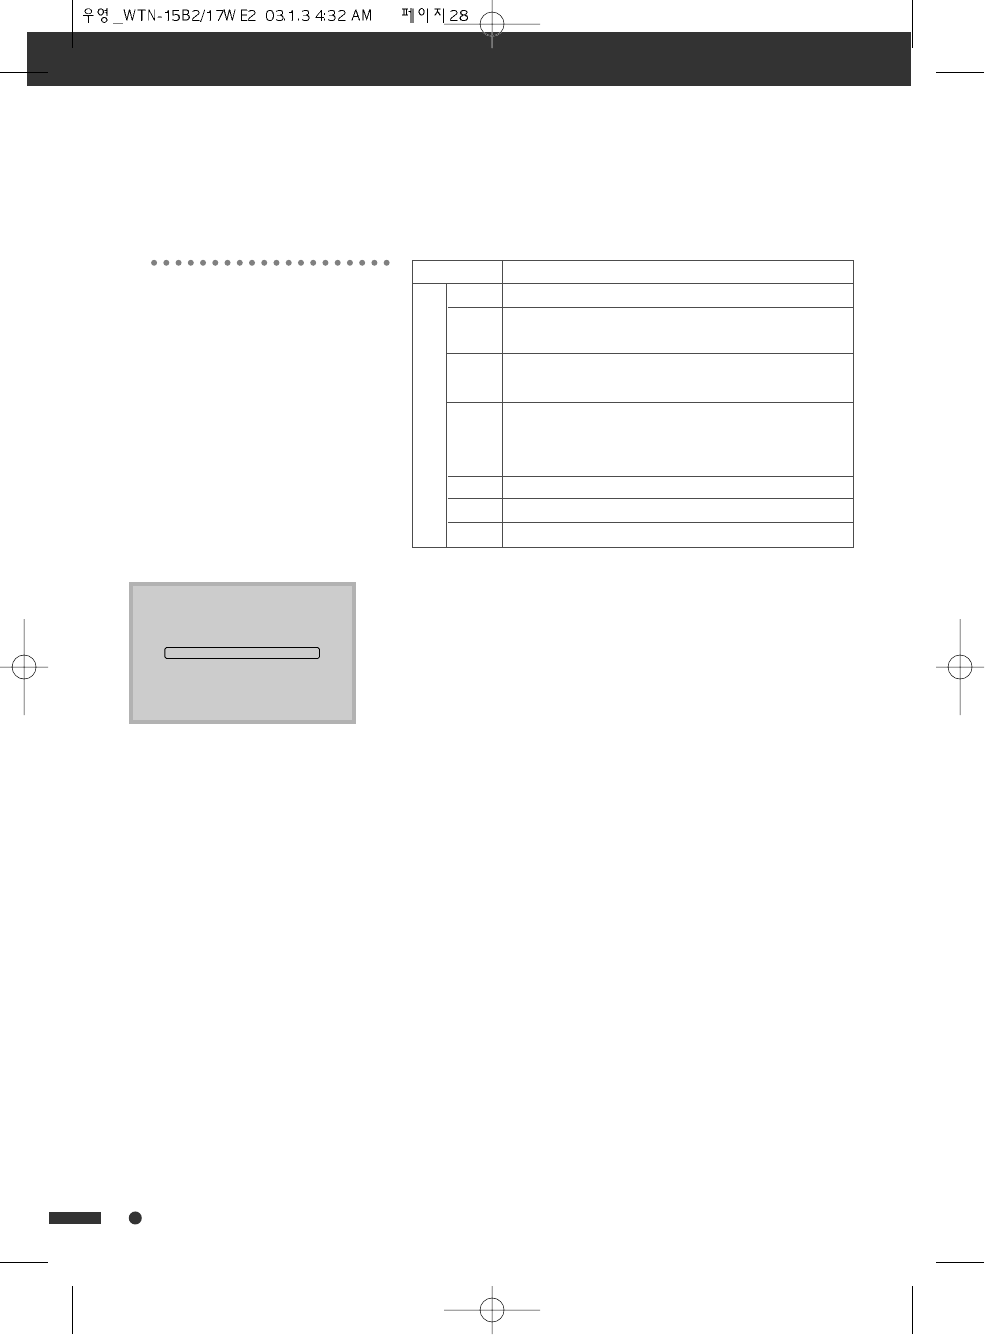
6 MPAA RATING : Select the desired TV Rating among G, PG,
PG-13, R, NC-17, X and NR. See below table for details.
7 NEW PASSWORD : Press VOL right (√) button. NEW
PASSWORD screen will be displayed. Enter new 4-digit
secret number.
And confirm new password.
Then the password was changed.
menu adjustment
Voluntary movie rating system (MPAA)
Rating Description
G General audiences. All ages admitted.
PG Parental guidance suggested. Some material may
not be suitable for children.
PG-13 Parents strongly cautioned. Some material may
Age be inappropriate for children under 13.
R Restricted. Under 17 requires accompanying
parent or adult guardian (age varies in some
jurisdictions).
NC-17 No one 17 and under admitted.
X A rating that has now been superseded by NC-17.
NR
• If you select “PG-13”, this will
automatically block the higher ratings
“R”, “NC-17” and “X”.
• Voluntary movie rating system only
uses an age-based rating.
1(:3$66:25'
29
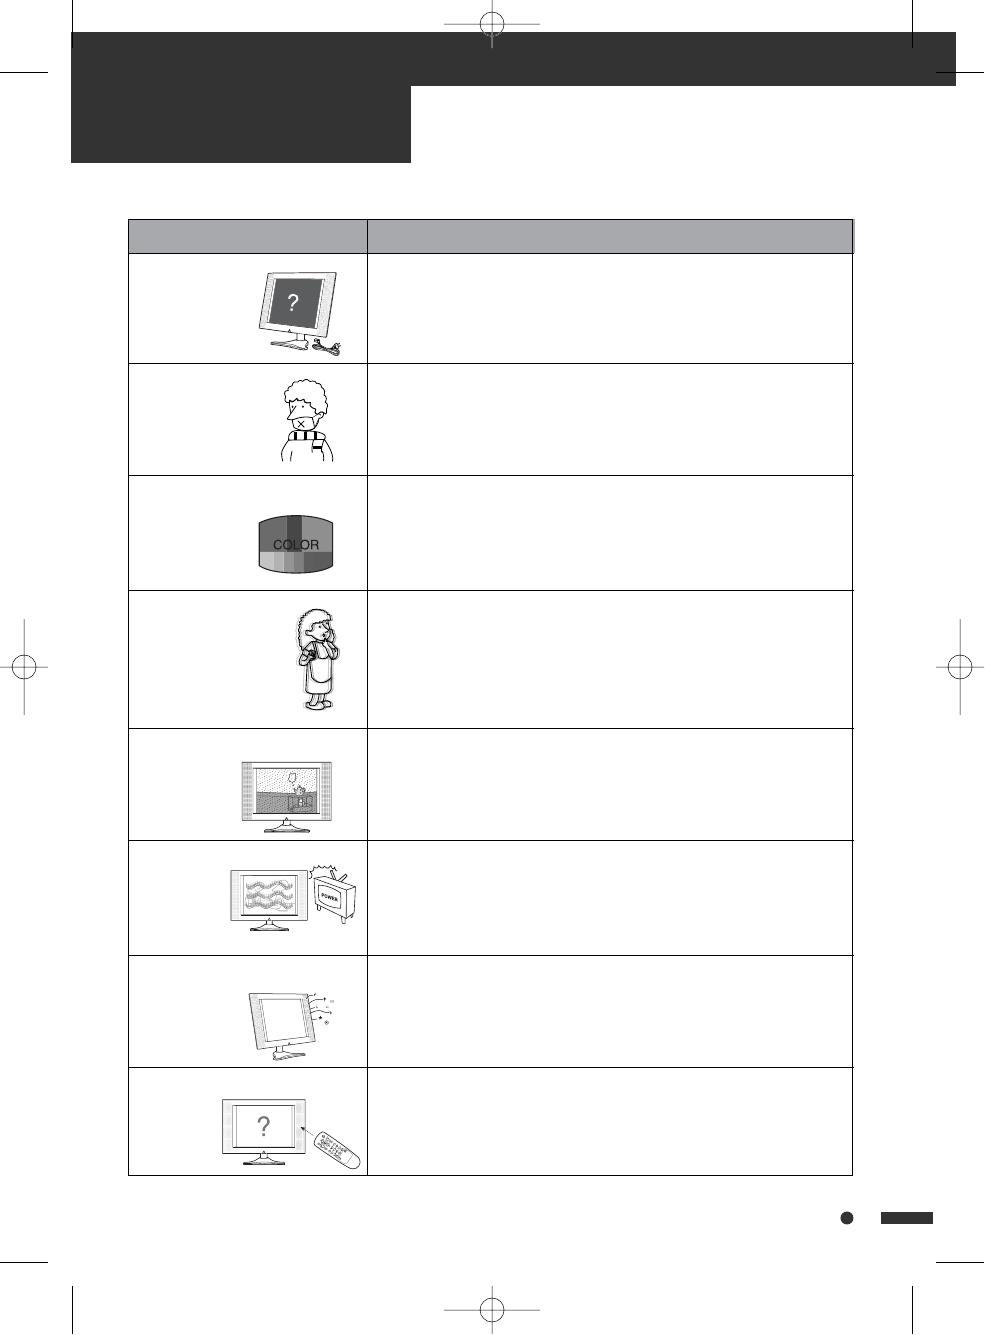
Please check the following items before asking for repair service.
Symptom Check items
Neither picture
nor sound
Picture is OK,
but no sound
Sound is OK, but
no color.
The picture is
overlapped image
Picture has “snow
noise”
Stripes on
picture
Bad stereo or SAP
sound.
Remote control
does not
work
- Check the contact of sockets is all right.
- Check the main power of the TV is turned on.
- Check the Volume control is set to minimum position or mute.
- Check the color control is set to the minimum position, if not
adjust the color properly.
- Check the program is in color or black & white.
- Check the antenna is installed correctly, if not, adjust the
antenna toward the broadcasting station.
- Check the “Fine Tuning” is set up correctly, if not adjust the
fine tuning properly.
- Check the antenna or its connection is correct, if not, correct
the antenna fault or connection cable fault.
- Check there is interference from car traffic or neon signs.
- Check is interference by other electronic device, such as radio,
television, etc. then keep magnetic or electronic devices away
from the TV.
- Long distance from the station or other radio waves could
cause bad sound reception, if so change the mode to Mono
- Check the batteries power in the Remote control are weak.
- Check the objects blocking between IR sensor on the TV and
the Remote control.
TROUBLESHOOTING
GUIDE

Troubleshooting Guide
30
IN PC MODE
Symptom Check items
2872)5$1*(
126,*1$/
“OUT OF RANGE”
appears on
screen
“NO SIGNAL”
appears on
screen
Image is not
clear
Image is not
centered.
- Check the resolution and frequency of your PC. Then adjust
them to optimum condition for LCD TV ; 1024 x 768 and 60Hz.
- Refer to the table of PC mode input format on page 22.
(Not being registered resolution and frequency on the table
won’t be displayed.)
- Ensure that the signal cable is firmly connected to the PC and
TV.
- Adjust the PHASE control. (Refer to the PC ADJUSTMENT on
page 23.)
- Adjust the H-POSITION and H-SIZE control. (Refer to the PC
ADJUSTMENT on page 23.)
31
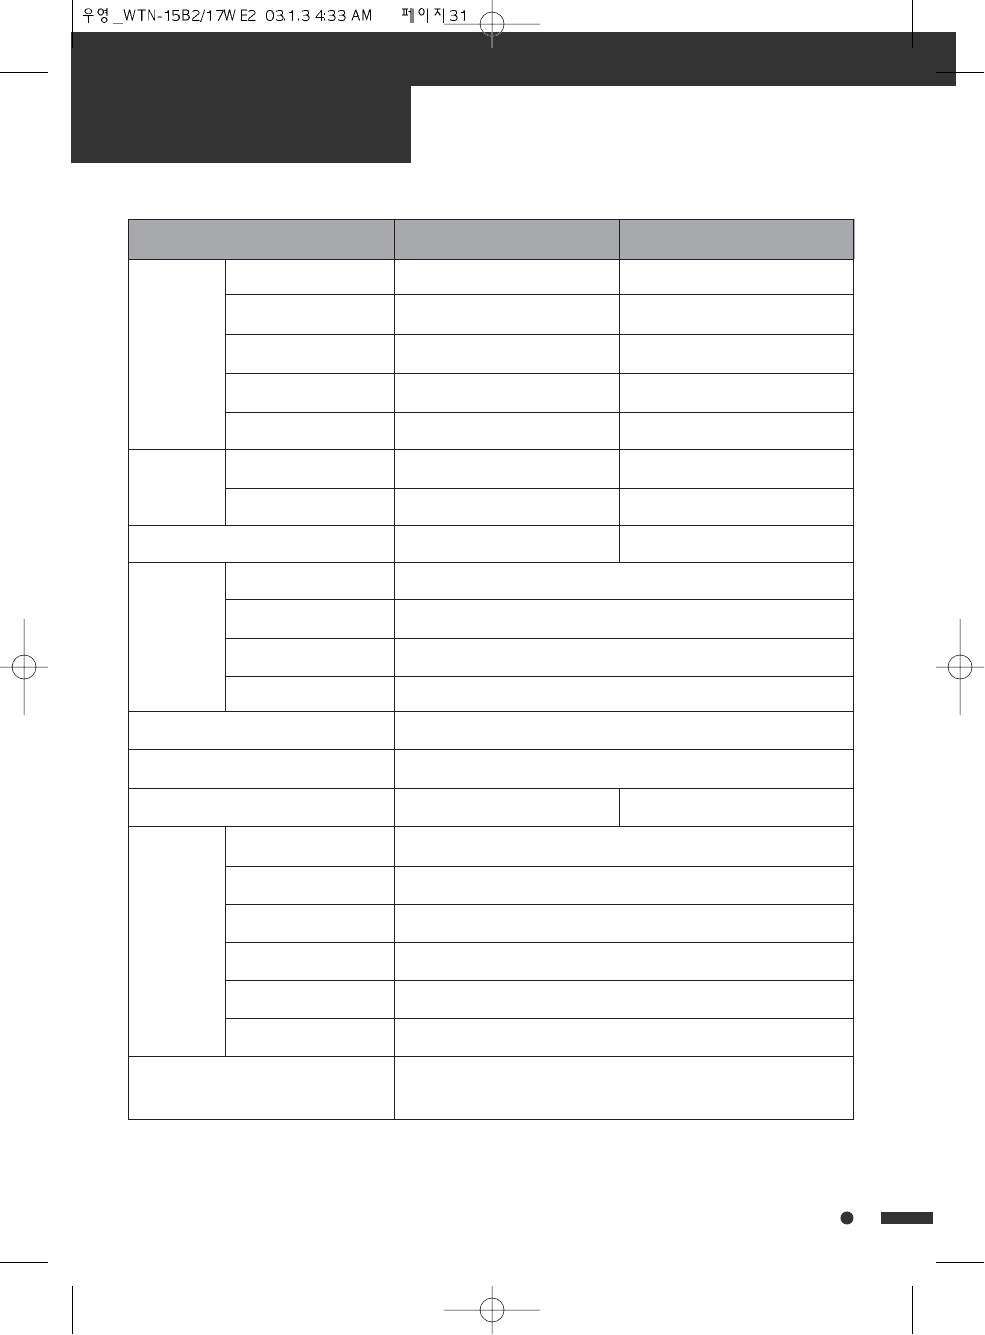
SPECIFICATION
MODEL WTN-15B2 WTN-17WE2
PANEL 15.1” TFT LCD 17”WIDE TFT LCD
RESOLUTION 1024 X RGB X 768 (XGA) 1028 X RGB X 768 (WXGA)
ACTIVE AREA [mm] 307.0 x 230.4 372.5 x 223.5
50/ 70/ 75/ 75 50/ 70/ 75/ 75
BRIGHTNESS [cd/m2] 450 450
484 X 350 X 185 532 X 352 X 185
484 X 303 X 59.7 532 X 296.5 X 68.2
WEIGHT [WITHOUT ACCESSORIES] 12.8lbs [5.8kg] 13.7lbs [6.6kg]
TV STANDARD NTSC-M
TUNING SYSTEM ELECTRIC TUNING SYSTEM WITH PLL 181 CHANNELS
STEREO MTS + SAP
CATV 125 CHANNELS
INPUT POWER DC12V, AC 100-240V~, 50/60Hz
SOUND OUTPUT 3W + 3W
POWER CONSUMPTION 43W 46W
AV IN VIDEO (COMPOSITE), S-VIDEO (Y/C), AUDIO L&R
COMPONENT Y, Pb(Cb), Pr(Cr) [480i, 480p, 720p, 1,080i], AUDIO L&R
MONITOR OUT VIDEO (COMPOSITE) OUT
HEADPHONE 3.5G STEREO MINI-JACK
PC IN D-SUB 15PIN RGB IN, PC AUDIO IN
ANT. IN F-TYPE
ACCESSORIES REMOTE CONTROLLER, BATTERIES, AC ADAPTER, AC CORD,
D-SUB 15PIN CABLE, PC AUDIO CABLE, USER’S MANUAL
VIEWING ANGLE
[U / D/ L/ R]
WITH STAND
[mm, W X H X D]
WITHOUT STAND
[mm, W X H X D]
LCD
DIMENSION
TV-FUNCTION
TERMINALS

FCC RF
INTERFERENCE STATEMENT
NOTE :
This equipment has been tested and found to comply with the limits for a Class B digital
device, pursuant to Part 15 of the FCC Rules. These limits are designed to provide
reasonable protection against harmful interference in a residential installation.
This equipment generates, uses and can radiate radio frequency energy and, if not installed
and used in accordance with the instructions, may cause harmful interference to radio
communications. However, there is no guarantee that interference will not occur in a
particular installation.
If this equipment does cause harmful interference to radio or television reception which can
be determined by turning the equipment off and on, the user is encouraged to try to correct
the interference by one or more of the following measures.
- Reorient or relocate the receiving antenna.
- Increase the separation between the equipment and receiver.
- Connect the equipment into an outlet on a circuit different from that to which the
receiver is connected.
- Consult the dealer or an experienced radio, TV technical for help.
- Only shielded interface cable should be used.
Finally, any changes or modifications to the equipment by the user not expressly approved
by the grantee or manufacturer could void the users authority to operate such equipment,