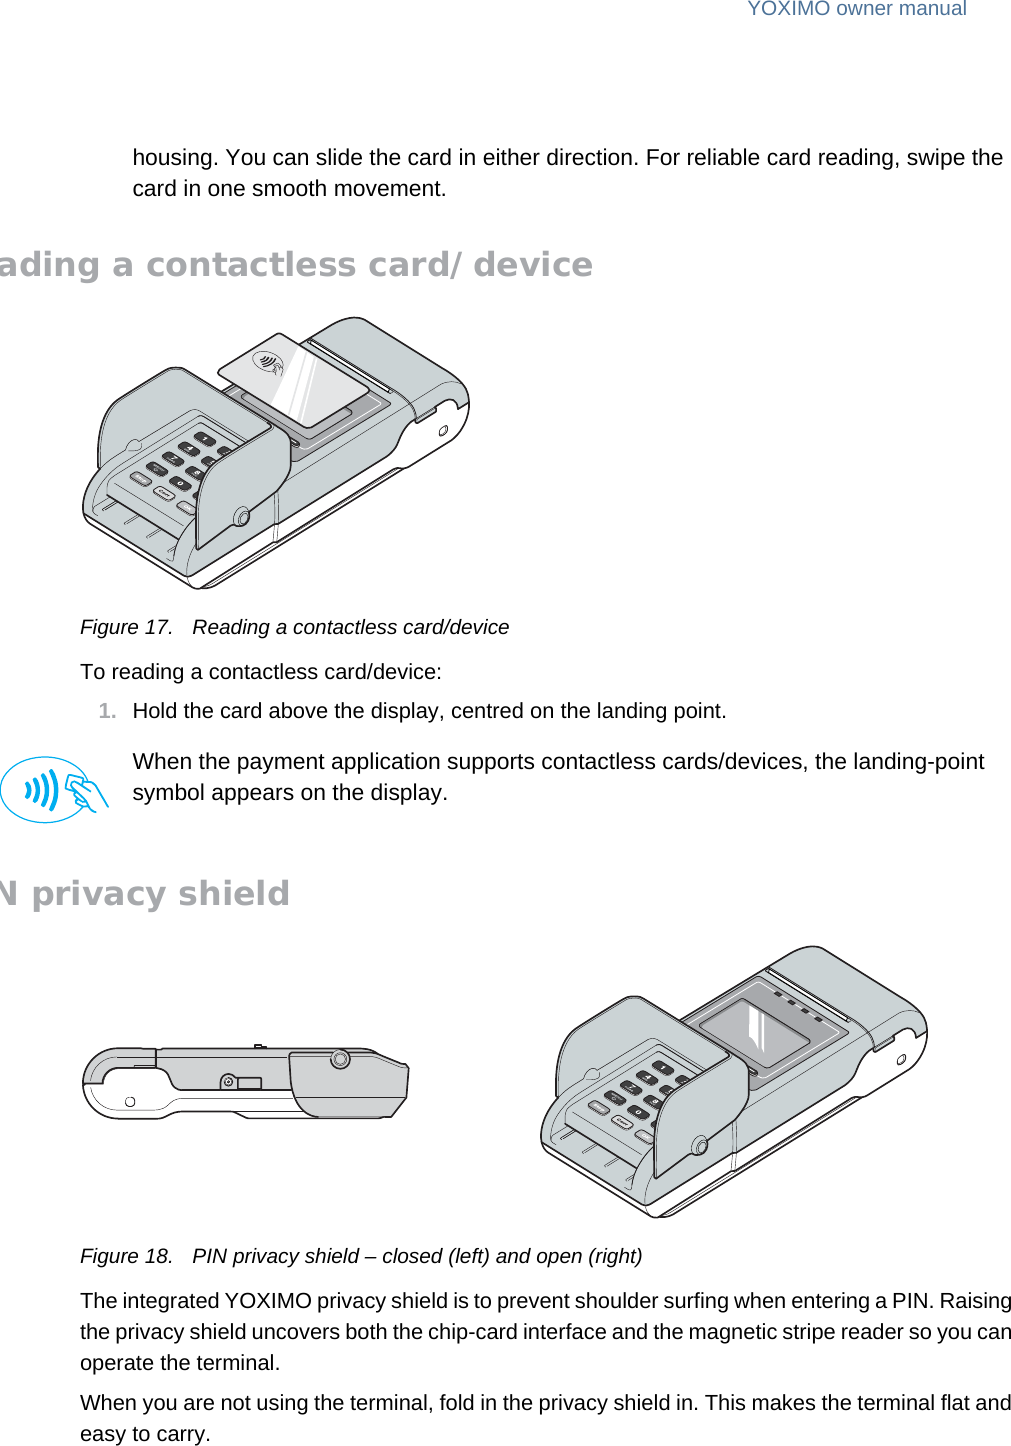
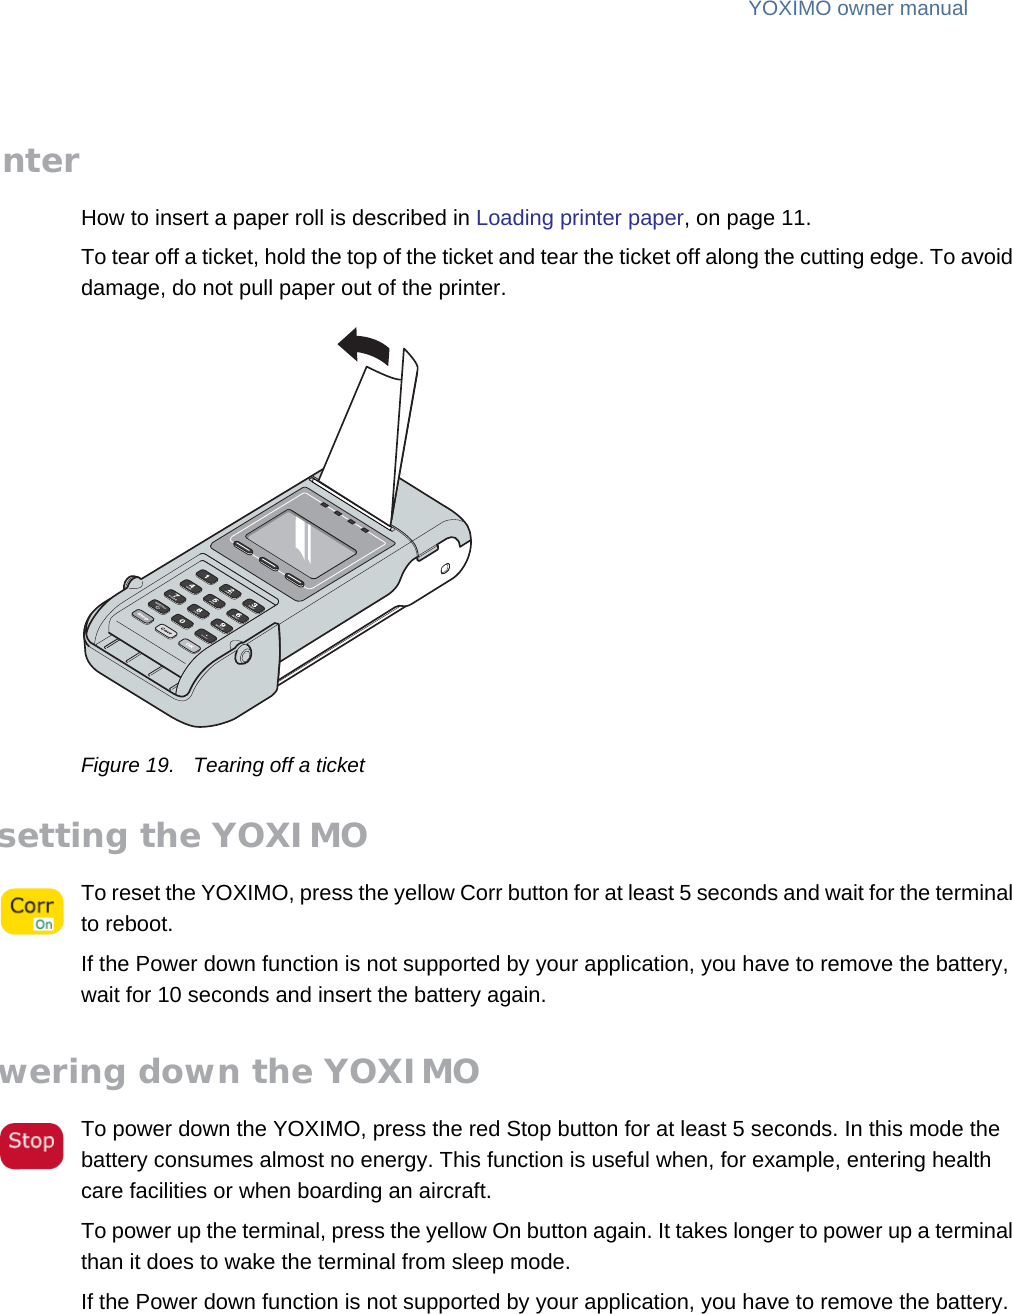
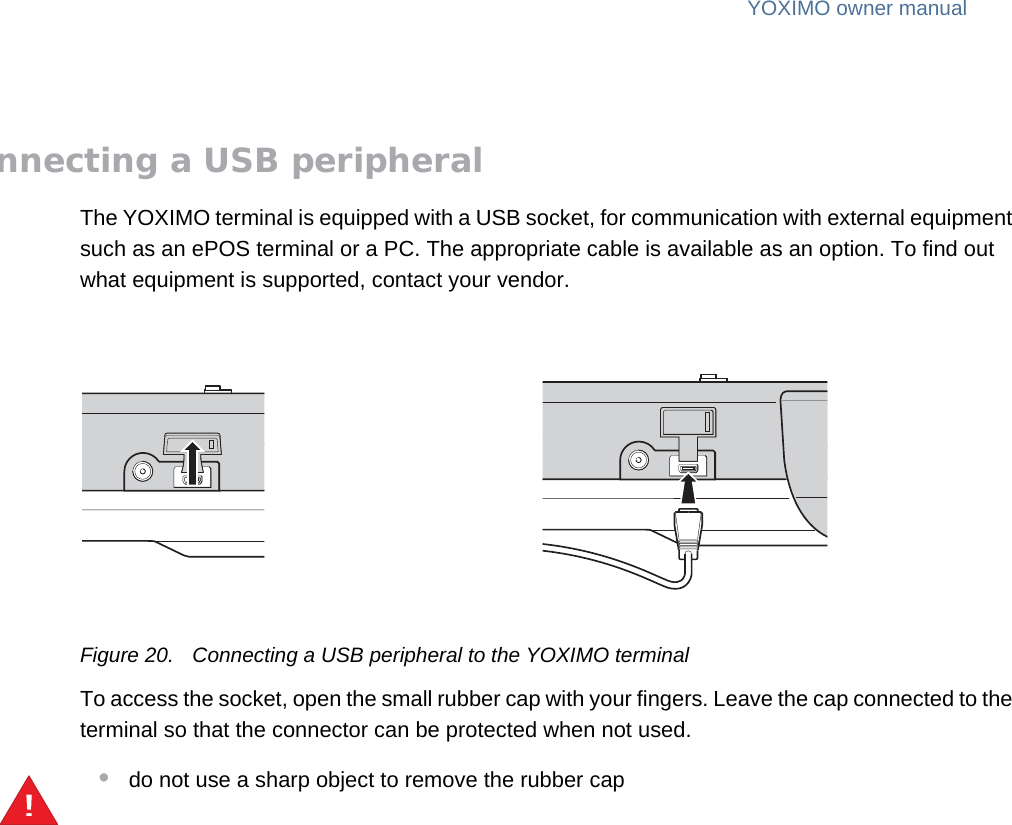
Worldline n v IMOCMEH19B Wifi/BT Portable Payment terminal User Manual YOXIMO Owner Manual
Worldline s.a./n.v. Wifi/BT Portable Payment terminal YOXIMO Owner Manual
UserManual.wiki
>
Worldline n v
>
IMOCMEH19B User Manual
>
User Manual
Contents
1.
User Manual
2.
yoximo_brochure
3.
User Manual addendum
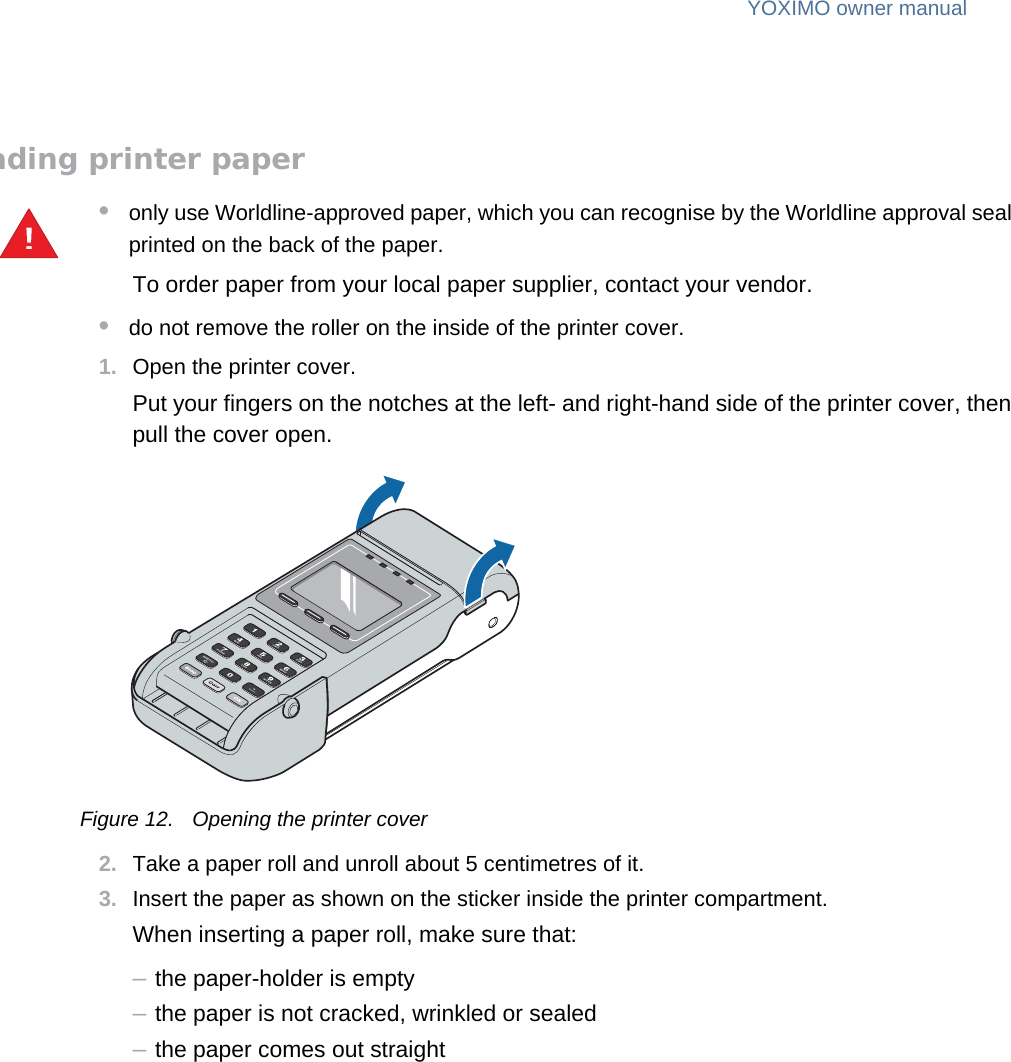
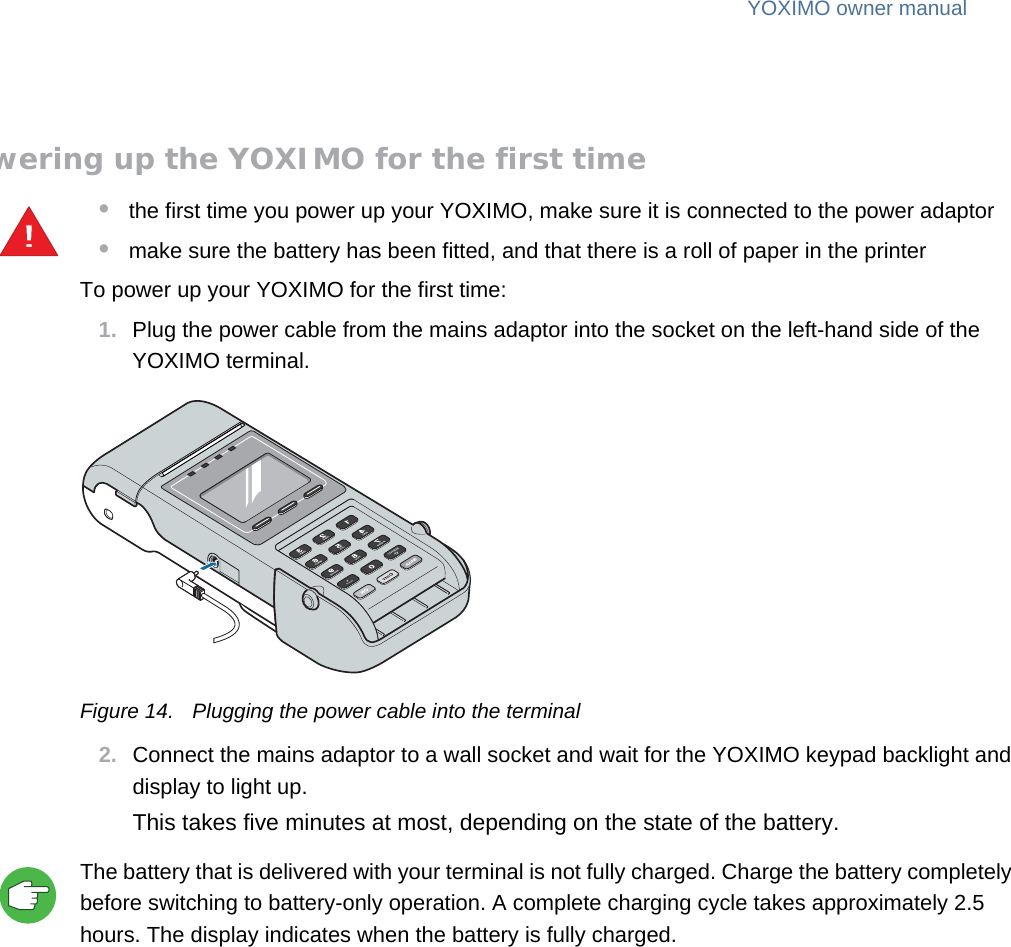
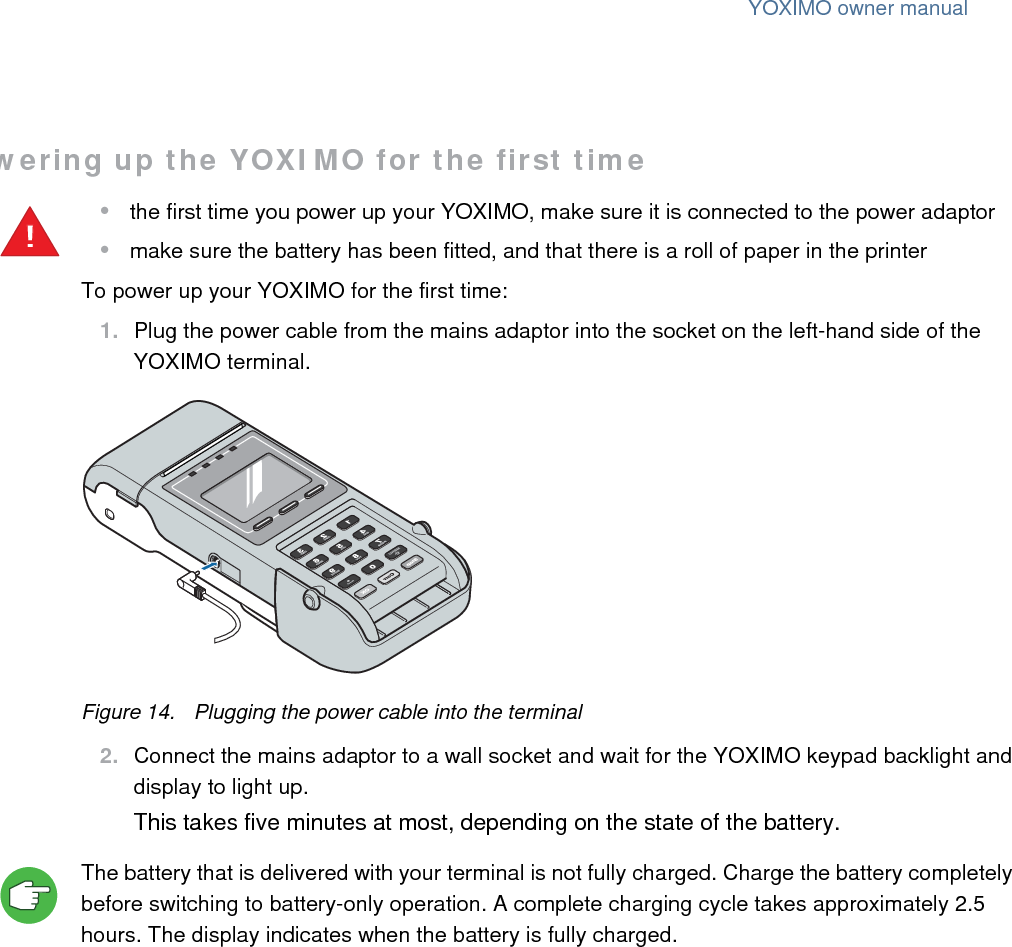
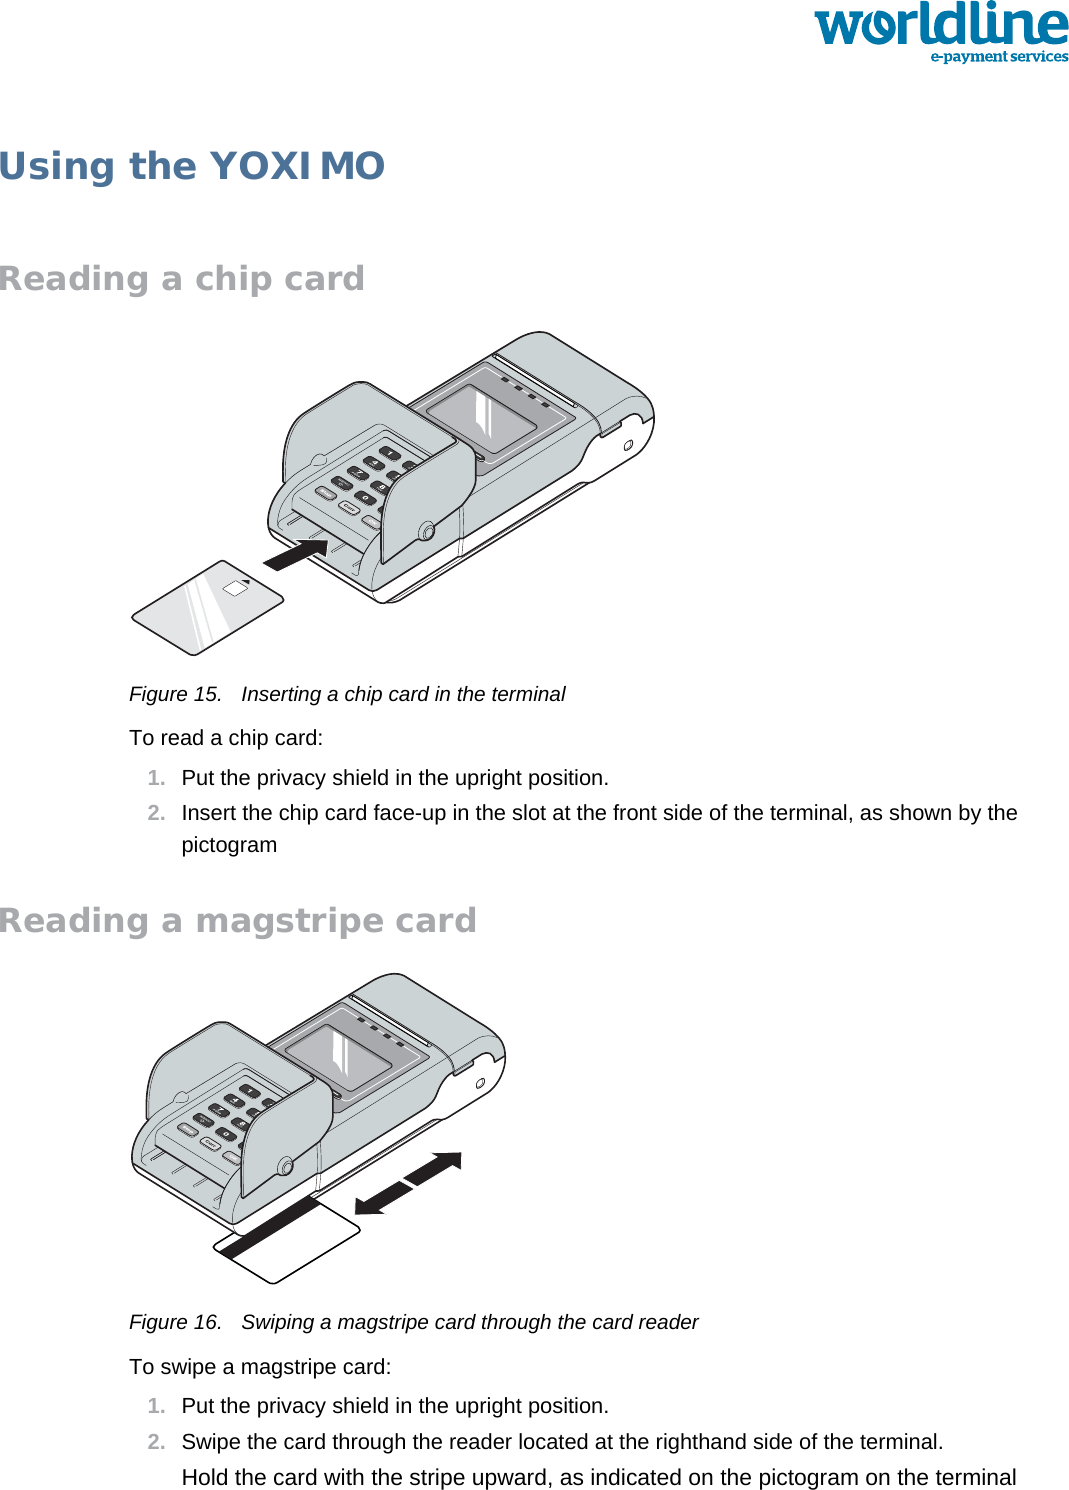
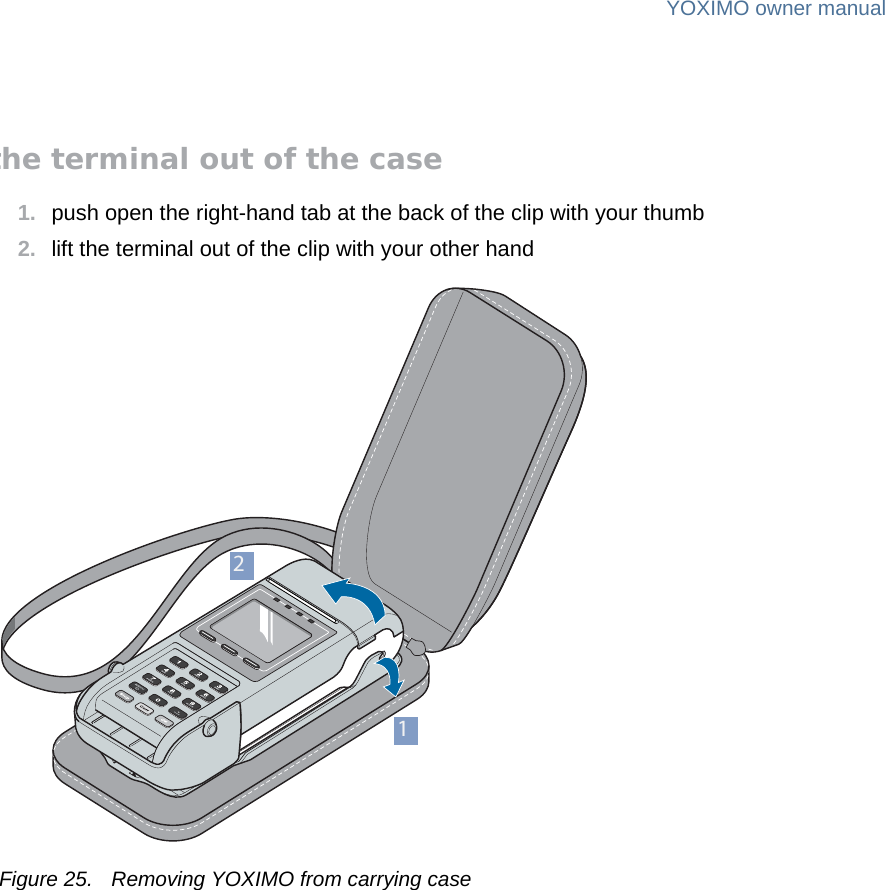
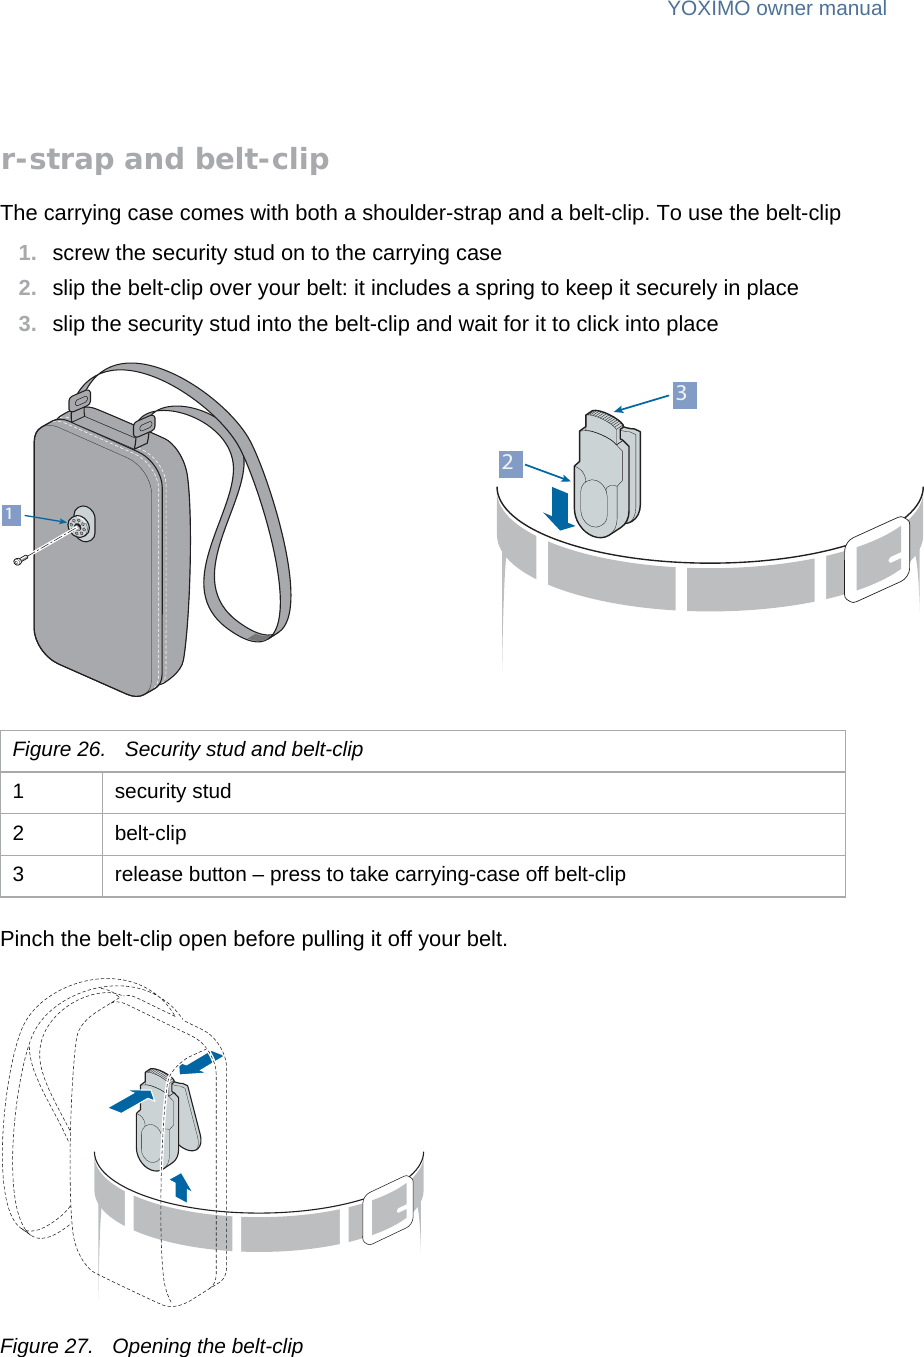
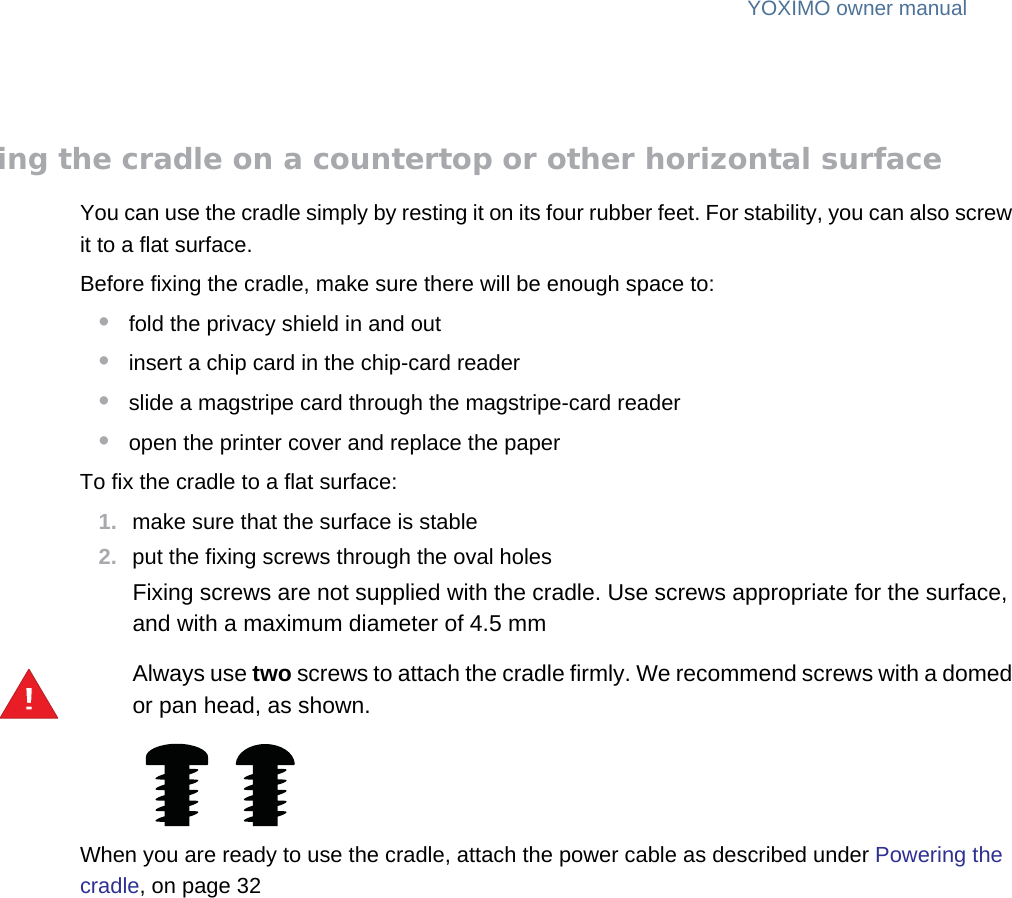
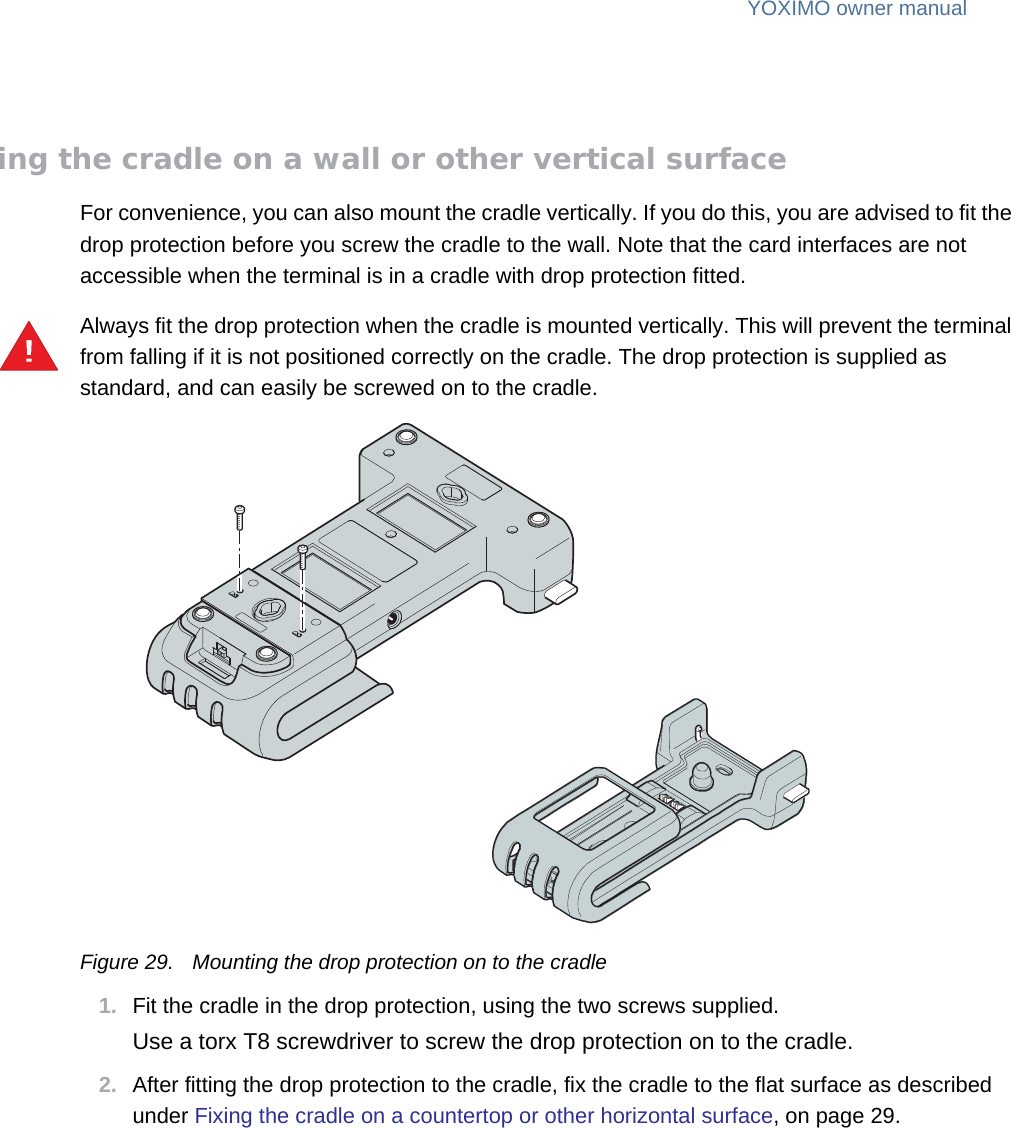
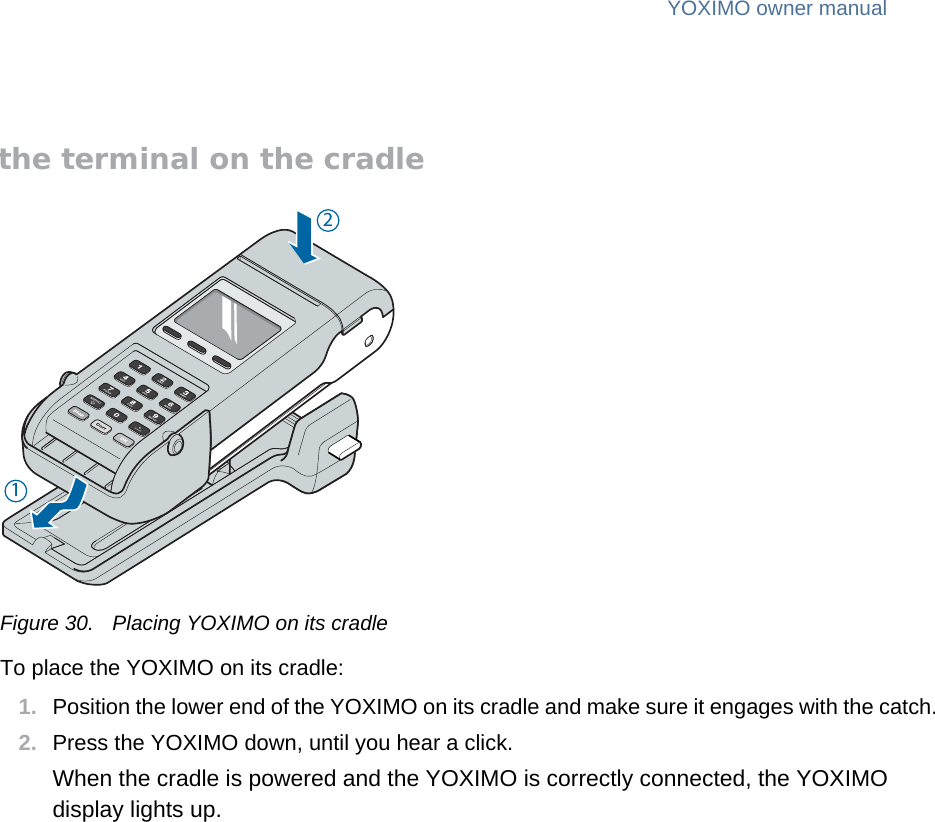
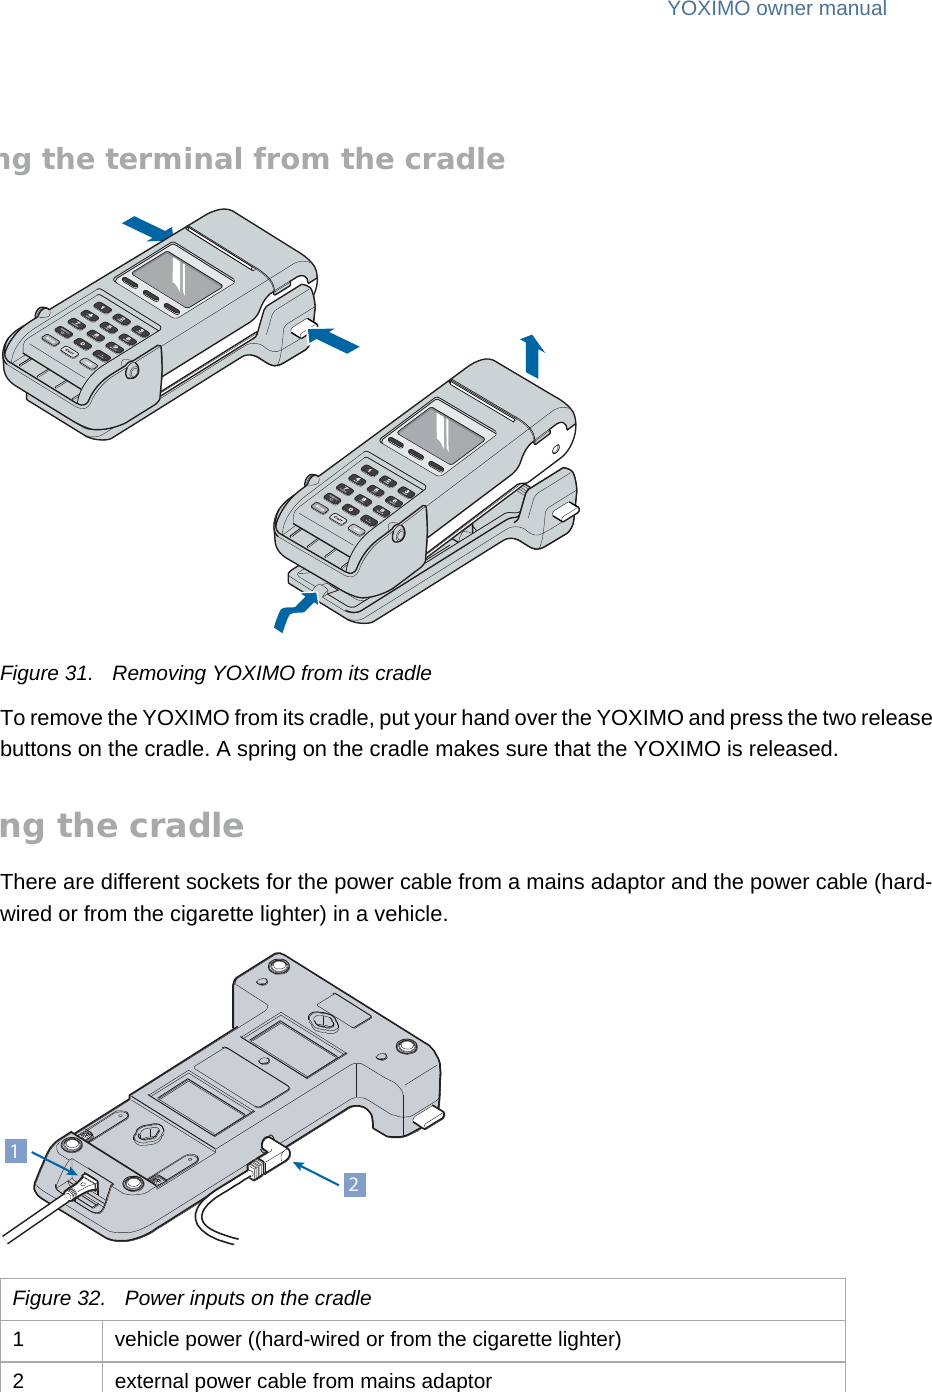
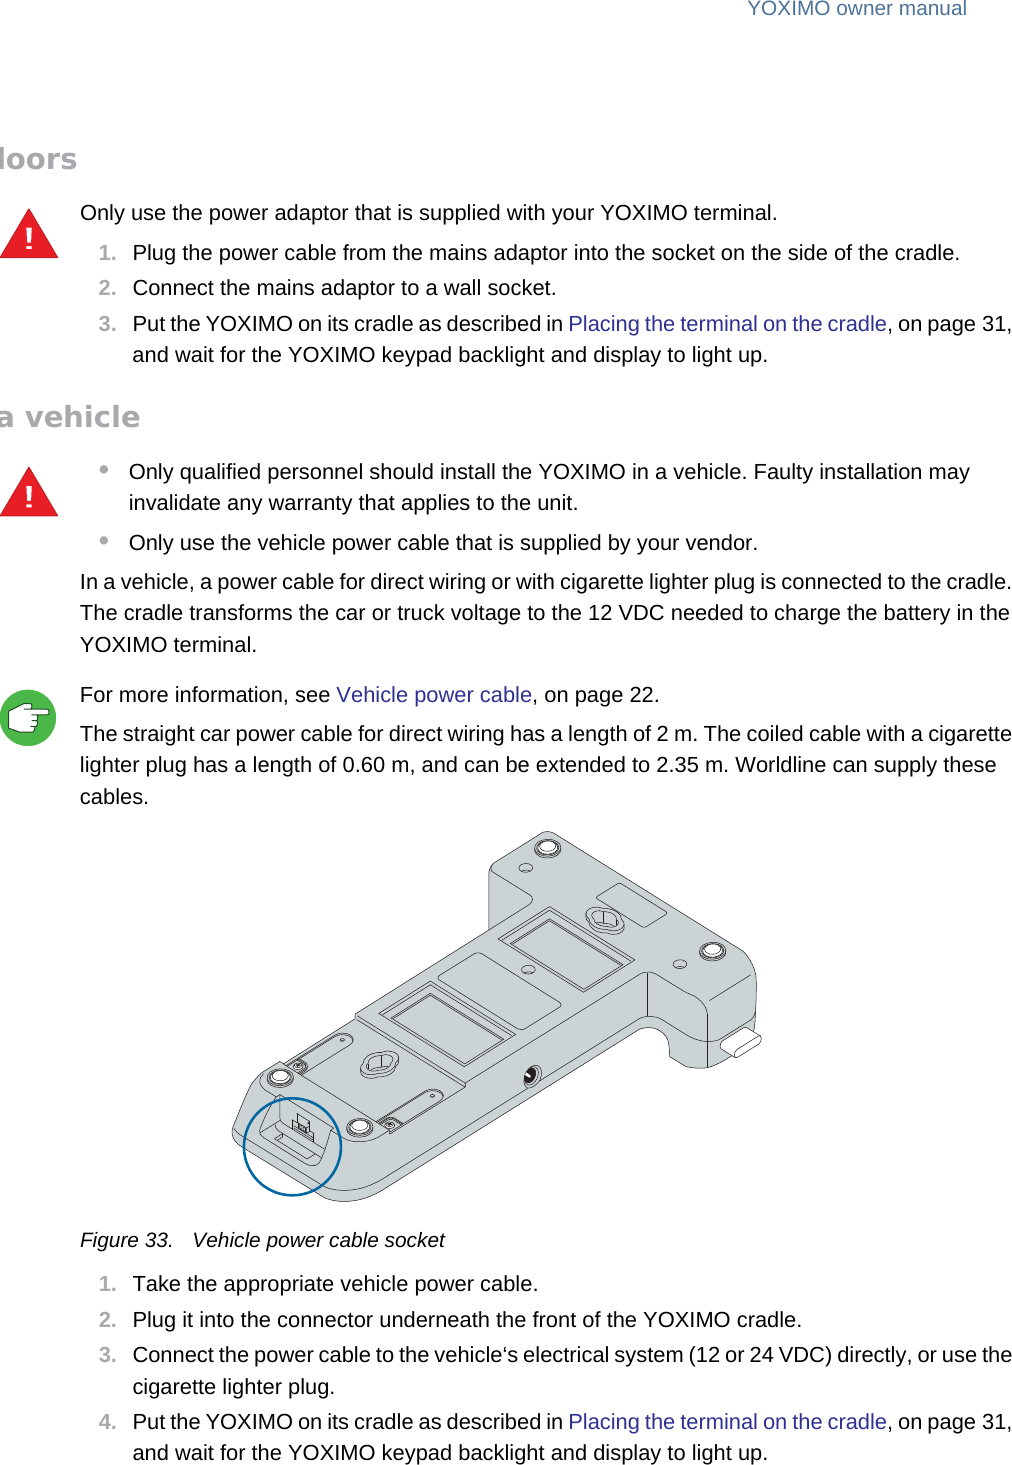
User Manual
Navigation menu
Upload a User Manual
Namespaces
Wiki Guide
HTML
PDF
Info
Views
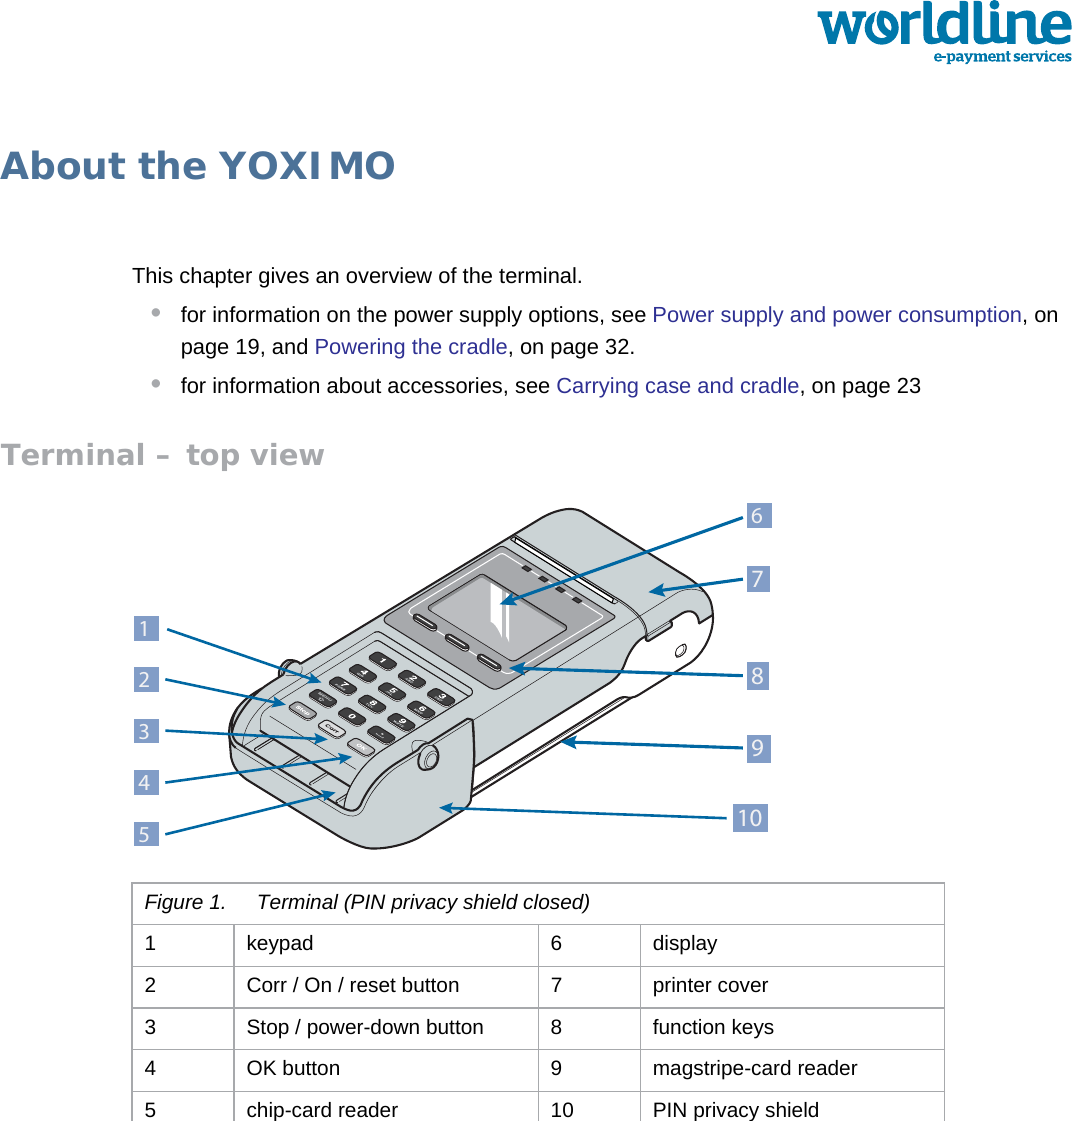
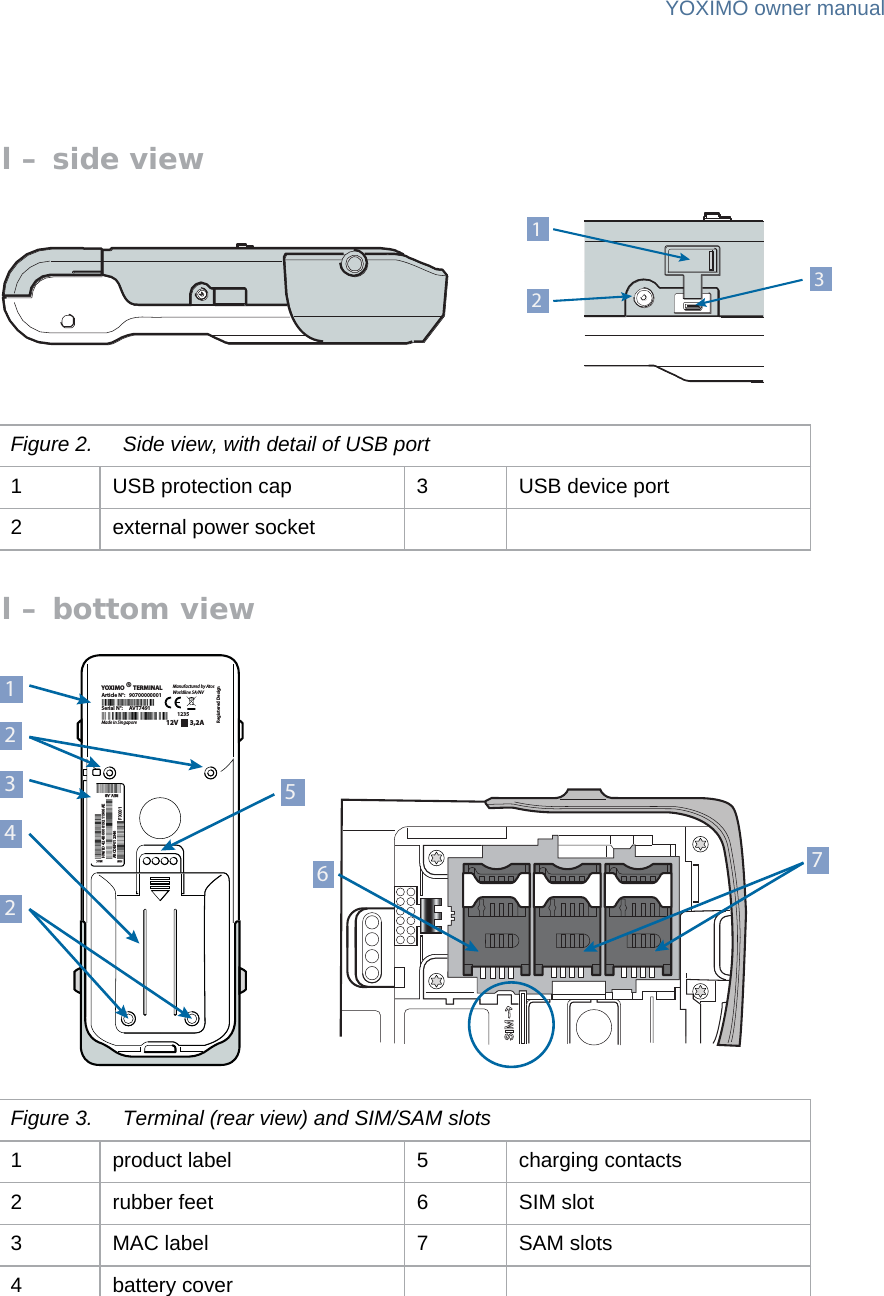
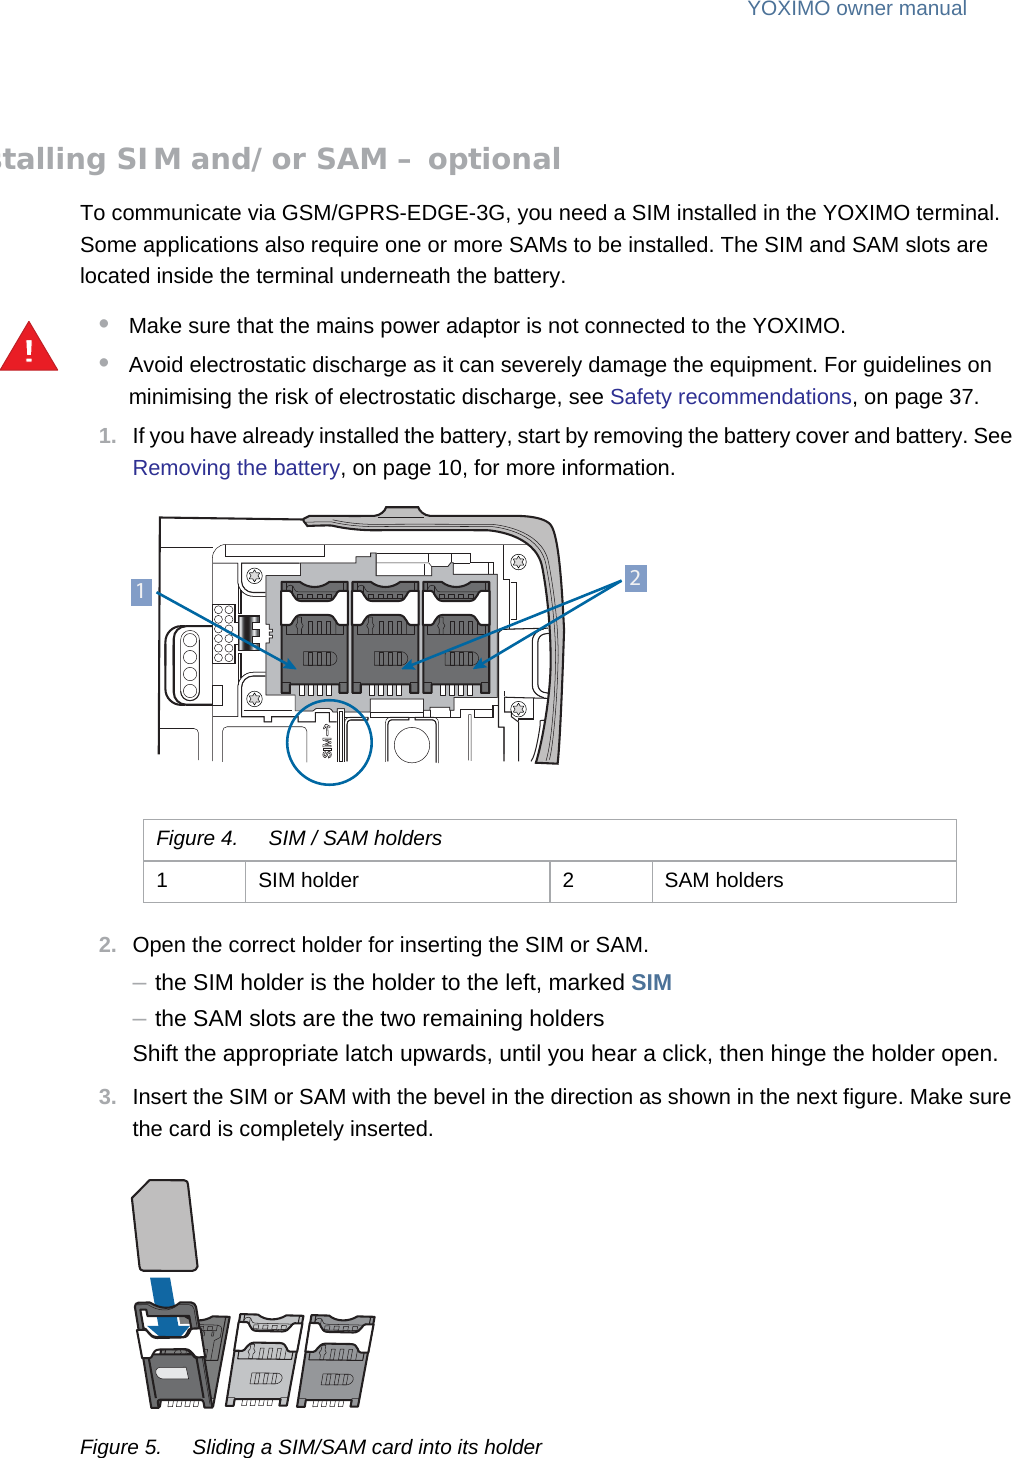
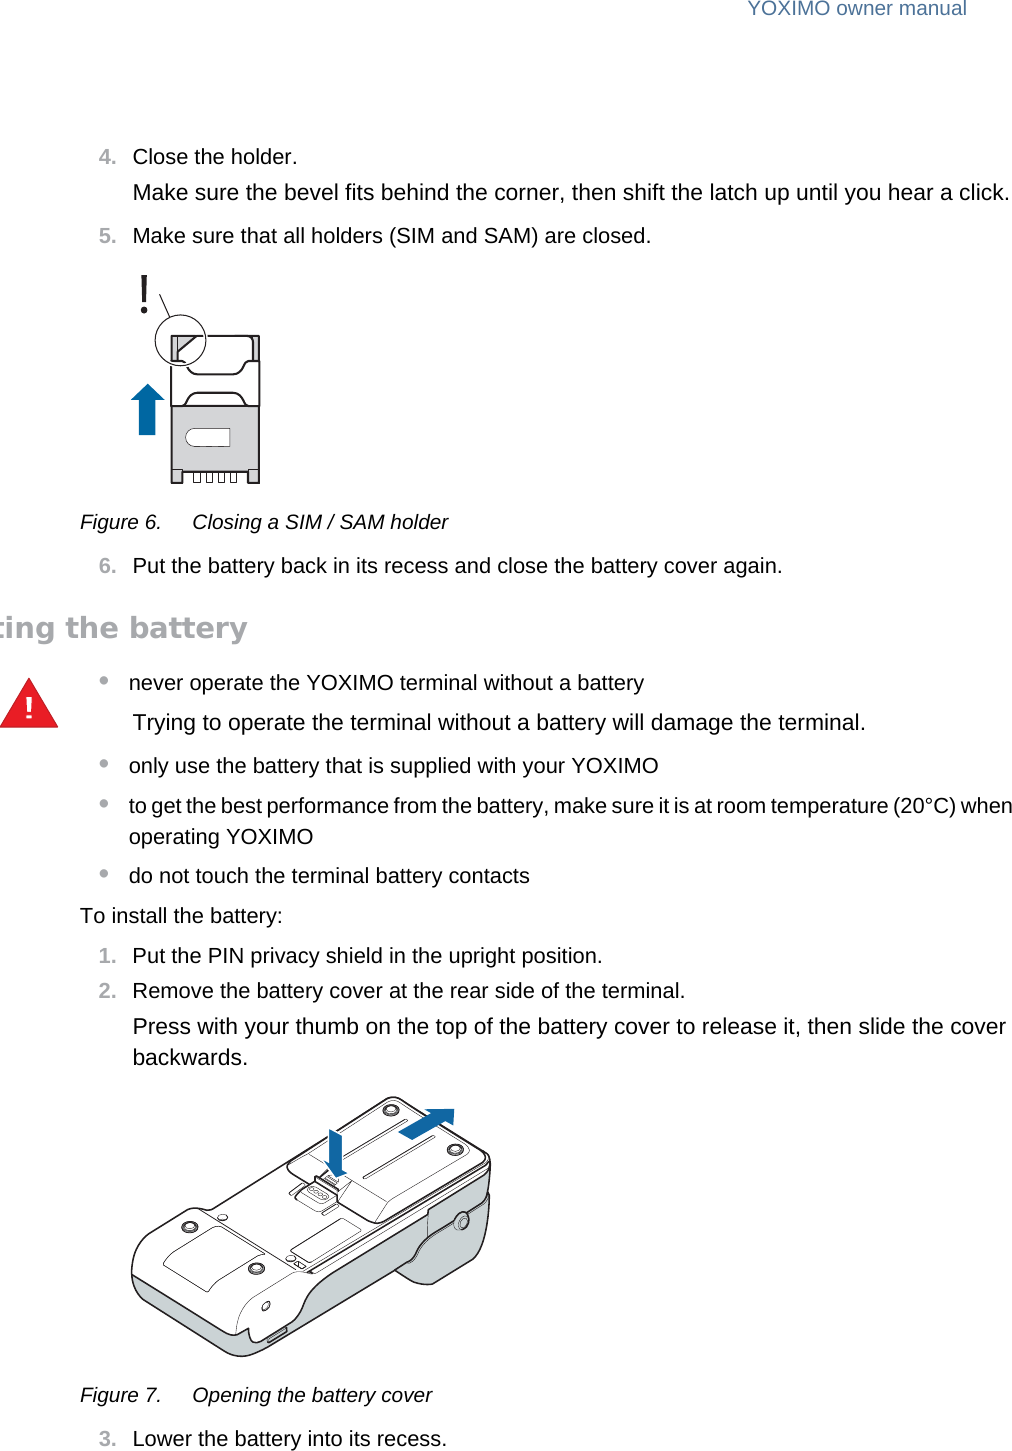
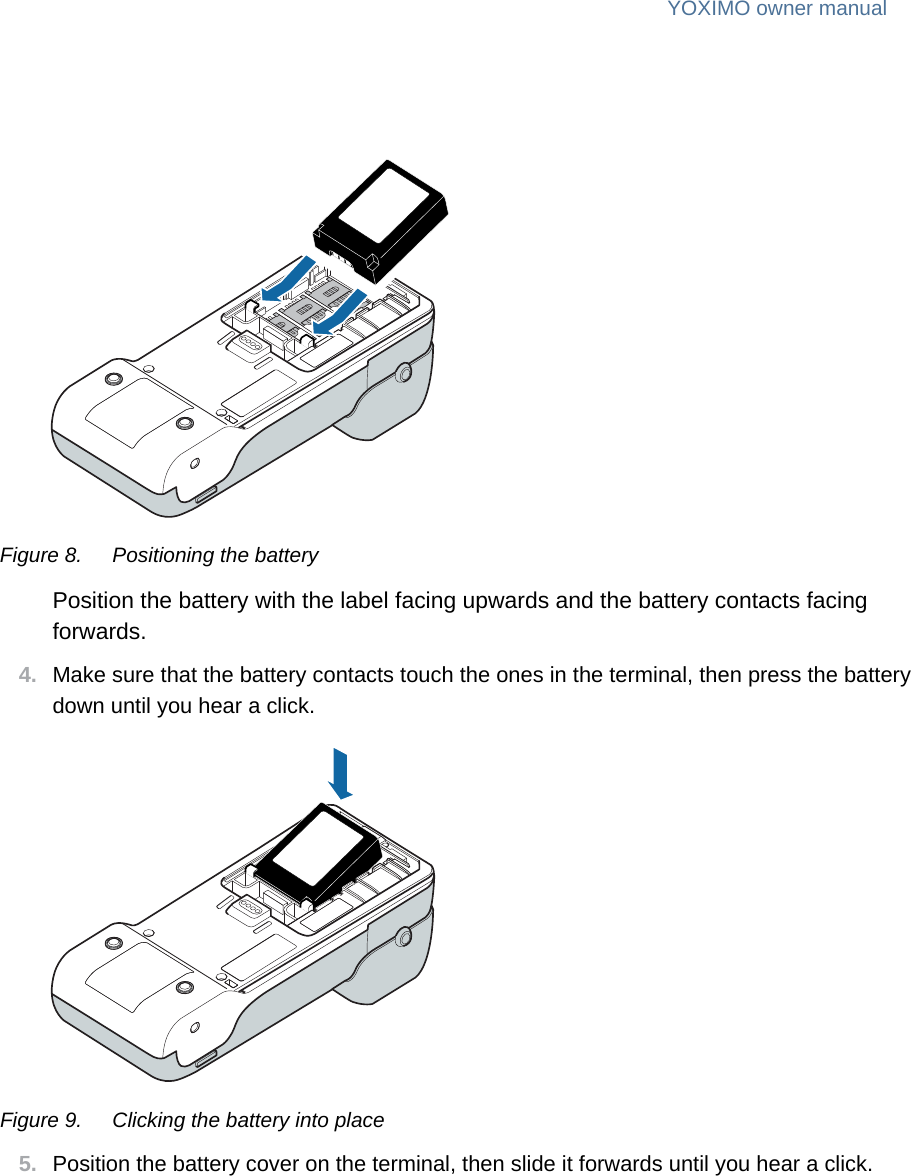
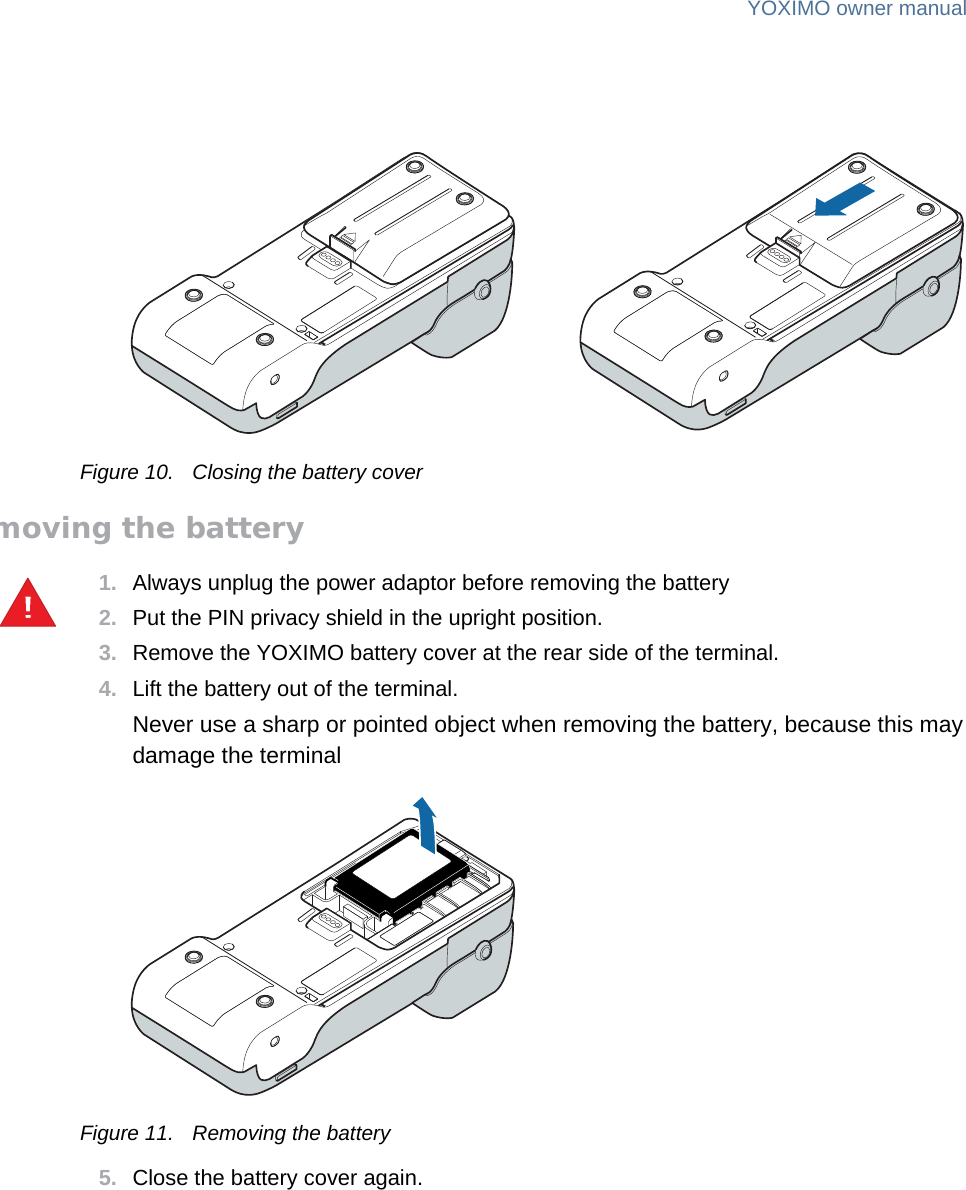
User Manual
Discussion / Help
Navigation