XAC Automation 8006L23CR PINPAD User Manual
XAC Automation Corporation PINPAD
UserManual.wiki
>
XAC Automation
>
8006L23CR User Manual
>
User Manual (QR Code).pdf
Contents
1.
User Manual (QR Code).pdf
2.
User Manual.pdf
User Manual (QR Code).pdf
Navigation menu
Upload a User Manual
Namespaces
Wiki Guide
HTML
PDF
Info
Views
User Manual
Discussion / Help
Navigation
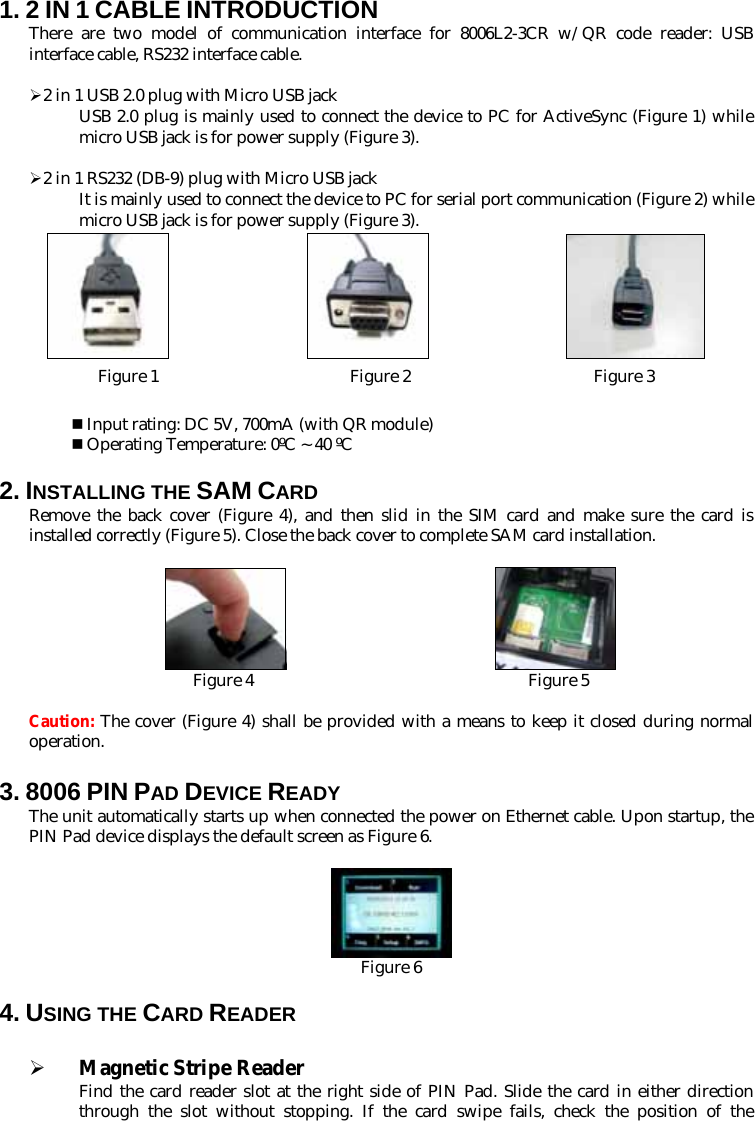
![magnetic stripe and slide the card again. (Figure 7) ¾ Smart Card Reader Find the card reader slot on bottom of PIN Pad. Please insert the card completely and make sure that it cannot be moved forward anymore. If inserted failed, check the position of the card and insert the card again. (Figure 8) Figure 7 Figure 8 5. USING THE QR CODE READER There is a QR Code Reader which is used to scan QR code on the top of the terminal (Figure 9). Target the QR code at the QR code camera (Figure 10). The camera will focus on the QR code and then scan your QR code. Figure 9 Figure 10 6. USING THE PIN PAD Press numeral key to enter password if needed. Then press green [ENTER] key to finish password key-in. Press red [CANCEL] key to exit from presently status (Figure 11). If the PIN is entered incorrectly, press yellow key and reenter it Figure 11 7. CLEANING Periodically clean the PIN Pad device with a clean cloth dampened with water and a mild soap or cleaner. Do not use harsh chemicals. 8. RETURNING THE PIN PAD DEVICE If you need to return your PIN Pad device for service or replacement, contact your service provider or sales representative for instructions.](https://usermanual.wiki/XAC-Automation/8006L23CR.User-Manual-QR-Code-pdf/User-Guide-2148825-Page-3.png)