XYZprinting CT-NFC Nobel Superfine 3D Printer User Manual Nobel Superfine EN V3
XYZprinting, Inc. Nobel Superfine 3D Printer Nobel Superfine EN V3
UserManual.wiki
>
XYZprinting
>
CT NFC User Manual
Users Manual
Navigation menu
Upload a User Manual
Namespaces
Wiki Guide
HTML
PDF
Info
Views
User Manual
Discussion / Help
Navigation
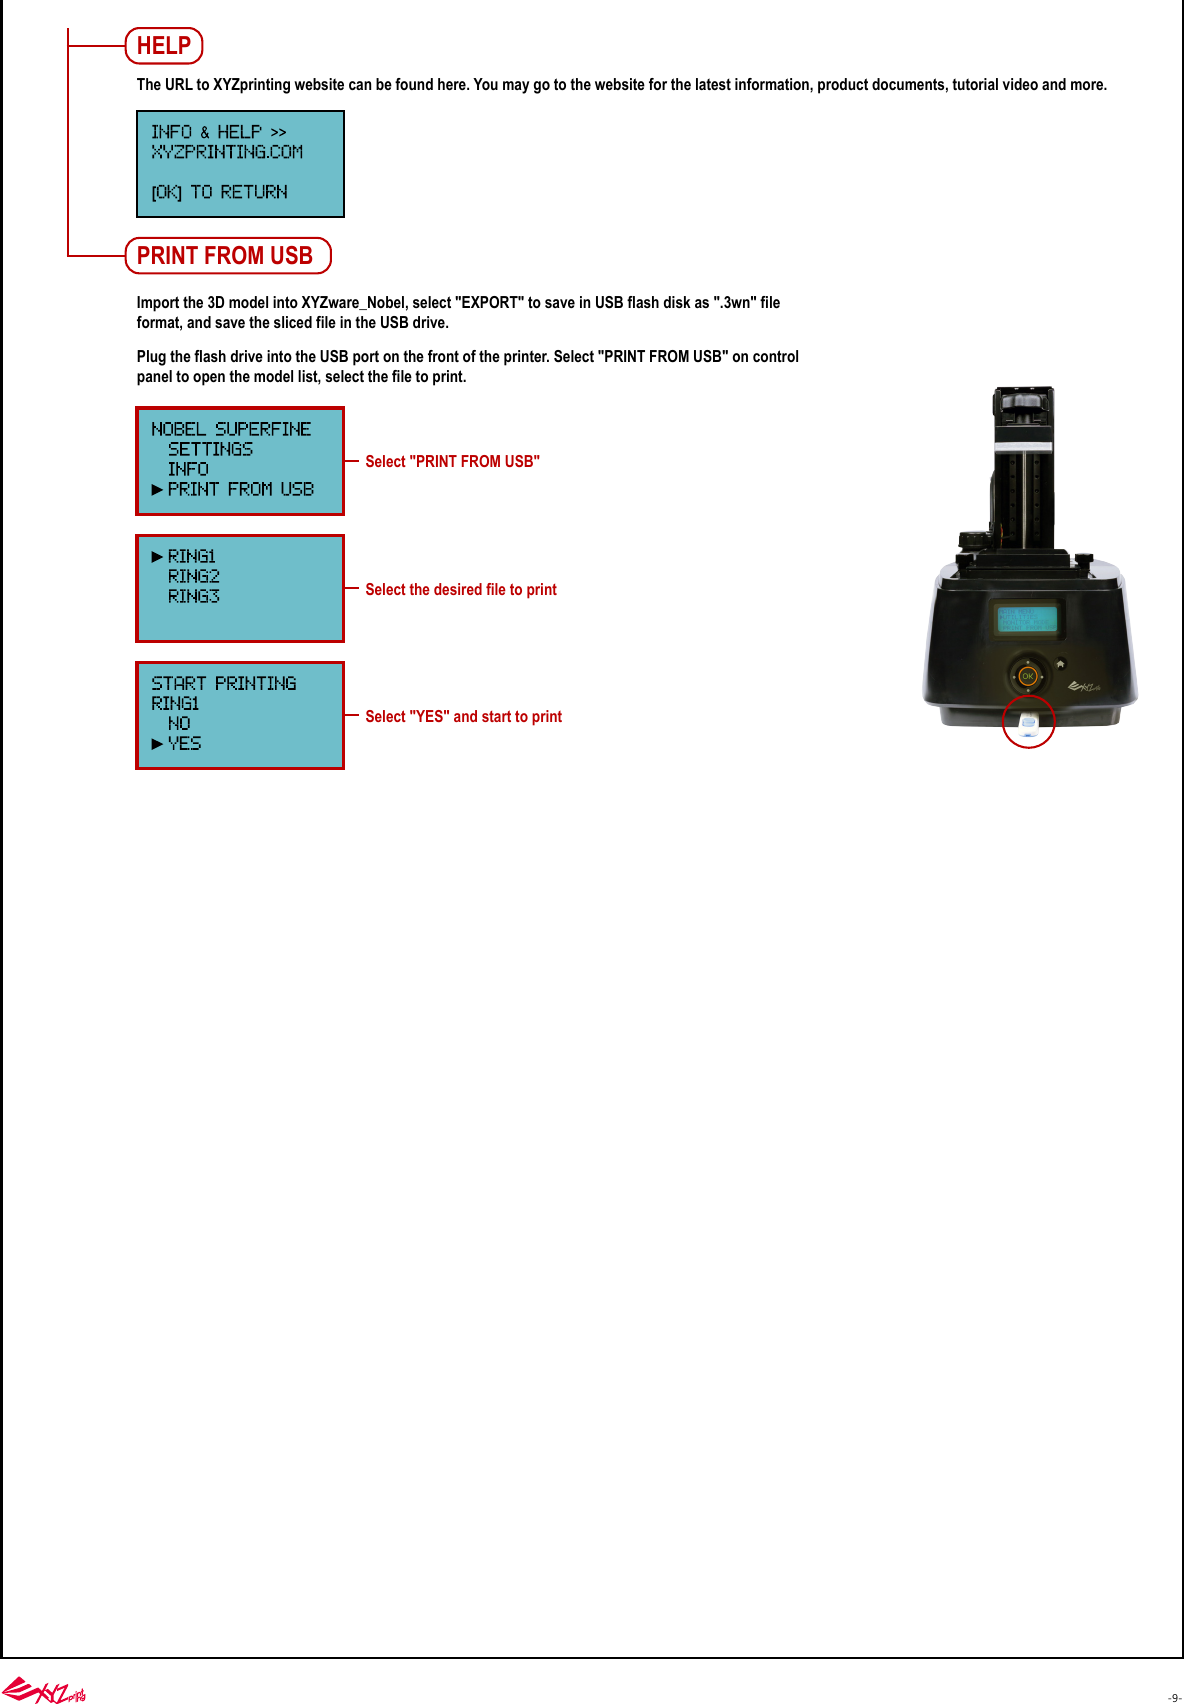
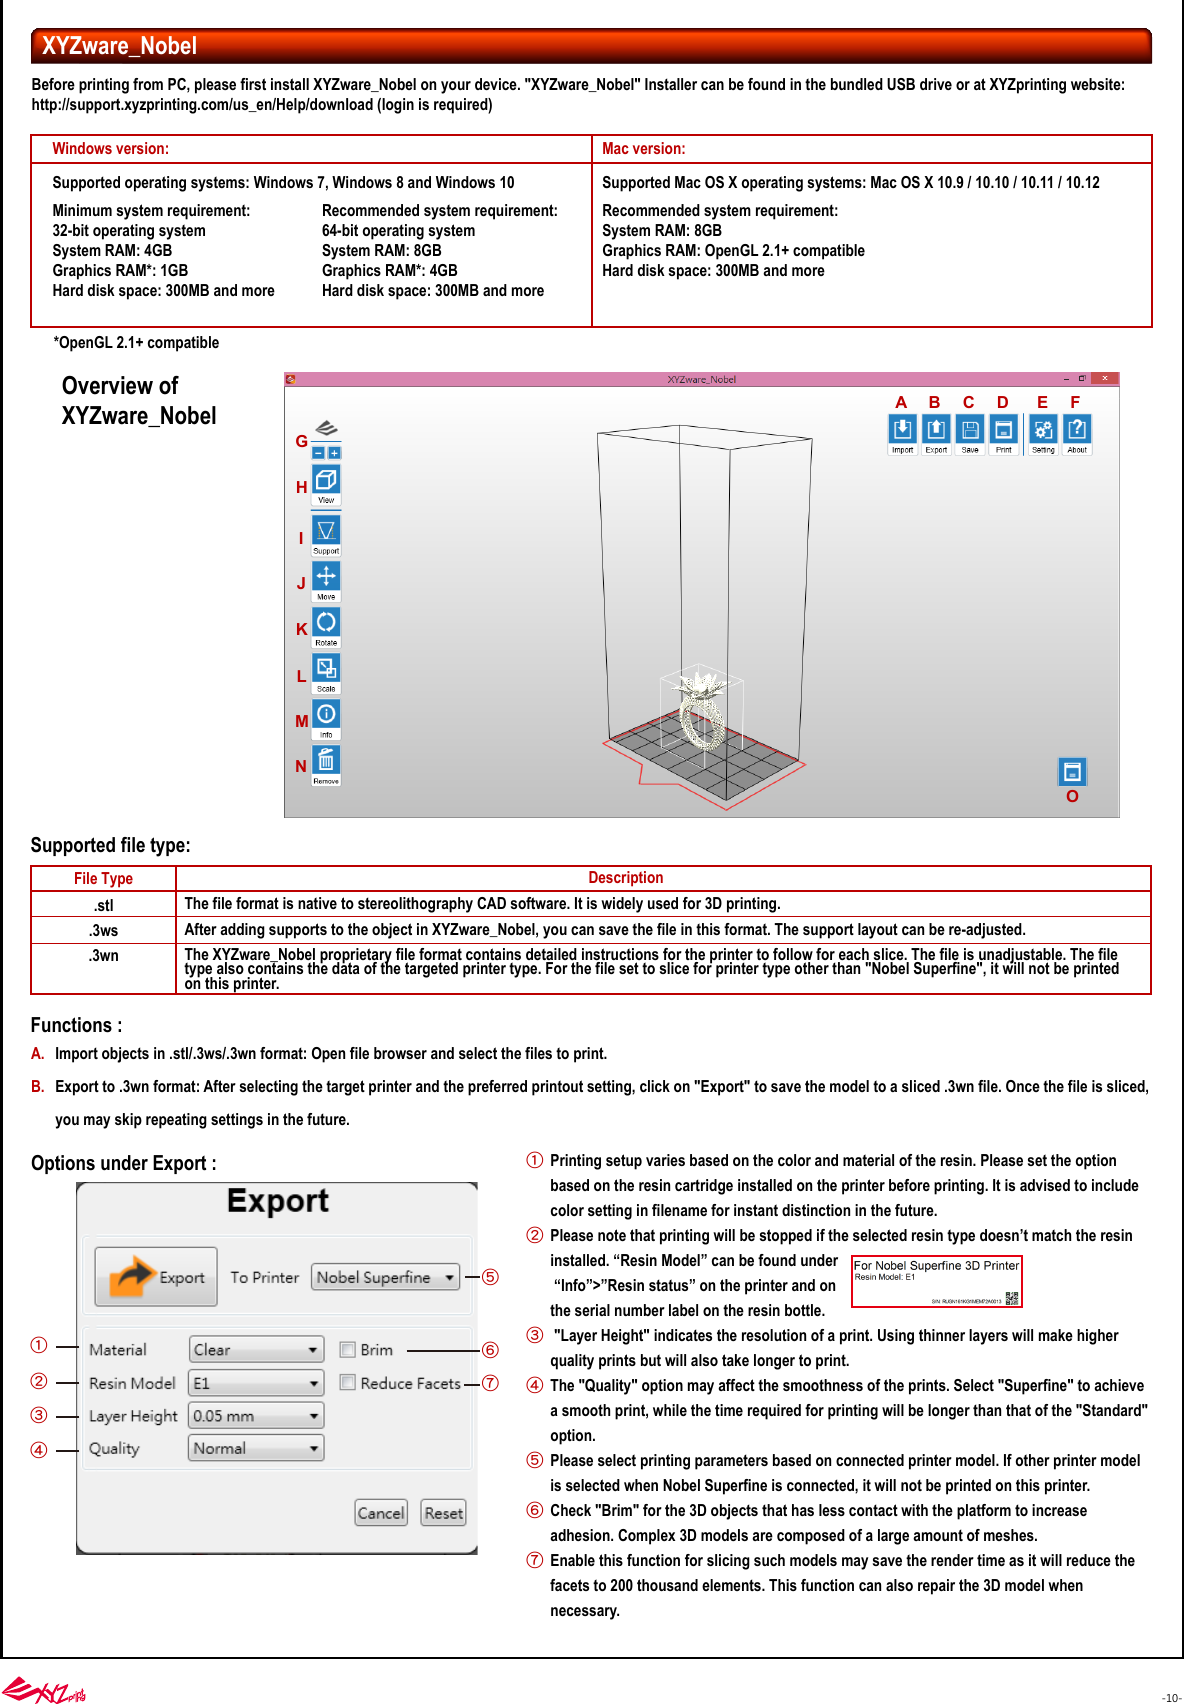
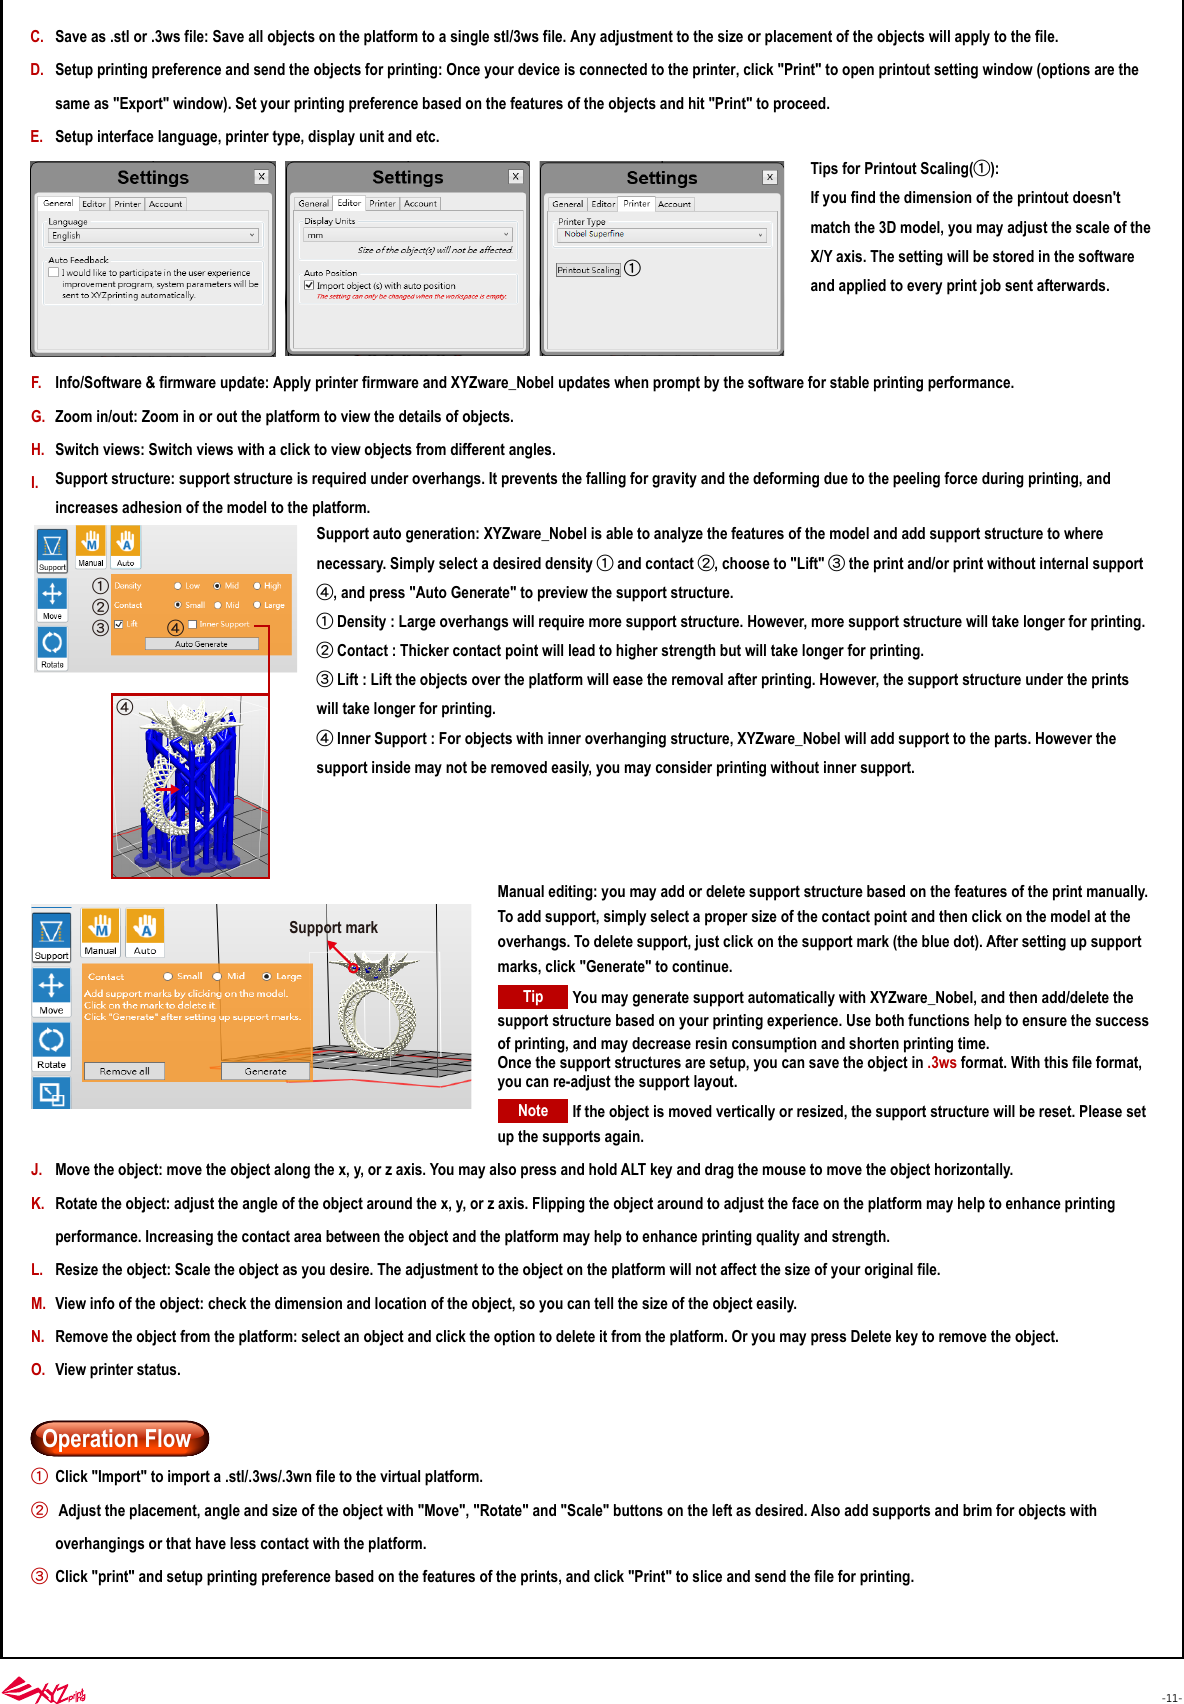
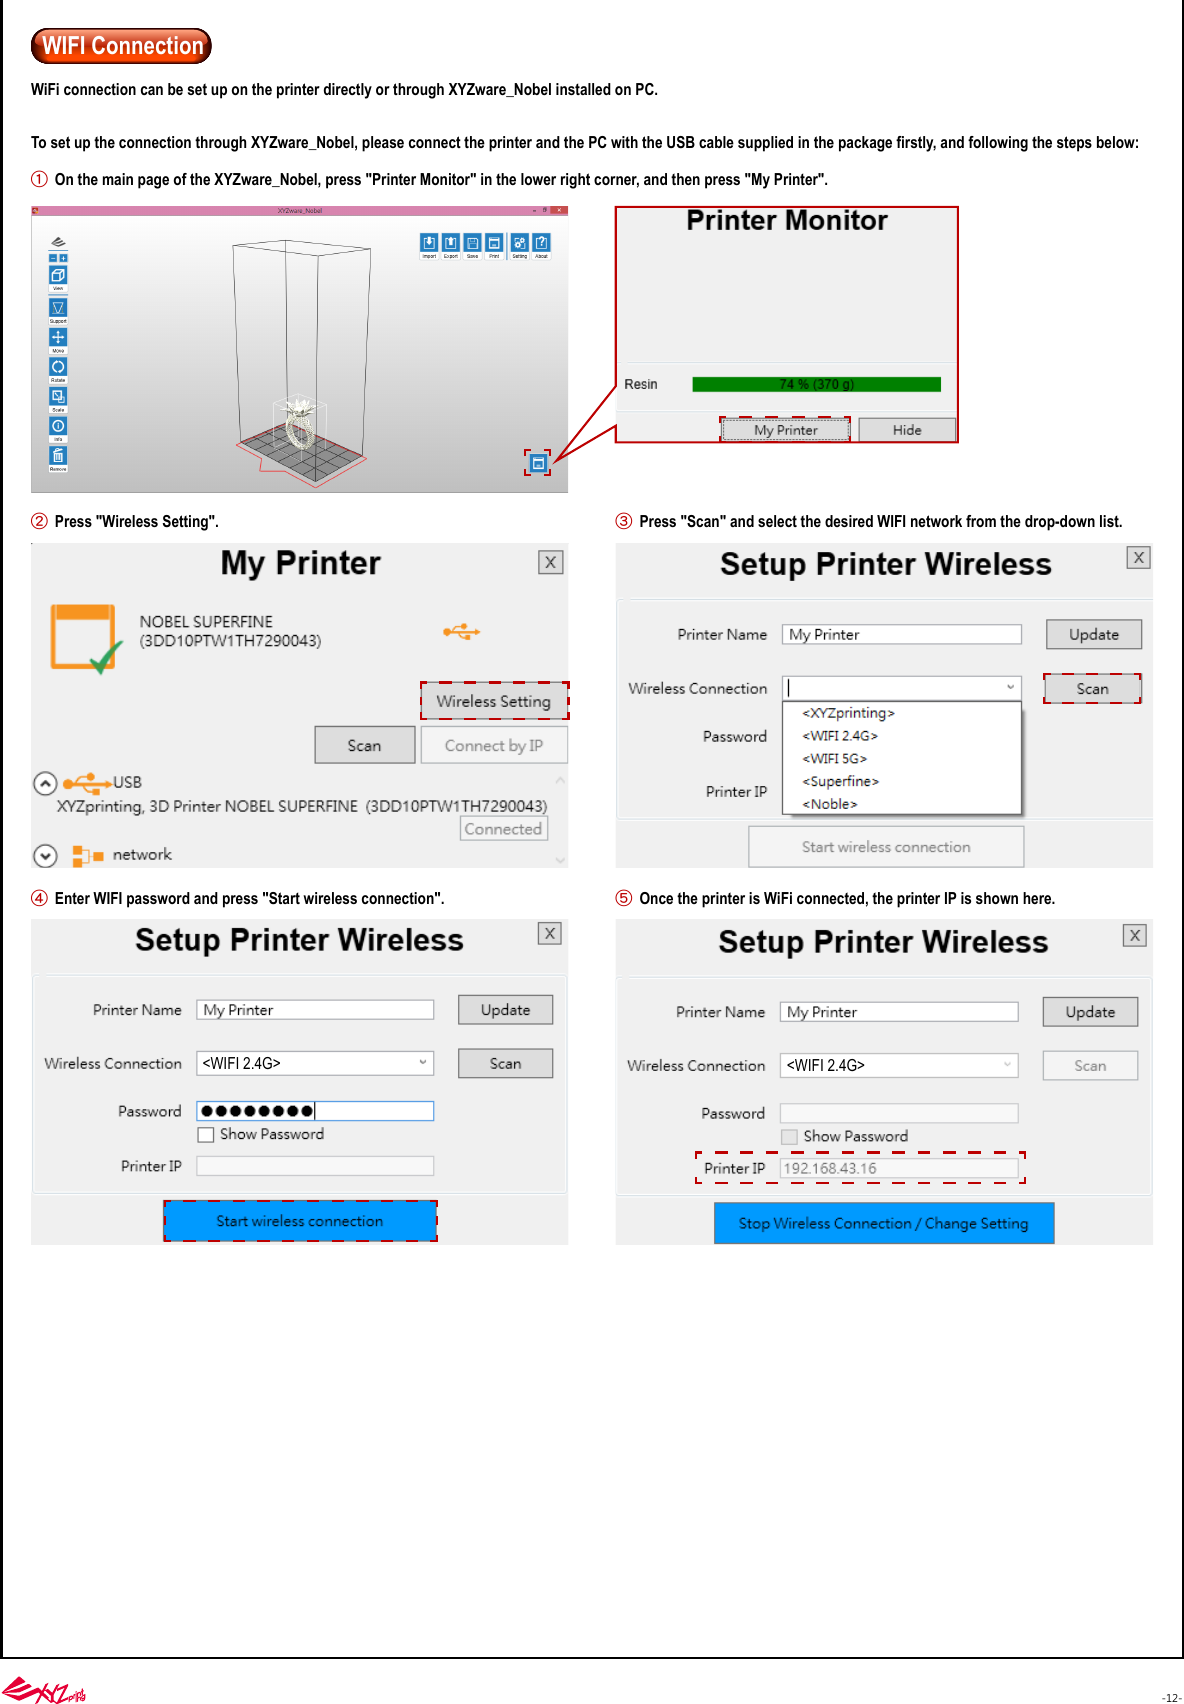
![-6-Each digit turns invisible as "X" once setupTo scan available WiFi connection againTo cancel the searchPlease wait while the printer is connecting to the selected networkThe printer is connected to the selected WiFi network. Press [OK] to finish settings06 : 06 : the number of WIFI connections currently detected20 : Maximum detected WIFIThe list will be replaced by the actual WiFi connections found in your area. To view more available network, press Down key to move to the next page.Press [OK] to enter the password.Press [OK] to read the instruction on inputing the password with the printer control panel.●Home Key: Switch input mode●Up and Down keys: Select numerals, alphabets, or symbols.●Left and Right keys:Moves to the previous or next digit.UpDownRightHOMELeftCapital English letters mode:Enter password with the control panel and press "OK" to activate the WiFi function.4 input modes are available, including capital English letters, lowercase English letters, Arabic numerals and special symbols. When in the password input mode, the keys function as illustrated below:In case of no WIFI is available, please select "SCAN AGAIN" to retry scanning.<---Current input modeLowercase English letters mode: Arabic numerals mode: Special symbols mode:■Input the WiFi Password](https://usermanual.wiki/XYZprinting/CT-NFC/User-Guide-3478566-Page-6.png)
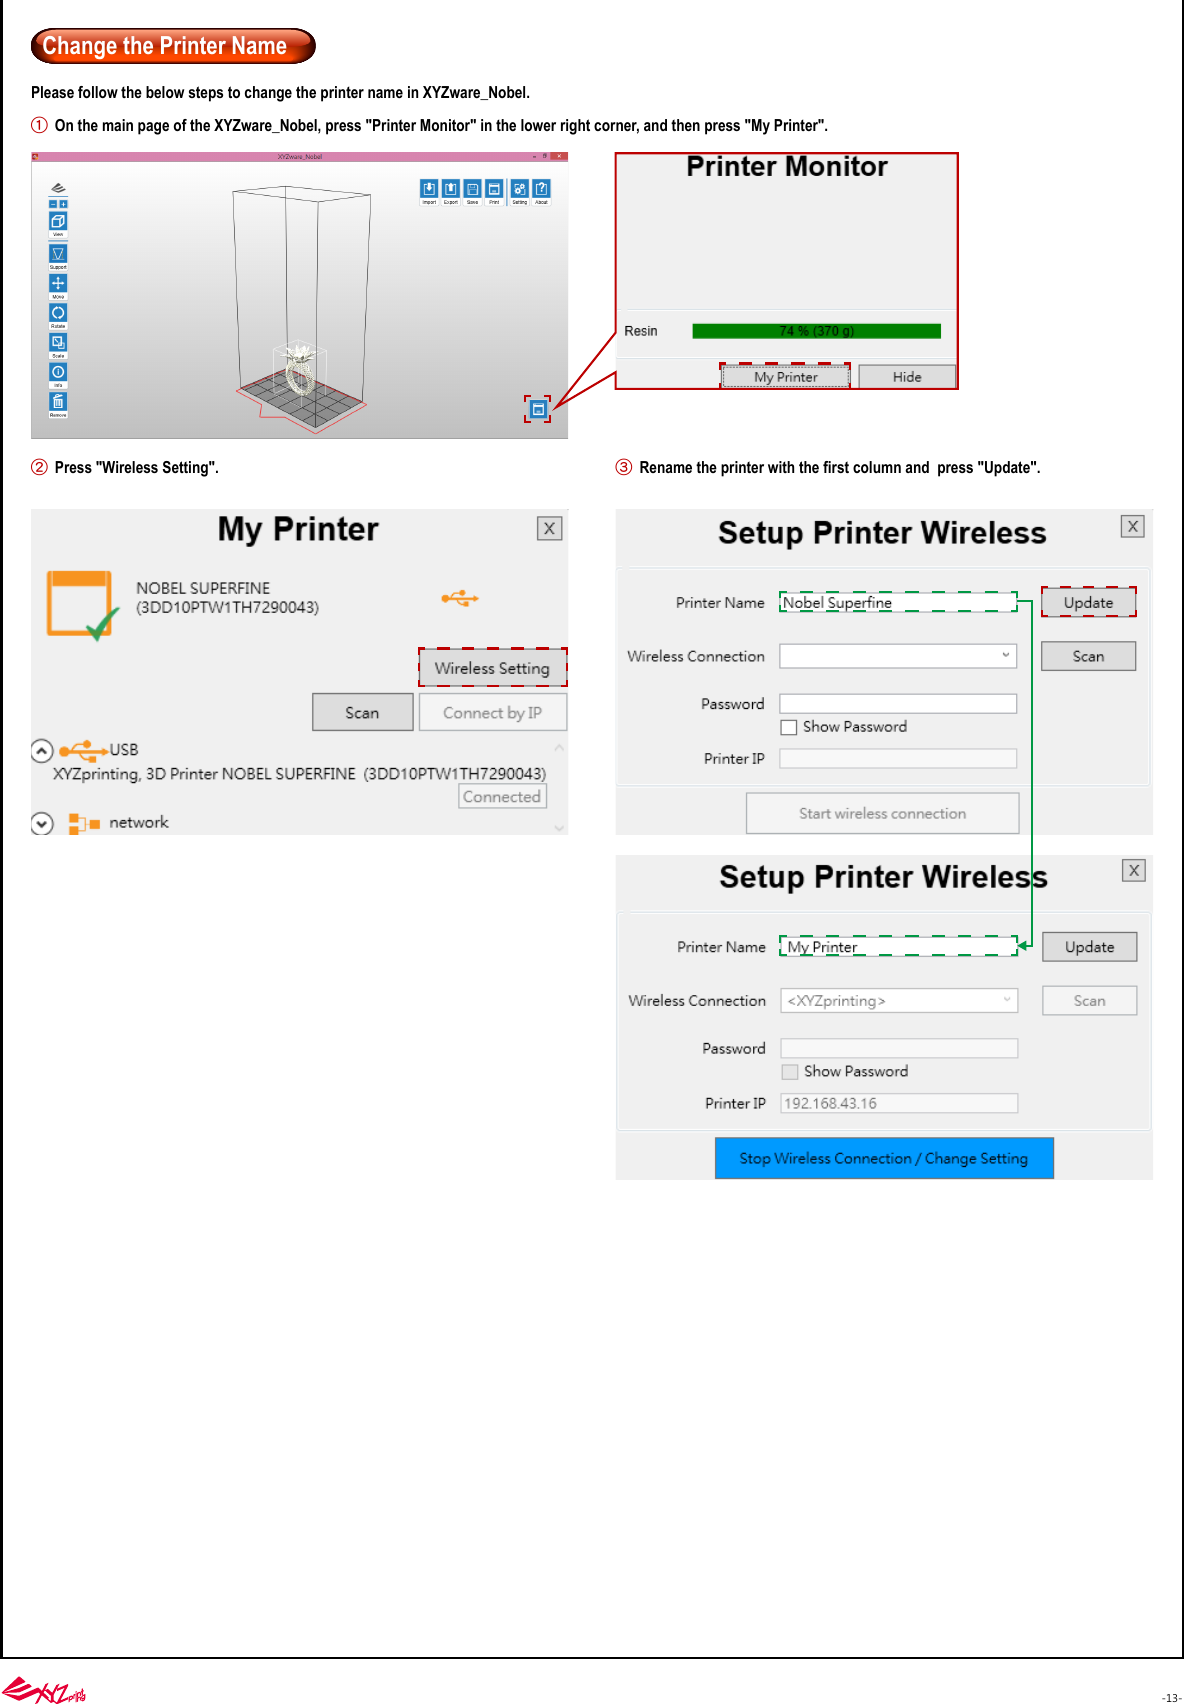
![-7-BUZZERWhen the buzzer is turned on, the printer will output an audible signal when a button is pressed.Buzzer is turned on by default. To switch off the buzzer:Select “OFF” and press [OK] to change the setting.ENERGY SAVELED backlight of the LCM enhances the readibility of the content of the display. To save energy consumed, the backlight will go off after the printer idles for 3 minutes (shown as 03M on the display) by default.To set a longer time interval:Select an option, and press [OK] to change the setting.Backlight will never go off.Backlight will go off after the printer idles 3 minutes.Backlight will go off after the printer idles 6 minutes.LANGUAGEYou may switch the display language on the printer. The default language is English. To switch to other language:Select a language and press [OK] to change the setting.PRINTER NAMEYou can change the printer name on the WiFi network with below steps:RESTORE DEFAULTAll settings can be reset to factory default with a few clicks.To reset all settings at once:Simply select “YES” and press [OK] to reset.Change the printer namePress [OK] to read the instruction on inputing the printer name with the printer control panel4 input modes are available:[A] : Capital English letters mode[a] : Lowercase English letters mode[1] : Arabic numerals mode[@] : Special symbols mode●Home Key: Switch input mode●Up and Down keys: Select numerals, alphabets, or symbols.●Left and Right keys:Moves to the previous or next digit.UpDownRightHOMELeftThis is the name of the printer. Only 16 characters are allowedConfirm the inputted printer name and press [OK] to finish.Press [OK] to change the printer name.](https://usermanual.wiki/XYZprinting/CT-NFC/User-Guide-3478566-Page-7.png)
![-8-The content may look like this:SENSOR STATUSWhen you encounter exceptional status during the operation of the printer, you may check the status of each sensor here. The information is especially helpful for troubleshooting.How to read the satus:C:1 – Lid (Top cover) covered; C:0 – Lid not coveredZ-T:1 – Platform at top; Z-T:0 – Platform away from topZ-B:1 –Platform at bottom; Z-B:0 - Platform away from bottomT:1- Tank motor in action (Right side of the tank sinks slightly) T:0 - Tank motor idling (Tank is leveled)Under “Info” menu, you can check the statistics and firmware version of the printer, status of resin bottle installed, and information on XYZprinting.SYSTEM VERSIONFirmware version is shown here. To ensure optimal printing performance, it is advised to keep the firmware up to date. To check for firmware updates, please go to XYZware_Nobel.RESIN STATUS“Resin Status” provides the information on resin level (see REMAINING), and the capacity, color and material of the resin. Press "OK" to read the second page.Resin Model indicates the resin version. While setting up printing preference in XYZware_Nobel, please select the correct resin model.The info is also printed on the serial number label on the resin bottle.INFOSYSTEM VERSIONENGINE:1.6.0.1LCM :0.1.6[OK] TO RETURNPRINTER NAMEXXXXXXXXXXX[OK] TO NEXTWIFI STATUSCheck the wireless connection status with this option. WIFI AP SSIDXXXXXXXXXXX[OK] TO NEXTDisplay the printer name. Click [OK] to go to the next page. IPXXX.XXX.XXX.XXXRSSI: XXX[OK] TO NEXTDisplay the name of the wireless network that the printer is connected to. Click [OK] to go to the next page. Display the MAC address of the printer. Click [OK] to return to the main menu. MACXX:XX:XX:XX:XX:XX[OK] TO RETURNIP: The IP address of the printerRSSI: Signal strength of the wireless network Click [OK] to go to the next page.](https://usermanual.wiki/XYZprinting/CT-NFC/User-Guide-3478566-Page-8.png)