Xplore Technologies of America IHW9533ANH J3400 Tablet PC User Manual BradstreetUsersGuide 112408
Xplore Technologies Corp of America J3400 Tablet PC BradstreetUsersGuide 112408
UserManual.wiki
>
Xplore Technologies of America
>
IHW9533ANH User Manual
Users Manual
Navigation menu
Upload a User Manual
Namespaces
Wiki Guide
HTML
PDF
Info
Views
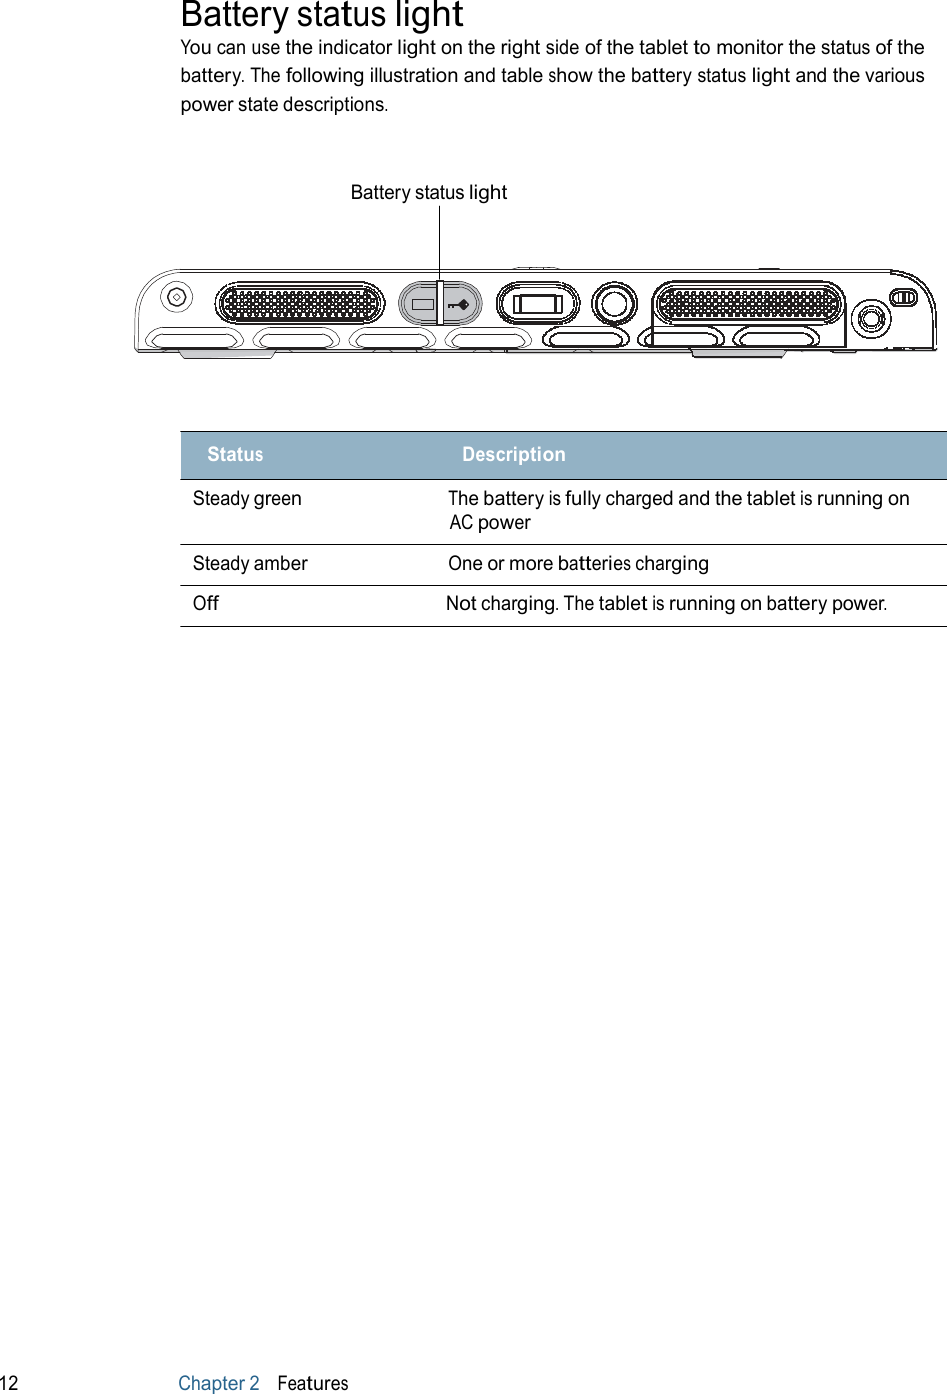
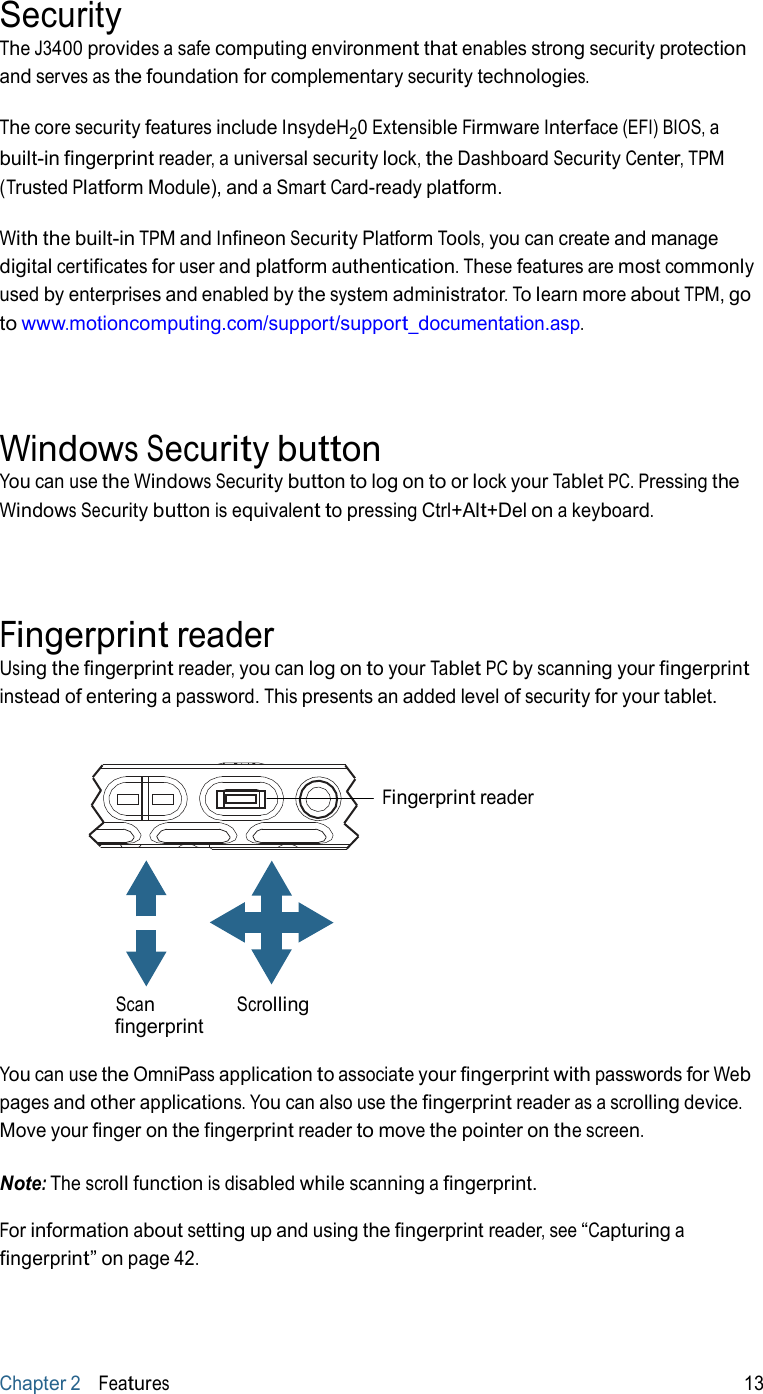
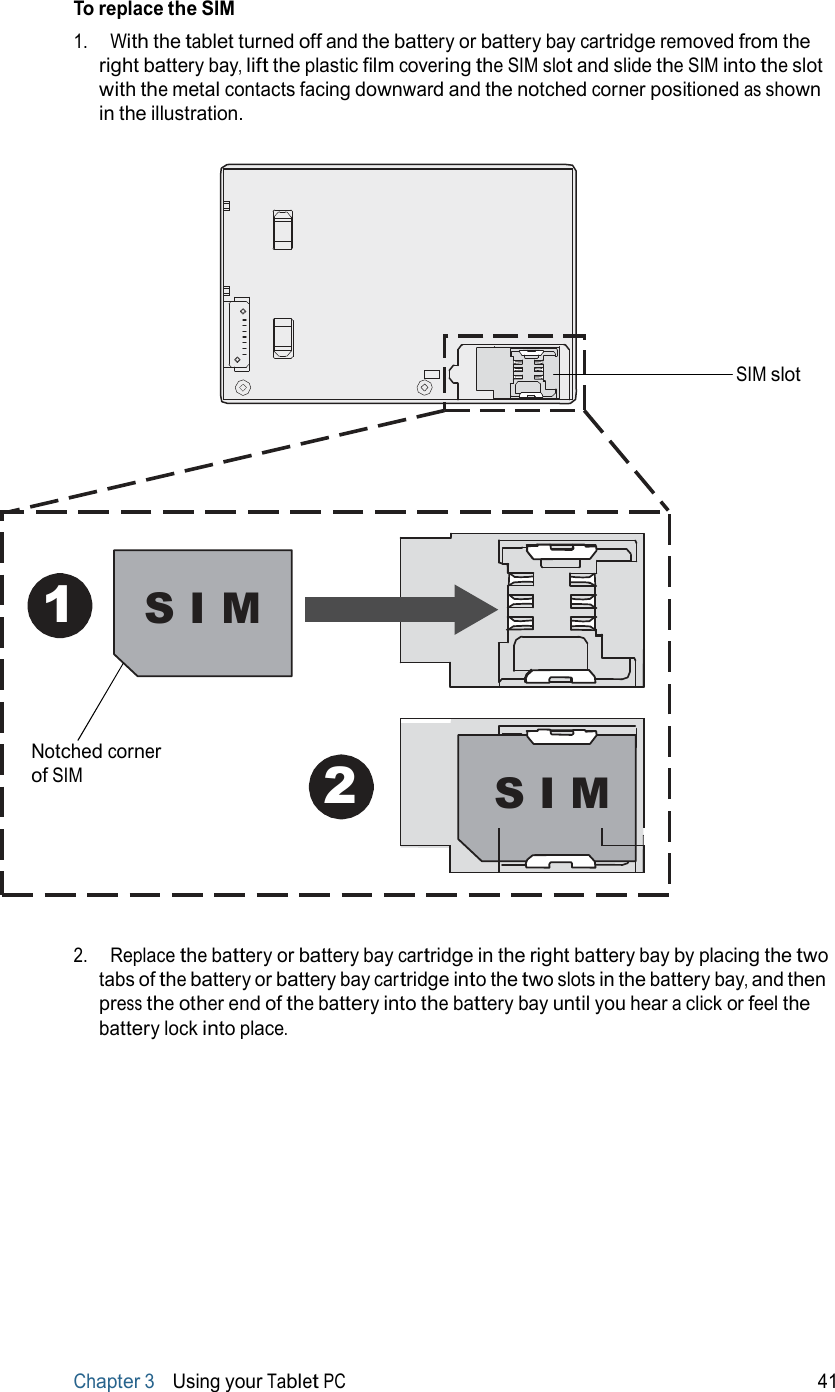
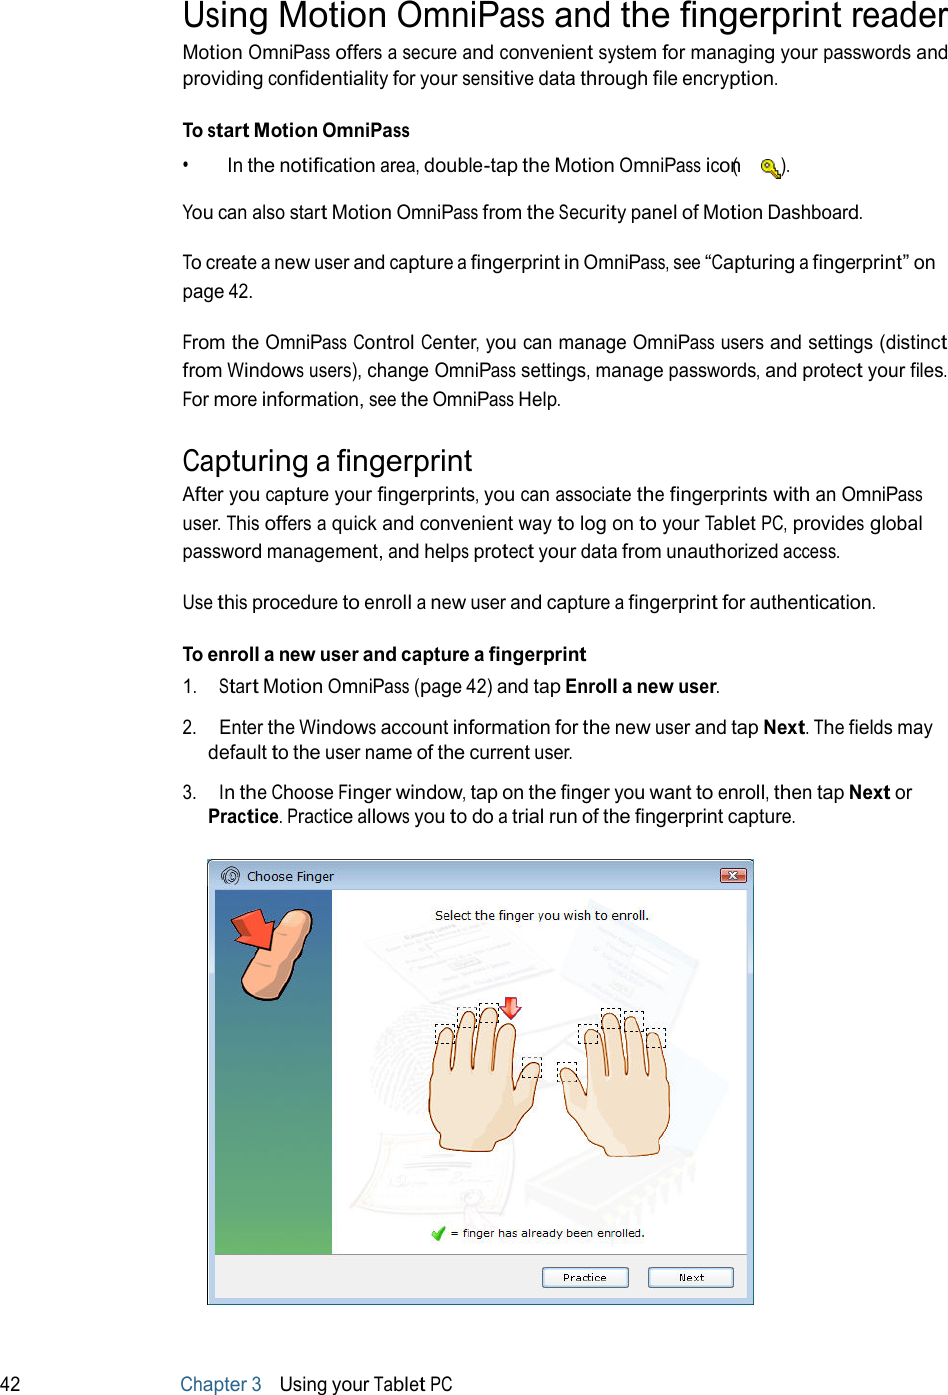
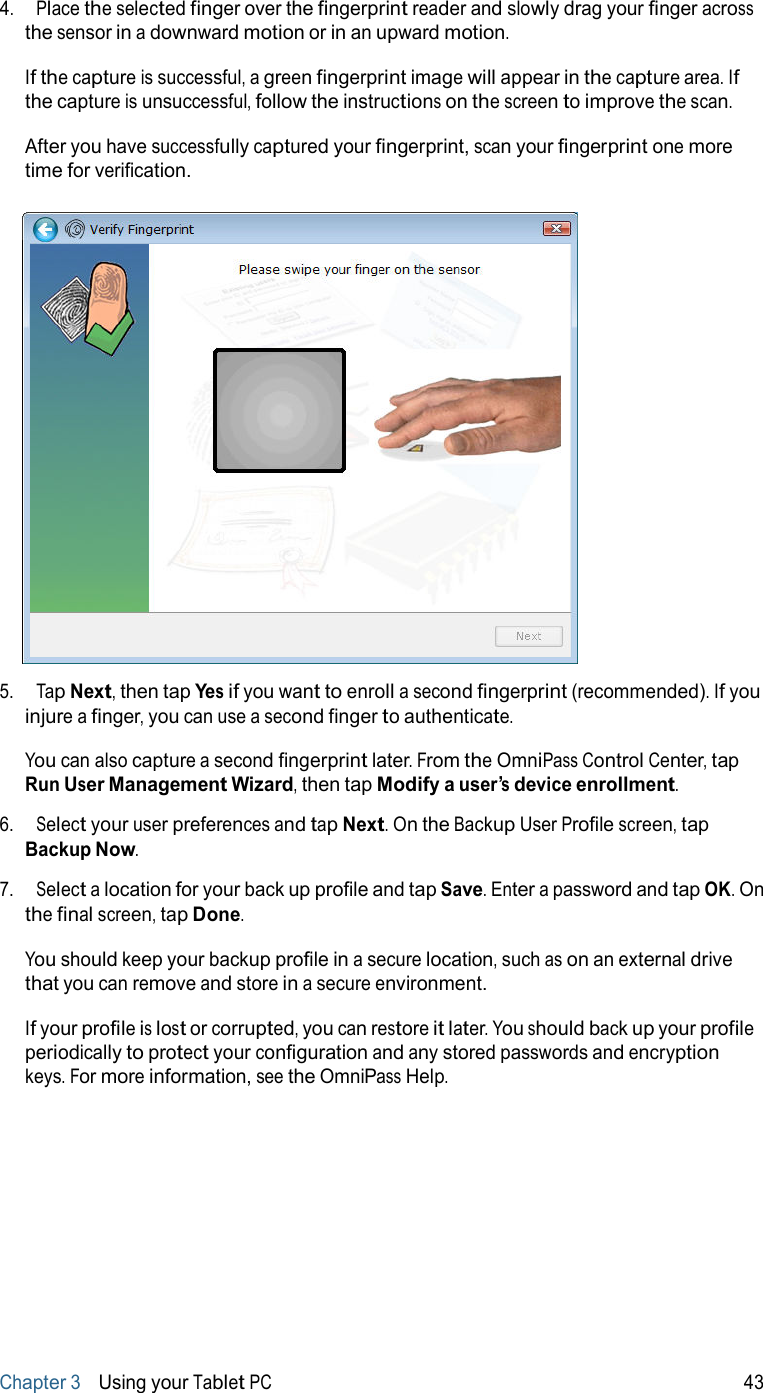
User Manual
Discussion / Help
Navigation