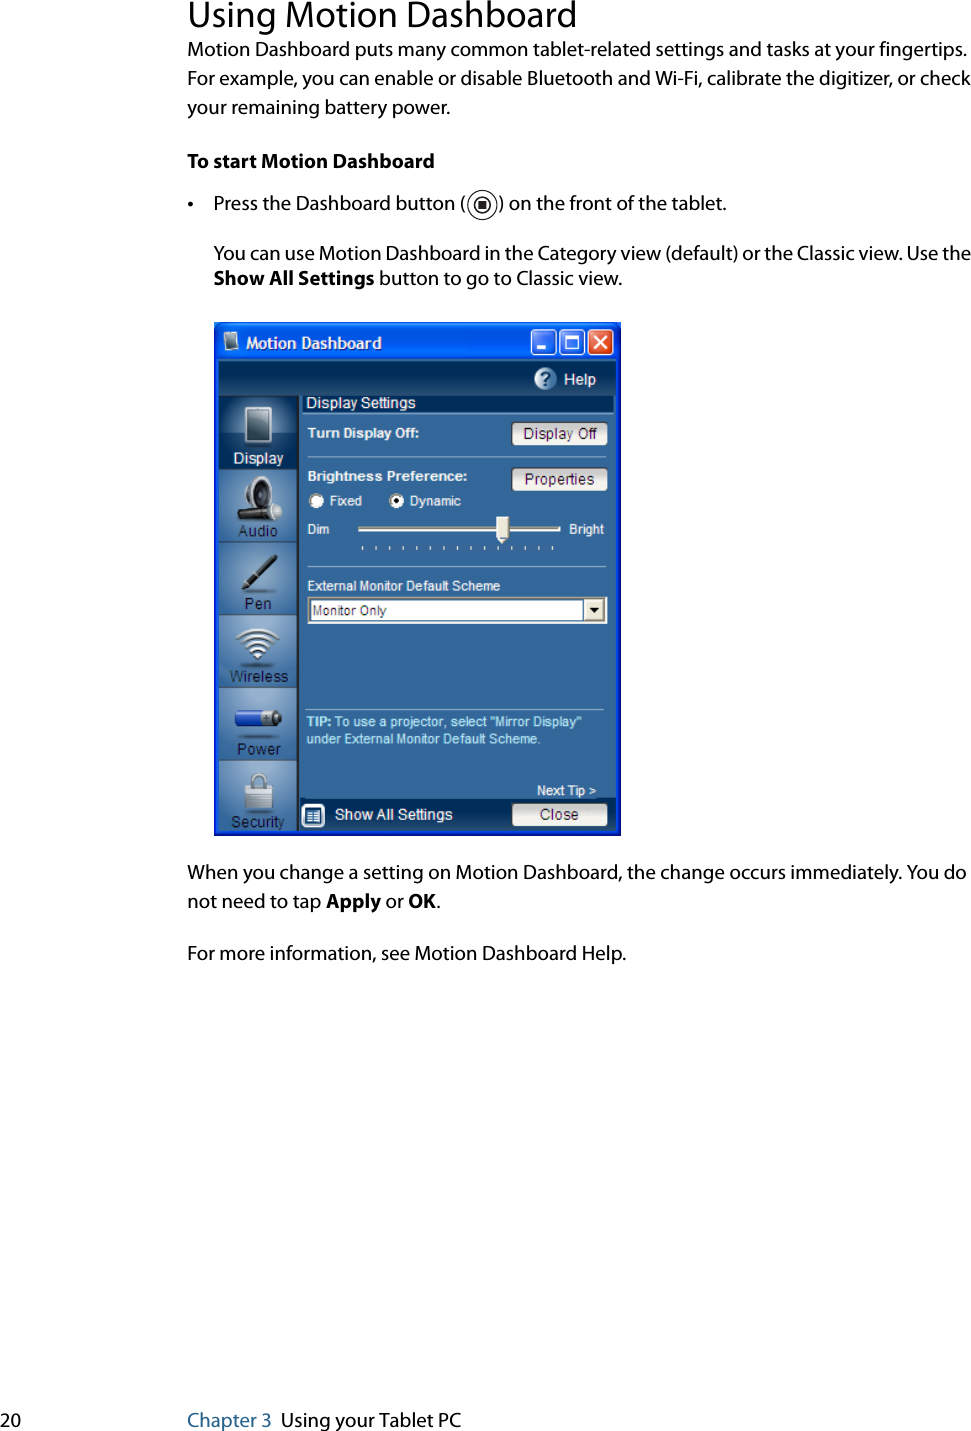
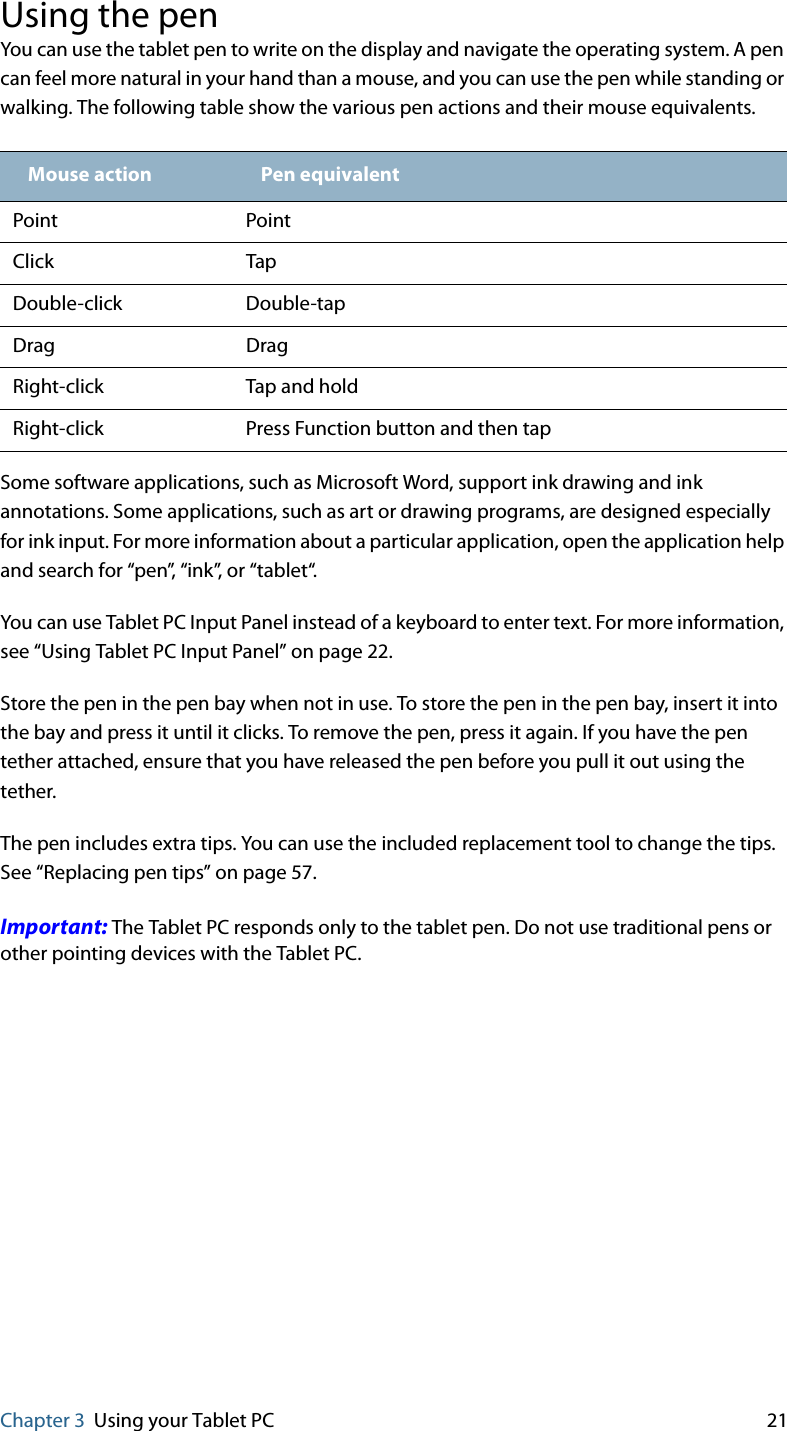
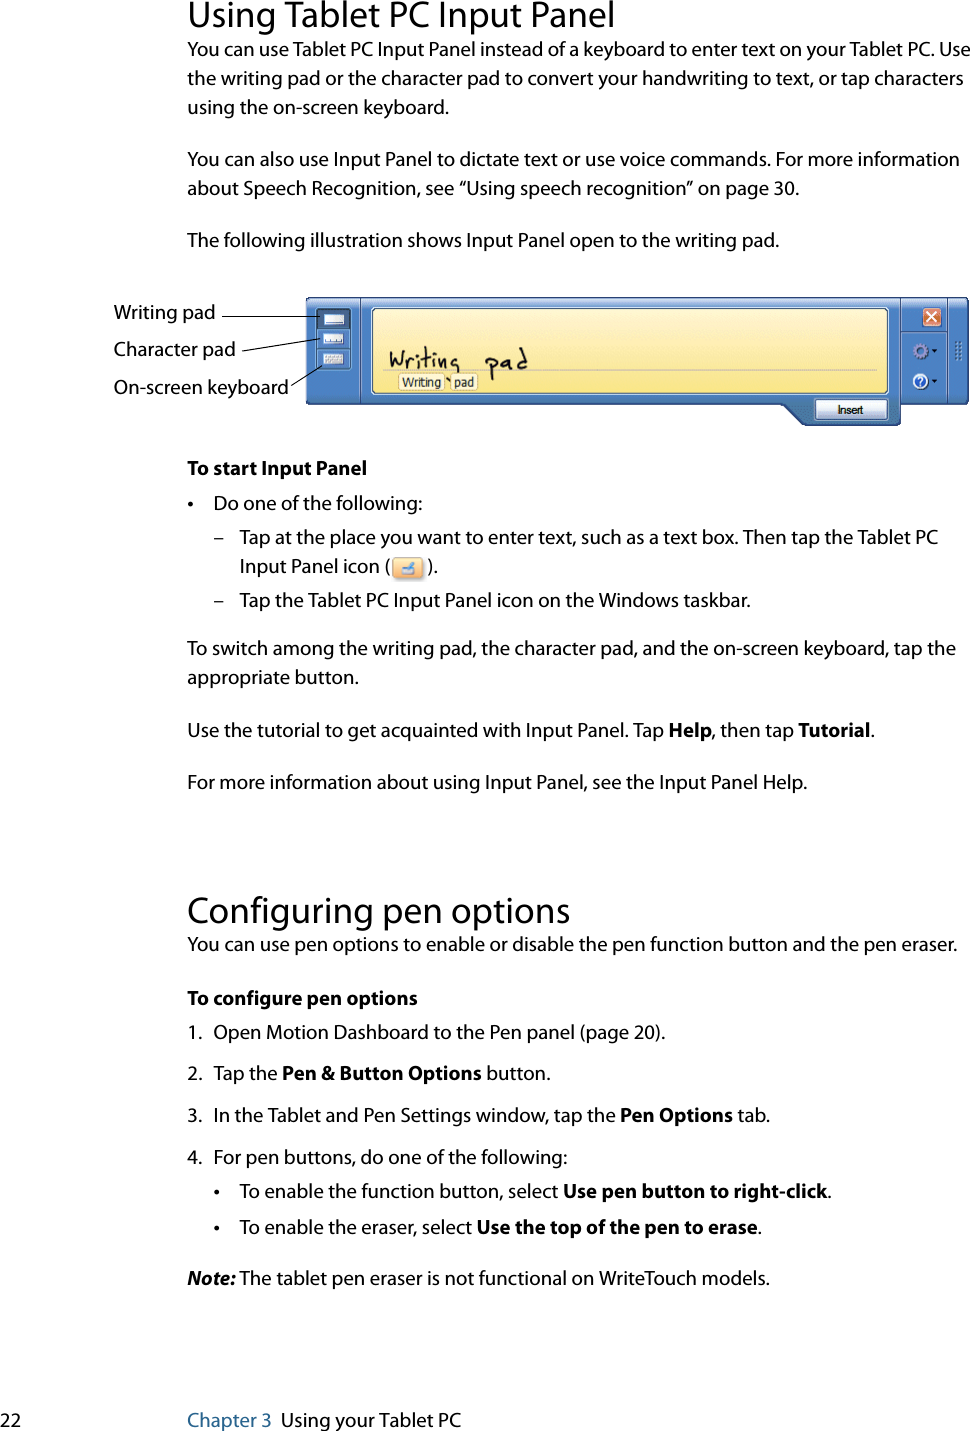
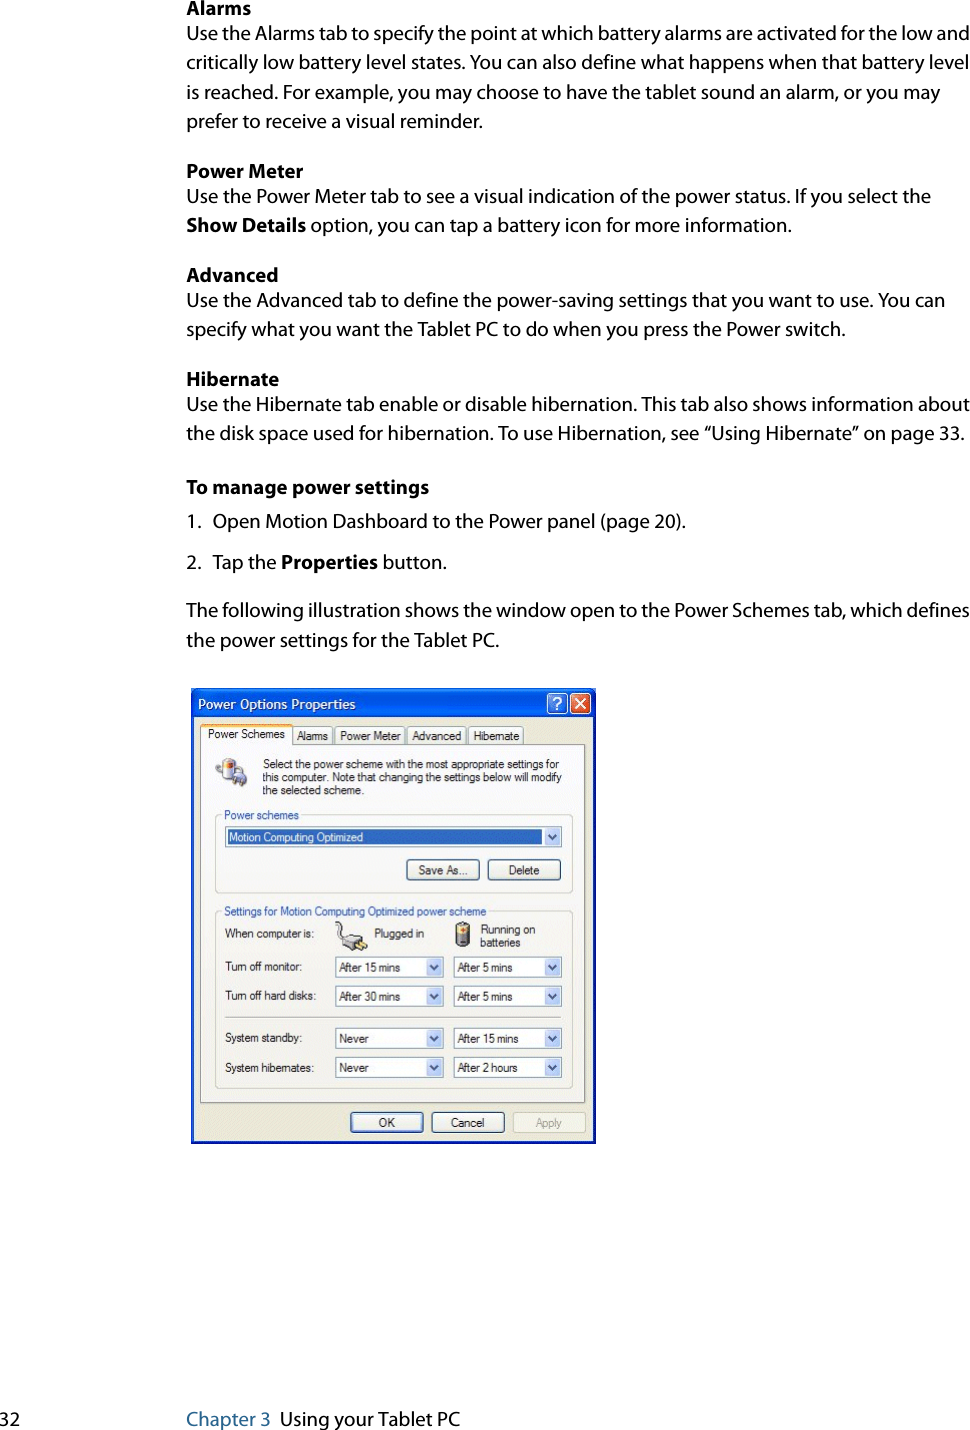
Xplore Technologies of America IWM3945ABG Motion Computing Tablet PC LE1700 (Model T006) User Manual LE 1700 User Guide
Xplore Technologies Corp of America Motion Computing Tablet PC LE1700 (Model T006) LE 1700 User Guide
UserManual.wiki
>
Xplore Technologies of America
>
IWM3945ABG User Manual
User Manual
Navigation menu
Upload a User Manual
Namespaces
Wiki Guide
HTML
PDF
Info
Views
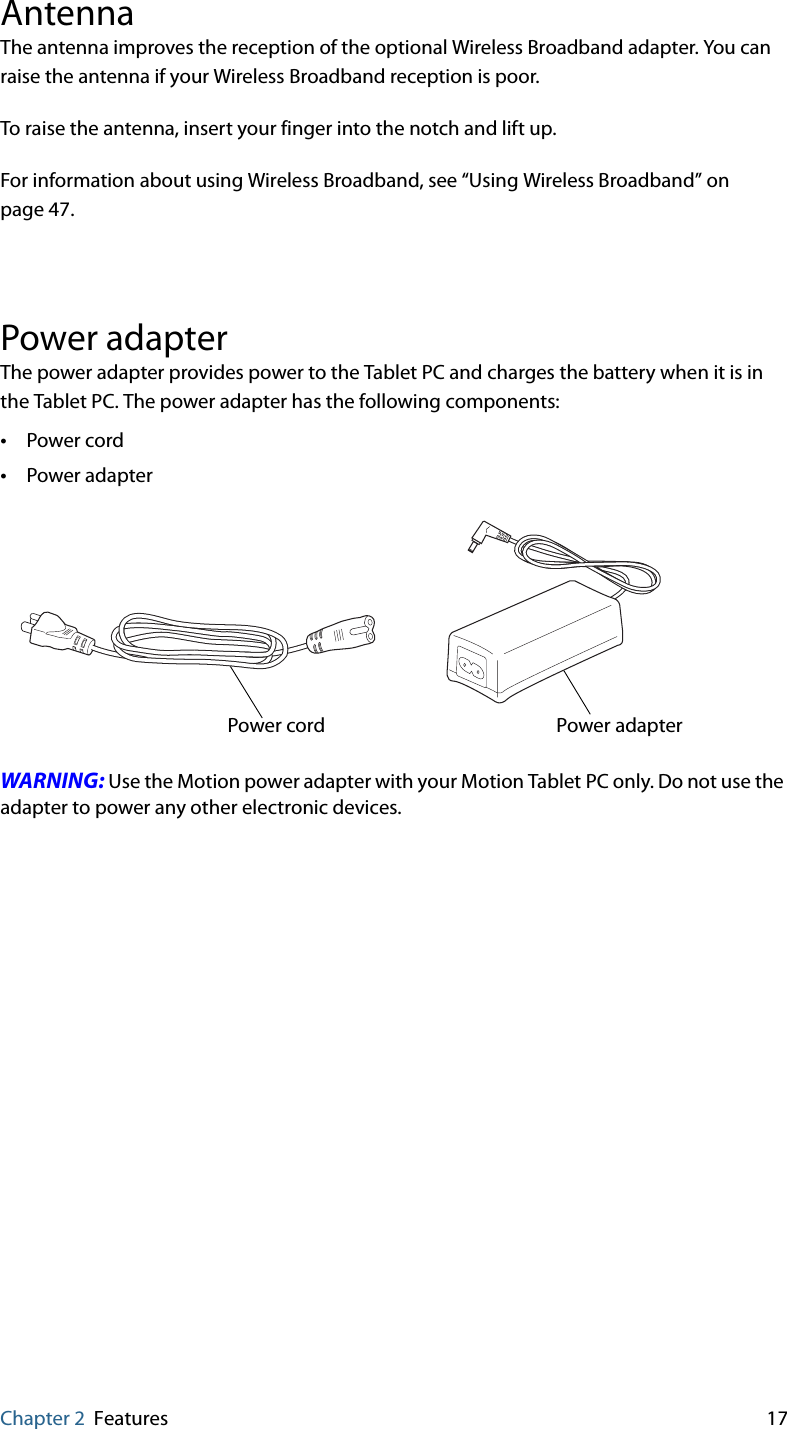
User Manual
Discussion / Help
Navigation