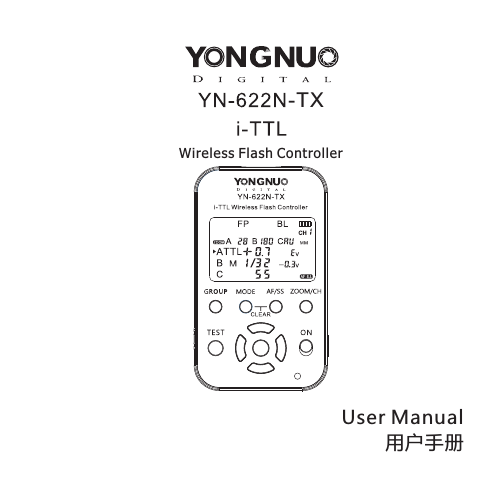
YONGNUO PHOTOGRAPHIC EQUIPMENT YN622N-TX i-TTL Wireless Flash Controller User Manual
SHENZHEN YONGNUO PHOTOGRAPHIC EQUIPMENT CO., LTD i-TTL Wireless Flash Controller
UserManual.wiki
>
YONGNUO PHOTOGRAPHIC EQUIPMENT
>
YN622N TX User Manual
User Manual
Navigation menu
Upload a User Manual
Namespaces
Wiki Guide
HTML
PDF
Info
Views
User Manual
Discussion / Help
Navigation


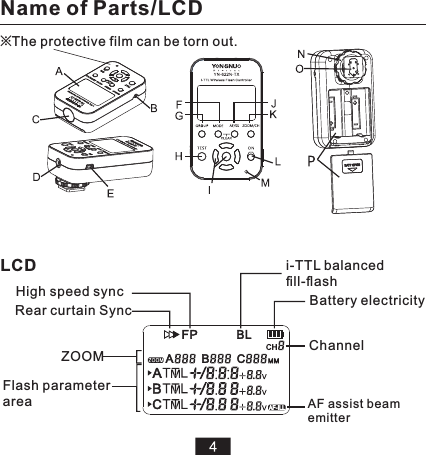
![A-LCD: Display all the settings of controller, convenient for your view and setup.B-2.5MM Shutter release interface: Wireless shutter release function(P.13).C-AF assist beam emitter: (P.10)D-PC interface: Input the flash sync signal(P.12).E-USB interface: Firmware upgrade through connecting the computer(P.15). F-Mode button: Each time you press the switch in the flash mode(P.8).G-Group button: The arrow shown the switch setting group(P.8).H-TEST button: Long press for flash awaken, loosen for flash testing(P.11).I-Select/Set button group: Multifunction button group, including the [UP] [DOWN] [LEFT] [RIGHT] and [OK] buttons, which can set the channel, ZOOM, flash output and other parameters. J-AF/SS button: Short press for AF switch(P.10), long press for [Super Sync] parameter setting (P.9).K-ZOOM/CH button: Each short press for A/B/C three groups switch(P.10), long press for channel setting(P.7) .L-Power switch: Slide to ON for power on.M-Status indicator : The green light will bright when in communication, while the red light will bright when in triggering (or shutter releasing).N-Locking ring and locking pin: (P.6)O-Hot shoe Mounting foot and contacts: (P.6)P-Battery compartment and battery cover: (P.6)assist beam emitterName of Parts/Quick Start Guide](https://usermanual.wiki/YONGNUO-PHOTOGRAPHIC-EQUIPMENT/YN622N-TX/User-Guide-2363871-Page-7.png)
![2.Installing the Controller on the Camera 1). Unscrew the locking ring of the controller.2). Slip the mounting foot into the hot shoe of the camera.3). Turn the locking ring according to the direction of arrow, the locking pin will protrude from the mounting foot. Open the cover and install two AA batteries (excluded)according to the marks , rechargeable batteries of 1.2V can be used. 1. Installing the BatteriesRemove the batteries when the product is not used for long time. Please replace the both two batteries at the same time.3. Power ON.Power on when the power switch slides to [ON].Preparation Before Use](https://usermanual.wiki/YONGNUO-PHOTOGRAPHIC-EQUIPMENT/YN622N-TX/User-Guide-2363871-Page-8.png)
![4.Channel Setting:Long press the [ZOOM/CH] button, then press the [UP] or [RIGHT] for increasing, press the [DOWN] or [LEFT] for decreasing, press [OK] for confirm. Set the same channel as the YN-622N transceiver.5. :1).2).*For non-i-TLL flash mode or other triggering mode, refer to P.12).Transceiver and Flash SettingsSet the transceiver’s receiving group, and set the same channel as the YN-622N-TX controller.Set the flash to i-TTL flash mode*, the flash will fire according to the flash mode and parameters set by the controller, support i -TTL/manual flash. (Preparation Before Use](https://usermanual.wiki/YONGNUO-PHOTOGRAPHIC-EQUIPMENT/YN622N-TX/User-Guide-2363871-Page-9.png)
![1) .P r es s t he [G RO U P] b ut to n to choose the setup group, press with the arrow to select A/B/C group.2).Press the [MODE] button to set the flash mode of selected group, each press for the settings as below: TTL: i-TTL Flash, the FEC adjustment range is within -3-+3EV, press [LEFT] or [RIGHT] button to increase and reduce 1EV, press [UP] or [RIGHT] button to increase and reduce 0.3EV. M: Manual Flash, The adjustment range is within 1/128-1/1, press [LEFT] or [RIGHT] button to adjust, press the [UP] or [RIGHT] button for fine adjustment.SS: (Super Sync, refer to Page 9)(None):The group is not participate in flash.It is supported to set the FEC on the flash directly, the compensation value shall be superposed according to flash setting plus the controller setting.When setting the flash mode and parameters on the controller, the screen of the flash on the transceiver will not change.1. Groups and Modes Setting(Remote Control)SettingShooting with a Different Flash Mode for Each Group](https://usermanual.wiki/YONGNUO-PHOTOGRAPHIC-EQUIPMENT/YN622N-TX/User-Guide-2363871-Page-10.png)
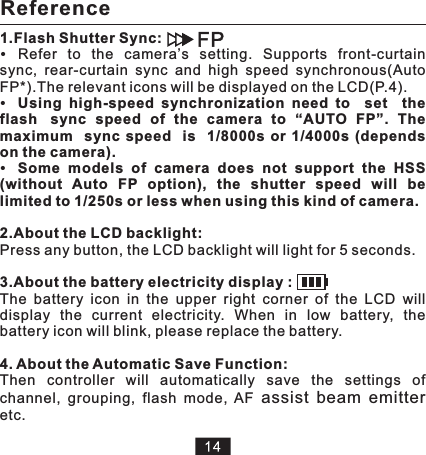
![1.Set the time delay parameter of controller SS: Long press the [AF/SS] button to proceed setting, press the [UP][DOWN][LEFT][RIGHT] button to adjust, press [OK] to confirm and exit setup, supports Automatic Setup (AU) or Manual Setup 0.1-3.0. Using Super Sync:1).Set the flash in manual mode, Support transceiver using hot shoe flash or connecting to the PC port . and it may needs setting at manual full-power flash output (1/1). According to the flash model, output power and shutter speed to adjust controller “SS” to a suitable time delay parameters. 2.2).Set the flash sync speed of the camera as AUTO FP, the maximum shutter sync speeds can reach to 1/8000s. 3).Take photos and check whether the photos are synchronous , it may see gradations or variations in the photos, results depend on the camera and flash.2.Use the non-high speed sync flash to realize higher sync speed, this function is more applicable to strobe flashes whose flash duration is longer, and it is for the camera w h i c h s u p p o r t A u t o FP o n l y. S u p p o r t About the Super Sync(SS)s e t u p t h e t i m e d e l a y parameter of Super Sync.Setting](https://usermanual.wiki/YONGNUO-PHOTOGRAPHIC-EQUIPMENT/YN622N-TX/User-Guide-2363871-Page-11.png)
![※It need to using single AF of the camera.4.bea m e m i tte r o f th e co n t orl l e r w il l b e em i t ted automatically to make it easier to autofocus.Short press the [AF/SS] button to enable/disable the AF Assist Beam Emitter function, the LCD will displayed the icon. AF Assist Beam EmitterWhen using AF under low-light, the built-in AF-assist 3.ZOOMEach short press the [ZOOM/CH] button, choose one of the A/B/C group, press the [UP] [DOWN] [LEFT] [RIGHT] buttons to setup, supports the range of setup: 24-200,AU (automa tic), press the [OK] button to confirm.It support the controller setting the the focal length of the flash lamp holder on the transceiver.Setting](https://usermanual.wiki/YONGNUO-PHOTOGRAPHIC-EQUIPMENT/YN622N-TX/User-Guide-2363871-Page-12.png)
![When half press the shutter button of the camera or press the [TEST] button of the controller , the awaking indicator light of green light will bright, the hot-shoe flash on the transceiver will be awakened. Completely press the shutter button of the camera will trigger the flash synchronously, the triggering indicator light of red light will bright.When loosing the [TEST] button, the groups have been selected of flash will be tested for once. 2.Flash triggeringFlash awaking and triggering1.Flash awaking&Testing flashExamples:](https://usermanual.wiki/YONGNUO-PHOTOGRAPHIC-EQUIPMENT/YN622N-TX/User-Guide-2363871-Page-13.png)
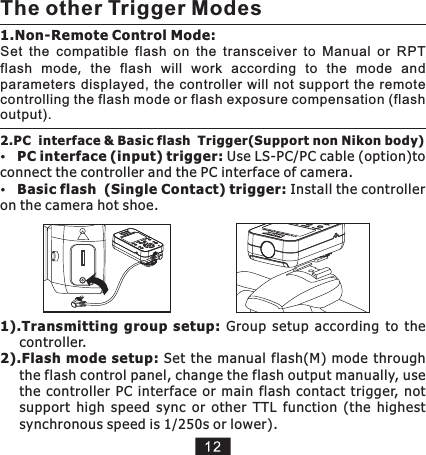
![1).Install the YN-622N-TX controller on the camera’s hot shoe, and use LS-2.5 series shutter connecting cable(may additional purchases) to connect the controller and camera.Support single shot only. If the controller does not installed on the compatible camera’s hot shoe, the shutter will release when pressing the [TEST] button of transceiver. 2).Long press the [TEST] button of YN-622N transceiver to focus, loosen the [TEST] button to shot. If the flash installed o n t h e Y N - 6 2 2 N t r a n s c e i v e r, t h e f l a s h w i l l f i r e synchronously. Use the YN-622N transceiver for wireless transmitting, the YN-622N-TX controller as the shutter signal output. Shutter Release FunctionThe compatible shutter release cable list:LS-2.5/N1:LS-2.5/N3:LS-2.5/N2(Optional):D200/D300/D300S/D700/D800D90/D600/D3100/D3200/D5000Series/D7000SeriesD70/D70S/D80](https://usermanual.wiki/YONGNUO-PHOTOGRAPHIC-EQUIPMENT/YN622N-TX/User-Guide-2363871-Page-15.png)
![5.Factory Reset 6.USB Firmware Upgrade Hold down the [MODE] and [AF/SS] buttons at the same time until the screen as shown, then loosen to restore factory settings. 1).Visit YONGNUO official website: http://www.hkyongnuo.com/e-detail.php?ID=339 to download the firmware upgrade software and the latest firmware. 2).Turn off . Keep pressing [mode] button and turn on again. The screen will show 3).Connect the controller to PC via USB-MINIB cable.4).Complete the firmware upgrade operation according to the prompt of software.firmware upgrade interface(). (not include)will display the current version Reference](https://usermanual.wiki/YONGNUO-PHOTOGRAPHIC-EQUIPMENT/YN622N-TX/User-Guide-2363871-Page-17.png)