Yifang Digital Technology XN680 Mobile Digital Pen User Manual
Shenzhen Yifang Digital Technology Co., Ltd. Mobile Digital Pen
User manual
1
Accessories
z Receiver ● USB Cable(Mini + Micro) ● Digital Pen(XN510)
z Ink Refill ● Refill Extractor ● User Manual
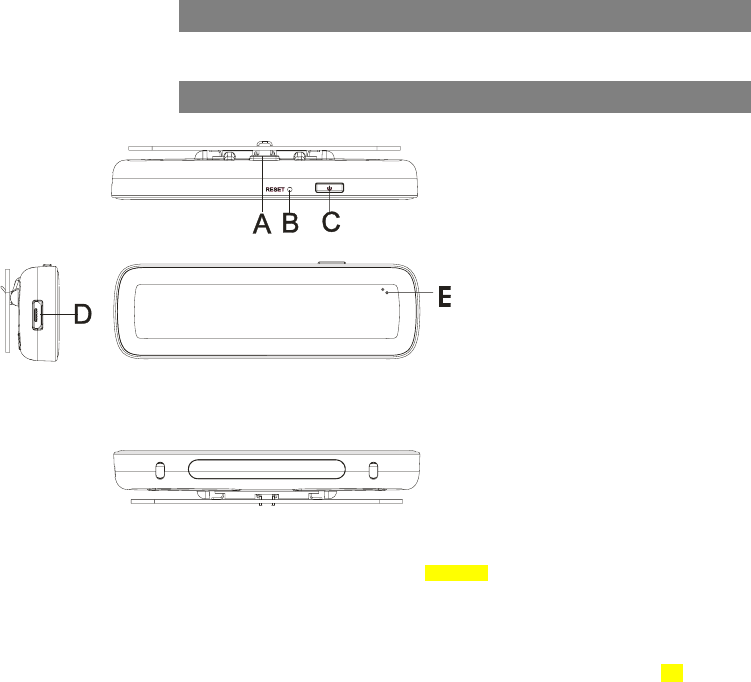
Overview of Receiver
A. Clip- Holds paper of Size A4 (default).
B. Reset hole- Reset the device.
C. Power button- Press to turn on/off the device.
D. Micro USB port- Connects to Micro USB cable for charging.
E. LED indicator- Indicate the various working status of the device.
Note: For the sake of power saving, usually only one LED indicator will light to
indicate related statuses at one time:
Power on: two LEDs blink once;
Charging: red LED blinks briefly;
Fully charged: red LED lights for a while
;
Low battery: red LED blinks slowly
;
Standby: green LED blink slowly
;
Writing: green LED blink briefly
;
Digit
a
F.
M
C
o
c
a
Note
:
G.
C
whe
n
Note
:
the
R
W
Do n
o
malfu
一、
1.Ins
Note:
long
X
2.Re
p
1
2
3
1)
a
l Pen
M
ini USB port
o
nnects to PC vi
a
a
ble for charging
.
:
Disconnect th
e
C
harging indic
a
n
charging com
p
:
Please use th
e
R
eceiver and th
e
Ho
w
W
ARNING:
o
t attempt to op
e
nction.
Getting p
r
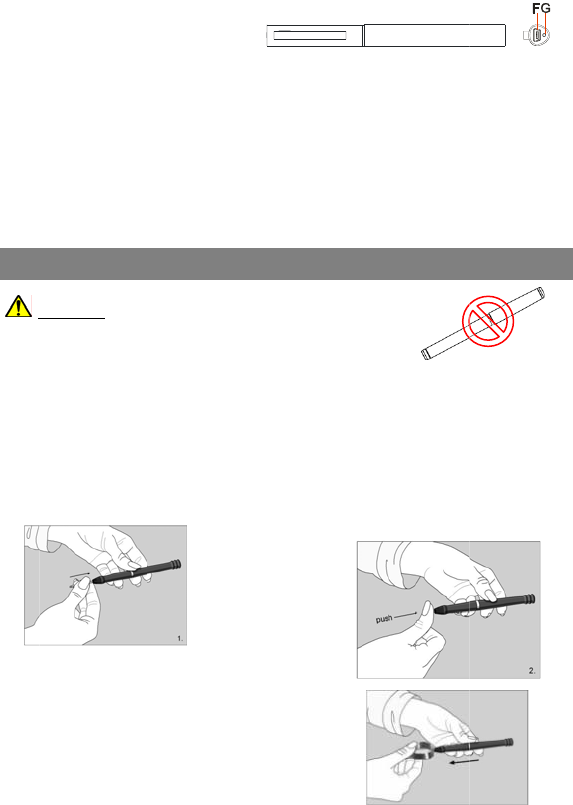
talling an Ink
R
Make sure you
X
2.35mm diam
e
p
lace the refill
)Remove the
c
)Use the extra
c
) Slightly pull t
Slide the ne
w
of the pen.
a
Mini USB
.
e
USB cable wh
e
a
tor: Lights re
d
p
letes; blinks on
c
e
dedicated USB
e
pen.
w
to Us
e
e
n the pen. This
r
epared
R
efill into the
P
use a refill that i
e
ter).
with the extra
c
c
ap off the pen;
c
tor to hold the r
e
he old refill out.
w
refill into the tip
2
e
n the device ha
s
d
when chargi
n
c
e the battery is
cable provided t
o
e
the Di
g
may cause the
p
P
en
s similar to the
o
c
tor
e
fill;
2
s
charged for ab
o
n
g is going on
low.
o
gether with this
g
ital Pen
p
en to
o
riginal (standar
d
)Gently pres
s
refill until it i
s
securely in
p
o
ut 2 hours.
and goes out
pen to connect
d
refill (67.0mm
s
the new
s
lodged
p
lace.
二、
1.Sy
s
y
y
2. Ru
a)
A
b)
c)
A
s
Software
A
s
tem requiremen
t
y
iPhone 4s /i
P
y
Android 4.3
o
n the applicatio
n
User can downl
o
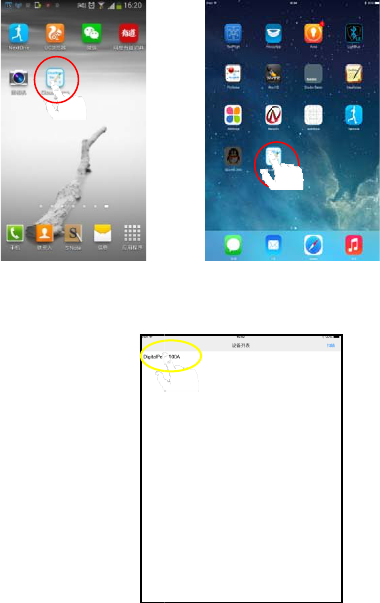
A
ppStore, Goog
and install it;
Find the “Cloud
device before ta
p
A
fter opening th
e
s
creen to find o
u
A
pplication
t
s:
P
ad3 or above(
w
o
r above, with B
L
n
“CloudMemo+”
:
o
ad the applicat
i
le Pla
y
, Android
Memo+” icon o
n
p
ping to open it.
e
app, select an
d
u
t the BT device
y
3
w
ith iOS7.0 or a
b
L
E4.0;
:
i
on “CloudMem
o
Market or by s
c
n
the app menu
d
tap on the “Sc
a
y
ou are using.
b
ove);
o
+” to your mobil
c
anning the two-
d
screen of the
A
a
n” button on the
e devices from
d
imention code
A
ndroid or iOS
top right of the
4
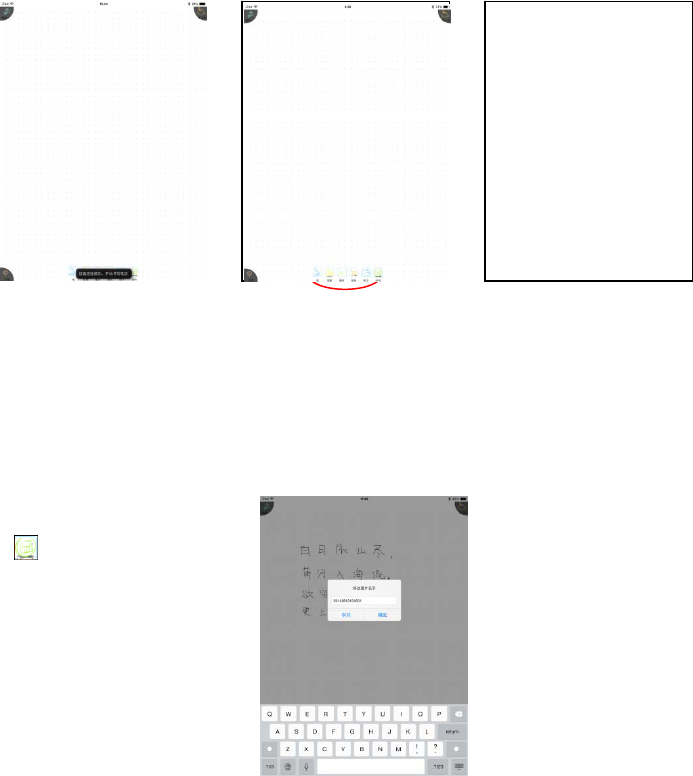
d) Tap on the device name that is identical with that on the bar code of the receiver
from the found device list, and then enter note-taking mode. At the bottom of the
screen, there will appear some words “device connected successfully, ready to take
notes”. You can take note now.
e) Fix the receiver on the top-center a piece of paper in size A4. Hold the pen and
write as usual. Whatever you write or draw with the pen will be displayed on the
screen of your mobile device.
Note:
1. Do not block the signal transmission between the pen tip and the receiver.
2.Make sure the pen is at least 1.5cm away from the receiver so that the sensor
can work normally.
。
3. Be sure to write with proper force to guarantee the high identification of the
writing.
f) After writing or drawing, tap on “Save”
button to save your note.
5
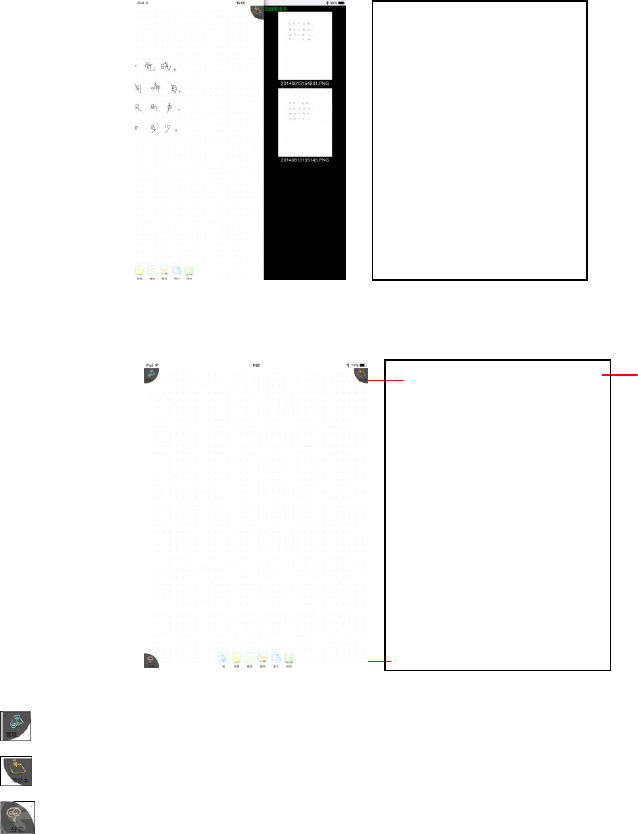
g) Tap on “Note” icon on the top right corner to check your recent notes.
三、 Description of the interfaces
Management:Modify the name of device or get back to device list.
Note:Check all notes that have been saved or uploaded.
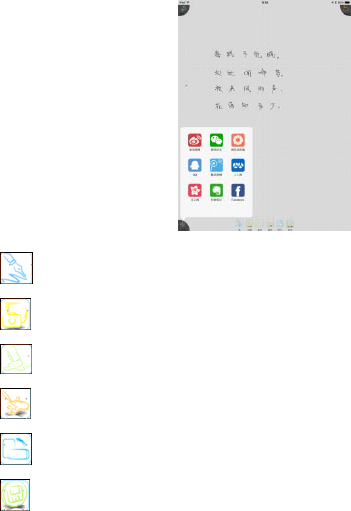
Share: Upload your notes to social networks.
Management Notes
Upload
6
Remarks: To share your notes, please make sure your mobile device is connected to
the Internet.
Pen: Select the options of pen width.
Wallpaper: Change the wallpaper (background) of your notes.
Eraser: Erase paticular part of your writing or drawing, or clear the whole page.
Color: Change the color of your ink.
Photo: Take photos or load an existing picture for editing or to set as wallpaper.
Save:Save your current note.
7
FCC Compliance
This device complies with Part 15 of the FCC Rules. Operation is
subject to the following two conditions:
(1) This device may not cause harmful interference, and
(2) This device must accept any interference received, including
interference that may cause undesired operation.
Warning: Changes or modifications to this unit not expressly approved
by the party responsible for compliance could void the user’s authority
to operate the equipment.
Note: This equipment has been tested and found to comply with the
limits for a Class B digital device, pursuant to Part 15 of the FCC
Rules.These limits are designed to provide reasonable protection
against harmful interference in a residential installation. This equipment
generates, uses and can radiate radio frequency energy and, if not
installed and used in accordance with the instructions, may cause
harmful interference to radio communications. However, there is no
guarantee that interference will not occur in a particular installation. If
this equipment does cause harmful interference to radio or television
reception, which can be determined by turning the equipment off and
on, the user is encouraged to try to correct the interference by one or
more of the following measures:
●Reorient or relocate the receiving antenna.
●Increase the separation between the equipment and receiver.
●Connect the equipment into an outlet on a circuit different from that to
which the
receiver is connected.
●Consult the dealer or an experienced radio/TV technician for help.
The device has been evaluated to meet general RF exposure requirement. The device can
be used in portable exposure condition without restriction.