Youngshin Electronics J2000S Transceiver of Car Alarm/Remote Engine Starter User Manual
Youngshin Electronics Co., LTD. Transceiver of Car Alarm/Remote Engine Starter Users Manual
UserManual.wiki
>
Youngshin Electronics
>
J2000S User Manual
>
Users Manual
Contents
1.
Users Manual
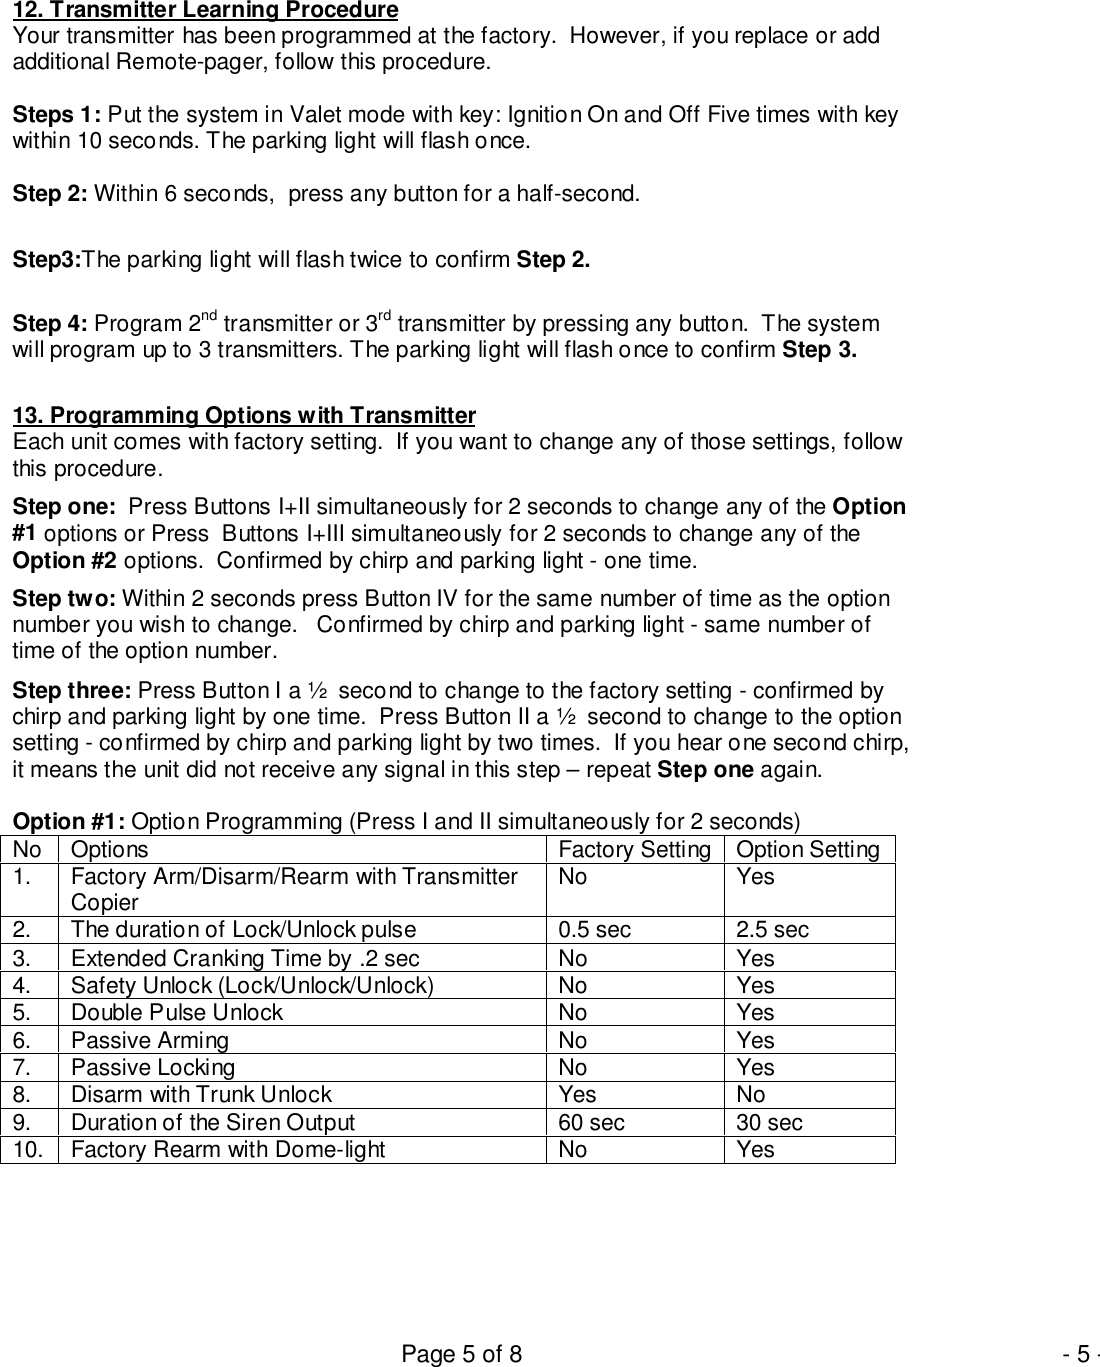
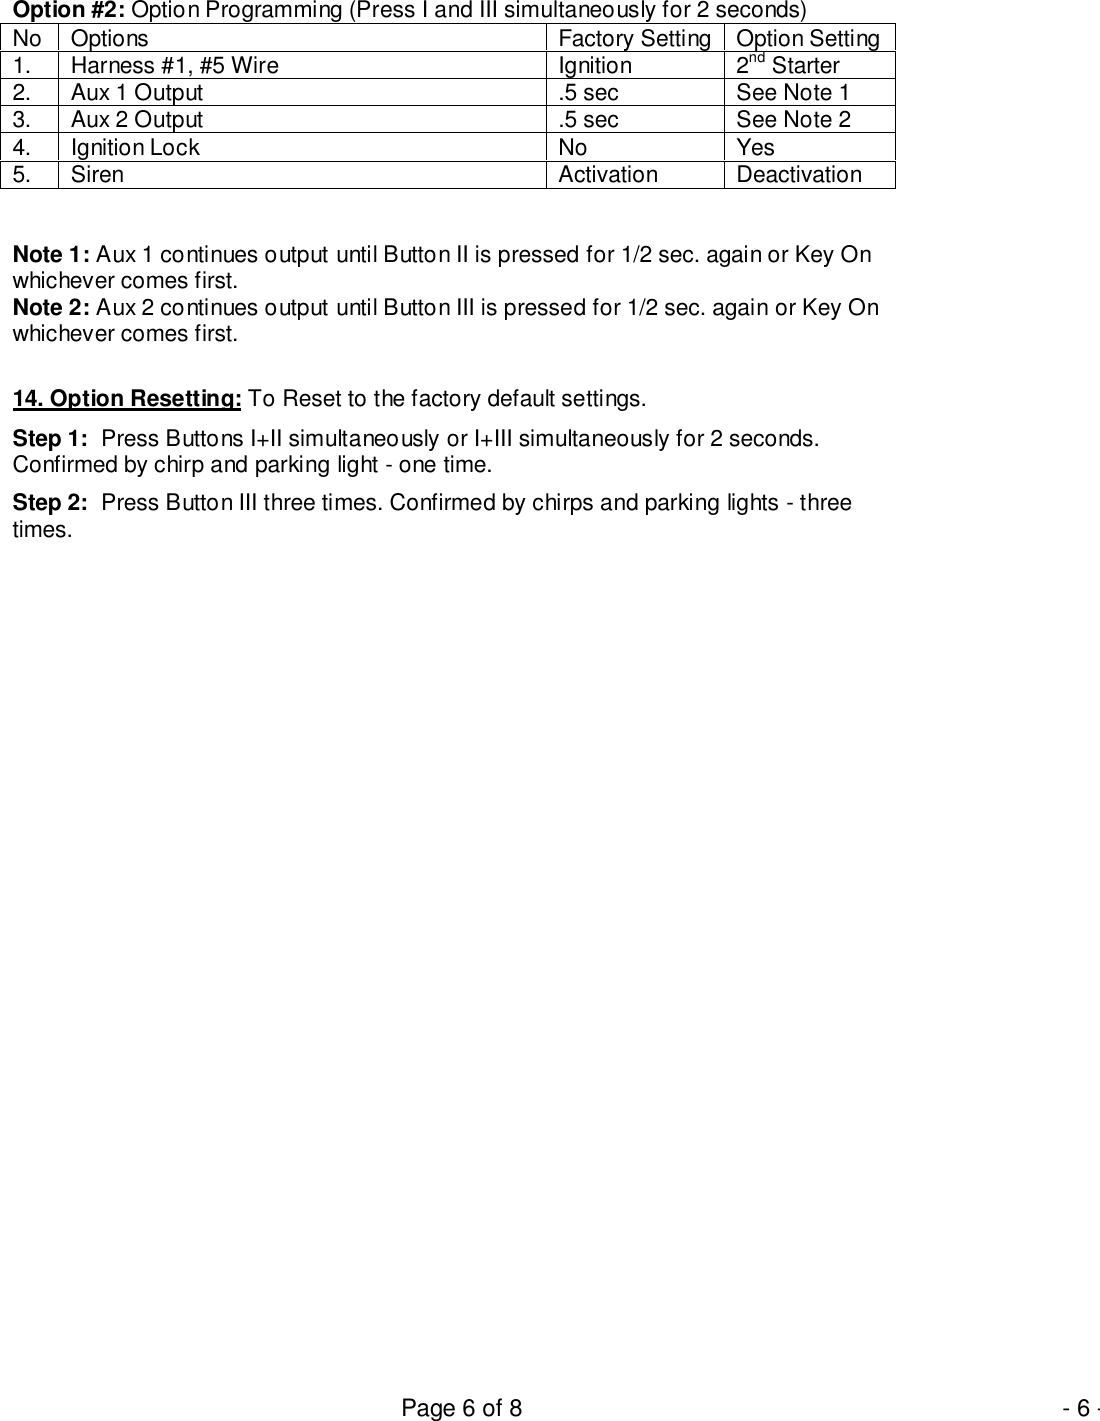
2.
Wire connection guide
Users Manual
Navigation menu
Upload a User Manual
Namespaces
Wiki Guide
HTML
PDF
Info
Views
User Manual
Discussion / Help
Navigation