ZHENGFANGXING TECHNOLOGY 18AV007 Audio Transmitter Box User Manual BWA18AV007 User Guide V1 0 EN 20180326

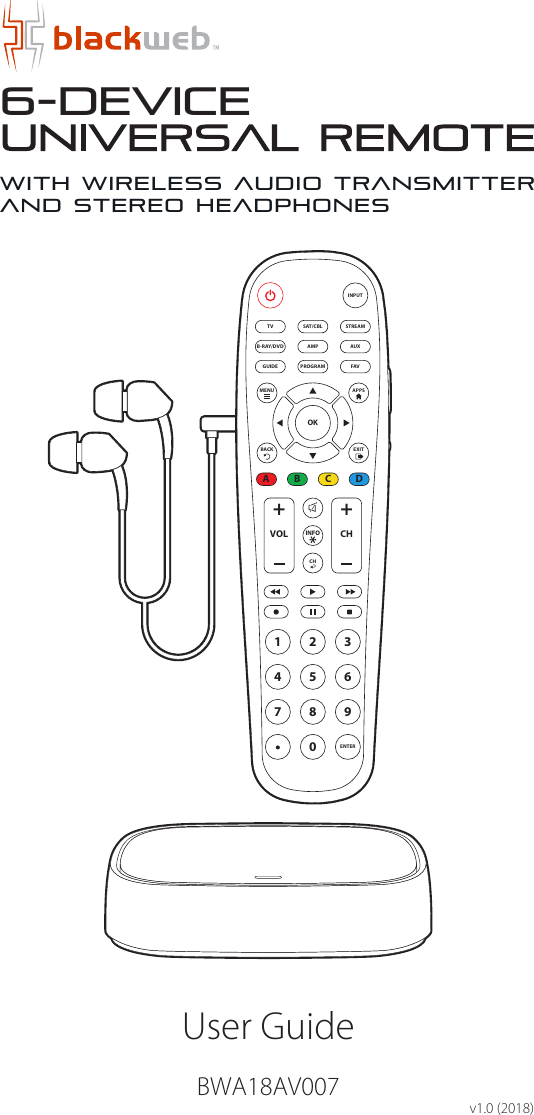
SHENZHEN ZHENGFANGXING TECHNOLOGY CO., LTD Audio Transmitter Box BWA18AV007 User Guide V1 0 EN 20180326

User Manual

6-DeviceUser Guidev1.0 (2018)BWA18AV007with wireless audio transmitterand stereo headphonesAMPPROGRAMAUXINPUTFAVENTER1234567 809+ +CHSAT/CBL STREAMTVBRAY/DVDGUIDEVOL CHMENUBACKAPPSEXITOKA B C DINFO
TABLE OF CONTENTSUNIVERSAL REMOTE CONTROL• GETTING STARTED (BATTERIES)• IN THE BOX• GETTING STARTED (BUTTONS)• PROGRAMMING YOUR REMOTE (DIRECT CODE ENTRY)• PROGRAMMING YOUR REMOTE (AUTO CODE SEARCH)• FAVORITE CHANNELS• VOLUME LOCK• CHANNEL LOCK• CODE IDENTIFICATION & FACTORY RESETWIRELESS AUDIO TRANSMITTER• ABOUT PRIVATE LISTENING• GET TO KNOW YOUR AUDIO TRANSMITTER• HOW TO SETUP YOUR AUDIO TRANSMITTER• OTHER CONNECTION OPTIONS• PRIVATE LISTENING THROUGH YOUR REMOTE• TROUBLESHOOTING• FCC INFORMATION• LIMITED 90-DAY WARRANTY020304060910111213141516182023252601
GETTING STARTED BATTERIESThank you for choosing the Blackweb Universal Remote Control and Wireless Audio Transmitter. This remote control can operate a wide range of electronic devices, works across most brands and models, and comes pre-programmed to operate many Samsung TVs (see the Programming Your Remote sections if your device is not compatible). Your remote can control up to 6 devices and is remarkably easy to set up. To get started, please install two AA alkaline batteries (not included) as shown below.Installing the Batteries1. Remove the battery cover.2. Insert the batteries as shown.3. Snap the battery cover back into place.Battery Precautions• Do not mix old and new batteries.• Do not mix alkaline, standard (carbon-zinc) or rechargeable (nickel-cadmium) batteries.• Always remove old, weak or worn- out batteries promptly and recycle or dispose of them in accordance with local and national regulations.Low Battery IndicatorIf while using the remote, the        button’s red indicator light flashes 3 times, this indicates the batteries need to be replaced. Please replace the batteries as soon as possible when this indication occurs. Code SaverWhen changing the batteries of your remote, please do so quickly. You have up to 20 minutes to change the batteries in your remote without losing the programmed codes.Battery SaverTo conserve battery power, the remote will automatically turn off if any button is pressed for more than 60 seconds (except during programming).This feature is helpful in the event that the remote is stuck in a location where the buttons remain depressed, such as between sofa cushions.Battery CoverYour remote control’s model number can be found in the battery compartmentTwo AAalkalinebatteries(not included)Model: BWA18AV007 (PCL-1)Customer Support: (877) 907-7010Made in China02
IN THE BOXAMPPROGRAMAUXINPUTFAVENTER1234567 809+ +CHSAT/CBL STREAMTVBRAY/DVDGUIDEVOL CHMENUBACKAPPSEXITOKREMOTE CONTROLAUDIO TRANSMITTERUSER GUIDE RCA/3.5MMAUDIO CABLESTEREO HEADPHONESUSB CHARGER6-DeviceUser Guidev1.0 (2018)BWA18AV007with wireless audio transmitterand stereo headphonesAMPPROGRAMAUXINPUTFAVENTER1234567 809+ +CHSAT/CBL STREAMTVBRAY/DVDGUIDEVOL CHMENUBACKAPPSEXITOKA B C DINFO03
GETTING STARTED BUTTONSNOTE: Some of the buttons on the remote may not be supported by your device.AMPPROGRAMAUXINPUTFAVENTER1234567 809+ +CHSAT/CBL STREAMTVBRAY/DVDGUIDEVOL CHMENUBACKAPPSEXITOKPOWER INPUTDEVICECATEGORIESGUIDEPROGRAMMENUAPPS3.5MMHEADPHONE JACKNAVIGATIONOKBACKMUTE(HEADPHONES)VOLUME(HEADPHONES)EXITA, B, C, DBUTTONS A B C DVOLUMECHANNELMUTEINFOPREVIOUSCHANNELVIDEOPLAYBACKCONTROLSNUMBERKEYPADFAVORITECHANNELSINFO04
POWERTurns your device On/Off and also serves as an indicator when the remote is being programmedINPUTSwitches between the sources connected to your TVDEVICE CATEGORIESUse these buttons to select the device you want to control PROGRAMUse to put your remote in programming mode GUIDEUse to access the guide of satellite and cable set-top boxesAPPSUse to access your smart TV’s apps (if supported) BACKReturn to the previous menu or screen A, B, C, D BUTTONSUse to access device shortcuts for additional features or custom apps on your device (if supported) INFOUse to access on-screen content description and informationTVBRAY/DVDSAT/CBLAMPSTREAMAUXPROGRAMGUIDEINPUTBACKA BC DAPPSINFO05
PROGRAMMING YOUR REMOTE DIRECT CODE ENTRYPress and hold the               button until the          button lights up red.The        button’s red indicator light remains on.Programming your remote is as easy as 1, 2, 3Before beginning, please make sure that the device you want to control is powered on and follow these three simple steps.NOTE: Press                  to exit at any time.NOTE: The Blackweb universal remote comes pre-programmed to operate many Samsung TVs.1. PROGRAMPROGRAMAMP AUXSAT/CBL STREAMTVBRAY/DVDINPUTFAVENTER1234567 809+ +CHGUIDEVOL CHMENUBACKAPPSEXITOKPROGRAMRed indicator lightINFO06
Select the device you want to program from the Device Categories:The        button’s red indicator light blinks once and remains on.2. TV SAT/CBL STREAMBRAY/DVD AMP AUXAMP AUXSAT/CBL STREAMTVBRAY/DVDINPUTFAVENTER1234567 809+ +CHGUIDEVOL CHMENUBACKAPPSEXITOKPROGRAMDevice CategoriesRed indicator lightINFO07
Enter the 4-digit code from the included list for the category and brand of your device.The        button’s red indicator light  shuts off if a valid code was entered.If the        button’s red indicator light flashes and remains on after entering four digits, that means an invalid code was entered. In that case, check the list again and re-enter the code.NOTE: Test the remote with the device to make sure the buttons work as expected. If some of the buttons/ features don’t work, try a different code on the list. Repeat this process for each device you wish to control. Code list and other helpful information available at: www.myblackwebremote.com3.  AMP AUXSAT/CBL STREAMTVBRAY/DVDINPUTFAVENTER1234567 809+ +CHGUIDEVOL CHMENUBACKAPPSEXITOKPROGRAMEnter the codeINFO08
PROGRAMMING YOUR REMOTE AUTO CODE SEARCHIt’s recommended to program your remote by using the Direct Code Entry method, however if with that method you were not able to find a code that is compatible with your device, you may try the Auto Code Search method below: 1. Power on the device that you want to control.2. Press and hold the               button until the        button lights up red.The       button’s red indicator light remains on.3. Select a device from Device Categories you would like to control. The        button’s red indicator light blinks once and remains on.NOTE: Please refer to the list below if you are unsure about the device category.• TV: TV, TV/DVD and other TV combinations• SAT/CBL: Satellite, Cable, DVR, and other set-top boxes• STREAM: Roku, Apple TV, Xbox, and other streaming media players*• B-RAY/DVD: Blu-ray Players and DVD Players• AMP: Sound Bars, Audio Receivers, and other audio devices• AUX: VCRs, Digital Frames, and devices not found on the code list*Compatible with Apple TV® and most Roku® devices; not compatible with Roku® Streaming Stick®,   Amazon® Fire TV and any voice-search features4. Point the remote at the device you wish to control and then press and hold the  OK  button until the device turns off. The       button’s red indicator light will blink as the codes are being tested. 5. When the device turns off, immediately release the  OK  button to lock in the code. The       button’s red indicator light will turn off. Test the remote with the device to make sure all the buttons work as expected. If some of the buttons/features don’t work, repeat the process or try the Direct Code Entry method.NOTE: It may take over 10 minutes to scan through all the possible codes for your device. If during the Auto Code Search you have either accidentally or deliberately released the  OK  button, you may repeat steps 1 through 5 above to resume the code search where it left off. After the Auto Code Search has exhausted all available codes for the selected category, the remote’s        button's red indicator light blinks three times and turns off. If none of the codes worked with your device, try the Direct Code Entry method.PROGRAMAMP AUXSAT/CBL STREAMTVBRAY/DVDDevice Categories09
FAVORITE CHANNELSFor easy access to up to 10 of your favorite channels, follow the steps below.1. Select a device from Device Categories that controls the channels. The        button’s red indicator light will blink once. 2. Press and hold the               button until the        button lights up red.The       button’s red indicator light remains on.3. Press the          button. The        button’s red indicator light blinks once and remains on.4. Select the button (0 – 9) that you will use for storing your favorite channel. The        button’s red indicator light blinks once and remains on.5. Enter the channel number you wish to program as a favorite channel. 6. Press the          button, the        button’s red indicator light will turn off and the channel is saved.NOTE: To change a stored favorite channel, repeat steps 1-6 above.To Access Your Favorite Channels:1. Press the          button. The       button’s red indicator lights up and remains lit.2. To access the favorite channel, press the programmed button for that channel (0-9). The       button’s red indicator light blinks, then turns off as the command is sent. PROGRAMFAVFAVFAV10
VOLUME LOCKUse this feature to lock a device to the remote’s volume control. For example, the remote can be in TV mode while the volume buttons control your sound bar.Enabling Volume Lock:1. Press and hold the               button until the        button lights up red.The        button’s red indicator light remains on.2. Select a device from Device Categories that you want to lock to the remote’s volume control. The        button’s red indicator light blinks once and remains on.3. Press the VOL+ button. The        button’s red indicator light blinks once and remains on.4. Press the  OK  button. The        button’s red indicator light will blink twice and turn off.Disabling Volume Lock:1. Press and hold the               button until the        button lights up red.The       button’s red indicator light remains on.2. Press the VOL- button. The        button’s red indicator light blinks once and remains on.3. Press the  OK  button. The        button’s red indicator light will blink twice and turn off.NOTE: On most newer HDMI-connected devices, the Volume Lock feature may be unnecessary as this feature is already built-in.PROGRAMPROGRAM11
CHANNEL LOCKUse this feature to lock a device to the remote’s channel control. For example, the remote can be in TV mode while the channel buttons control your satellite or cable box. Enabling Channel Lock:1. Press and hold the               button until the        button lights up red.The       button’s red indicator light remains on.2. Select a device from Device Categories that you want to lock to the remote’s channel control. The        button’s red indicator light blinks once and remains on.3. Press the CH+ button. The        button’s red indicator light blinks once and remains on.4. Press the  OK  button. The        button’s red indicator light will blink twice and turn off.Disabling Channel Lock:1. Press and hold the               button until the        button lights up red.The       button’s red indicator light remains on.2. Press the CH- button. The        button’s red indicator light blinks once and remains on.3. Press the  OK  button. The        button’s red indicator light will blink twice and turn off.NOTE: On most newer HDMI-connected devices, the Channel Lock feature may be unnecessary as this feature is already built-in.PROGRAMPROGRAM12
CODE IDENTIFICATION & FACTORY RESETCode Identication:To identify any of your programmed codes, follow the steps below. 1. Press and hold the               button until the        button lights up red.The       button’s red indicator light remains on.2. Select a device from Device Categories that you would like the code for. The        button’s red indicator light blinks once and remains on.3. Press the         button. The        button’s red indicator light blinks once and remains on.4. Press the       button. Count the number of times the        button’s red indicator light flashes. This is the number corresponding to the first digit of the code. If the        button does not flash, the corresponding code number is 0. Repeat the process by pressing the       ,       and       buttons for the remaining digits.5. Press the         button to exit.NOTE: Press           to exit at any time.Reset to Factory Settings:1. Press and hold the               button until the        button lights up red.The       button’s red indicator light remains on.2. Press the       button. The        button’s red indicator light blinks once and remains on.3. Press the  OK  button. The        button’s red indicator light will flash twice and the remote will revert to factory settings.PROGRAM12 3 4PROGRAMAAA13
ABOUT PRIVATE LISTENINGWhen you want to watch without disturbing others, you can use the universal remote's Private Listening feature by inserting headphones into the universal remote and transmitting the sound from the audio transmitter attached to your television.AMPPROGRAMAUXINPUTFAVENTER1234567 809+ +CHSAT/CBL STREAMTVBRAY/DVDGUIDEVOL CHMENUBACKAPPSEXITOKTVAUDIO TRANSMITTERUNIVERSAL REMOTESTEREOHEADPHONESApproximately 30 ft maximum wireless range14
GET TO KNOW YOUR AUDIO TRANSMITTERCAUTION: Don’t press this button unless you want to unpair the remote from the audio transmitter (your universal remote and audio transmitter are already paired to work together out of the box).For more information, please refer to “PARING MODE” in Troubleshooting.BACKSTEREO INR OUT(RCA audio output)POWER(Micro USB port,5V/300mA)L OUT(RCA audio output)OPTICAL IN(S/PDIF)OPTICAL OUT(S/PDIF)LED INDICATORPAIRING BUTTONTOPBACKBOTTOM15
HOW TO SET UP YOUR AUDIO TRANSMITTER1. Connect the supplied USB charger to the audio transmitter's USB port labeled "POWER".When connected to a power source, the audio transmitter’s LED indicator turns solid blue.NOTE: A steady blue light indicates that the audio transmitter is paired to the remote (by default). If the LED indicator is continuously flashing, it indicates that the audio transmitter and remote are not properly paired (please refer to “Pairing Mode” in Troubleshooting).LED INDICATORTOPWALL OUTLETUSB CHARGERPOWERBACK16
2. Connect the white and red plugs of the supplied RCA/3.5mm audio cable to the (L) and (R) AUDIO OUT on your television's connection panel.NOTE: Ensure the cables are NOT plugged into the TV’s audio input.3. Connect the 3.5mm stereo plug to the audio transmitter's "STEREO IN" port as shown below.NOTE: The Private Listening feature DOES NOT SILENCE the audio that may be playing through your television's built-in speakers, sound bar or other connected A/V equipment.• You can use the equipment manufacturer's remote or the universal remote's volume, mute or power controls to silence the audio.• On some televisions, you may need to manually switch the audio output from the built-in speakers to the connected audio transmitter equipment. Please consult your equipment manufacturer's manual for instructions.L RRCA/3.5MM AUDIO CABLE(included)STEREO IN(3.5mm audio jack)AUDIOTRANSMITTERRCA AUDIO OUTTV17
OTHER CONNECTION OPTIONSIf you have a sound bar or other audio equipment already connected to your television's audio jacks, you can use the audio transmitter's audio passthrough connection labeled "L OUT" and "R OUT" to connect to your other audio equipment.RCA STEREO AUDIO CABLE(not included)SOUND BAR OR OTHER AUDIO EQUIPMENTL RAUDIO INL OUT R OUT18
Using an S/PDIF optical cable for digital audioFor televisions equipped with an S/PDIF optical output, you may connect an optical cable (not included) to the TV’s connection panel. Connect the other end of the optical cable into the audio transmitter's "OPTICAL IN" port (supports 96kHz/24bit).If you have a sound bar or other audio equipment already connected to your television, you can use the audio transmitter's audio passthrough connection labeled "OPTICAL OUT" to connect to your other audio equipment.NOTE: When an audio source is connected to the audio transmitter’s “STEREO IN”, the optical ports will not function.OPTICAL IN OPTICAL OUTOPTICAL AUDIO CABLE(not included)STEREO IN(3.5mm audio jack)TVSOUND BAR OROTHER AUDIO EQUIPMENTOPTICAL INOPTICAL OUT19
PRIVATE LISTENING THROUGH YOUR REMOTEYou may control the headphone‘s audio volume with the HEADPHONE VOLUME buttons located on the right side of the remote.To mute and unmute the headphone audio, press the HEADPHONE MUTE button located on the right side of the remote.The buttons below ARE NOT used for controlling the headphone’s audio volume.RIGHTSIDELEFTSIDEHEADPHONEVOLUMEHEADPHONEMUTE3.5MMHEADPHONE JACK(enables/disablesPrivate Listening)FRONTAMPPROGRAMAUXINPUTFAV123456789++CHSAT/CBL STREAMTVBRAY/DVDGUIDEVOLA B C DCHMENUBACKAPPSEXITOKINFO20
Activating Private ListeningTo activate the universal remote's Private Listening feature, simply plug in a pair of headphones into the 3.5MM HEADPHONE JACK located on the left side of the remote. After inserting the headphones, the audio transmitter’s LED indicator will flash three times and play a beep in the headphones indicating when the Private Listening feature has been activated.STEREO HEADPHONESPlug inLEFTSIDE3.5MMHEADPHONEJACKLED INDICATORFlashes 3 times21
Deactivating Private ListeningTo deactivate the universal remote's Private Listening feature, simply unplug the headphones.  When the headphones are unplugged, the audio transmitter’s LED indicator will flash once to indicate that the Private Listening feature has been deactivated.CAUTION: DON’T FORGET TO UNPLUG THE HEADPHONES OR IT WILL DRAIN THE REMOTE'S BATTERIES.LED INDICATORFlashes onceUnplugAMPPROGRAMAUXINPUTFAVENTER1234567 809+ +CHSAT/CBL STREAMTVBRAY/DVDGUIDEVOL CHMENUBACKAPPSEXITOKSTEREO HEADPHONES22
TROUBLESHOOTINGIf you are having issues with the universal remote:The tips below can help you solve problems and answer questions you may have with your remote control. In general, always make sure: 1) The remote is in the correct device category mode (TV, SAT/CBL, STREAM, B-RAY/DVD, AMP, AUX); this tells the remote which device to operate. 2) The batteries are fresh and properly installed. 3) To remove any obstacles between the remote and the device, and that you’re aiming the remote at the device’s IR sensor. The remote can’t be programmed to operate my device.• If you’re using the Direct Code Entry method to enter the codes for your brand and the device is still not functioning properly after trying all the code options, try the Auto Code Search method.• To control combo devices like TV/VCRs or TV/DVDs, you must program the individual corresponding device buttons to control each part of the combo unit. Some of the buttons of the remote are not supported or working properly on my device. • It's possible the code that you programmed is not fully compatible with your device. Try selecting the next code from the options available for the category and brand of your device. • There may be some buttons from your device's original remote that are not supported. • You may have pressed an invalid button for the device category mode the remote is in.  The remote will not change the channels on my device.• Make sure the remote is in the correct device category mode (TV, SAT/CBL, STREAM, B-RAY/DVD, AMP, AUX) that controls the channels.• Try pressing the ENTER button after you enter a channel number (a requirement with certain models and brands of TV and/or Cable/Satellite boxes). The remote will not adjust the volume on my device.• Make sure the remote is in the correct device category mode (TV, SAT/ CBL, STREAM, B-RAY/DVD, AMP, AUX) that controls the volume. My device’s menu or app hub does not appear.• Menu and app hub access isn’t supported for all brands. You may need to use your original remote control to access the menu functions and/or app hub for some devices.My remote’s light is blinking• If while using the remote the indicator light flashes 3 times, this indicates the batteries need to be replaced.23
If you are having issues with the Private Listening feature:• Ensure the batteries in your remote are working and the audio transmitter is connected to a power source.• Ensure the television’s selected audio output is configured to send the audio to the audio transmitter.• Ensure the television’s audio output volume is not too low or muted• Ensure the headphones are plugged in properly.• Raise the headphone volume using the volume control on the right side of the universal remote.If the LED indicator is continuously ashing:Your universal remote and audio transmitter are already paired to work together out of the box. The LED indicator on your audio transmitter will be steady blue when paired properly and will flash 1-3 times when the Private Listening feature is activated or deactivated. If you notice the LED indicator is continuously flashing, it means that the audio transmitter and universal remote are not paired. In that case, please follow the instructions below.Follow these instructions only if the LED indicator is continuously ashing on the audio transmitterPAIRING MODETo enter pairing mode: 1. Connect the audio transmitter to a power source.2. Plug the headphones into the universal remote.3. Locate the PAIRING button on the bottom of the audio transmitter. 4. Locate the HEADPHONE MUTE button on the universal remote. 5. With the devices no further than 18” apart, hold down both buttons for 5 seconds. When your devices are paired there will be a short beep in the headphones and the audio transmitter’s LED indicator will become steady blue.For more information, please visit www.myblackwebremote.com or call the Customer Support Help Line: (877) 907-7010PAIRING BUTTONAUDIO TRANSMITTERBOTTOMREMOTERIGHT SIDEHEADPHONEMUTE24
FCC INFORMATIONThis device complies with part 15 of the FCC rules. Operation is subject to the following two conditions:(1) this device may not cause harmful interference, and(2) this device must accept any interference received, including interference that may cause undesired operation.NOTE: This equipment has been tested and found to comply with the limits for a Class B digital device, pursuant to Part 15 of the FCC Rules. These limits are designed to provide reasonable protection against harmful interference in a residential installation. This equipment generates, uses and can radiate radio frequency energy and, if not installed and used in accordance with the instructions may cause harmful interference to radio communications. However, there is no guarantee that interference will not occur in a particular installation. If this equipment does cause harmful interference to radio or television reception, which can be determined by turning the equipment off and on, the user is encouraged to try to correct the interference by one or more of the following measures:• Reorient or relocate the receiving antenna.• Increase the separation between the equipment and receiver.• Connect the equipment into an outlet on a circuit different from that to which the receiver is connected.• Consult the dealer or an experienced radio/TV technician for help.CAUTION: Any changes or modifications not expressly approved by the party responsible for compliance could void the user’s authority to operate this equipment.25

Navigation menu