ZIJIANG ELECTRONICS ZJ-8001DD Portable Thermal Printer User Manual 15 ZJ 8001DD UserMan r1
SHENZHEN ZIJIANG ELECTRONICS CO., LTD Portable Thermal Printer 15 ZJ 8001DD UserMan r1
UserManual.wiki
>
ZIJIANG ELECTRONICS
>
ZJ 8001DD User Manual
15_ZJ-8001DD UserMan r1
Navigation menu
Upload a User Manual
Namespaces
Wiki Guide
HTML
PDF
Info
Views
User Manual
Discussion / Help
Navigation


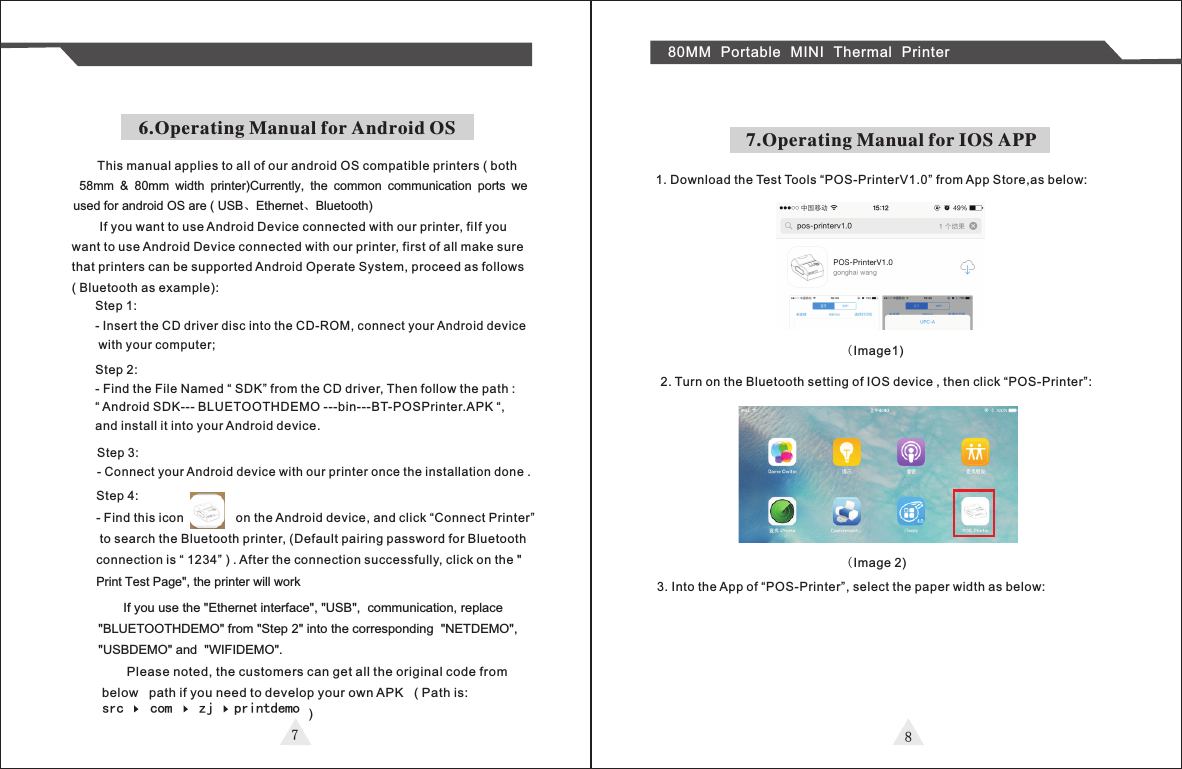
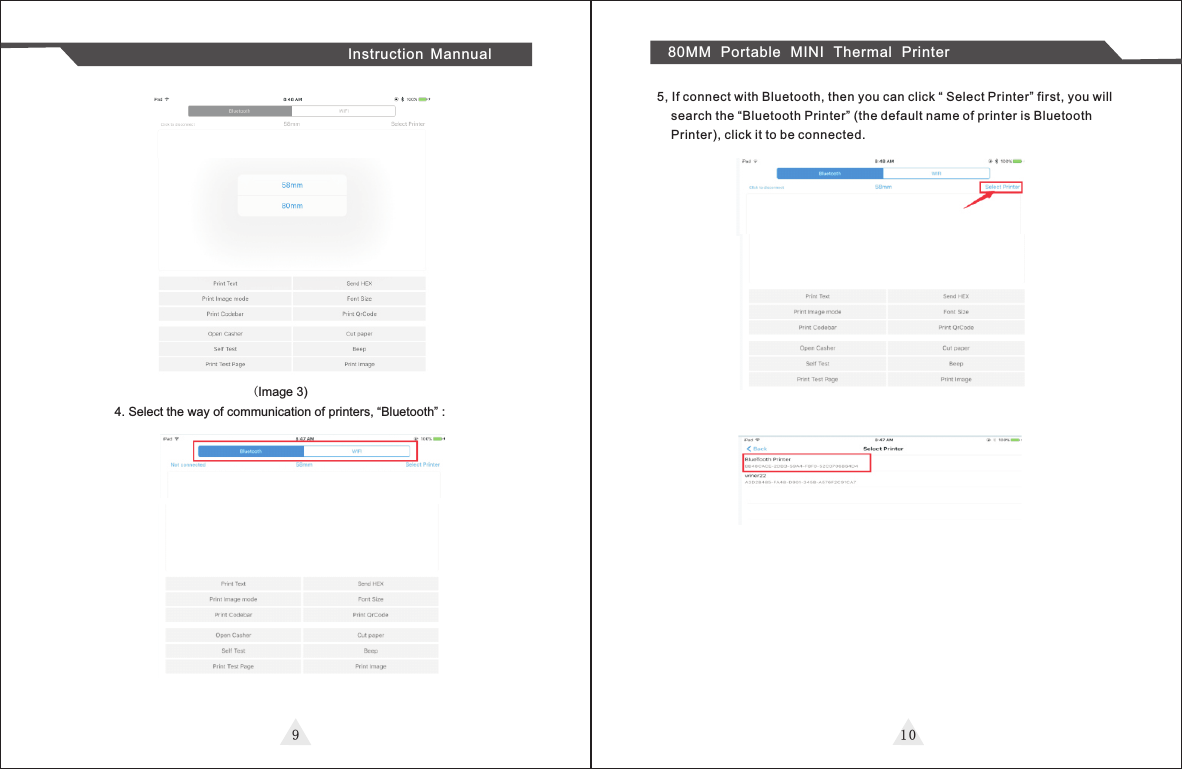
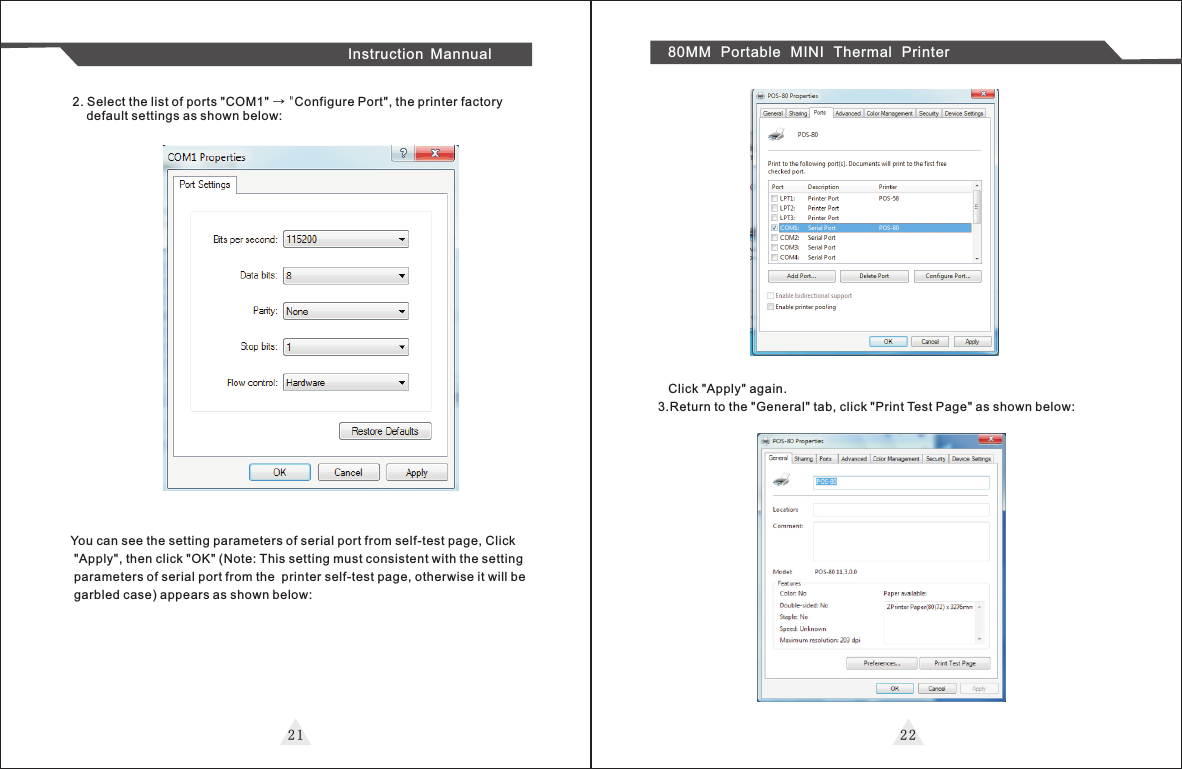
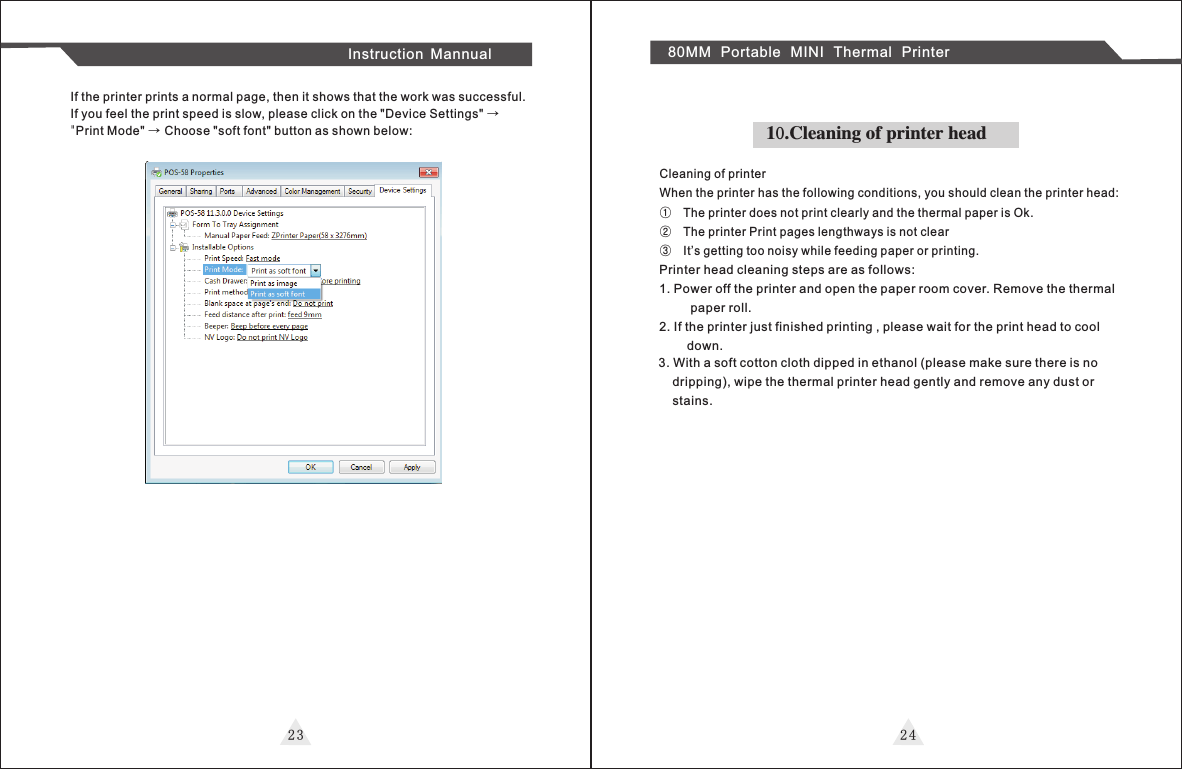
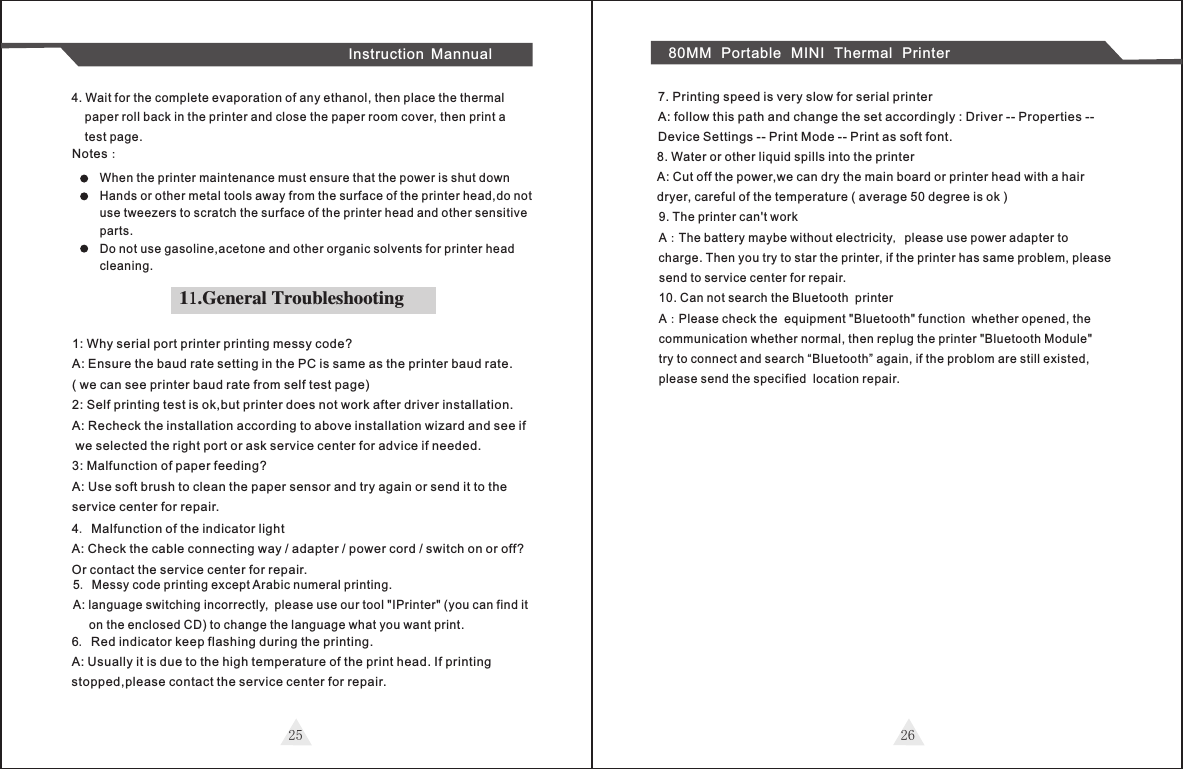
![Instruction Mannual 80MM Portable MINI Thermal Printer1 1 1 26, If above steps are successful, then you can print text to have a test:9, Other features of this APP:①Send HEX: In the text box, enter the hexadecimal data, click “Send HEX”, then can send text box hexadecimal data to the printer.② Print Image mode: input data in the text box, click "Print Image mode", you will be able to convert the contents of the text box into a image printed③ Open Casher: If your printer is connected with the cash drawer, click "open casher", the drawer will be opened (portable printers without drawerinterface, this feature does not work).④ Cut paper: After click on it, the paper will be feed out and cut (portable printers, 58 series of printers without cutter, this feature does not work).⑤ Self Test: Click the "self-test", the printer will print out a self-test page (because the Bluetooth printer has been connected to the device, then]the Bluetooth name or MAC address will be not displayed in the self-test page ).⑥ Beep: Click the "Beep", the printer will beep sound (portable printers,58 series of printers without buzzer, this feature does not work).⑦ Print test page: Click the "Print Test Page", the text will print a sectionof the test, to confirm that the printer is connected and normal print successfully. 9.The applicable version: can be compatible with IOS6.0 or above versions.8.The Bluetooth configurationStep1: Make sure your device ( like PC, Note Book ) has Bluetooth function, then once the Bluetooth for your device is activated, you will see the Bluetoothsign showed in the right bottom side of your device(like PC) screen.](https://usermanual.wiki/ZIJIANG-ELECTRONICS/ZJ-8001DD/User-Guide-3445849-Page-7.png)