ZTE K70 Tablet PC User Manual
ZTE Corporation Tablet PC
UserManual.wiki
>
ZTE
>
K70 User Manual
>
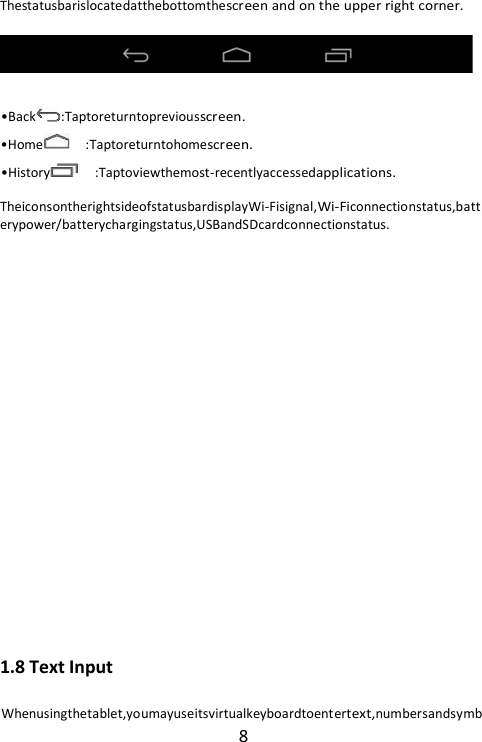
user manual
Contents
1.
user manual
2.
User Manual
user manual
Navigation menu
Upload a User Manual
Namespaces
Wiki Guide
HTML
PDF
Info
Views
User Manual
Discussion / Help
Navigation

![10 ChapterTwo: Internet& Bluetooth 2.1 Wi-Fi and Network Networksupportisneededtousethewebbrowser.Ifyouexperienceanynetworkproblems,pleasecontactyourwireless serviceprovider. ClicktoenterSettings.TurnonWi-Fiandfindyourwirelessnetwork.SigninwithyourWi-Fipassword.Onceconnected,Wi-Ficonnectivityiconwillbeshownattherightsideof toolbar.Youmayalsoclick[+]Addnetworktomanuallyinputyourwirelessnetworkifitdoesnotappearonthelist,butiswithinrange. OtherWi-FiOptions TaptheAdvancediconontheupper-rightcornerofthescreentodisplayadvancedoptionsandother networkinformation. WhentheNetworknotificationoptionischecked,thesystemautomaticallyscans](https://usermanual.wiki/ZTE/K70.user-manual/User-Guide-2449864-Page-10.png)