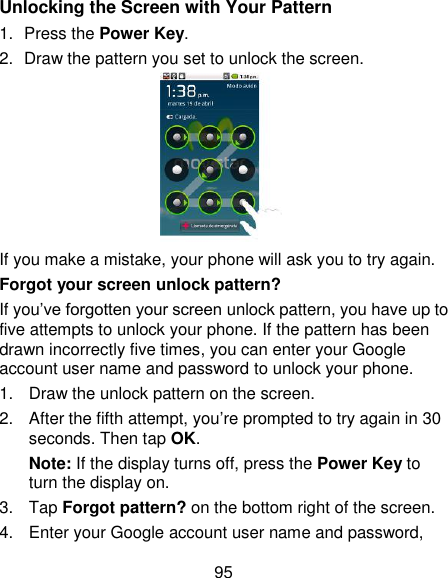
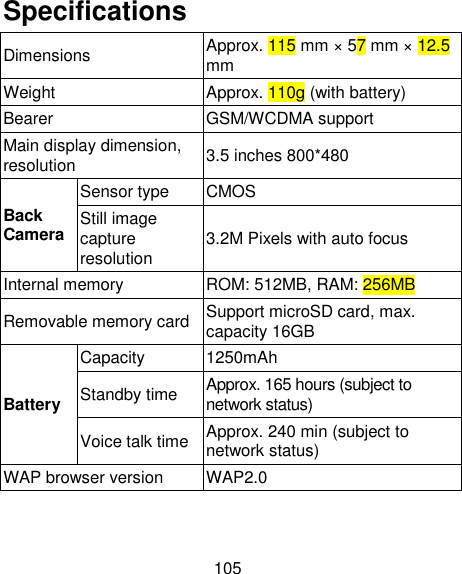
ZTE MOVISTARPRIME WCDMA/GSM (GPRS) Dual-Mode Digital Mobile Phone User Manual San Francisco
ZTE Corporation WCDMA/GSM (GPRS) Dual-Mode Digital Mobile Phone San Francisco
UserManual.wiki
>
ZTE
>
MOVISTARPRIME User Manual
Movistar Prime uers manual_rev2
Navigation menu
Upload a User Manual
Namespaces
Wiki Guide
HTML
PDF
Info
Views
User Manual
Discussion / Help
Navigation
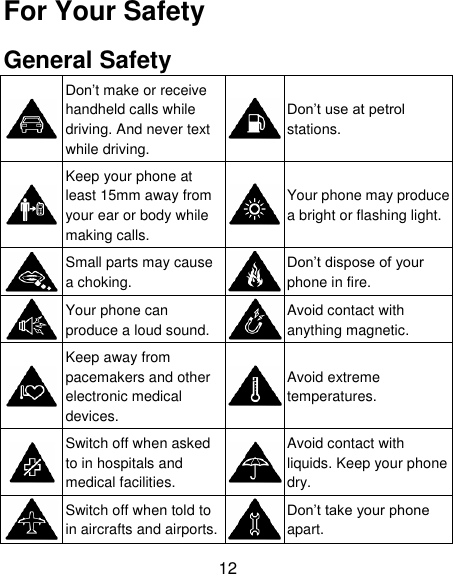
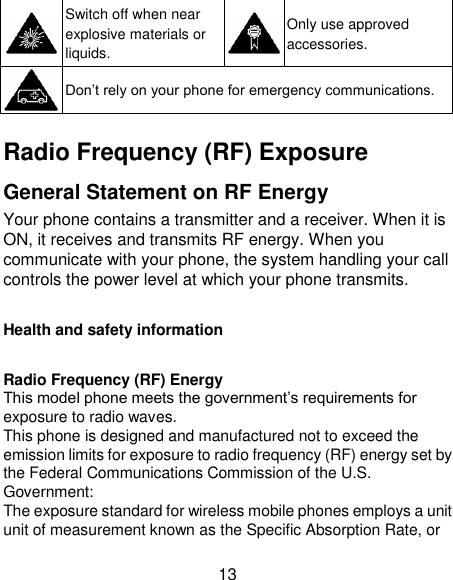

![19 Do not attempt to disassemble your phone or its accessories, only authorized personnel can do so. Do not expose your phone or its accessories to extreme temperatures, minimum - [5] and maximum + [50] degrees Celsius. Please check local regulations for disposal of electronic products. Do not carry your phone in your back pocket as it could break when you sit down. Small Children Do not leave your phone and its accessories within the reach of small children or allow them to play with it. They could hurt themselves or others, or could accidentally damage the phone. Your phone contains small parts with sharp edges that may cause an injury or may become detached and create a choking hazard. Demagnetization To avoid the risk of demagnetization, do not allow electronic devices or magnetic media close to your phone for a long time. Electrostatic Discharge (ESD) Do not touch the SIM card‘s metal connectors.](https://usermanual.wiki/ZTE/MOVISTARPRIME/User-Guide-1480257-Page-19.png)


![61 Email Tap Home Key > > Email. You can enter the Email Screen to setup your Email account and exchange Emails. Creating an Email account 1. Enter your Email address and password. Then tap Next when you enter the Email Screen for the first time. 2. Select the type of your account, edit the incoming server settings, and then tap Next or Next [Check]. After you press Next [Check], your phone will check the incoming server settings. If you are notified that setup could not be finished, you might need to correct some settings to finish it. If there is any problem, please contact your mobile service provider and Email service provider. 3. Edit the outgoing server settings and tap Next or Next [Check]. After you press Next [Check], your phone will check the outgoing server settings. NOTE: Your MOVISTAR PRIME knows the client settings for lots of Email service providers. If the Email service you use is from those providers, the phone will automatically check the incoming and outgoing settings after you enter your Email account and password. 4. Set the Email checking frequency, select whether to use](https://usermanual.wiki/ZTE/MOVISTARPRIME/User-Guide-1480257-Page-61.png)