ZTE T54 WCDMA/GSM(GPRS) Dual-Mode Digital Mobile Phone User Manual Exhibit09 user manual rev2
ZTE Corporation WCDMA/GSM(GPRS) Dual-Mode Digital Mobile Phone Exhibit09 user manual rev2
UserManual.wiki
>
ZTE
>
T54 User Manual
Exhibit09.user_manual_rev2
Navigation menu
Upload a User Manual
Namespaces
Wiki Guide
HTML
PDF
Info
Views
User Manual
Discussion / Help
Navigation


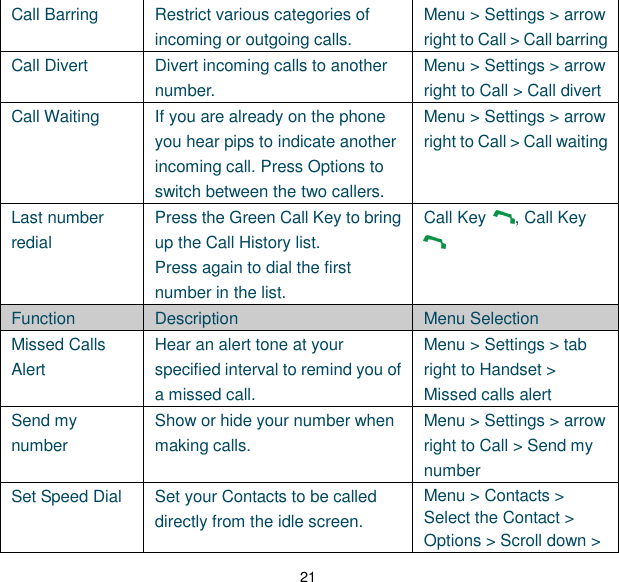
![28 SMS Message count Number of characters built-in Dictionary which is called My Words. Press the Options key to access My Words to Add new words to the available lists 3.4 How to add words to the built in Dictionary (My Words) From predictive text mode enter words directly by choosing Spell Word? From the text entry screen press the Options key and select My Words The first time you use My Words press OK to Add a new word Type the new word using the ABC, abc or 123 modes then press OK to Save it In My Words you can press the Options key to Edit, Delete or Delete all words. 3.5 Special Characters and SMS Message Length € \ │ [ ] { } Each time one of these symbols is used 2 standard SMS characters are transmitted. … This symbol is not part of the standard SMS character set. Each time one of these symbols is used the entire message is converted to Unicode.](https://usermanual.wiki/ZTE/T54/User-Guide-1482037-Page-28.png)