ZTE Z700 GSM/WCDMA/LTE CPE User Manual
ZTE Corporation GSM/WCDMA/LTE CPE
UserManual.wiki
>
ZTE
>
Z700 User Manual
User Manual
Navigation menu
Upload a User Manual
Namespaces
Wiki Guide
HTML
PDF
Info
Views
User Manual
Discussion / Help
Navigation

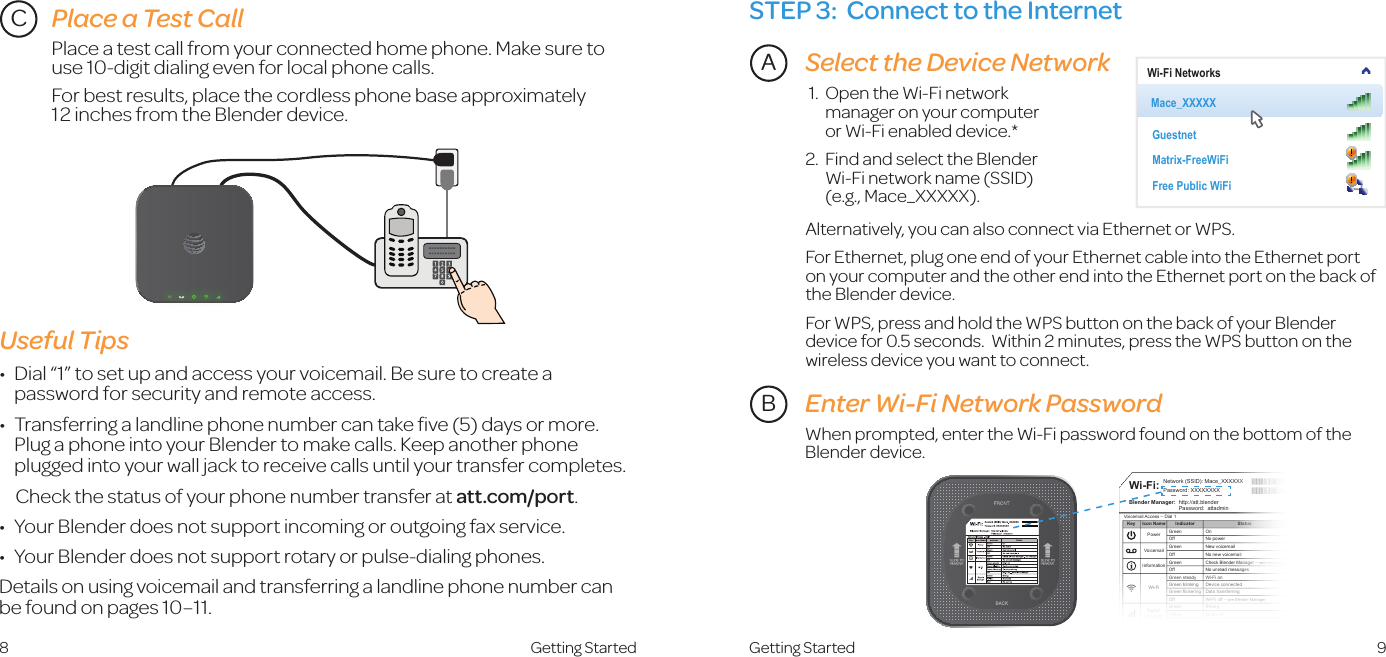
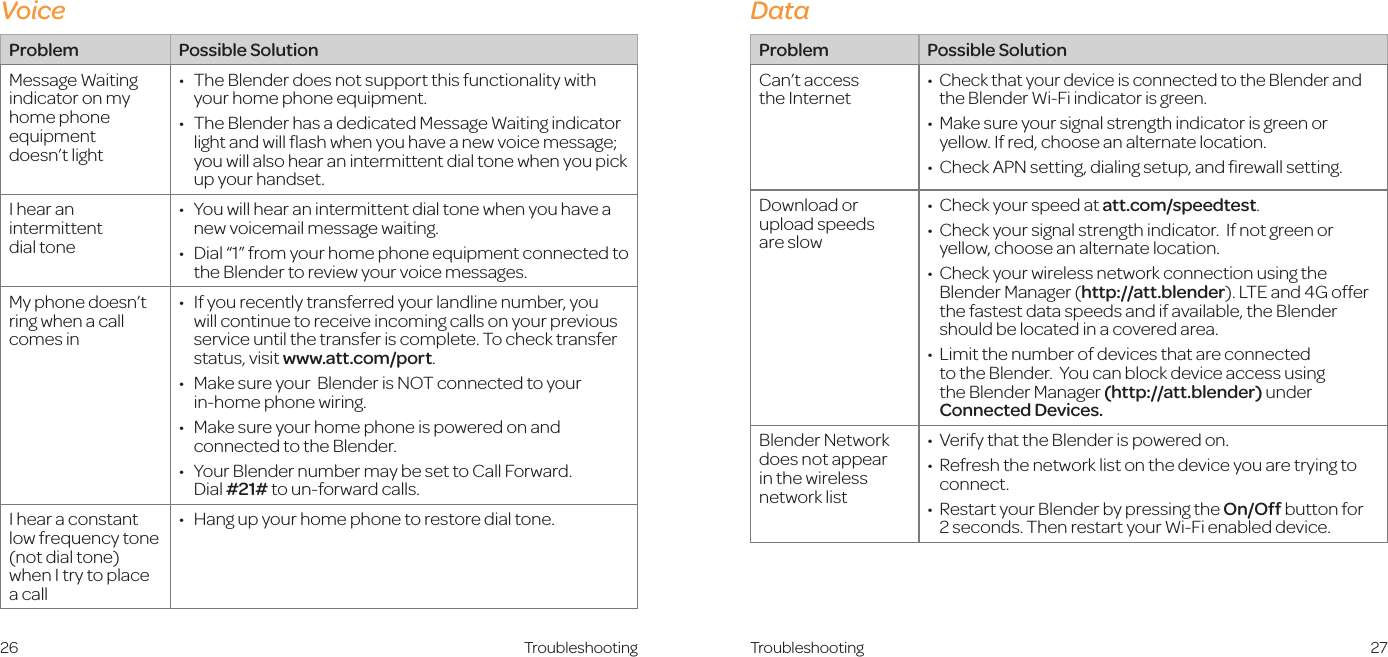
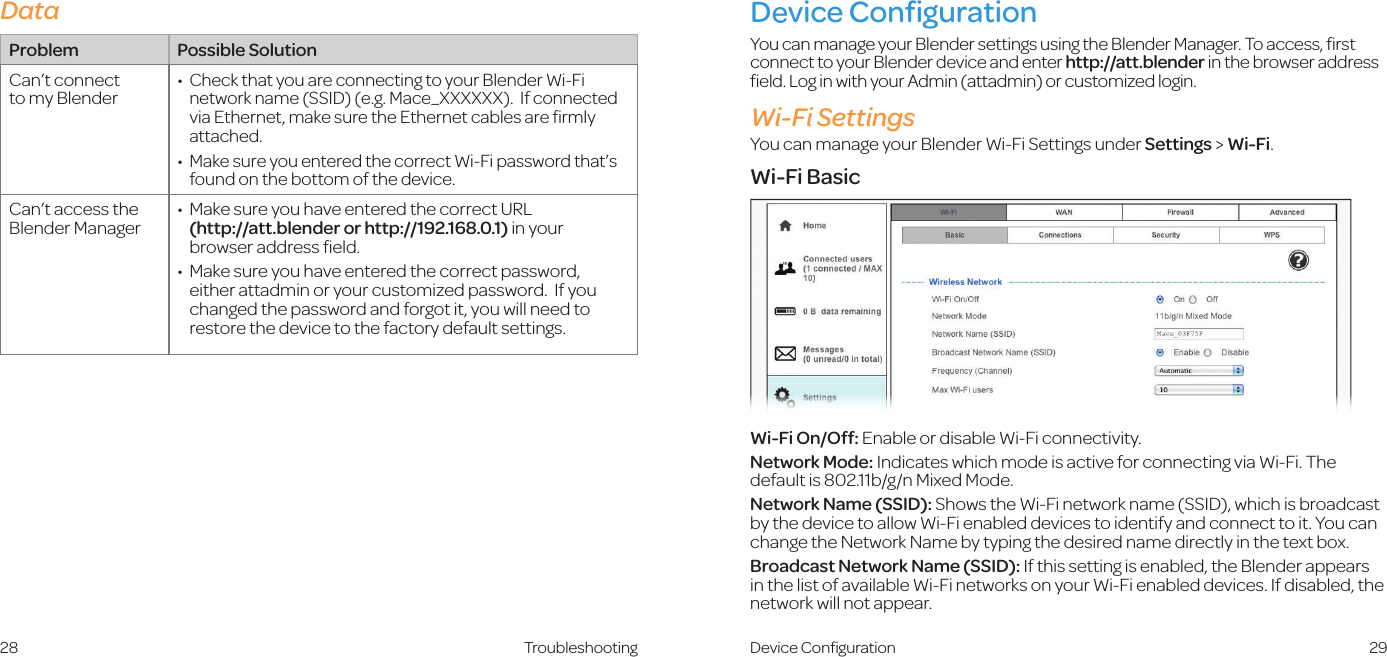
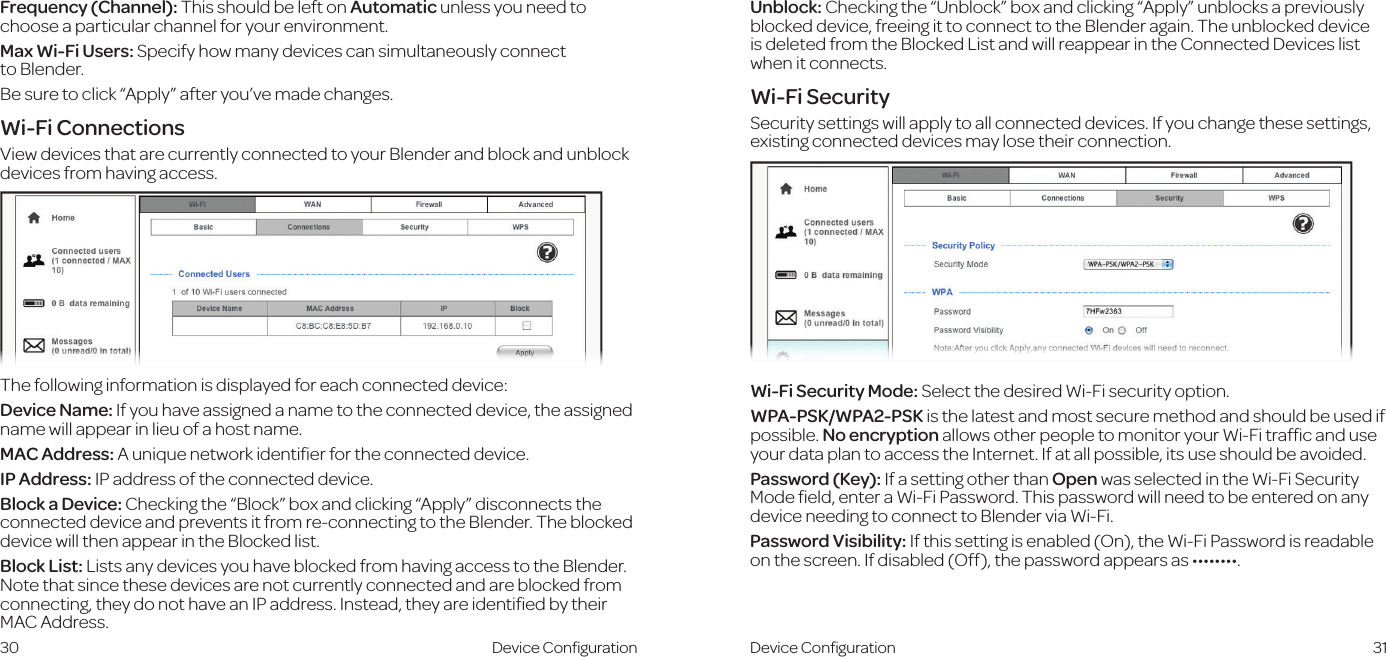
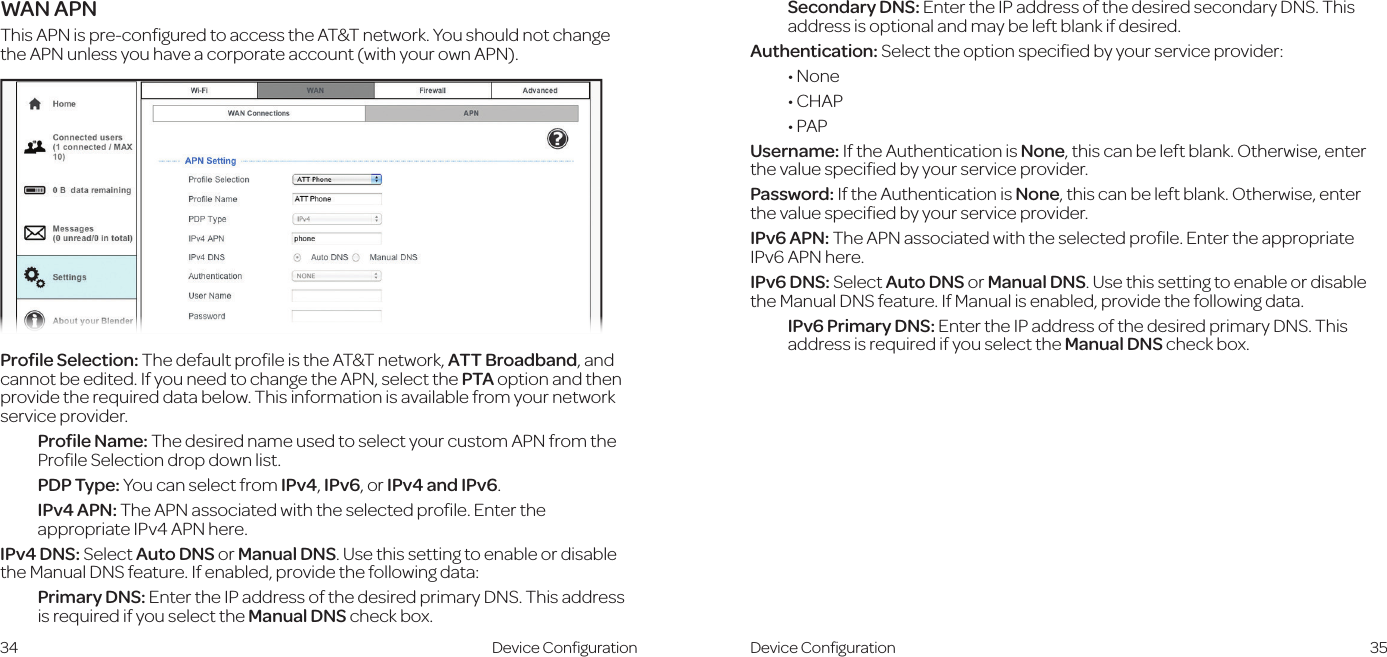
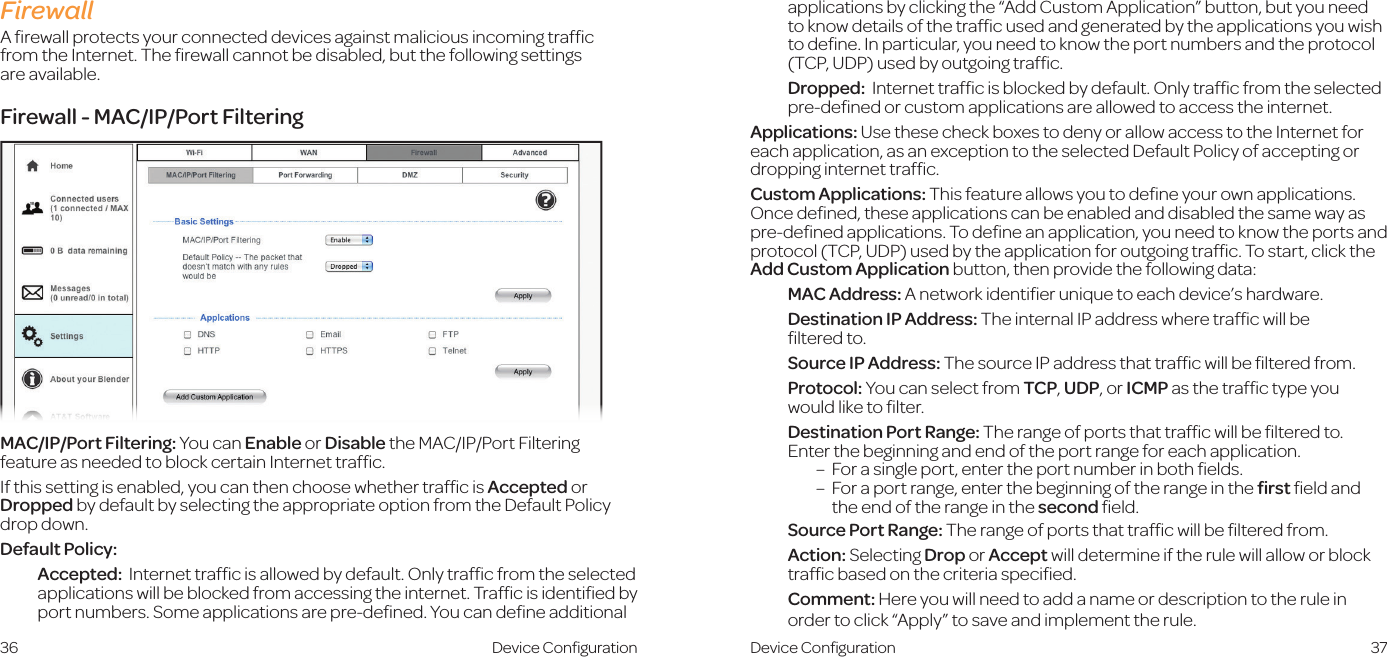
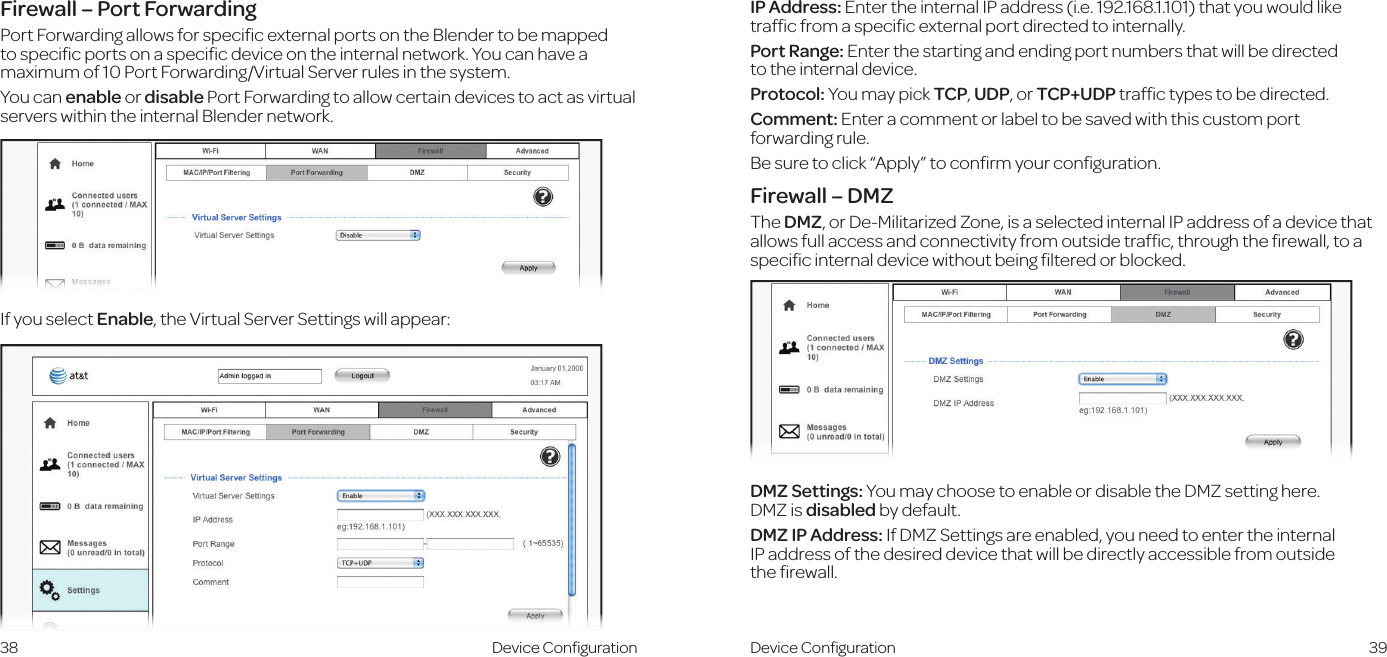
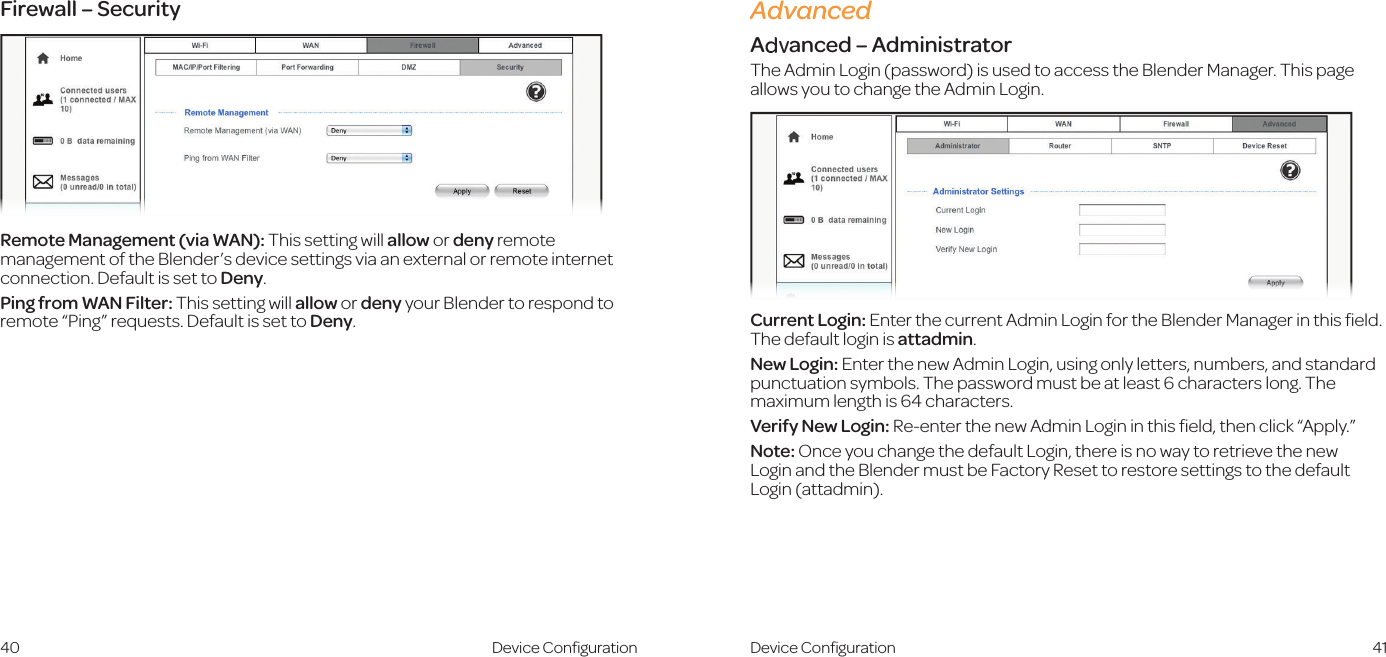
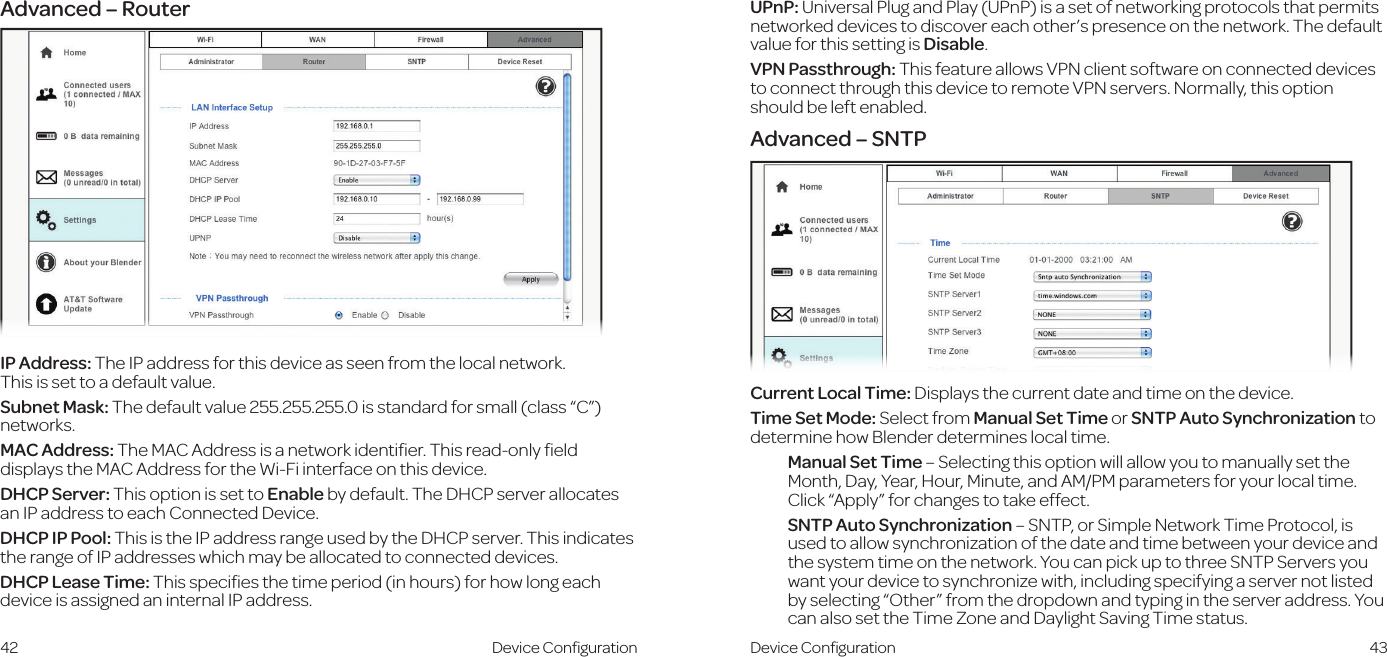
![12 13Blender ManagerThe Blender Manager allows you to easily manage your Blender device. With the Blender Manager, you can:• Customize settings• Change your Wi-Fi network name and password• Check signal strength, data usage and SMS messages• Get help and informationTo access the Blender Manager, first connect to your Blender device. In your browser address field, enter http://att.blender. Log in with your Web password (attadmin).A navigation panel is included at the left of the browser interface on each page and contains the following:• Home – displays general device information, as well as current network connection (LTE, 4G, 3G) and battery charge. • Connected Devices – view devices currently connected to your Blender device and blocked devices.• Data Usage – check your billing month-to-date data usage and days remaining in billing cycle.• Messages – view messages from AT&T (See SMS Messages on page 16). • Settings – customize your device’s Wi-Fi and security settings (See Wi-Fi Settings on page 29 for detailed instructions).• About your Blender – get details regarding current device status and device information.• AT&T Software Update – view software updates that are delivered automatically over the AT&T cellular network.CallingMaking CallsUsing a phone connected to your Blender, place and receive calls as you normally would. The Blender supports both cordless and corded phone dialing methods.Note: You will need to dial 10 digits even for local numbers.Three-Way CallingWhile on an existing call, press the Flash (or Talk) key on your phone to put the first party on hold. When you hear a dial tone, dial the second party’s number (wait up to four [4] seconds). When the second party answers, press the Flash (or Talk) key again to complete the three-way connection. If the second party does not answer, press the Flash (or Talk) key to end the connection and return to the first party.Note: If your phone does not have a Flash (or Talk) key, use the off-hook mechanism supported by your phone instead.Call WaitingYou will hear two tones if someone calls while you are already on a call. To hold the current call and accept the waiting call, press the Flash (or Talk) key. You can press the Flash (or Talk) key anytime to switch back and forth between calls.To clear the current call and accept the waiting call, enter 1 and press the Flash (or Talk) key. To reject (User Busy) the waiting call, enter 0 and press the Flash (or Talk) key. Getting StartedUsing Your DeviceUsing Your Device](https://usermanual.wiki/ZTE/Z700/User-Guide-1962087-Page-11.png)