ZTE ZTEB2017G LTE/WCDMA/CDMA/GSM (GPRS) Multi-Mode Digital Mobile Phone User Manual SRQ ZTEB2017G
ZTE Corporation LTE/WCDMA/CDMA/GSM (GPRS) Multi-Mode Digital Mobile Phone SRQ ZTEB2017G
ZTE >
Contents
- 1. User Manuel
- 2. User Manual
- 3. Users Manual
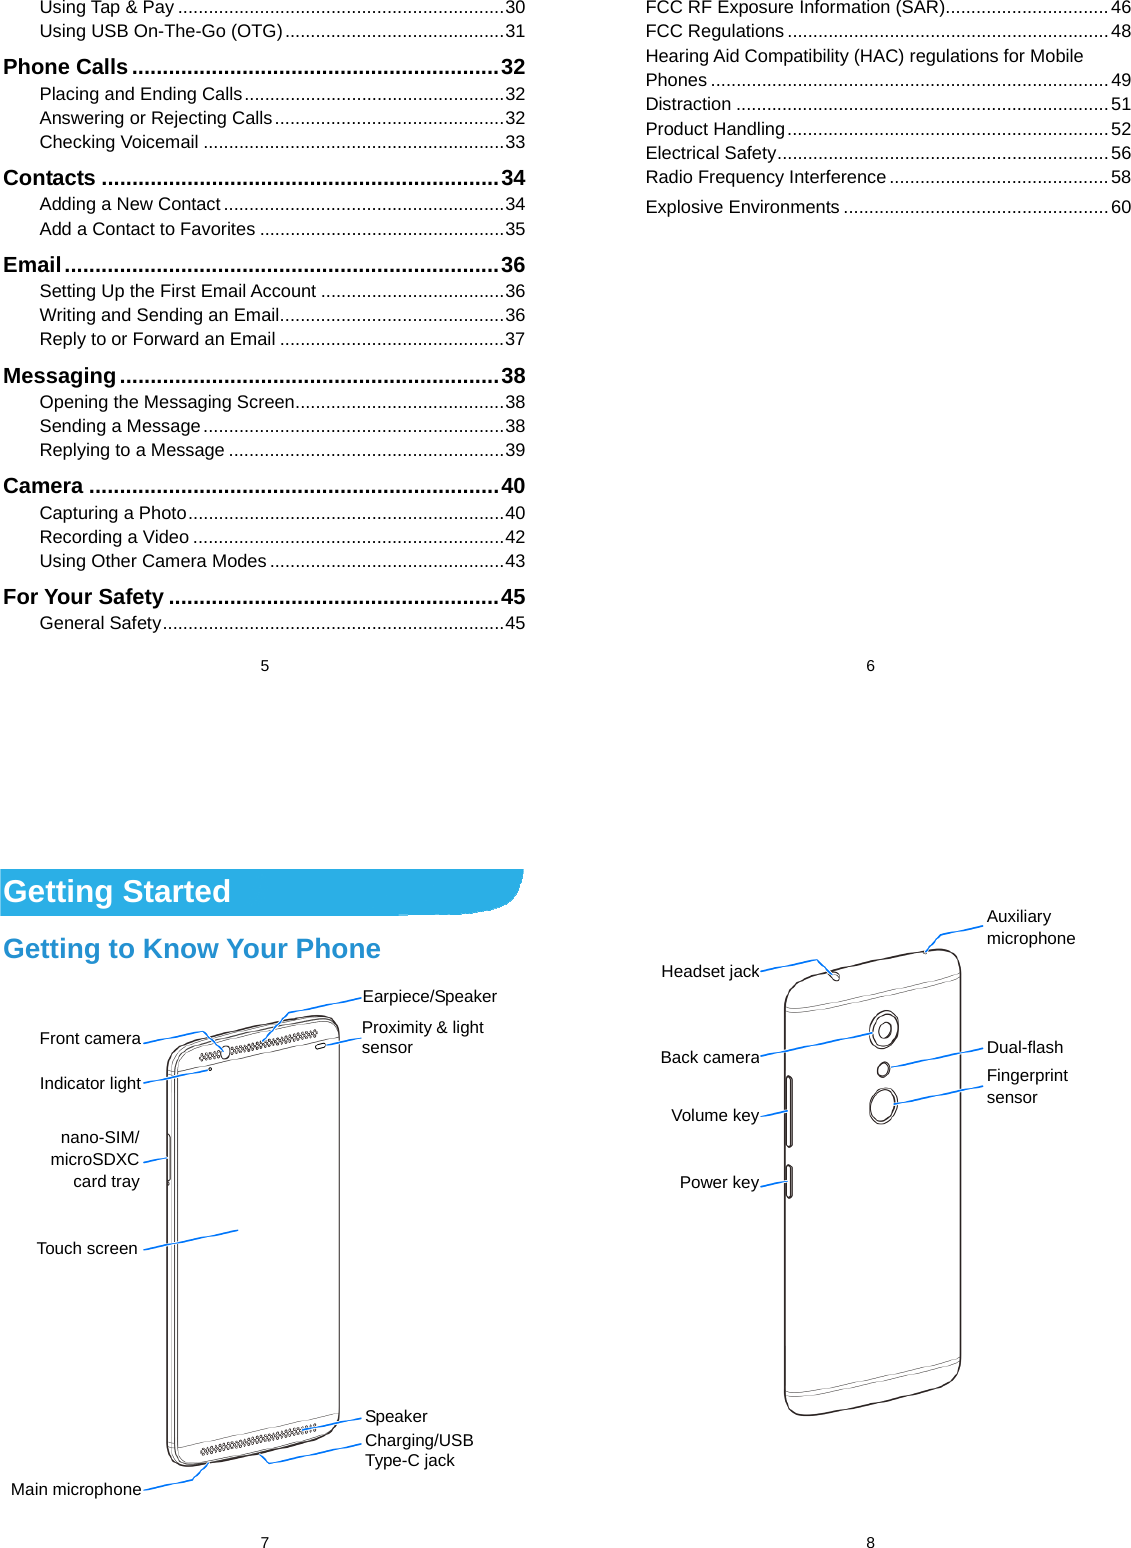
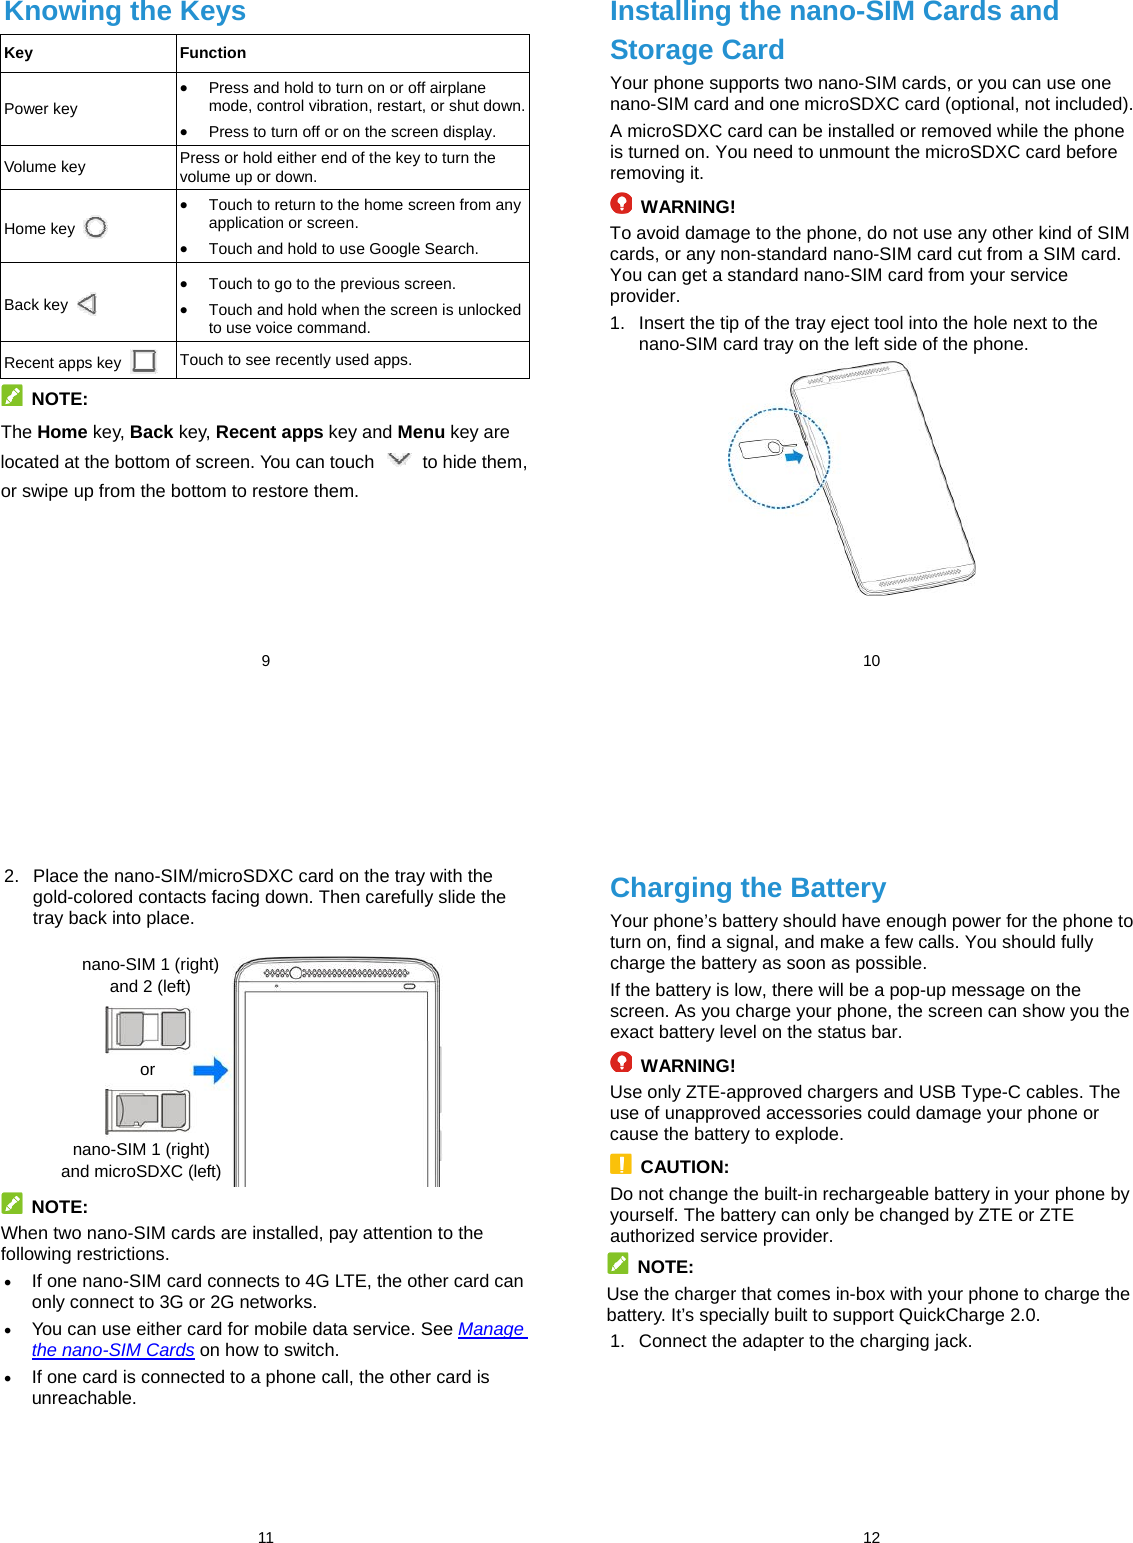
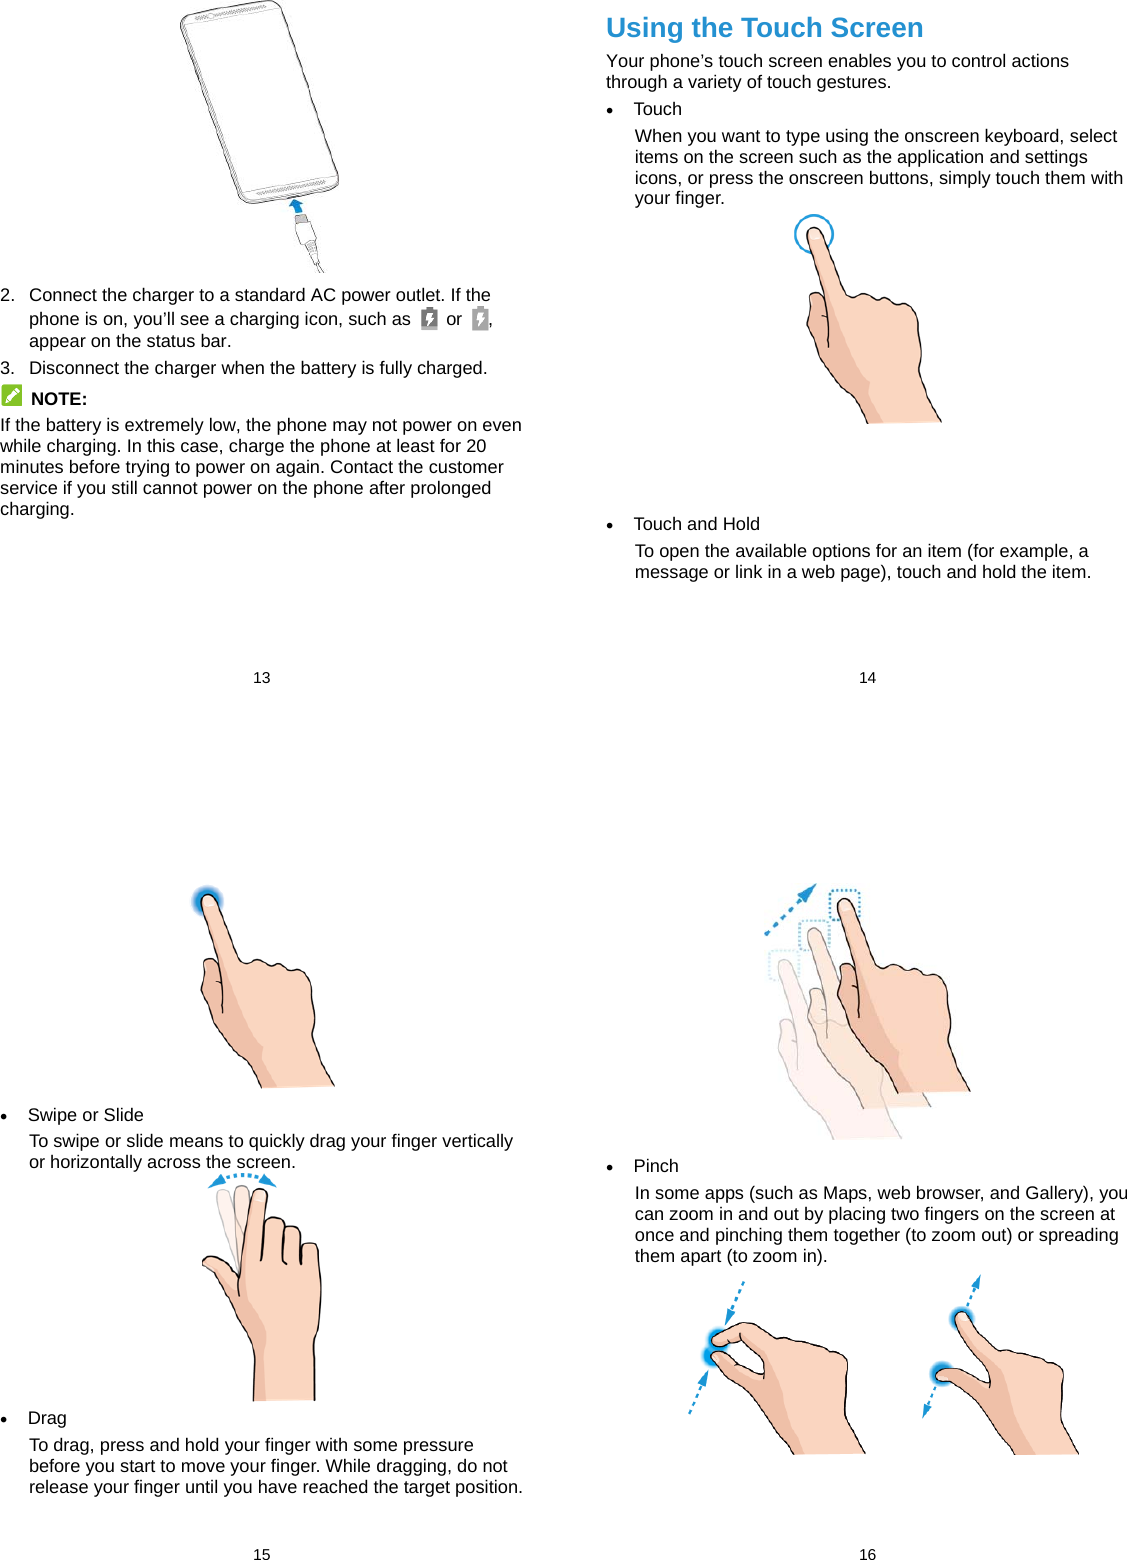
User Manuel


![53 Do not paint your phone or its accessories. Do not attempt to disassemble your phone or its accessories. Only authorized personnel can do so. Do not expose or use your phone or its accessories in a environment with or that can reach extreme temperatures, minimum - [5] and maximum + [50] degrees Celsius. Do not place your phone inside or near heating equipments or high pressure containers, such as water heaters, microwave ovens, or hot cooking utensils. Otherwise, your phone may be damaged. Please check local regulations for disposal of electronic products. Do not carry your phone in your back pocket as it could break when you sit down. Small Children Do not leave your phone and its accessories within the reach of small children or allow them to play with it. They could hurt themselves or others, or could accidentally damage the phone. Your phone contains small parts with sharp edges that may cause an injury or may become detached and create a choking hazard. Demagnetization To avoid the risk of demagnetization, do not allow electronic 54 devices or magnetic media to be close to your phone for a long time. Electrostatic Discharge (ESD) Do not touch the nano-SIM card’s metal connectors. Antenna Do not touch the antenna unnecessarily. Normal Use Position When placing or receiving a phone call, hold your phone to your ear, with the bottom towards your mouth. Air Bags Do not place a phone in the area over an air bag or in the air bag deployment area as an airbag inflates with great force and serious injury could result. Store the phone safely before driving your vehicle. Seizures/Blackouts The phone can produce a bright or flashing light. A small percentage of people may be susceptible to blackouts or seizures (even if they have never had one before) when exposed to flashing lights or light patterns such as when playing games or watching video. If you have experienced seizures or blackouts or have a family history of such occurrences, please consult a 55 physician. Repetitive Strain Injuries To minimize the risk of Repetitive Strain Injury (RSI) when texting or playing games with your phone: Do not grip the phone too tightly. Press the buttons lightly. Use the special features which are designed to minimize the times of pressing buttons, such as Message Templates and Predictive Text. Take many breaks to stretch and relax. Emergency Calls This phone, like any wireless phone, operates using radio signals, which cannot guarantee connection in all conditions. Therefore, you must never rely solely on any wireless phone for emergency communications. Loud Noise This phone is capable of producing loud noises, which may damage your hearing. Turn down the volume before using headphones, Bluetooth stereo headsets or other audio devices. 56 Phone Heating Your phone may become warm during charging and during normal use. Electrical Safety Accessories Use only approved accessories. Do not connect with incompatible products or accessories. Take care not to touch or allow metal objects, such as coins or key rings, to contact or short-circuit in the battery terminals. Never puncture the surface of the battery with sharp objects. Connection to a Car Seek professional advice when connecting a phone interface to the vehicle electrical system. Faulty and Damaged Products Do not attempt to disassemble the phone or its accessories. Only qualified personnel can service or repair the phone or its accessories. If your phone (or its accessories) has been submerged in water, punctured, or subjected to a severe fall, do not use it until you have taken it to be checked at an authorized service center.](https://usermanual.wiki/ZTE/ZTEB2017G.User-Manuel/User-Guide-3141513-Page-14.png)