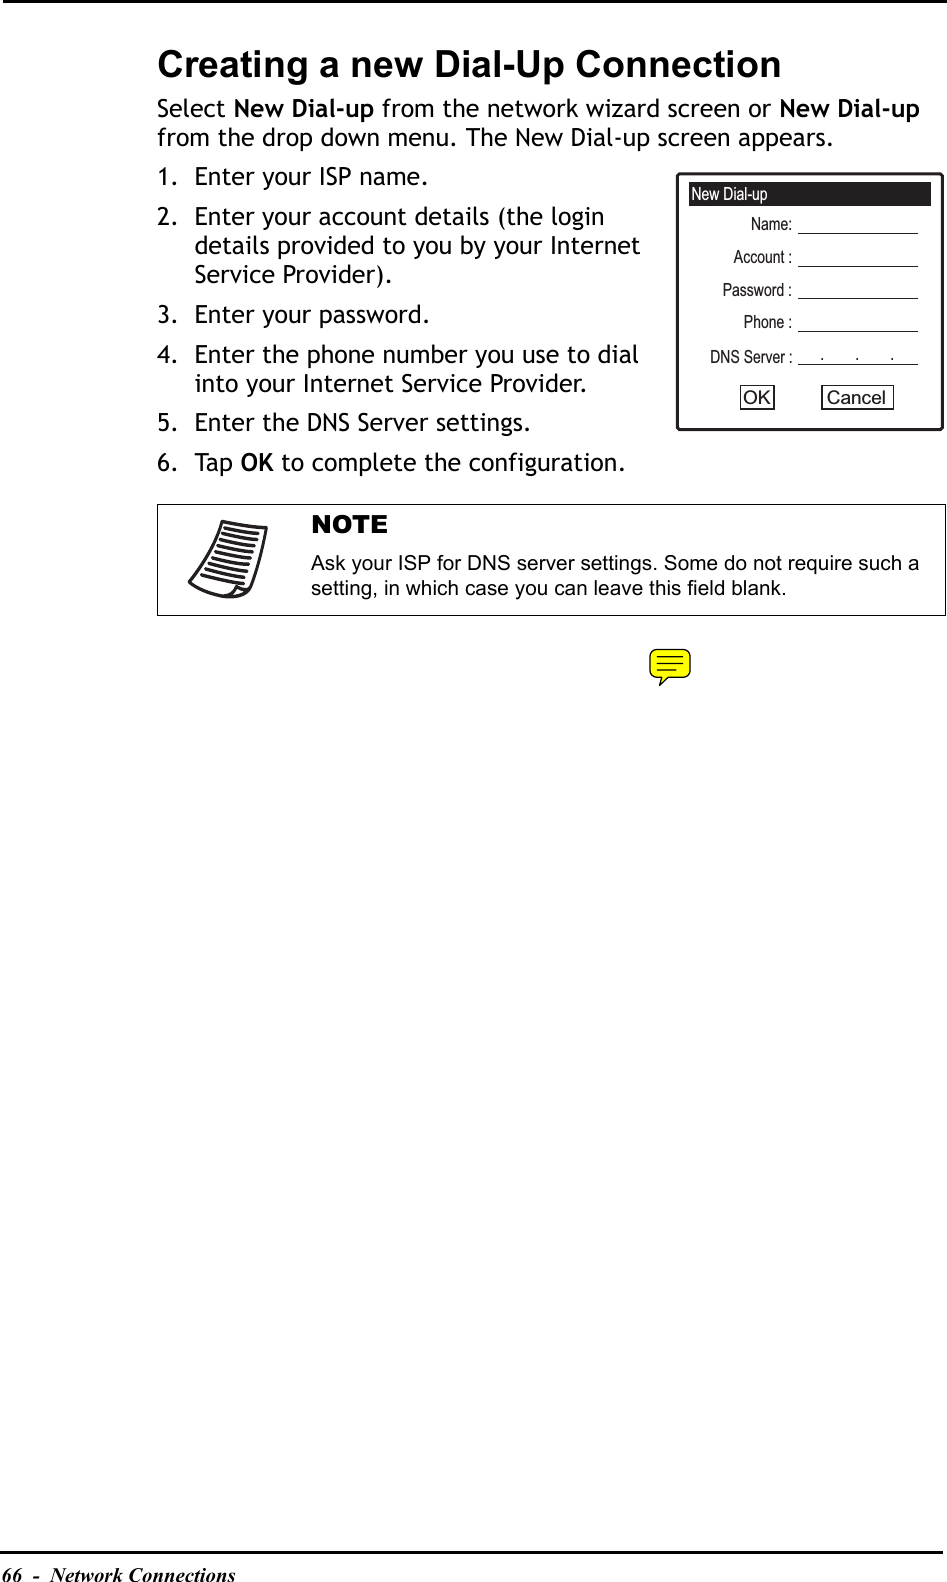
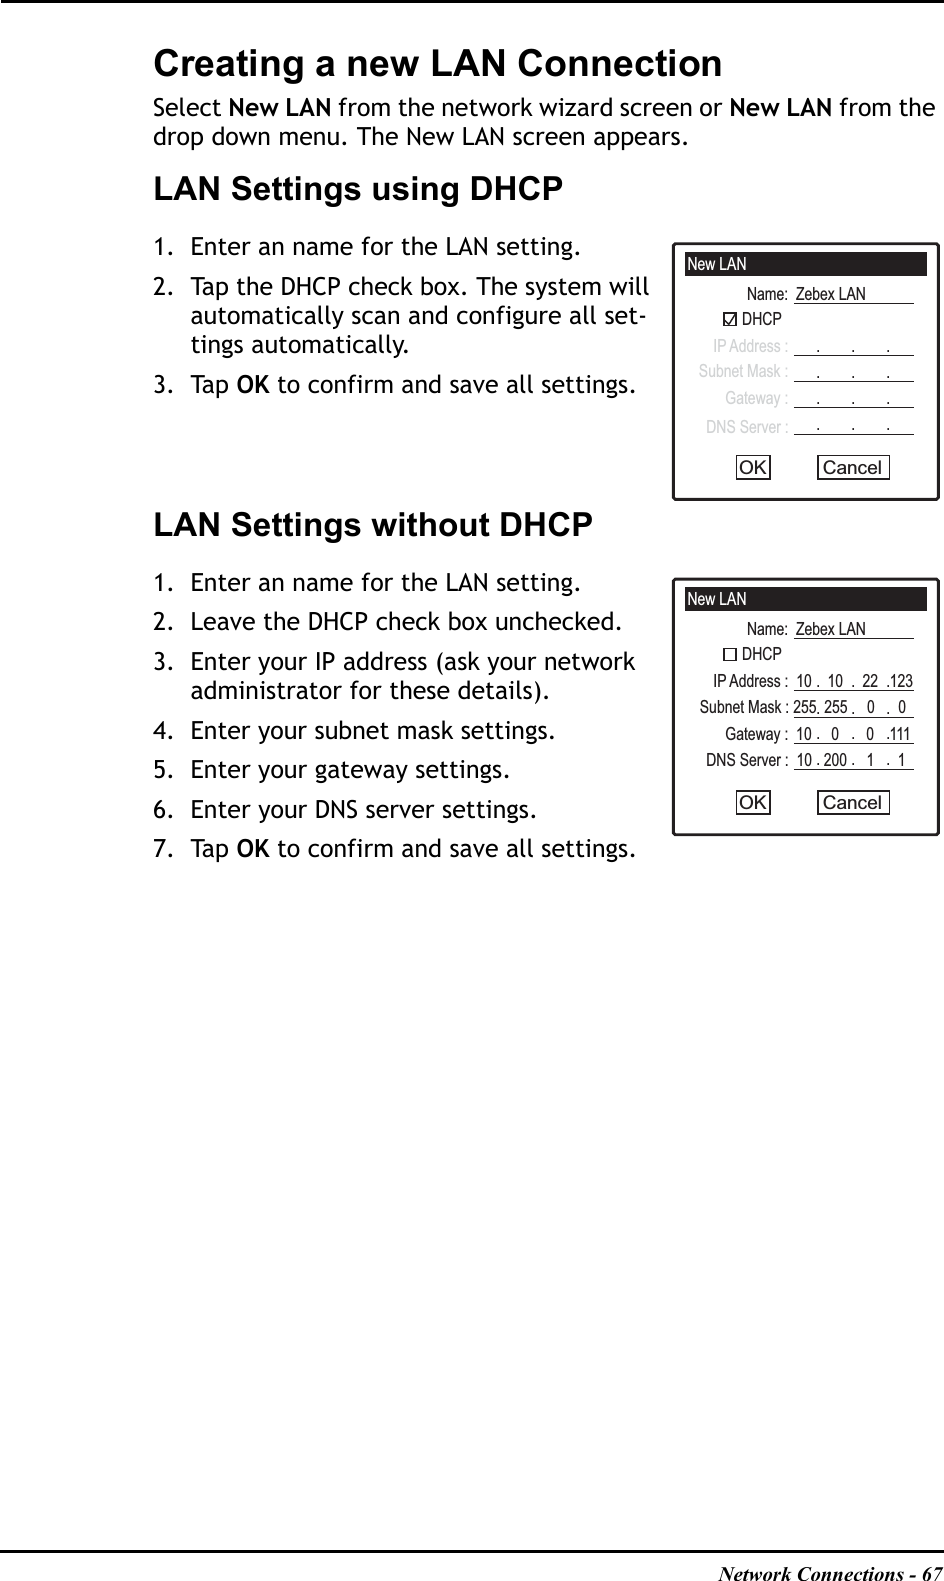
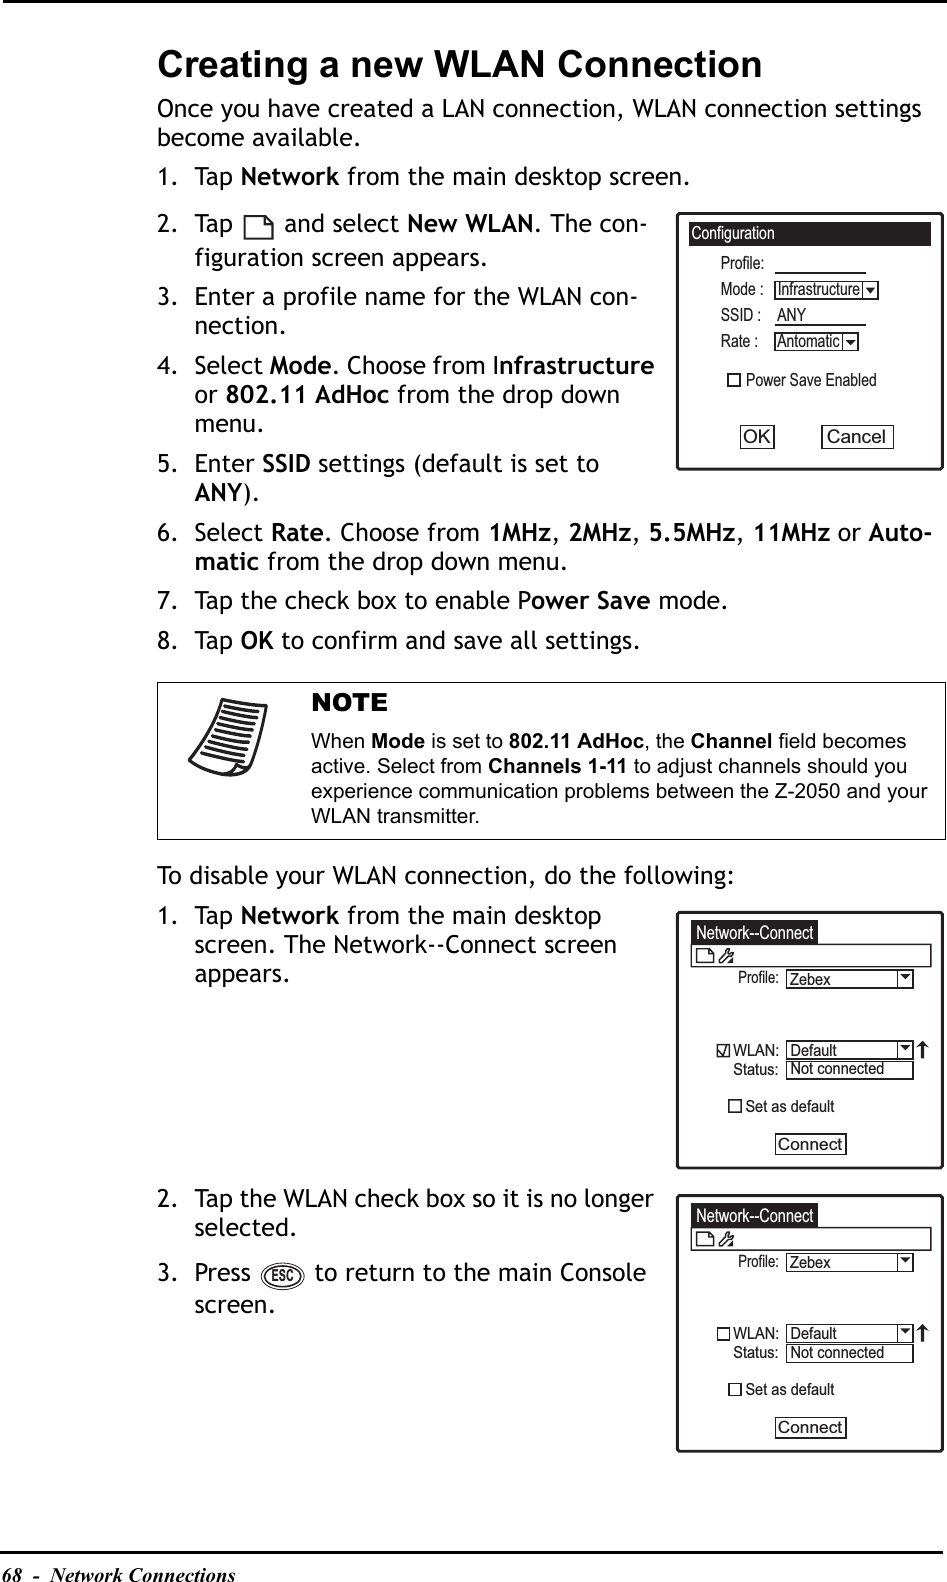
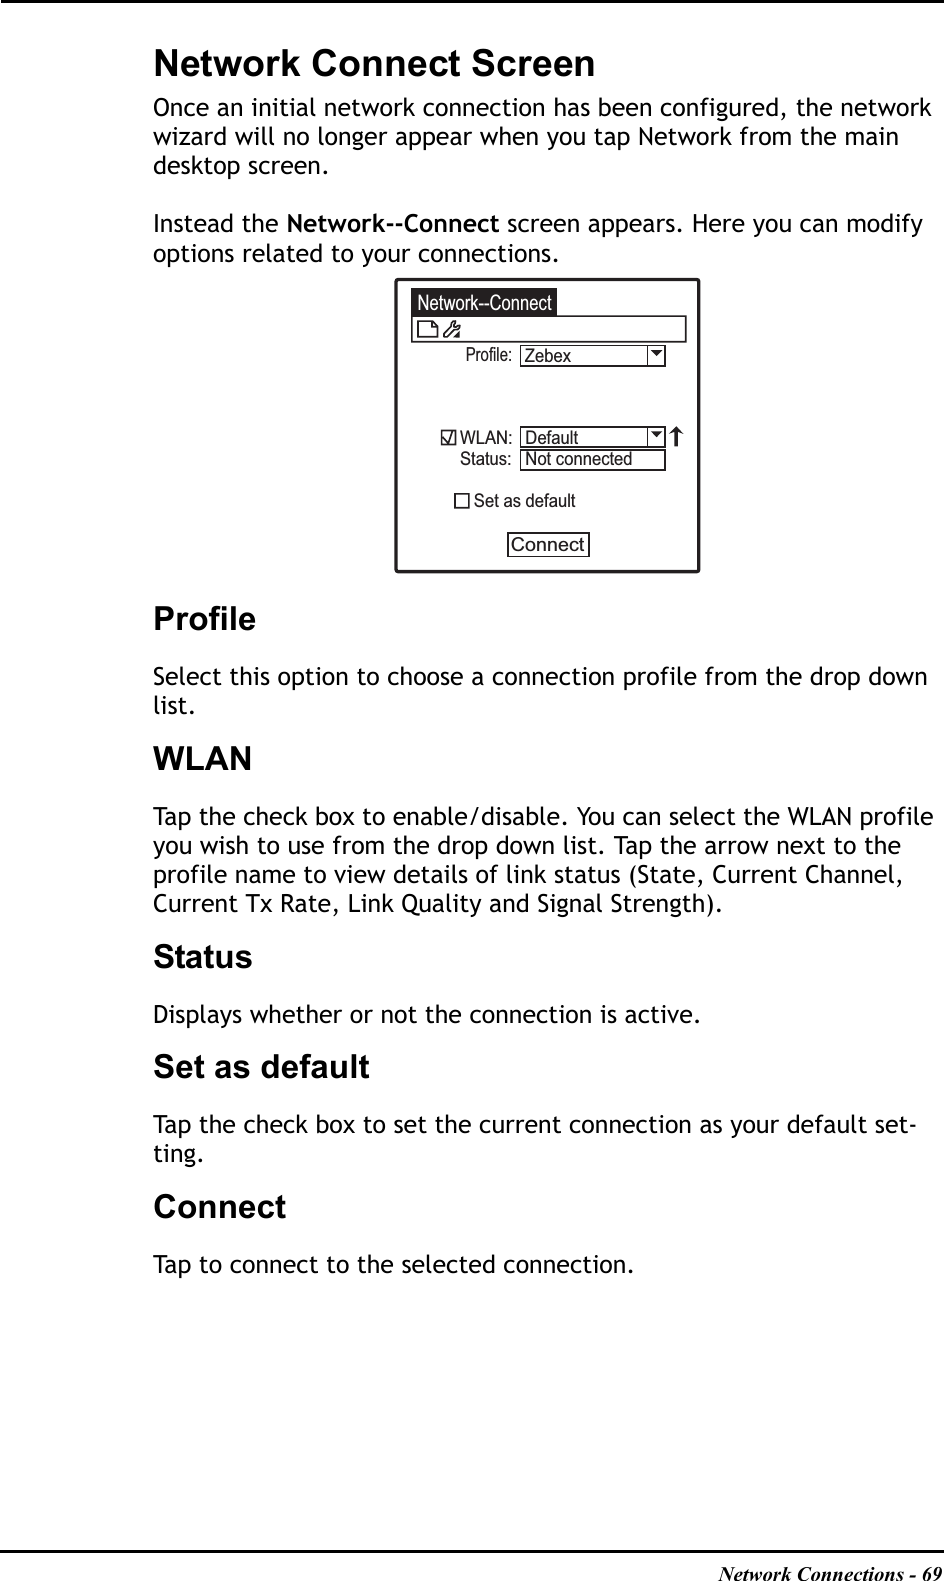
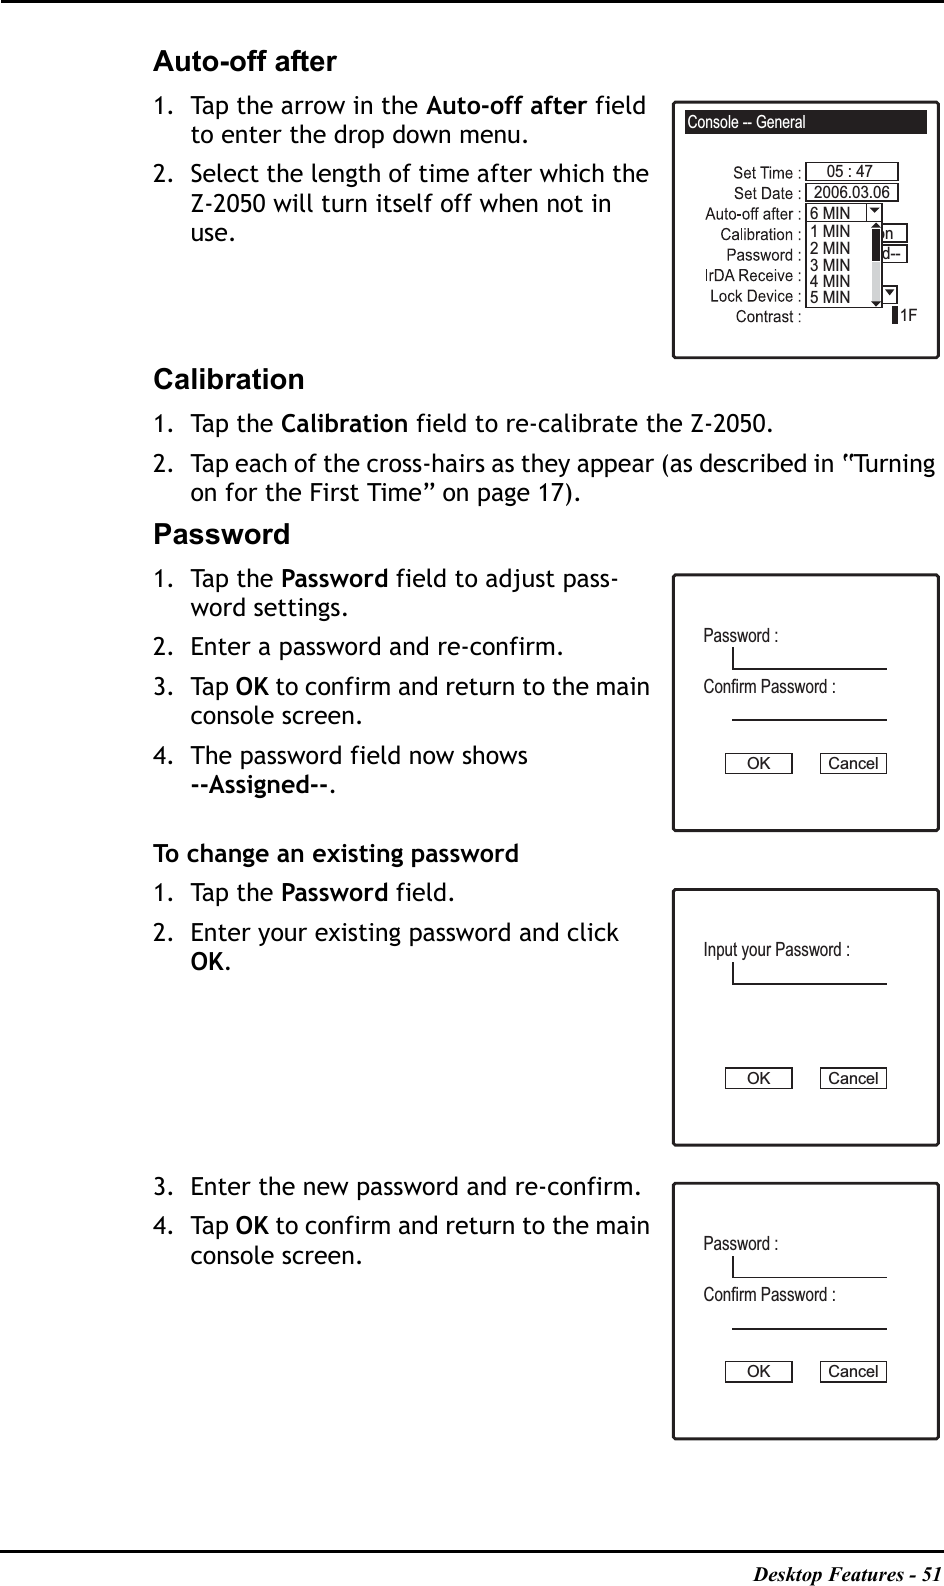
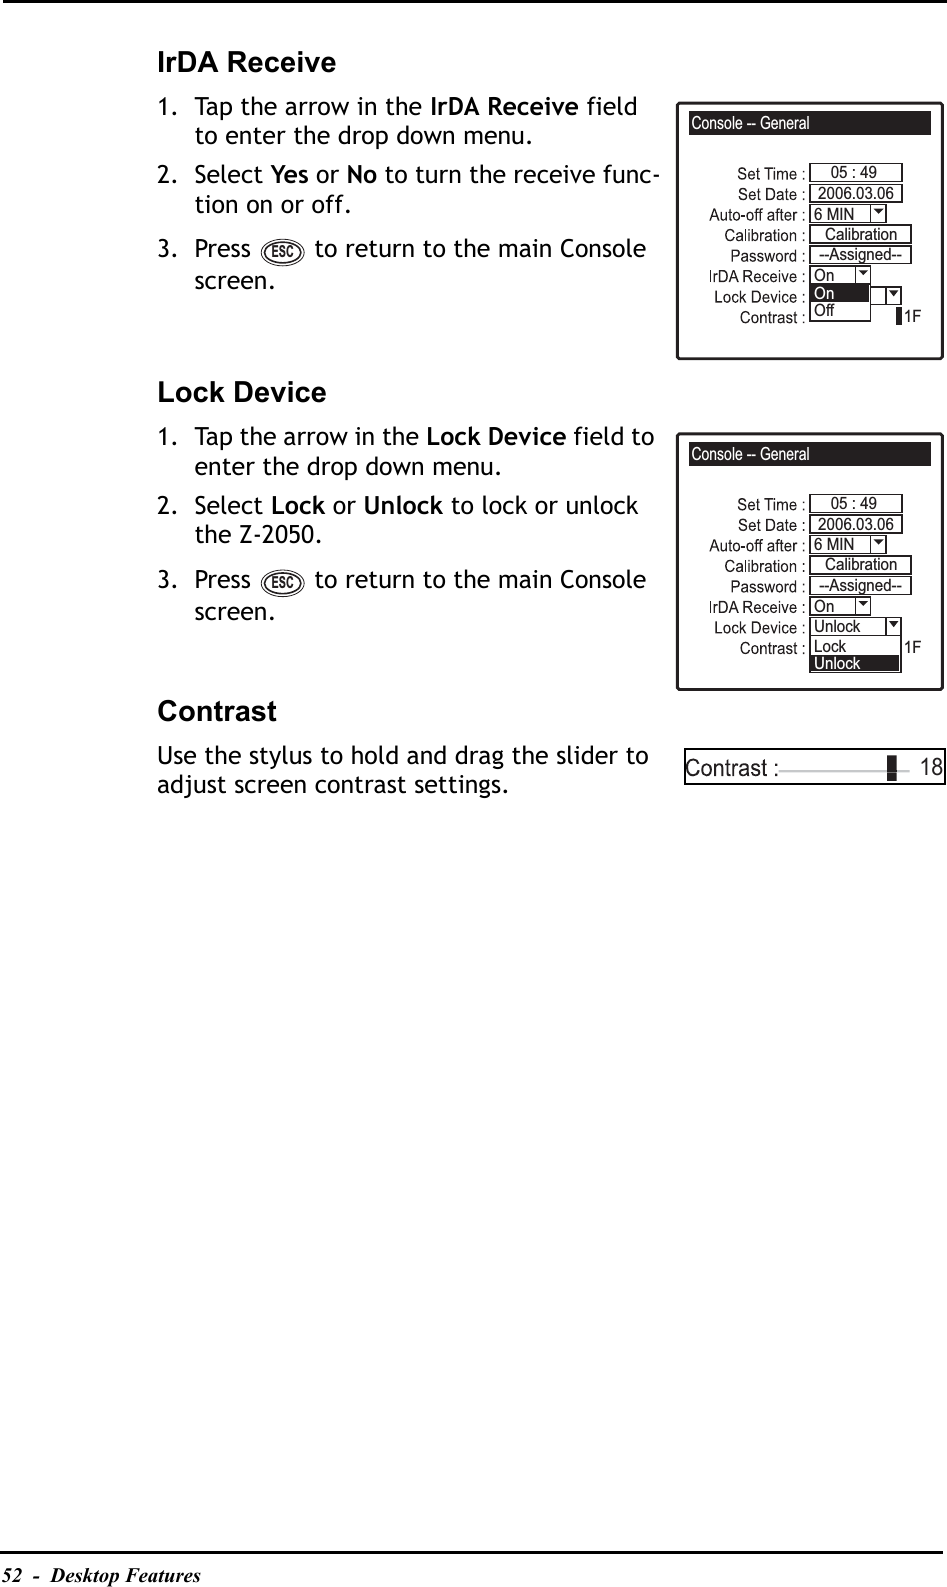
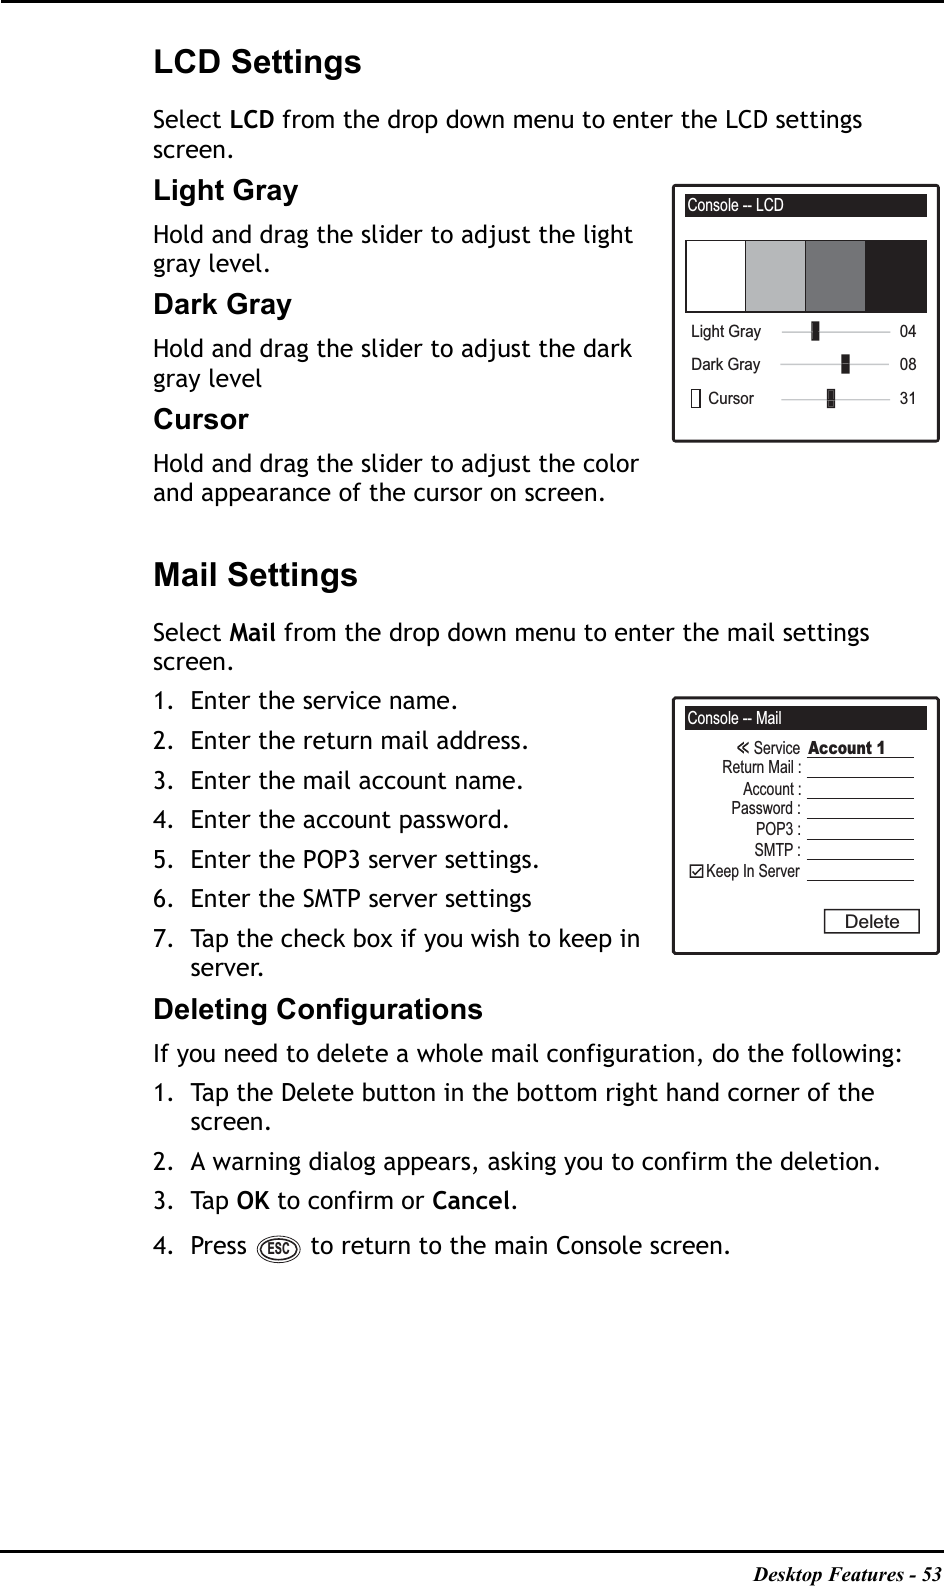
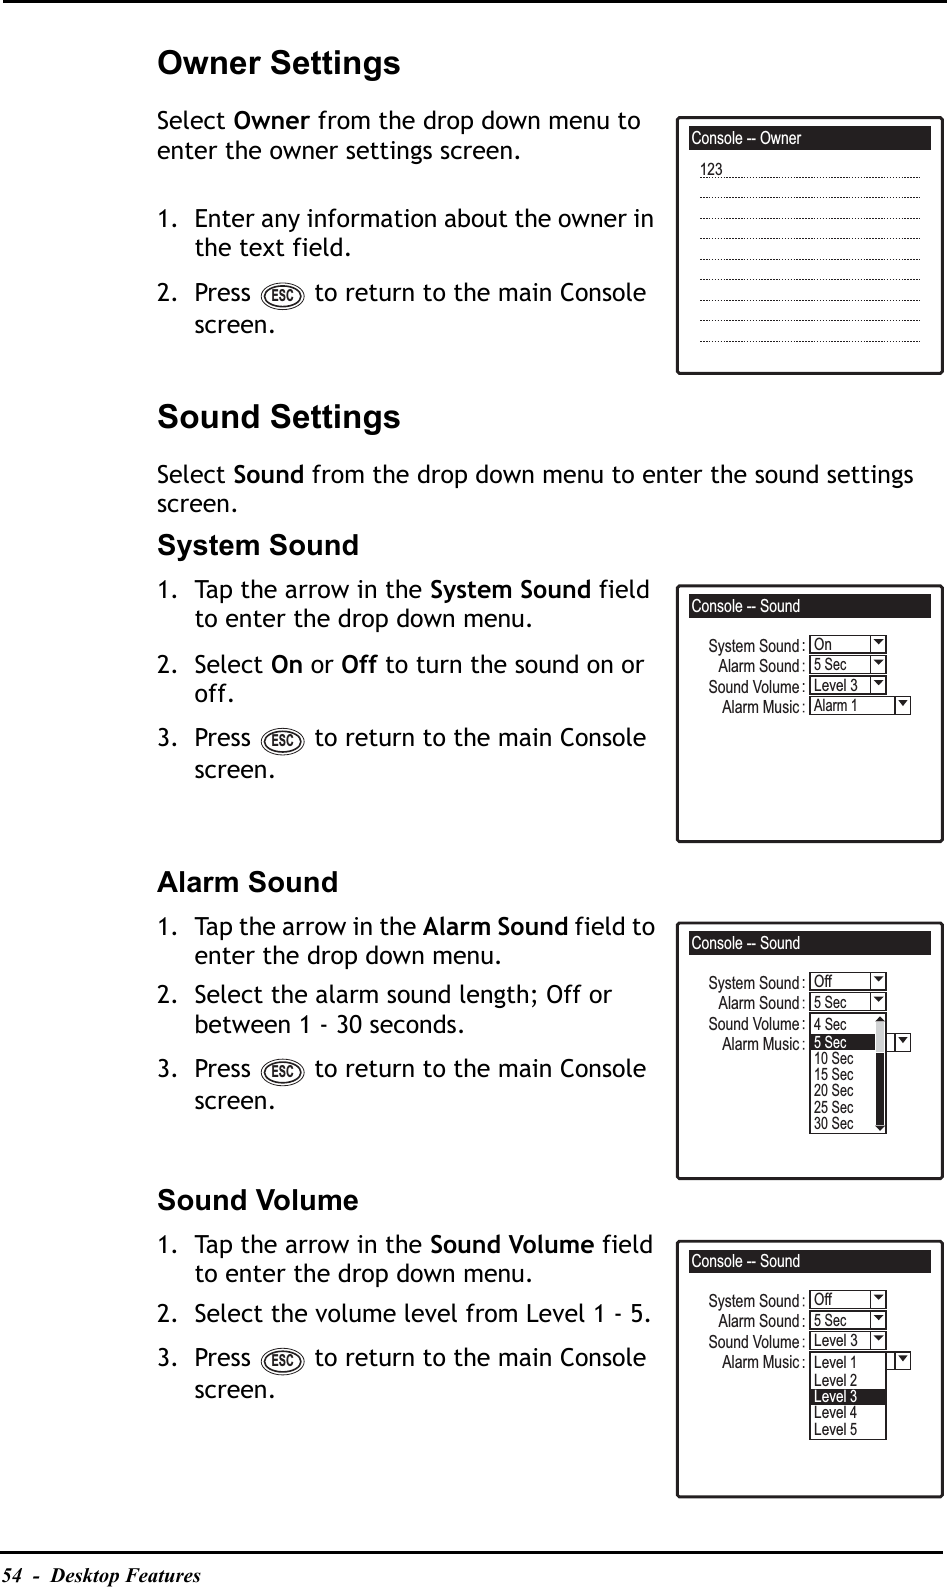
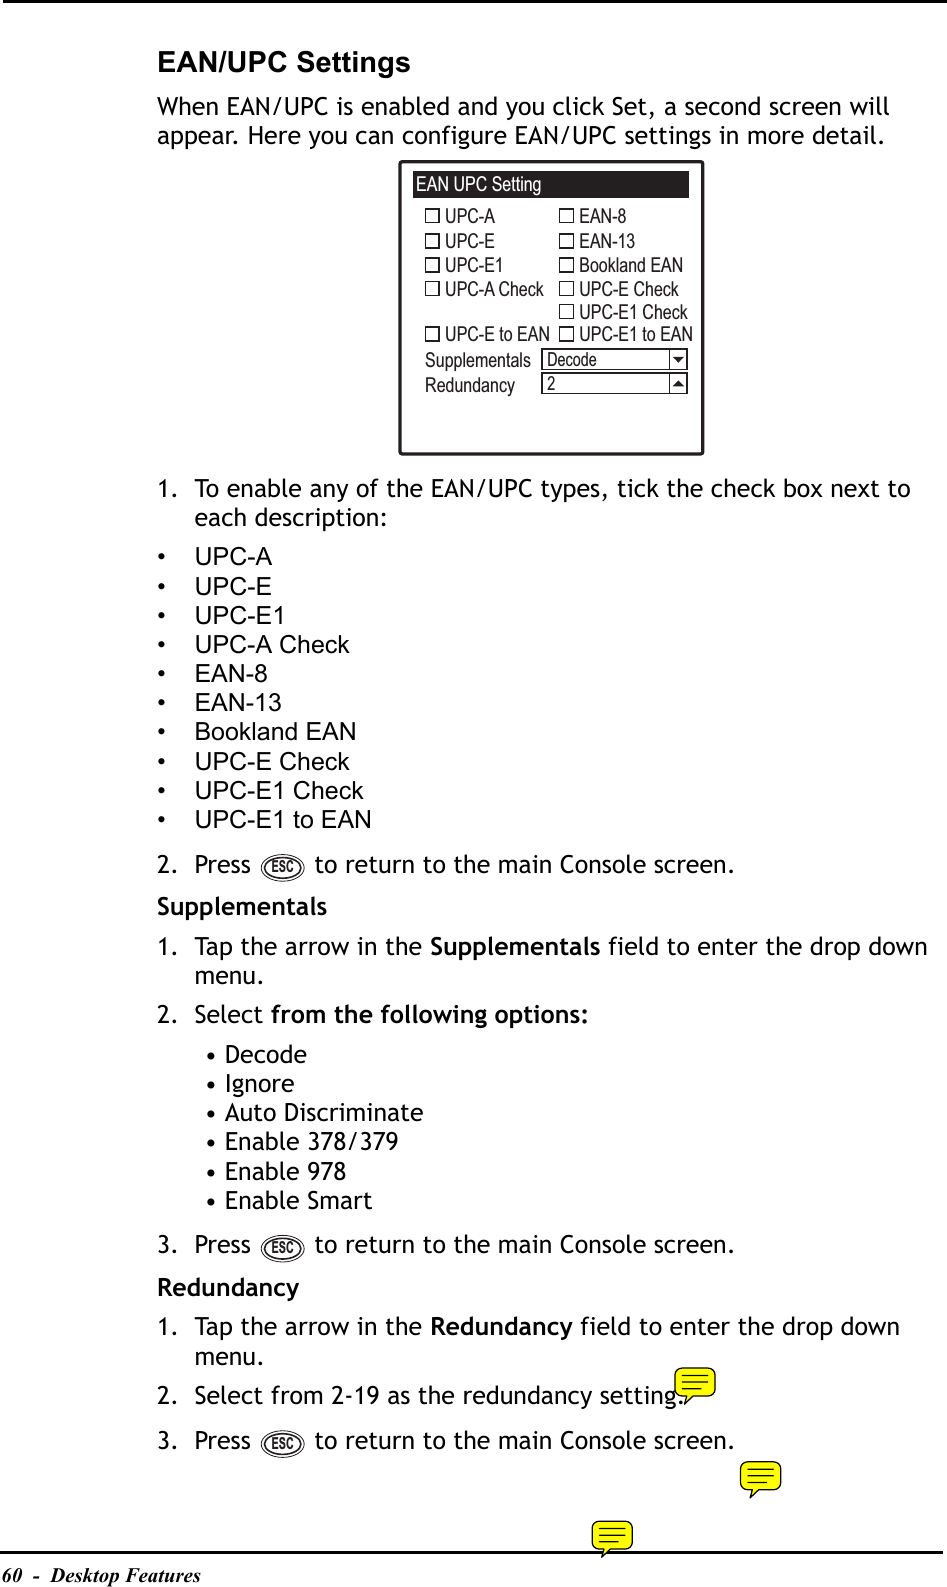
Zebex Z-2050 Mobile Data Collector User Manual Z 2050 UserMan
Zebex Industries Inc Mobile Data Collector Z 2050 UserMan
UserManual.wiki
>
Zebex
>
Z 2050 User Manual
User Manual
Navigation menu
Upload a User Manual
Namespaces
Wiki Guide
HTML
PDF
Info
Views
User Manual
Discussion / Help
Navigation

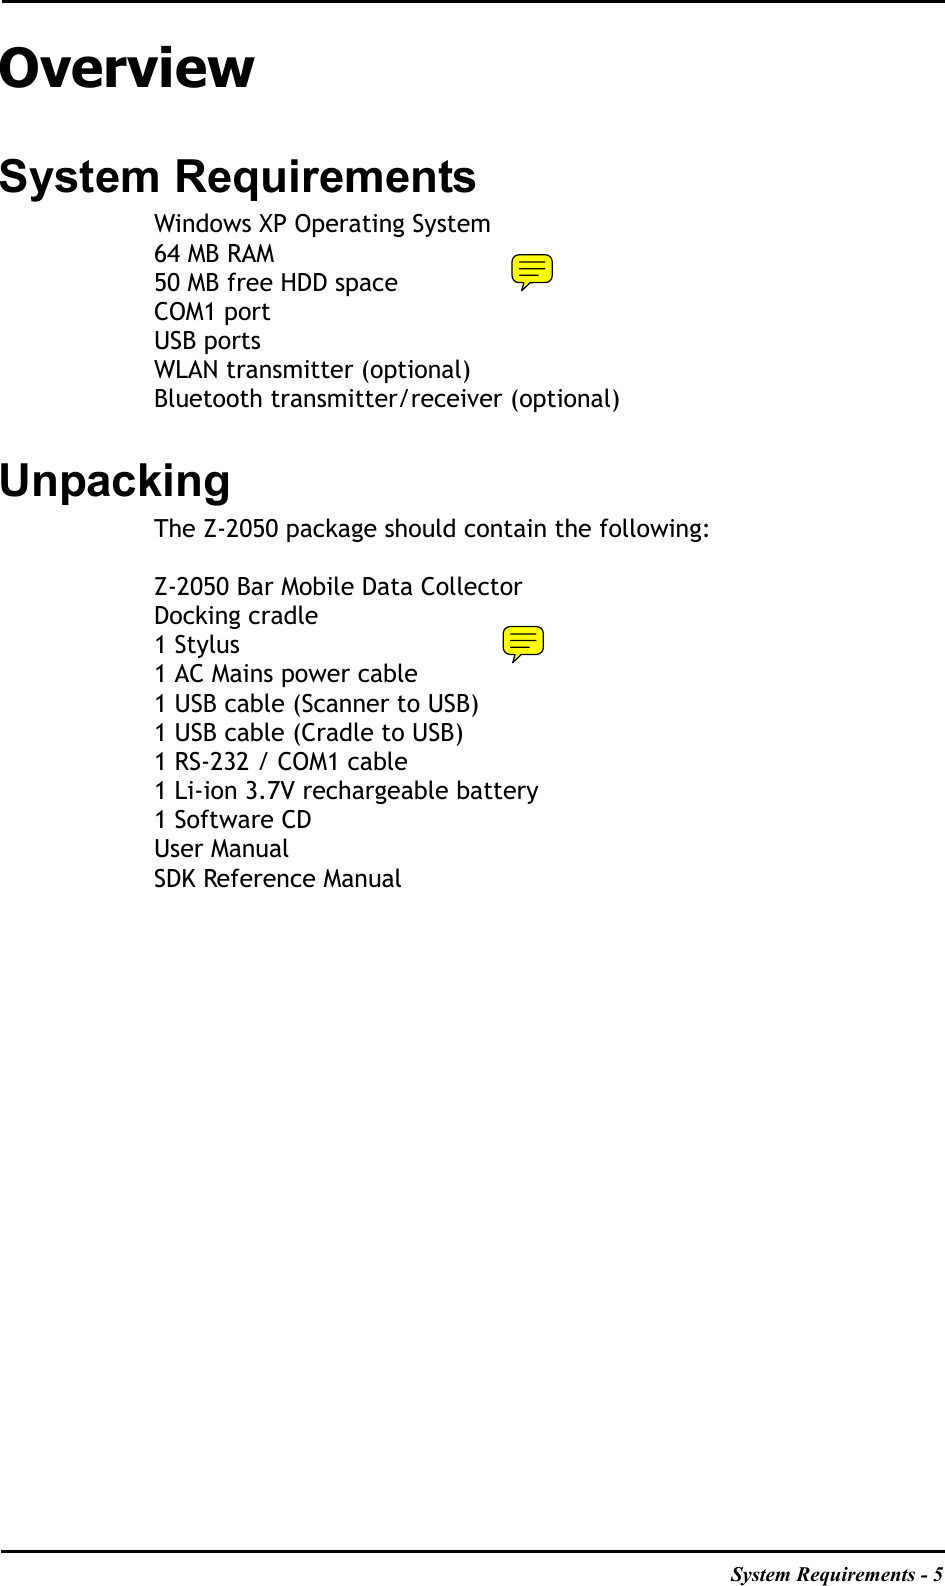
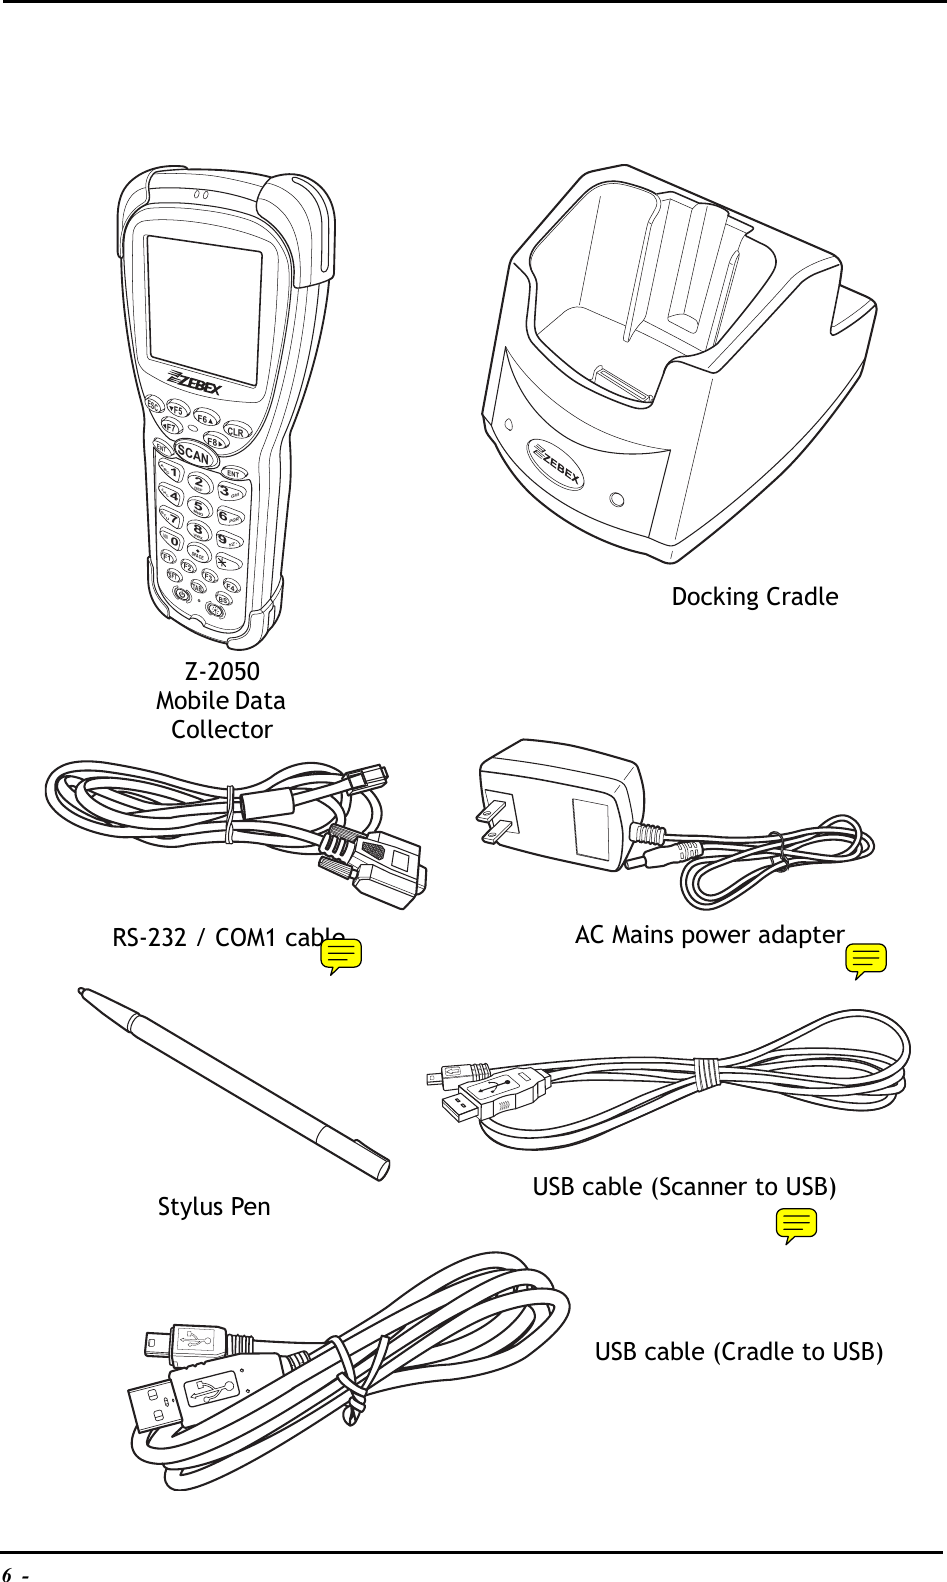

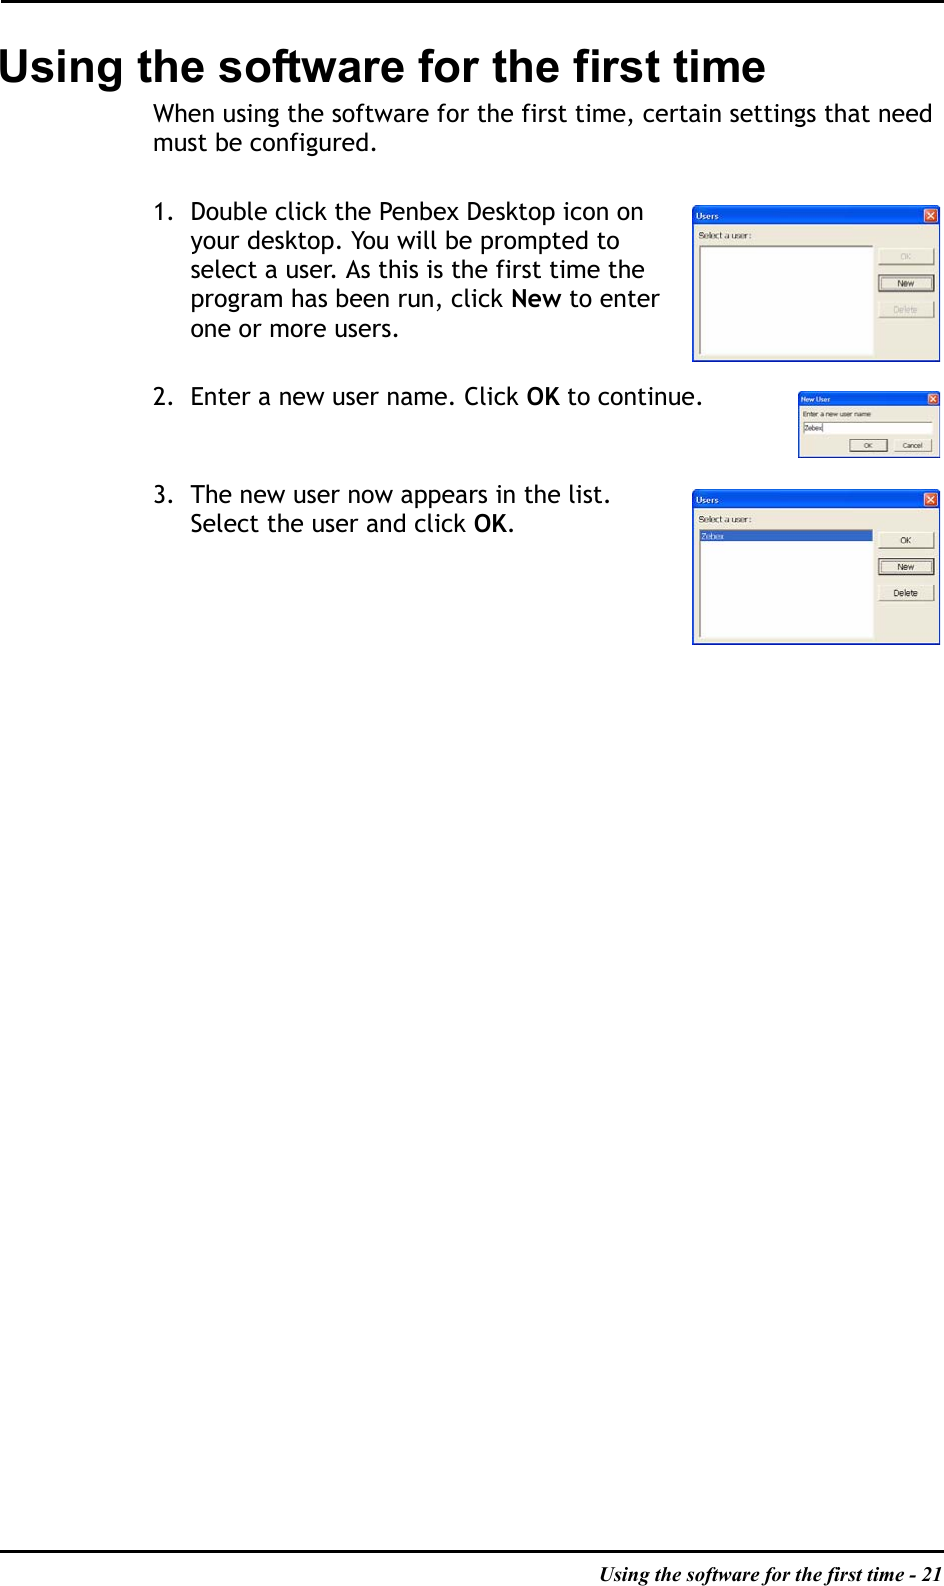

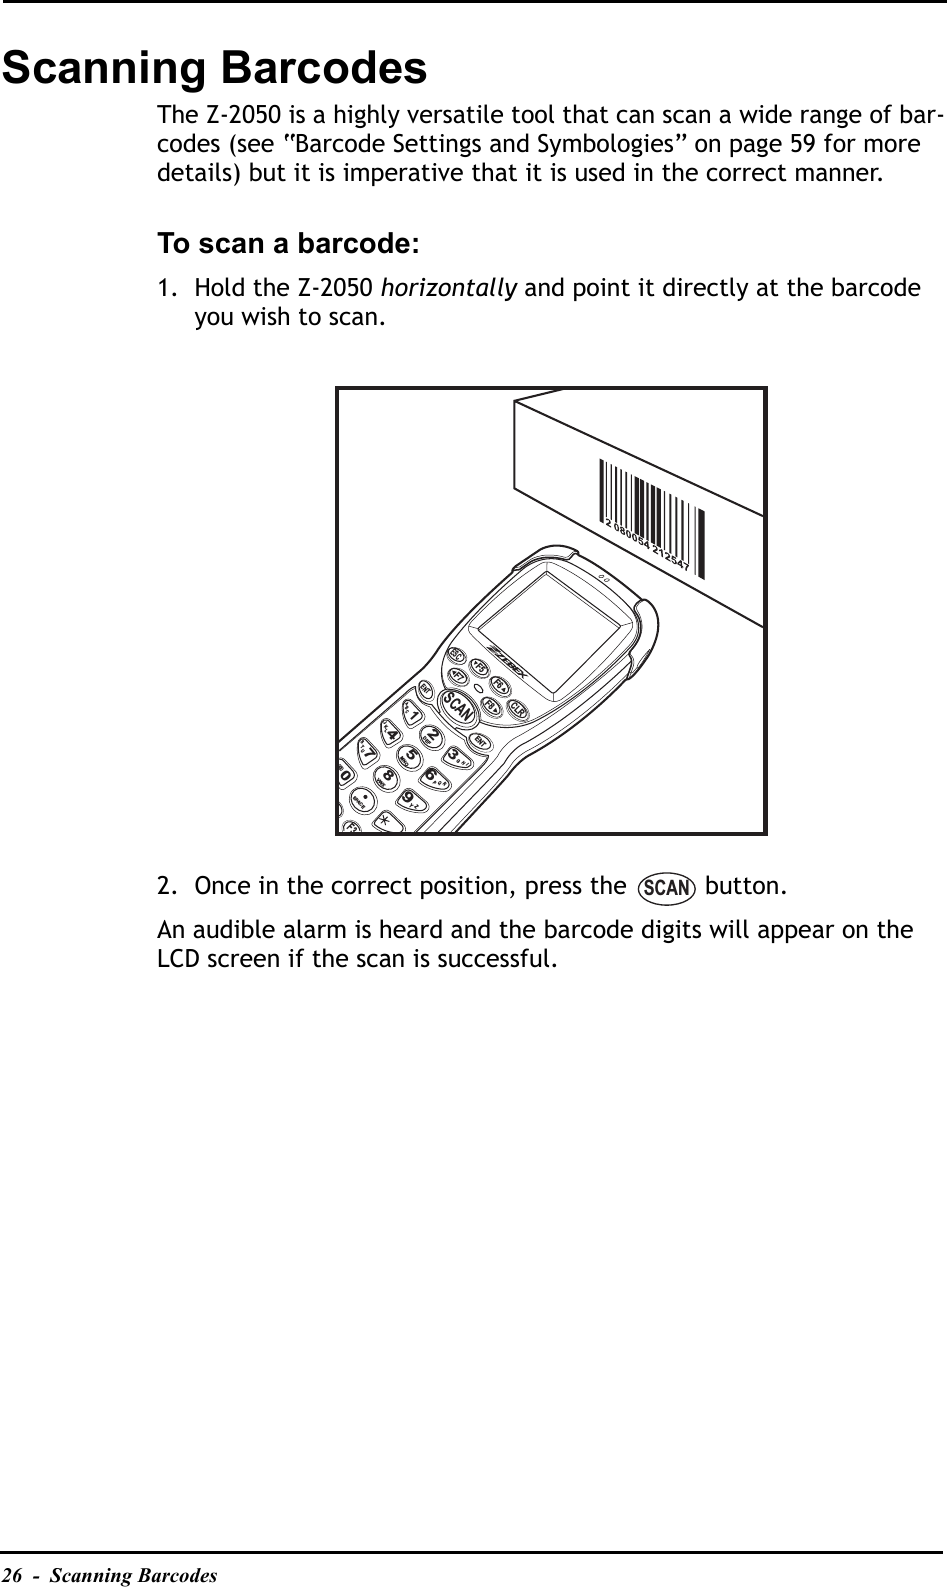

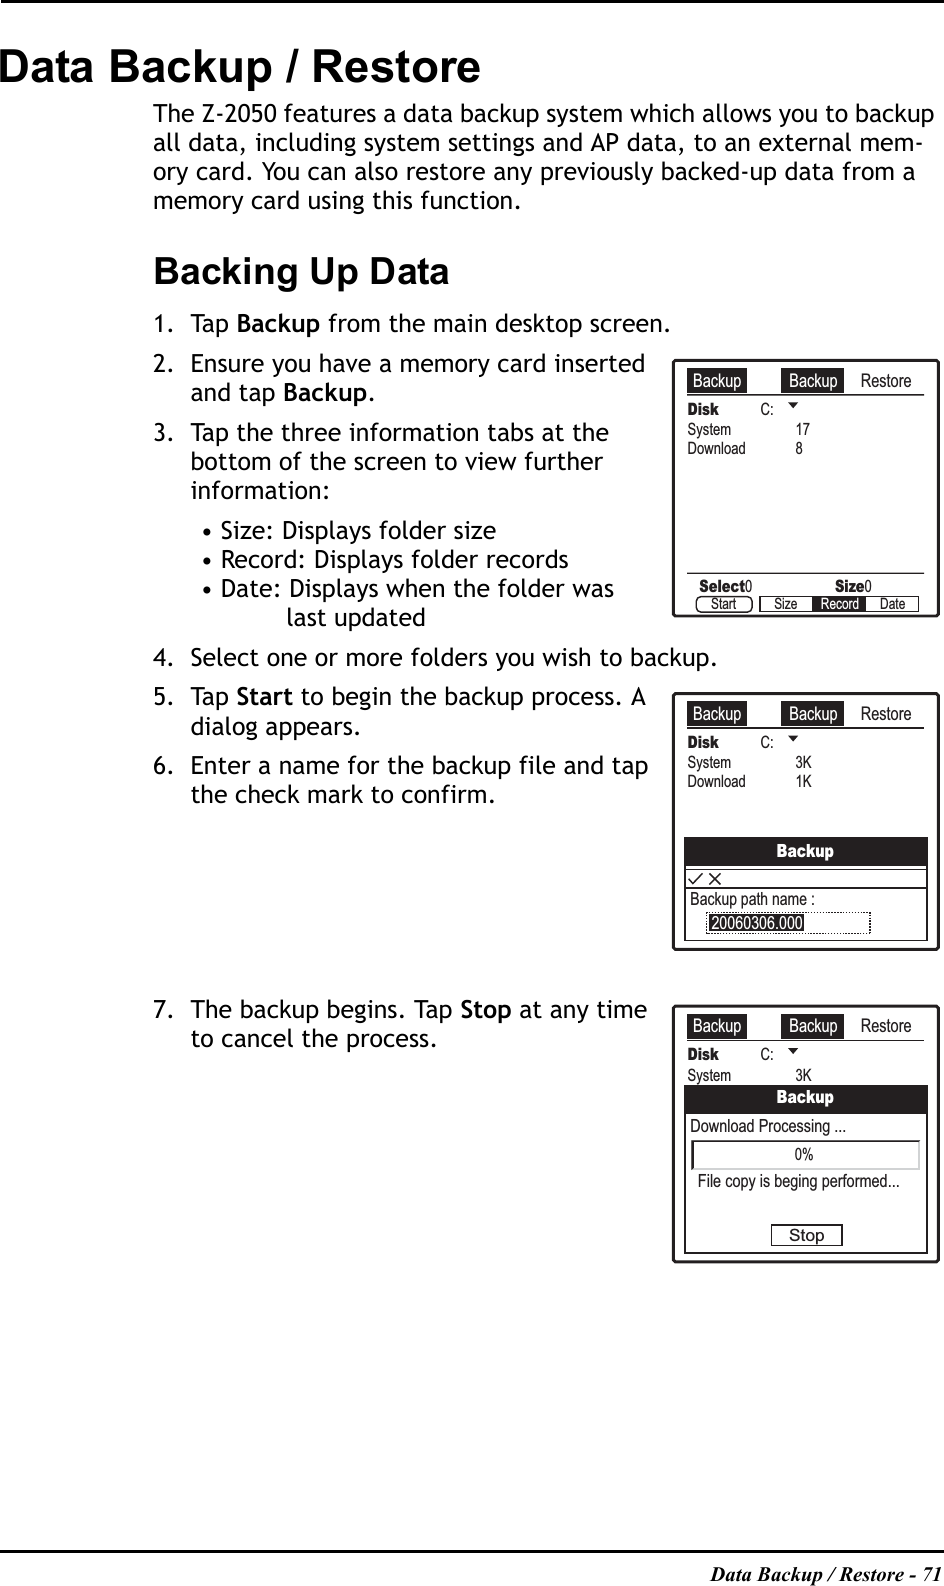
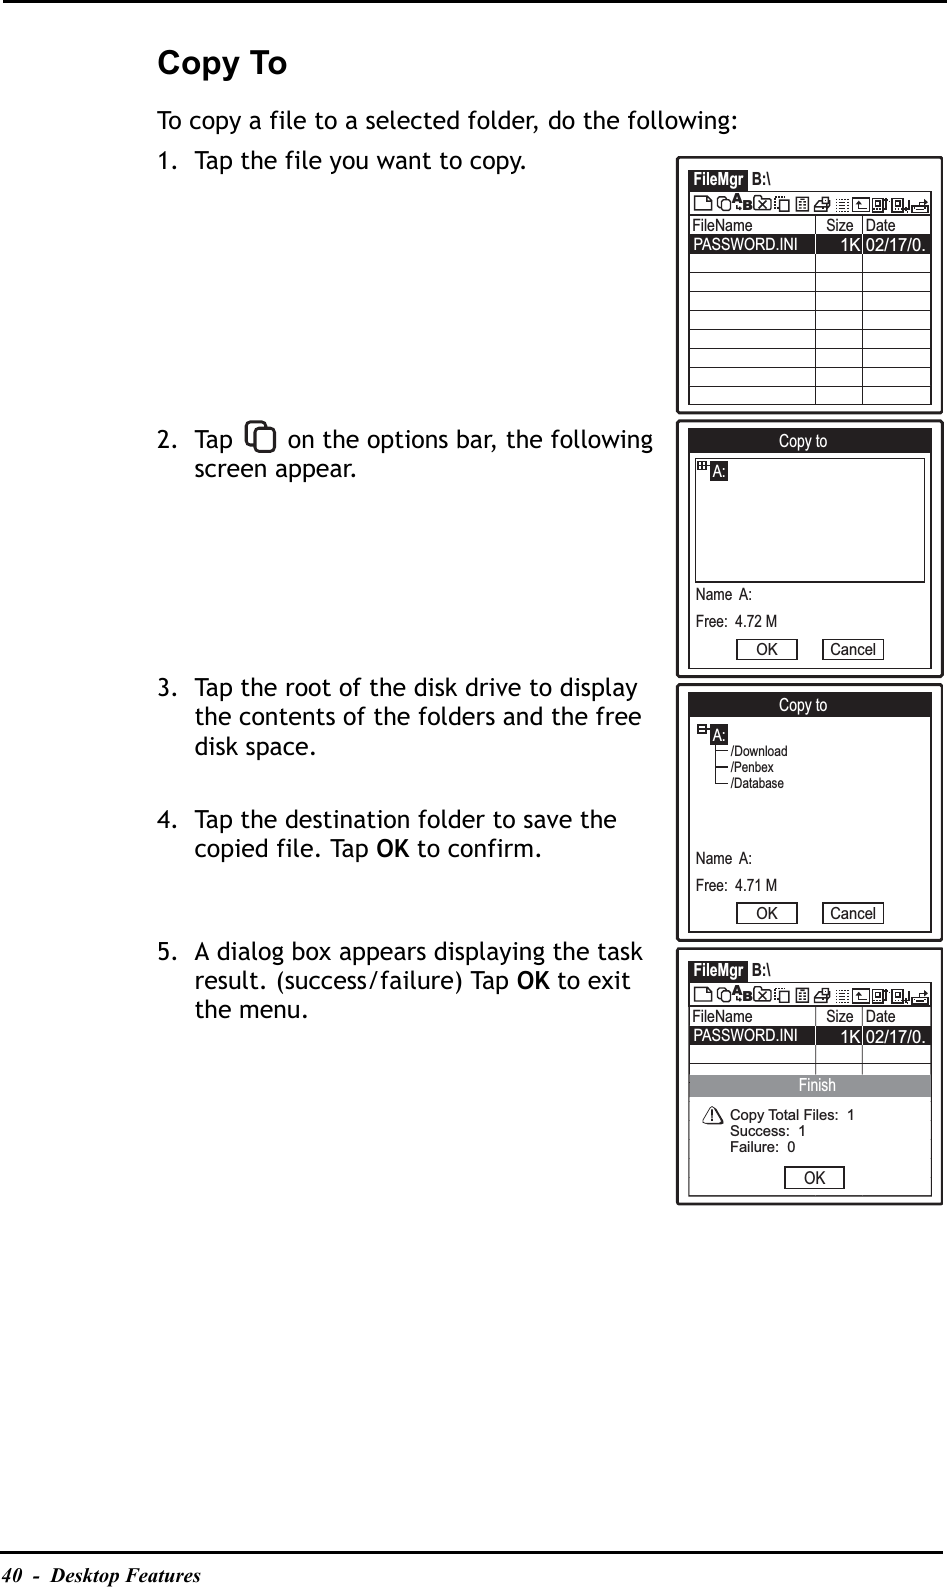
![Desktop Features - 39Using the FileMgr Tool BarThe File Manager displays the current contents of your local disks. It is equipped with a quick access tool bar which enables you to manage the data saved on the Z-2050 with the following functions:Create a new folderTo create a new folder, do the following:1. Tap on the tool bar, the following screen appears.2. Use the on-screen keypad or the stylus to enter the name for the new folder. Tap OK to confirm. 3. The new folder created is now listed in the FileMgr main screen.FileMgr A:\FileName Size Date02/17/0.02/15/0.02/15/0./DATABASE/DOWNLOAD/PENBEXABTool barFileMgr drop down menuMake New folder NamePlease specify a new foldername.OK Cancel1234567890qwertyuiopasdfghjkl;'zxcvbnm,.@123[]\=/capshiftMake New folder NamePlease specify a new foldername.OK Cancel1234567890qwertyuiopasdfghjkl;'zxcvbnm,.@123[]\=/capshiftZebexFileMgr A:\FileName Size Date02/17/0.02/15/0.02/15/0./DATABASE/DOWNLOAD/PENBEXAB/ZEBEX02/21/0.](https://usermanual.wiki/Zebex/Z-2050/User-Guide-728689-Page-43.png)
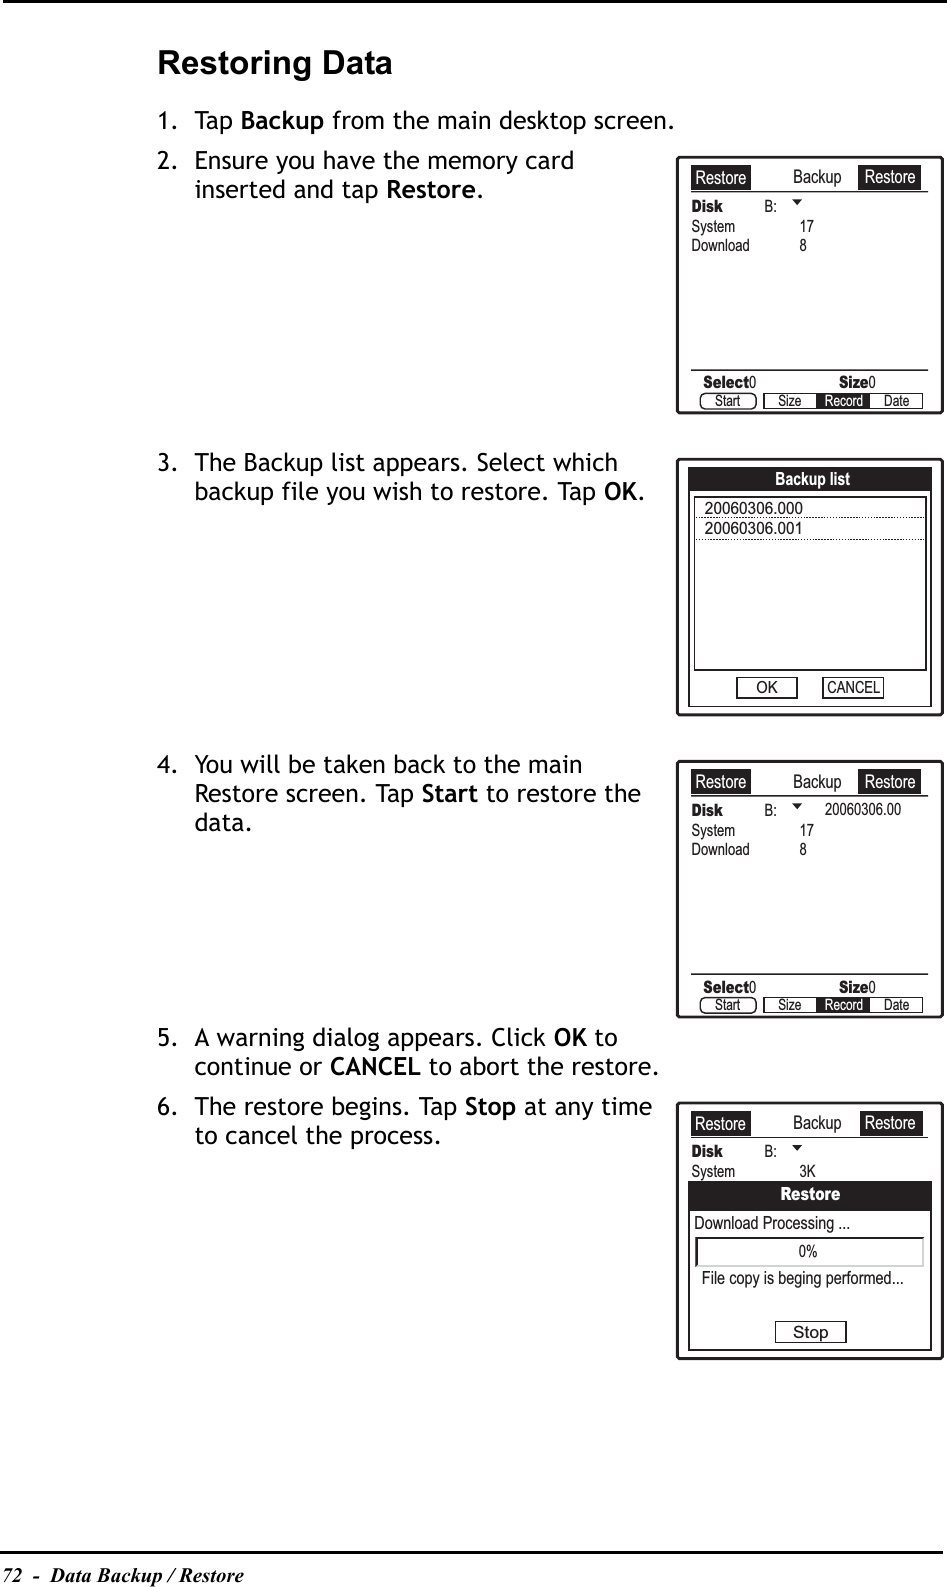
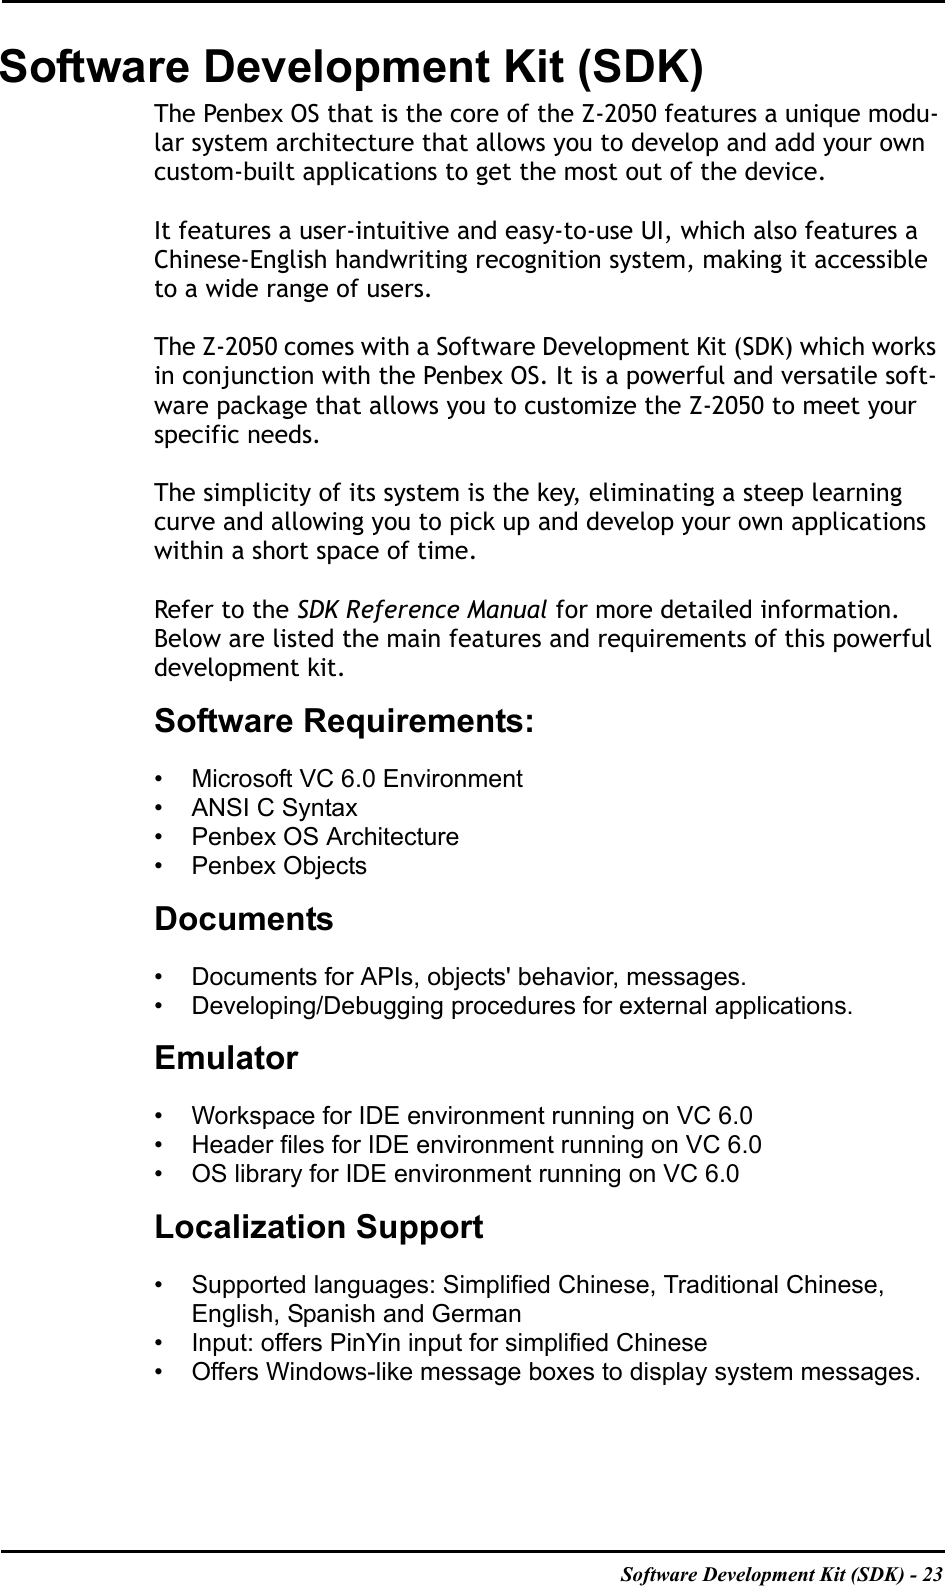
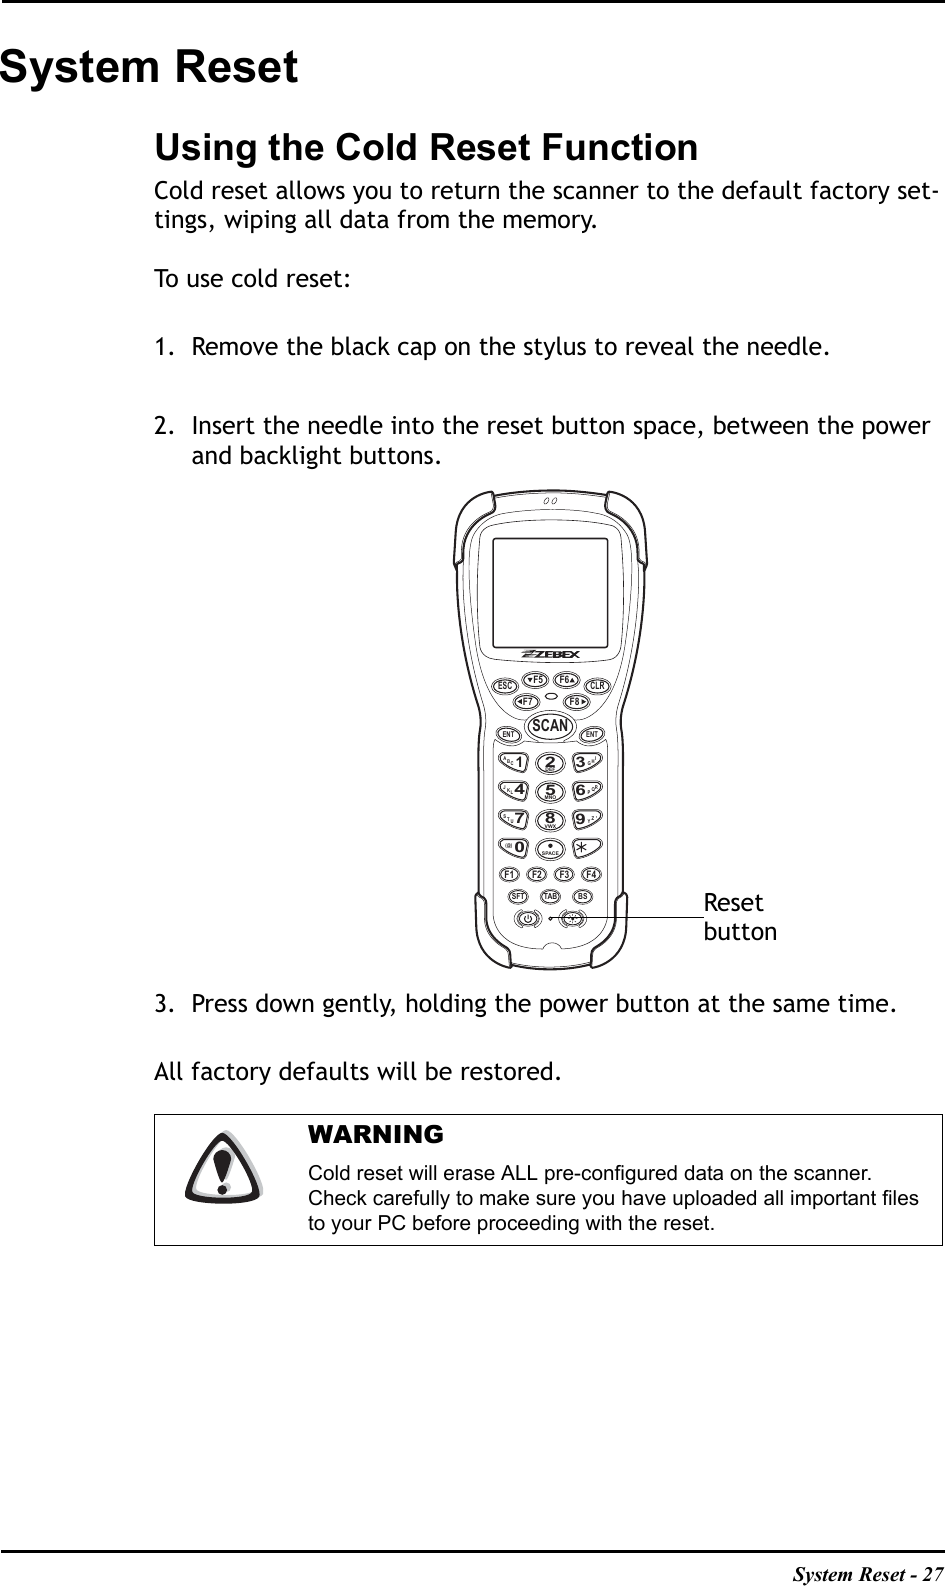
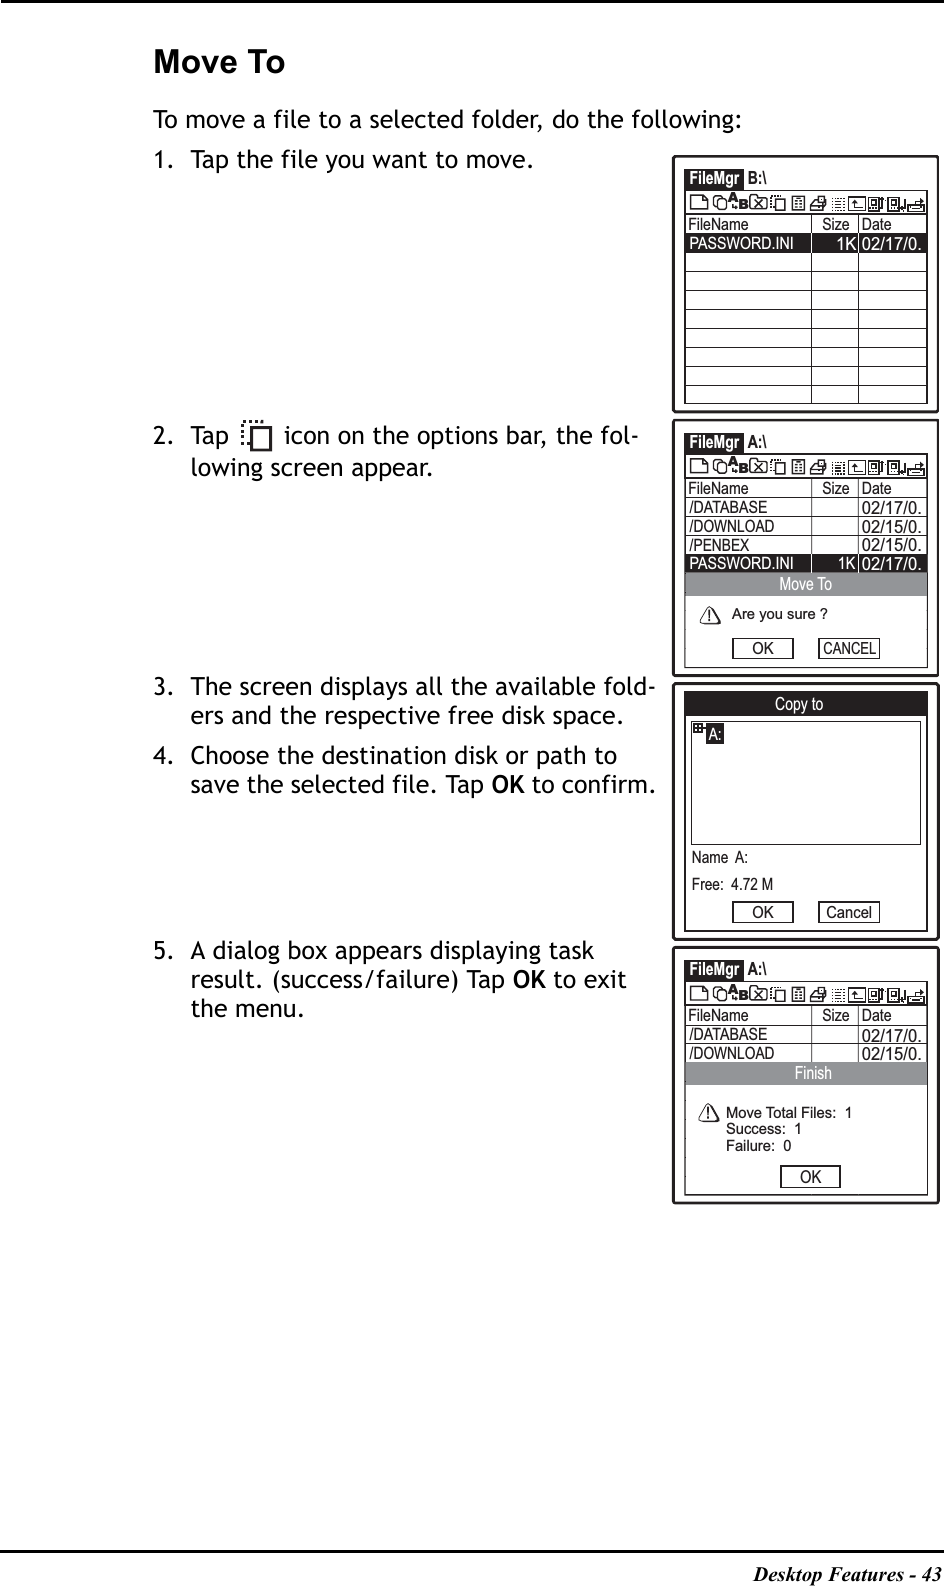
![Desktop Features - 41RenameTo specify a new name for a existing file, do the following:1. Tap the file you want to rename.2. Tap on the options bar. A warning dialog appears to confirm renaming of the folder. Press OK to proceed.3. Use the on-screen keypad or the stylus to enter the new file name. Tap OK to con-firm. 4. File name has been modified. The new file name is displayed on the FileMgr main screen.FileMgr A:\FileName Size Date02/17/0.02/15/0.02/15/0./DATABASE02/17/0.PASSWORD.INI 1K/DOWNLOAD/PENBEXABFileMgr A:\FileName Size Date02/17/0.02/15/0.02/15/0./DATABASE02/17/0.PASSWORD.INI 1K/DOWNLOAD/PENBEXABAre you sure ?OKRenameCANCELMake New File NamePASSWORD.INI Pleasespecify a new name.PASSWORD.INIOK Cancel1234567890qwertyuiopasdfghjkl;'zxcvbnm,.@123[]\=/capshift](https://usermanual.wiki/Zebex/Z-2050/User-Guide-728689-Page-45.png)

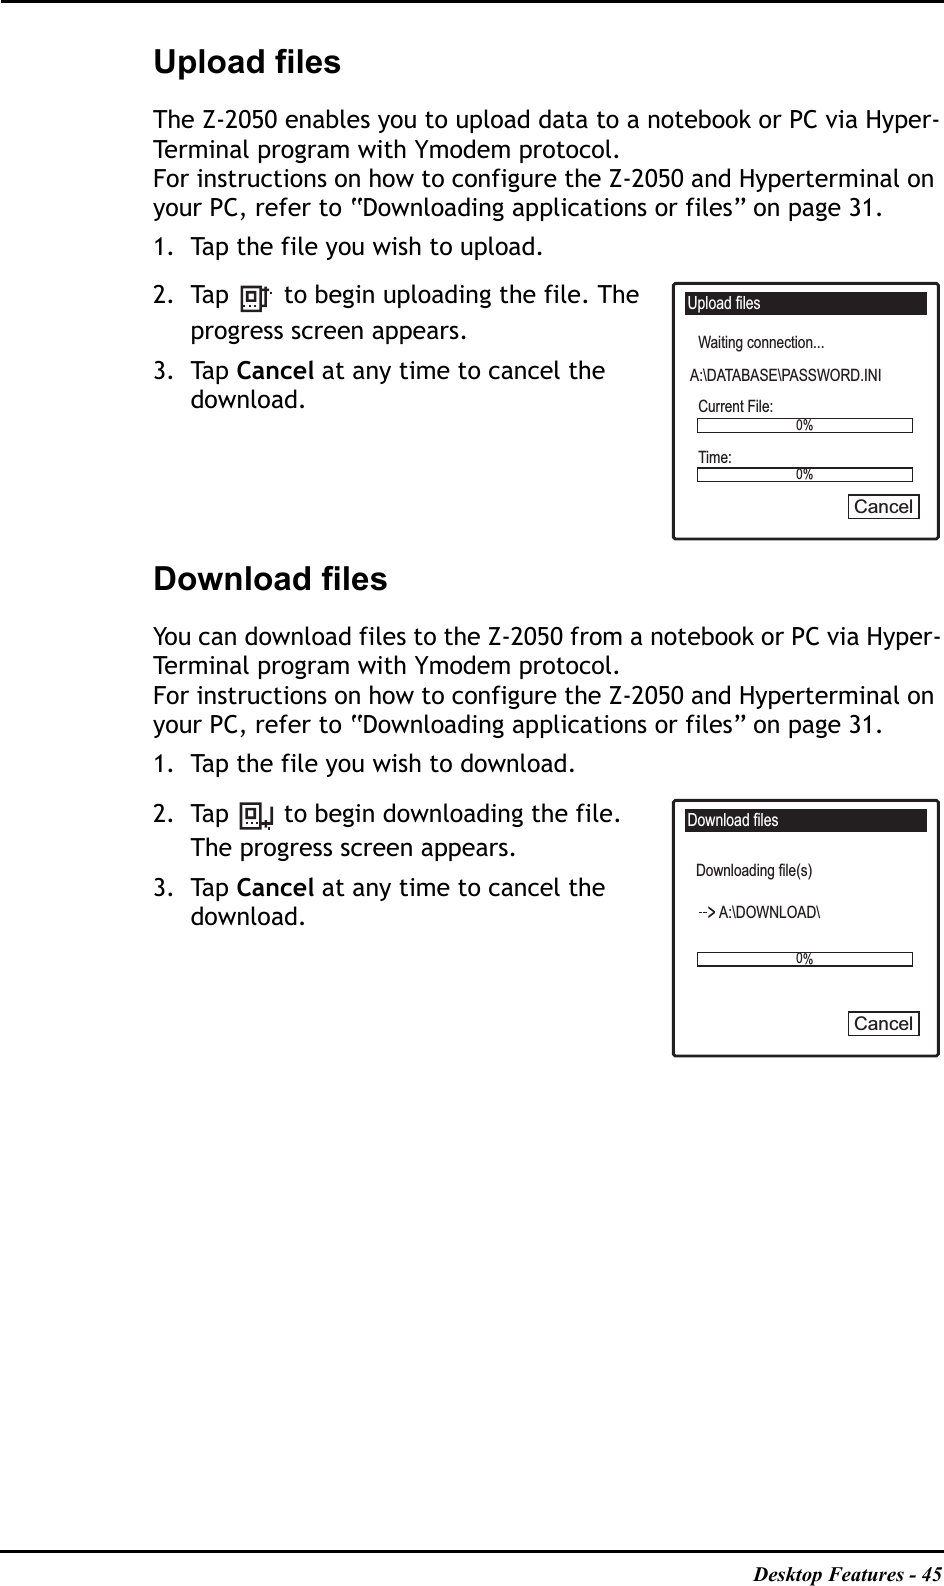


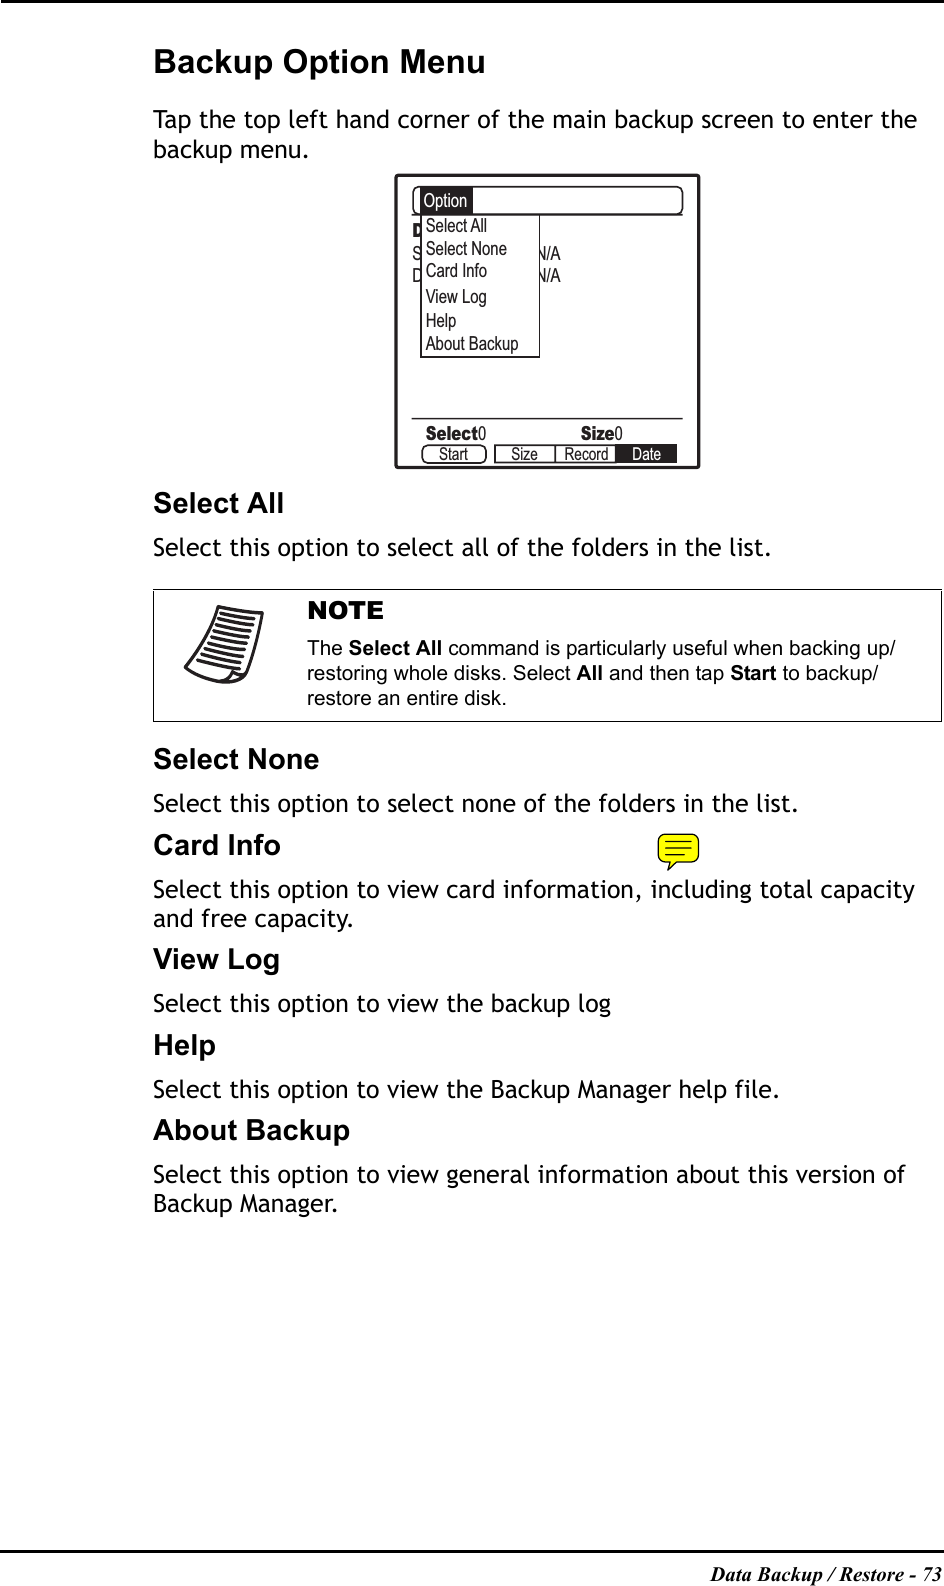
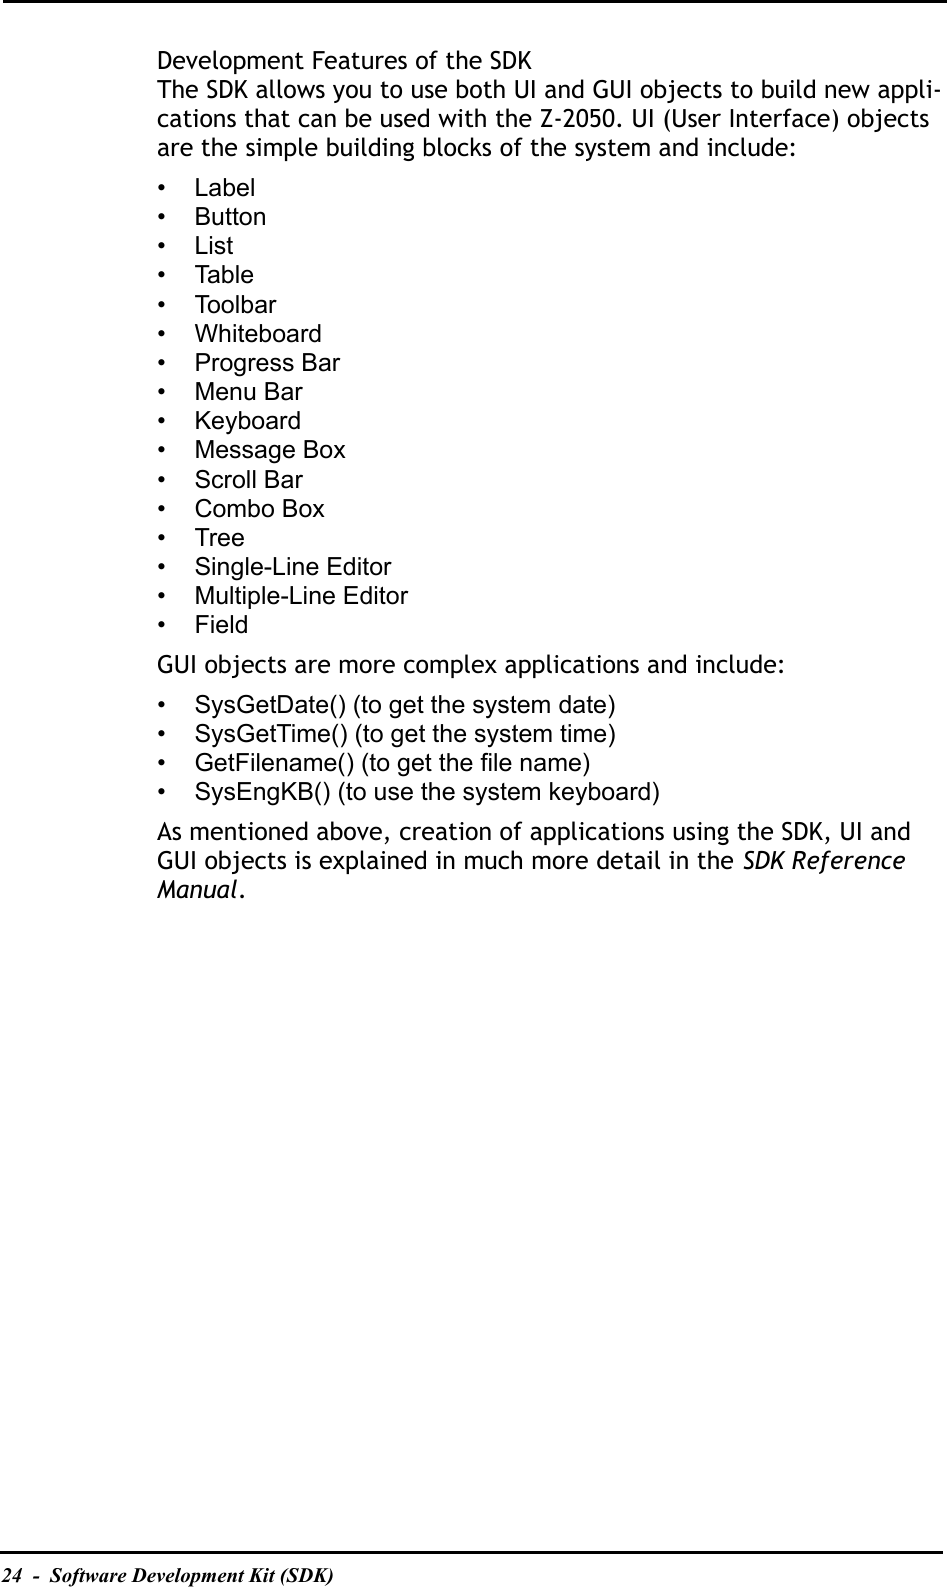
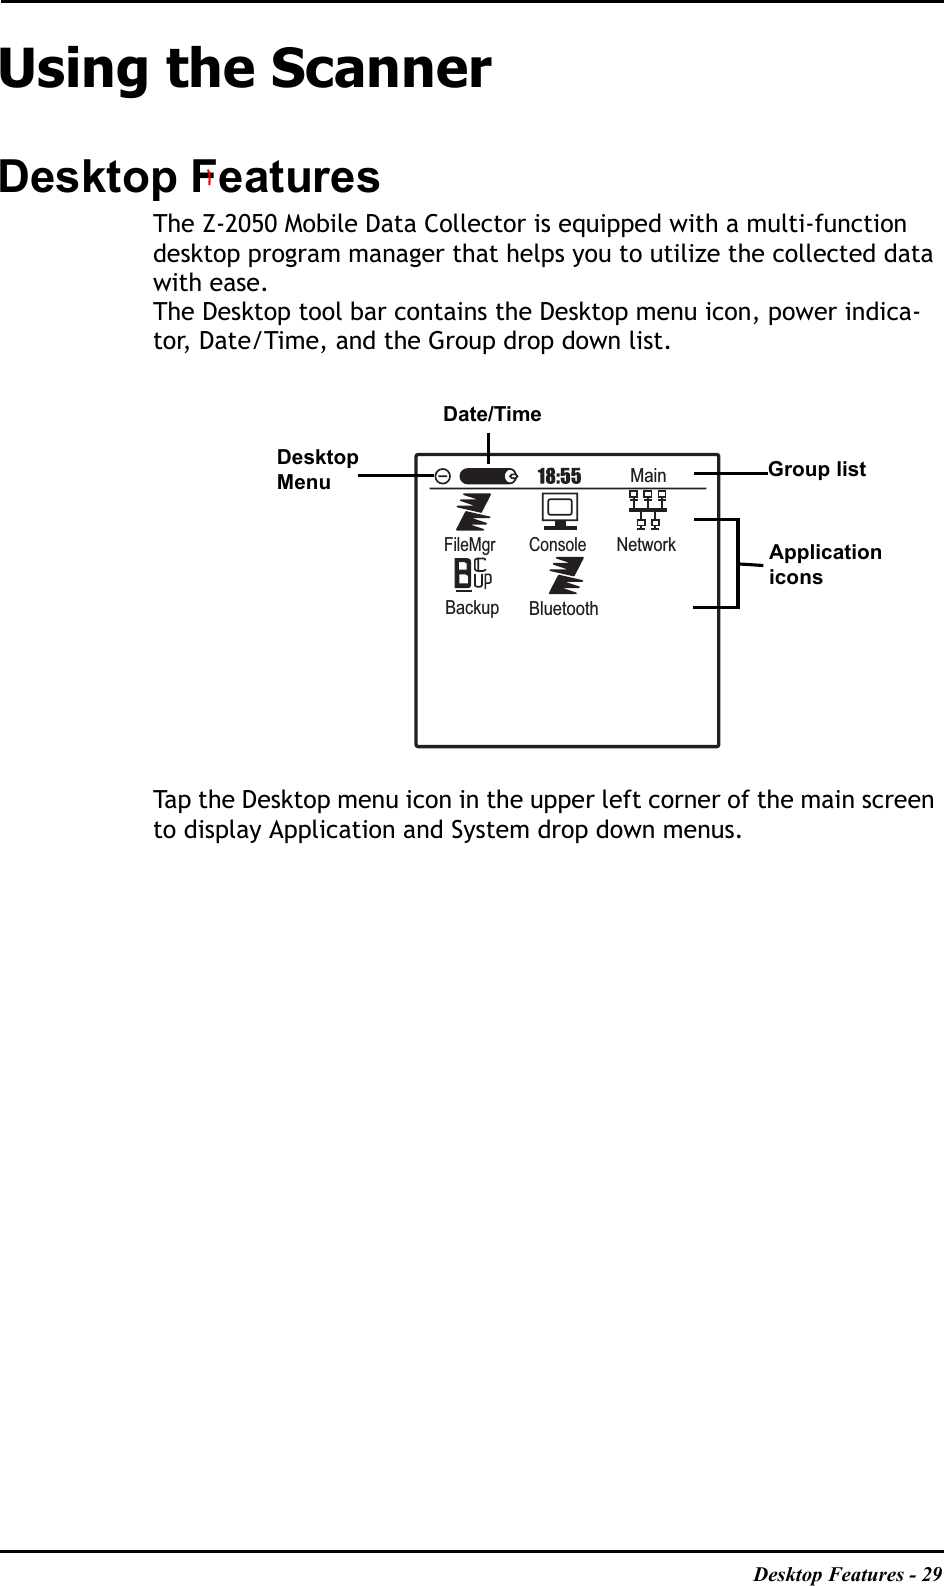
![Inputting Data - 61Inputting DataUsing the On-Screen KeyboardThe quickest way to enter data into the Z-2050 is via the on screen keyboard. Use the stylus to input data and then tap the check box in the top right hand corner of the screen to confirm.The on screen keyboard is accessed by double-clicking on the field into which you are inputting data.Using the Alphanumeric KeypadYou can also enter data via the alphanumeric keypad. To enter a let-ter, tap the corresponding key the appropriate amount of times.For example, to enter the letter C, tap the key three times.Press the key to toggle between alphabetical and numerical input.Using Handwritten InputYou can also enter data using the handwriting recognition function and the stylus.The full screen pen writing function must be turned on in order to get the most out of this function - see “Pen Settings” on page 56 for instructions on how to do this.1234567890qwertyuiopasdfghjkl;'zxcvbnm,.@123[]\=/capshiftABC1SFT](https://usermanual.wiki/Zebex/Z-2050/User-Guide-728689-Page-65.png)