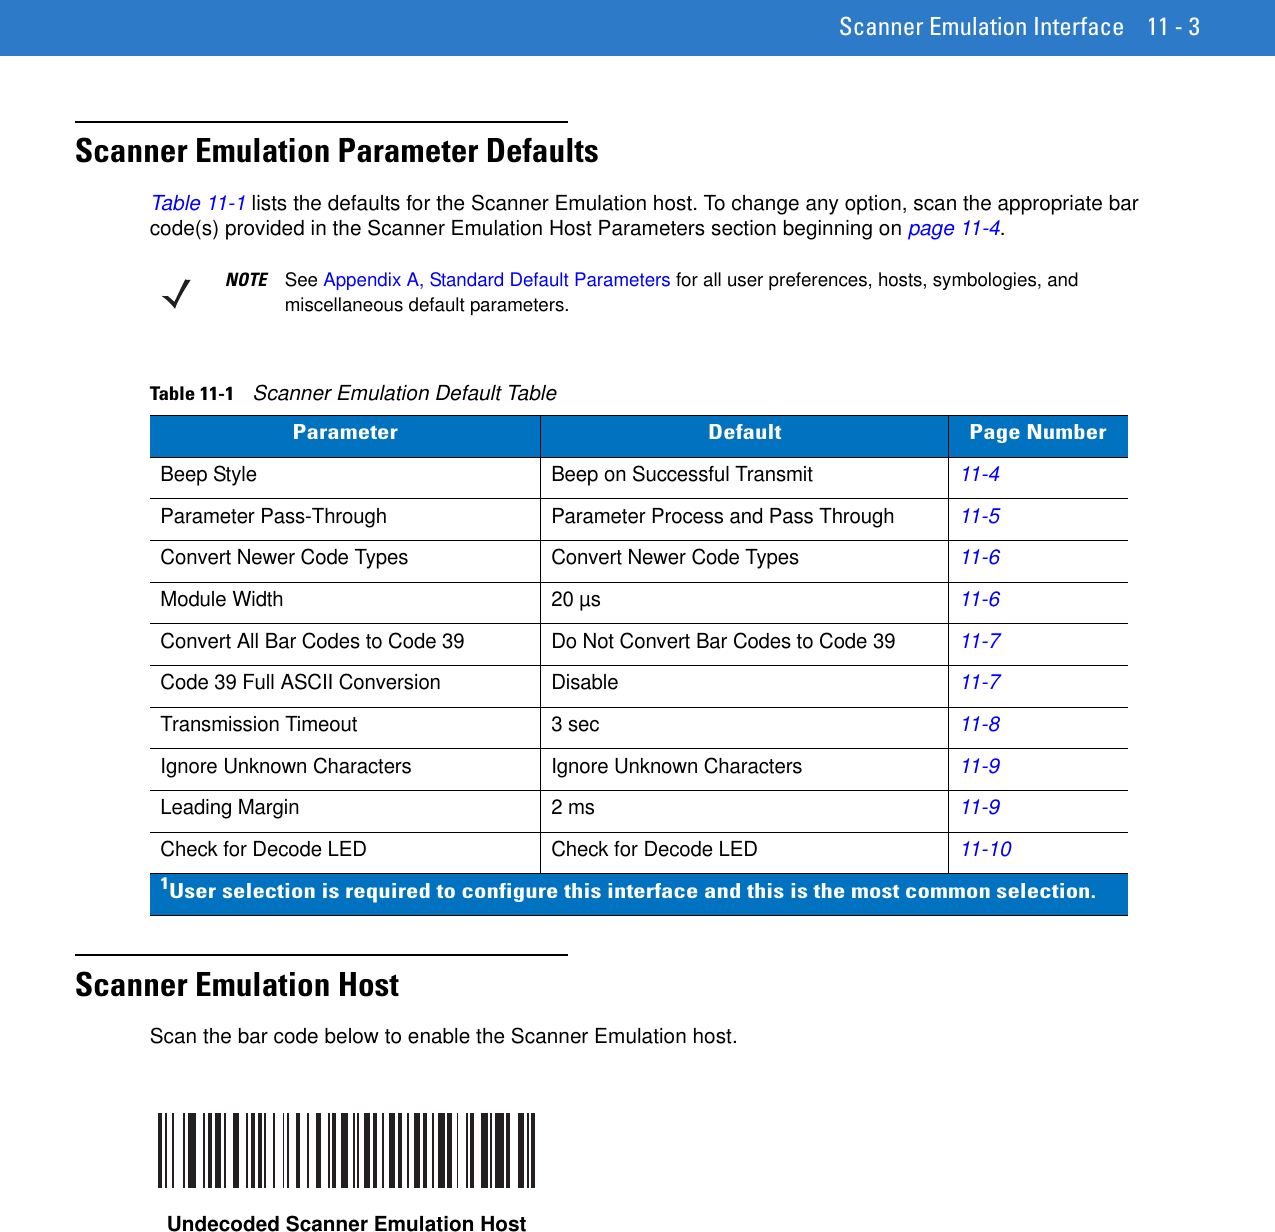
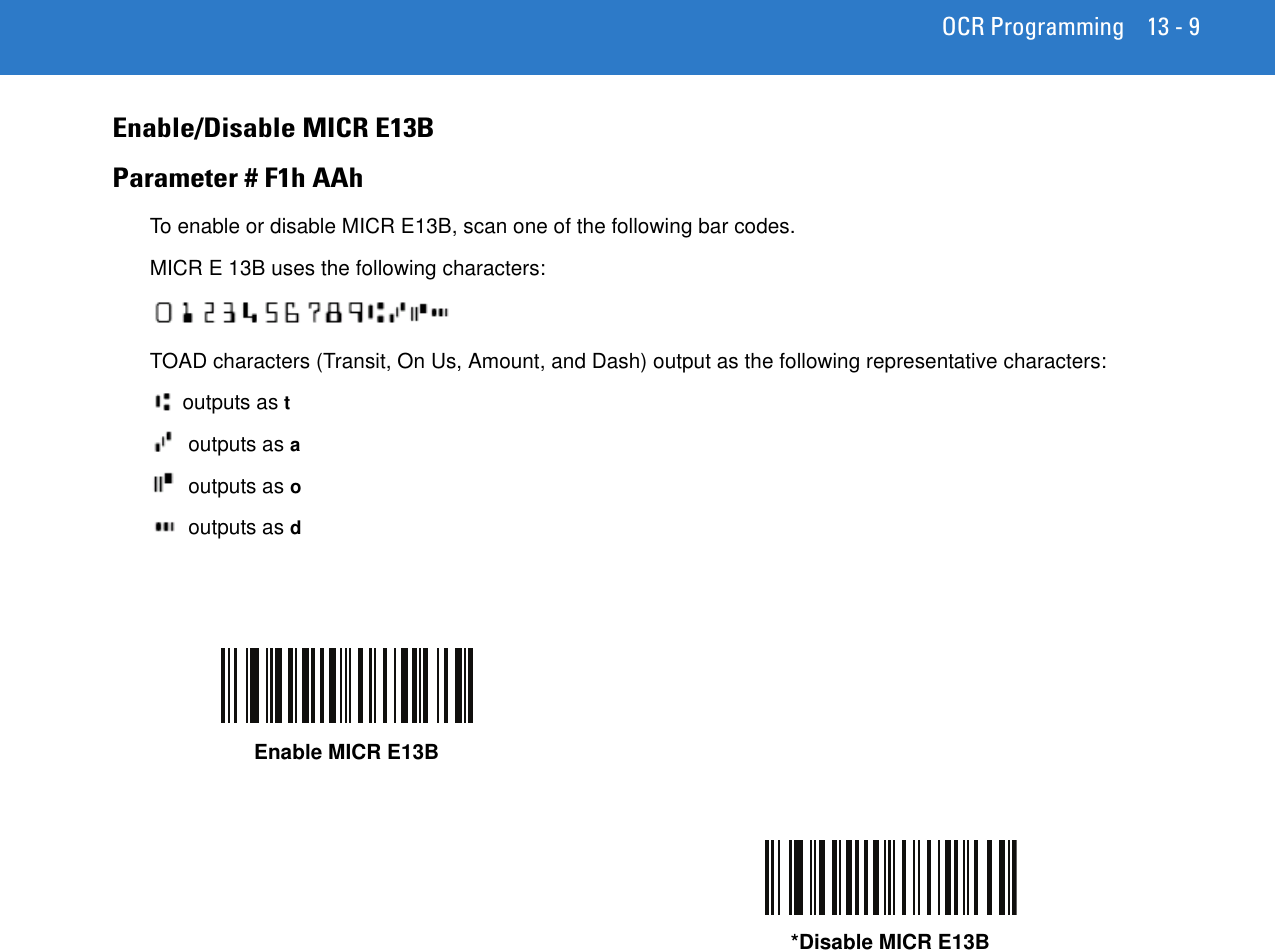
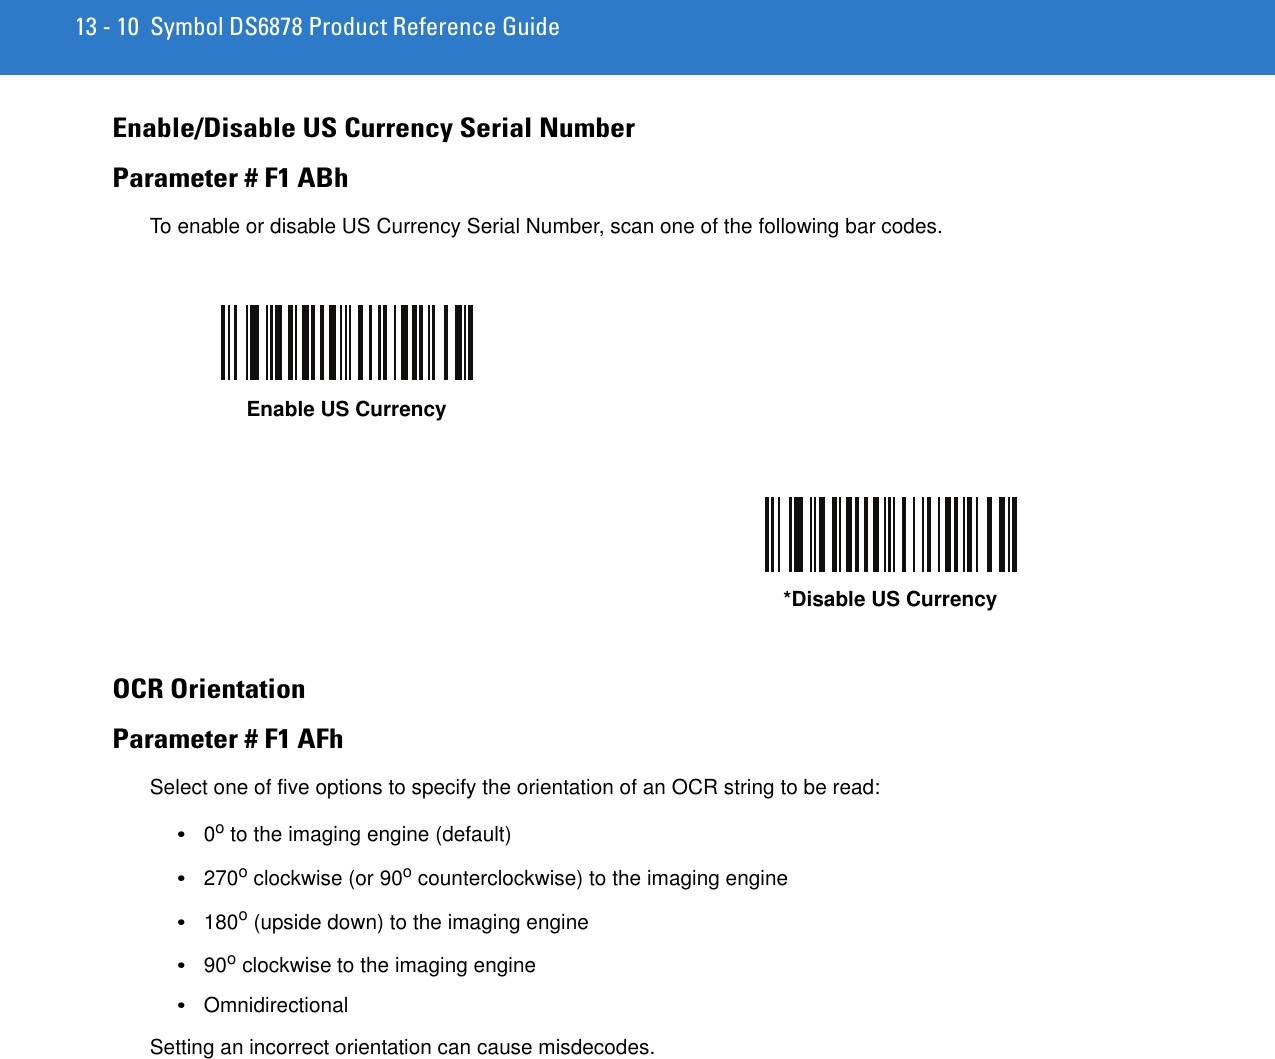
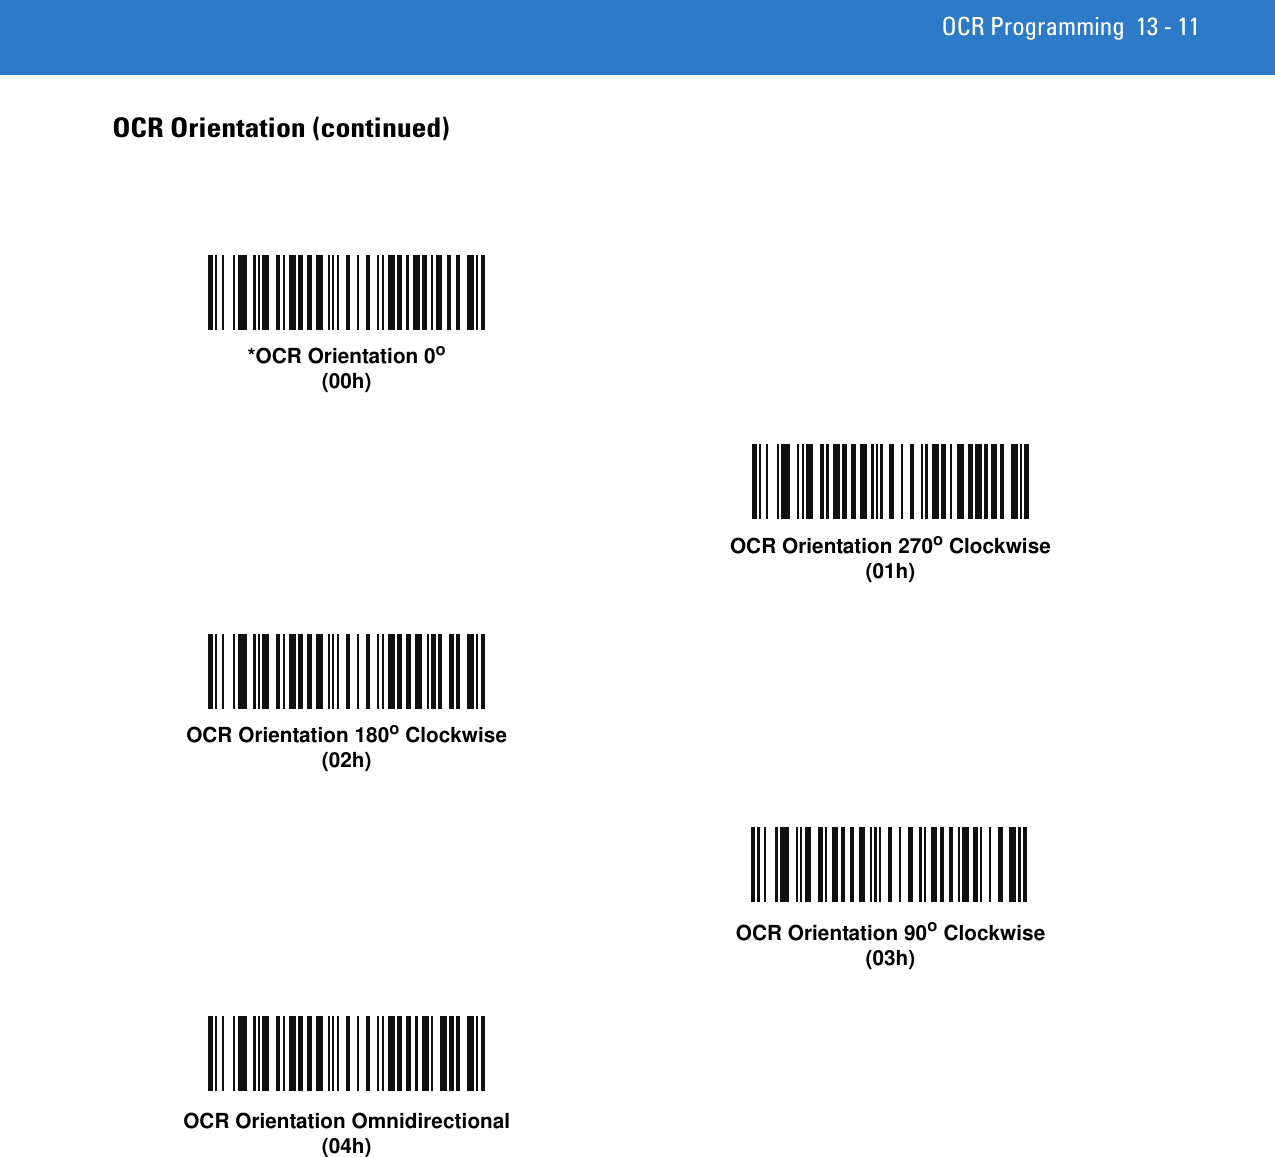
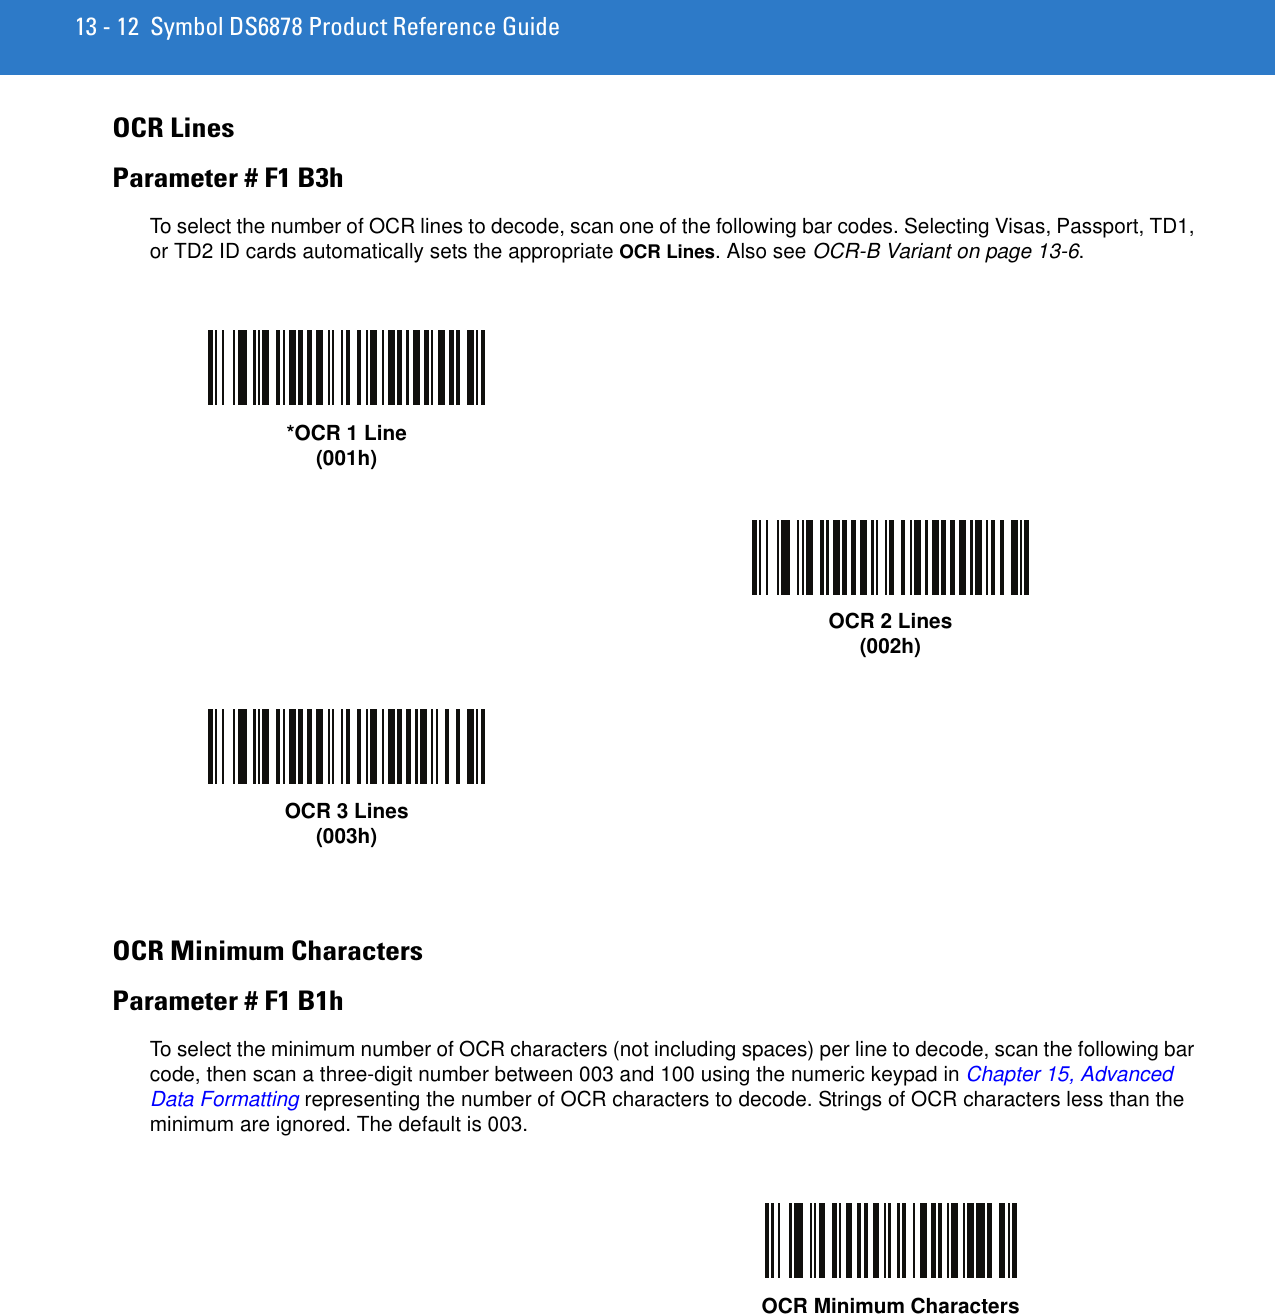
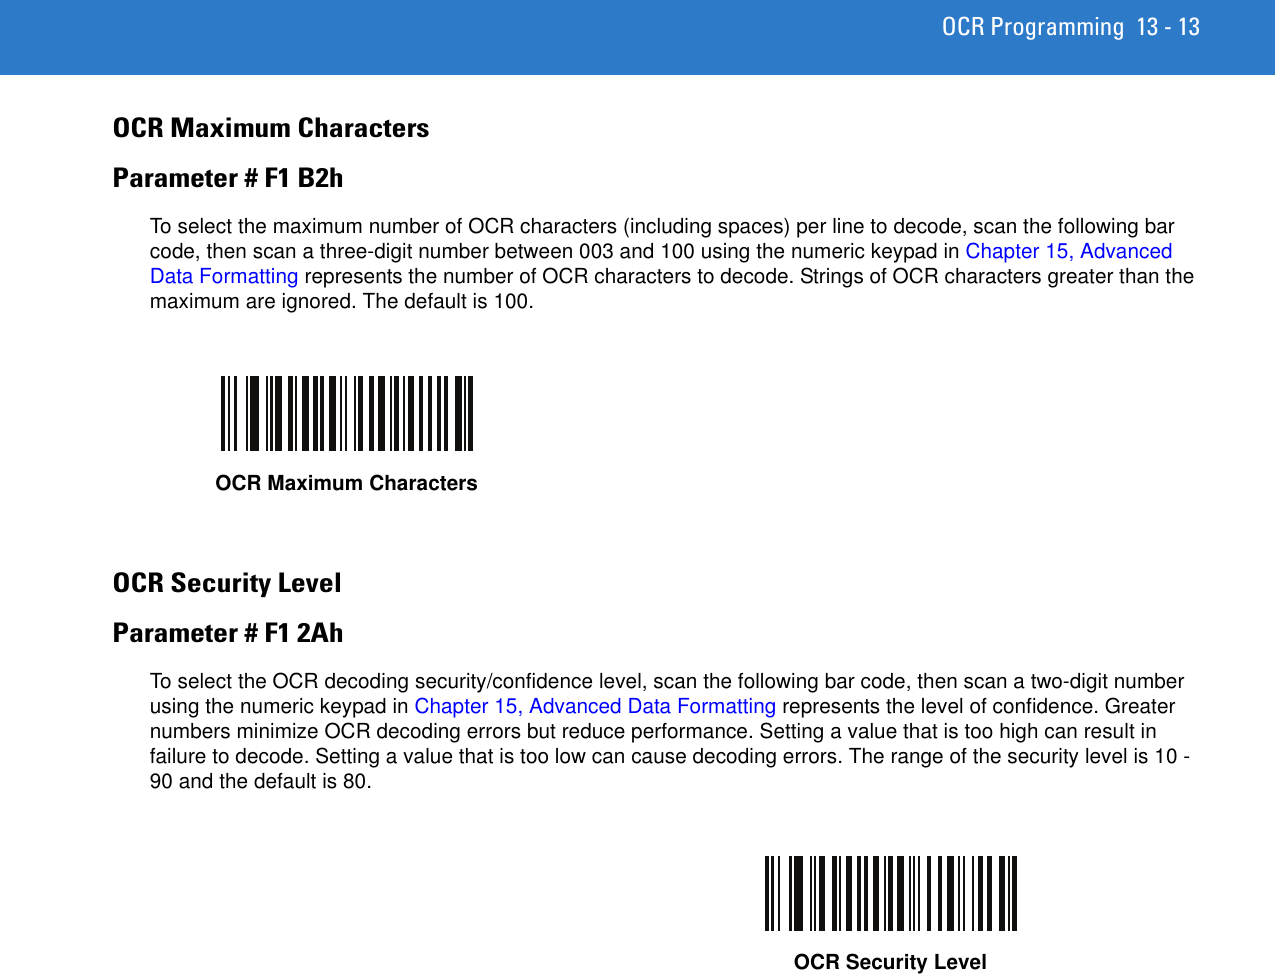
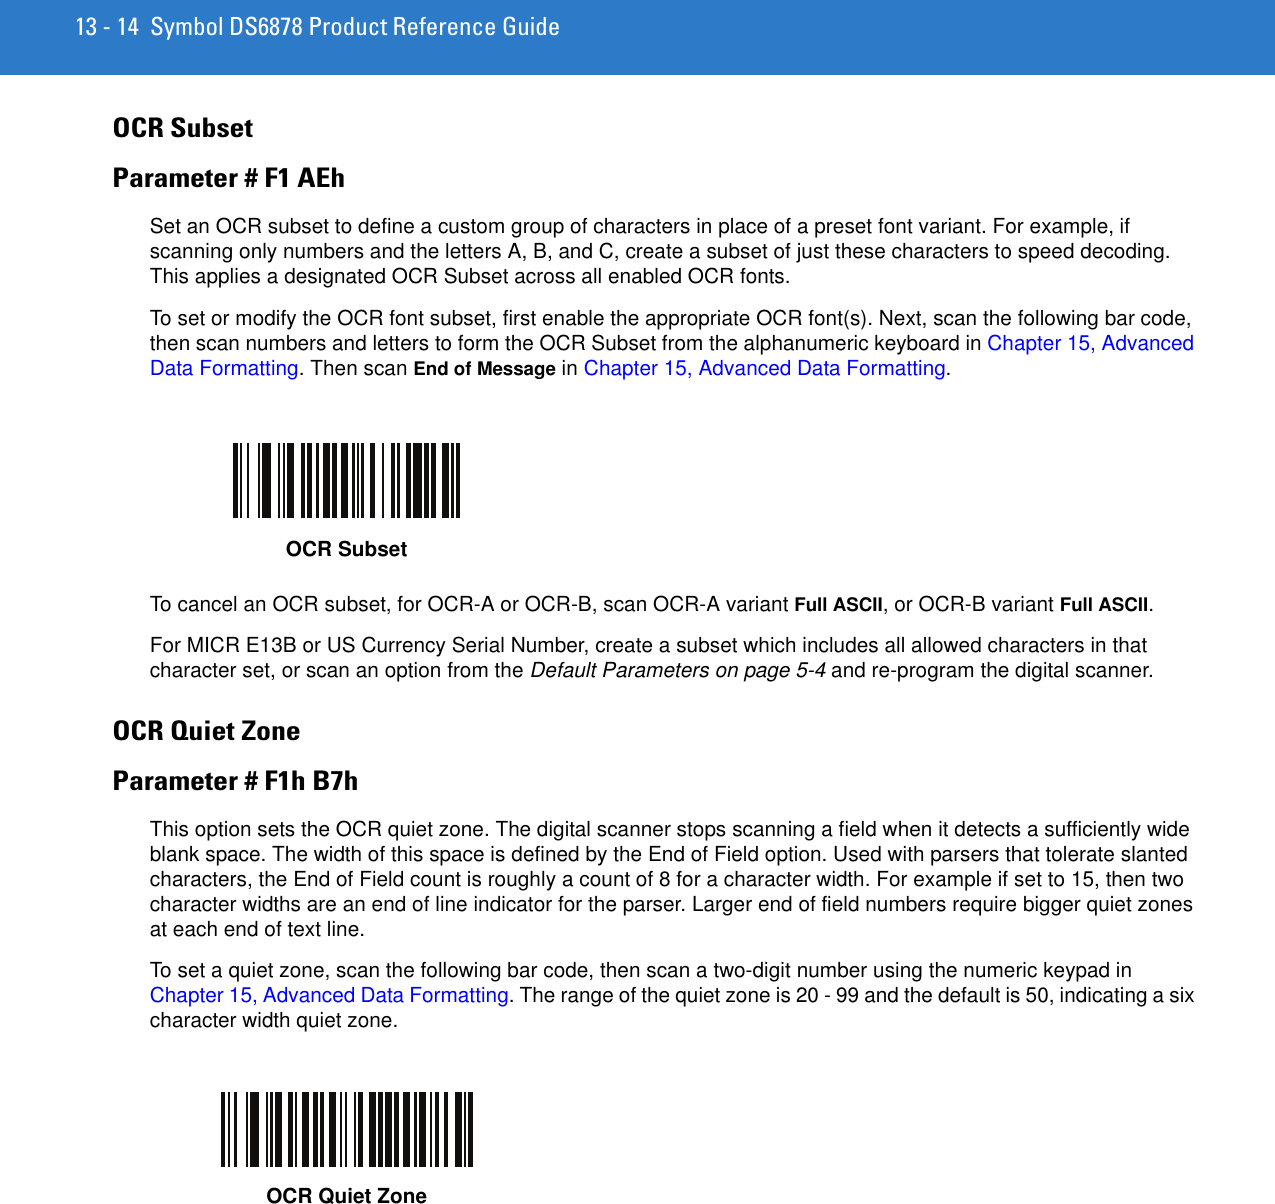
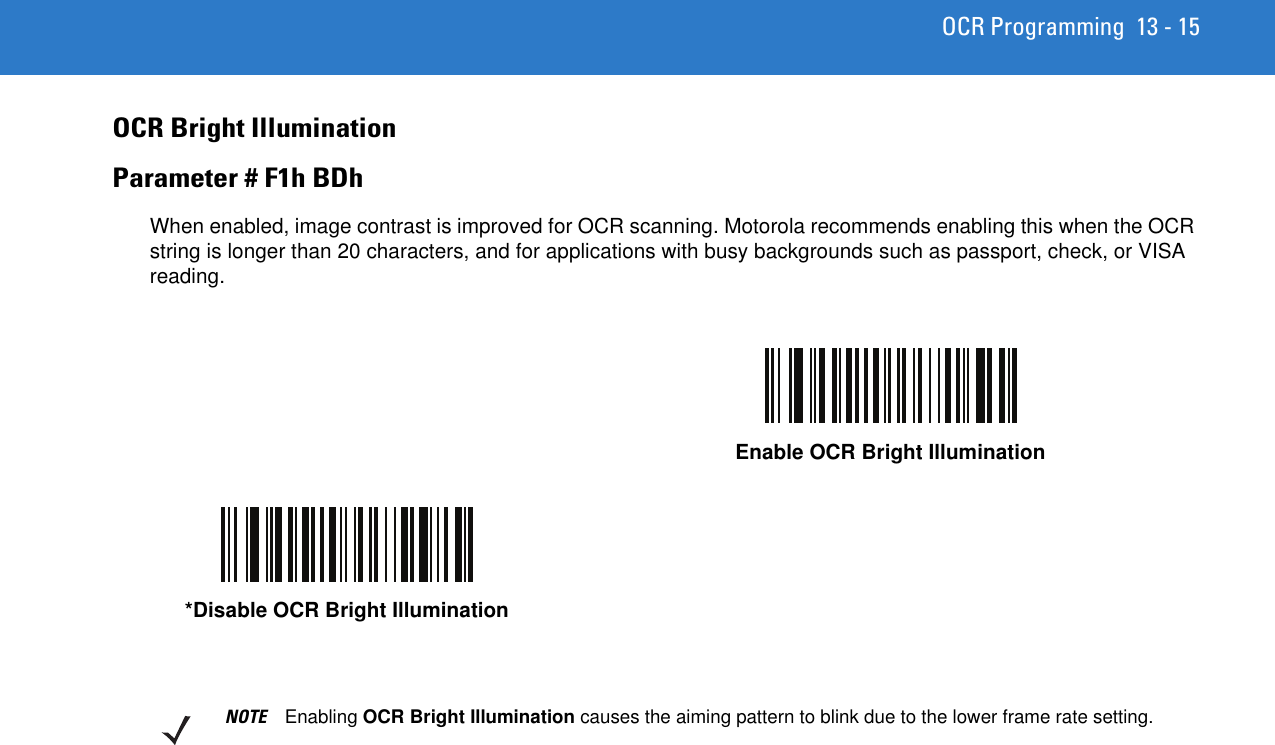
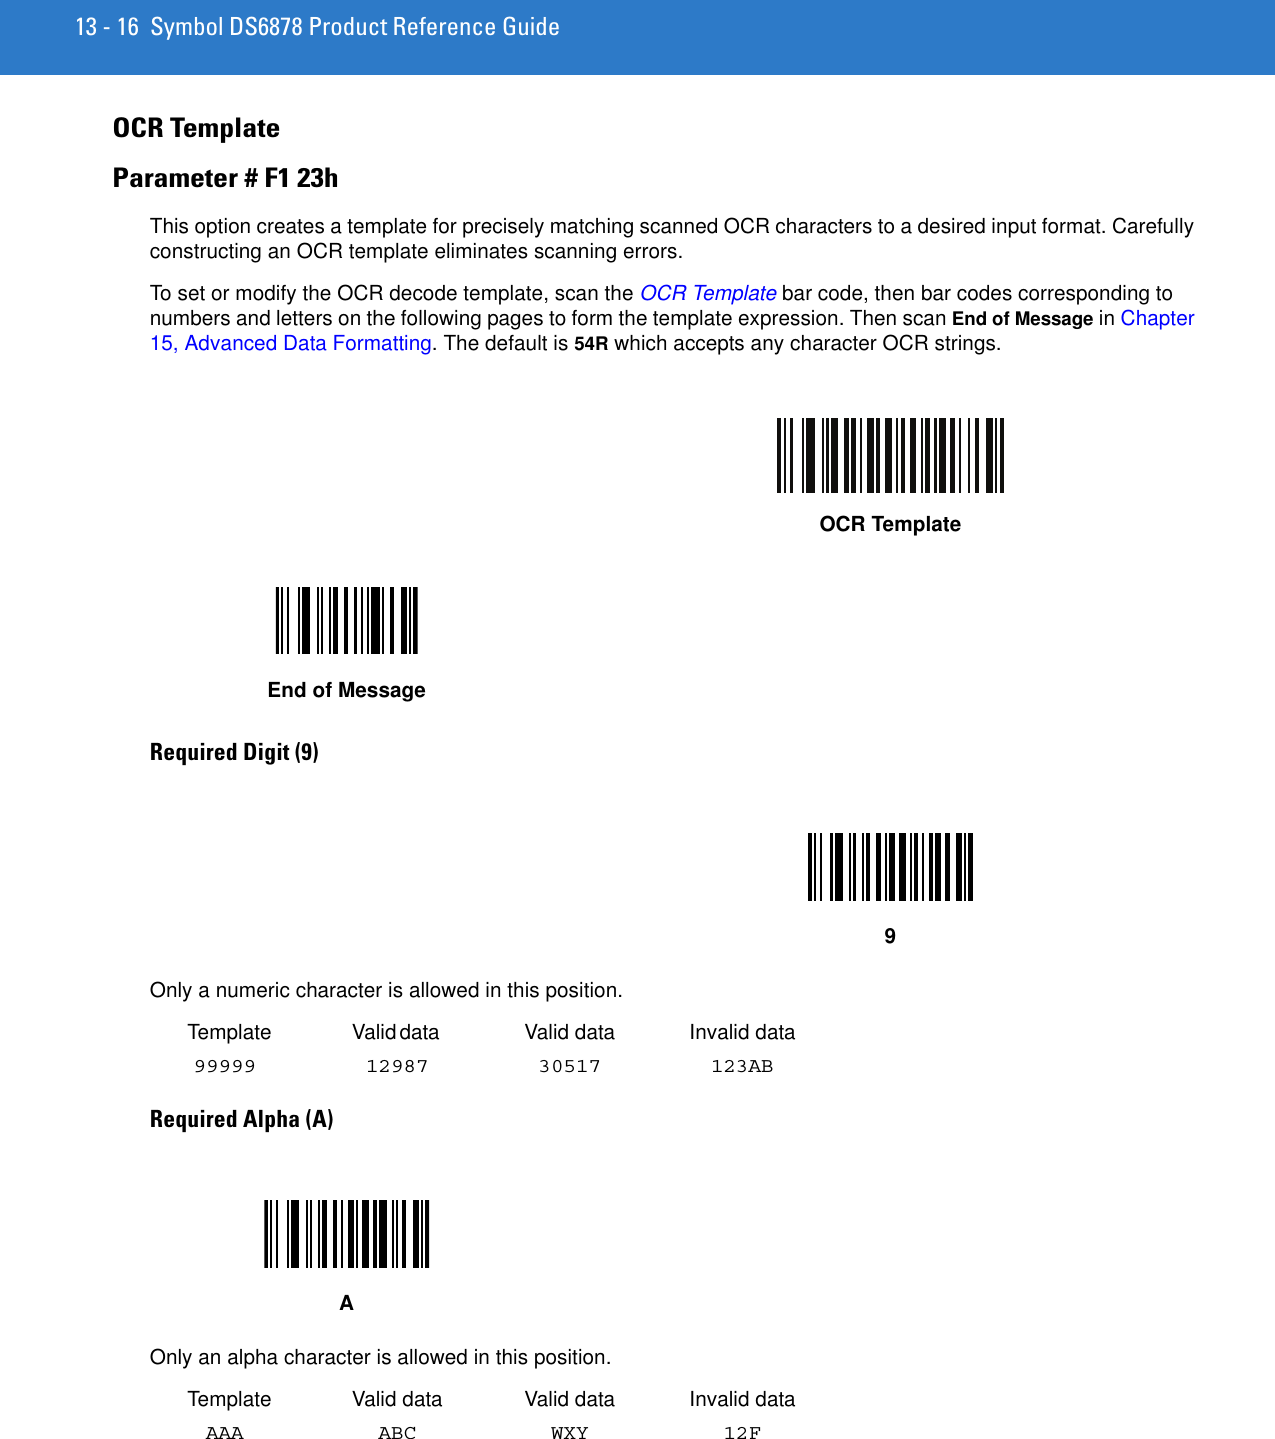
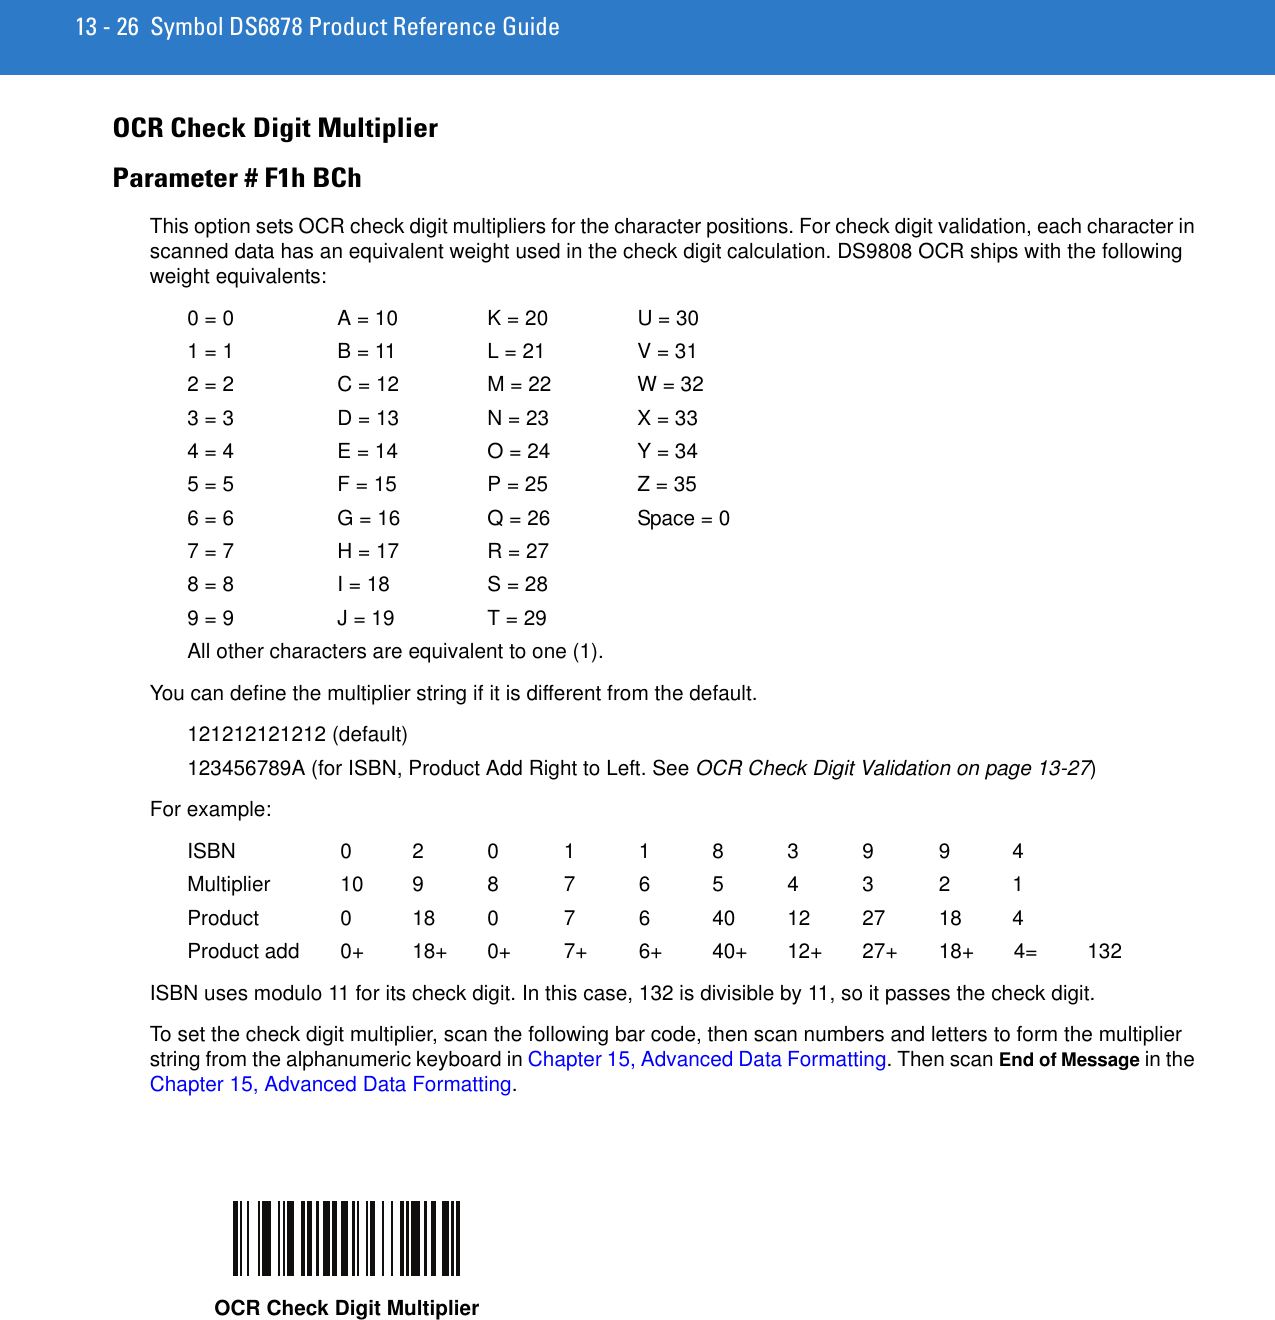
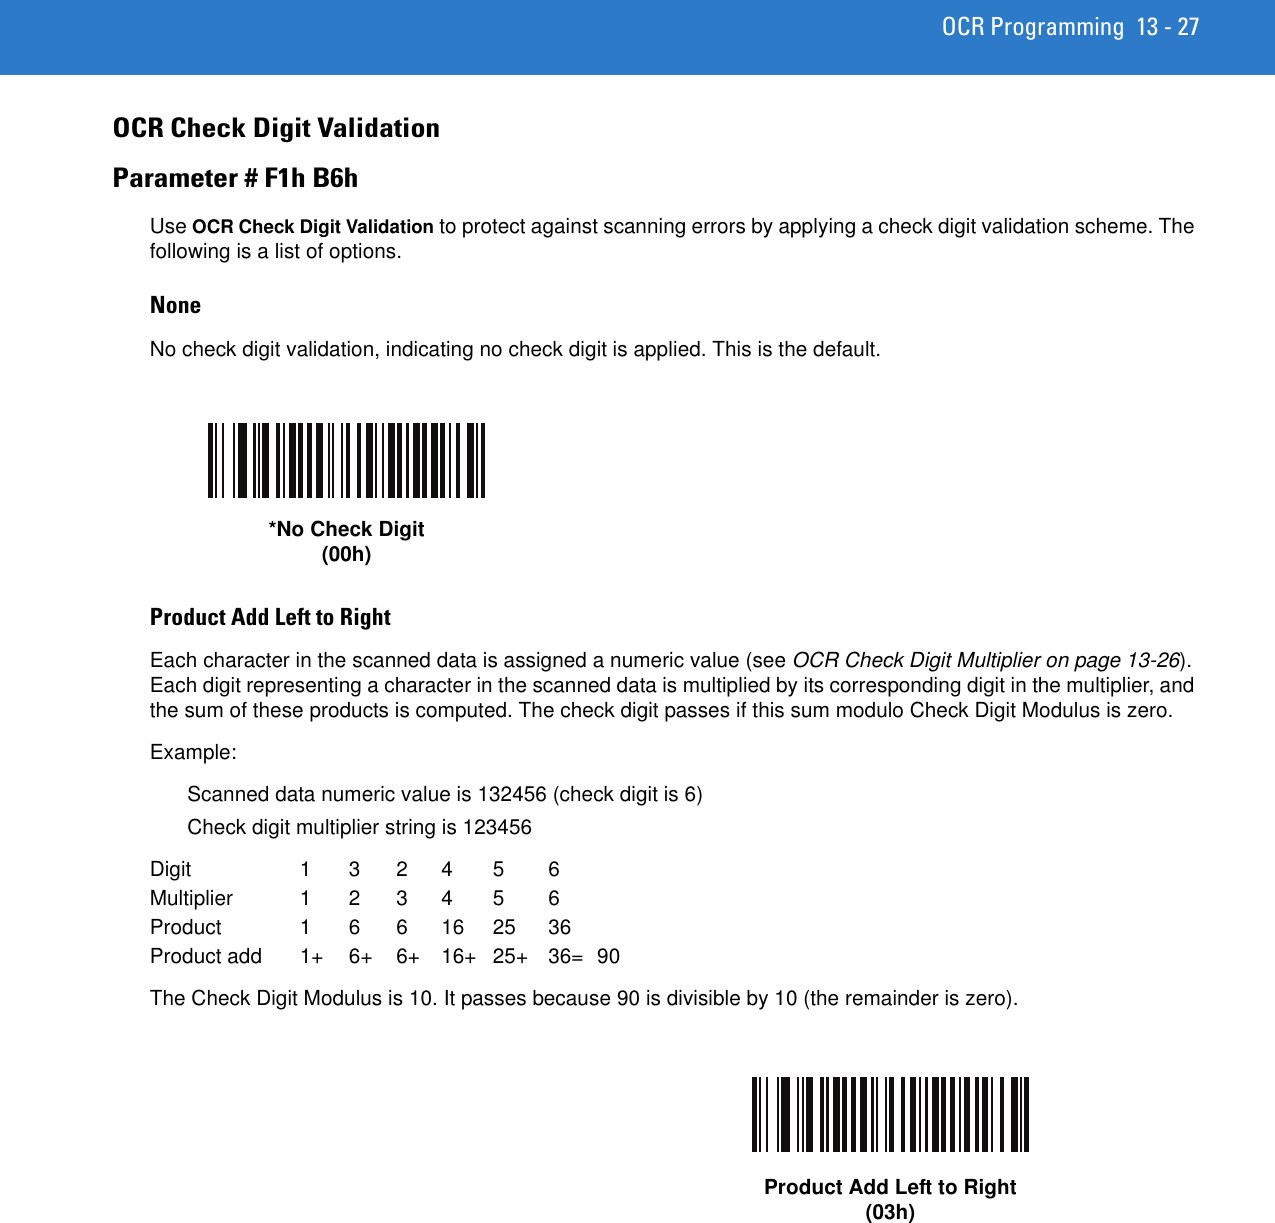
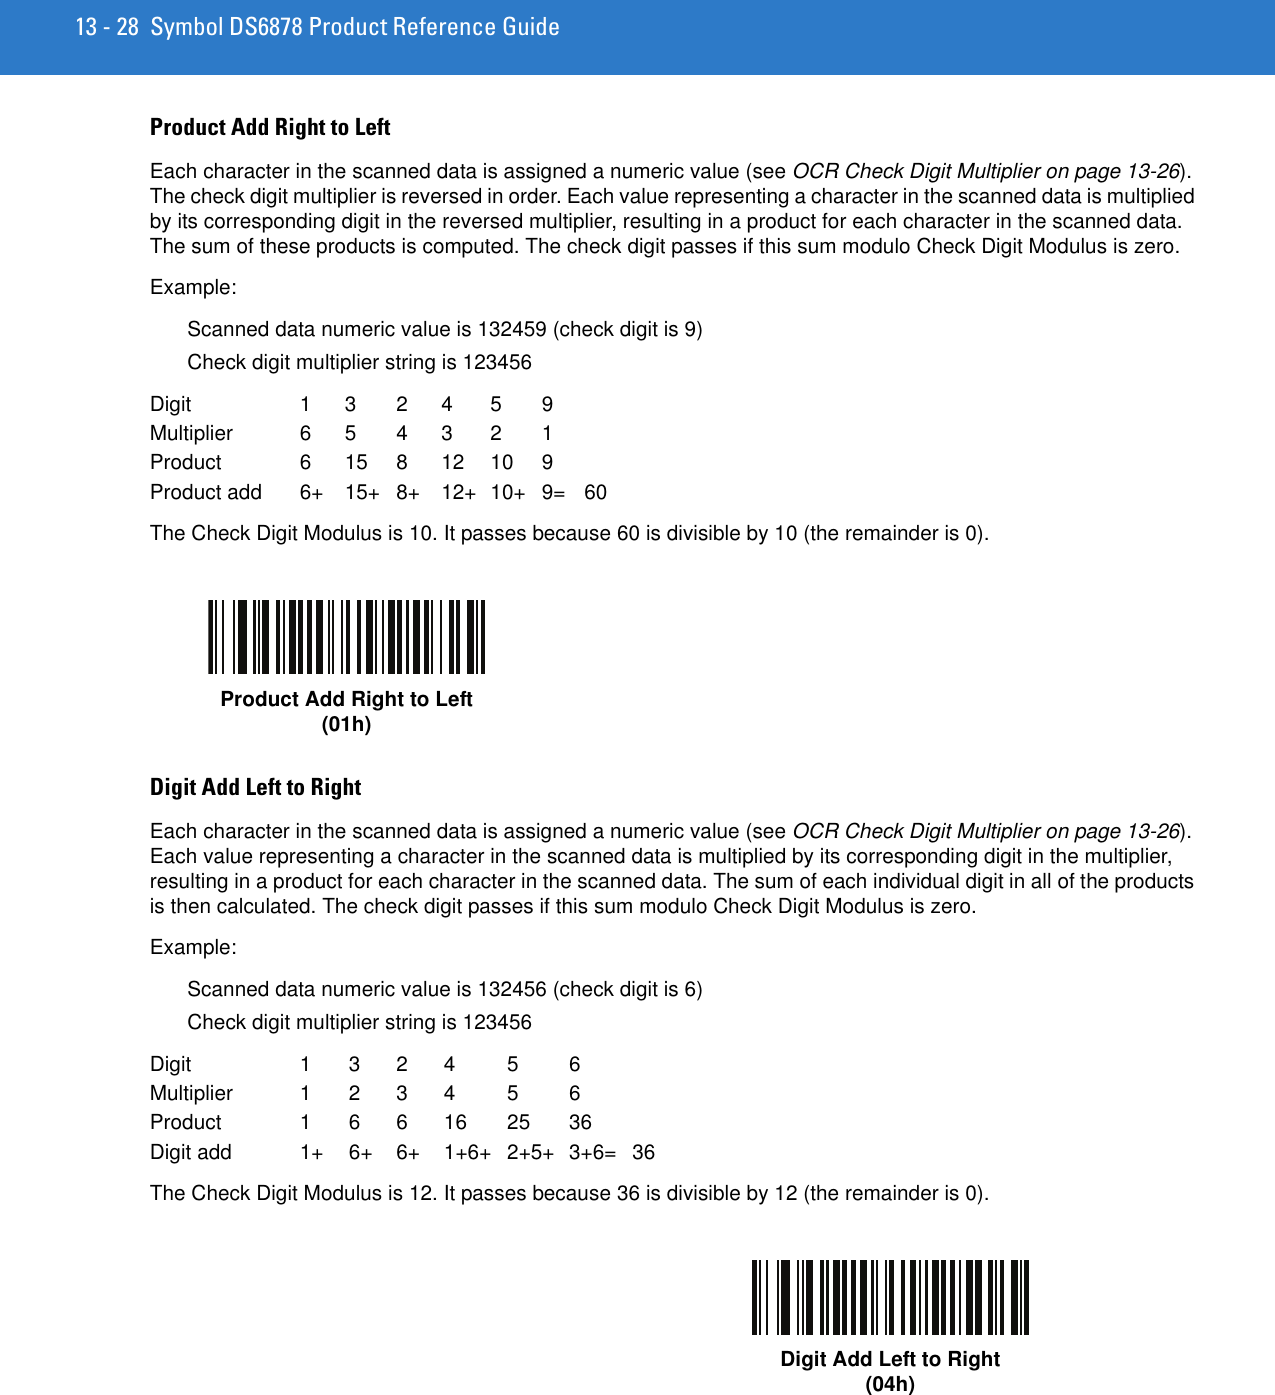
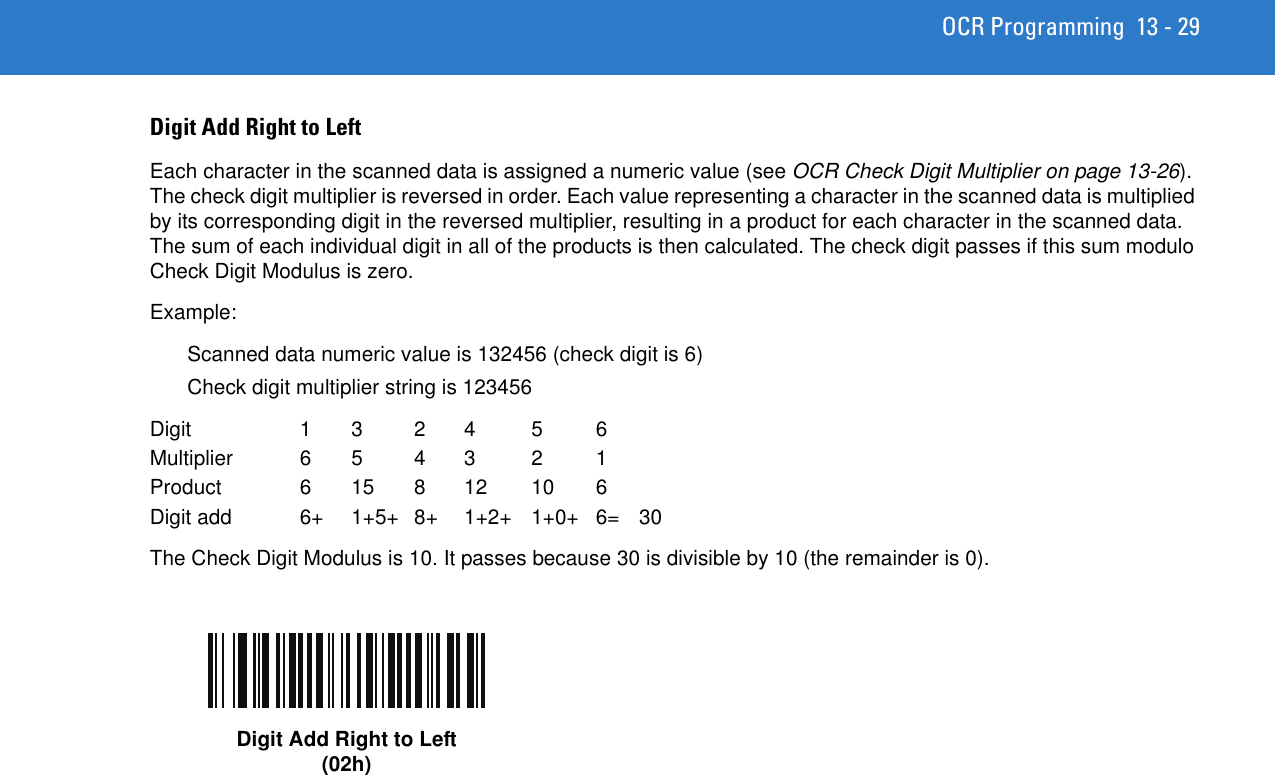
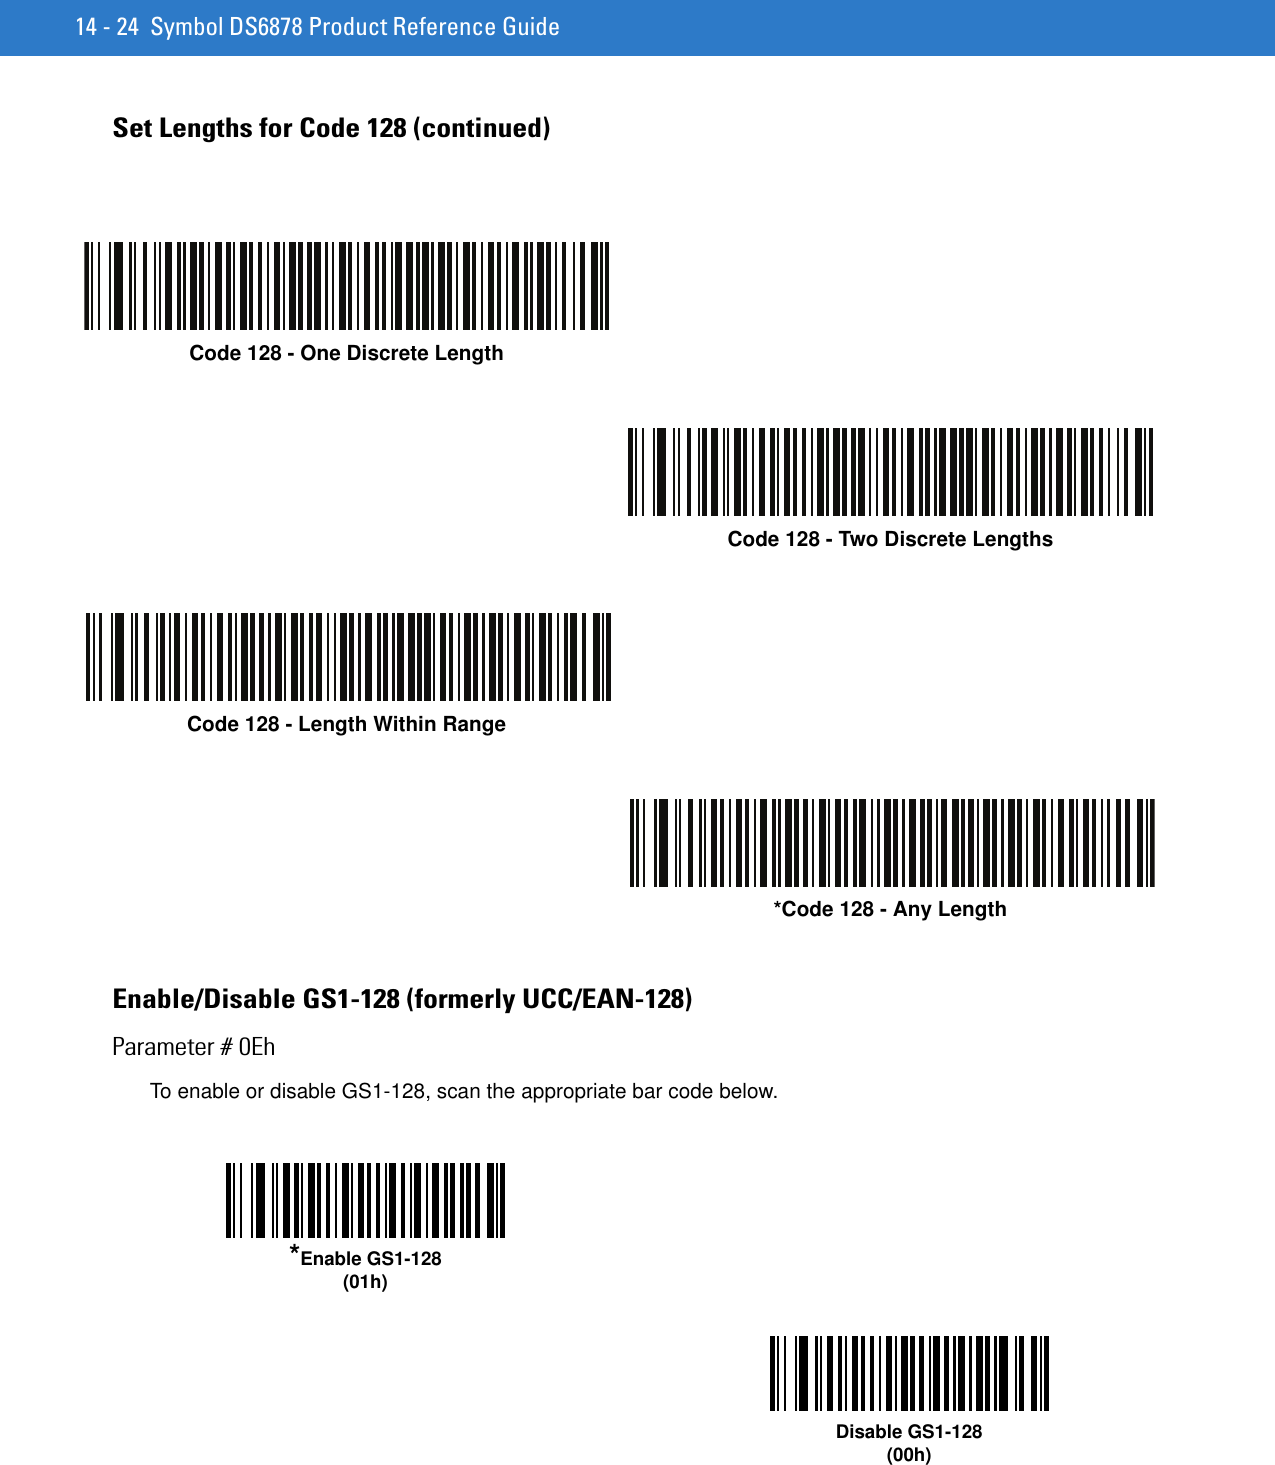
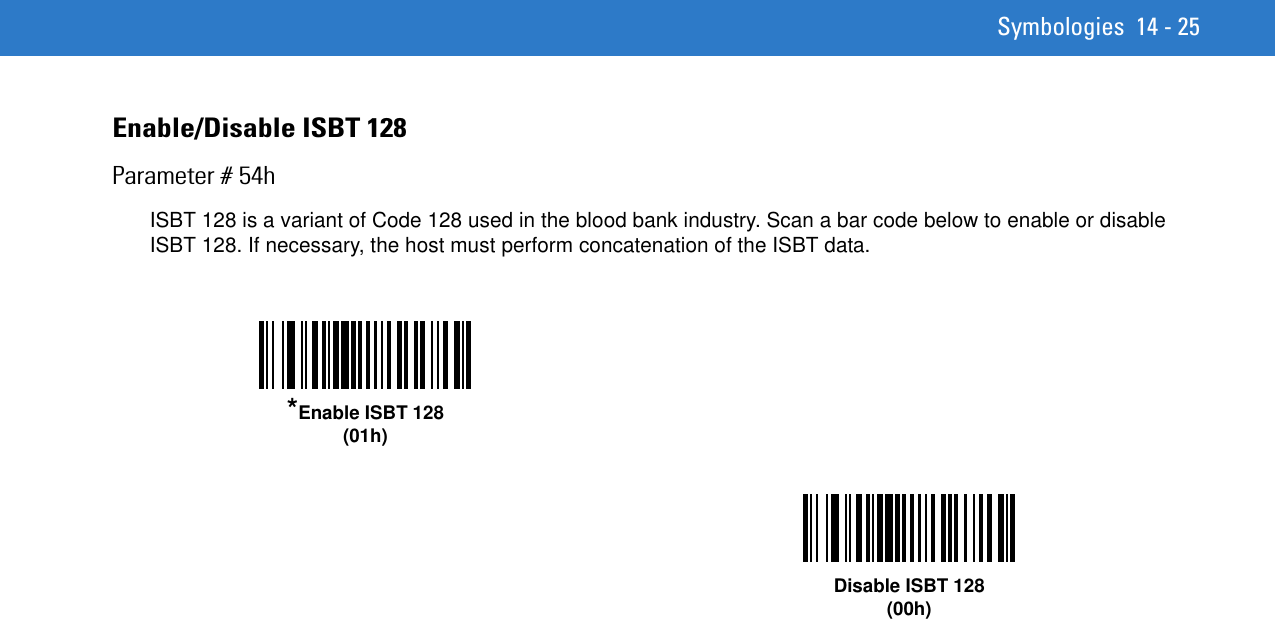
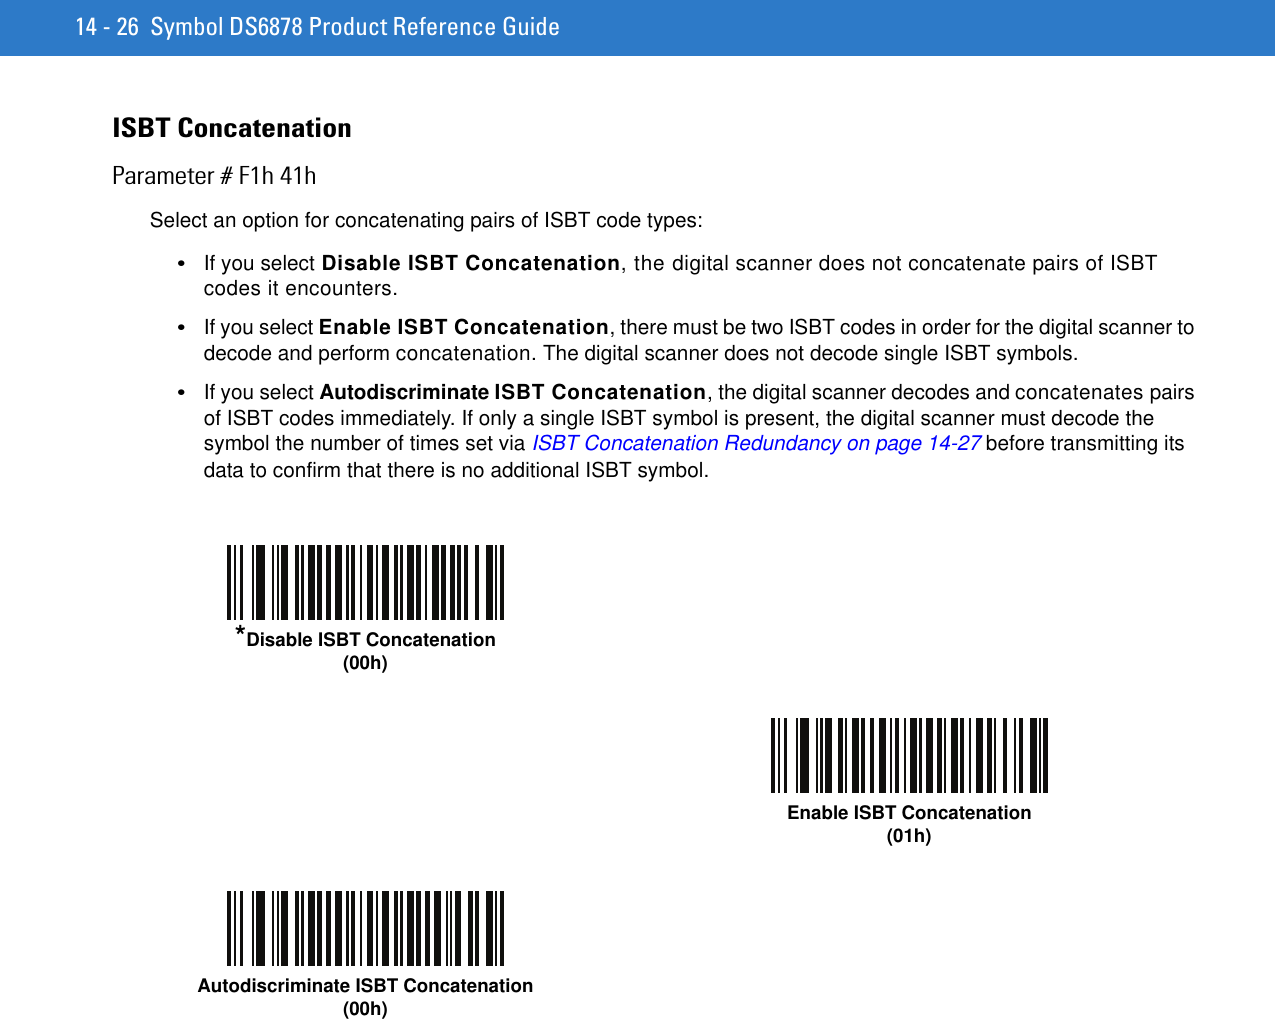
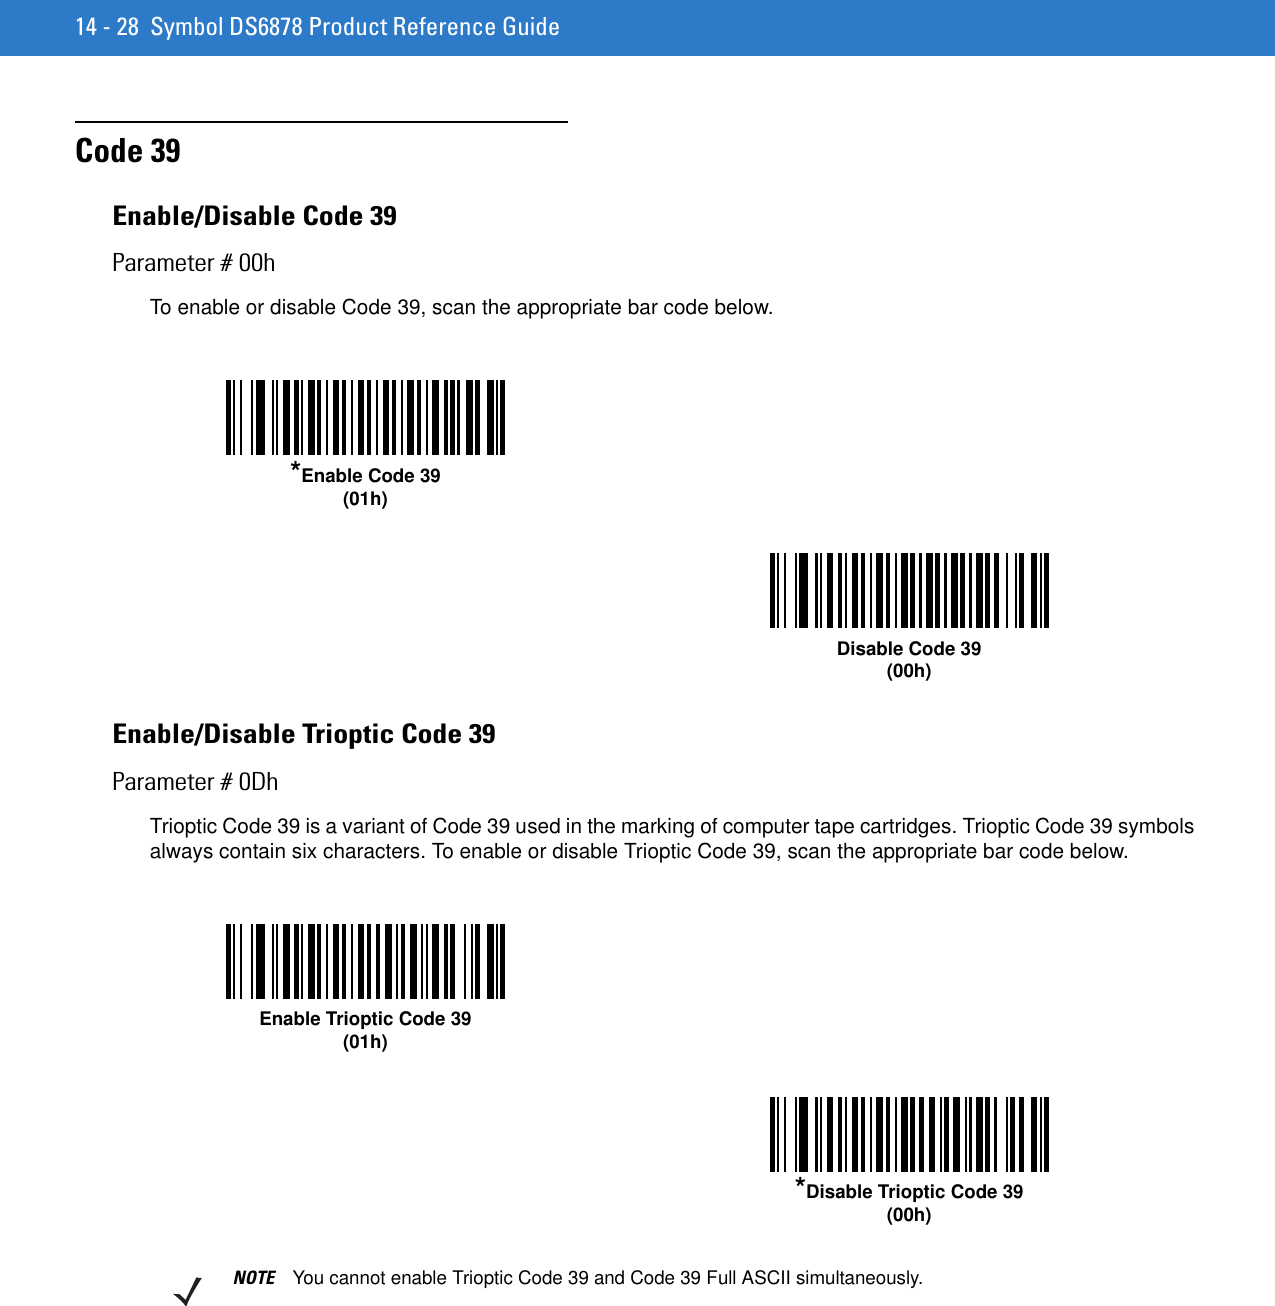
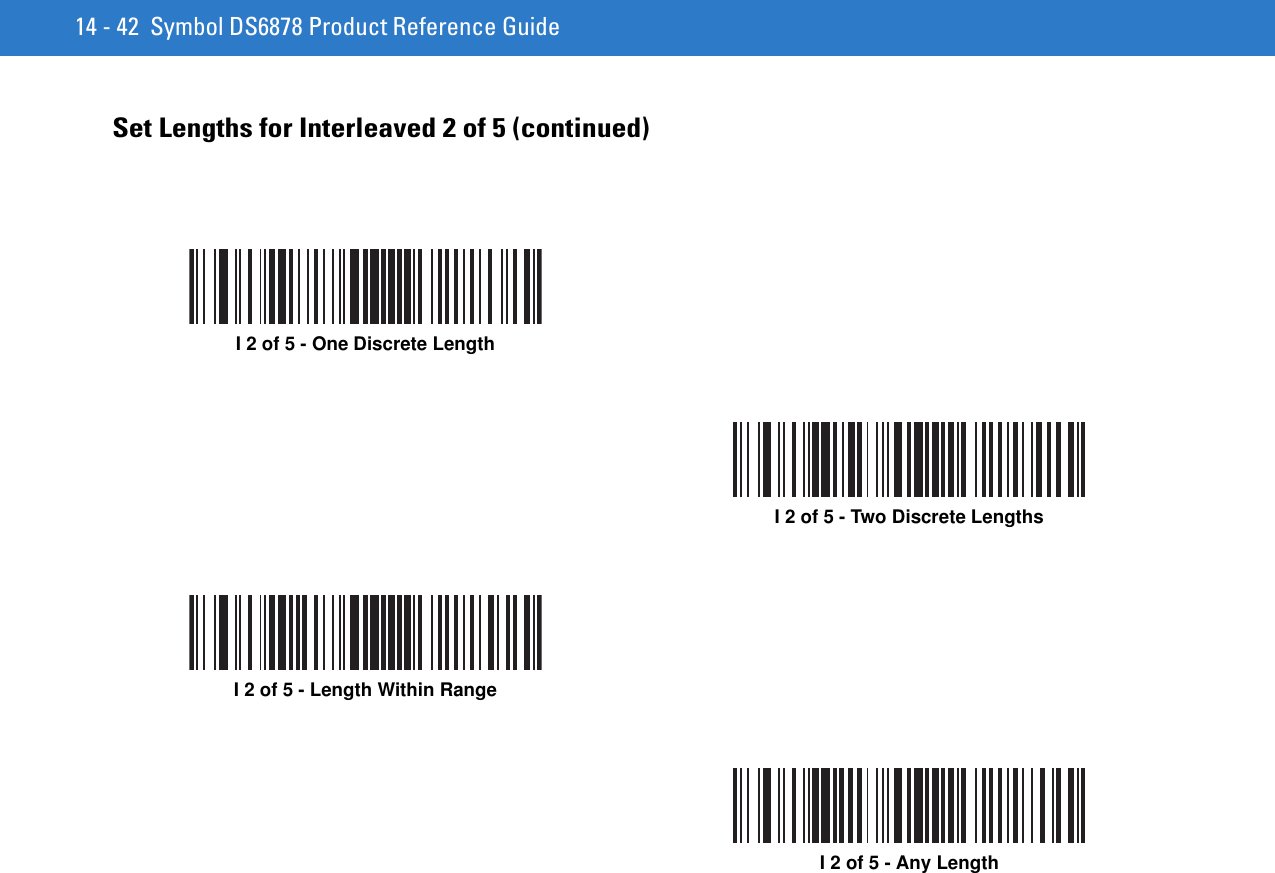
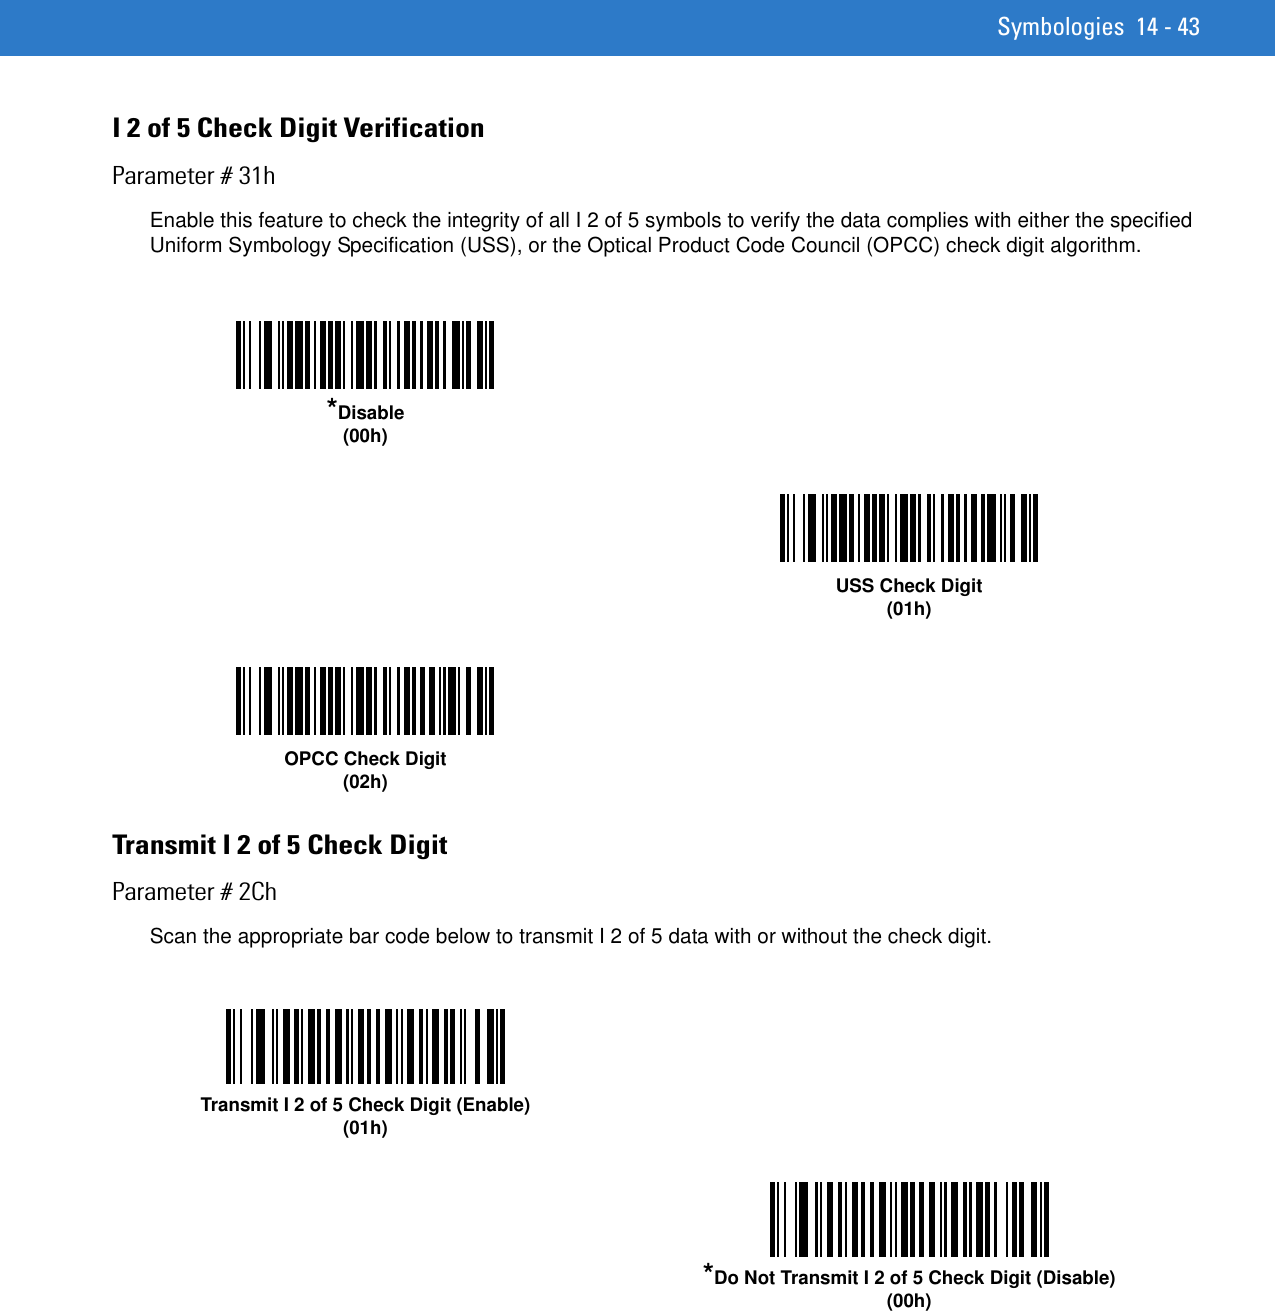
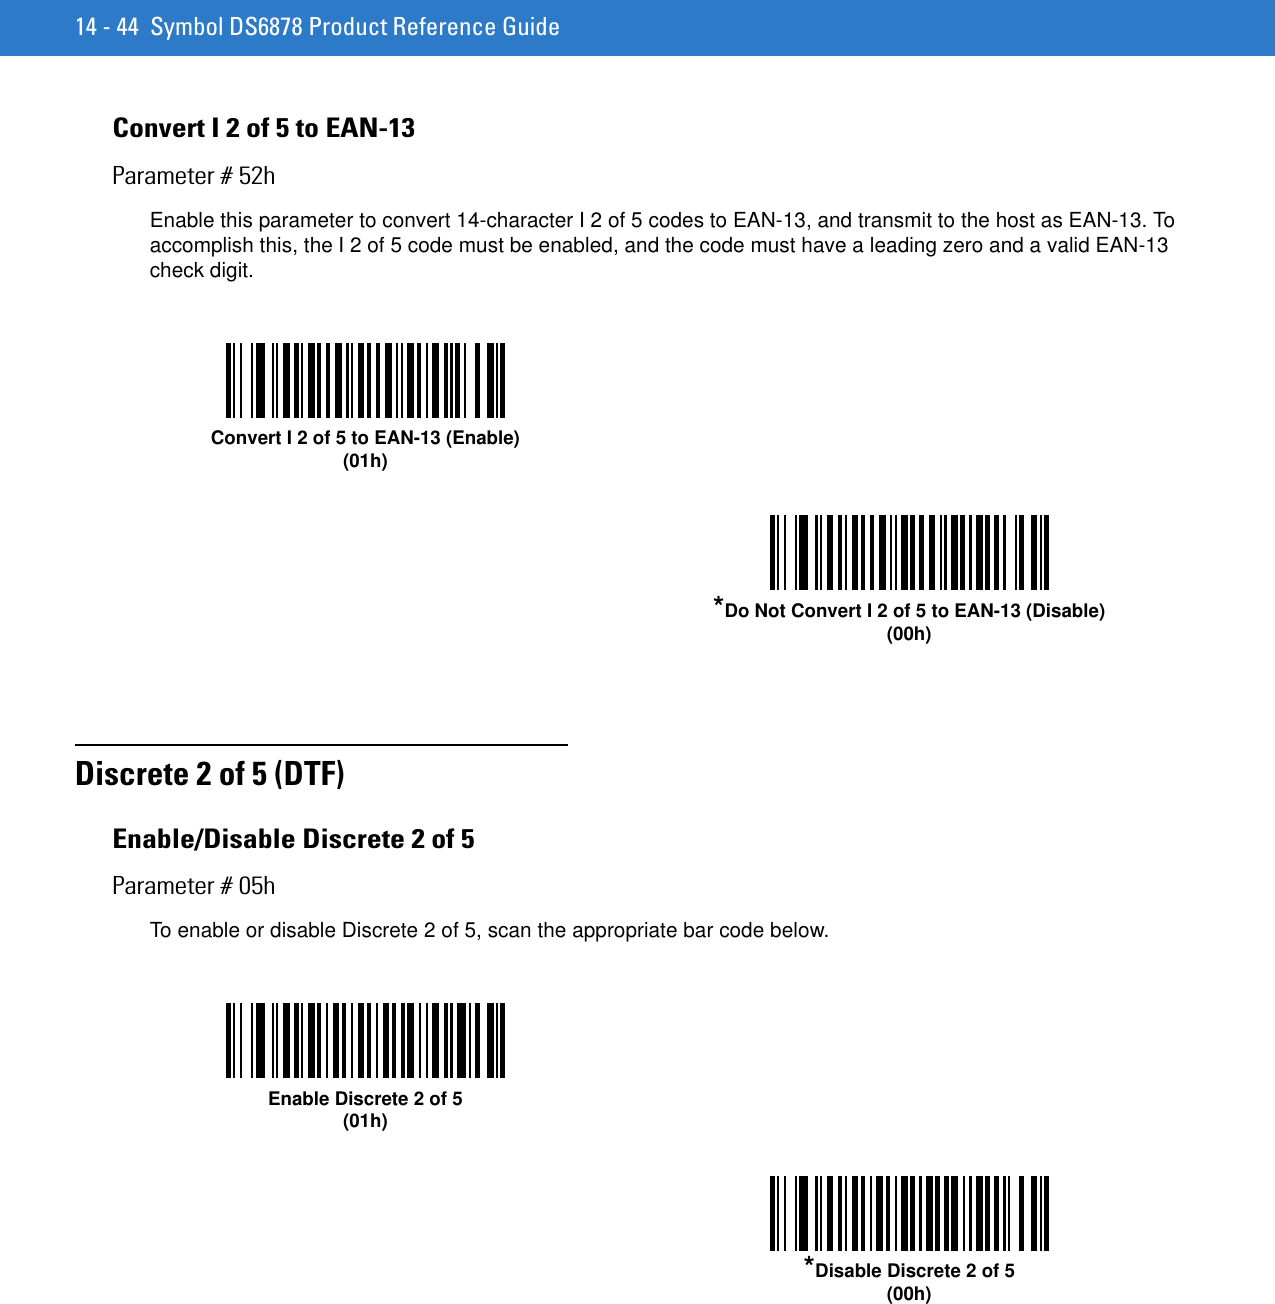
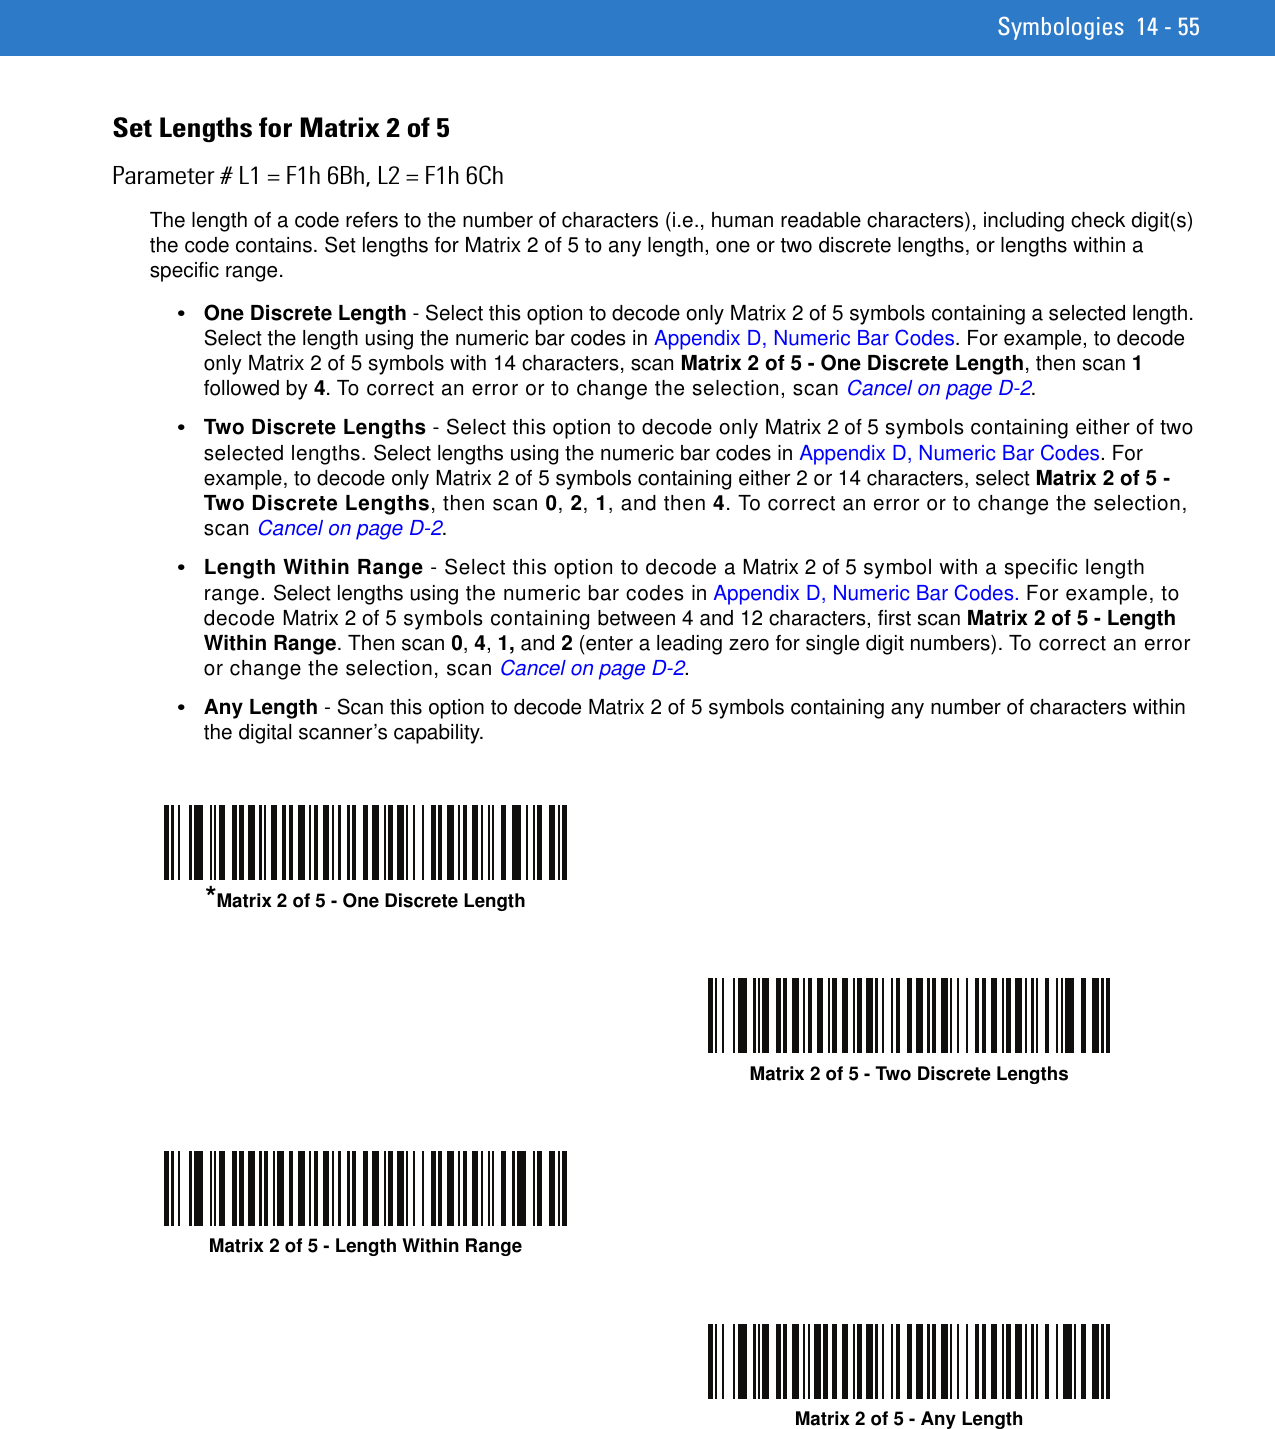
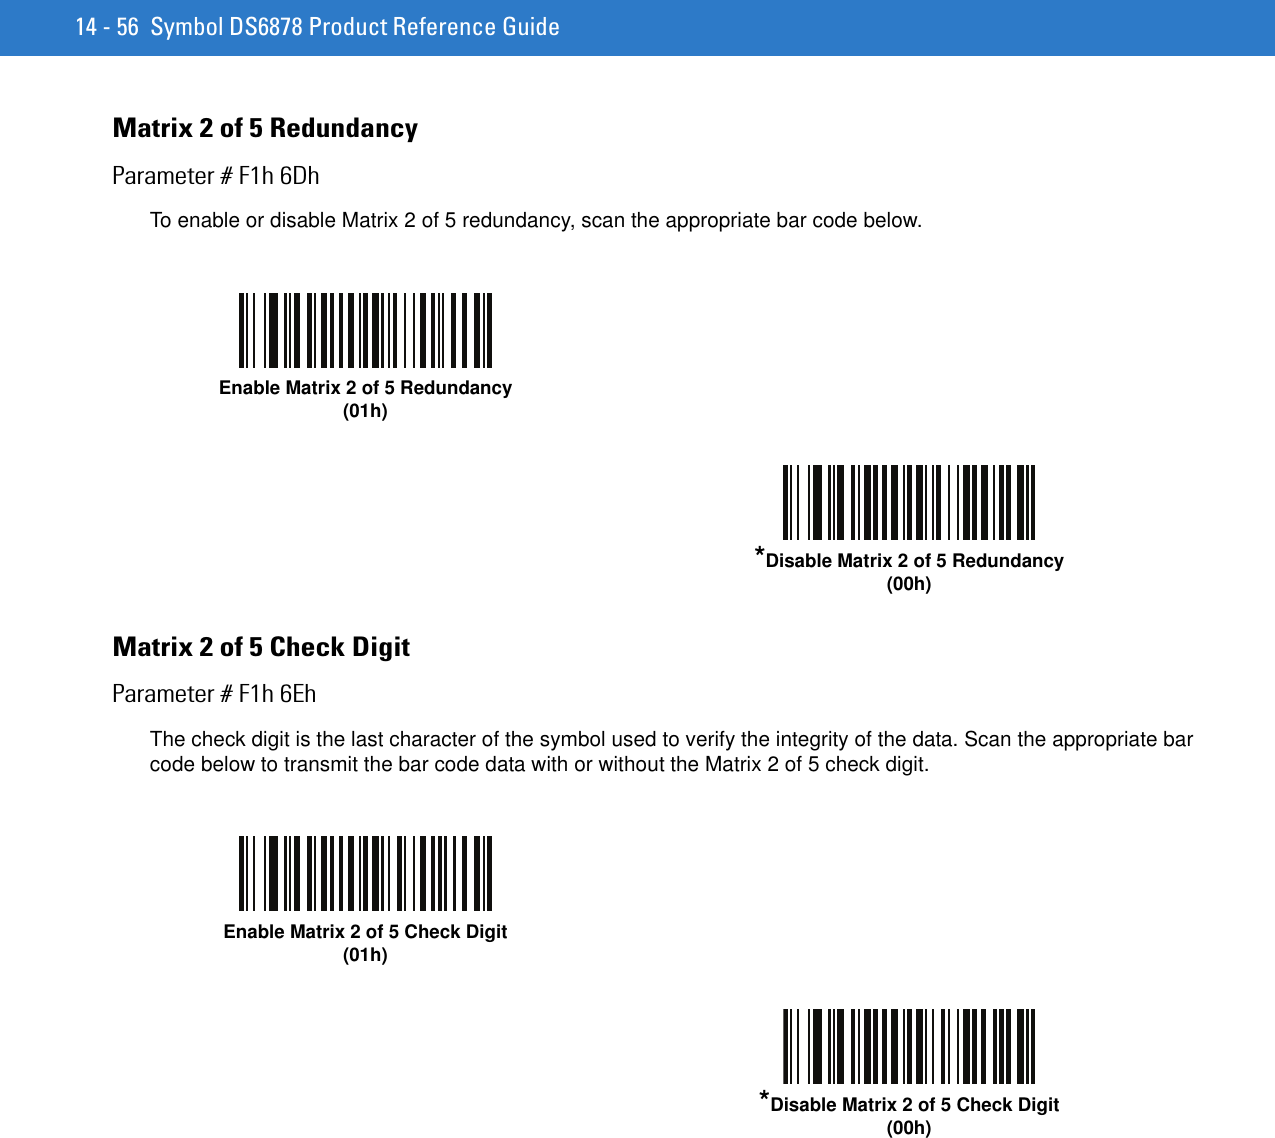
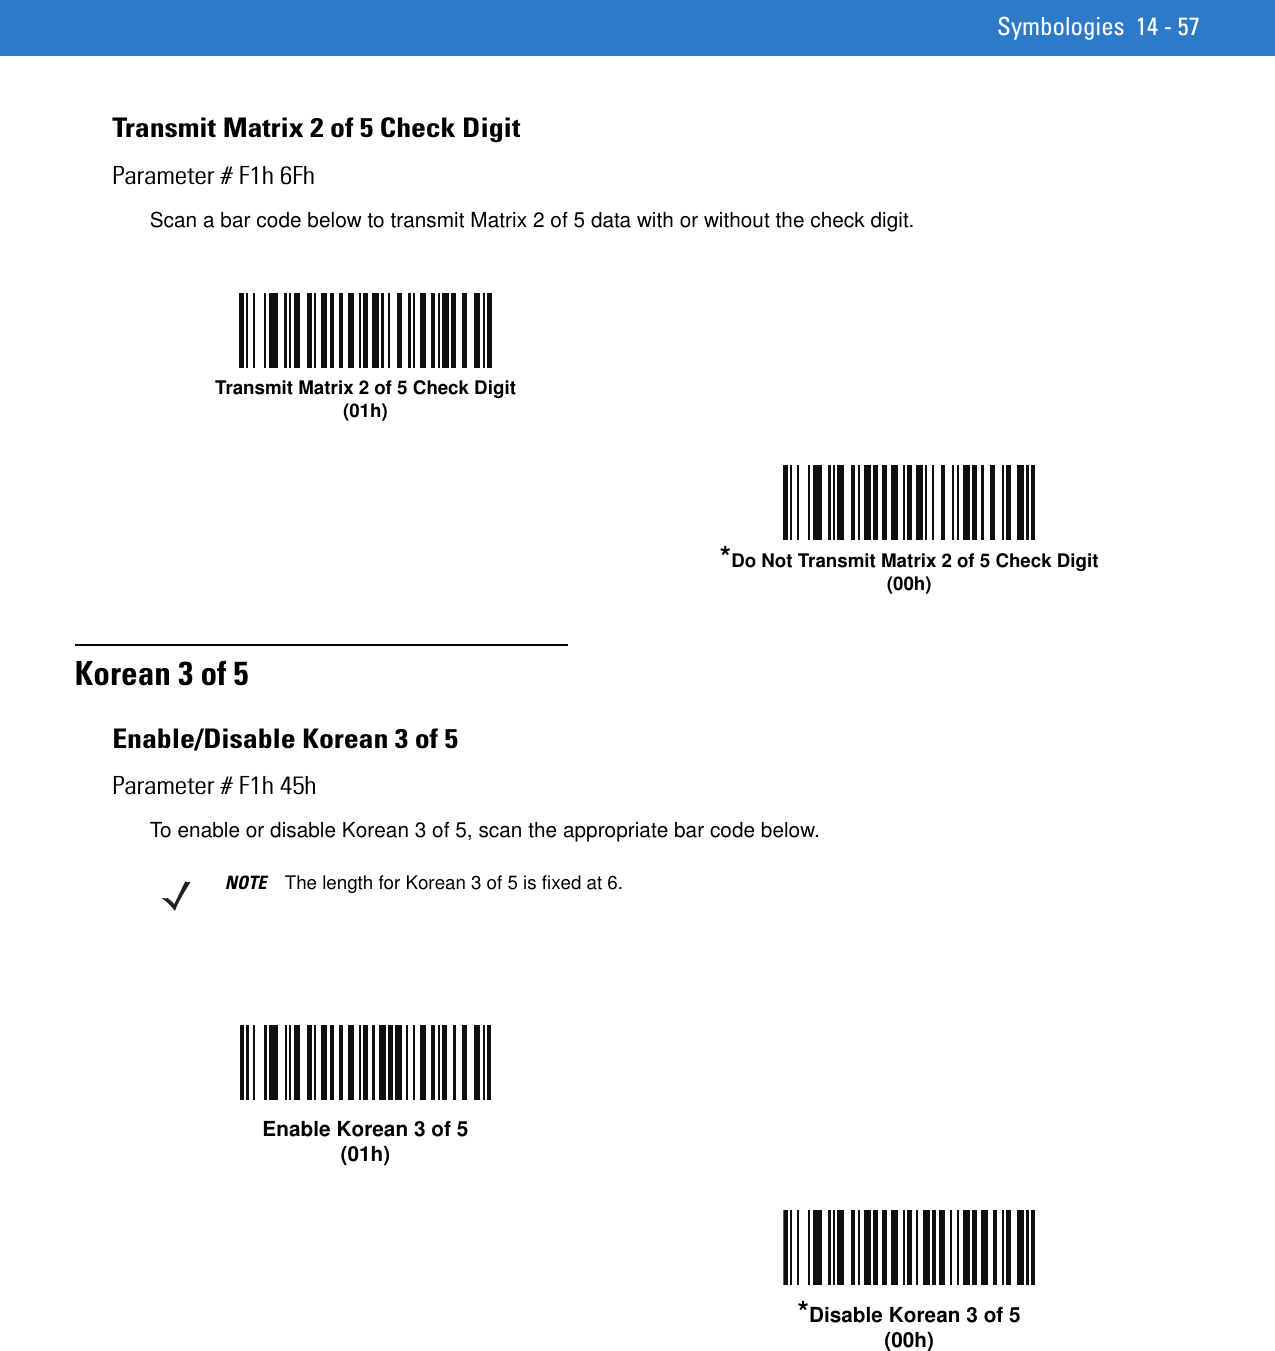
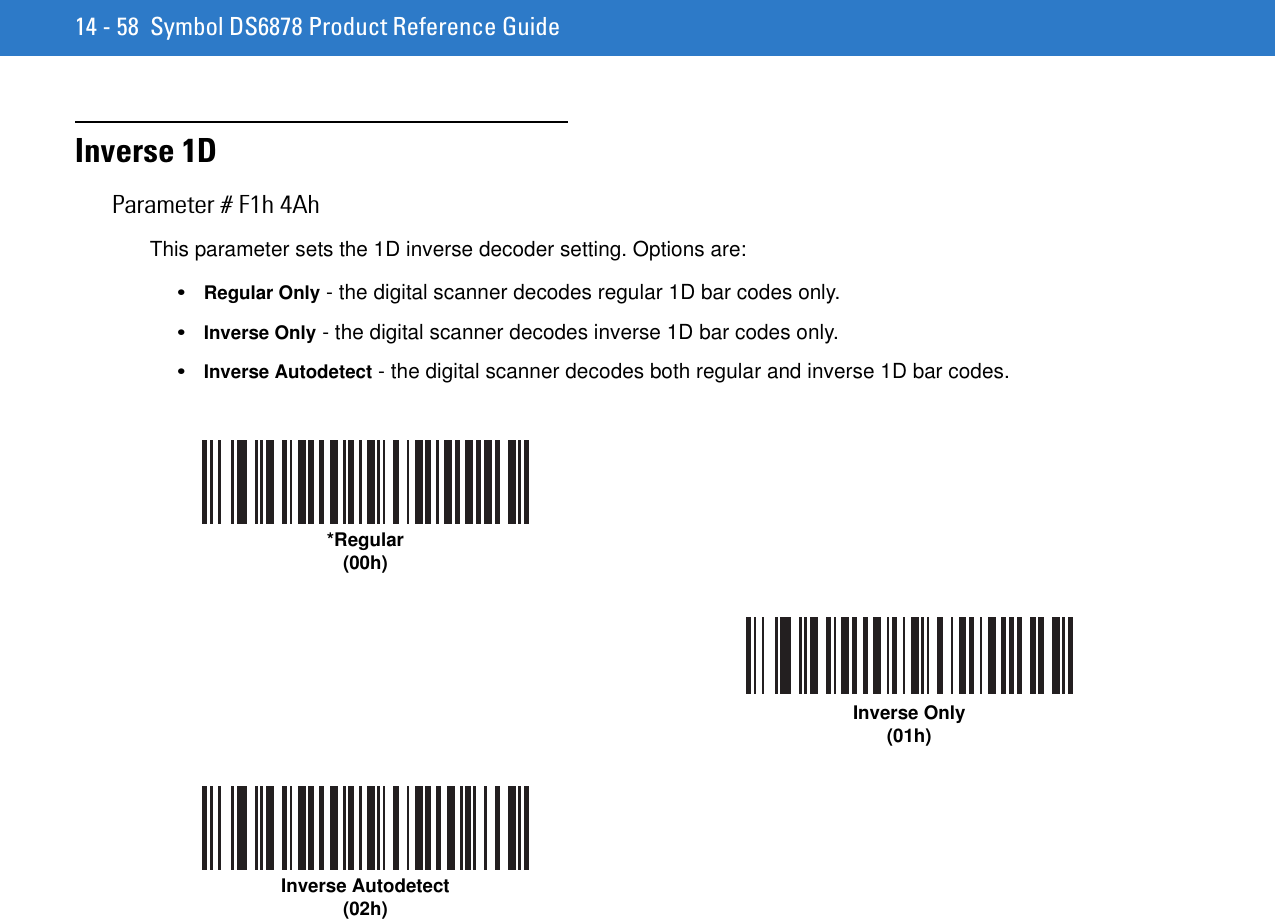
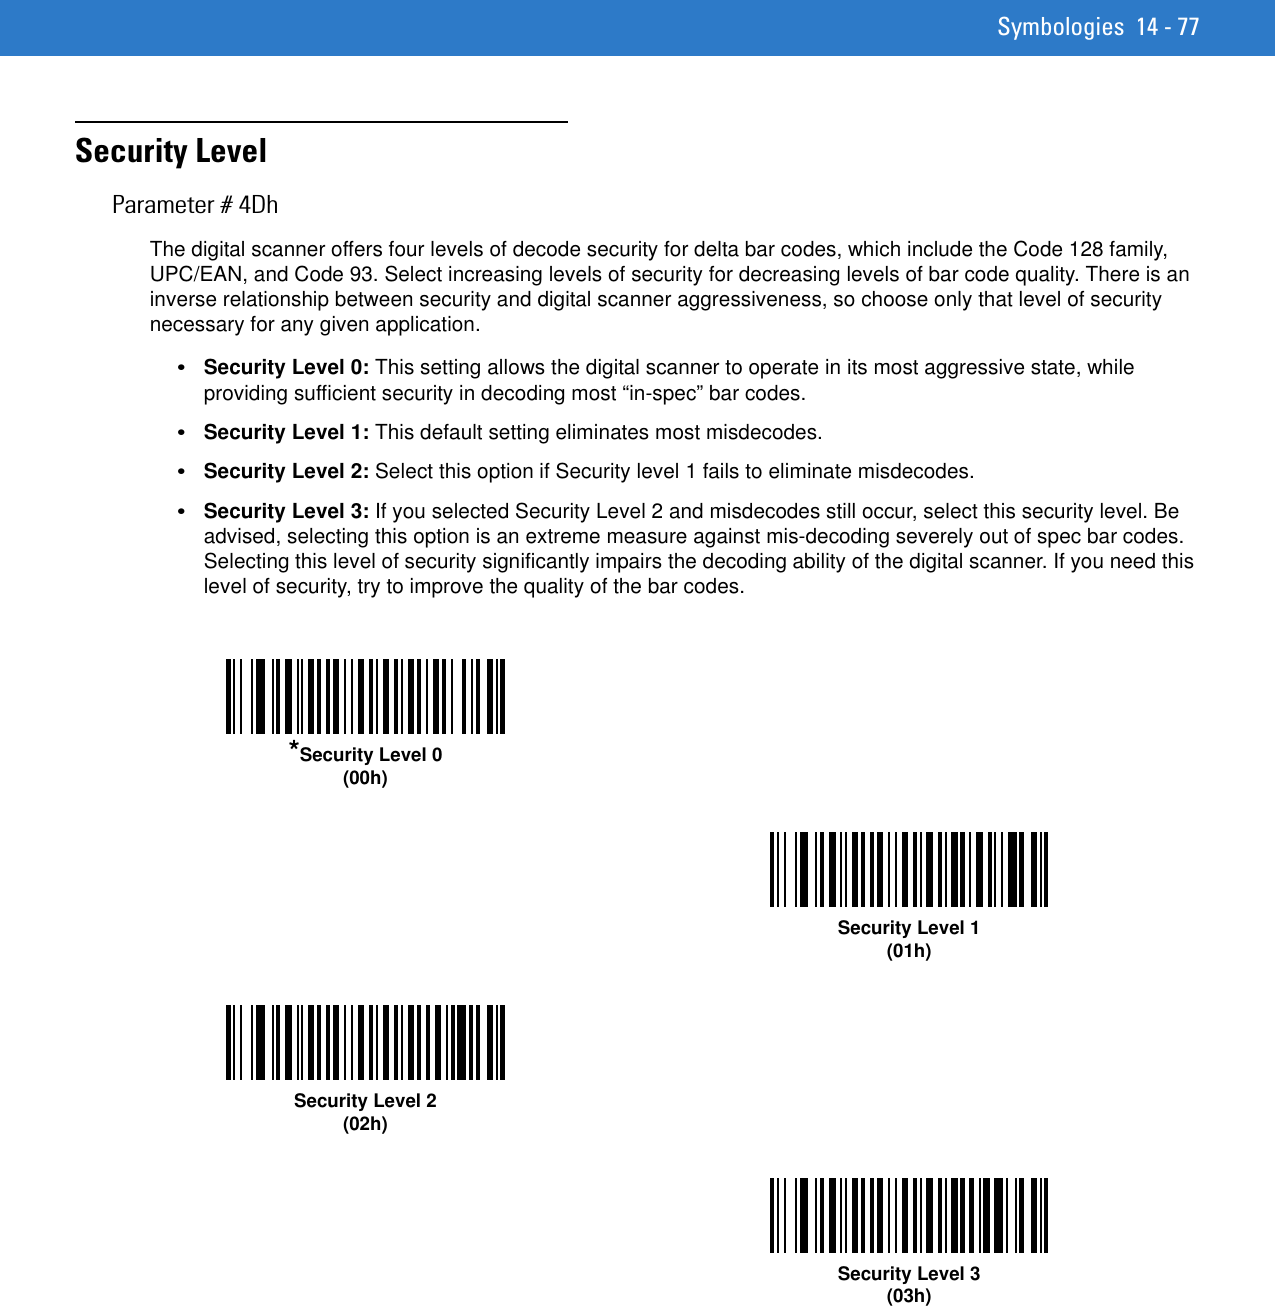
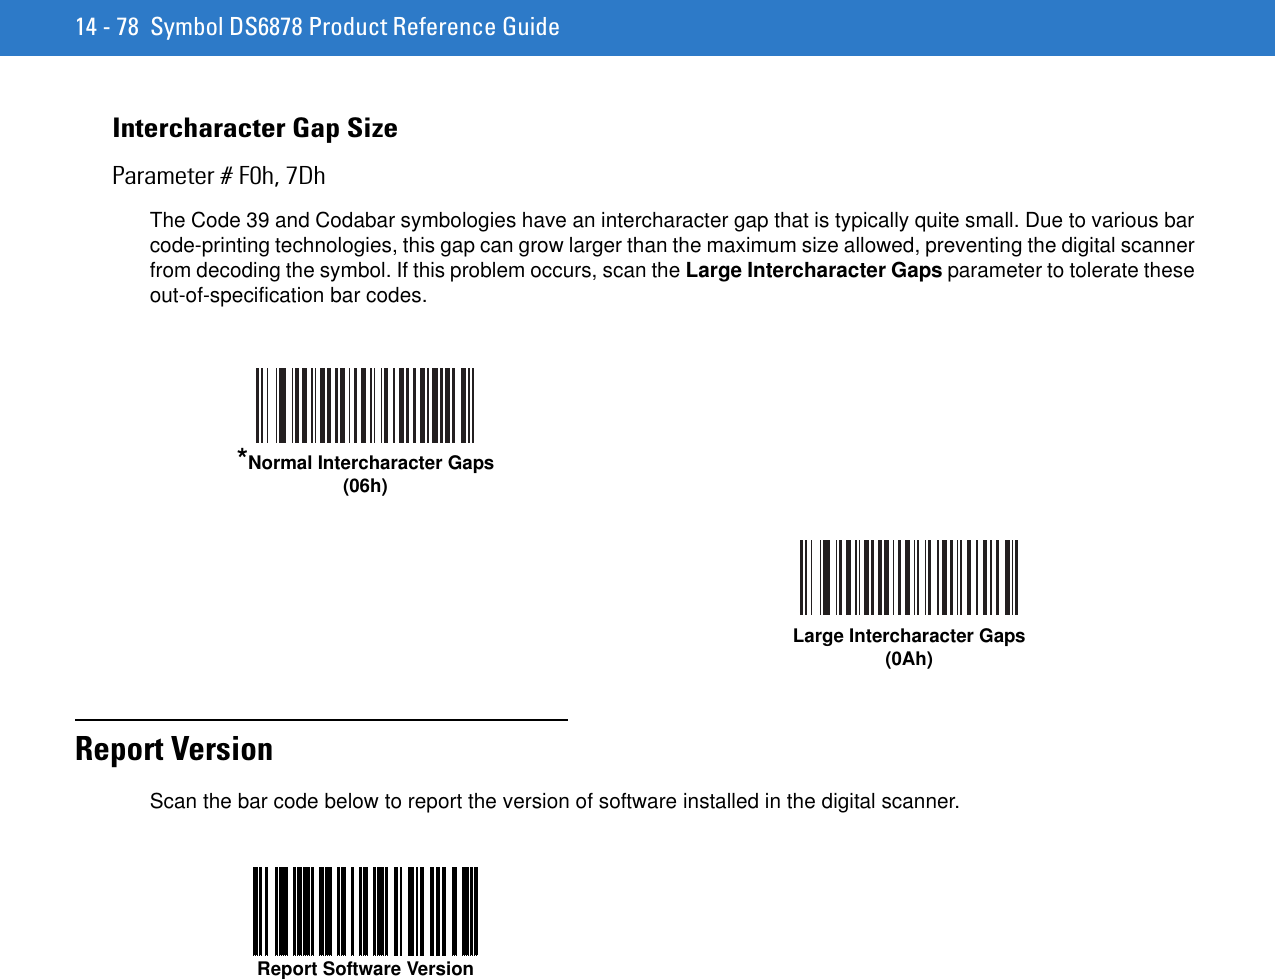
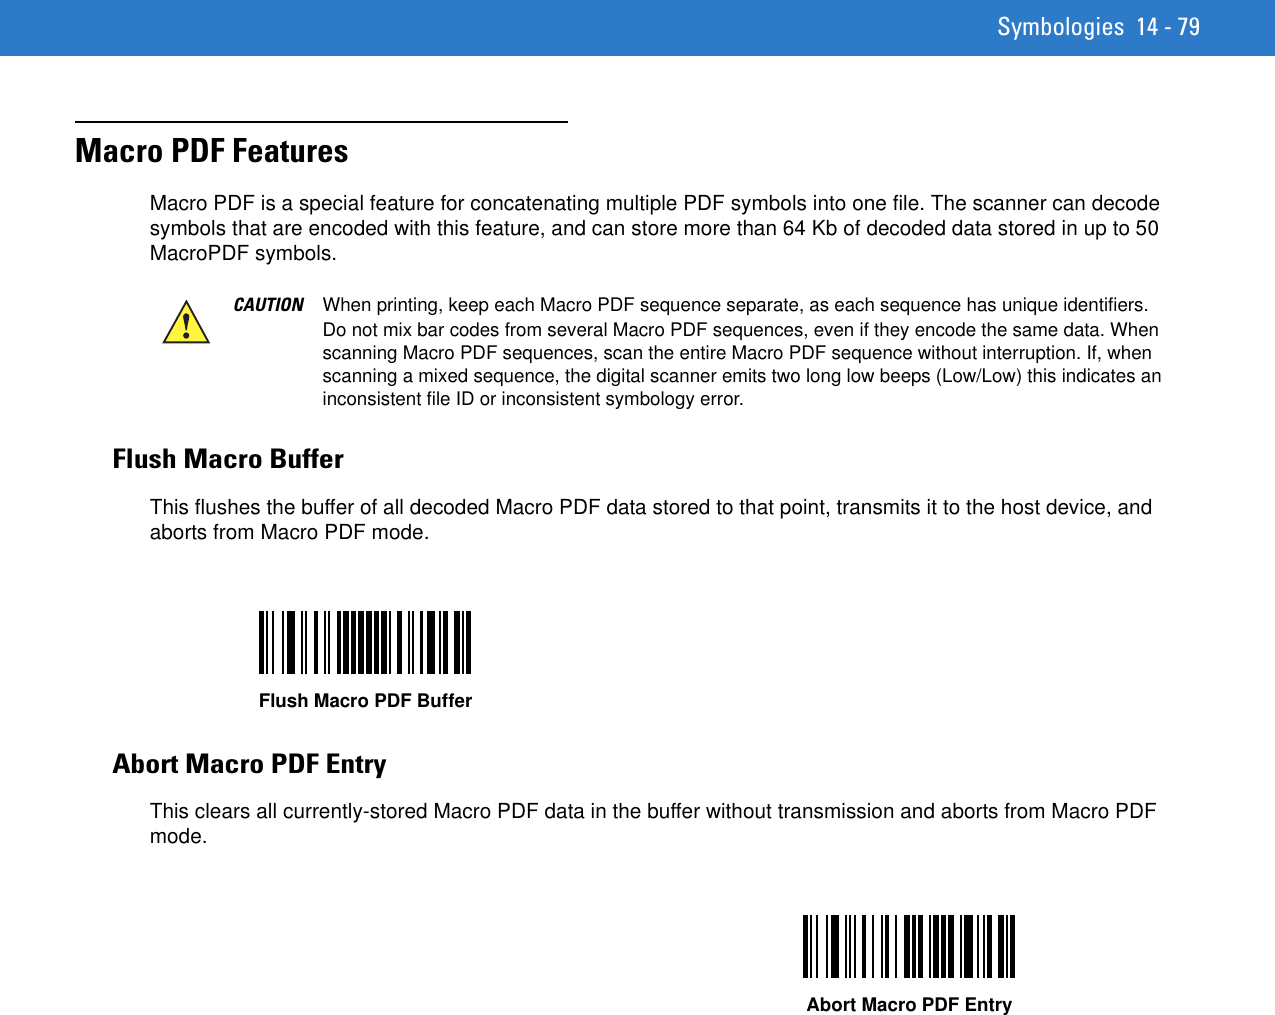
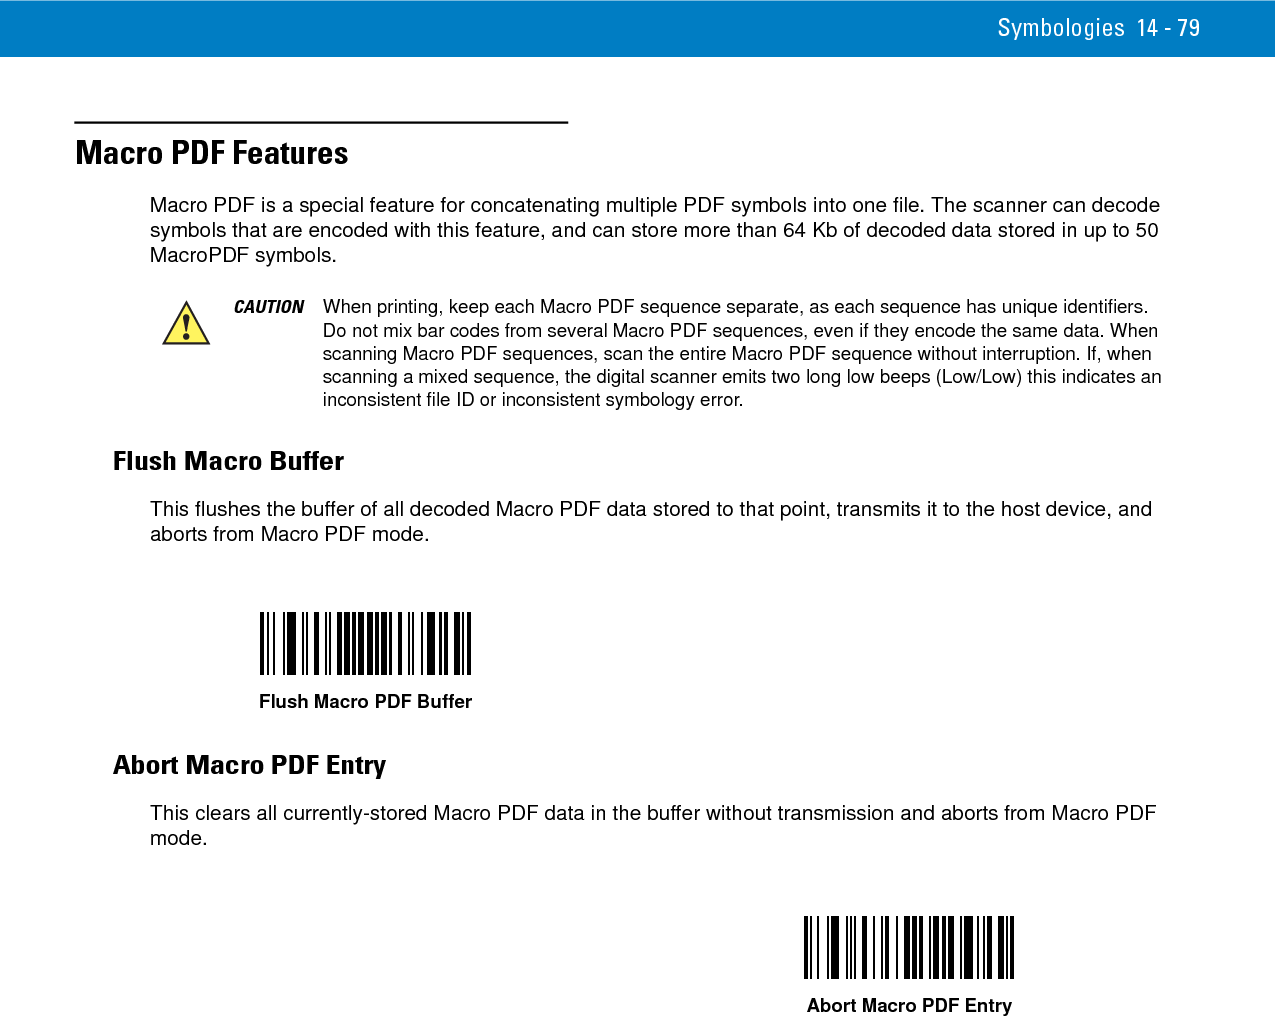
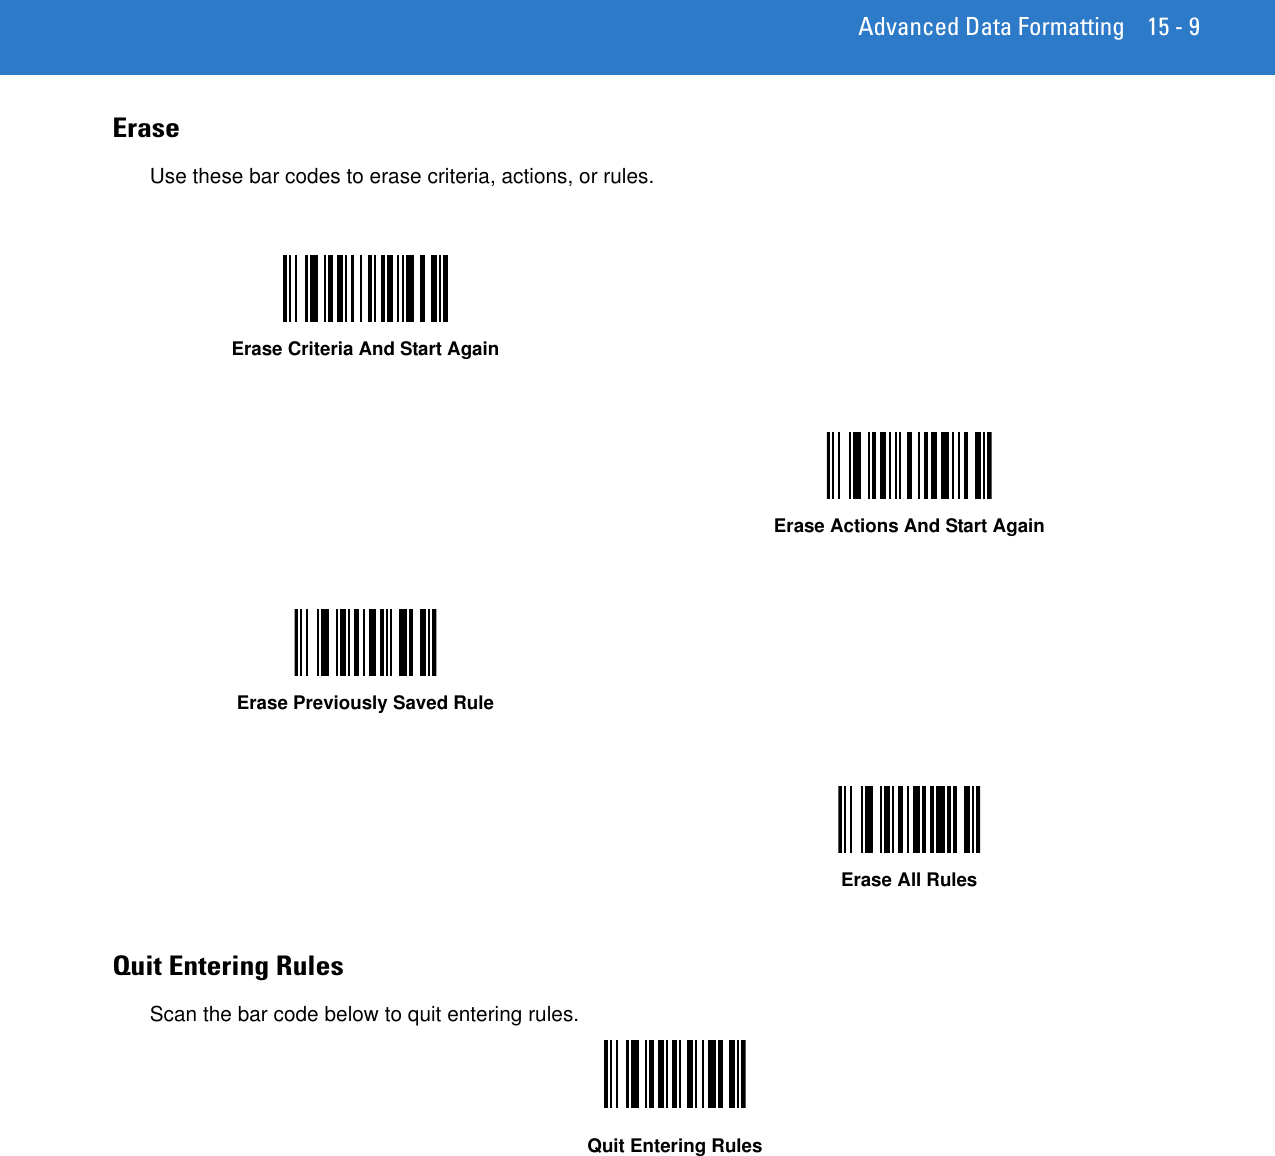
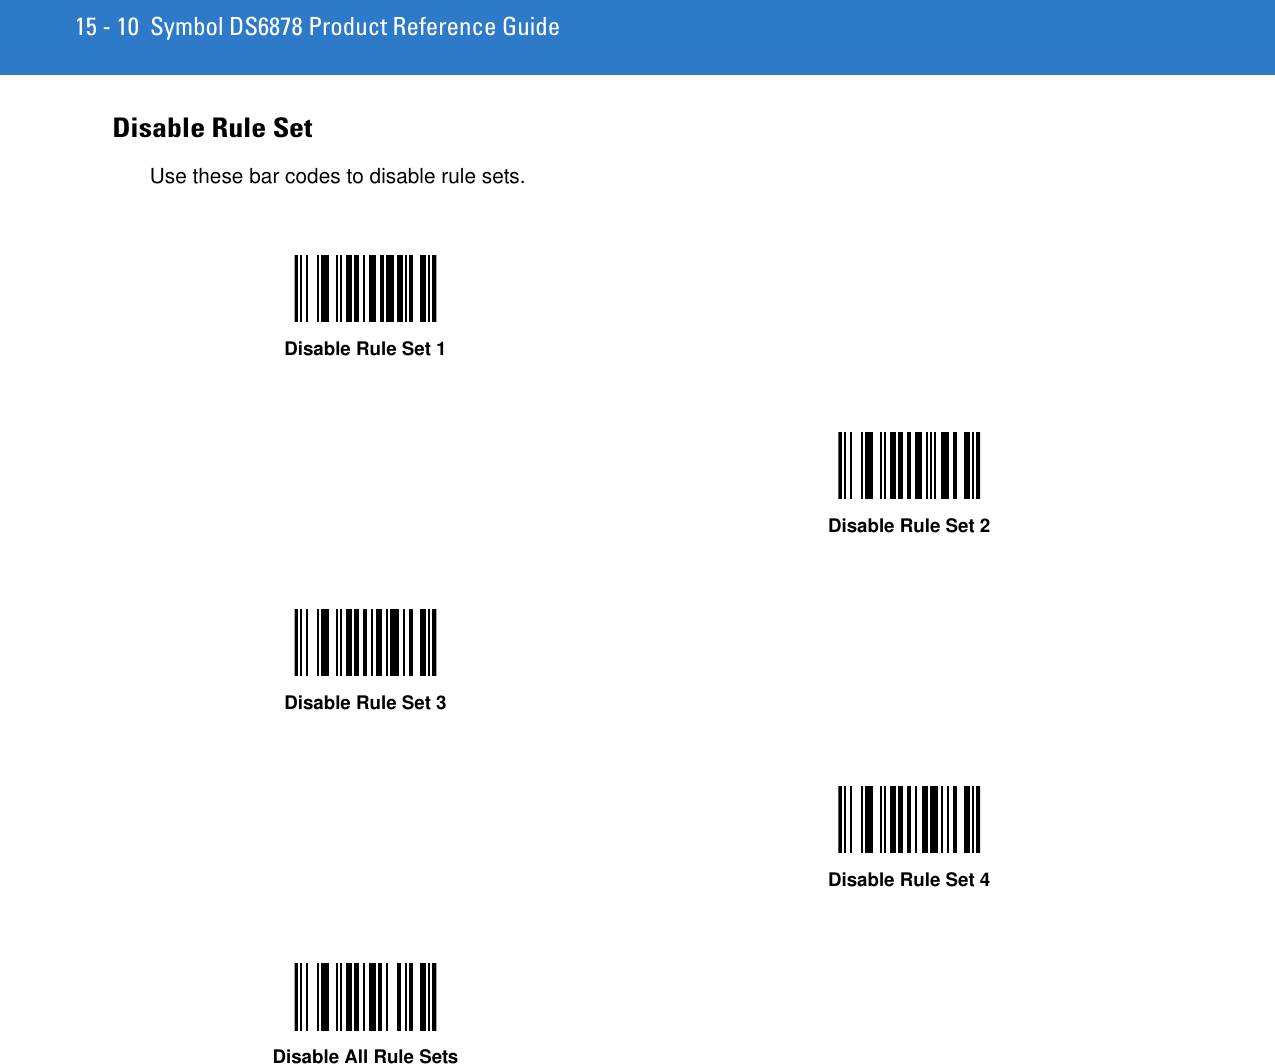
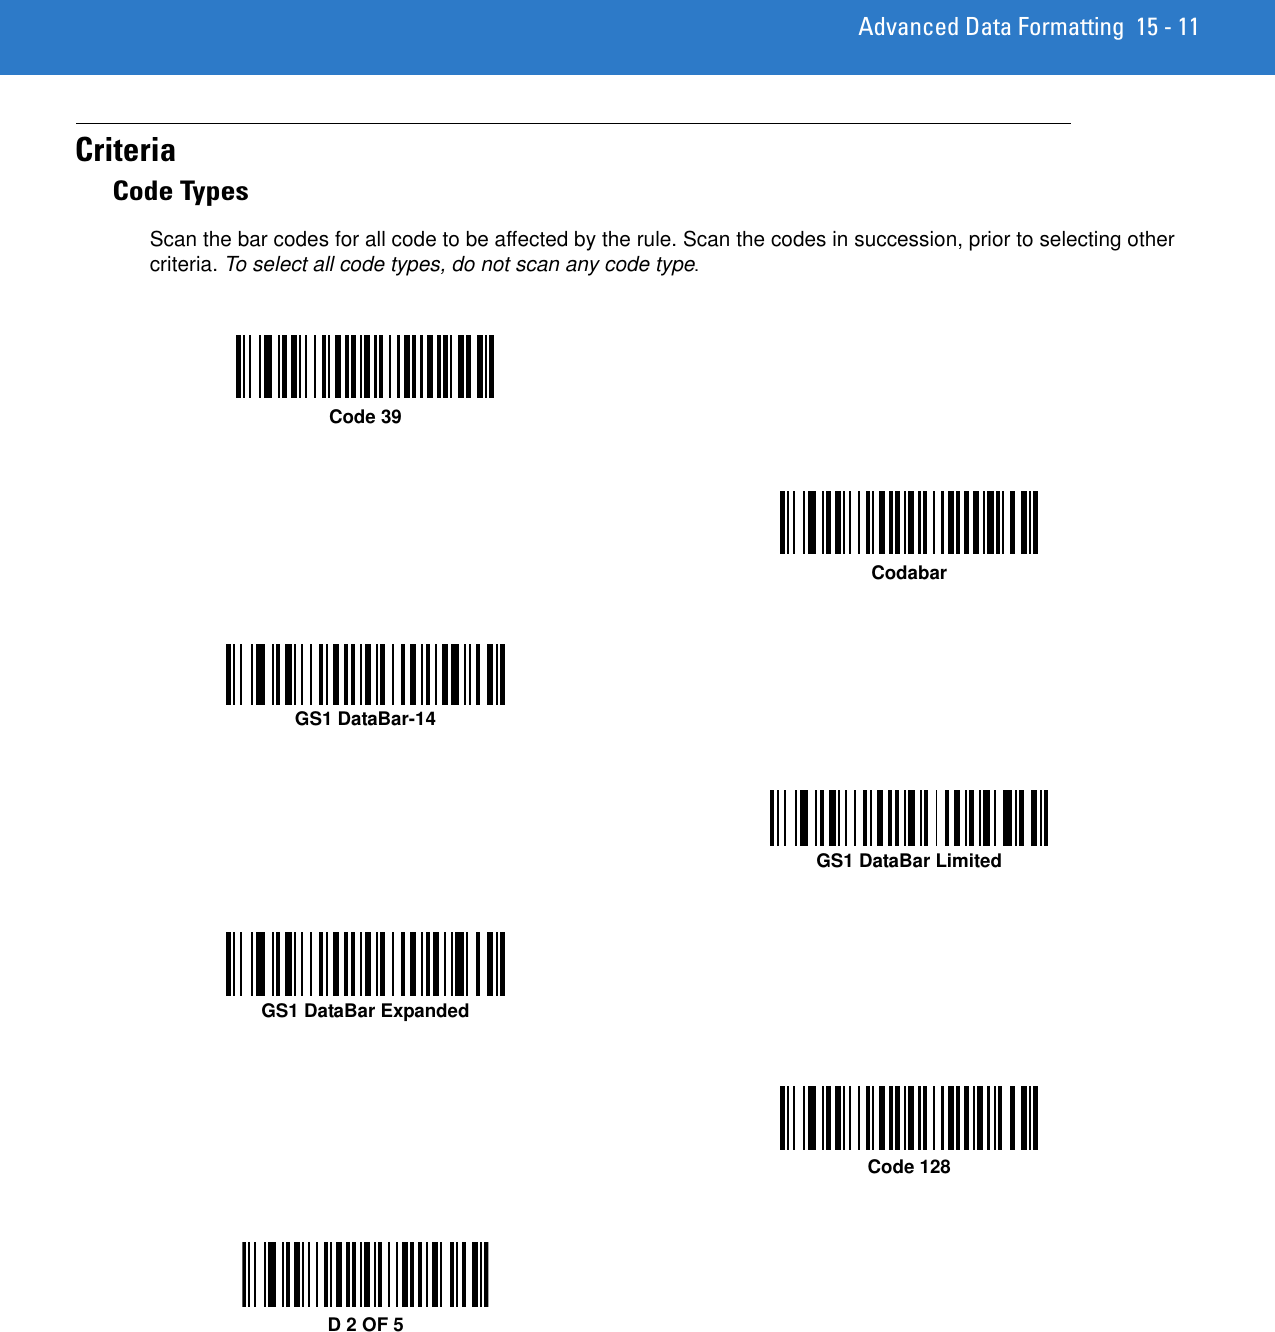
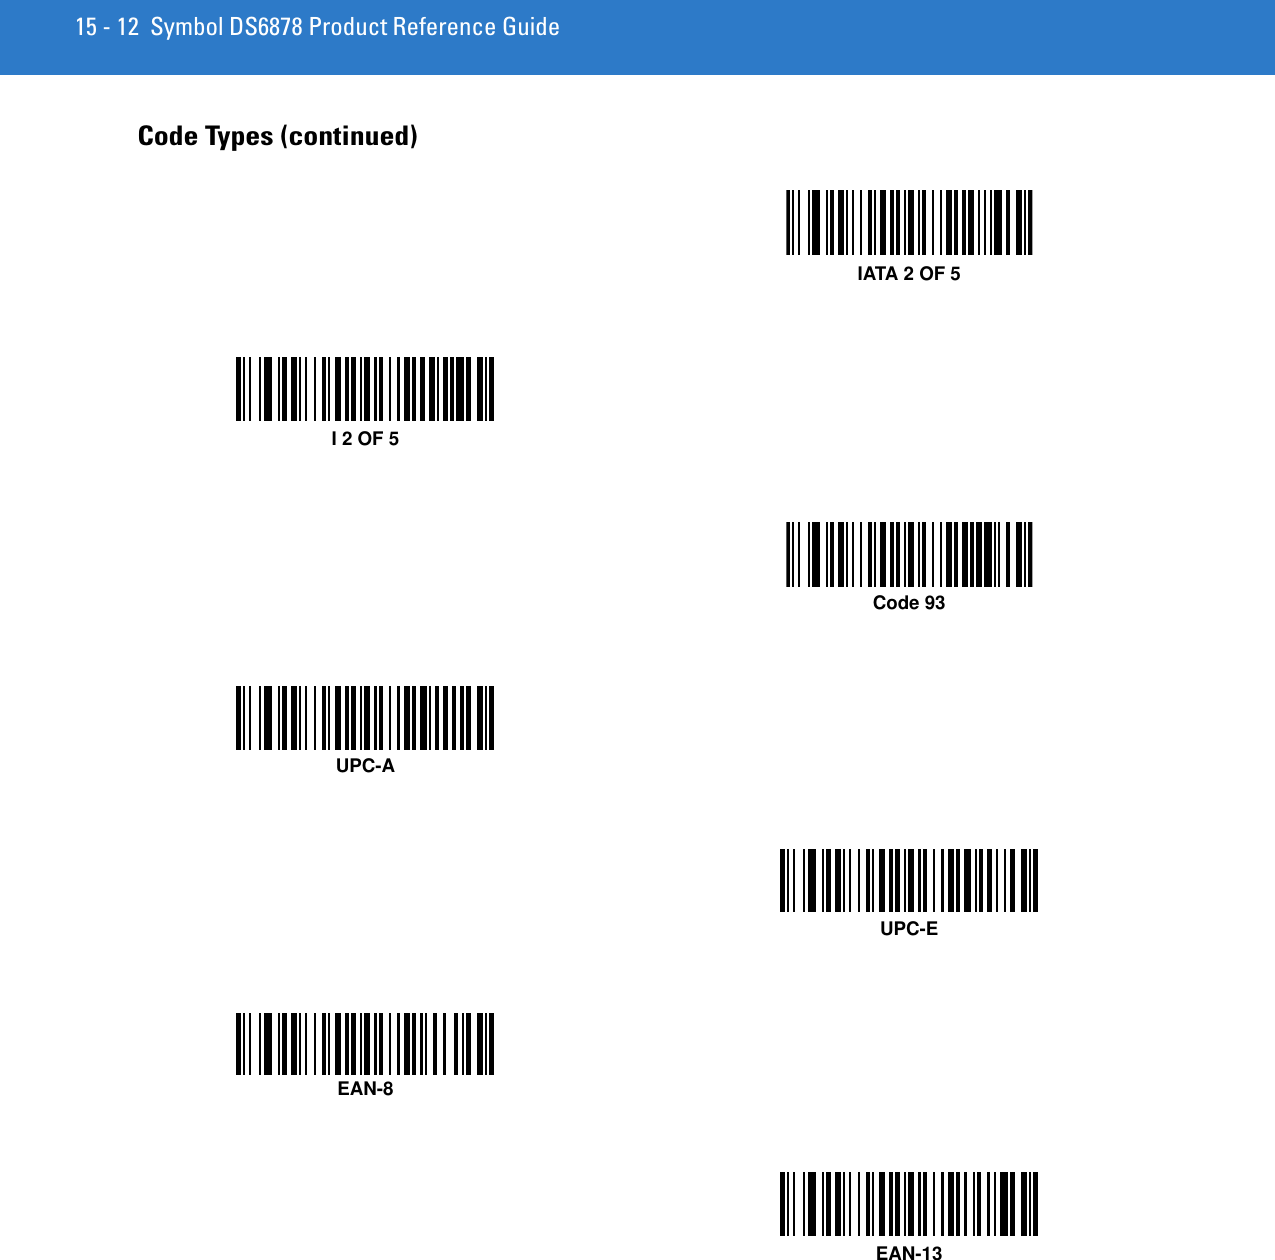
Zebra Technologies DS6878 Barcode scanner with integrated Bluetooth User Manual Symbol DS6878 Product Reference Guide
Zebra Technologies Corporation Barcode scanner with integrated Bluetooth Symbol DS6878 Product Reference Guide
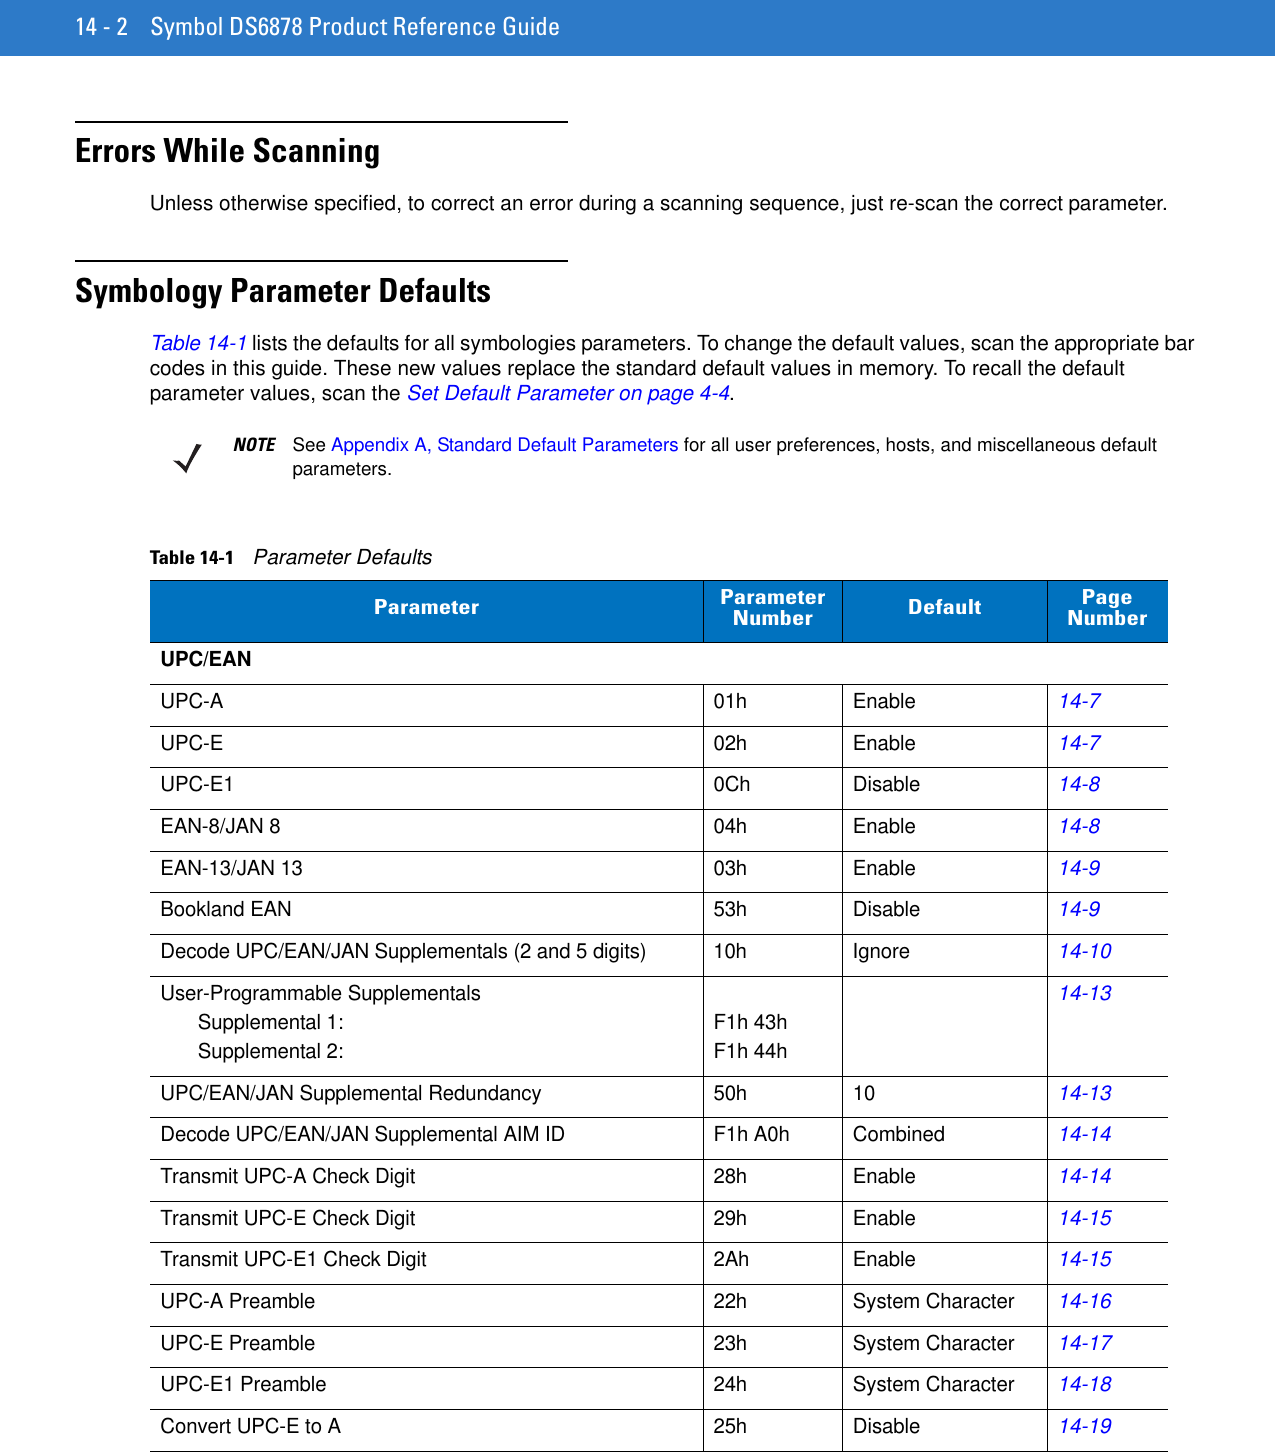
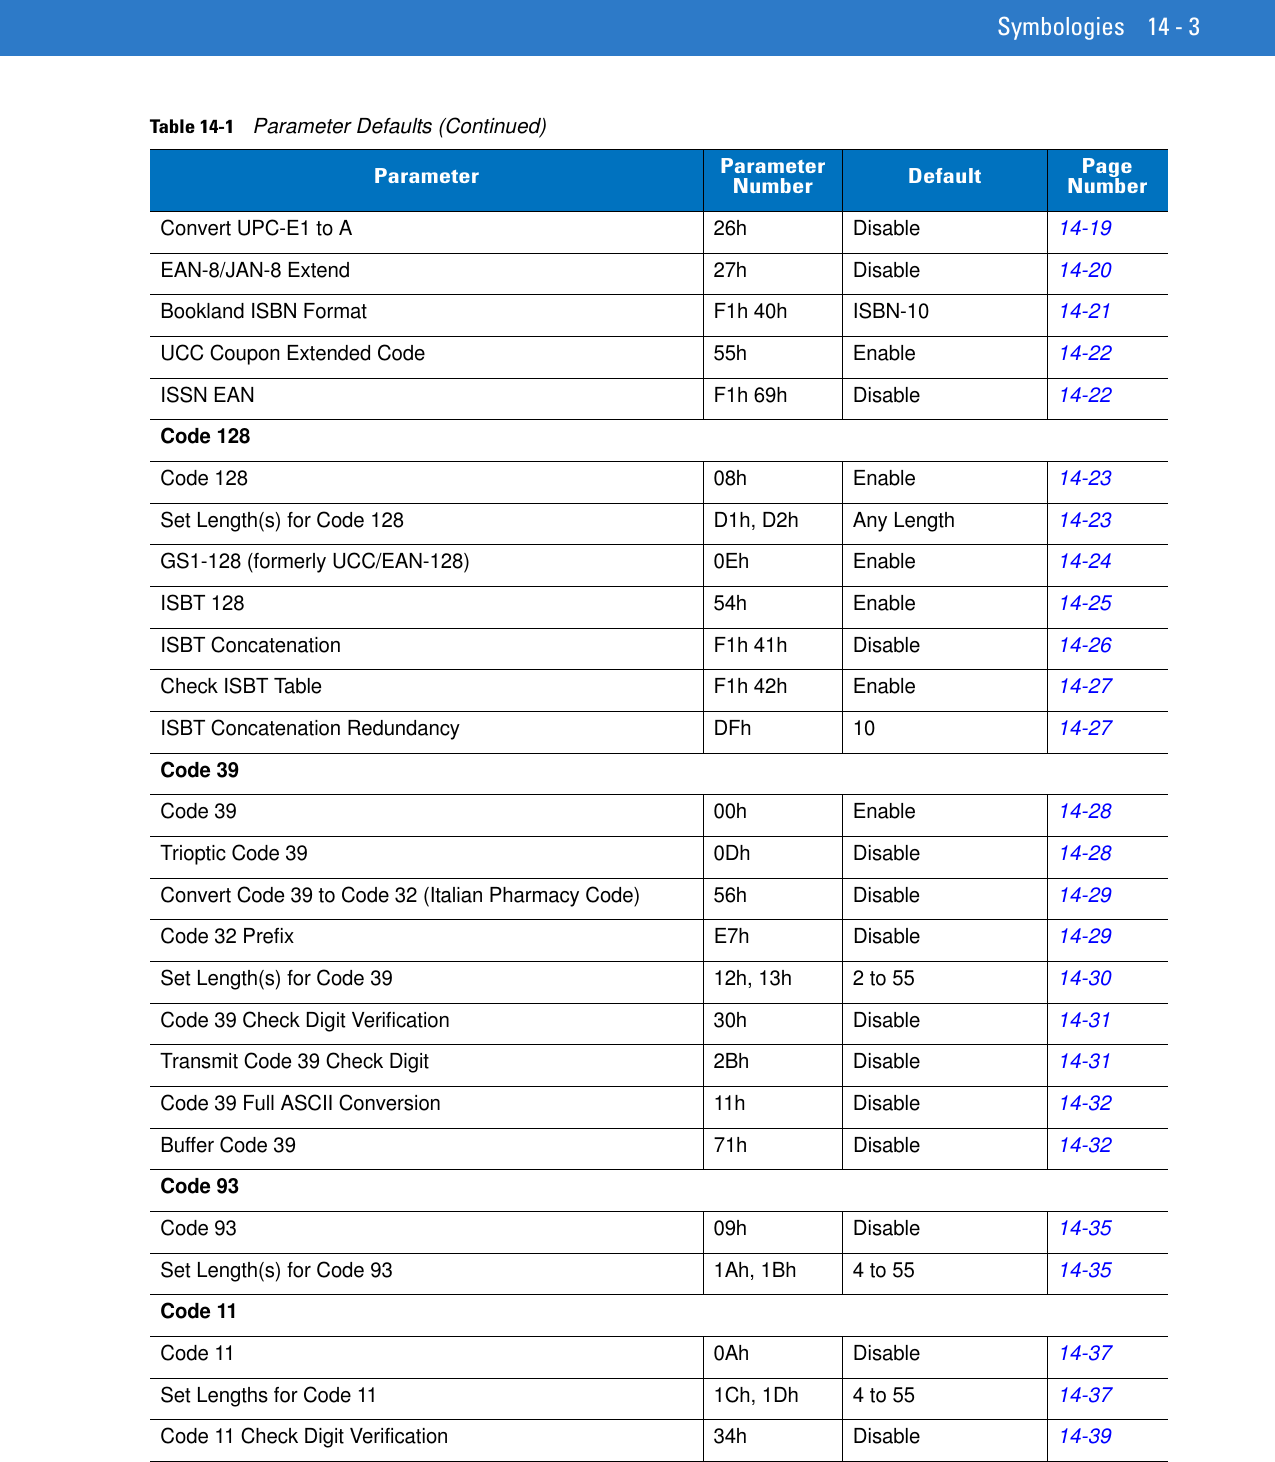
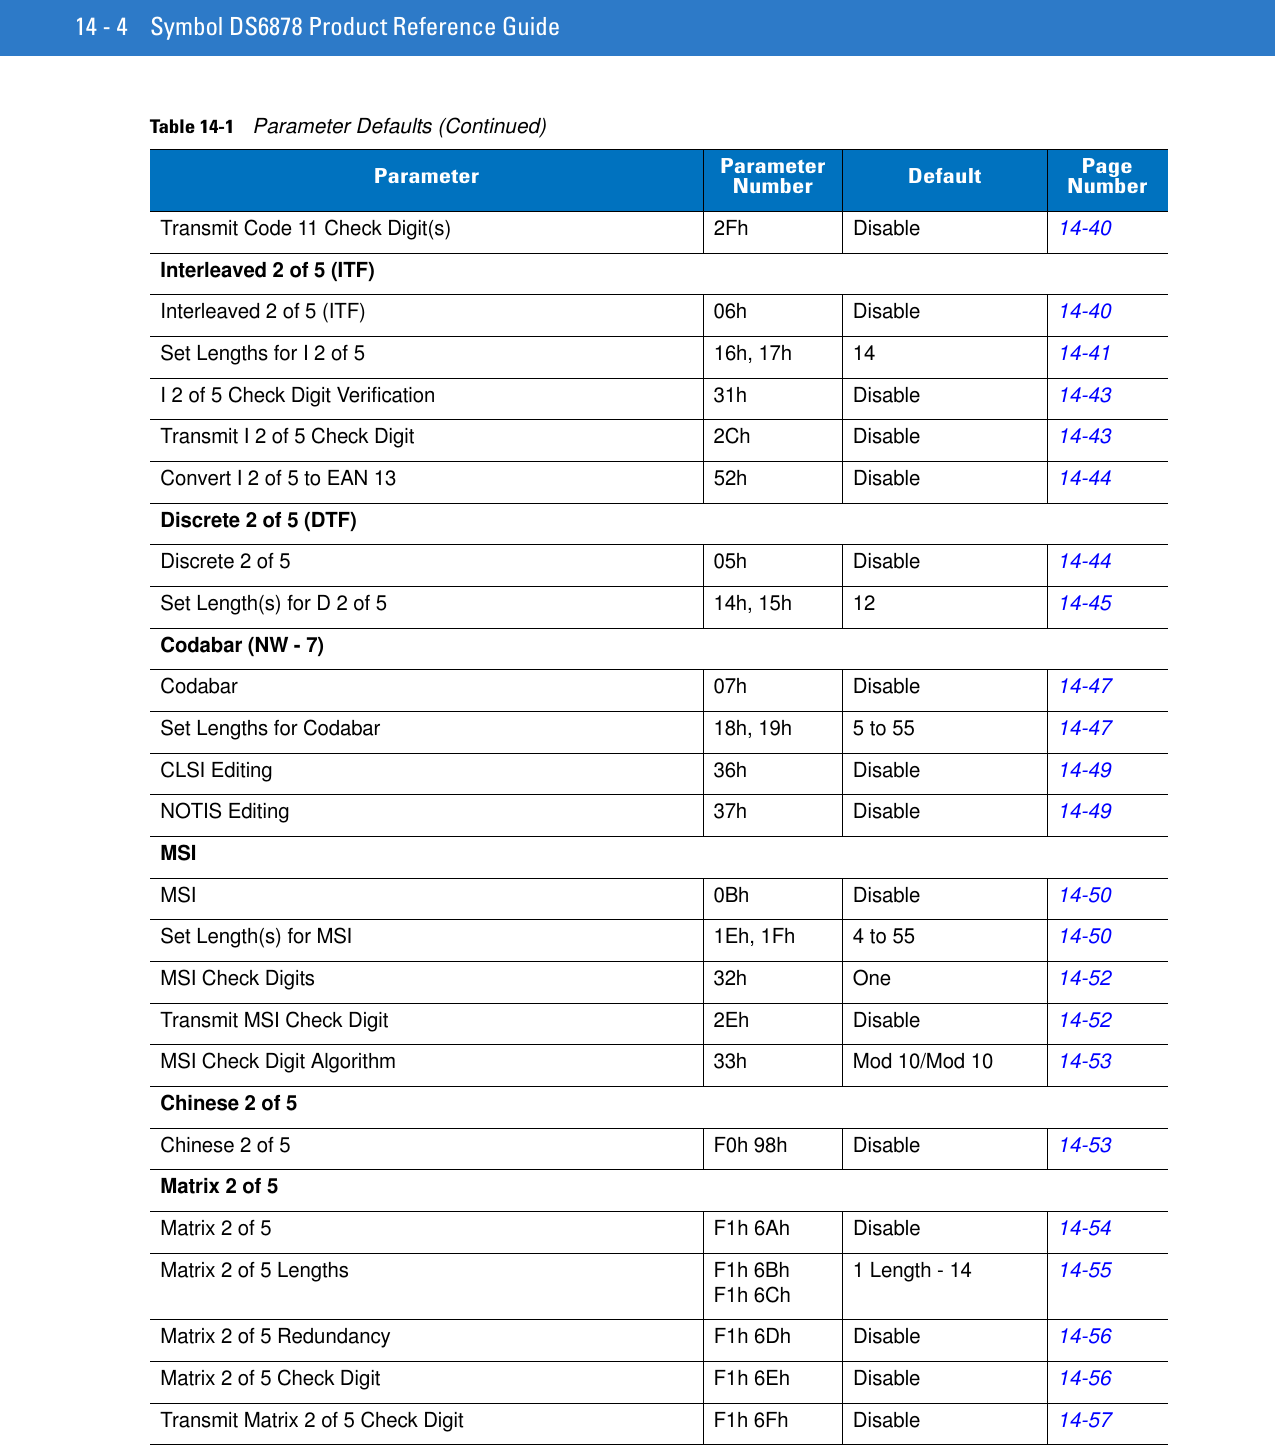
Contents
- 1. User Manual II
- 2. User Manual III
- 3. User Manual I
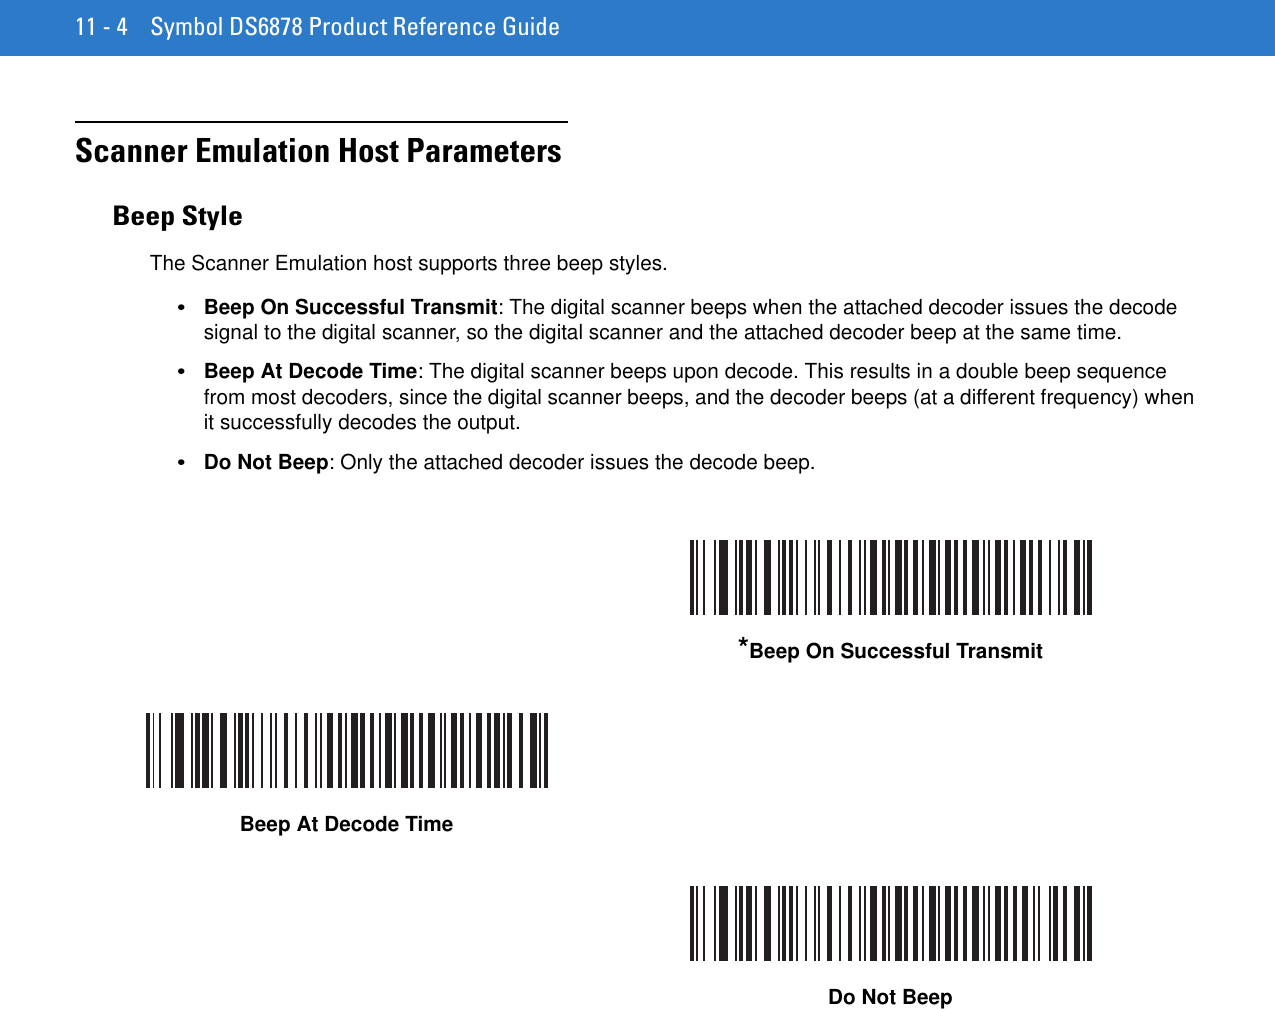
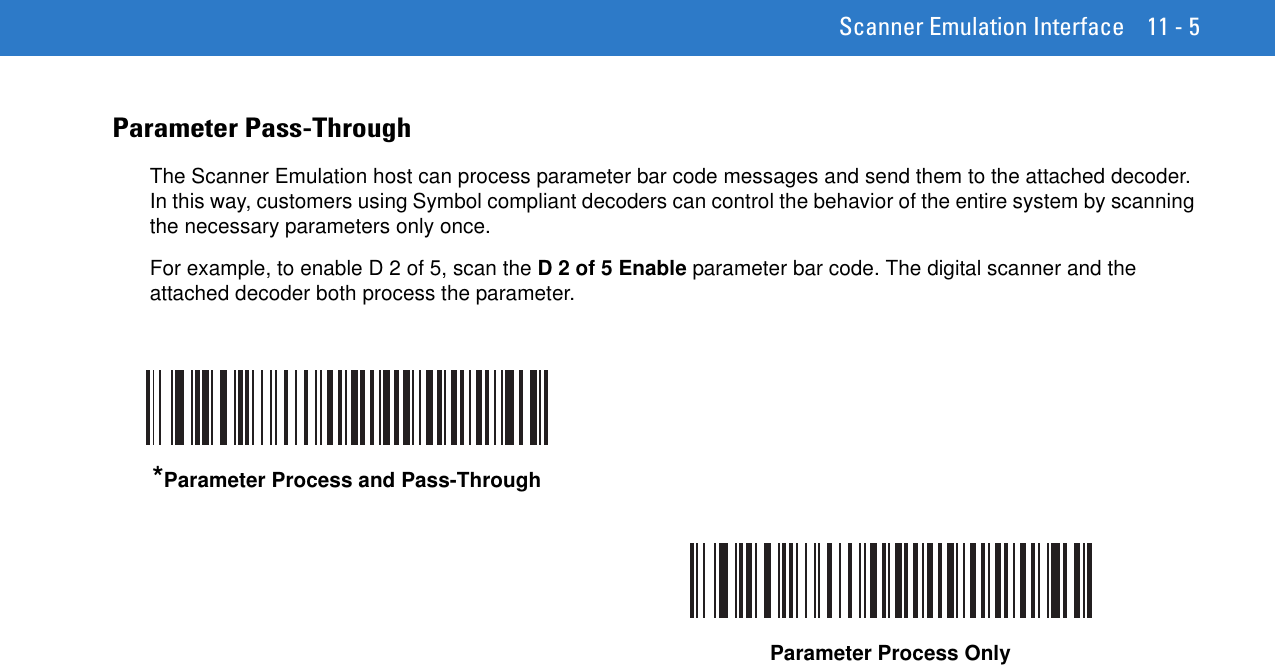
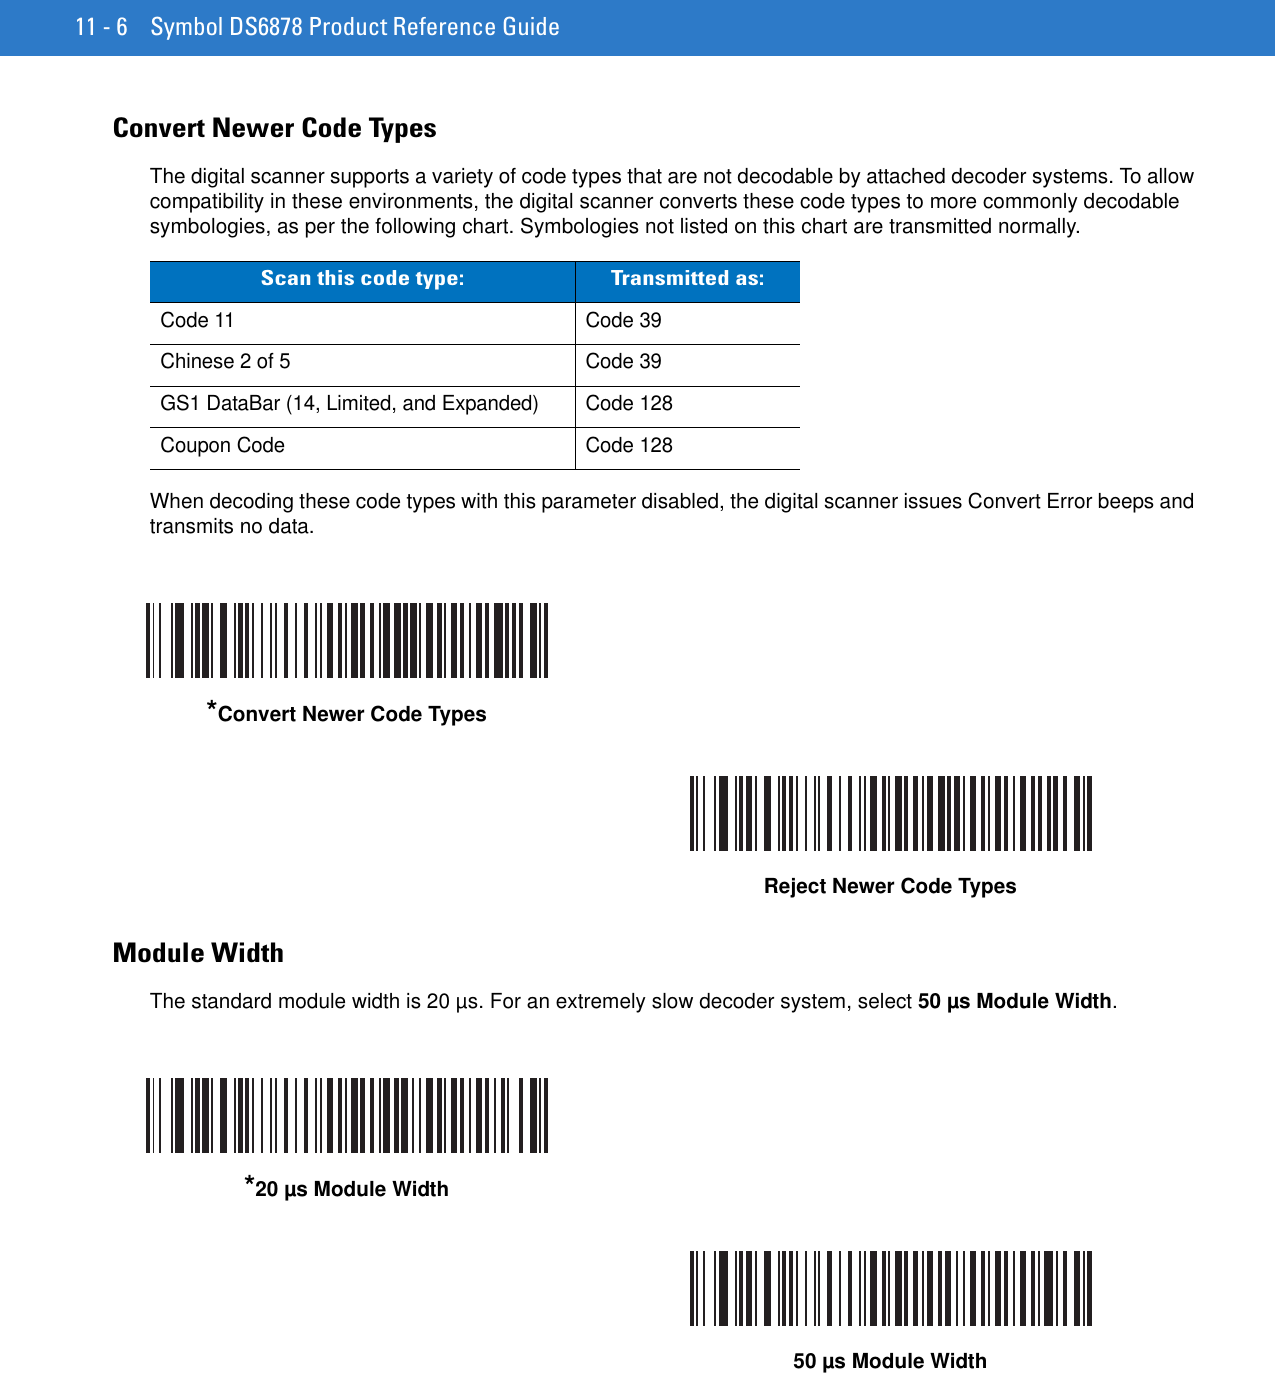
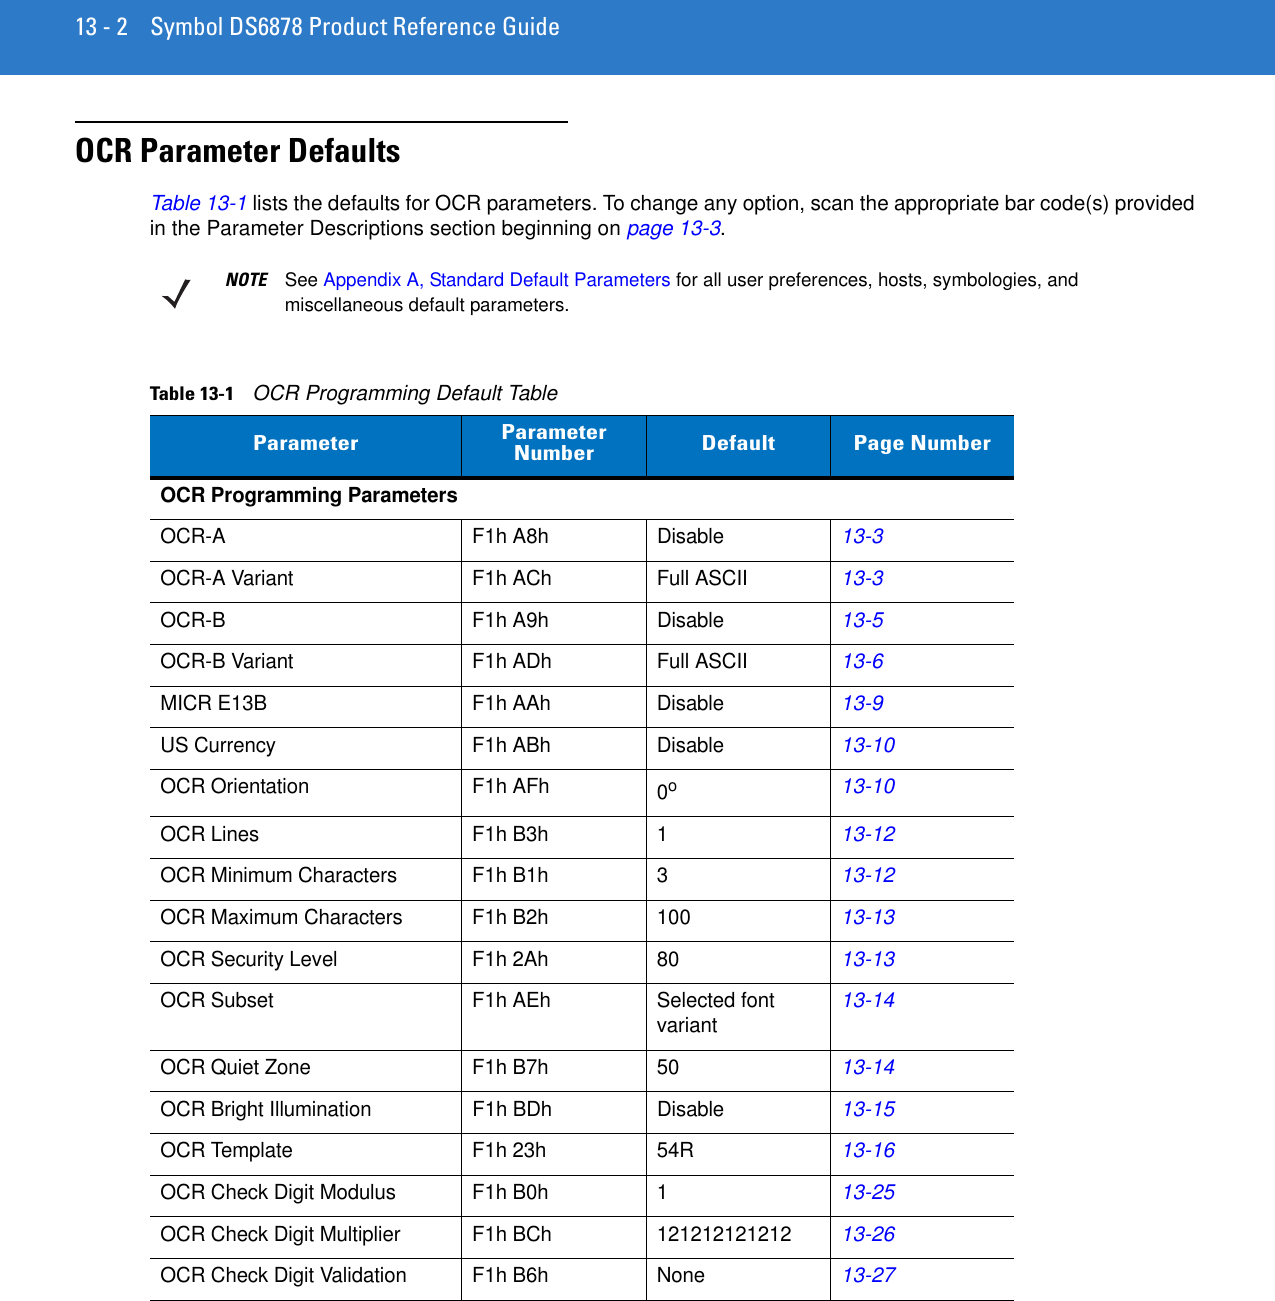
User Manual II


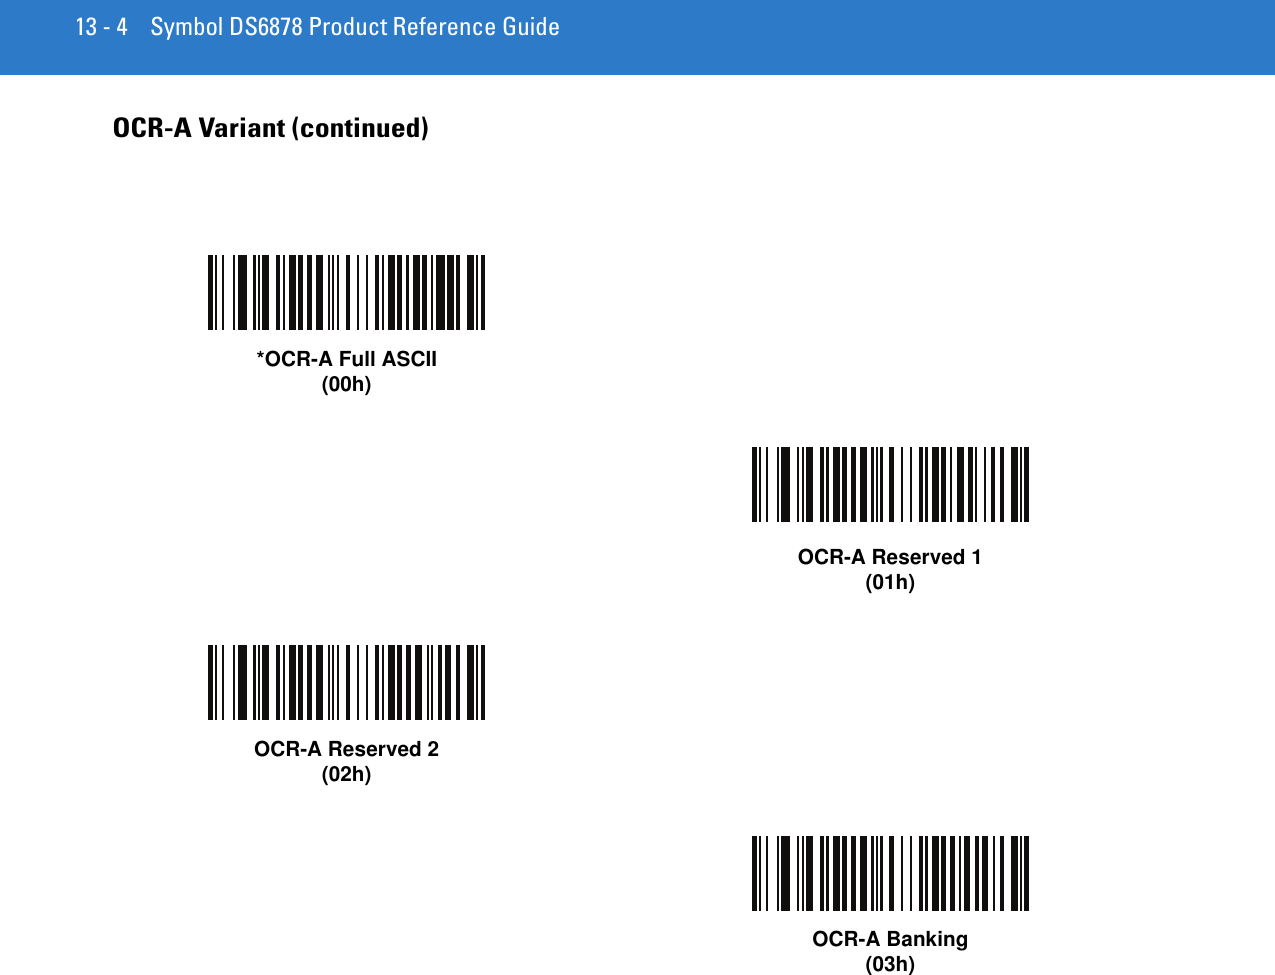


![14 - 14 Symbol DS6878 Product Reference GuideUPC/EAN/JAN Supplemental AIM ID FormatParameter # F1h A0hSelect an output format when reporting UPC/EAN/JAN bar codes with supplementals with AIM ID enabled:•Separate - UPC/EAN with supplementals transmit as ]E<0 or 4><data>]E<1 or 2>[supp data]•Combined - EAN-8 with supplementals transmit as ]E4<data>]E<1 or 2>[supp data]All other UPC/EAN with supplementals transmit as ]E3<data+supps>Transmit UPC-A Check DigitParameter # 28hThe check digit is the last character of the symbol used to verify the integrity of the data. Scan the appropriate bar code below to transmit the bar code data with or without the UPC-A check digit. It is always verified to guarantee the integrity of the data. Separate(00h)*Combined(01h)*Transmit UPC-A Check Digit(01h)Do Not Transmit UPC-A Check Digit(00h)](https://usermanual.wiki/Zebra-Technologies/DS6878.User-Manual-II/User-Guide-1246130-Page-72.png)


![14 - 70 Symbol DS6878 Product Reference GuideCode 128 EmulationParameter # 7BhEnable this parameter to transmit data from certain MicroPDF417 symbols as Code 128. AIM Code ID Character (01h) on page 4-34 must be enabled for this parameter to work.Enable Code 128 Emulation to transmit these MicroPDF417 symbols with one of the following prefixes:]C1 if the first codeword is 903-905]C2 if the first codeword is 908 or 909]C0 if the first codeword is 910 or 911Disable Code 128 Emulation to transmit these MicroPDF417 symbols with one of the following prefixes:]L3 if the first codeword is 903-905]L4 if the first codeword is 908 or 909]L5 if the first codeword is 910 or 911Scan a bar code below to enable or disable Code 128 Emulation.NOTE Linked MicroPDF codewords 906, 907, 912, 914, and 915 are not supported. Use GS1 Composites instead.Enable Code 128 Emulation(01h)*Disable Code 128 Emulation(00h)](https://usermanual.wiki/Zebra-Technologies/DS6878.User-Manual-II/User-Guide-1246130-Page-128.png)


![Advanced Data Formatting 15 - 47Control Characters (continued)Send Control XSend Control YSend Control ZSend Control [Send Control \Send Control ]](https://usermanual.wiki/Zebra-Technologies/DS6878.User-Manual-II/User-Guide-1246130-Page-185.png)


![Advanced Data Formatting 15 - 57Keyboard Characters (continued)Send \Send ]Send ^Send _Send `Send aSend b](https://usermanual.wiki/Zebra-Technologies/DS6878.User-Manual-II/User-Guide-1246130-Page-195.png)

![15 - 66 Symbol DS6878 Product Reference GuideSend ALT Characters (continued)Send Alt \Send Alt ]](https://usermanual.wiki/Zebra-Technologies/DS6878.User-Manual-II/User-Guide-1246130-Page-204.png)


![15 - 90 Symbol DS6878 Product Reference GuideAlphanumeric Keyboard (continued)@[\]^_(Underscore)`](https://usermanual.wiki/Zebra-Technologies/DS6878.User-Manual-II/User-Guide-1246130-Page-228.png)