Zebra Technologies DS6878 Barcode scanner with integrated Bluetooth User Manual Symbol DS6878 Product Reference Guide
Zebra Technologies Corporation Barcode scanner with integrated Bluetooth Symbol DS6878 Product Reference Guide
Contents
- 1. User Manual II
- 2. User Manual III
- 3. User Manual I
User Manual II

Chapter 9 IBM Interface
Introduction
This chapter provides instructions for programming the cradle to interface with an IBM 468X/469X host computer.
Throughout the programming bar code menus, default values are indicated with asterisks (*).
*Disable Convert to Code 39 Feature/Option
* Indicates Default

9 - 2 Symbol DS6878 Product Reference Guide
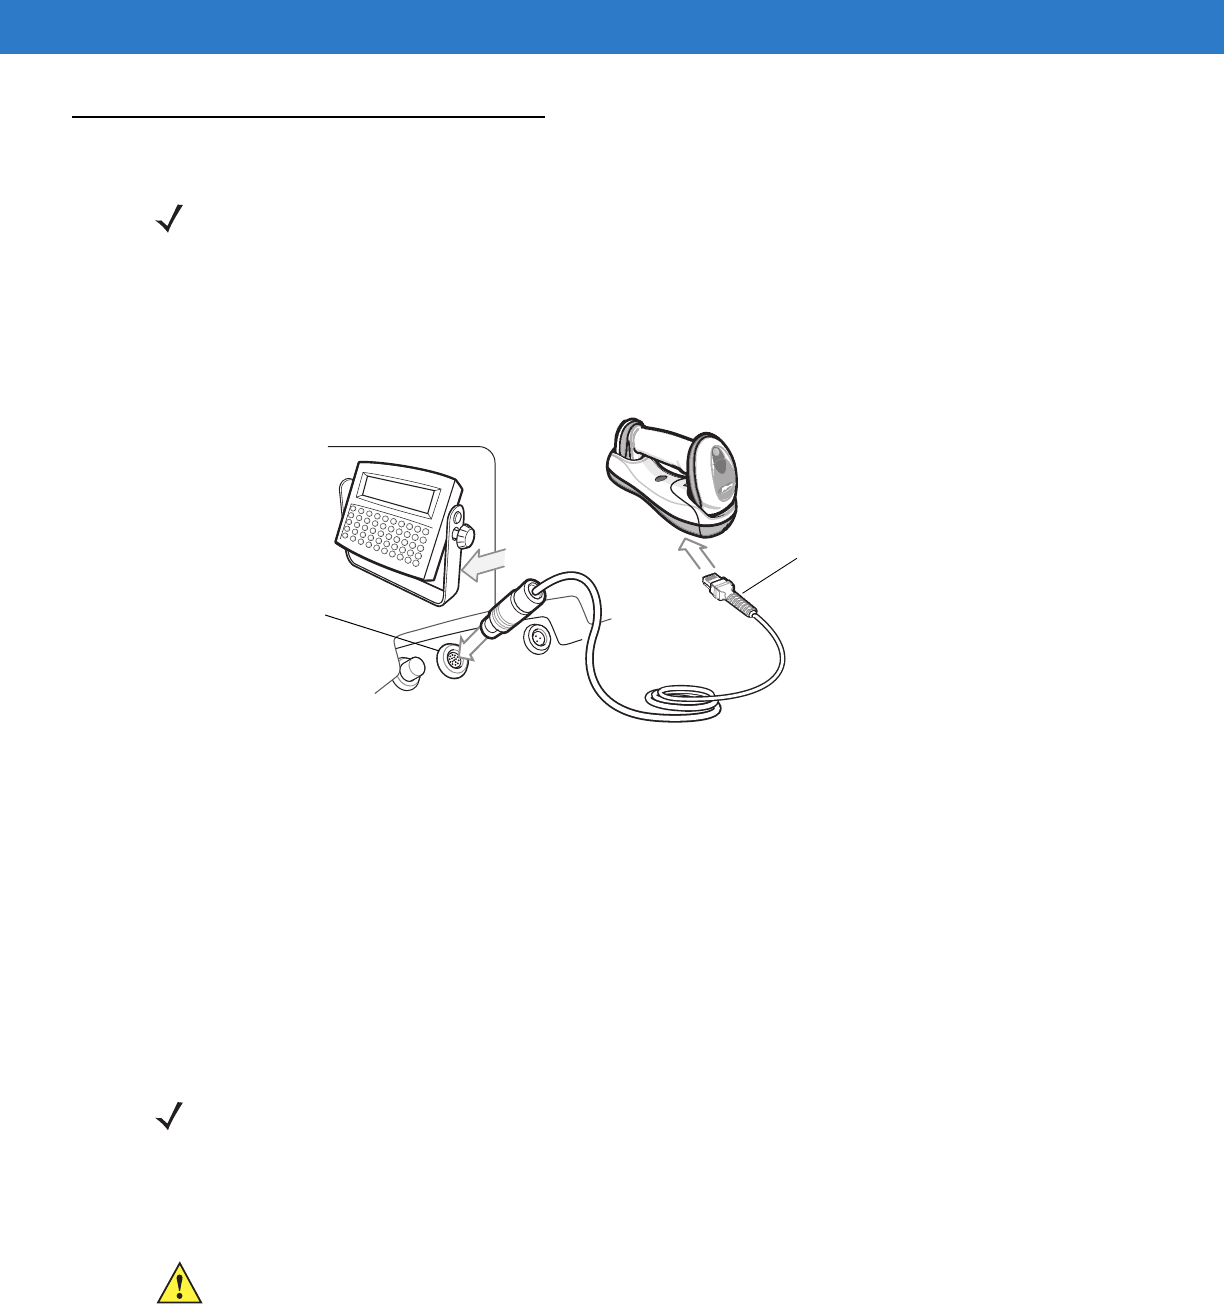
Connecting to an IBM 468X/469X Host
This connection is made directly from the cradle to the host interface.
Figure 9-1
IBM Direct Connection
To connect the IBM 46XX interface:
1. Attach the modular connector of the IBM 46XX interface cable to the host port on the bottom of the digital
scanner cradle (see Connecting the Cables to the Cradle on page 1-6).
2. Connect the other end of the IBM 46XX interface cable to the appropriate port on the host (typically Port 9).
3. Select the port address by scanning the appropriate bar code from Port Address on page 9-4.
4. To modify any other parameter options, scan the appropriate bar codes in this chapter.
NOTE See Chapter 4, Radio Communications for information about digital scanner/cradle pairing and wireless
communication
The digital scanner must be connected to the cradle for the host parameter setting to take effect. When
the digital scanner is not connected to a cradle, and a host parameter bar code is scanned, a long
low/long high beep sequence sounds.
Host Port Connector
Interface Cable
NOTE Interface cables vary depending on configuration. The connectors illustrated in Figure 9-1 are examples
only. The connectors may be different than those illustrated, but the steps to connect the cradle remain the
same.
If a power supply is used, disconnect the power supply before changing host cables or the cradle may not
recognize the new host.
The only required configuration is the port number. Other digital scanner parameters are typically
controlled by the IBM system.
IBM Interface 9 - 3
IBM Parameter Defaults
Table 9-1 lists the defaults for IBM host parameters. To change any option, scan the appropriate bar code(s)
provided in the Parameter Descriptions section beginning on page 9-4.
NOTE See Appendix A, Standard Default Parameters for all user preferences, hosts, symbologies, and
miscellaneous default parameters.
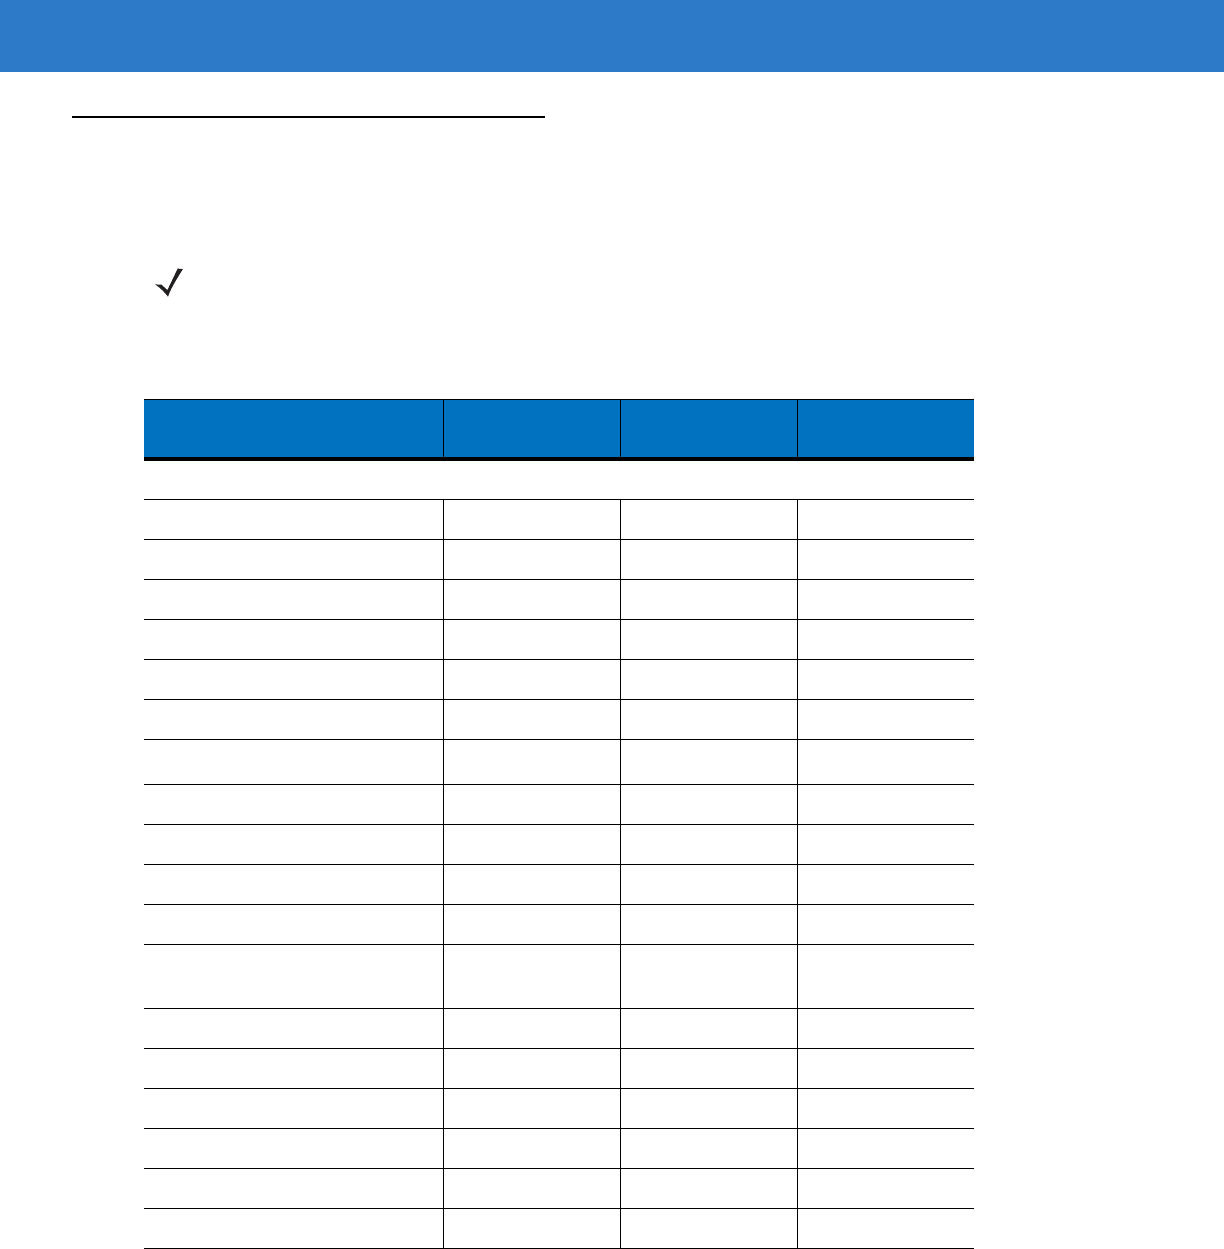
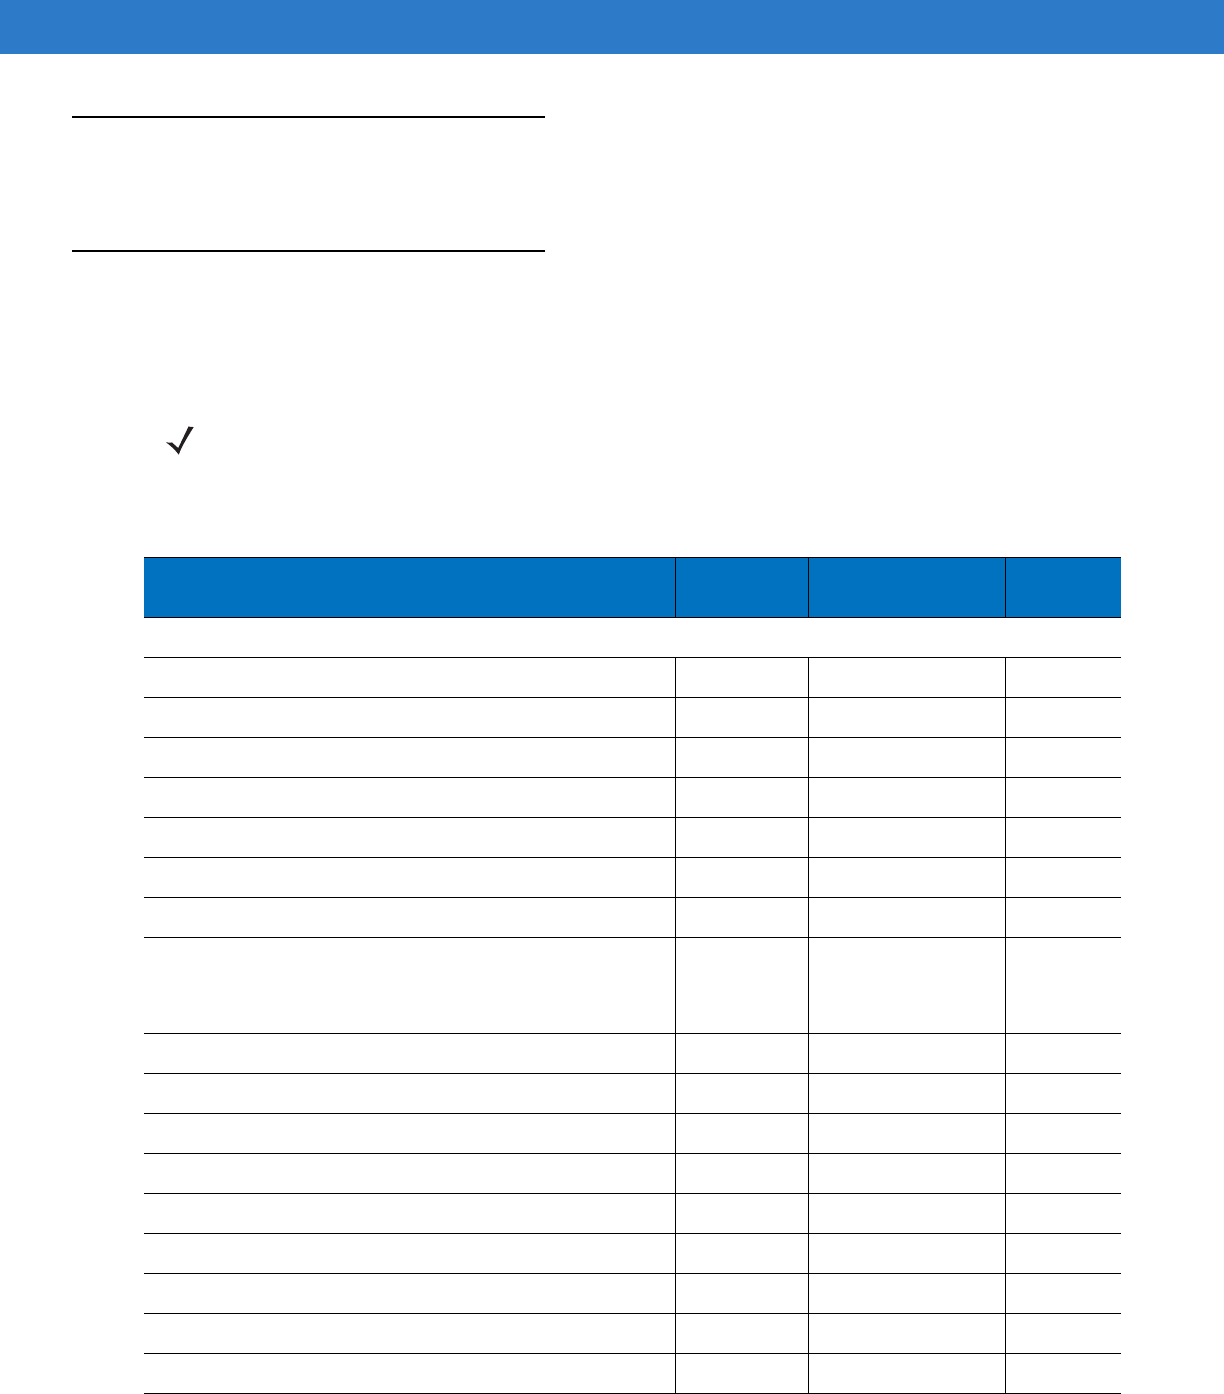
Table 9-1
IBM Host Default Table
Parameter Default Page
Number
IBM 468X/469X Host Parameters
Port Address None Selected
9-4
Convert Unknown to Code 39 Disable
9-5
Ignore Beep Disable
9-5
Ignore Bar Code Configuration Disable
9-6
9 - 4 Symbol DS6878 Product Reference Guide
IBM 468X/469X Host Parameters
Port Address
This parameter sets the IBM 468X/469X port used.
NOTE Scanning one of these bar codes enables the RS-485 interface on the digital scanner.
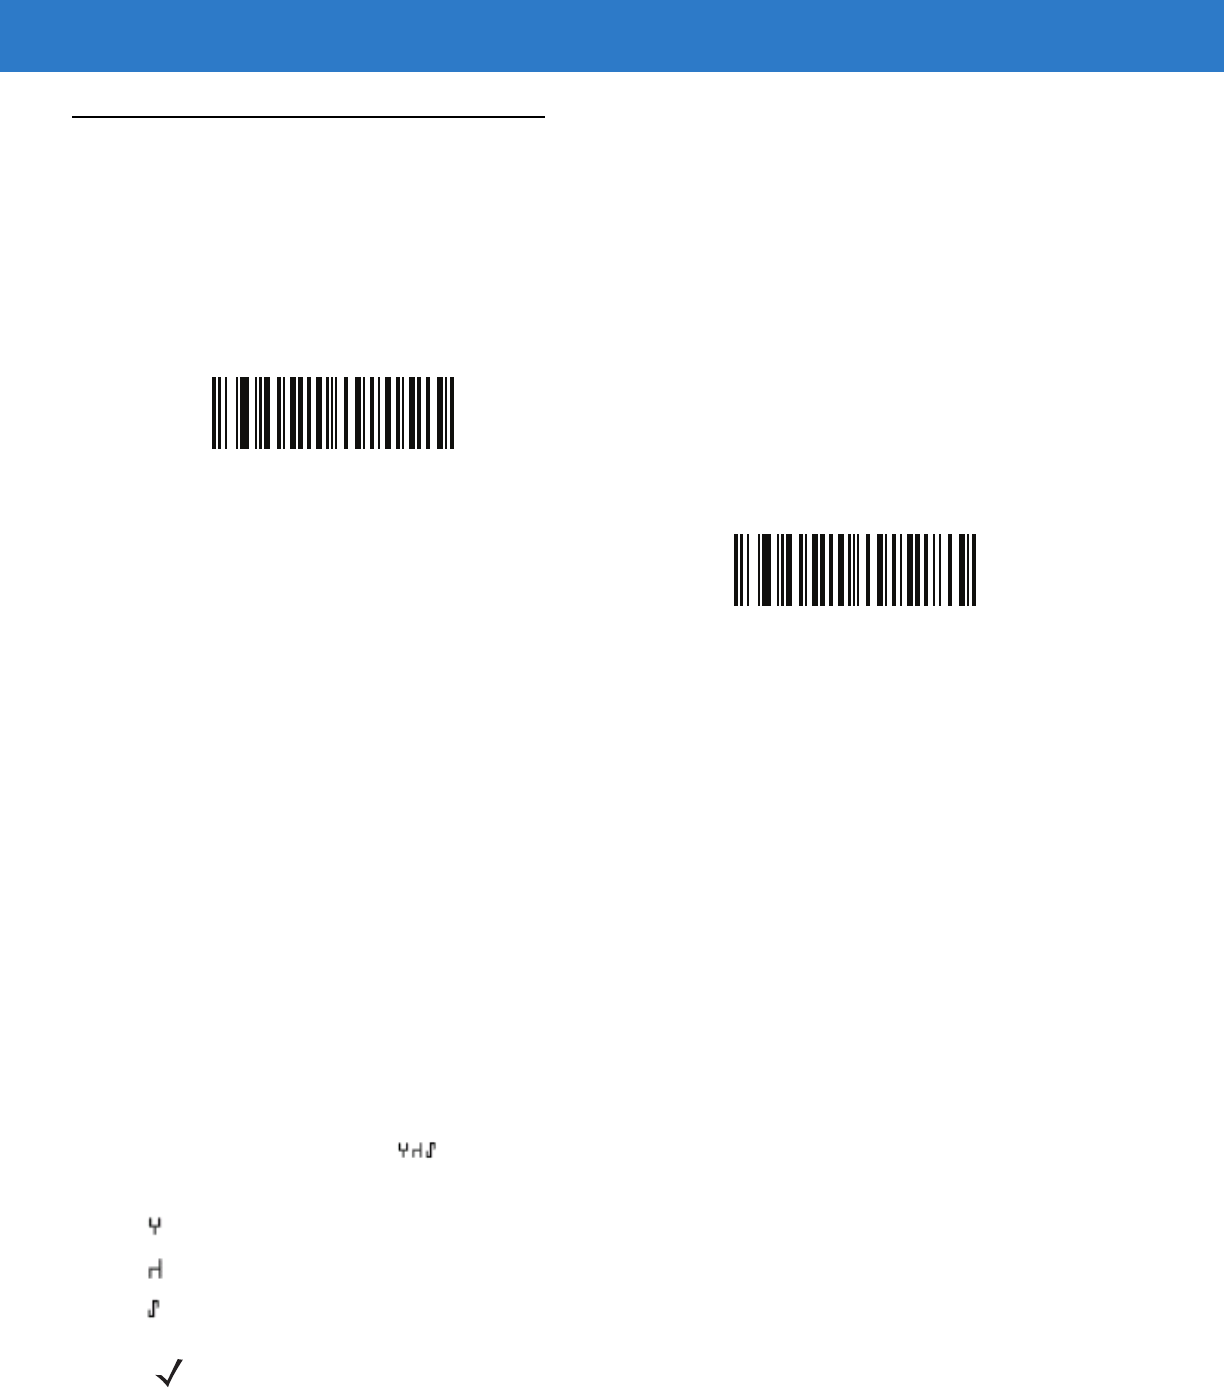
* None Selected
Hand-held Scanner Emulation (Port 9B)1
Non-IBM Scanner Emulation (Port 5B)
Table-top Scanner Emulation (Port 17)
NOTE 1User selection is required to configure this interface and this is the most common selection.
IBM Interface 9 - 5
Convert Unknown to Code 39
Scan a bar code below to enable or disable the conversion of unknown bar code type data to Code 39.
Optional IBM Parameters
If you configure the digital scanner and find the settings were not saved, or changed, when the system is restarted
scan the bar codes that follow to override IBM interface defaults.
Scan a bar code below after setting defaults and before configuring the digital scanner.
Ignore Beep
The host can send a beep request to the digital scanner. When this parameter is enabled, the request is not sent to
the attached digital scanner. All directives are still acknowledged to the IBM RS485 host as if it were processed.
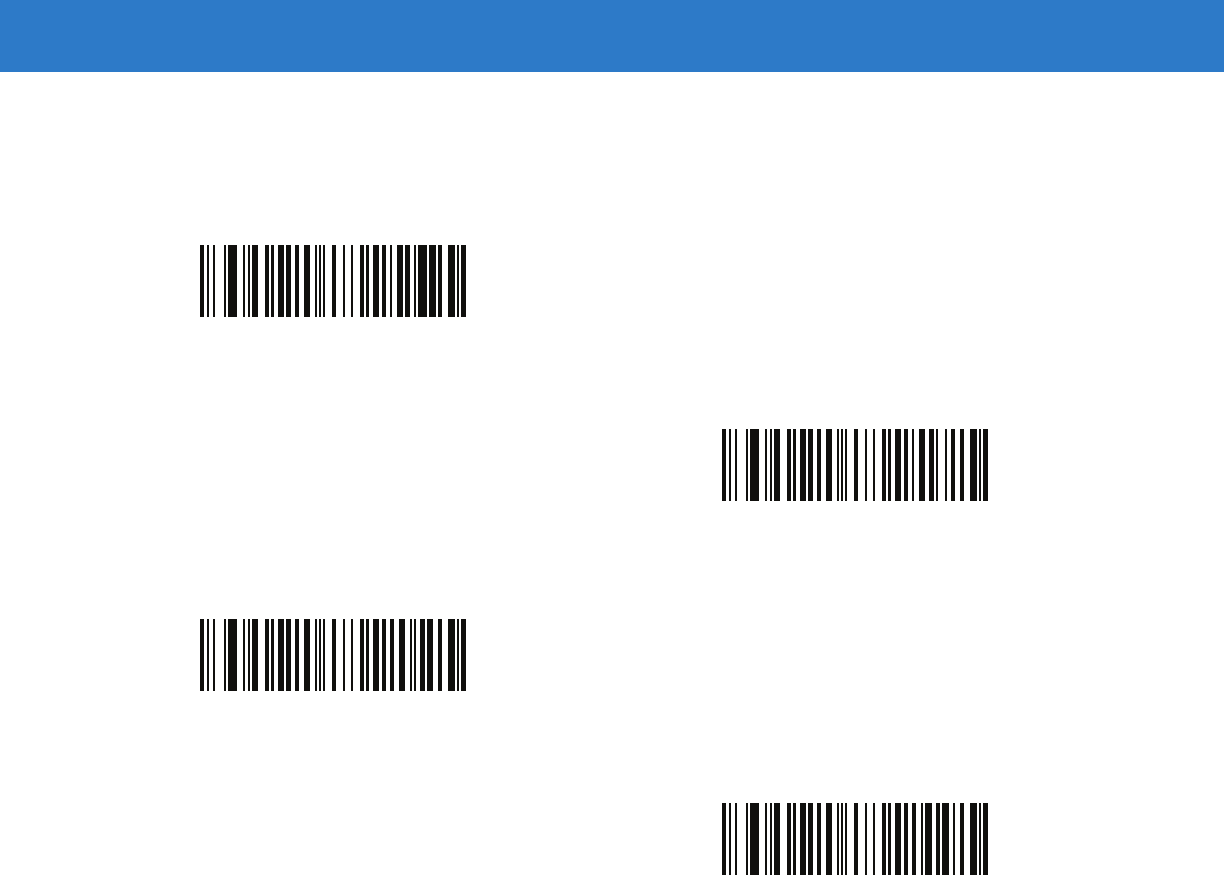
Enable Convert Unknown to Code 39
*Disable Convert Unknown to Code 39
*Disable
Enable

9 - 6 Symbol DS6878 Product Reference Guide
Ignore Bar Code Configuration
The host has the ability to enable/disable code types. When this parameter is enabled, the request is not sent to
the attached digital scanner. All directives are still acknowledged to the IBM RS485 host as if it were processed.
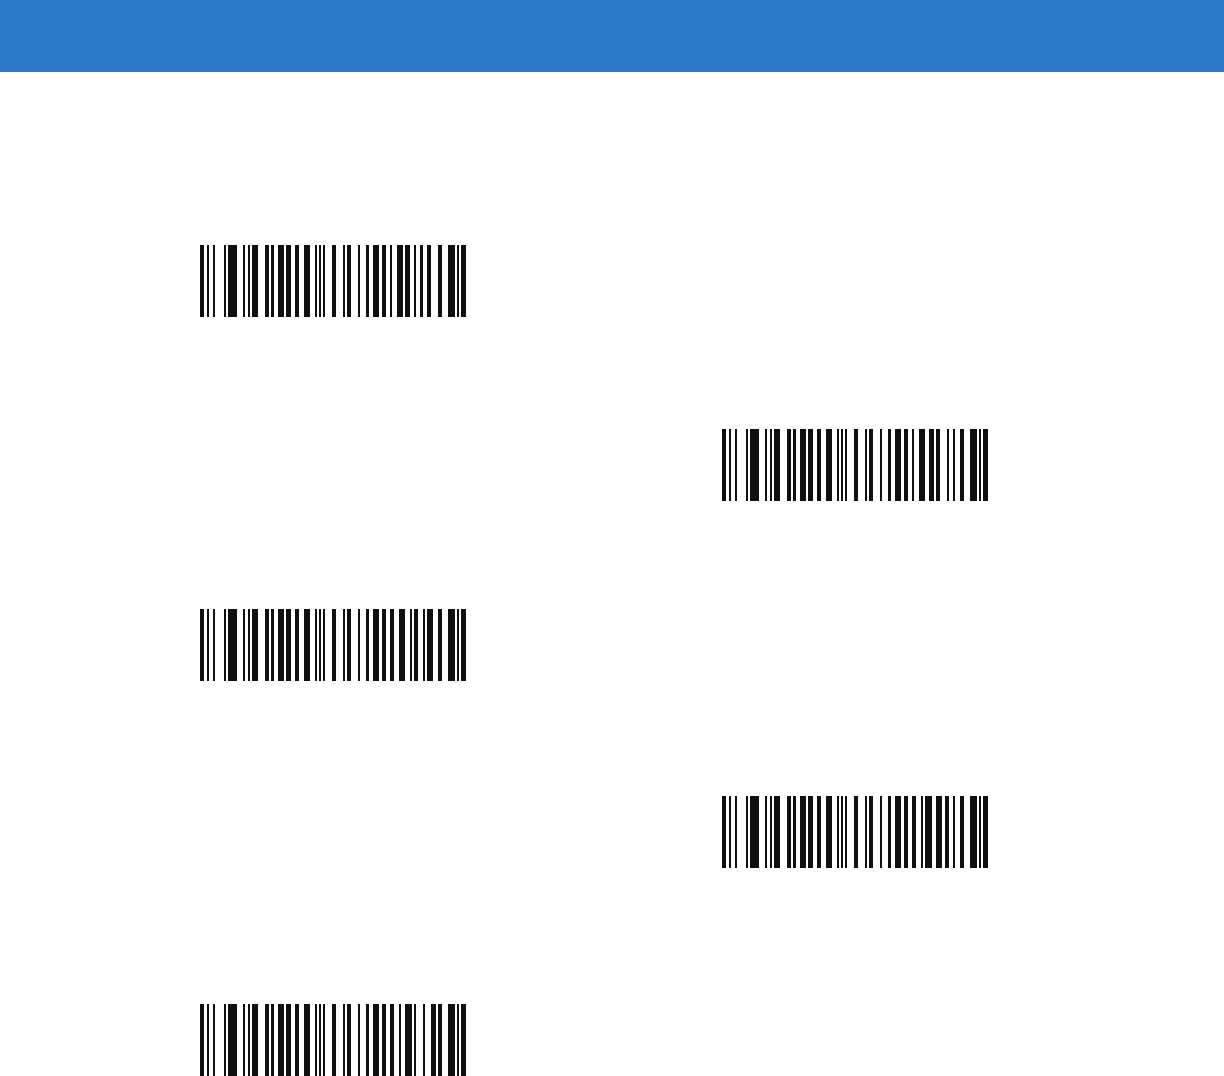
*Disable
Enable

Chapter 10 Wand Emulation Interface
Introduction
This chapter provides instructions for programming the cradle to interface with a wand emulation host. This mode
is used whenever wand emulation communication is needed. The digital scanner cradle connects either to an
external wand decoder or to a decoder integrated in a portable terminal or Point-of-Sale (POS) terminal.
In this mode the digital scanner emulates the signal of a digital wand to make it “readable” by a wand decoder.
Throughout the programming bar code menus, default values are indicated with asterisks (*).
*Transmit Unknown Characters Feature/Option* Indicates Default
10 - 2 Symbol DS6878 Product Reference Guide
Connecting Using Wand Emulation
To perform Wand Emulation, connect the cradle to a portable data terminal, or a controller which collects the wand
data and interprets it for the host.
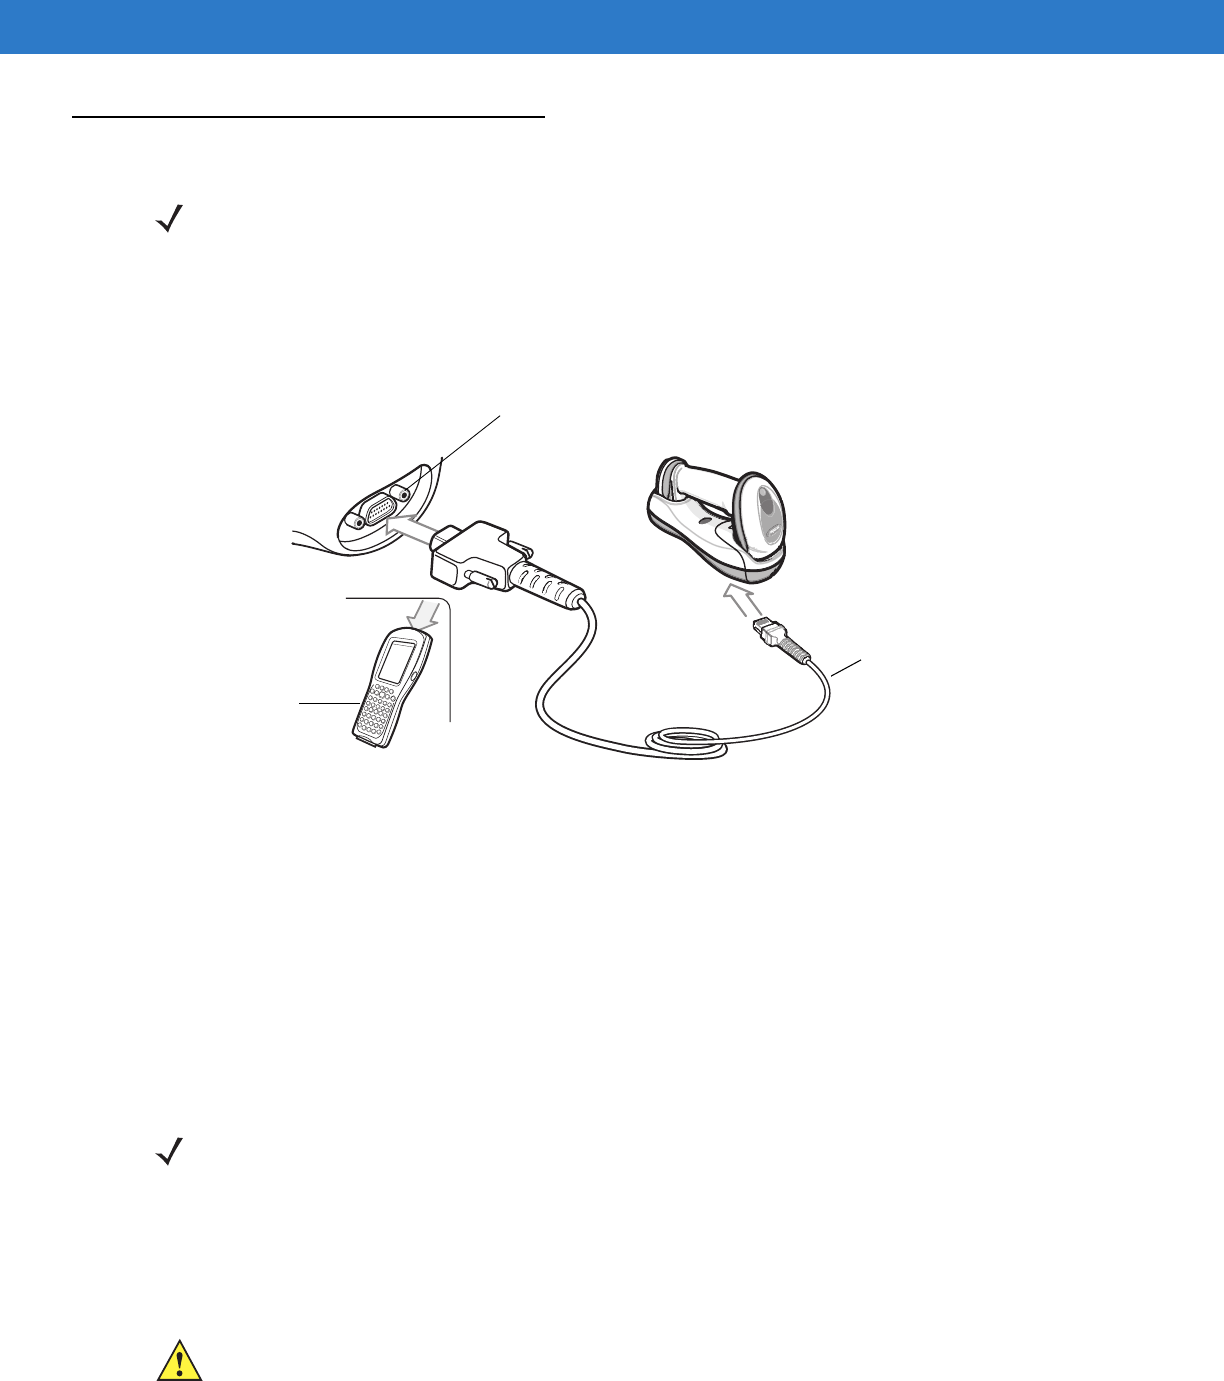
Figure 10-1
Wand Emulation Connection
To connect the Wand Emulation interface:
1. Attach the modular connector of the Wand Emulation interface cable to the host port on the bottom of the
digital scanner cradle (see Connecting the Cradle on page 1-6).
2. Connect the other end of the Wand Emulation interface cable to the wand port on the mobile computer or
controller.
3. Select the Wand Emulation host type by scanning the appropriate bar code from Wand Emulation Host Types
on page 10-4.
4. To modify any other parameter options, scan the appropriate bar codes in this chapter.
NOTE See Chapter 4, Radio Communications for information about digital scanner/cradle pairing and wireless
communication
The digital scanner must be connected to the cradle for the host parameter setting to take effect. When
the digital scanner is not connected to a cradle, and a host parameter bar code is scanned, a long
low/long high beep sequence sounds.
Wand Port
Mobile Computer
Interface Cable
NOTE Interface cables vary depending on configuration. The connectors illustrated in Figure 10-1 are examples
only. The connectors may be different than those illustrated, but the steps to connect the cradle remain the
same.
If a power supply is used, disconnect the power supply before changing host cables or the cradle may not
recognize the new host.
CAUTION Connect the cradle to a 5 volt decoder only. Connecting the cradle to a 12 volt decoder can damage
the digital scanner and invalidate the warranty.

Wand Emulation Interface 10 - 3
Wand Emulation Parameter Defaults
Table 10-1 lists the defaults for Wand Emulation host types. To change any option, scan the appropriate bar
code(s) provided in Wand Emulation Host Parameters beginning on page 10-4.
NOTE See Appendix A, Standard Default Parameters for all user preferences, hosts, symbologies, and
miscellaneous default parameters.
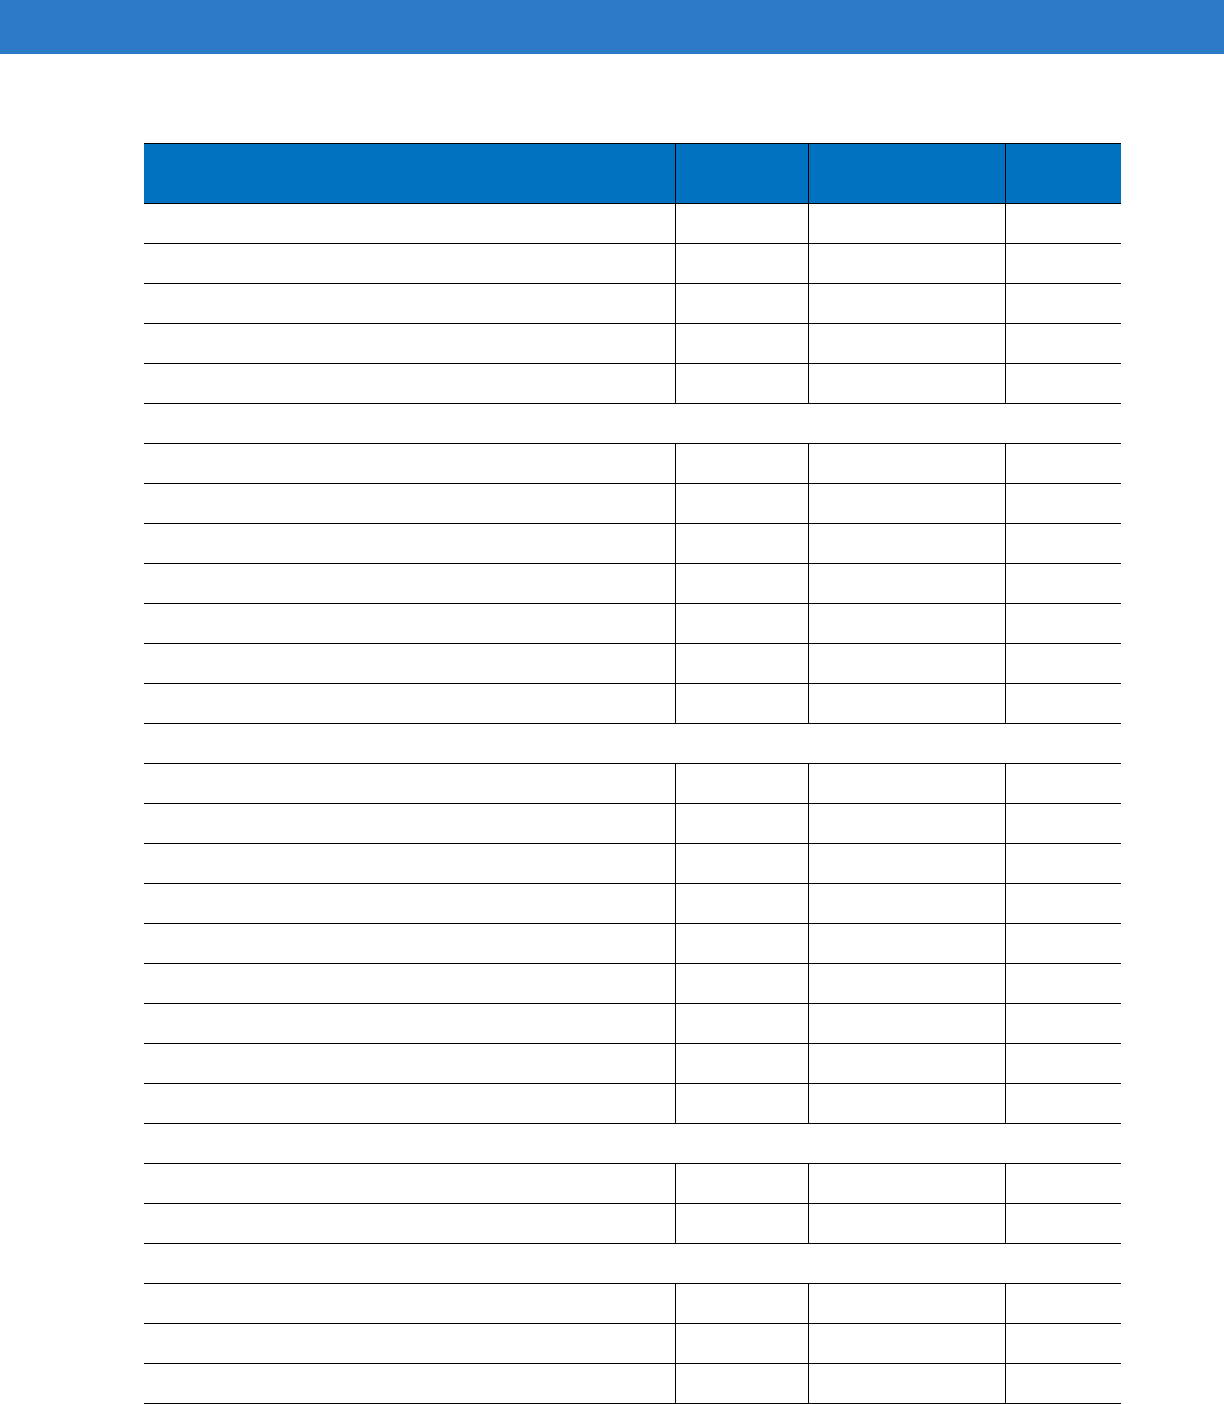
Table 10-1
Wand Emulation Default Table
Parameter Default Page
Number
Wand Emulation Host Parameters
Wand Emulation Host Types Symbol OmniLink Interface Controller
1
10-4
Leading Margin 80 msec
10-5
Polarity Bar High/Margin Low
10-6
Ignore Unknown Characters Send
10-6
Convert All Bar Codes to Code 39 Disable
10-7
Convert Code 39 to Full ASCII Disable
10-8
1
User selection is required to configure this interface and this is the most common selection.
10 - 4 Symbol DS6878 Product Reference Guide
Wand Emulation Host Parameters
Wand Emulation Host Types
Select a Wand Emulation host by scanning one of the bar codes below.
Symbol OmniLink Interface Controller1
Symbol PDT Terminal (MSI)
Symbol PTC Terminal (Telxon)
NOTE 1User selection is required to configure this interface and this is the most common selection.
Wand Emulation Interface 10 - 5
Leading Margin (Quiet Zone)
Scan a bar code below to select a leading margin duration. A leading margin is the time that precedes the first bar
of the scan, (in milliseconds). The minimum allowed value is 80 msec and the maximum is 250 msec. This
parameter accommodates older wand decoders which cannot handle short leading margins.
NOTE 250 msec is the maximum value that this parameter can attain, however, 200 msec is sufficient.
*80 msec
140 msec
200 msec
10 - 6 Symbol DS6878 Product Reference Guide
Polarity
Scan a bar code below to select the polarity required by the decoder. Polarity determines how the cradle's Wand
Emulation interface creates the Digitized Bar code Pattern (DBP). DBP is a digital signal that represents the
scanned bar code. Different decoders expect the DBP to be in a certain format. The DBP either has the "highs"
represent bars and the "lows" represent spaces (margins), or the "highs" represent spaces (margins) and the
"lows" represent bars.
Ignore Unknown Characters
Unknown characters are characters the host does not recognize. When Send Bar Codes With Unknown
Characters is selected, all bar code data is sent except for unknown characters, and no error beeps sound on the
digital scanner. When Do Not Send Bar Codes With Unknown Characters is selected, bar codes containing at
least one unknown character are not sent to the host, and the digital scanner emits an error beep.
*Bar High/Margin Low
Bar Low/Margin High
*Send Bar Codes With Unknown Characters
Do Not Send Bar Codes With Unknown Characters
Wand Emulation Interface 10 - 7
Convert All Bar Codes to Code 39
By default, the Wand Emulation interface sends data to the attached host in the same symbology that was
decoded. This can be a problem for customers with older systems that do not recognize newer symbologies (for
example, GS1 DataBar).
Enabling this parameter ignores the original symbology decoded, and outputs the data as if it were a Code 39 bar
code. Any lowercase characters in the original data stream are transmitted as uppercase characters. This also
allows ADF rules.
If Ignore Unknown Characters is enabled, any characters that do not have a corresponding character in the Code
39 symbology set are replaced by a space.
If Ignore Unknown Characters is disabled, if any characters that do not have a corresponding character are
encountered, the digital scanner emits an error beep and no data is transmitted.
NOTE ADF Note: By default, the Wand Emulation interface does not allow scanned data to be processed by ADF
rules. Enabling this parameter has the side effect of allowing the scanned data to be processed by the
ADF rules (see Chapter 15, Advanced Data Formatting).
Enable Convert to Code 39 for Wand Host
*Disable Convert to Code 39 for Wand Host

10 - 8 Symbol DS6878 Product Reference Guide
Convert Code 39 to Full ASCII
By default, any characters that do not have a corresponding character in the Code 39 symbology set are replaced
by a space. If this parameter is enabled, the data sent to the wand interface is encoded in Code 39 Full ASCII. This
setting requires that the host be able to interpret Code 39 Full ASCII data.
This setting applies only if Convert to Code 39 is also enabled.
*Disable Code 39 Full ASCII Conversion
Enable Code 39 Full ASCII Conversion

Chapter 11 Scanner Emulation Interface
This chapter provides instructions for programming the cradle to interface with a digital scanner emulation host.
With digital scanner emulation, the cradle connects either to an external decoder or to a decoder integrated in a
portable terminal or Point-of-Sale (POS) terminal.
Throughout the programming bar code menus, default values are indicated with asterisks (*).
*Parameter Process
and Pass-Through Feature/Option
* Indicates Default
11 - 2 Symbol DS6878 Product Reference Guide
Connecting Using Scanner Emulation
To perform Scanner Emulation, connect the cradle to a mobile computer, or a controller which collects the data and
interprets it for the host.
Figure 11-1
Scanner Emulation Connection
To connect the Scanner Emulation interface:
1. Attach the modular connector of the Scanner Emulation interface cable to the host port on the bottom of the
digital scanner cradle (see Connecting the Cables to the Cradle on page 1-6).
2. Connect the other end of the Scanner Emulation interface cable to the digital scanner port on the mobile
computer or controller.
3. Scan the Scanner Emulation host bar code from Scanner Emulation Host on page 11-3 to enable the Scanner
Emulation host interface.
4. To modify any other parameter options, scan the appropriate bar codes in this chapter.
If a power supply is used, disconnect the power supply before changing host cables or the cradle may not
recognize the new host.
NOTE See Chapter 4, Radio Communications for information about scanner/cradle pairing and wireless
communication
The digital scanner must be connected to the cradle for the host parameter setting to take effect. When
the digital scanner is not connected to a cradle, and a host parameter bar code is scanned, a long
low/long high beep sequence sounds.
Host Port Connector
Interface Cable
NOTE Interface cables vary depending on configuration. The connectors illustrated in Figure 11-1 are examples
only. The connectors may be different than those illustrated, but the steps to connect the cradle remain the
same.
CAUTION Connect the cradle to a 5 volt decoder only. Connecting the cradle to a 12 volt decoder can damage
the digital scanner and invalidate the warranty.
Scanner Emulation Interface 11 - 3
Scanner Emulation Parameter Defaults
Table 11-1 lists the defaults for the Scanner Emulation host. To change any option, scan the appropriate bar
code(s) provided in the Scanner Emulation Host Parameters section beginning on page 11-4.
Scanner Emulation Host
Scan the bar code below to enable the Scanner Emulation host.
NOTE See Appendix A, Standard Default Parameters for all user preferences, hosts, symbologies, and
miscellaneous default parameters.
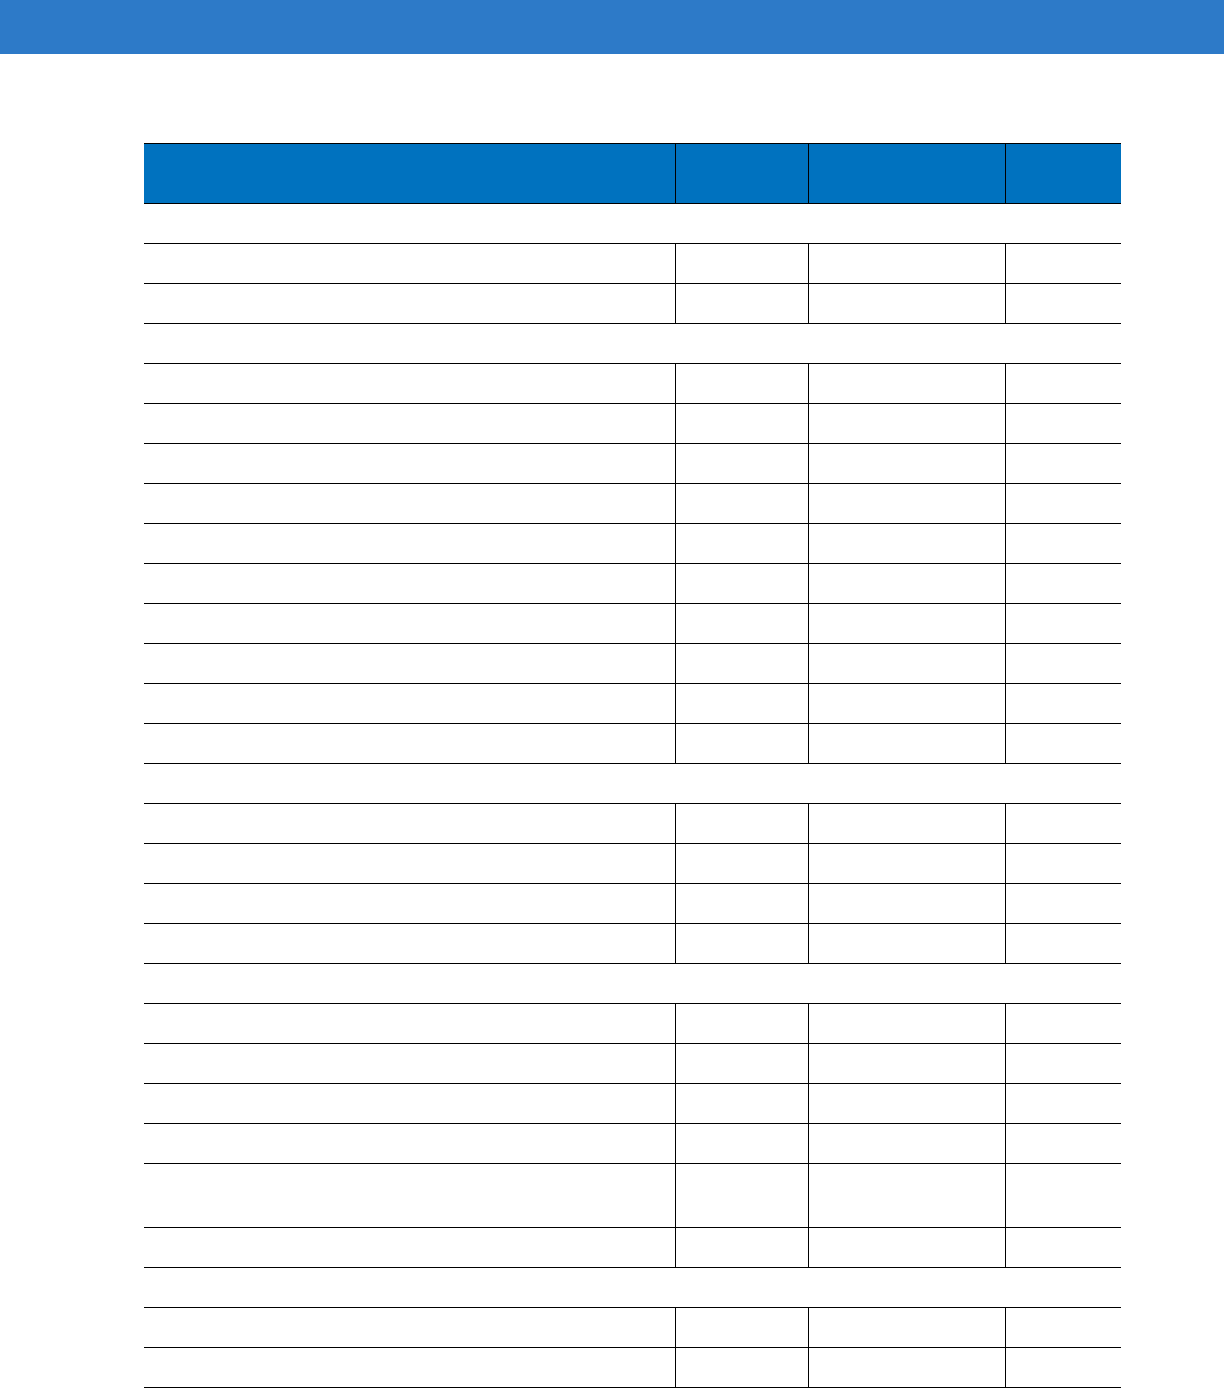
Table 11-1
Scanner Emulation Default Table
Parameter Default Page Number
Beep Style Beep on Successful Transmit
11-4
Parameter Pass-Through Parameter Process and Pass Through
11-5
Convert Newer Code Types Convert Newer Code Types
11-6
Module Width 20 µs
11-6
Convert All Bar Codes to Code 39 Do Not Convert Bar Codes to Code 39
11-7
Code 39 Full ASCII Conversion Disable
11-7
Transmission Timeout 3 sec
11-8
Ignore Unknown Characters Ignore Unknown Characters
11-9
Leading Margin 2 ms
11-9
Check for Decode LED Check for Decode LED
11-10
1
User selection is required to configure this interface and this is the most common selection.
Undecoded Scanner Emulation Host
11 - 4 Symbol DS6878 Product Reference Guide
Scanner Emulation Host Parameters
Beep Style
The Scanner Emulation host supports three beep styles.
•
Beep On Successful Transmit: The digital scanner beeps when the attached decoder issues the decode
signal to the digital scanner, so the digital scanner and the attached decoder beep at the same time.
•
Beep At Decode Time: The digital scanner beeps upon decode. This results in a double beep sequence
from most decoders, since the digital scanner beeps, and the decoder beeps (at a different frequency) when
it successfully decodes the output.
•
Do Not Beep: Only the attached decoder issues the decode beep.
*Beep On Successful Transmit
Beep At Decode Time
Do Not Beep

Scanner Emulation Interface 11 - 5
Parameter Pass-Through
The Scanner Emulation host can process parameter bar code messages and send them to the attached decoder.
In this way, customers using Symbol compliant decoders can control the behavior of the entire system by scanning
the necessary parameters only once.
For example, to enable D 2 of 5, scan the D 2 of 5 Enable parameter bar code. The digital scanner and the
attached decoder both process the parameter.
*Parameter Process and Pass-Through
Parameter Process Only
11 - 6 Symbol DS6878 Product Reference Guide
Convert Newer Code Types
The digital scanner supports a variety of code types that are not decodable by attached decoder systems. To allow
compatibility in these environments, the digital scanner converts these code types to more commonly decodable
symbologies, as per the following chart. Symbologies not listed on this chart are transmitted normally.
When decoding these code types with this parameter disabled, the digital scanner issues Convert Error beeps and
transmits no data.
Module Width
The standard module width is 20 µs. For an extremely slow decoder system, select 50 µs Module Width.
Scan this code type: Transmitted as:
Code 11 Code 39
Chinese 2 of 5 Code 39
GS1 DataBar (14, Limited, and Expanded) Code 128
Coupon Code Code 128
*Convert Newer Code Types
Reject Newer Code Types
*20 µs Module Width
50 µs Module Width
Scanner Emulation Interface 11 - 7
Convert All Bar Codes to Code 39
Scan the bar code below to enable or disable the conversion of all bar code data to Code 39.
Code 39 Full ASCII Conversion
By default, any characters that do not have a corresponding character in the Code 39 symbology set are replaced
by a space. If this parameter is enabled, the data sent to the Scanner Emulation host is encoded in Code 39 Full
ASCII. The host must be able to interpret Code 39 Full ASCII data. This setting applies only if Convert to Code 39
is also enabled.
*Do Not Convert Bar Codes To Code 39
Convert All To Code 39
*Disable Convert Code 39 To Full ASCII
Enable Convert Code 39 To Full ASCII
11 - 8 Symbol DS6878 Product Reference Guide
Transmission Timeout
The Scanner Emulation host transmits bar code data to the attached decoder and waits for the decoder to assert
the Decode signal, indicating successful transmission. If, after a specified amount of time, the Decode signal is not
asserted (indicating that the attached decoder has not successfully received the bar code data), the digital scanner
issues transmit error beeps.
Scan a bar code below to select the desired transmission timeout.
*3 Second Transmission Timeout
4 Second Transmission Timeout
5 Second Transmission Timeout
10 Second Transmission Timeout
30 Second Transmission Timeout
Scanner Emulation Interface 11 - 9
Ignore Unknown Characters
Unknown characters are characters the decoder does not recognize. When Ignore Unknown Characters is
selected, all bar code data is sent except for unknown characters, and no error beeps sound. When Convert Error
on Unknown Characters is selected, bar codes containing at least one unknown character are not sent to the
decoder, and a convert error beep sounds.
Leading Margin
Scan a bar code below to select a leading margin duration.
*Ignore Unknown Characters
Convert Error On Unknown Characters
1 ms Leading Margin
*2 ms Leading Margin
3 ms Leading Margin
11 - 10 Symbol DS6878 Product Reference Guide
Leading Margin (continued)
Check For Decode LED
The attached decoder normally asserts the Decode line to signal to the Scanner Emulation host that it successfully
decoded the transmitted bar code. Some decoders, however, do not assert the Decode signal. In this case, the
digital scanner emits transmit error beeps to indicate that the bar code was not successfully transmitted. Scan the
Ignore Decode LED bar code to disable the Transmit Error beeps.
5 ms Leading Margin
10 ms Leading Margin
*Check For Decode LED
Ignore Decode LED

Chapter 12 123Scan2
Introduction
123Scan² is an easy-to-use, PC-based software tool that enables rapid and easy customized setup of Symbol
scanners by Motorola.
123Scan² uses a wizard tool to guide users through a streamlined set up process. Settings are saved in a
configuration file that can be distributed via e-mail, electronically downloaded via a USB cable, or used to generate
a sheet of scannable programming bar codes.
Additionally 123Scan² can upgrade scanner firmware, check online to enable support for newly released products,
generate a collection of multi-setting bar codes if the number of settings is very large, stage large number of
scanners simultaneously, generate reports with asset tracking information and create custom products.
Communication with 123Scan2
To communicate with the 123Scan² program which runs on a host computer running a Windows XP SP2 or
Windows Vista operating system, use a USB cable to connect the scanner cradle to the host computer (see USB
Connection on page 6-2).
123Scan2 Requirements
•
Host computer with Windows XP SP2 or Windows Vista
•
Scanner
•
Cradle
•
USB cable.


Chapter 13 OCR Programming
Introduction
This chapter describes how to set up the digital scanner for OCR programming. The digital scanner can read 6 to
60 point OCR typeface. It supports font types OCR-A, OCR-B, MICR-E13B, and US Currency Serial Number.
OCR is not as secure as a bar code. To decrease OCR misdecodes and speed OCR reading, set an accurate OCR
template and character subset, and use a check digit.
All OCR fonts are disabled by default. Enabling OCR can slow bar code decoding. Enabling more than one OCR
font could also slow OCR decoding and impact OCR decoding accuracy.
Throughout the programming bar code menus, asterisks (*) indicate default values.
*Disable OCR-A Feature/Option
* Indicates Default
NOTE Most computer monitors allow scanning the bar codes directly on the screen. When scanning from the
screen, be sure to set the document magnification to a level where you can see the bar code clearly, and
bars and/or spaces are not merging.
13 - 2 Symbol DS6878 Product Reference Guide
OCR Parameter Defaults
Table 13-1 lists the defaults for OCR parameters. To change any option, scan the appropriate bar code(s) provided
in the Parameter Descriptions section beginning on page 13-3.
NOTE See Appendix A, Standard Default Parameters for all user preferences, hosts, symbologies, and
miscellaneous default parameters.
Table 13-1
OCR Programming Default Table
Parameter Parameter
Number Default Page Number
OCR Programming Parameters
OCR-A F1h A8h Disable
13-3
OCR-A Variant F1h ACh Full ASCII
13-3
OCR-B F1h A9h Disable
13-5
OCR-B Variant F1h ADh Full ASCII
13-6
MICR E13B F1h AAh Disable
13-9
US Currency F1h ABh Disable
13-10
OCR Orientation F1h AFh 0
o
13-10
OCR Lines F1h B3h 1
13-12
OCR Minimum Characters F1h B1h 3
13-12
OCR Maximum Characters F1h B2h 100
13-13
OCR Security Level F1h 2Ah 80
13-13
OCR Subset F1h AEh Selected font
variant
13-14
OCR Quiet Zone F1h B7h 50
13-14
OCR Bright Illumination F1h BDh Disable
13-15
OCR Template F1h 23h 54R
13-16
OCR Check Digit Modulus F1h B0h 1
13-25
OCR Check Digit Multiplier F1h BCh 121212121212
13-26
OCR Check Digit Validation F1h B6h None
13-27
OCR Programming 13 - 3
OCR Programming Parameters
Enable/Disable OCR-A
Parameter # F1h A8h
To enable or disable OCR-A, scan one of the following bar codes.
OCR-A Variant
Parameter # F1 ACh
Font variant sets a processing algorithm and default character subset for the given font. To choose a variant, scan
one of the following bar codes. Selecting the most appropriate font variant optimizes performance and accuracy.
OCR-A supports the following variants:
•
OCR-A Full ASCII
!"#$()*+,-./0123456789<>ABCDEFGHIJKLMNOPQRSTUVWXYZ\^
•
OCR-A Reserved 1
$*+-./0123456789ABCDEFGHIJKLMNOPQRSTUVWXYZ
•
OCR-A Reserved 2
$*+-./0123456789<>ABCDEFGHIJKLMNOPQRSTUVWXYZ
•
OCR-A Banking
-0123456789<>
Special banking characters output as the following representative characters:
outputs as f
outputs as c
outputs as h
Enable OCR-A
*Disable OCR-A
NOTE Enable OCR-A before setting this parameter. If disabling OCR-A, set the variant to its default
(OCR-A Full ASCII).
13 - 4 Symbol DS6878 Product Reference Guide
OCR-A Variant (continued)
*OCR-A Full ASCII
(00h)
OCR-A Reserved 1
(01h)
OCR-A Reserved 2
(02h)
OCR-A Banking
(03h)

OCR Programming 13 - 5
Enable/Disable OCR-B
Parameter # F1h A9h
To enable or disable OCR-B, scan one of the following bar codes.
Enable OCR-B
*Disable OCR-B

13 - 6 Symbol DS6878 Product Reference Guide
OCR-B Variant
Parameter # F1 ADh
OCR-B has the following variants. Selecting the most appropriate font variant affects performance and accuracy.
•
OCR-B Full ASCII
!#$%()*+,-./0123456789<>ABCDEFGHIJKLMNOPQRSTUVWXYZ^|Ñ
•
OCR-B Banking
#+-0123456789<>JNP|
•
OCR-B Limited
+,-./0123456789<>ACENPSTVX
•
OCR-B Travel Document Version 1 (TD1) 3-Line ID Cards
-0123456789<ABCDEFGHIJKLMNOPQRSTUVWXYZ
•
OCR-B Passport
-0123456789<ABCDEFGHIJKLMNOPQRSTUVWXYZÑ
•
OCR-B ISBN 10-Digit Book Numbers
-0123456789>BCEINPSXz
•
OCR-B ISBN 10 or 13-Digit Book Numbers
-0123456789>BCEINPSXz
•
OCR-B Travel Document Version 2 (TD2) 2-Line ID Cards
-0123456789<ABCDEFGHIJKLMNOPQRSTUVWXYZ
•
OCR-B Visa Type A
-0123456789<ABCDEFGHIJKLMNOPQRSTUVWXYZ
•
OCR-B Visa Type B
-0123456789<ABCDEFGHIJKLMNOPQRSTUVWXYZÑ
To choose a variant, scan one of the following bar codes. Selecting the following OCR-B variants automatically sets
the appropriate OCR Lines on page 13-12. These five variants invoke extensive special algorithms and checking
for that particular document type:
Variant OCR Lines Setting
Passport 2
TD1 ID Cards 3
TD2 ID Cards 2
Visa Type A 2
Visa Type B 2
Selecting one of the ISBN Book Numbers automatically applies the appropriate ISBN checksum, so you do not
need to set this.
For the best performance in passport reading, fix the target passport and the imaging engine in place (6.5 - 7.5”).
NOTE Enable OCR-B before setting this parameter. If disabling OCR-B, set the variant to its default
(OCR-B Full ASCII).
OCR Programming 13 - 7
OCR-B Variant (continued)
*OCR-B Full ASCII
(00h)
OCR-B Banking
(01h)
OCR-B Limited
(02h)
OCR-B Travel Document Version 1 (TD1)
3 Line ID Cards
(03h)
OCR-B Passport
(04h)
13 - 8 Symbol DS6878 Product Reference Guide
OCR-B Variant (continued)
OCR-B ISBN 10-Digit Book Numbers
(06h)
OCR-B ISBN 10 or 13-Digit Book Numbers
(07h)
OCR-B Travel Document Version 2 (TD2)
2-Line ID Cards
(08h)
OCR-B Visa Type A
(09h)
OCR-B Visa Type B
(0Ah)
OCR Programming 13 - 9
Enable/Disable MICR E13B
Parameter # F1h AAh
To enable or disable MICR E13B, scan one of the following bar codes.
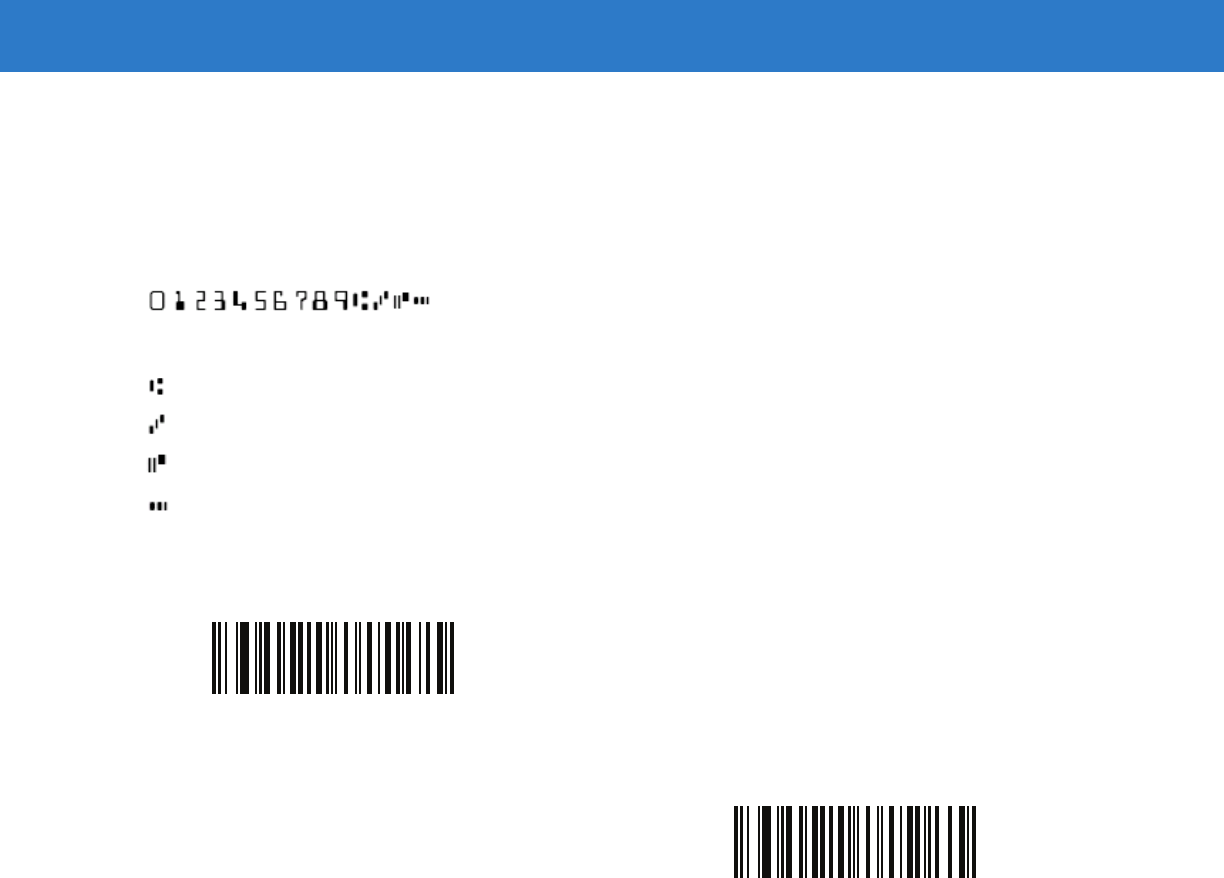
MICR E 13B uses the following characters:
TOAD characters (Transit, On Us, Amount, and Dash) output as the following representative characters:
outputs as t
outputs as a
outputs as o
outputs as d
Enable MICR E13B
*Disable MICR E13B

13 - 10 Symbol DS6878 Product Reference Guide
Enable/Disable US Currency Serial Number
Parameter # F1 ABh
To enable or disable US Currency Serial Number, scan one of the following bar codes.
OCR Orientation
Parameter # F1 AFh
Select one of five options to specify the orientation of an OCR string to be read:
•
0o to the imaging engine (default)
•
270o clockwise (or 90o counterclockwise) to the imaging engine
•
180o (upside down) to the imaging engine
•
90o clockwise to the imaging engine
•
Omnidirectional
Setting an incorrect orientation can cause misdecodes.
Enable US Currency
*Disable US Currency
OCR Programming 13 - 11
OCR Orientation (continued)
*OCR Orientation 0o
(00h)
OCR Orientation 270o Clockwise
(01h)
OCR Orientation 180o Clockwise
(02h)
OCR Orientation 90o Clockwise
(03h)
OCR Orientation Omnidirectional
(04h)
13 - 12 Symbol DS6878 Product Reference Guide
OCR Lines
Parameter # F1 B3h
To select the number of OCR lines to decode, scan one of the following bar codes. Selecting Visas, Passport, TD1,
or TD2 ID cards automatically sets the appropriate OCR Lines. Also see OCR-B Variant on page 13-6.
OCR Minimum Characters
Parameter # F1 B1h
To select the minimum number of OCR characters (not including spaces) per line to decode, scan the following bar
code, then scan a three-digit number between 003 and 100 using the numeric keypad in Chapter 15, Advanced
Data Formatting representing the number of OCR characters to decode. Strings of OCR characters less than the
minimum are ignored. The default is 003.
*OCR 1 Line
(001h)
OCR 2 Lines
(002h)
OCR 3 Lines
(003h)
OCR Minimum Characters

OCR Programming 13 - 13
OCR Maximum Characters
Parameter # F1 B2h
To select the maximum number of OCR characters (including spaces) per line to decode, scan the following bar
code, then scan a three-digit number between 003 and 100 using the numeric keypad in Chapter 15, Advanced
Data Formatting represents the number of OCR characters to decode. Strings of OCR characters greater than the
maximum are ignored. The default is 100.
OCR Security Level
Parameter # F1 2Ah
To select the OCR decoding security/confidence level, scan the following bar code, then scan a two-digit number
using the numeric keypad in Chapter 15, Advanced Data Formatting represents the level of confidence. Greater
numbers minimize OCR decoding errors but reduce performance. Setting a value that is too high can result in
failure to decode. Setting a value that is too low can cause decoding errors. The range of the security level is 10 -
90 and the default is 80.
OCR Maximum Characters
OCR Security Level

13 - 14 Symbol DS6878 Product Reference Guide
OCR Subset
Parameter # F1 AEh
Set an OCR subset to define a custom group of characters in place of a preset font variant. For example, if
scanning only numbers and the letters A, B, and C, create a subset of just these characters to speed decoding.
This applies a designated OCR Subset across all enabled OCR fonts.
To set or modify the OCR font subset, first enable the appropriate OCR font(s). Next, scan the following bar code,
then scan numbers and letters to form the OCR Subset from the alphanumeric keyboard in Chapter 15, Advanced
Data Formatting. Then scan End of Message in Chapter 15, Advanced Data Formatting.
To cancel an OCR subset, for OCR-A or OCR-B, scan OCR-A variant Full ASCII, or OCR-B variant Full ASCII.
For MICR E13B or US Currency Serial Number, create a subset which includes all allowed characters in that
character set, or scan an option from the Default Parameters on page 5-4 and re-program the digital scanner.
OCR Quiet Zone
Parameter # F1h B7h
This option sets the OCR quiet zone. The digital scanner stops scanning a field when it detects a sufficiently wide
blank space. The width of this space is defined by the End of Field option. Used with parsers that tolerate slanted
characters, the End of Field count is roughly a count of 8 for a character width. For example if set to 15, then two
character widths are an end of line indicator for the parser. Larger end of field numbers require bigger quiet zones
at each end of text line.
To set a quiet zone, scan the following bar code, then scan a two-digit number using the numeric keypad in
Chapter 15, Advanced Data Formatting. The range of the quiet zone is 20 - 99 and the default is 50, indicating a six
character width quiet zone.
OCR Subset
OCR Quiet Zone
OCR Programming 13 - 15
OCR Bright Illumination
Parameter # F1h BDh
When enabled, image contrast is improved for OCR scanning. Motorola recommends enabling this when the OCR
string is longer than 20 characters, and for applications with busy backgrounds such as passport, check, or VISA
reading.
Enable OCR Bright Illumination
*Disable OCR Bright Illumination
NOTE Enabling OCR Bright Illumination causes the aiming pattern to blink due to the lower frame rate setting.
13 - 16 Symbol DS6878 Product Reference Guide
OCR Template
Parameter # F1 23h
This option creates a template for precisely matching scanned OCR characters to a desired input format. Carefully
constructing an OCR template eliminates scanning errors.
To set or modify the OCR decode template, scan the OCR Template bar code, then bar codes corresponding to
numbers and letters on the following pages to form the template expression. Then scan End of Message in Chapter
15, Advanced Data Formatting. The default is 54R which accepts any character OCR strings.
Required Digit (9)
Only a numeric character is allowed in this position.
Template Valid data Valid data Invalid data
99999 12987 30517 123AB
Required Alpha (A)
Only an alpha character is allowed in this position.
Template Valid data Valid data Invalid data
AAA ABC WXY 12F
OCR Template
End of Message
9
A
OCR Programming 13 - 17
Optional Alphanumeric (1)
When this option appears in the template string, the data validator accepts an alphanumeric character if present.
Optional characters are not allowed as the first character(s) in a field of like characters.
Template Valid data Valid data Invalid data
99991 1234A 12345 1234<
Optional Alpha (2)
When this option appears in the template string, the data validator accepts an alpha character if present. Optional
characters are not allowed as the first character(s) in a field of like characters.
Template Valid data Valid data Invalid data
AAAA2 ABCDE WXYZ ABCD6
Alpha or Digit (3)
The data validator requires an alphanumeric character in this position to validate the incoming data.
Template Valid data Valid data Invalid data
33333 12ABC WXY34 12AB<
1
2
3
13 - 18 Symbol DS6878 Product Reference Guide
Any Including Space & Reject (4)
The template accepts any character in this position, including space and reject. Rejects are represented as an
underscore (_) in the output. This is a good selection for troubleshooting.
Template Valid data Valid data
99499 12$34 34_98
Any except Space & Reject (5)
The template accepts any character in this position except a space or reject.
Template Valid data Valid data Invalid data
55999 A.123 *Z456 A BCD
Optional Digit (7)
When this option appears in the template string, the template accepts a numeric character if present. Optional
characters are not allowed as the first character(s) in a field of like characters.
Template Valid data Valid data Invalid data
99977 12345 789 789AB
4
5
7
OCR Programming 13 - 19
Digit or Fill (8)
The data validator accepts any numeric or fill character in this position.
Template Valid data Valid data Invalid data
88899 12345 >>789 <<789
Alpha or Fill (F)
The data validator accepts any alpha or fill character in this position.
Template Valid data Valid data Invalid data
AAAFF ABCXY LMN>> ABC<5
Required Space ( )
When this option appears in the template string, the template accepts a space if present. Optional characters are
not allowed as the first character(s) in a field of like characters.
Template Valid data Invalid data
99 99 12 34 67891
8
F
Space
13 - 20 Symbol DS6878 Product Reference Guide
Optional Small Special (.)
When this option appears in the template string, the data validator accepts a special character if present. Optional
characters are not allowed as the first character(s) in a field of like characters. Small special characters are - , and .
Template Valid data Valid data Invalid data
AA.99 MN.35 XY98 XYZ12
Other Template Operators
These template operators assist in capturing, delimiting, and formatting scanned OCR data.
Literal String (" and +)
Use either of these delimiting characters surrounding characters from the alphanumeric keyboard in Chapter 15,
Advanced Data Formatting to define a literal string within a template that must be present in scanned OCR data.
There are two characters used to delimit required literal strings; if one of the delimiter characters is present in the
desired literal string, use the other delimiter.
Template Valid data Invalid data
"35+BC" 35+BC AB+22
.
“
+

OCR Programming 13 - 21
New Line (E)
To create a template of multiple lines, add E between the template of each single line.
Template Valid data Valid data Invalid data
999EAAAA 321 987 XYZW
BCAD ZXYW 12
String Extract (C)
This operator combined with others defines a string of characters to extract from the scanned data. The string
extract is structured as follows:
CbPe
Where:
•
C is the string extract operator
•
b is the string begin delimiter
•
P is the category (one or more numeric or alpha characters) describing the string representation
•
e is the string end delimiter
Values for b and e can be any scannable character. They are included in the output stream.
Template Incoming data Output
C>A> XQ3>ABCDE> >ABCDE>
->ATHRUZ>123 >ATHRUZ>
1ABCZXYZ No Output
E
C
13 - 22 Symbol DS6878 Product Reference Guide
Ignore to End of Field (D)
This operator causes all characters after a template to be ignored. Use this as the last character in a template
expression. Examples for the template 999D:
Template Incoming data Output
999D 123-PED 123
357298 357
193 193
Skip Until (P1)
This operator allows skipping over characters until a specific character type or a literal string is detected. It can be
used in two ways:
P1ct
Where:
•
P1 is the Skip Until operator
•
c is the type of character that triggers the start of output
•
t is one or more template characters
P1"s"t
Where:
•
P1 is the Skip Until operator
•
"s" is one or more literal string characters (see Literal String (" and +) on page 13-20) that trigger the start of
output
•
t is one or more template characters
D
P
1

OCR Programming 13 - 23
The trigger character or literal string is included in output from a Skip Until operator, and the first character in the
template should accommodate this trigger.
Template Incoming data Output
P1"PN"AA999 123PN9876 PN9876
PN1234 PN1234
X-PN3592 PN3592
Skip Until Not (P0)
This operator allows skipping over characters until a specific character type or a literal string is not matched in the
output stream. It can be used in two ways:
P0ct
Where:
•
P0 is the Skip Until Not operator
•
c is the type of character that triggers the start of output
•
t is one or more template characters
P0"s"t
Where:
•
P0 is the Skip Until Not operator
•
"s" is one or more literal string characters (see Literal String (" and +) on page 13-20) that trigger the start
of output
•
t is one or more template characters
P
0

13 - 24 Symbol DS6878 Product Reference Guide
The trigger character or literal string is not included in output from a Skip Until Not operator.
Template Incoming data Output
P0A9999 BPN3456 3456
PN1234 PN1234
5341 5341
Template Incoming data Output
P0"PN"9999 PN3456 3456
5341 5341
PNPN7654 7654
Repeat Previous (R)
This operator allows a template character to repeat one or more times, allowing the capture of variable-length
scanned data. The following examples capture two required alpha characters followed by one or more required
digits:
Template Incoming data Output
AA9R AB3 AB3
PN12345 PN12345
32RM52700 No output
Scroll Until Match (S)
This operator steps through scanned data one character at a time until the data matches the template.
Template Incoming data Output
S99999 AB3 No Output
PN12345 12345
32RM52700 52700
R
S

OCR Programming 13 - 25
Template Examples
Following are sample templates with descriptions of valid data for each definition.
Field Definition Description
"M"99977 M followed by three digits and two optional digits.
"X"997777"X" X followed by two digits, four optional digits, and an X.
9959775599 Two digits followed by any character, a digit, two optional digits, any two characters,
and two digits.
A55"-"999"-"99 A letter followed by two characters, a dash, three digits, a dash, and two digits.
33A"."99 Two alphanumeric characters followed by a letter, a period, and two digits.
999992991 Five digits followed by an optional alpha, two digits, and an optional alphanumeric.
"PN98" Literal field - PN98
OCR Check Digit Modulus
Parameter # F1h B0h
This option sets OCR module check digit calculation. The check digit is the last digit (in the rightmost position) in an
OCR string and improves the accuracy of the collected data. The check digit is the end product of a calculation
made on the incoming data. For check digit calculation, for example Modulus 10, alpha and numeric characters are
assigned numeric weights (see OCR Check Digit Multiplier on page 13-26). The calculation is applied to the
character weights and the resulting check digit is added to the end of the data. If the incoming data does not match
the check digit, the data is considered corrupt.
The selected check digit option does not take effect until you set OCR Check Digit Validation.
To choose the Check Digit Modulus, such as 10 for modulo 10, scan the following bar code, then scan a three-digit
number from 001 to 099 representing the check digit using the numeric keypad in Chapter 15, Advanced Data
Formatting. The default is 1.
OCR Check Digit

13 - 26 Symbol DS6878 Product Reference Guide
OCR Check Digit Multiplier
Parameter # F1h BCh
This option sets OCR check digit multipliers for the character positions. For check digit validation, each character in
scanned data has an equivalent weight used in the check digit calculation. DS9808 OCR ships with the following
weight equivalents:
0 = 0 A = 10 K = 20 U = 30
1 = 1 B = 11 L = 21 V = 31
2 = 2 C = 12 M = 22 W = 32
3 = 3 D = 13 N = 23 X = 33
4 = 4 E = 14 O = 24 Y = 34
5 = 5 F = 15 P = 25 Z = 35
6 = 6 G = 16 Q = 26 Space = 0
7 = 7 H = 17 R = 27
8 = 8 I = 18 S = 28
9 = 9 J = 19 T = 29
All other characters are equivalent to one (1).
You can define the multiplier string if it is different from the default.
121212121212 (default)
123456789A (for ISBN, Product Add Right to Left. See OCR Check Digit Validation on page 13-27)
For example:
ISBN 0 2 0 1 1 8 3 9 9 4
Multiplier 10 9 8 7 6 5 4 3 2 1
Product 0 18 0 7 6 40 12 27 18 4
Product add 0+ 18+ 0+ 7+ 6+ 40+ 12+ 27+ 18+ 4= 132
ISBN uses modulo 11 for its check digit. In this case, 132 is divisible by 11, so it passes the check digit.
To set the check digit multiplier, scan the following bar code, then scan numbers and letters to form the multiplier
string from the alphanumeric keyboard in Chapter 15, Advanced Data Formatting. Then scan End of Message in the
Chapter 15, Advanced Data Formatting.
OCR Check Digit Multiplier
OCR Programming 13 - 27
OCR Check Digit Validation
Parameter # F1h B6h
Use OCR Check Digit Validation to protect against scanning errors by applying a check digit validation scheme. The
following is a list of options.
None
No check digit validation, indicating no check digit is applied. This is the default.
Product Add Left to Right
Each character in the scanned data is assigned a numeric value (see OCR Check Digit Multiplier on page 13-26).
Each digit representing a character in the scanned data is multiplied by its corresponding digit in the multiplier, and
the sum of these products is computed. The check digit passes if this sum modulo Check Digit Modulus is zero.
Example:
Scanned data numeric value is 132456 (check digit is 6)
Check digit multiplier string is 123456
Digit 1 3 2 4 5 6
Multiplier 1 2 3 4 5 6
Product 1 6 6 16 25 36
Product add 1+ 6+ 6+ 16+ 25+ 36= 90
The Check Digit Modulus is 10. It passes because 90 is divisible by 10 (the remainder is zero).
*No Check Digit
(00h)
Product Add Left to Right
(03h)
13 - 28 Symbol DS6878 Product Reference Guide
Product Add Right to Left
Each character in the scanned data is assigned a numeric value (see OCR Check Digit Multiplier on page 13-26).
The check digit multiplier is reversed in order. Each value representing a character in the scanned data is multiplied
by its corresponding digit in the reversed multiplier, resulting in a product for each character in the scanned data.
The sum of these products is computed. The check digit passes if this sum modulo Check Digit Modulus is zero.
Example:
Scanned data numeric value is 132459 (check digit is 9)
Check digit multiplier string is 123456
Digit 1 3 2 4 5 9
Multiplier 6 5 4 3 2 1
Product 6 15 8 12 10 9
Product add 6+ 15+ 8+ 12+ 10+ 9= 60
The Check Digit Modulus is 10. It passes because 60 is divisible by 10 (the remainder is 0).
Digit Add Left to Right
Each character in the scanned data is assigned a numeric value (see OCR Check Digit Multiplier on page 13-26).
Each value representing a character in the scanned data is multiplied by its corresponding digit in the multiplier,
resulting in a product for each character in the scanned data. The sum of each individual digit in all of the products
is then calculated. The check digit passes if this sum modulo Check Digit Modulus is zero.
Example:
Scanned data numeric value is 132456 (check digit is 6)
Check digit multiplier string is 123456
Digit 1 3 2 4 5 6
Multiplier 1 2 3 4 5 6
Product 1 6 6 16 25 36
Digit add 1+ 6+ 6+ 1+6+ 2+5+ 3+6= 36
The Check Digit Modulus is 12. It passes because 36 is divisible by 12 (the remainder is 0).
Product Add Right to Left
(01h)
Digit Add Left to Right
(04h)

OCR Programming 13 - 29
Digit Add Right to Left
Each character in the scanned data is assigned a numeric value (see OCR Check Digit Multiplier on page 13-26).
The check digit multiplier is reversed in order. Each value representing a character in the scanned data is multiplied
by its corresponding digit in the reversed multiplier, resulting in a product for each character in the scanned data.
The sum of each individual digit in all of the products is then calculated. The check digit passes if this sum modulo
Check Digit Modulus is zero.
Example:
Scanned data numeric value is 132456 (check digit is 6)
Check digit multiplier string is 123456
Digit 1 3 2 4 5 6
Multiplier 6 5 4 3 2 1
Product 6 15 8 12 10 6
Digit add 6+ 1+5+ 8+ 1+2+ 1+0+ 6= 30
The Check Digit Modulus is 10. It passes because 30 is divisible by 10 (the remainder is 0).
Digit Add Right to Left
(02h)

13 - 30 Symbol DS6878 Product Reference Guide
Product Add Right to Left Simple Remainder
Each character in the scanned data is assigned a numeric value (see OCR Check Digit Multiplier on page 13-26).
The check digit multiplier is reversed in order. Each value representing a character in the scanned data is multiplied
by its corresponding digit in the reversed multiplier, resulting in a product for each character in the scanned data.
The sum of these products except for the check digit's product is computed. The check digit passes if this sum
modulo Check Digit Modulus is equal to the check digit's product.
Example:
Scanned data numeric value is 122456 (check digit is 6)
Check digit multiplier string is 123456
Digit 1 2 2 4 5 6
Multiplier 6 5 4 3 2 1
Product 6 10 8 12 10 6
Product add 6+ 10+ 8+ 12+ 10= 46 6
The Check Digit Modulus is 10. It passes because 46 divided by 10 leaves a remainder of 6.
Product Add Right to Left Simple Remainder
(05h)

OCR Programming 13 - 31
Digit Add Right To Left Simple Remainder
Each character in the scanned data is assigned a numeric value (see OCR Check Digit Multiplier on page 13-26).
The check digit multiplier is reversed in order. Each value representing a character in the scanned data is multiplied
by its corresponding digit in the reversed multiplier, resulting in a product for each character in the scanned data.
The sum of each individual digit in all of the products except for the check digit's product is then calculated. The
check digit passes if this sum modulo Check Digit Modulus is equal to the check digit's product.
Example:
Scanned data numeric value is 122459 (check digit is 6)
Check digit multiplier string is 123456
Digit 1 2 2 4 5 9
Multiplier 6 5 4 3 2 1
Product 6 10 8 12 10 9
Digit add 6+ 1+0+ 8+ 1+2+ 1+0= 19 9
The Check Digit Modulus is 10. It passes because 19 divided by 10 leaves a remainder of 9.
Health Industry - HIBCC43
This is the health industry module 43 check digit standard.
Digit Add Right to Left Simple Remainder
(06h)
Health Industry - HIBCC43
(09h)

13 - 32 Symbol DS6878 Product Reference Guide

Chapter 14 Symbologies
Introduction
This chapter describes symbology features and provides programming bar codes for selecting these features.
Before programming, follow the instructions in Chapter 1, Getting Started.
To set feature values, scan a single bar code or a short bar code sequence. The settings are stored in non-volatile
memory and are preserved even when the digital scanner powers down.
Select a host type (see each host chapter for specific host information) after the power-up beeps sound. This is
only necessary upon the first power-up when connected to a new host.
To return all features to default values, scan the Set Default Parameter on page 4-4. Throughout the programming
bar code menus, asterisks (*) indicate default values.
Scanning Sequence Examples
In most cases, scanning one bar code sets the parameter value. For example, to transmit bar code data without the
UPC-A check digit, simply scan the Do Not Transmit UPC-A Check Digit bar code under Transmit UPC-A Check
Digit on page 14-14. The digital scanner issues a fast warble beep and the LED turns green, signifying a successful
parameter entry.
Other parameters, such as Set Length(s) for D 2 of 5 require scanning several bar codes. See the individual
parameter, such as Set Length(s) for D 2 of 5, for this procedure.
NOTE Most computer monitors allow scanning the bar codes directly on the screen. When scanning from the
screen, be sure to set the document magnification to a level where you can see the bar code clearly, and
bars and/or spaces do not merge.
*Enable UPC-A
(01h) Feature/Option
* Indicates Default
Option Hex Value
14 - 2 Symbol DS6878 Product Reference Guide
Errors While Scanning
Unless otherwise specified, to correct an error during a scanning sequence, just re-scan the correct parameter.
Symbology Parameter Defaults
Table 14-1 lists the defaults for all symbologies parameters. To change the default values, scan the appropriate bar
codes in this guide. These new values replace the standard default values in memory. To recall the default
parameter values, scan the Set Default Parameter on page 4-4.
NOTE See Appendix A, Standard Default Parameters for all user preferences, hosts, and miscellaneous default
parameters.
Table 14-1
Parameter Defaults
Parameter Parameter
Number Default Page
Number
UPC/EAN
UPC-A 01h Enable
14-7
UPC-E 02h Enable
14-7
UPC-E1 0Ch Disable
14-8
EAN-8/JAN 8 04h Enable
14-8
EAN-13/JAN 13 03h Enable
14-9
Bookland EAN 53h Disable
14-9
Decode UPC/EAN/JAN Supplementals (2 and 5 digits) 10h Ignore
14-10
User-Programmable Supplementals
Supplemental 1:
Supplemental 2:
F1h 43h
F1h 44h
14-13
UPC/EAN/JAN Supplemental Redundancy 50h 10
14-13
Decode UPC/EAN/JAN Supplemental AIM ID F1h A0h Combined
14-14
Transmit UPC-A Check Digit 28h Enable
14-14
Transmit UPC-E Check Digit 29h Enable
14-15
Transmit UPC-E1 Check Digit 2Ah Enable
14-15
UPC-A Preamble 22h System Character
14-16
UPC-E Preamble 23h System Character
14-17
UPC-E1 Preamble 24h System Character
14-18
Convert UPC-E to A 25h Disable
14-19
Symbologies 14 - 3
Convert UPC-E1 to A 26h Disable
14-19
EAN-8/JAN-8 Extend 27h Disable
14-20
Bookland ISBN Format F1h 40h ISBN-10
14-21
UCC Coupon Extended Code 55h Enable
14-22
ISSN EAN F1h 69h Disable
14-22
Code 128
Code 128 08h Enable
14-23
Set Length(s) for Code 128 D1h, D2h Any Length
14-23
GS1-128 (formerly UCC/EAN-128) 0Eh Enable
14-24
ISBT 128 54h Enable
14-25
ISBT Concatenation F1h 41h Disable
14-26
Check ISBT Table F1h 42h Enable
14-27
ISBT Concatenation Redundancy DFh 10
14-27
Code 39
Code 39 00h Enable
14-28
Trioptic Code 39 0Dh Disable
14-28
Convert Code 39 to Code 32 (Italian Pharmacy Code) 56h Disable
14-29
Code 32 Prefix E7h Disable
14-29
Set Length(s) for Code 39 12h, 13h 2 to 55
14-30
Code 39 Check Digit Verification 30h Disable
14-31
Transmit Code 39 Check Digit 2Bh Disable
14-31
Code 39 Full ASCII Conversion 11h Disable
14-32
Buffer Code 39 71h Disable
14-32
Code 93
Code 93 09h Disable
14-35
Set Length(s) for Code 93 1Ah, 1Bh 4 to 55
14-35
Code 11
Code 11 0Ah Disable
14-37
Set Lengths for Code 11 1Ch, 1Dh 4 to 55
14-37
Code 11 Check Digit Verification 34h Disable
14-39
Table 14-1
Parameter Defaults (Continued)
Parameter Parameter
Number Default Page
Number

14 - 4 Symbol DS6878 Product Reference Guide
Transmit Code 11 Check Digit(s) 2Fh Disable
14-40
Interleaved 2 of 5 (ITF)
Interleaved 2 of 5 (ITF) 06h Disable
14-40
Set Lengths for I 2 of 5 16h, 17h 14
14-41
I 2 of 5 Check Digit Verification 31h Disable
14-43
Transmit I 2 of 5 Check Digit 2Ch Disable
14-43
Convert I 2 of 5 to EAN 13 52h Disable
14-44
Discrete 2 of 5 (DTF)
Discrete 2 of 5 05h Disable
14-44
Set Length(s) for D 2 of 5 14h, 15h 12
14-45
Codabar (NW - 7)
Codabar 07h Disable
14-47
Set Lengths for Codabar 18h, 19h 5 to 55
14-47
CLSI Editing 36h Disable
14-49
NOTIS Editing 37h Disable
14-49
MSI
MSI 0Bh Disable
14-50
Set Length(s) for MSI 1Eh, 1Fh 4 to 55
14-50
MSI Check Digits 32h One
14-52
Transmit MSI Check Digit 2Eh Disable
14-52
MSI Check Digit Algorithm 33h Mod 10/Mod 10
14-53
Chinese 2 of 5
Chinese 2 of 5 F0h 98h Disable
14-53
Matrix 2 of 5
Matrix 2 of 5 F1h 6Ah Disable
14-54
Matrix 2 of 5 Lengths F1h 6Bh
F1h 6Ch 1 Length - 14
14-55
Matrix 2 of 5 Redundancy F1h 6Dh Disable
14-56
Matrix 2 of 5 Check Digit F1h 6Eh Disable
14-56
Transmit Matrix 2 of 5 Check Digit F1h 6Fh Disable
14-57
Table 14-1
Parameter Defaults (Continued)
Parameter Parameter
Number Default Page
Number
Symbologies 14 - 5
Korean 3 of 5
Korean 3 of 5 F1h 45h Disable
14-57
Inverse 1D
F1h 4Ah Regular
14-58
Postal Codes
US Postnet 59h Disable
14-59
US Planet 5Ah Disable
14-59
Transmit US Postal Check Digit 5Fh Enable
14-60
UK Postal 5Bh Disable
14-60
Transmit UK Postal Check Digit 60h Enable
14-61
Japan Postal F0h 22h Disable
14-61
Australian Postal F0h 23h Disable
14-62
Netherlands KIX Code F0h 46h Disable
14-62
USPS 4CB/One Code/Intelligent Mail F1h 50h Disable
14-63
UPU FICS Postal F1h 63h Disable
14-63
GS1 DataBar
GS1 DataBar-14 F0h 52h Disable
14-64
GS1 DataBar Limited F0h 53h Disable
14-64
GS1 DataBar Expanded F0h 54h Disable
14-65
Convert GS1 DataBar to UPC/EAN F0h 8Dh Disable
14-65
Composite
Composite CC-C F0h 55h Disable
14-66
Composite CC-A/B F0h 56h Disable
14-66
Composite TLC-39 F0h 73h Disable
14-67
UPC Composite Mode F0h 58h Never Linked
14-67
Composite Beep Mode F0h 8Eh Beep As Each Code
Type is Decoded
14-68
GS1-128 Emulation Mode for UCC/EAN Composite Codes F0h ABh Disable
14-68
2D Symbologies
PDF417 0Fh Enable
14-69
MicroPDF417 E3h Disable
14-69
Table 14-1
Parameter Defaults (Continued)
Parameter Parameter
Number Default Page
Number
14 - 6 Symbol DS6878 Product Reference Guide
Code 128 Emulation 7Bh Disable
14-70
Data Matrix F0h 24h Enable
14-71
Data Matrix Inverse F1h 4Ch Regular
14-71
Maxicode F0h 26h Disable
14-72
QR Code F0h 25h Enable
14-72
QR Inverse F1h 4Bh Regular
14-73
MicroQR F1h 3Dh Enable
14-73
Aztec F1h 3Eh Enable
14-74
Aztec Inverse F1h 4Dh Regular
14-74
Symbology-Specific Security Levels
Redundancy Level 4Eh 1
14-75
Security Level 4Dh 0
14-77
Intercharacter Gap Size F0h 7Dh Normal
14-78
Report Version
14-78
Macro PDF
Flush Macro PDF Buffer
14-79
Abort Macro PDF Entry
14-79
Table 14-1
Parameter Defaults (Continued)
Parameter Parameter
Number Default Page
Number
Symbologies 14 - 7
UPC/EAN
Enable/Disable UPC-A
Parameter # 01h
To enable or disable UPC-A, scan the appropriate bar code below.
Enable/Disable UPC-E
Parameter # 02h
To enable or disable UPC-E, scan the appropriate bar code below.
*Enable UPC-A
(01h)
Disable UPC-A
(00h)
*Enable UPC-E
(01h)
Disable UPC-E
(00h)

14 - 8 Symbol DS6878 Product Reference Guide
Enable/Disable UPC-E1
Parameter # 0Ch
UPC-E1 is disabled by default.
To enable or disable UPC-E1, scan the appropriate bar code below.
Enable/Disable EAN-8/JAN-8
Parameter # 04h
To enable or disable EAN-8/JAN-8, scan the appropriate bar code below.
NOTE UPC-E1 is not a UCC (Uniform Code Council) approved symbology.
Enable UPC-E1
(01h)
*Disable UPC-E1
(00h)
*Enable EAN-8/JAN-8
(01h)
Disable EAN-8/JAN-8
(00h)
Symbologies 14 - 9
Enable/Disable EAN-13/JAN-13
Parameter # 03h
To enable or disable EAN-13/JAN-13, scan the appropriate bar code below.
Enable/Disable Bookland EAN
Parameter # 53h
To enable or disable Bookland EAN, scan the appropriate bar code below.
*Enable EAN-13/JAN-13
(01h)
Disable EAN-13/JAN-13
(00h)
Enable Bookland EAN
(01h)
*Disable Bookland EAN
(00h)
NOTE If you enable Bookland EAN, select a Bookland ISBN Format on page 14-21. Also select either Decode
UPC/EAN Supplementals, Autodiscriminate UPC/EAN Supplementals, or Enable 978/979 Supplemental
Mode in Decode UPC/EAN/JAN Supplementals on page 14-10.

14 - 10 Symbol DS6878 Product Reference Guide
Decode UPC/EAN/JAN Supplementals
Parameter # 10h
Supplementals are bar codes appended according to specific format conventions (e.g., UPC A+2, UPC E+2, EAN
13+2). The following options are available:
•
If you select Ignore UPC/EAN with Supplementals, and the digital scanner is presented with a
UPC/EAN plus supplemental symbol, the digital scanner decodes UPC/EAN and ignores the supplemental
characters.
•
If you select Decode UPC/EAN with Supplementals, the digital scanner only decodes UPC/EAN symbols
with supplemental characters, and ignores symbols without supplementals.
•
If you select Autodiscriminate UPC/EAN Supplementals, the digital scanner decodes UPC/EAN symbols
with supplemental characters immediately. If the symbol does not have a supplemental, the digital scanner
must decode the bar code the number of times set via UPC/EAN/JAN Supplemental Redundancy on page
14-13 before transmitting its data to confirm that there is no supplemental.
•
If you select one of the following Supplemental Mode options, the digital scanner immediately transmits
EAN-13 bar codes starting with that prefix that have supplemental characters. If the symbol does not have a
supplemental, the digital scanner must decode the bar code the number of times set via UPC/EAN/JAN
Supplemental Redundancy on page 14-13 before transmitting its data to confirm that there is no
supplemental. The digital scanner transmits UPC/EAN bar codes that do not have that prefix immediately.
• Enable 378/379 Supplemental Mode
• Enable 978/979 Supplemental Mode
• Enable 977 Supplemental Mode
• Enable 414/419/434/439 Supplemental Mode
• Enable 491 Supplemental Mode
• Enable Smart Supplemental Mode - applies to EAN-13 bar codes starting with any prefix listed
previously.
• Supplemental User-Programmable Type 1 - applies to EAN-13 bar codes starting with a 3-digit
user-defined prefix. Set this 3-digit prefix using User-Programmable Supplementals on page 14-13.
• Supplemental User-Programmable Type 1 and 2 - applies to EAN-13 bar codes starting with either of
two 3-digit user-defined prefixes. Set the 3-digit prefixes using User-Programmable Supplementals on
page 14-13.
• Smart Supplemental Plus User-Programmable 1 - applies to EAN-13 bar codes starting with any prefix
listed previously or the user-defined prefix set using User-Programmable Supplementals on page 14-13.
• Smart Supplemental Plus User-Programmable 1 and 2 - applies to EAN-13 bar codes starting with any
prefix listed previously or one of the two user-defined prefixes set using User-Programmable
Supplementals on page 14-13.
NOTE If you select 978/979 Supplemental Mode and are scanning Bookland EAN bar codes, see
Enable/Disable Bookland EAN on page 14-9 to enable Bookland EAN, and select a format using
Bookland ISBN Format on page 14-21.
NOTE To minimize the risk of invalid data transmission, select either to decode or ignore supplemental
characters.
Symbologies 14 - 11
Decode UPC/EAN/JAN Supplementals (continued)
Decode UPC/EAN/JAN Only With Supplementals
(01h)
*Ignore Supplementals
(00h)
Autodiscriminate UPC/EAN/JAN Supplementals
(02h)
Enable 378/379 Supplemental Mode
(04h)
Enable 978/979 Supplemental Mode
(05h)
Enable 977 Supplemental Mode
(07h)
14 - 12 Symbol DS6878 Product Reference Guide
Decode UPC/EAN/JAN Supplementals (continued)
Enable 414/419/434/439 Supplemental Mode
(06h)
Enable 491 Supplemental Mode
(08h)
Enable Smart Supplemental Mode
(03h)
Supplemental User-Programmable Type 1
(09h)
Supplemental User-Programmable Type 1 and 2
(0Ah)
Smart Supplemental Plus User-Programmable 1
(0Bh)
Smart Supplemental Plus User-Programmable 1 and 2
(0Ch)
Symbologies 14 - 13
User-Programmable Supplementals
Supplemental 1: Parameter # F1h 43h
Supplemental 2: Parameter # F1h 44h
If you selected a Supplemental User-Programmable option from Decode UPC/EAN/JAN Supplementals on page
14-10, select User-Programmable Supplemental 1 to set the 3-digit prefix. Then select the 3 digits using the
numeric bar codes beginning onpage D-1. Select User-Programmable Supplemental 2 to set a second 3-digit
prefix. Then select the 3 digits using the numeric bar codes beginning onpage D-1.
UPC/EAN/JAN Supplemental Redundancy
Parameter # 50h
If you selected Autodiscriminate UPC/EAN/JAN Supplementals, this option adjusts the number of times to
decode a symbol without supplementals before transmission. The range is from two to thirty times. Five or above is
recommended when decoding a mix of UPC/EAN/JAN symbols with and without supplementals. The default is 10.
Scan the bar code below to set a decode redundancy value. Next, scan two numeric bar codes in Appendix D,
Numeric Bar Codes. Enter a leading zero for single digit numbers. To correct an error or change a selection, scan
Cancel on page D-2.
User-Programmable Supplemental 1
User-Programmable Supplemental 2
UPC/EAN/JAN Supplemental Redundancy

14 - 14 Symbol DS6878 Product Reference Guide
UPC/EAN/JAN Supplemental AIM ID Format
Parameter # F1h A0h
Select an output format when reporting UPC/EAN/JAN bar codes with supplementals with AIM ID enabled:
•
Separate - UPC/EAN with supplementals transmit as ]E<0 or 4><data>]E<1 or 2>[supp data]
•
Combined - EAN-8 with supplementals transmit as ]E4<data>]E<1 or 2>[supp data]
All other UPC/EAN with supplementals transmit as ]E3<data+supps>
Transmit UPC-A Check Digit
Parameter # 28h
The check digit is the last character of the symbol used to verify the integrity of the data. Scan the appropriate bar
code below to transmit the bar code data with or without the UPC-A check digit. It is always verified to guarantee
the integrity of the data.
Separate
(00h)
*Combined
(01h)
*Transmit UPC-A Check Digit
(01h)
Do Not Transmit UPC-A Check Digit
(00h)
Symbologies 14 - 15
Transmit UPC-E Check Digit
Parameter # 29h
The check digit is the last character of the symbol used to verify the integrity of the data. Scan the appropriate bar
code below to transmit the bar code data with or without the UPC-E check digit. It is always verified to guarantee
the integrity of the data.
Transmit UPC-E1 Check Digit
Parameter # 2Ah
The check digit is the last character of the symbol used to verify the integrity of the data. Scan the appropriate bar
code below to transmit the bar code data with or without the UPC-E1 check digit. It is always verified to guarantee
the integrity of the data.
*Transmit UPC-E Check Digit
(01h)
Do Not Transmit UPC-E Check Digit
(00h)
*Transmit UPC-E1 Check Digit
(01h)
Do Not Transmit UPC-E1 Check Digit
(00h)

14 - 16 Symbol DS6878 Product Reference Guide
UPC-A Preamble
Parameter # 22h
Preamble characters are part of the UPC symbol, and include Country Code and System Character. There are
three options for transmitting a UPC-A preamble to the host device: transmit System Character only, transmit
System Character and Country Code (“0” for USA), and transmit no preamble. Select the appropriate option to
match the host system.
No Preamble (<DATA>)
(00h)
*System Character (<SYSTEM CHARACTER> <DATA>)
(01h)
System Character & Country Code
(< COUNTRY CODE> <SYSTEM CHARACTER> <DATA>)
(02h)

Symbologies 14 - 17
UPC-E Preamble
Parameter # 23h
Preamble characters are part of the UPC symbol, and include Country Code and System Character. There are
three options for transmitting a UPC-E preamble to the host device: transmit System Character only, transmit
System Character and Country Code (“0” for USA), and transmit no preamble. Select the appropriate option to
match the host system.
No Preamble (<DATA>)
(00h)
*System Character (<SYSTEM CHARACTER> <DATA>)
(01h)
System Character & Country Code
(< COUNTRY CODE> <SYSTEM CHARACTER> <DATA>)
(02h)

14 - 18 Symbol DS6878 Product Reference Guide
UPC-E1 Preamble
Parameter # 24h
Preamble characters are part of the UPC symbol, and include Country Code and System Character. There are
three options for transmitting a UPC-E1 preamble to the host device: transmit System Character only, transmit
System Character and Country Code (“0” for USA), and transmit no preamble. Select the appropriate option to
match the host system.
No Preamble (<DATA>)
(00h)
*System Character (<SYSTEM CHARACTER> <DATA>)
(01h)
System Character & Country Code
(< COUNTRY CODE> <SYSTEM CHARACTER> <DATA>)
(02h)
Symbologies 14 - 19
Convert UPC-E to UPC-A
Parameter # 25h
Enable this to convert UPC-E (zero suppressed) decoded data to UPC-A format before transmission. After
conversion, the data follows UPC-A format and is affected by UPC-A programming selections (e.g., Preamble,
Check Digit).
Disable this to transmit UPC-E decoded data as UPC-E data, without conversion.
Convert UPC-E1 to UPC-A
Parameter # 26h
Enable this to convert UPC-E1 decoded data to UPC-A format before transmission. After conversion, the data
follows UPC-A format and is affected by UPC-A programming selections (e.g., Preamble, Check Digit).
Disable this to transmit UPC-E1 decoded data as UPC-E1 data, without conversion.
Convert UPC-E to UPC-A (Enable)
(01h)
*Do Not Convert UPC-E to UPC-A (Disable)
(00h)
Convert UPC-E1 to UPC-A (Enable)
(01h)
*Do Not Convert UPC-E1 to UPC-A (Disable)
(00h)

14 - 20 Symbol DS6878 Product Reference Guide
EAN-8/JAN-8 Extend
Parameter # 27h
Enable this parameter to add five leading zeros to decoded EAN-8 symbols to make them compatible in format to
EAN-13 symbols.
Disable this to transmit EAN-8 symbols as is.
Enable EAN/JAN Zero Extend
(01h)
*Disable EAN/JAN Zero Extend
(00h)
Symbologies 14 - 21
Bookland ISBN Format
Parameter # F1h 40h
If you enabled Bookland EAN using Enable/Disable Bookland EAN on page 14-9, select one of the following
formats for Bookland data:
•
Bookland ISBN-10 - The digital scanner reports Bookland data starting with 978 in traditional 10-digit format
with the special Bookland check digit for backward-compatibility. Data starting with 979 is not considered
Bookland in this mode.
•
Bookland ISBN-13 - The digital scanner reports Bookland data (starting with either 978 or 979) as EAN-13 in
13-digit format to meet the 2007 ISBN-13 protocol.
*Bookland ISBN-10
(00h)
Bookland ISBN-13
(01h)
NOTE For Bookland EAN to function properly, first enable Bookland EAN using Enable/Disable Bookland EAN
on page 14-9, then select either Decode UPC/EAN Supplementals, Autodiscriminate UPC/EAN
Supplementals, or Enable 978/979 Supplemental Mode in Decode UPC/EAN/JAN Supplementals on
page 14-10.
14 - 22 Symbol DS6878 Product Reference Guide
UCC Coupon Extended Code
Parameter # 55h
Enable this parameter to decode UPC-A bar codes starting with digit ‘5’, EAN-13 bar codes starting with digit ‘99’,
and UPC-A/GS1-128 Coupon Codes. UPCA, EAN-13, and GS1-128 must be enabled to scan all types of
Coupon Codes.
ISSN EAN
Parameter # F1h 69h
To enable or disable ISSN EAN, scan the appropriate bar code below.
*Enable UCC Coupon Extended Code
(01h)
Disable UCC Coupon Extended Code
(00h)
NOTE See UPC/EAN/JAN Supplemental Redundancy on page 14-13 to control autodiscrimination of the
GS1-128 (right half) of a coupon code.
Enable ISSN EAN
(01h)
*Disable ISSN EAN
(00h)
Symbologies 14 - 23
Code 128
Enable/Disable Code 128
Parameter # 08h
To enable or disable Code 128, scan the appropriate bar code below.
Set Lengths for Code 128
Parameter # L1 = D1h, L2 = D2h
The length of a code refers to the number of characters (i.e., human readable characters), including check digit(s)
the code contains. Set lengths for Code 128 to any length, one or two discrete lengths, or lengths within a specific
range.
•
One Discrete Length - Select this option to decode only Code 128 symbols containing a selected length.
Select the length using the numeric bar codes in Appendix D, Numeric Bar Codes. For example, to decode
only Code 128 symbols with 14 characters, scan Code 128 - One Discrete Length, then scan 1 followed by
4. To correct an error or change the selection, scan Cancel on page D-2.
•
Two Discrete Lengths - Select this option to decode only Code 128 symbols containing either of two
selected lengths. Select lengths using the numeric bar codes in Appendix D, Numeric Bar Codes. For
example, to decode only Code 128 symbols containing either 2 or 14 characters, select Code 128 - Two
Discrete Lengths, then scan 0, 2, 1, and then 4. To correct an error or change the selection, scan
Cancel on page D-2.
•
Length Within Range - Select this option to decode a Code 128 symbol with a specific length range.
Select lengths using numeric bar codes in Appendix D, Numeric Bar Codes. For example, to decode
Code 128 symbols containing between 4 and 12 characters, first scan Code 128 - Length Within Range.
Then scan 0, 4, 1, and 2 (enter a leading zero for single digit numbers). To correct an error or change the
selection, scan Cancel on page D-2.
•
Any Length - Select this option to decode Code 128 symbols containing any number of characters within the
digital scanner’s capability.
*Enable Code 128
(01h)
Disable Code 128
(00h)
NOTE When setting lengths for different bar code types, enter a leading zero for single digit numbers.
14 - 24 Symbol DS6878 Product Reference Guide
Set Lengths for Code 128 (continued)
Enable/Disable GS1-128 (formerly UCC/EAN-128)
Parameter # 0Eh
To enable or disable GS1-128, scan the appropriate bar code below.
Code 128 - One Discrete Length
Code 128 - Two Discrete Lengths
Code 128 - Length Within Range
*Code 128 - Any Length
*Enable GS1-128
(01h)
Disable GS1-128
(00h)

Symbologies 14 - 25
Enable/Disable ISBT 128
Parameter # 54h
ISBT 128 is a variant of Code 128 used in the blood bank industry. Scan a bar code below to enable or disable
ISBT 128. If necessary, the host must perform concatenation of the ISBT data.
*Enable ISBT 128
(01h)
Disable ISBT 128
(00h)

14 - 26 Symbol DS6878 Product Reference Guide
ISBT Concatenation
Parameter # F1h 41h
Select an option for concatenating pairs of ISBT code types:
•
If you select Disable ISBT Concatenation, the digital scanner does not concatenate pairs of ISBT
codes it encounters.
•
If you select Enable ISBT Concatenation, there must be two ISBT codes in order for the digital scanner to
decode and perform concatenation. The digital scanner does not decode single ISBT symbols.
•
If you select Autodiscriminate ISBT Concatenation, the digital scanner decodes and concatenates pairs
of ISBT codes immediately. If only a single ISBT symbol is present, the digital scanner must decode the
symbol the number of times set via ISBT Concatenation Redundancy on page 14-27 before transmitting its
data to confirm that there is no additional ISBT symbol.
*Disable ISBT Concatenation
(00h)
Enable ISBT Concatenation
(01h)
Autodiscriminate ISBT Concatenation
(00h)
Symbologies 14 - 27
Check ISBT Table
Parameter # F1h 42h
The ISBT specification includes a table that lists several types of ISBT bar codes that are commonly used in pairs.
If you set ISBT Concatenation to Enable, enable Check ISBT Table to concatenate only those pairs found in this
table. Other types of ISBT codes are not concatenated.
ISBT Concatenation Redundancy
Parameter # DFh
If you set ISBT Concatenation to Autodiscriminate, use this parameter to set the number of times the digital
scanner must decode an ISBT symbol before determining that there is no additional symbol.
Scan the bar code below, then scan two numeric bar codes in Appendix D, Numeric Bar Codes to set a value
between 2 and 20. Enter a leading zero for single digit numbers. To correct an error or change a selection, scan
Cancel on page D-2. The default is 10.
*Enable Check ISBT Table
(01h)
Disable Check ISBT Table
(00h)
ISBT Concatenation Redundancy
14 - 28 Symbol DS6878 Product Reference Guide
Code 39
Enable/Disable Code 39
Parameter # 00h
To enable or disable Code 39, scan the appropriate bar code below.
Enable/Disable Trioptic Code 39
Parameter # 0Dh
Trioptic Code 39 is a variant of Code 39 used in the marking of computer tape cartridges. Trioptic Code 39 symbols
always contain six characters. To enable or disable Trioptic Code 39, scan the appropriate bar code below.
*Enable Code 39
(01h)
Disable Code 39
(00h)
Enable Trioptic Code 39
(01h)
*Disable Trioptic Code 39
(00h)
NOTE You cannot enable Trioptic Code 39 and Code 39 Full ASCII simultaneously.
Symbologies 14 - 29
Convert Code 39 to Code 32
Parameter # 56h
Code 32 is a variant of Code 39 used by the Italian pharmaceutical industry. Scan the appropriate bar code below
to enable or disable converting Code 39 to Code 32.
Code 32 Prefix
Parameter # E7h
Scan the appropriate bar code below to enable or disable adding the prefix character “A” to all Code 32 bar codes.
NOTE Code 39 must be enabled for this parameter to function.
Enable Convert Code 39 to Code 32
(01h)
*Disable Convert Code 39 to Code 32
(00h)
NOTE Convert Code 39 to Code 32 must be enabled for this parameter to function.
Enable Code 32 Prefix
(01h)
*Disable Code 32 Prefix
(00h)

14 - 30 Symbol DS6878 Product Reference Guide
Set Lengths for Code 39
Parameter # L1 = 12h, L2 = 13h
The length of a code refers to the number of characters (i.e., human readable characters), including check digit(s)
the code contains. Set lengths for Code 39 to any length, one or two discrete lengths, or lengths within a specific
range. If Code 39 Full ASCII is enabled, Length Within a Range or Any Length are the preferred options.
•
One Discrete Length - Select this option to decode only Code 39 symbols containing a selected length.
Select the length using the numeric bar codes in Appendix D, Numeric Bar Codes. For example, to decode
only Code 39 symbols with 14 characters, scan Code 39 - One Discrete Length, then scan 1 followed by 4.
To correct an error or change the selection, scan Cancel on page D-2.
•
Two Discrete Lengths - Select this option to decode only Code 39 symbols containing either of two
selected lengths. Select lengths using the numeric bar codes in Appendix D, Numeric Bar Codes. For
example, to decode only Code 39 symbols containing either 2 or 14 characters, select Code 39 - Two
Discrete Lengths, then scan 0, 2, 1, and then 4. To correct an error or change the selection, scan
Cancel on page D-2.
•
Length Within Range - Select this option to decode a Code 39 symbol with a specific length range.
Select lengths using numeric bar codes in Appendix D, Numeric Bar Codes. For example, to decode
Code 39 symbols containing between 4 and 12 characters, first scan Code 39 - Length Within Range.
Then scan 0, 4, 1, and 2 (enter a leading zero for single digit numbers). To correct an error or change the
selection, scan Cancel on page D-2.
•
Any Length - Select this option to decode Code 39 symbols containing any number of characters within the
digital scanner’s capability.
NOTE When setting lengths for different bar code types, enter a leading zero for single digit numbers.
Code 39 - One Discrete Length
Code 39 - Two Discrete Lengths
Code 39 - Length Within Range
Code 39 - Any Length
Symbologies 14 - 31
Code 39 Check Digit Verification
Parameter # 30h
Enable this feature to check the integrity of all Code 39 symbols to verify that the data complies with specified
check digit algorithm. Only Code 39 symbols which include a modulo 43 check digit are decoded. Enable this
feature if the Code 39 symbols contain a Modulo 43 check digit.
Transmit Code 39 Check Digit
Parameter # 2Bh
Scan a bar code below to transmit Code 39 data with or without the check digit.
Enable Code 39 Check Digit
(01h)
*Disable Code 39 Check Digit
(00h)
Transmit Code 39 Check Digit (Enable)
(01h)
*Do Not Transmit Code 39 Check Digit (Disable)
(00h)
NOTE Code 39 Check Digit Verification must be enabled for this parameter to function.

14 - 32 Symbol DS6878 Product Reference Guide
Code 39 Full ASCII Conversion
Parameter # 11h
Code 39 Full ASCII is a variant of Code 39 which pairs characters to encode the full ASCII character set. To enable
or disable Code 39 Full ASCII, scan the appropriate bar code below.
Code 39 Buffering - Scan & Store
Parameter # 71h
This feature allows the digital scanner to accumulate data from multiple Code 39 symbols.
Selecting the Scan and Store option (Buffer Code 39) temporarily buffers all Code 39 symbols having a leading
space as a first character for later transmission. The leading space is not buffered.
Decoding a Code 39 symbol with no leading space transmits in sequence all buffered data in a first-in first-out
format, plus the “triggering” symbol. See the following pages for further details.
Select Do Not Buffer Code 39 to transmit all decoded Code 39 symbols immediately without storing them in the
buffer.
Enable Code 39 Full ASCII
(01h)
*Disable Code 39 Full ASCII
(00h)
NOTE You cannot enable Trioptic Code 39 and Code 39 Full ASCII simultaneously.
Code 39 Full ASCII to Full ASCII Correlation is host-dependent, and is therefore described in the ASCII
Character Set Table for the appropriate interface. See the ASCII Character Set for USB on page 6-13 or
the ASCII Character Set for RS-232 on page 7-19.
Symbologies 14 - 33
Code 39 Buffering - Scan & Store (continued)
This feature affects Code 39 only. If selecting Buffer Code 39, we recommend configuring the digital scanner to
decode Code 39 symbology only.
While there is data in the transmission buffer, you cannot select Do Not Buffer Code 39. The buffer holds 200
bytes of information.
To disable Code 39 buffering when there is data in the transmission buffer, first force the buffer transmission (see
Transmit Buffer on page 14-34) or clear the buffer.
Buffer Data
To buffer data, enable Code 39 buffering and scan a Code 39 symbol with a space immediately following the start
pattern.
•
Unless the data overflows the transmission buffer, the digital scanner issues a low/high beep to indicate
successful decode and buffering. (For overflow conditions, see Overfilling Transmission Buffer on page
14-34.)
•
The digital scanner adds the decoded data excluding the leading space to the transmission buffer.
•
No transmission occurs.
Clear Transmission Buffer
To clear the transmission buffer, scan the Clear Buffer bar code below, which contains only a start character, a
dash (minus), and a stop character.
•
The digital scanner issues a short high/low/high beep.
•
The digital scanner erases the transmission buffer.
•
No transmission occurs.
Buffer Code 39 (Enable)
(01h)
*Do Not Buffer Code 39 (Disable)
(00h)
Clear Buffer
NOTE The Clear Buffer contains only the dash (minus) character. In order to scan this command, set Code 39
lengths to include length 1.

14 - 34 Symbol DS6878 Product Reference Guide
Transmit Buffer
There are two methods to transmit the Code 39 buffer.
1. Scan the Transmit Buffer bar code below, which includes only a start character, a plus (+), and a stop
character.
2. The digital scanner transmits and clears the buffer.
•
The digital scanner issues a low/high beep.
3. Scan a Code 39 bar code with a leading character other than a space.
•
The digital scanner appends new decode data to buffered data.
•
The digital scanner transmits and clears the buffer.
•
The digital scanner signals that it transmitted the buffer with a low/high beep.
•
The digital scanner transmits and clears the buffer.
Overfilling Transmission Buffer
The Code 39 buffer holds 200 characters. If the symbol just read overflows the transmission buffer:
•
The digital scanner indicates that it rejected the symbol by issuing three long, high beeps.
•
No transmission occurs. The data in the buffer is not affected.
Attempt to Transmit an Empty Buffer
If you scan the Transmit Buffer symbol and the Code 39 buffer is empty:
•
A short low/high/low beep signals that the buffer is empty.
•
No transmission occurs.
•
The buffer remains empty.
Transmit Buffer
NOTE The Transmit Buffer contains only a plus (+) character. In order to scan this command, set Code 39
lengths to include length 1.

Symbologies 14 - 35
Code 93
Enable/Disable Code 93
Parameter # 09h
To enable or disable Code 93, scan the appropriate bar code below.
Set Lengths for Code 93
Parameter # L1 = 1Ah, L2 = 1Bh
The length of a code refers to the number of characters (i.e., human readable characters), including check digit(s)
the code contains. Set lengths for Code 93 to any length, one or two discrete lengths, or lengths within a specific
range.
•
One Discrete Length - Select this option to decode only Code 93 symbols containing a selected length.
Select the length using the numeric bar codes in Appendix D, Numeric Bar Codes. For example, to decode
only Code 93 symbols with 14 characters, scan Code 93 - One Discrete Length, then scan 1 followed by 4.
To correct an error or to change the selection, scan Cancel on page D-2.
•
Two Discrete Lengths - Select this option to decode only Code 93 symbols containing either of two
selected lengths. Select lengths using the numeric bar codes in Appendix D, Numeric Bar Codes. For
example, to decode only Code 93 symbols containing either 2 or 14 characters, select Code 93 - Two
Discrete Lengths, then scan 0, 2, 1, and then 4. To correct an error or to change the selection, scan
Cancel on page D-2.
•
Length Within Range - Select this option to decode a Code 93 symbol with a specific length range.
Select lengths using the numeric bar codes in Appendix D, Numeric Bar Codes. For example, to decode
Code 93 symbols containing between 4 and 12 characters, first scan Code 93 - Length Within Range.
Then scan 0, 4, 1, and 2 (enter a leading zero for single digit numbers). To correct an error or change the
selection, scan Cancel on page D-2.
•
Any Length - Scan this option to decode Code 93 symbols containing any number of characters within the
digital scanner’s capability.
Enable Code 93
(01h)
*Disable Code 93
(00h)
14 - 36 Symbol DS6878 Product Reference Guide
Set Lengths for Code 93 (continued)
Code 93 - One Discrete Length
Code 93 - Two Discrete Lengths
Code 93 - Length Within Range
Code 93 - Any Length

Symbologies 14 - 37
Code 11
Code 11
Parameter # 0Ah
To enable or disable Code 11, scan the appropriate bar code below.
Set Lengths for Code 11
Parameter # L1 = 1Ch, L2 = 1Dh
The length of a code refers to the number of characters (i.e., human readable characters), including check digit(s)
the code contains. Set lengths for Code 11 to any length, one or two discrete lengths, or lengths within a specific
range.
•
One Discrete Length - Select this option to decode only Code 11 symbols containing a selected length.
Select the length using the numeric bar codes in Appendix D, Numeric Bar Codes. For example, to decode
only Code 11 symbols with 14 characters, scan Code 11 - One Discrete Length, then scan 1 followed by 4.
To correct an error or to change the selection, scan Cancel on page D-2.
•
Two Discrete Lengths - Select this option to decode only Code 11 symbols containing either of two
selected lengths. Select lengths using the numeric bar codes in Appendix D, Numeric Bar Codes. For
example, to decode only Code 11 symbols containing either 2 or 14 characters, select Code 11 - Two
Discrete Lengths, then scan 0, 2, 1, and then 4. To correct an error or to change the selection, scan
Cancel on page D-2.
•
Length Within Range - Select this option to decode a Code 11 symbol with a specific length range.
Select lengths using numeric bar codes in Appendix D, Numeric Bar Codes. For example, to decode
Code 11 symbols containing between 4 and 12 characters, first scan Code 11 - Length Within Range.
Then scan 0, 4, 1, and 2 (enter a leading zero for single digit numbers). To correct an error or change the
selection, scan Cancel on page D-2.
•
Any Length - Scan this option to decode Code 11 symbols containing any number of characters within the
digital scanner’s capability.
Enable Code 11
(01h)
*Disable Code 11
(00h)
14 - 38 Symbol DS6878 Product Reference Guide
Set Lengths for Code 11 (continued)
Code 11 - One Discrete Length
Code 11 - Two Discrete Lengths
Code 11 - Length Within Range
Code 11 - Any Length

Symbologies 14 - 39
Code 11 Check Digit Verification
Parameter # 34h
This feature allows the digital scanner to check the integrity of all Code 11 symbols to verify that the data complies
with the specified check digit algorithm. This selects the check digit mechanism for the decoded Code 11 bar code.
The options are to check for one check digit, check for two check digits, or disable the feature.
To enable this feature, scan the bar code below corresponding to the number of check digits encoded in the Code
11 symbols.
*Disable
(00h)
One Check Digit
(01h)
Two Check Digits
(02h)
14 - 40 Symbol DS6878 Product Reference Guide
Transmit Code 11 Check Digits
Parameter # 2Fh
This feature selects whether or not to transmit the Code 11 check digit(s).
Interleaved 2 of 5 (ITF)
Enable/Disable Interleaved 2 of 5
Parameter # 06h
To enable or disable Interleaved 2 of 5, scan the appropriate bar code below, and select an Interleaved 2 of 5
length from the following pages.
Transmit Code 11 Check Digit(s) (Enable)
(01h)
*Do Not Transmit Code 11 Check Digit(s) (Disable)
(00h)
NOTE Code 11 Check Digit Verification must be enabled for this parameter to function.
Enable Interleaved 2 of 5
(01h)
*Disable Interleaved 2 of 5
(00h)

Symbologies 14 - 41
Set Lengths for Interleaved 2 of 5
Parameter # L1 = 16h, L2 = 17h
The length of a code refers to the number of characters (i.e., human readable characters), including check digit(s)
the code contains. Set lengths for I 2 of 5 to any length, one or two discrete lengths, or lengths within a specific
range. The range for Interleaved 2 of 5 lengths is 0 - 55.
•
One Discrete Length - Select this option to decode only I 2 of 5 symbols containing a selected length. Select
the length using the numeric bar codes in Appendix D, Numeric Bar Codes. For example, to decode only I 2
of 5 symbols with 14 characters, scan I 2 of 5 - One Discrete Length, then scan 1 followed by 4. To correct
an error or to change the selection, scan Cancel on page D-2.
•
Two Discrete Lengths - Select this option to decode only I 2 of 5 symbols containing either of two
selected lengths. Select lengths using the numeric bar codes in Appendix D, Numeric Bar Codes. For
example, to decode only I 2 of 5 symbols containing either 2 or 14 characters, select I 2 of 5 - Two Discrete
Lengths, then scan 0, 2, 1, and then 4. To correct an error or to change the selection, scan Cancel on
page D-2.
•
Length Within Range - Select this option to decode an I 2 of 5 symbol with a specific length range.
Select lengths using numeric bar codes in Appendix D, Numeric Bar Codes. For example, to decode I 2 of
5 symbols containing between 4 and 12 characters, first scan I 2 of 5 - Length Within Range. Then scan 0,
4, 1, and 2 (enter a leading zero for single digit numbers). To correct an error or change the selection,
scan Cancel on page D-2.
•
Any Length - Scan this option to decode I 2 of 5 symbols containing any number of characters within the
digital scanner’s capability.
NOTE Due to the construction of the I 2 of 5 symbology, it is possible for a scan line covering only a portion of the
code to transmit as a complete scan, yielding less data than is encoded in the bar code. To prevent this,
select specific lengths (I 2 of 5 - One Discrete Length, Two Discrete Lengths) for I 2 of 5 applications.
14 - 42 Symbol DS6878 Product Reference Guide
Set Lengths for Interleaved 2 of 5 (continued)
I 2 of 5 - One Discrete Length
I 2 of 5 - Two Discrete Lengths
I 2 of 5 - Length Within Range
I 2 of 5 - Any Length
Symbologies 14 - 43
I 2 of 5 Check Digit Verification
Parameter # 31h
Enable this feature to check the integrity of all I 2 of 5 symbols to verify the data complies with either the specified
Uniform Symbology Specification (USS), or the Optical Product Code Council (OPCC) check digit algorithm.
Transmit I 2 of 5 Check Digit
Parameter # 2Ch
Scan the appropriate bar code below to transmit I 2 of 5 data with or without the check digit.
*Disable
(00h)
USS Check Digit
(01h)
OPCC Check Digit
(02h)
Transmit I 2 of 5 Check Digit (Enable)
(01h)
*Do Not Transmit I 2 of 5 Check Digit (Disable)
(00h)
14 - 44 Symbol DS6878 Product Reference Guide
Convert I 2 of 5 to EAN-13
Parameter # 52h
Enable this parameter to convert 14-character I 2 of 5 codes to EAN-13, and transmit to the host as EAN-13. To
accomplish this, the I 2 of 5 code must be enabled, and the code must have a leading zero and a valid EAN-13
check digit.
Discrete 2 of 5 (DTF)
Enable/Disable Discrete 2 of 5
Parameter # 05h
To enable or disable Discrete 2 of 5, scan the appropriate bar code below.
Convert I 2 of 5 to EAN-13 (Enable)
(01h)
*Do Not Convert I 2 of 5 to EAN-13 (Disable)
(00h)
Enable Discrete 2 of 5
(01h)
*Disable Discrete 2 of 5
(00h)

Symbologies 14 - 45
Set Lengths for Discrete 2 of 5
Parameter # L1 = 14h, L2 = 15h
The length of a code refers to the number of characters (i.e., human readable characters), including check digit(s)
the code contains. Set lengths for D 2 of 5 to any length, one or two discrete lengths, or lengths within a specific
range. The range for Discrete 2 of 5 lengths is 0 - 55.
•
One Discrete Length - Select this option to decode only D 2 of 5 symbols containing a selected length.
Select the length using the numeric bar codes in Appendix D, Numeric Bar Codes. For example, to decode
only D 2 of 5 symbols with 14 characters, scan D 2 of 5 - One Discrete Length, then scan 1 followed by 4.
To correct an error or to change the selection, scan Cancel on page D-2.
•
Two Discrete Lengths - Select this option to decode only D 2 of 5 symbols containing either of two
selected lengths. Select lengths using the numeric bar codes in Appendix D, Numeric Bar Codes. For
example, to decode only D 2 of 5 symbols containing either 2 or 14 characters, select D 2 of 5 - Two
Discrete Lengths, then scan 0, 2, 1, and then 4. To correct an error or to change the selection, scan
Cancel on page D-2.
•
Length Within Range - Select this option to decode a D 2 of 5 symbol with a specific length range.
Select lengths using numeric bar codes in Appendix D, Numeric Bar Codes. For example, to decode D 2
of 5 symbols containing between 4 and 12 characters, first scan D 2 of 5 - Length Within Range. Then
scan 0, 4, 1, and 2 (enter a leading zero for single digit numbers). To correct an error or change the
selection, scan Cancel on page D-2.
•
Any Length - Scan this option to decode D 2 of 5 symbols containing any number of characters within the
digital scanner’s capability.
NOTE Due to the construction of the D 2 of 5 symbology, it is possible for a scan line covering only a portion of
the code to transmit as a complete scan, yielding less data than is encoded in the bar code. To prevent
this, select specific lengths (D 2 of 5 - One Discrete Length, Two Discrete Lengths) for D 2 of 5
applications.
14 - 46 Symbol DS6878 Product Reference Guide
Set Lengths for Discrete 2 of 5 (continued)
D 2 of 5 - One Discrete Length
D 2 of 5 - Two Discrete Lengths
D 2 of 5 - Length Within Range
D 2 of 5 - Any Length

Symbologies 14 - 47
Codabar (NW - 7)
Enable/Disable Codabar
Parameter # 07h
To enable or disable Codabar, scan the appropriate bar code below.
Set Lengths for Codabar
Parameter # L1 = 18h, L2 = 19h
The length of a code refers to the number of characters (i.e., human readable characters), including check digit(s)
the code contains. Set lengths for Codabar to any length, one or two discrete lengths, or lengths within a specific
range.
•
One Discrete Length - Select this option to decode only Codabar symbols containing a selected length.
Select the length using the numeric bar codes in Appendix D, Numeric Bar Codes. For example, to decode
only Codabar symbols with 14 characters, scan Codabar - One Discrete Length, then scan 1 followed by 4.
To correct an error or to change the selection, scan Cancel on page D-2.
•
Two Discrete Lengths - Select this option to decode only Codabar symbols containing either of two
selected lengths. Select lengths using the numeric bar codes in Appendix D, Numeric Bar Codes. For
example, to decode only Codabar symbols containing either 2 or 14 characters, select Codabar - Two
Discrete Lengths, then scan 0, 2, 1, and then 4. To correct an error or to change the selection, scan
Cancel on page D-2.
•
Length Within Range - Select this option to decode a Codabar symbol with a specific length range.
Select lengths using numeric bar codes in Appendix D, Numeric Bar Codes. For example, to decode
Codabar symbols containing between 4 and 12 characters, first scan Codabar - Length Within Range.
Then scan 0, 4, 1, and 2 (enter a leading zero for single digit numbers). To correct an error or change the
selection, scan Cancel on page D-2.
•
Any Length - Scan this option to decode Codabar symbols containing any number of characters within the
digital scanner’s capability.
Enable Codabar
(01h)
*Disable Codabar
(00h)
14 - 48 Symbol DS6878 Product Reference Guide
Set Lengths for Codabar (continued)
Codabar - One Discrete Length
Codabar - Two Discrete Lengths
Codabar - Length Within Range
Codabar - Any Length
Symbologies 14 - 49
CLSI Editing
Parameter # 36h
Enable this parameter to strip the start and stop characters and insert a space after the first, fifth, and tenth
characters of a 14-character Codabar symbol. Enable this feature if the host system requires this data format.
NOTIS Editing
Parameter # 37h
Enable this parameter to strip the start and stop characters from a decoded Codabar symbol. Enable this feature if
the host system requires this data format.
NOTE Symbol length does not include start and stop characters.
Enable CLSI Editing
(01h)
*Disable CLSI Editing
(00h)
Enable NOTIS Editing
(01h)
*Disable NOTIS Editing
(00h)

14 - 50 Symbol DS6878 Product Reference Guide
MSI
Enable/Disable MSI
Parameter # 0Bh
To enable or disable MSI, scan the appropriate bar code below.
Set Lengths for MSI
Parameter # L1 = 1Eh, L2 = 1Fh
The length of a code refers to the number of characters (i.e., human readable characters), including check digit(s)
the code contains. Set lengths for MSI to any length, one or two discrete lengths, or lengths within a specific range.
•
One Discrete Length - Select this option to decode only MSI symbols containing a selected length. Select
the length using the numeric bar codes in Appendix D, Numeric Bar Codes. For example, to decode only MSI
symbols with 14 characters, scan MSI - One Discrete Length, then scan 1 followed by 4. To correct an
error or to change the selection, scan Cancel on page D-2.
•
Two Discrete Lengths - Select this option to decode only MSI symbols containing either of two selected
lengths. Select lengths using the numeric bar codes in Appendix D, Numeric Bar Codes. For example, to
decode only MSI symbols containing either 2 or 14 characters, select MSI - Two Discrete Lengths, then
scan 0, 2, 1, and then 4. To correct an error or to change the selection, scan Cancel on page D-2.
•
Length Within Range - Select this option to decode a MSI symbol with a specific length range. Select
lengths using numeric bar codes in Appendix D, Numeric Bar Codes. For example, to decode MSI
symbols containing between 4 and 12 characters, first scan MSI - Length Within Range. Then scan 0, 4,
1, and 2 (enter a leading zero for single digit numbers). To correct an error or change the selection, scan
Cancel on page D-2.
•
Any Length - Scan this option to decode MSI symbols containing any number of characters within the digital
scanner’s capability.
Enable MSI
(01h)
*Disable MSI
(00h)
Symbologies 14 - 51
Set Lengths for MSI (continued)
NOTE Due to the construction of the MSI symbology, it is possible for a scan line covering only a portion of the
code to transmit as a complete scan, yielding less data than is encoded in the bar code. To prevent this,
select specific lengths (MSI - One Discrete Length, Two Discrete Lengths) for MSI applications.
MSI - One Discrete Length
MSI - Two Discrete Lengths
MSI - Length Within Range
MSI - Any Length
14 - 52 Symbol DS6878 Product Reference Guide
MSI Check Digits
Parameter # 32h
With MSI symbols, one check digit is mandatory and always verified by the reader. The second check digit is
optional. If the MSI codes include two check digits, scan the Two MSI Check Digits bar code to enable verification
of the second check digit.
See MSI Check Digit Algorithm on page 14-53 for the selection of second digit algorithms.
Transmit MSI Check Digit(s)
Parameter # 2Eh
Scan a bar code below to transmit MSI data with or without the check digit.
*One MSI Check Digit
(00h)
Two MSI Check Digits
(01h)
Transmit MSI Check Digit(s) (Enable)
(01h
*Do Not Transmit MSI Check Digit(s) (Disable)
(00h)
Symbologies 14 - 53
MSI Check Digit Algorithm
Parameter # 33h
Two algorithms are possible for the verification of the second MSI check digit. Select the bar code below
corresponding to the algorithm used to encode the check digit.
Chinese 2 of 5
Enable/Disable Chinese 2 of 5
Parameter # F0h 98h
To enable or disable Chinese 2 of 5, scan the appropriate bar code below.
MOD 10/MOD 11
(00h)
*MOD 10/MOD 10
(01h)
Enable Chinese 2 of 5
(01h)
*Disable Chinese 2 of 5
(00h)

14 - 54 Symbol DS6878 Product Reference Guide
Matrix 2 of 5
Enable/Disable Matrix 2 of 5
Parameter # F1h 6Ah
To enable or disable Matrix 2 of 5, scan the appropriate bar code below.
Enable Matrix 2 of 5
(01h)
*Disable Matrix 2 of 5
(00h)

Symbologies 14 - 55
Set Lengths for Matrix 2 of 5
Parameter # L1 = F1h 6Bh, L2 = F1h 6Ch
The length of a code refers to the number of characters (i.e., human readable characters), including check digit(s)
the code contains. Set lengths for Matrix 2 of 5 to any length, one or two discrete lengths, or lengths within a
specific range.
•
One Discrete Length - Select this option to decode only Matrix 2 of 5 symbols containing a selected length.
Select the length using the numeric bar codes in Appendix D, Numeric Bar Codes. For example, to decode
only Matrix 2 of 5 symbols with 14 characters, scan Matrix 2 of 5 - One Discrete Length, then scan 1
followed by 4. To correct an error or to change the selection, scan Cancel on page D-2.
•
Two Discrete Lengths - Select this option to decode only Matrix 2 of 5 symbols containing either of two
selected lengths. Select lengths using the numeric bar codes in Appendix D, Numeric Bar Codes. For
example, to decode only Matrix 2 of 5 symbols containing either 2 or 14 characters, select Matrix 2 of 5 -
Two Discrete Lengths, then scan 0, 2, 1, and then 4. To correct an error or to change the selection,
scan Cancel on page D-2.
•
Length Within Range - Select this option to decode a Matrix 2 of 5 symbol with a specific length
range. Select lengths using the numeric bar codes in Appendix D, Numeric Bar Codes. For example, to
decode Matrix 2 of 5 symbols containing between 4 and 12 characters, first scan Matrix 2 of 5 - Length
Within Range. Then scan 0, 4, 1, and 2 (enter a leading zero for single digit numbers). To correct an error
or change the selection, scan Cancel on page D-2.
•
Any Length - Scan this option to decode Matrix 2 of 5 symbols containing any number of characters within
the digital scanner’s capability.
*Matrix 2 of 5 - One Discrete Length
Matrix 2 of 5 - Two Discrete Lengths
Matrix 2 of 5 - Length Within Range
Matrix 2 of 5 - Any Length
14 - 56 Symbol DS6878 Product Reference Guide
Matrix 2 of 5 Redundancy
Parameter # F1h 6Dh
To enable or disable Matrix 2 of 5 redundancy, scan the appropriate bar code below.
Matrix 2 of 5 Check Digit
Parameter # F1h 6Eh
The check digit is the last character of the symbol used to verify the integrity of the data. Scan the appropriate bar
code below to transmit the bar code data with or without the Matrix 2 of 5 check digit.
Enable Matrix 2 of 5 Redundancy
(01h)
*Disable Matrix 2 of 5 Redundancy
(00h)
Enable Matrix 2 of 5 Check Digit
(01h)
*Disable Matrix 2 of 5 Check Digit
(00h)
Symbologies 14 - 57
Transmit Matrix 2 of 5 Check Digit
Parameter # F1h 6Fh
Scan a bar code below to transmit Matrix 2 of 5 data with or without the check digit.
Korean 3 of 5
Enable/Disable Korean 3 of 5
Parameter # F1h 45h
To enable or disable Korean 3 of 5, scan the appropriate bar code below.
Transmit Matrix 2 of 5 Check Digit
(01h)
*Do Not Transmit Matrix 2 of 5 Check Digit
(00h)
NOTE The length for Korean 3 of 5 is fixed at 6.
Enable Korean 3 of 5
(01h)
*Disable Korean 3 of 5
(00h)

14 - 58 Symbol DS6878 Product Reference Guide
Inverse 1D
Parameter # F1h 4Ah
This parameter sets the 1D inverse decoder setting. Options are:
•
Regular Only - the digital scanner decodes regular 1D bar codes only.
•
Inverse Only - the digital scanner decodes inverse 1D bar codes only.
•
Inverse Autodetect - the digital scanner decodes both regular and inverse 1D bar codes.
*Regular
(00h)
Inverse Only
(01h)
Inverse Autodetect
(02h)
Symbologies 14 - 59
Postal Codes
US Postnet
Parameter # 59h
To enable or disable US Postnet, scan the appropriate bar code below.
US Planet
Parameter # 5Ah
To enable or disable US Planet, scan the appropriate bar code below.
Enable US Postnet
(01h)
*Disable US Postnet
(00h)
Enable US Planet
(01h)
*Disable US Planet
(00h)
14 - 60 Symbol DS6878 Product Reference Guide
Transmit US Postal Check Digit
Parameter # 5Fh
Select whether to transmit US Postal data, which includes both US Postnet and US Planet, with or without the
check digit.
UK Postal
Parameter # 5Bh
To enable or disable UK Postal, scan the appropriate bar code below.
*Transmit US Postal Check Digit
(01h)
Do Not Transmit US Postal Check Digit
(00h)
Enable UK Postal
(01h)
*Disable UK Postal
(00h)
Symbologies 14 - 61
Transmit UK Postal Check Digit
Parameter # 60h
Select whether to transmit UK Postal data with or without the check digit.
Japan Postal
Parameter # F0h, 22h
To enable or disable Japan Postal, scan the appropriate bar code below.
*Transmit UK Postal
Check Digit
(01h)
Do Not Transmit UK Postal Check Digit
(00h)
Enable Japan Postal
(01h)
*Disable Japan Postal
(00h)
14 - 62 Symbol DS6878 Product Reference Guide
Australian Postal
Parameter # F0h, 23h
To enable or disable Australian Postal, scan the appropriate bar code below.
Netherlands KIX Code
Parameter # F0h, 46h
To enable or disable Netherlands KIX Code, scan the appropriate bar code below.
Enable Australian Postal
(01h)
*Disable Australian Postal
(00h)
Enable Netherlands KIX Code
(01h)
*Disable Netherlands KIX Code
(00h)
Symbologies 14 - 63
USPS 4CB/One Code/Intelligent Mail
Parameter # F1h 50h
To enable or disable USPS 4CB/One Code/Intelligent Mail, scan the appropriate bar code below.
UPU FICS Postal
Parameter # F1h 63h
To enable or disable UPU FICS Postal, scan the appropriate bar code below.
Enable USPS 4CB/One Code/Intelligent Mail
(01h)
*Disable USPS 4CB/One Code/Intelligent Mail
(00h)
Enable UPU FICS Postal
(01h)
*Disable UPU FICS Postal
(00h)
14 - 64 Symbol DS6878 Product Reference Guide
GS1 DataBar
The variants of GS1 DataBar are DataBar-14, DataBar Expanded, and DataBar Limited. The limited and expanded
versions have stacked variants. Scan the appropriate bar codes to enable or disable each variant of GS1 DataBar.
GS1 DataBar-14
Parameter # F0h 52h.
GS1 DataBar Limited
Parameter # F0h 53h.
Enable GS1 DataBar-14
(01h)
*Disable GS1 DataBar 14
(00h)
Enable GS1 DataBar Limited
(01h)
*Disable GS1 DataBar Limited
(00h)
Symbologies 14 - 65
GS1 DataBar Expanded
Parameter # F0h 54h.
Convert GS1 DataBar to UPC/EAN
Parameter # F0h, 8Dh
This parameter only applies to GS1 DataBar-14 and GS1 DataBar Limited symbols not decoded as part of a
Composite symbol. Enable this to strip the leading '010' from DataBar-14 and DataBar Limited symbols encoding a
single zero as the first digit, and report the bar code as EAN-13.
For bar codes beginning with two or more zeros but not six zeros, this parameter strips the leading '0100' and
reports the bar code as UPC-A. The UPC-A Preamble parameter that transmits the system character and country
code applies to converted bar codes. Note that neither the system character nor the check digit can be stripped.
Enable GS1 DataBar Expanded
(01h)
*Disable GS1 DataBar Expanded
(00h)
Enable Convert GS1 DataBar to UPC/EAN
(01h)
*Disable Convert GS1 DataBar to UPC/EAN
(00h)
14 - 66 Symbol DS6878 Product Reference Guide
Composite
Composite CC-C
Parameter # F0h 55h
Scan a bar code below to enable or disable Composite bar codes of type CC-C.
Composite CC-A/B
Parameter # F0h 56h
Scan a bar code below to enable or disable Composite bar codes of type CC-A/B.
Enable CC-C
(01h)
*Disable CC-C
(00h)
Enable CC-A/B
(01h)
*Disable CC-A/B
(00h)
Symbologies 14 - 67
Composite TLC-39
Parameter # F0h 73h
Scan a bar code below to enable or disable Composite bar codes of type TLC-39.
UPC Composite Mode
Parameter # F0h 58h
Select an option for linking UPC symbols with a 2D symbol during transmission as if they were one symbol:
•
Select UPC Never Linked to transmit UPC bar codes regardless of whether a 2D symbol is detected.
•
Select UPC Always Linked to transmit UPC bar codes and the 2D portion.
If 2D is not present, the UPC bar code does not transmit.
•
If you select Autodiscriminate UPC Composites, the digital scanner determines if there is a 2D portion,
then transmits the UPC, as well as the 2D portion if present.
Enable TLC39
(01h)
*Disable TLC39
(00h)
*UPC Never Linked
(00h)
UPC Always Linked
(01h)
Autodiscriminate UPC Composites
(02h)
14 - 68 Symbol DS6878 Product Reference Guide
Composite Beep Mode
Parameter # F0h, 8Eh
To select the number of decode beeps when a composite bar code is decoded, scan the appropriate bar code.
GS1-128 Emulation Mode for UCC/EAN Composite Codes
Parameter # F0h, ABh
Select whether to enable or disable this mode.
Single Beep after both are decoded
(00h)
*Beep as each code type is decoded
(01h)
Double Beep after both are decoded
(02h)
Enable GS1-128 Emulation Mode for
UCC/EAN Composite Codes
(01h)
*Disable GS1-128 Emulation Mode for
UCC/EAN Composite Codes
(00h)
Symbologies 14 - 69
2D Symbologies
Enable/Disable PDF417
Parameter # 0Fh
To enable or disable PDF417, scan the appropriate bar code below.
Enable/Disable MicroPDF417
Parameter # E3h
To enable or disable MicroPDF417, scan the appropriate bar code below.
*Enable PDF417
(01h)
Disable PDF417
(00h)
Enable MicroPDF417
(01h)
*Disable MicroPDF417
(00h)

14 - 70 Symbol DS6878 Product Reference Guide
Code 128 Emulation
Parameter # 7Bh
Enable this parameter to transmit data from certain MicroPDF417 symbols as Code 128. AIM Code ID Character
(01h) on page 4-34 must be enabled for this parameter to work.
Enable Code 128 Emulation to transmit these MicroPDF417 symbols with one of the following prefixes:
]C1 if the first codeword is 903-905
]C2 if the first codeword is 908 or 909
]C0 if the first codeword is 910 or 911
Disable Code 128 Emulation to transmit these MicroPDF417 symbols with one of the following prefixes:
]L3 if the first codeword is 903-905
]L4 if the first codeword is 908 or 909
]L5 if the first codeword is 910 or 911
Scan a bar code below to enable or disable Code 128 Emulation.
NOTE Linked MicroPDF codewords 906, 907, 912, 914, and 915 are not supported. Use GS1 Composites
instead.
Enable Code 128 Emulation
(01h)
*Disable Code 128 Emulation
(00h)

Symbologies 14 - 71
Data Matrix
Parameter # F0h, 24h
To enable or disable Data Matrix, scan the appropriate bar code below.
Data Matrix Inverse
Parameter # F1h 4Ch
This parameter sets the Data Matrix inverse decoder setting. Options are:
•
Regular Only - the digital scanner decodes regular Data Matrix bar codes only.
•
Inverse Only - the digital scanner decodes inverse Data Matrix bar codes only.
•
Inverse Autodetect - the digital scanner decodes both regular and inverse Data Matrix bar codes.
*Enable Data Matrix
(01h)
Disable Data Matrix
(00h)
*Regular
(00h)
Inverse Only
(01h)
Inverse Autodetect
(02h)
14 - 72 Symbol DS6878 Product Reference Guide
Maxicode
Parameter # F0h, 26h
To enable or disable Maxicode, scan the appropriate bar code below.
QR Code
Parameter # F0h,25h
To enable or disable QR Code, scan the appropriate bar code below.
Enable Maxicode
(01h)
*Disable Maxicode
(00h)
*Enable QR Code
(01h)
Disable QR Code
(00h)
Symbologies 14 - 73
QR Inverse
Parameter # F1h 4Bh
This parameter sets the QR inverse decoder setting. Options are:
•
Regular Only - the digital scanner decodes regular QR bar codes only.
•
Inverse Only - the digital scanner decodes inverse QR bar codes only.
•
Inverse Autodetect - the digital scanner decodes both regular and inverse QR bar codes.
MicroQR
Parameter # F1h 3Dh
To enable or disable MicroQR, scan the appropriate bar code below.
*Regular
(00h)
Inverse Only
(01h)
Inverse Autodetect
(02h)
*Enable MicroQR
(01h)
Disable MicroQR
(00h)
14 - 74 Symbol DS6878 Product Reference Guide
Aztec
Parameter # F1h 3Eh
To enable or disable Aztec, scan the appropriate bar code below.
Aztec Inverse
Parameter # F1h 4Dh
This parameter sets the Aztec inverse decoder setting. Options are:
•
Regular Only - the digital scanner decodes regular Aztec bar codes only.
•
Inverse Only - the digital scanner decodes inverse Aztec bar codes only.
•
Inverse Autodetect - the digital scanner decodes both regular and inverse Aztec bar codes.
*Enable Aztec
(01h)
Disable Aztec
(00h)
*Regular
(00h)
Inverse Only
(01h)
Inverse Autodetect
(02h)
Symbologies 14 - 75
Redundancy Level
Parameter # 4Eh
The digital scanner offers four levels of decode redundancy. Select higher redundancy levels for decreasing levels
of bar code quality. As redundancy levels increase, the digital scanner’s aggressiveness decreases.
Select the redundancy level appropriate for the bar code quality.
Redundancy Level 1
The following code types must be successfully read twice before being decoded:
Redundancy Level 2
The following code types must be successfully read twice before being decoded:
Redundancy Level 3
Code types other than the following must be successfully read twice before being decoded. The following codes
must be read three times:
Table 14-2
Redundancy Level 1 Codes
Code Type Code Length
Codabar 8 characters or less
MSI 4 characters or less
D 2 of 5 8 characters or less
I 2 of 5 8 characters or less
Table 14-3
Redundancy Level 2 Codes
Code Type Code Length
All All
Table 14-4
Redundancy Level 3 Codes
Code Type Code Length
MSI 4 characters or less
D 2 of 5 8 characters or less
I 2 of 5 8 characters or less
Codabar 8 characters or less
14 - 76 Symbol DS6878 Product Reference Guide
Redundancy Level 4
The following code types must be successfully read three times before being decoded:
Table 14-5
Redundancy Level 4 Codes
Code Type Code Length
All All
*Redundancy Level 1
(01h)
Redundancy Level 2
(02h)
Redundancy Level 3
(03h)
Redundancy Level 4
(04h)
Symbologies 14 - 77
Security Level
Parameter # 4Dh
The digital scanner offers four levels of decode security for delta bar codes, which include the Code 128 family,
UPC/EAN, and Code 93. Select increasing levels of security for decreasing levels of bar code quality. There is an
inverse relationship between security and digital scanner aggressiveness, so choose only that level of security
necessary for any given application.
•
Security Level 0: This setting allows the digital scanner to operate in its most aggressive state, while
providing sufficient security in decoding most “in-spec” bar codes.
•
Security Level 1: This default setting eliminates most misdecodes.
•
Security Level 2: Select this option if Security level 1 fails to eliminate misdecodes.
•
Security Level 3: If you selected Security Level 2 and misdecodes still occur, select this security level. Be
advised, selecting this option is an extreme measure against mis-decoding severely out of spec bar codes.
Selecting this level of security significantly impairs the decoding ability of the digital scanner. If you need this
level of security, try to improve the quality of the bar codes.
*Security Level 0
(00h)
Security Level 1
(01h)
Security Level 2
(02h)
Security Level 3
(03h)

14 - 78 Symbol DS6878 Product Reference Guide
Intercharacter Gap Size
Parameter # F0h, 7Dh
The Code 39 and Codabar symbologies have an intercharacter gap that is typically quite small. Due to various bar
code-printing technologies, this gap can grow larger than the maximum size allowed, preventing the digital scanner
from decoding the symbol. If this problem occurs, scan the Large Intercharacter Gaps parameter to tolerate these
out-of-specification bar codes.
Report Version
Scan the bar code below to report the version of software installed in the digital scanner.
*Normal Intercharacter Gaps
(06h)
Large Intercharacter Gaps
(0Ah)
Report Software Version
Symbologies 14 - 79
Macro PDF Features
Macro PDF is a special feature for concatenating multiple PDF symbols into one file. The scanner can decode
symbols that are encoded with this feature, and can store more than 64 Kb of decoded data stored in up to 50
MacroPDF symbols.
Flush Macro Buffer
This flushes the buffer of all decoded Macro PDF data stored to that point, transmits it to the host device, and
aborts from Macro PDF mode.
Abort Macro PDF Entry
This clears all currently-stored Macro PDF data in the buffer without transmission and aborts from Macro PDF
mode.
CAUTION When printing, keep each Macro PDF sequence separate, as each sequence has unique identifiers.
Do not mix bar codes from several Macro PDF sequences, even if they encode the same data. When
scanning Macro PDF sequences, scan the entire Macro PDF sequence without interruption. If, when
scanning a mixed sequence, the digital scanner emits two long low beeps (Low/Low) this indicates an
inconsistent file ID or inconsistent symbology error.
Flush Macro PDF Buffer
Abort Macro PDF Entry

14 - 80 Symbol DS6878 Product Reference Guide

Chapter 15 Advanced Data Formatting
Introduction
Advanced Data Formatting (ADF) is a means of customizing data before transmission to the host device. Scan
data can be edited to suit particular requirements.
To implement ADF, scan a related series of bar codes, which begin on page 15-8, which allows programming the
digital scanner with Advanced Data Formatting (ADF) Rules.
Avoid using ADF formatting with bar codes containing more than 60 characters. To add a prefix or suffix value for
such bar codes, use Prefix/Suffix Values on page 5-34. Using ADF with longer bar codes transmits the bar code in
segments of length 252 or less (depending on the host selected), and applies the rule to each segment
Rules: Criteria Linked to Actions
ADF uses rules to customize data. These rules perform detailed actions when the data meets certain criteria. One
rule may consist of single or multiple criteria applied to single or multiple actions.
For instance, a data formatting rule could be:
Criteria: When scan data is Code 39, length 12, and data at the start position is the string “129”,
Actions: pad all sends with zeros to length 8,
send all data up to X,
send a space.
Scanning a Code 39 bar code of 1299X1559828 transmits the following: 00001299<space>. If you scan a Code 39
bar code of 1299X15598, this rule is ignored because the bar code did not meet the length criteria.
The rule specifies the editing conditions and requirements before data transmission occurs.

15 - 2 Symbol DS6878 Product Reference Guide
Using ADF Bar Codes
When programming a rule, make sure the rule is logically correct. Plan ahead before scanning.
To program each data formatting rule:
•
Start the Rule. Scan the Begin New Rule bar code on page 15-8.
•
Specify Criteria. Scan the bar codes for all pertinent criteria. Criteria can include code type (e.g., Code 128),
code length, or data that contains a specific character string (e.g., the digits “129”). See Criteria on page
15-11.
•
Select Actions. Scan all actions related to, or affecting, these criteria. The actions of a rule specify how to
format the data for transmission. See Actions on page 15-24.
•
Save the Rule. Scan the Save Rule bar code on page 15-8. This places the rule in the “top” position in the
rule buffer.
•
To correct any errors, see Erase on page 15-9 to erase criteria, actions, and entire rules.
ADF Bar Code Menu Example
This section provides an example of how to enter and use ADF rules for scan data.
An auto parts distribution center wants to encode manufacturer ID, part number, and destination code into their
own Code 128 bar codes. The distribution center also has products that carry UPC bar codes, placed there by the
manufacturer. The Code 128 bar codes have the following format:
MMMMMPPPPPDD
Where: M = Manufacturer ID
P = Part Number
D = Destination Code
The distribution center uses a PC with dedicated control characters for manufacturer ID <CTRL M>, part number
<CTRL P>, and destination code <CTRL D>. At this center the UPC data is treated as manufacturer ID code.
The following rules need to be entered:
When scanning data of code type Code 128, send the next 5 characters, send the manufacturer ID key
<CTRL M>, send the next 5 characters, send the part number key <CTRL P>, send the next 2 characters,
send the destination code key <CTRL D>.
When scanning data of code type UPC/EAN, send all data, send the manufacturer ID key <CTRL M>.
To enter these rules, see the following steps.

Advanced Data Formatting 15 - 3
Rule 1: The Code 128 Scanning Rule
Step Bar Code On Page Beep Indication
1 Begin New Rule 15-8 High High
2 Code 128 15-11 High High
3 Send next 5 characters 15-25 High High
4 Send <CTRL M> 15-45 High High
5 Send next 5 characters 15-25 High High
6 Send <CTRL P> 15-45 High High
7 Send next 2 characters 15-24 High High
8 Send <CTRL D> 15-44 High High
9 Save Rule 15-8 High Low High Low
Rule 2: The UPC Scanning Rule
Step Bar Code On Page Beep Indication
1 Begin New Rule 15-8 High High
2UPC/EAN 15-13 High High
3 Send all remaining data 15-24 High High
4 Send <CTRL M> 15-45 High High
5 Save Rule 15-8 High Low High Low
To correct any errors made while entering this rule, scan the Quit Entering Rules bar code on page 15-9. If you
already saved the rule, scan the Erase Previously Saved Rule bar code on page 15-9.
Alternate Rule Sets
You can group ADF rules into one of four alternate sets which you can turn on and off when needed. This is useful
to format the same message in different ways. For example, a Code 128 bar code contains the following
information:
Class (2 digits), Stock Number (8) digits, Price (5 digits)
The bar code might look like this:
245671243701500
where:
Class = 24
Stock Number = 56712437
Price = 01500
Ordinarily, data is sent as follows:
24 (class key)
56712437 (stock key)
01500 (enter key)
But, when there is a sale, send only the following:
24 (class key)
56712437 (stock key)

15 - 4 Symbol DS6878 Product Reference Guide
and the cashier keys the price manually.
To implement this, first enter an ADF rule that applies to the normal situation, such as:
Scan Rule Belongs to Set 1. When scanning a bar code of length 15, send the next 2 characters, send the class
key, send the next 8 characters, send the stock key, send the data that remains, send the Enter key.
The “sale” rule may look like this:
Scan Rule Belongs to Set 2. When scanning a bar code of length 15, send the next 2 characters, send the class
key, send the next 8 characters, send the stock key.
To switch between the two sets of rules, program a “switching rule” that specifies what type of bar code to scan to
switch between the rule sets. For example, in the case of the “sale” rule above, the rule programmer wants the
cashier to scan the bar code “M” before a sale. To do this, a rule can be entered as follows:
When scanning a bar code of length 1 that begins with “M”, select rule set number 1.
Program another rule to switch back.
When scanning a bar code of length 1 that begins with “N”, turn off rule set number 1.
Or include the switching back to normal rules in the “sale” rule:
When scanning a bar code of length 15, send the next 2 characters, send the class key, send the next 8
characters, send the stock key, turn off rule set 1.
For optimal results, scan the Disable All Rule Sets bar code on page 15-10 after programming a rule belonging to
an alternate rule set.
In addition to enabling and disabling rule sets within the rules, enable or disable them by scanning the appropriate
bar codes on page 15-10.
Rules Hierarchy (in Bar Codes)
The order of programming individual rules is important.Program the most general rule first.
All programmed rules are stored in a buffer. As they are programmed, they are stored at the “top” of a rules list. If
you create three rules, the list is configured as follows:
Third Rule
Second Rule
First Rule
When you scan data, the rules list is checked from top to bottom to determine if the criteria matches (and therefore,
if the actions occur). Input is modified into the data format specified by the first matching set of criteria it finds. Be
sure to program the most general rule first.
For example, if the THIRD rule states:
When scanning a bar code of any length, send all data, then send the ENTER key.
And the SECOND rule states:
When scanning a Code 128 bar code of length 12, send the first four characters, then send the ENTER key,
then send all remaining data.
and you scan a Code 128 bar code of length 12, the THIRD rule applies, and the SECOND rule appears to not
function.

Advanced Data Formatting 15 - 5
Note that using the standard data editing functions also creates ADF rules. Scan options are entered as ADF rules,
and the hierarchy mentioned above also applies to them. For the digital scanner, this applies to prefix/suffix
programming in the parameter Scan Data Transmission Format on page 5-35.
These rules reside in the same “rule list” as ADF Rules, so the order you create them is also important.
Default Rules
Every unit has a default rule to send all scan data. Units with custom software may have one or more default rules
burned in. The rules hierarchy checks user programmable rules first, then the default rules. Disable default rules by
entering the following general rule in the user programmable buffer:
When receiving scan data, send all data.
Since this rule always applies, ADF never applies the default rules.
15 - 6 Symbol DS6878 Product Reference Guide
ADF Bar Codes
Table 15-1 lists the bar codes available through ADF.
Table 15-1
ADF Bar Codes
Parameter Page
Number
Special Commands
15-8
Pause Duration
15-8
Begin New Rule
15-8
Save Rule
15-8
Erase
15-9
Quit Entering Rules
15-9
Disable Rule Set
15-10
Criteria
15-11
Code Types
15-11
Code Lengths
15-15
1 Character
-
6 Characters
15-15
7 Characters
-
13 Characters
15-16
14 Characters
-
20 Characters
15-17
21 Characters
-
27 Characters
15-18
28 Characters
-
30 Characters
15-19
Specific String at Start
15-19
Specific String, Any Location
15-20
Any Message OK
15-20
Numeric Keypad
15-21
Rule Belongs To Set
15-23
Actions
15-24
Send Data
15-24
Send Data Up To Character
15-24
Send Next Character
15-24
Send All Data That Remains
15-24
Send Next 2 Characters
-
Send Next 20 Characters
15-24
Move Cursor
15-28

Advanced Data Formatting 15 - 7
Send Pause
15-28
Skip Ahead
15-29
Skip Back
15-30
Send Preset Value
15-32
Remove All Spaces
15-32
Crunch All Spaces
15-32
Stop Space Removal
15-32
Remove Leading Zeros
15-33
Stop Zero Removal
15-33
Pad Data with Spaces
15-34
Pad Data with Zeros
15-38
Beeps
15-43
Control Characters
15-43
Keyboard Characters
15-48
Send ALT Characters
15-61
Send Keypad Characters
15-67
Send Function Key
15-72
Send F1 Key
-
Send F24 Key
15-72
Send PF1 Key
-
Send PF30 Key
15-75
Send Right Control Key
15-79
Send Graphic User Interface (GUI) Characters
15-80
Send GUI 0
-
Send GUI 9
15-80
Send GUI A
-
Send GUI Z
15-81
Turn On/Off Rule Sets
15-85
Alphanumeric Keyboard
15-87
Space
-
`
15-87
0
-
9
15-91
A
-
Z
15-92
Cancel
15-96
Table 15-1
ADF Bar Codes (Continued)
Parameter Page
Number
15 - 8 Symbol DS6878 Product Reference Guide
Special Commands
Pause Duration
Use this parameter, along with Send Pause on page 15-28, to insert a pause in the data transmission. Set the
pause by scanning a two-digit number (i.e., two bar codes) from Appendix D, Numeric Bar Codes in 0.1 second
intervals. For example, scanning bar codes 0 and 1 inserts a 0.1 second pause; 0 and 5 inserts a 0.5 second delay.
To correct an error or change a selection, scan Cancel on page D-3.
Pause Duration
Begin New Rule
Scan the bar code below to start entering a new rule
.
Begin New Rule
Save Rule
Scan the bar code below to save the rule.
Save Rule
End of Message
15-96
a
-
z
15-96
{
-
~
15-100
Table 15-1
ADF Bar Codes (Continued)
Parameter Page
Number
Advanced Data Formatting 15 - 9
Erase
Use these bar codes to erase criteria, actions, or rules.
Quit Entering Rules
Scan the bar code below to quit entering rules.
Quit Entering Rules
Erase Criteria And Start Again
Erase Actions And Start Again
Erase Previously Saved Rule
Erase All Rules
15 - 10 Symbol DS6878 Product Reference Guide
Disable Rule Set
Use these bar codes to disable rule sets.
Disable Rule Set 1
Disable Rule Set 2
Disable Rule Set 3
Disable Rule Set 4
Disable All Rule Sets
Advanced Data Formatting 15 - 11
Criteria
Code Types
Scan the bar codes for all code to be affected by the rule. Scan the codes in succession, prior to selecting other
criteria. To select all code types, do not scan any code type.
Code 39
Codabar
GS1 DataBar-14
GS1 DataBar Limited
GS1 DataBar Expanded
Code 128
D 2 OF 5
15 - 12 Symbol DS6878 Product Reference Guide
Code Types (continued)
IATA 2 OF 5
I 2 OF 5
Code 93
UPC-A
UPC-E
EAN-8
EAN-13
Advanced Data Formatting 15 - 13
Code Types (continued)
MSI
GS1-128
UPC-E1
Bookland EAN
Trioptic Code 39
Code 11
Code 32
15 - 14 Symbol DS6878 Product Reference Guide
Code Types (continued)
ISBT 128
Coupon Code
TLC 39
UPC/EAN Composites
GS1 DataBar and EAN128 Composites
NOTE When selecting composite bar codes, enable AIM IDs if parsing UPC or EAN composite data, or data from
an application that uses symbol separators.
Advanced Data Formatting 15 - 15
Code Lengths
Scan these bar codes to define the number of characters the selected code type must contain. Select one length
per rule only. Do not select any code length to select code types of any length.
1 Character
2 Characters
3 Characters
4 Characters
5 Characters
6 Characters
15 - 16 Symbol DS6878 Product Reference Guide
Code Lengths (continued)
7 Characters
8 Characters
9 Characters
10 Characters
11 Characters
12 Characters
13 Characters
Advanced Data Formatting 15 - 17
Code Lengths (continued)
14 Characters
15 Characters
16 Characters
17 Characters
18 Characters
19 Characters
20 Characters

15 - 18 Symbol DS6878 Product Reference Guide
Code Lengths (continued)
21 Characters
22 Characters
23 Characters
24 Characters
25 Characters
26 Characters
27 Characters
Advanced Data Formatting 15 - 19
Message Containing A Specific Data String
Use this feature to select whether the formatting affects data that begins with a specific character or data string, or
contains a specific character or data string.
There are 4 features:
•
Specific String at Start
•
Specific String, Any Location
•
Any Message OK
•
Rule Belongs to Set
Specific String at Start
1. Scan the following bar code.
2. Scan the bar codes representing the desired character or characters (up to a total of 8) using the Alphanumeric
Keyboard on page 15-87.
3. Scan End of Message bar code on page 15-96.
Specific String At Start
Code Lengths (continued)
28 Characters
29 Characters
30 Characters

15 - 20 Symbol DS6878 Product Reference Guide
Specific String, Any Location
1. Scan the following bar code.
2. Enter a location by scanning a two-digit number representing the position (use a leading “zero” if necessary)
using the Numeric Keypad on page 15-21.
3. Scan the bar codes representing the desired character or characters (up to a total of 8) using the Alphanumeric
Keyboard on page 15-87.
4. Scan End of Message bar code on page 15-96.
Specific String Any Location
Any Message OK
Do not scan any bar code to format all selected code types, regardless of information contained.
Advanced Data Formatting 15 - 21
Numeric Keypad
Do not confuse bar codes on this page with those on the alphanumeric keyboard.
0
1
2
3
4
5
6
15 - 22 Symbol DS6878 Product Reference Guide
Numeric Keypad (continued)
7
8
9
Cancel
15 - 24 Symbol DS6878 Product Reference Guide
Actions
Select how to format the data for transmission.
Send Data
Send all data that remains, send all data up to a specific character selected from the Alphanumeric Keyboard on
page 15-87, or send the next X characters. Note that only bar codes for Send Next 1 to 20 appear here, and can
be scanned multiple times to send values greater then 20. For instance, to send the next 28 characters, scan Send
Next 20 Characters, then Send Next 8 Characters.
Send Data Up To Character
Send All Data That Remains
Send Next Character
Send Next 2 Characters
Send Next 3 Characters
Send Next 4 Characters
Advanced Data Formatting 15 - 25
Send Data (continued)
Send Next 5 Characters
Send Next 6 Characters
Send Next 7 Characters
Send Next 8 Characters
Send Next 9 Characters
Send Next 10 Characters
Send Next 11 Characters
15 - 26 Symbol DS6878 Product Reference Guide
Send Data (continued)
Send Next 12 Characters
Send Next 13 Characters
Send Next 14 Characters
Send Next 15 Characters
Send Next 16 Characters
Send Next 17 Characters
Send Next 18 Characters
Advanced Data Formatting 15 - 27
Setup Field(s)
Send Data (continued)
Send Next 19 Characters
Send Next 20 Characters
Table 15-2
Setup Field(s) Definitions
Parameter Description Page
Move Cursor
Move Cursor To a Character Scan the
Move Cursor To Character on page 15-28
, then any
printable ASCII character from the
Alphanumeric Keyboard on page
15-87
. This moves the cursor to the position after the matching
character. If the character is not there, the rule fails and ADF tries the
next rule.
15-28
Move Cursor to Start of Data Scan this bar code to move the cursor to the beginning of the data. 15-28
Move Cursor Past a Character This action moves the cursor past all sequential occurrences of a
selected character. For example, if the selected character is ‘A’, then
the cursor moves past ‘A’, ‘AA’, ‘AAA’, etc. Scan the
Move Cursor Past
Character on page 15-28
, then select a character from the
Alphanumeric Keyboard on page 15-87
. If the character is not there,
the cursor does not move (i.e., has no effect).
15-28
Skip Ahead “N” Characters Scan one of these bar codes to select the number of positions ahead
to move the cursor. 15-29
Skip Back “N” Characters Scan one of these bar codes to select the number of positions back to
move the cursor. 15-30
Send Preset Value Send Values 1 through 6 by scanning the appropriate bar code. Set
these values using the prefix/suffix values in
Table 7-4 on page 7-19
.
Value 1 = Scan Suffix
Value 2 = Scan Prefix
Values 3-6 are not applicable
15-30
15 - 28 Symbol DS6878 Product Reference Guide
Move Cursor
Scan a bar code below to move the cursor in relation to a specified character. Then enter a character by scanning
a bar code from the Alphanumeric Keyboard on page 15-87.
Send Pause
Scan the bar code below to insert a pause in the transmission of data. See Pause Duration on page 15-8 to set the
length of this pause.
NOTE If there is no match and the rule fails, the next rule is checked.
Move Cursor To Character
Move Cursor To Start
Move Cursor Past Character
Send Pause
Advanced Data Formatting 15 - 29
Skip Ahead
Use the following bar codes to skip ahead characters.
Skip Ahead 1 Character
Skip Ahead 2 Characters
Skip Ahead 3 Characters
Skip Ahead 4 Characters
Skip Ahead 5 Characters
Skip Ahead 6 Characters
Skip Ahead 7 Characters
15 - 30 Symbol DS6878 Product Reference Guide
Skip Back
Use the following bar codes to skip back characters.
Skip Ahead (continued)
Skip Ahead 8 Characters
Skip Ahead 9 Characters
Skip Ahead 10 Characters
Skip Back 1 Character
Skip Back 2 Characters
Skip Back 3 Characters

Advanced Data Formatting 15 - 31
Skip Back (continued)
Skip Back 4 Characters
Skip Back 5 Characters
Skip Back 6 Characters
Skip Back 7 Characters
Skip Back 8 Characters
Skip Back 9 Characters
Skip Back 10 Characters
15 - 32 Symbol DS6878 Product Reference Guide
Send Preset Value
Use these bar codes to send preset values. See Prefix/Suffix Values on page 5-34 to set these values.
Modify Data
Modify data as described below. The following actions work for all send commands that follow it within a rule.
Programming pad zeros to length 6, send next 3 characters, stop padding, send next 5 characters, adds three
zeros to the first send, and the next send is unaffected by the padding. These options do not apply to the Send
Keystroke or Send Preset Value options.
Remove All Spaces
To remove all spaces in the send commands that follow, scan the bar code below.
Remove All Spaces
Crunch All Spaces
To leave one space between words, scan the bar code below. This also removes all leading and trailing spaces.
Crunch All Spaces
Stop Space Removal
Scan the bar code below to disable space removal.
Stop Space Removal
Send Prefix
Send Suffix

Advanced Data Formatting 15 - 33
Remove Leading Zeros
Scan the bar code below to remove all leading zeros.
Remove Leading Zeros
Stop Zero Removal
Scan the bar code below to disable the removal of zeros.
Stop Zero Removal
15 - 34 Symbol DS6878 Product Reference Guide
Pad Data with Spaces
To pad data to the left, scan the bar code containing the desired number of spaces. Use Send commands to
activate this parameter.
Pad Spaces To Length 1
Pad Spaces To Length 2
Pad Spaces To Length 3
Pad Spaces To Length 4
Pad Spaces To Length 5
Pad Spaces To Length 6
Pad Spaces To Length 7
Advanced Data Formatting 15 - 35
Pad Data with Spaces (continued)
Pad Spaces To Length 8
Pad Spaces To Length 9
Pad Spaces To Length 10
Pad Spaces To Length 11
Pad Spaces To Length 12
Pad Spaces To Length 13
Pad Spaces To Length 14
15 - 36 Symbol DS6878 Product Reference Guide
Pad Data with Spaces (continued)
Pad Spaces To Length 15
Pad Spaces To Length 16
Pad Spaces To Length 17
Pad Spaces To Length 18
Pad Spaces To Length 19
Pad Spaces To Length 20
Pad Spaces To Length 21

Advanced Data Formatting 15 - 37
Pad Data with Spaces (continued)
Pad Spaces To Length 22
Pad Spaces To Length 23
Pad Spaces To Length 24
Pad Spaces To Length 25
Pad Spaces To Length 26
Pad Spaces To Length 27
Pad Spaces To Length 28
15 - 38 Symbol DS6878 Product Reference Guide
Pad Data with Zeros
To pad data to the left, scan the bar code containing the desired number of zeros. Use Send commands to activate
this parameter.
Pad Data with Spaces (continued)
Pad Spaces To Length 29
Pad Spaces To Length 30
Stop Pad Spaces
Pad Zeros To Length 1
Pad Zeros To Length 2
Pad Zeros To Length 3
Advanced Data Formatting 15 - 39
Pad Data with Zeros (continued)
Pad Zeros To Length 4
Pad Zeros To Length 5
Pad Zeros To Length 6
Pad Zeros To Length 7
Pad Zeros To Length 8
Pad Zeros To Length 9
Pad Zeros To Length 10

15 - 40 Symbol DS6878 Product Reference Guide
Pad Data with Zeros (continued)
Pad Zeros To Length 11
Pad Zeros To Length 12
Pad Zeros To Length 13
Pad Zeros To Length 14
Pad Zeros To Length 15
Pad Zeros To Length 16
Pad Zeros To Length 17

Advanced Data Formatting 15 - 41
Pad Data with Zeros (continued)
Pad Zeros To Length 18
Pad Zeros To Length 19
Pad Zeros To Length 20
Pad Zeros To Length 21
Pad Zeros To Length 22
Pad Zeros To Length 23
Pad Zeros To Length 24
15 - 42 Symbol DS6878 Product Reference Guide
Pad Data with Zeros (continued)
Pad Zeros To Length 25
Pad Zeros To Length 26
Pad Zeros To Length 27
Pad Zeros To Length 28
Pad Zeros To Length 29
Pad Zeros To Length 30
Stop Pad Zeros
Advanced Data Formatting 15 - 43
Beeps
Select a beep sequence for each ADF rule.
Send Keystroke (Control Characters and Keyboard Characters)
Control Characters
Scan a Send bar code for the keystroke to send.
Beep Once
Beep Twice
Beep Three Times
Send Control 2
Send Control A
Send Control B
15 - 44 Symbol DS6878 Product Reference Guide
Control Characters (continued)
Send Control C
Send Control D
Send Control E
Send Control F
Send Control G
Send Control H
Send Control I

Advanced Data Formatting 15 - 45
Control Characters (continued)
Send Control J
Send Control K
Send Control L
Send Control M
Send Control N
Send Control O
Send Control P
15 - 46 Symbol DS6878 Product Reference Guide
Control Characters (continued)
Send Control Q
Send Control R
Send Control S
Send Control T
Send Control U
Send Control V
Send Control W
Advanced Data Formatting 15 - 47
Control Characters (continued)
Send Control X
Send Control Y
Send Control Z
Send Control [
Send Control \
Send Control ]
15 - 48 Symbol DS6878 Product Reference Guide
Keyboard Characters
Scan a Send bar code for the keyboard characters to send.
Control Characters (continued)
Send Control 6
Send Control -
Send Space
Send !
Send “
Send #
Advanced Data Formatting 15 - 49
Keyboard Characters (continued)
Send $
Send %
Send &
Send ‘
Send (
Send )
Send *
15 - 50 Symbol DS6878 Product Reference Guide
Keyboard Characters (continued)
Send +
Send ,
Send -
Send .
Send /
Send 0
Send 1
Advanced Data Formatting 15 - 51
Keyboard Characters (continued)
Send 2
Send 3
Send 4
Send 5
Send 6
Send 7
Send 8
15 - 52 Symbol DS6878 Product Reference Guide
Keyboard Characters (continued)
Send 9
Send :
Send ;
Send <
Send =
Send >
Send ?

Advanced Data Formatting 15 - 53
Keyboard Characters (continued)
Send @
Send A
Send B
Send C
Send D
Send E
Send F
15 - 54 Symbol DS6878 Product Reference Guide
Keyboard Characters (continued)
Send G
Send H
Send I
Send J
Send K
Send L
Send M
Advanced Data Formatting 15 - 55
Keyboard Characters (continued)
Send N
Send O
Send P
Send Q
Send R
Send S
Send T
15 - 56 Symbol DS6878 Product Reference Guide
Keyboard Characters (continued)
Send U
Send V
Send W
Send X
Send Y
Send Z
Send [

Advanced Data Formatting 15 - 57
Keyboard Characters (continued)
Send \
Send ]
Send ^
Send _
Send `
Send a
Send b
15 - 58 Symbol DS6878 Product Reference Guide
Keyboard Characters (continued)
Send c
Send d
Send e
Send f
Send g
Send h
Send i

Advanced Data Formatting 15 - 59
Keyboard Characters (continued)
Send j
Send k
Send l
Send m
Send n
Send o
Send p
15 - 60 Symbol DS6878 Product Reference Guide
Keyboard Characters (continued)
Send q
Send r
Send s
Send t
Send u
Send v
Send w

Advanced Data Formatting 15 - 61
Send ALT Characters
Keyboard Characters (continued)
Send x
Send y
Send z
Send {
Send |
Send }
Send ~

15 - 62 Symbol DS6878 Product Reference Guide
Send Alt 2
Send Alt A
Send Alt B
Send Alt C
Send Alt D
Send Alt E
Send Alt F

Advanced Data Formatting 15 - 63
Send ALT Characters (continued)
Send Alt G
Send Alt H
Send Alt I
Send Alt J
Send Alt K
Send Alt L
Send Alt M
15 - 64 Symbol DS6878 Product Reference Guide
Send ALT Characters (continued)
Send Alt N
Send Alt O
Send Alt P
Send Alt Q
Send Alt R
Send Alt S
Send Alt T

Advanced Data Formatting 15 - 65
Send ALT Characters (continued)
Send Alt U
Send Alt V
Send Alt W
Send Alt X
Send Alt Y
Send Alt Z
Send Alt [

15 - 66 Symbol DS6878 Product Reference Guide
Send ALT Characters (continued)
Send Alt \
Send Alt ]
Advanced Data Formatting 15 - 67
Send Keypad Characters
Send Keypad *
Send Keypad +
Send Keypad -
Send Keypad .
Send Keypad /
Send Keypad 0
Send Keypad 1
15 - 68 Symbol DS6878 Product Reference Guide
Send Keypad Characters (continued)
Send Keypad 2
Send Keypad 3
Send Keypad 4
Send Keypad 5
Send Keypad 6
Send Keypad 7
Send Keypad 8

Advanced Data Formatting 15 - 69
Send Keypad Characters (continued)
Send Keypad 9
Send Keypad Enter
Send Keypad Numlock
Send Break Key
Send Delete Key
Send Page Up Key
Send End Key
15 - 70 Symbol DS6878 Product Reference Guide
Send Keypad Characters (continued)
Send Page Down Key
Send Pause Key
Send Scroll Lock Key
Send Backspace Key
Send Tab Key
Send Print Screen Key
Send Insert Key
Advanced Data Formatting 15 - 71
Send Keypad Characters (continued)
Send Home Key
Send Enter Key
Send Escape Key
Send Up Arrow Key
Send Down Arrow Key
Send Left Arrow Key
Send Right Arrow Key

15 - 72 Symbol DS6878 Product Reference Guide
Send Function Key
Send F1 Key
Send F2 Key
Send F3 Key
Send F4 Key
Send F5 Key
Send F6 Key
Send F7 Key

Advanced Data Formatting 15 - 73
Send Function Key (continued)
Send F8 Key
Send F9 Key
Send F10 Key
Send F11 Key
Send F12 Key
Send F13 Key
Send F14 Key
15 - 74 Symbol DS6878 Product Reference Guide
Send Function Key (continued)
Send F15 Key
Send F16 Key
Send F17 Key
Send F18 Key
Send F19 Key
Send F20 Key
Send F21 Key

Advanced Data Formatting 15 - 75
Send Function Key (continued)
Send F22 Key
Send F23 Key
Send F24 Key
Send PF1 Key
Send PF2 Key
Send PF3 Key
Send PF4 Key
15 - 76 Symbol DS6878 Product Reference Guide
Send Function Key (continued)
Send PF5 Key
Send PF6 Key
Send PF7 Key
Send PF8 Key
Send PF9 Key
Send PF10 Key
Send PF11 Key
Advanced Data Formatting 15 - 77
Send Function Key (continued)
Send PF12 Key
Send PF13 Key
Send PF14 Key
Send PF15 Key
Send PF16 Key
Send PF17 Key
Send PF18 Key
15 - 78 Symbol DS6878 Product Reference Guide
Send Function Key (continued)
Send PF19 Key
Send PF20 Key
Send PF21 Key
Send PF22 Key
Send PF23 Key
Send PF24 Key
Send PF25 Key
Advanced Data Formatting 15 - 79
Send Right Control Key
The “Send Right Control Key” action will send a tap (press and release) of the Right Control Key.
Send Right Control Key
Send Function Key (continued)
Send PF26 Key
Send PF27 Key
Send PF28 Key
Send PF29 Key
Send PF30 Key
15 - 80 Symbol DS6878 Product Reference Guide
Send Graphic User Interface (GUI) Characters
The Send Graphic User Interface Character actions taps the specified key while holding the System Dependent
Graphic User Interface (GUI) Key. The definition of the Graphic User Interface key depends on the attached
system.
Send GUI 0
Send GUI 1
Send GUI 2
Send GUI 3
Send GUI 4
Send GUI 5
Advanced Data Formatting 15 - 81
Send Graphic User Interface (GUI) Characters (continued)
Send GUI 6
Send GUI 7
Send GUI 8
Send GUI 9
Send GUI A
Send GUI B
Send GUI C
15 - 82 Symbol DS6878 Product Reference Guide
Send Graphic User Interface (GUI) Characters (continued)
Send GUI D
Send GUI E
Send GUI F
Send GUI G
Send GUI H
Send GUI I
Send GUI J
Advanced Data Formatting 15 - 83
Send Graphic User Interface (GUI) Characters (continued)
Send GUI K
Send GUI L
Send GUI M
Send GUI N
Send GUI O
Send GUI P
Send GUI Q

15 - 84 Symbol DS6878 Product Reference Guide
Send Graphic User Interface (GUI) Characters (continued)
Send GUI R
Send GUI S
Send GUI T
Send GUI U
Send GUI V
Send GUI W
Send GUI X
Advanced Data Formatting 15 - 85
Turn On/Off Rule Sets
Use these bar codes to turn rule sets on and off.
Send Graphic User Interface (GUI) Characters (continued)
Send GUI Y
Send GUI Z
Turn On Rule Set 1
Turn On Rule Set 2
Turn On Rule Set 3
Turn On Rule Set 4

15 - 86 Symbol DS6878 Product Reference Guide
Turn On/Off Rule Sets (continued)
Use these bar codes to turn rule sets on and off.
Turn Off Rule Set 1
Turn Off Rule Set 2
Turn Off Rule Set 3
Turn Off Rule Set 4

Advanced Data Formatting 15 - 87
Alphanumeric Keyboard
Space
#
$
%
*
(Single Quote)
+
-
(Dash)
15 - 88 Symbol DS6878 Product Reference Guide
Alphanumeric Keyboard (continued)
.
,
(Comma)
/
!
“
&
‘
(
Advanced Data Formatting 15 - 89
Alphanumeric Keyboard (continued)
)
:
;
<
=
>
?
15 - 90 Symbol DS6878 Product Reference Guide
Alphanumeric Keyboard (continued)
@
[
\
]
^
_
(Underscore)
`

Advanced Data Formatting 15 - 91
Alphanumeric Keyboard (continued)
NOTEDo not confuse the numeric bar codes below with those on the numeric keypad.
0
1
2
3
4
5
15 - 92 Symbol DS6878 Product Reference Guide
Alphanumeric Keyboard (continued)
6
7
8
9
A
B
C
Advanced Data Formatting 15 - 93
Alphanumeric Keyboard (continued)
D
E
F
G
H
I
J
15 - 94 Symbol DS6878 Product Reference Guide
Alphanumeric Keyboard (continued)
K
L
M
N
O
P
Q
Advanced Data Formatting 15 - 95
Alphanumeric Keyboard (continued)
R
S
T
U
V
W
X
15 - 96 Symbol DS6878 Product Reference Guide
Alphanumeric Keyboard (continued)
Y
Z
Cancel
End of Message
a
b
c

Advanced Data Formatting 15 - 97
Alphanumeric Keyboard (continued)
d
e
f
g
h
i
j
15 - 98 Symbol DS6878 Product Reference Guide
Alphanumeric Keyboard (continued)
k
l
m
n
o
p
q
Advanced Data Formatting 15 - 99
Alphanumeric Keyboard (continued)
r
s
t
u
v
w
x
15 - 100Symbol DS6878 Product Reference Guide
Alphanumeric Keyboard (continued)
y
z
{
|
}
~