Zebra Technologies MD-BTC2TY5 Zebra Cameo-ZBR3 BT radio User Manual CERTIFICATE OF COMPLIANCE
Zebra Technologies Corporation Zebra Cameo-ZBR3 BT radio CERTIFICATE OF COMPLIANCE
UserManual.wiki
>
Zebra Technologies
>
MD BTC2TY5 User Manual
Manual
Navigation menu
Upload a User Manual
Namespaces
Wiki Guide
HTML
PDF
Info
Views
User Manual
Discussion / Help
Navigation
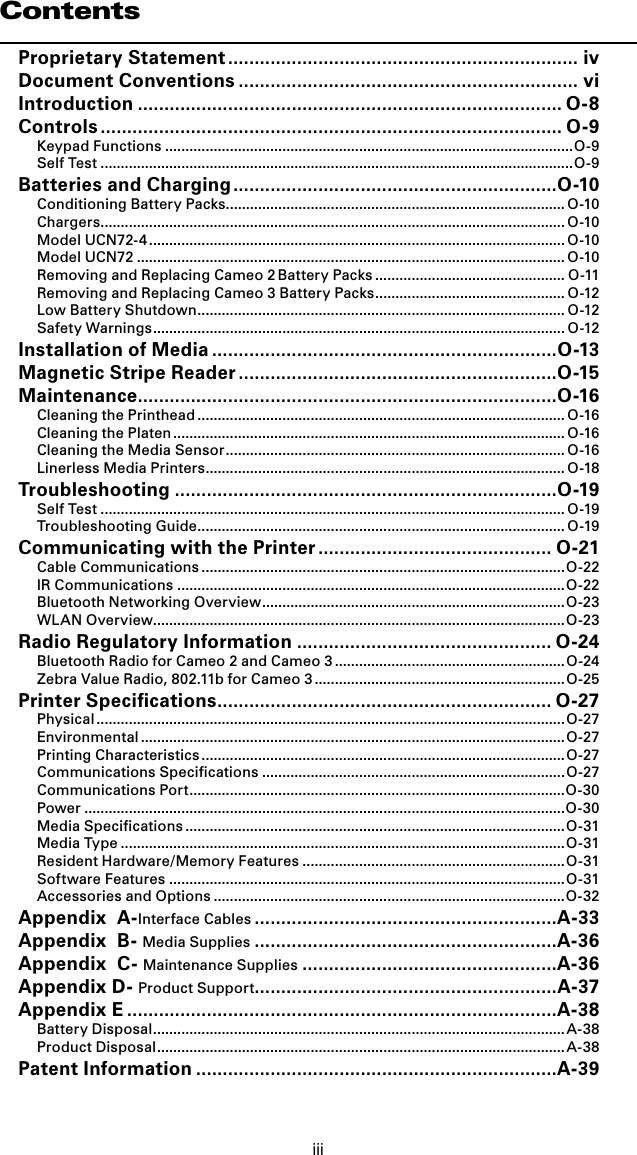

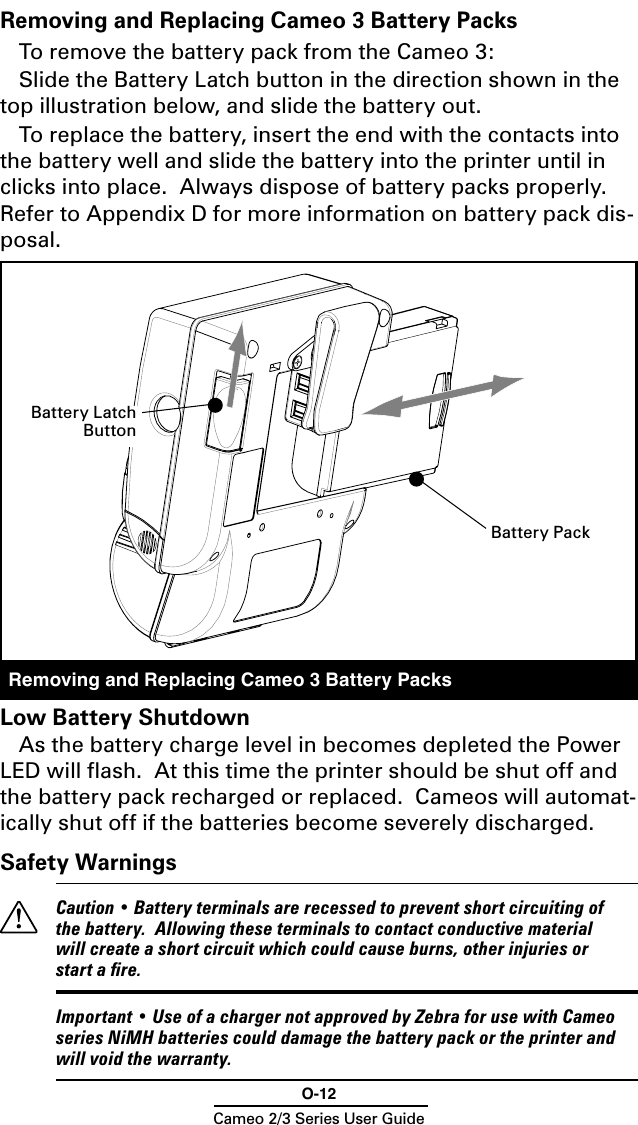
![O-14Cameo 2/3 Series User Guideprinter body that will allow the media roll to spin freely yet prevent it from wandering from side to side so much that print quality is affected. Important • The media roll must sit between the right hand surface of the edge guide and the printer frame as shown in the illustration.4. Drop a new roll of paper into the compartment. Media should feed from the top of the roll and the roll should fit between the edge guide and the right hand wall. The inner core of the media roll should be Ø.75” [19 mm] or larger to prevent the media at the end of the roll from jamming in the printer mechanism. 5. Close the cover while holding the free end of the media roll.6. Ensure the cover is securely latched before beginning to print. Caution •When printing, there must be a wait time of one second between labels to remain within the optimal performance specifications for this product.](https://usermanual.wiki/Zebra-Technologies/MD-BTC2TY5/User-Guide-642592-Page-15.png)
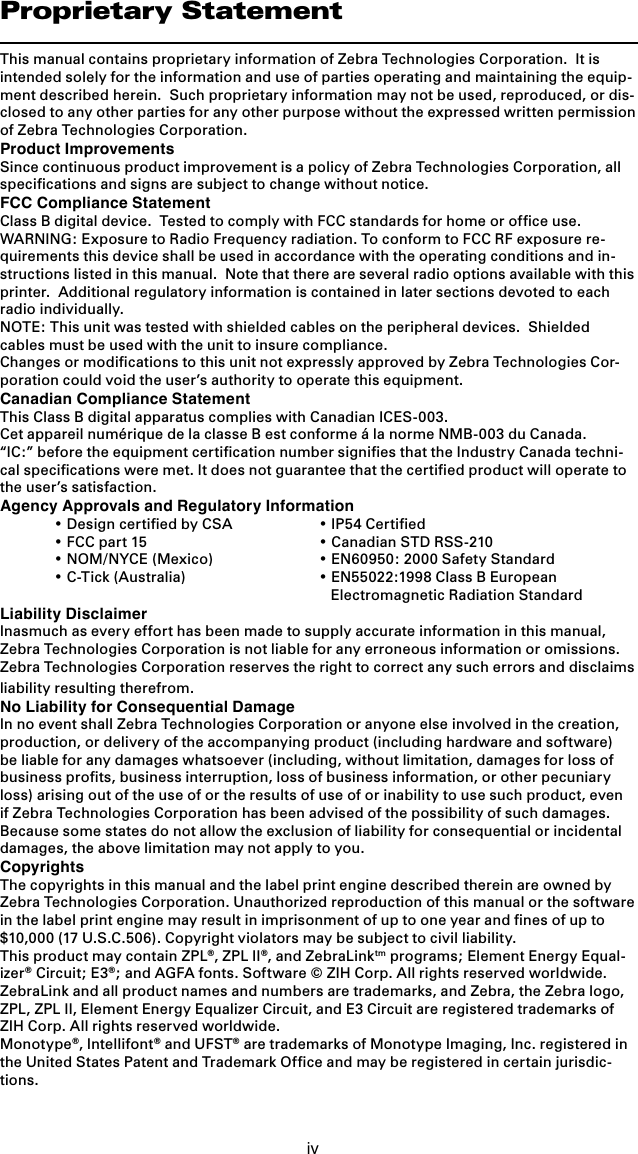
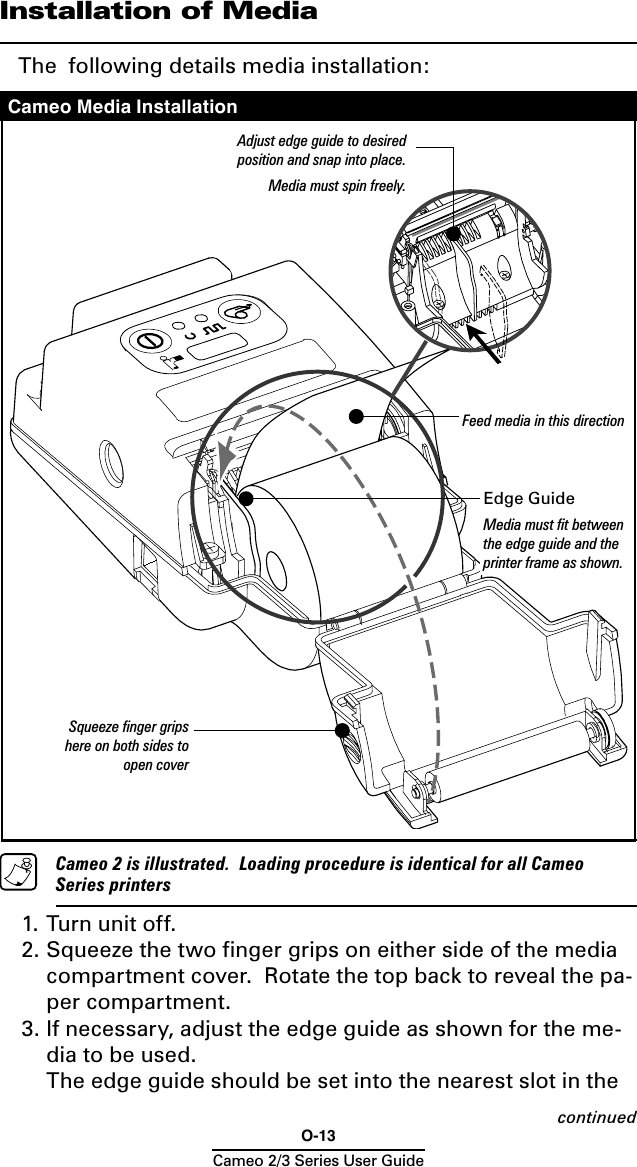
![O-31Cameo 2/3 Series User GuideMedia Specifications Cameo 2 Cameo 3 Max. Print Width 1.9” (48.3 mm) 2.83” (71.9 mm) Max. Roll O.D. 2.25” [57 mm] Core Diameter .75” [19 mm] min.Media Width Settings(all dimensions ±.05” [±1.3 mm] Cameo 2 Cameo 3 0.72 [18.2 mm] 1.47 [37.3 mm] 0.85 [21.6 mm] 1.60 [40.64 mm] 0.97 [24.6 mm] 1.72 [43.7 mm] 1.10 [27.9 mm] 1.85 [47.0 mm] 1.22 [31.0 mm] 1.97 [50.0 mm] 1.35 [34.3 mm] 2.10 [53.3 mm] 1.47 [37.3 mm] 2.22 [56.4 mm] 1.60 [40.64 mm] 2.35 [59.7 mm] 1.72 [43.7 mm] 2.47 [62.7 mm] 1.85 [47.0 mm] 2.60 66.0 mm] 1.97 [50.0 mm] 2.72 [69.1 mm] 2.13 [54.1 mm]1 2.85 [72.4 mm] 2.97 [75.4 mm] 3.10 [78.7 mm]1 1. This width available only with edge guide removed.Media Type • Paper Journal • Two-part thermal receipts • Linerless labels (on linerless models only)Resident Hardware/Memory Features• 25 Resident fonts• Optional international character fonts• Flash memory for down-loadable programs, label formats, fonts and graphics• Fully scalable fonts• Built-in graphics supportSoftware Features• Vertical or horizontal printing• Left, right, or center justification• Scale to fit• Concatenation• Line print mode- ideal for receipt printing• Programmable label odometer with on-demand terminal reporting• Serial number reporting to terminal on demand• Automatic printhead temperature compensationcontinued](https://usermanual.wiki/Zebra-Technologies/MD-BTC2TY5/User-Guide-642592-Page-32.png)