Zebra Technologies MD-CXLAN11G Zebra Embedded b/g radio User Manual UMAN QLP 002A
Zebra Technologies Corporation Zebra Embedded b/g radio UMAN QLP 002A
UserManual.wiki
>
Zebra Technologies
>
MD CXLAN11G User Manual
Users Manual
Navigation menu
Upload a User Manual
Namespaces
Wiki Guide
HTML
PDF
Info
Views
User Manual
Discussion / Help
Navigation


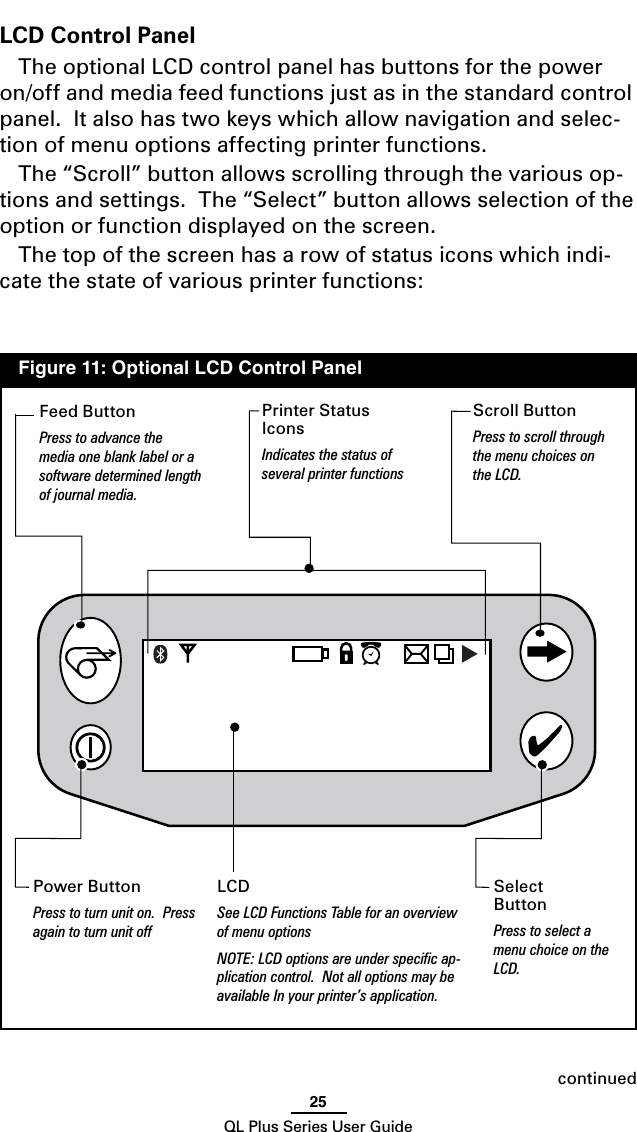


![75QL Plus Series User Guidecontinued Figure 30: QL 320 Plus Overall Dimensions1. Belt Clip must be removed to use all three mounting holes on the bottom of the QL 320 Plus.1.18 in.[30.0 mm]1.56 in.[39.7 mm]2.80 in.[71.1 mm]8.27 in. [210 mm]8.16 in. [207.4 mm]3.9 in.[100.2 mm]3.18 in. [80.7 mm](3x) #8-324.67 in.[118.7 mm]](https://usermanual.wiki/Zebra-Technologies/MD-CXLAN11G/User-Guide-1222261-Page-75.png)
![76QL Plus Series User Guide Figure 31: QL 420 Plus Overall Dimensions0.74 in.[18.7 mm]2.26 in [57.4 mm]3.05 in.[77.5 mm]3.57 in. [90.7 mm]3.53 in. [89.7 mm]3.83 in. [97.3 mm]4.7 in.[119.3 mm]4.98 in. [126.5 mm]6.1 in. [154.9 mm]7.8 in. [198.0 mm]3.5 in. [89 mm]3.0 in. [76.2 mm]8.20 in.[208 mm](4x) #8-320.79 in.[20.0 mm]1.26 in. [32.0 mm]1.63 in.[41.4 mm]0.38 in.[9.65 mm]](https://usermanual.wiki/Zebra-Technologies/MD-CXLAN11G/User-Guide-1222261-Page-76.png)