Zebra Technologies MD-QL3021 FHSS RF Module User Manual CERTIFICATE OF COMPLIANCE
Zebra Technologies Corporation FHSS RF Module CERTIFICATE OF COMPLIANCE
UserManual.wiki
>
Zebra Technologies
>
MD QL3021 User Manual
Users Manual
Navigation menu
Upload a User Manual
Namespaces
Wiki Guide
HTML
PDF
Info
Views
User Manual
Discussion / Help
Navigation


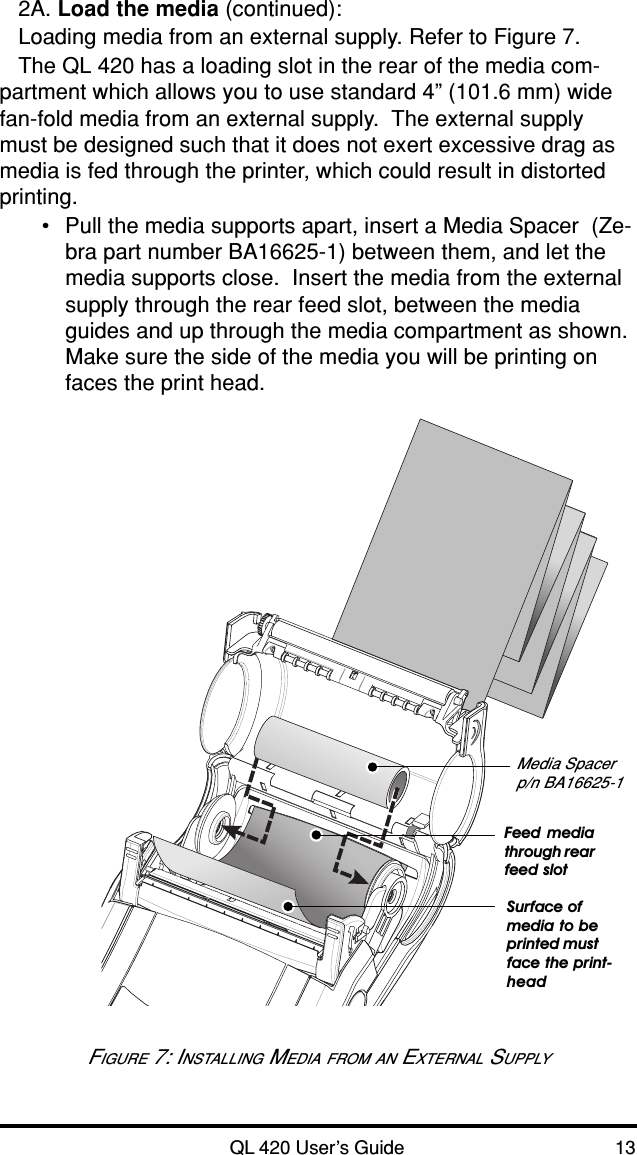
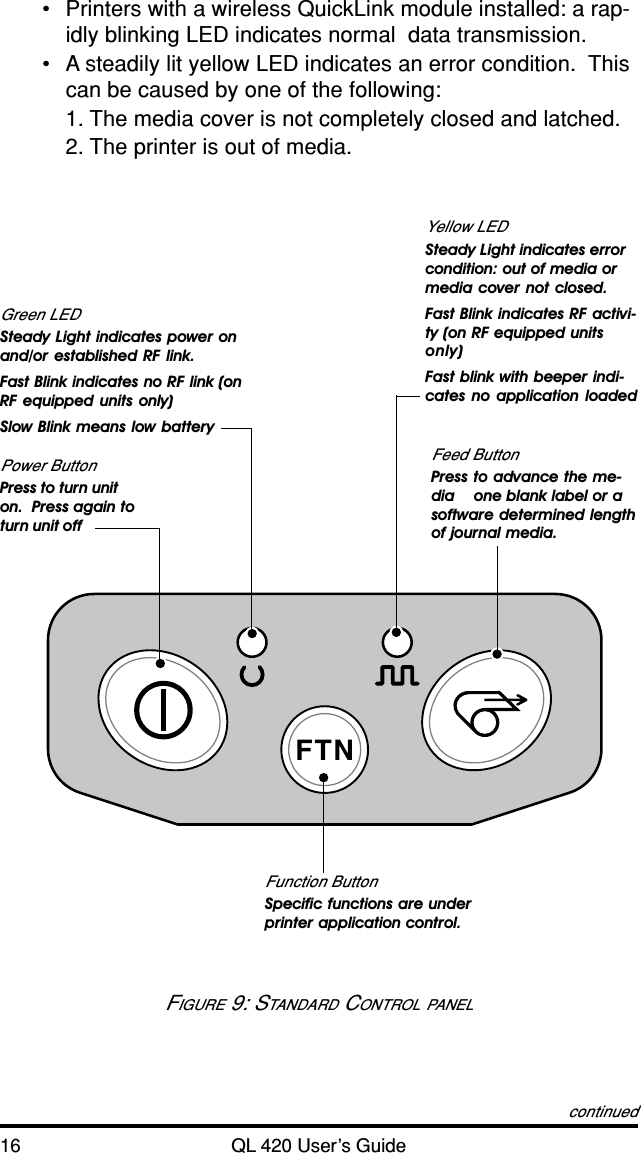
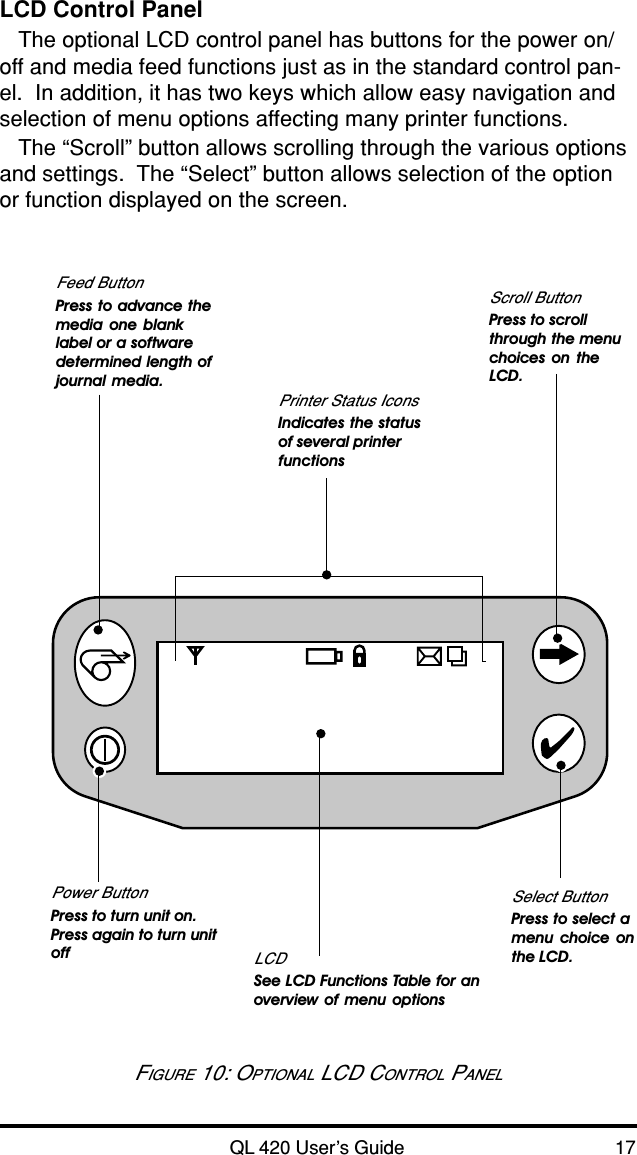
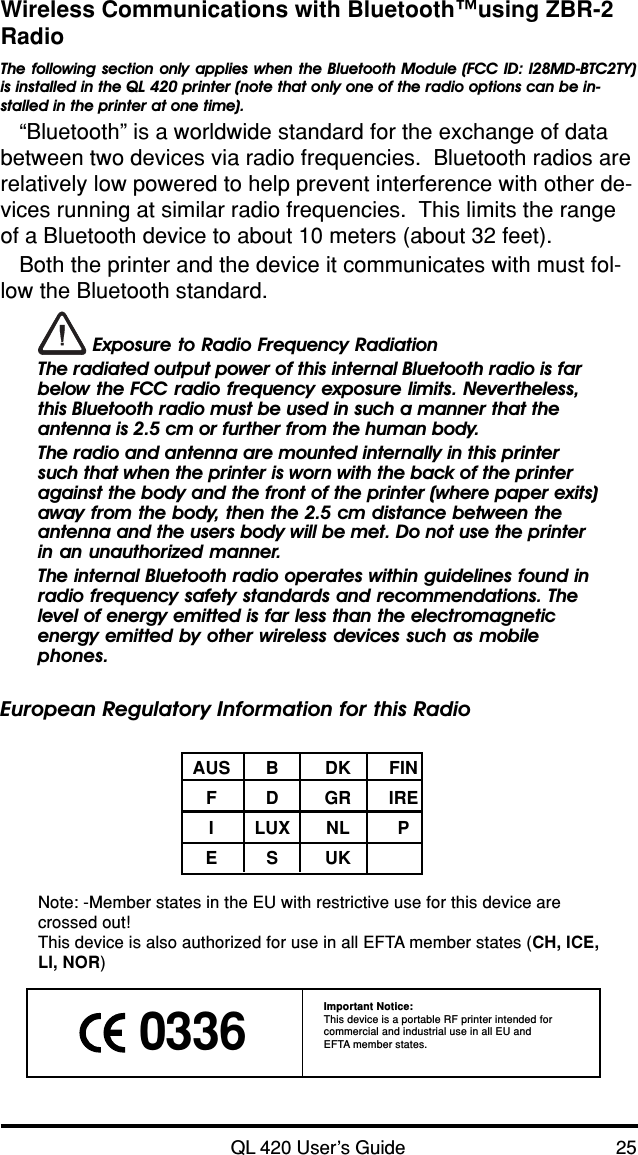

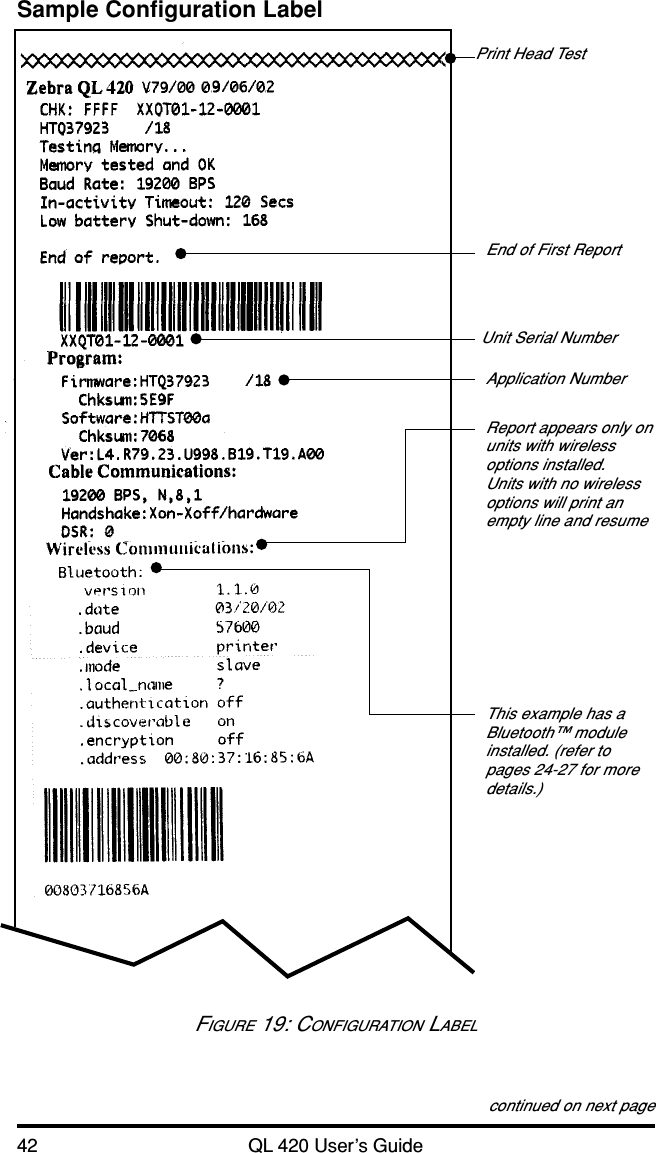

![QL 420 User’s Guide 47Physical/Environmental/Electrical SpecificationsFIGURE 20 OVERALL DIMENSIONS3.0”[76.2 mm]3.5”[89 mm]7.8” [198.0 mm]6.1”[154.9mm]4.7” [119.3 mm]3.83”[97.3 mm]3.53”[89.7 mm]3.57”[90.7 mm].74” [18.7 mm](4x) #8-322.26” [57.4 mm]3.05” [77.5 mm].79” [20.0 mm]1.26” [32.0 mm]8.2 “[208 mm]4.98”[126.5 mm]1.63” [41.4 mm].38” [9.65 mm]](https://usermanual.wiki/Zebra-Technologies/MD-QL3021/User-Guide-392284-Page-48.png)