Zebra Technologies QL320352 Portable Printer User Manual UMAN Q3D
Zebra Technologies Corporation Portable Printer UMAN Q3D
UserManual.wiki
>
Zebra Technologies
>
QL320352 User Manual
>
Users Manual
Contents
1.
Users Manual
2.
Manual
Users Manual
Navigation menu
Upload a User Manual
Namespaces
Wiki Guide
HTML
PDF
Info
Views
User Manual
Discussion / Help
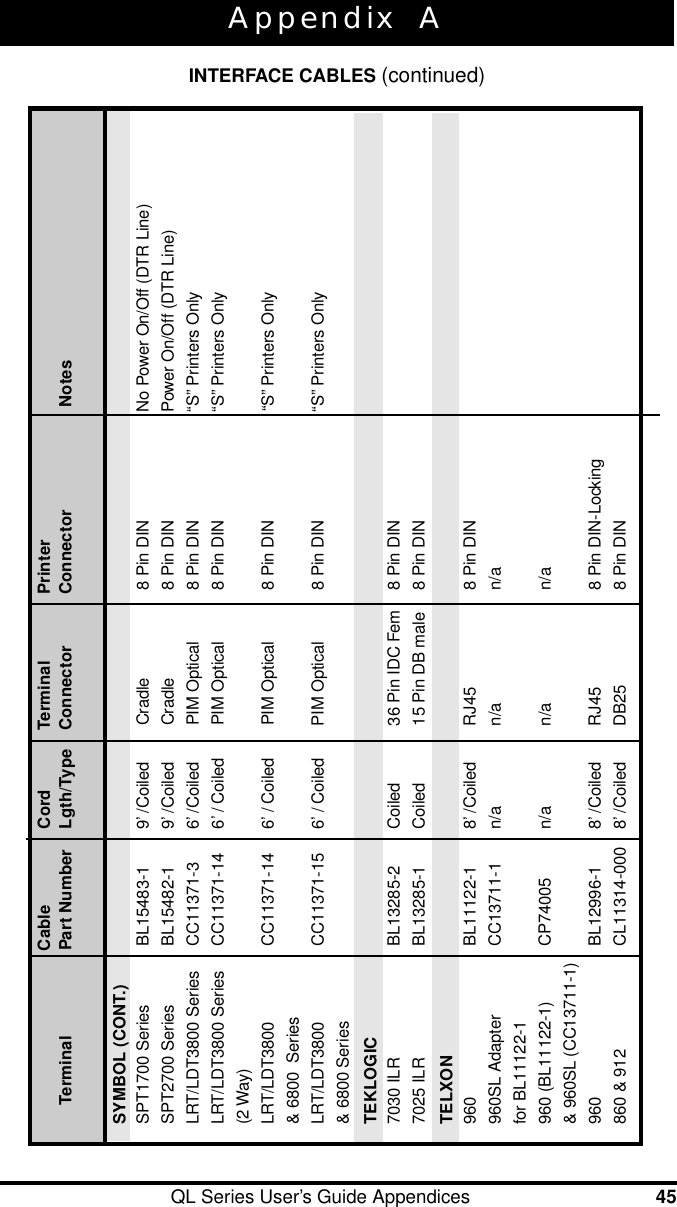
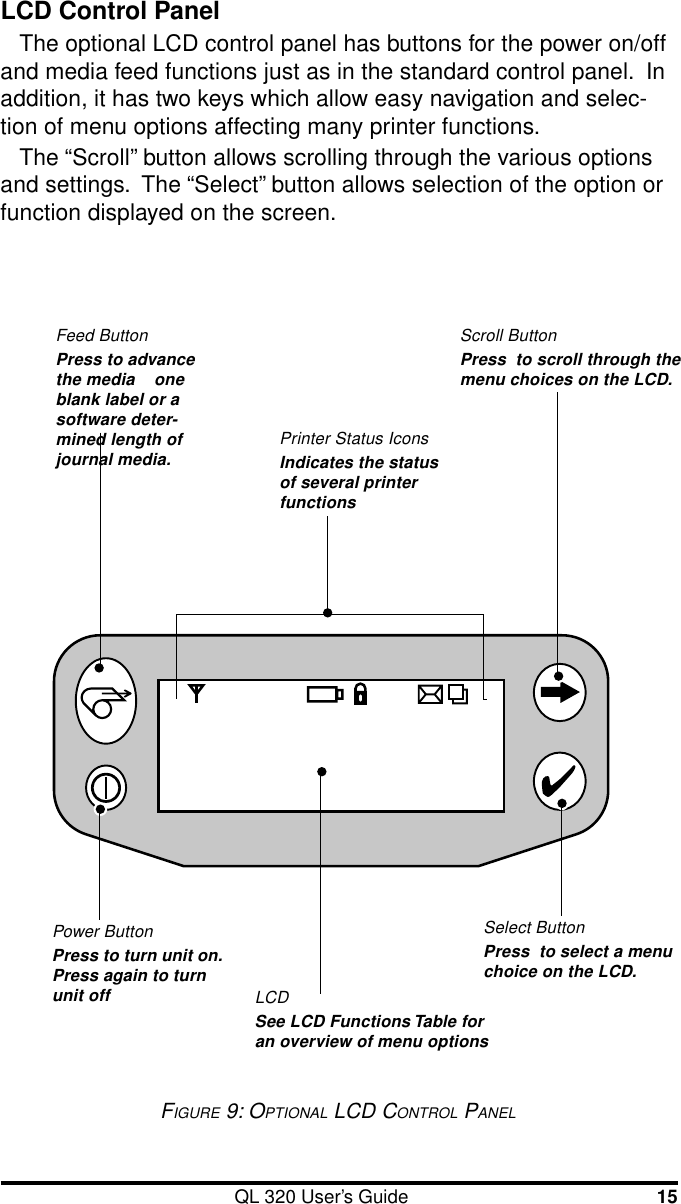
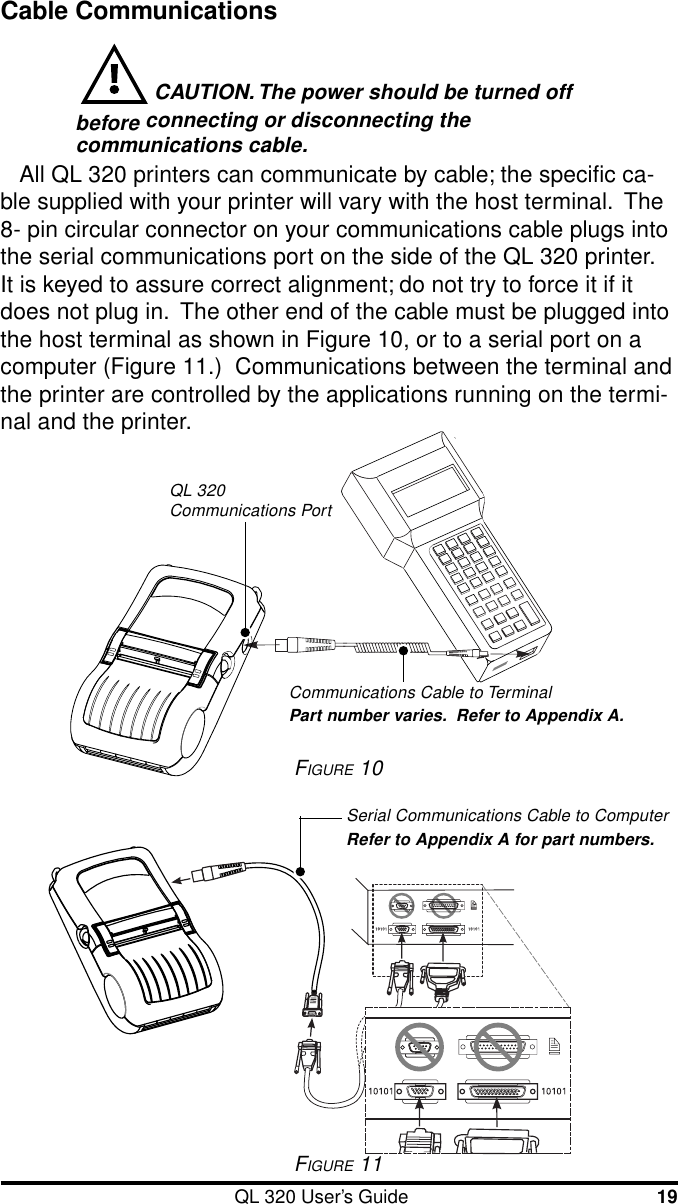
Navigation
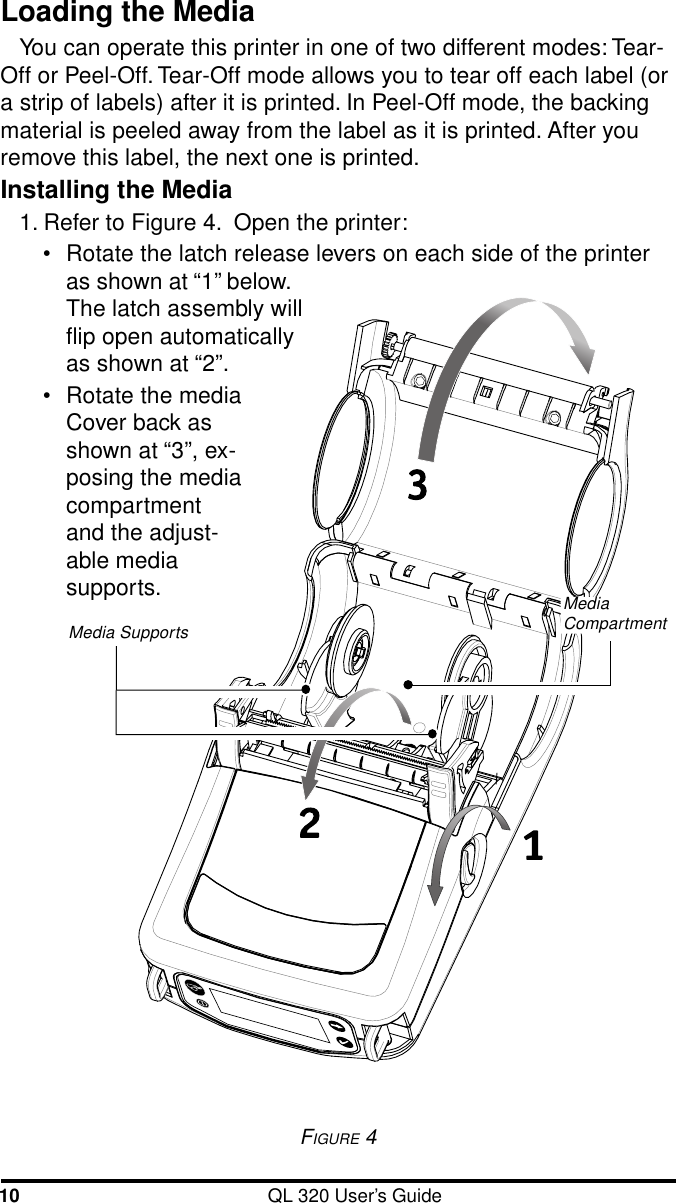
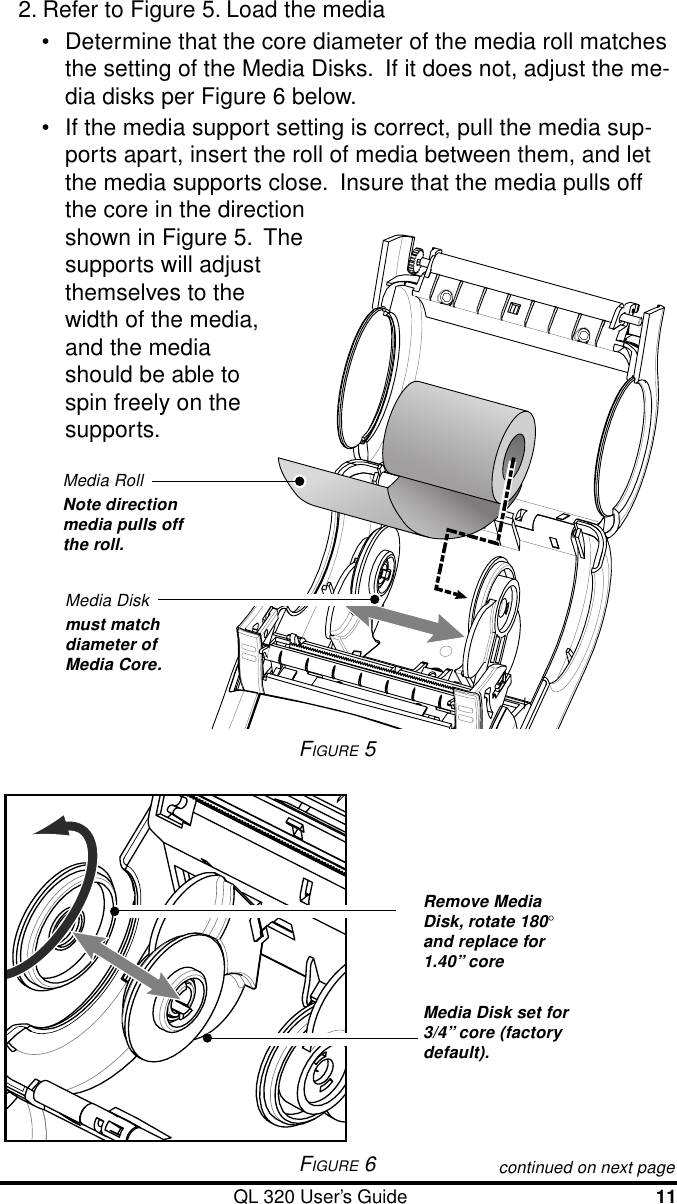

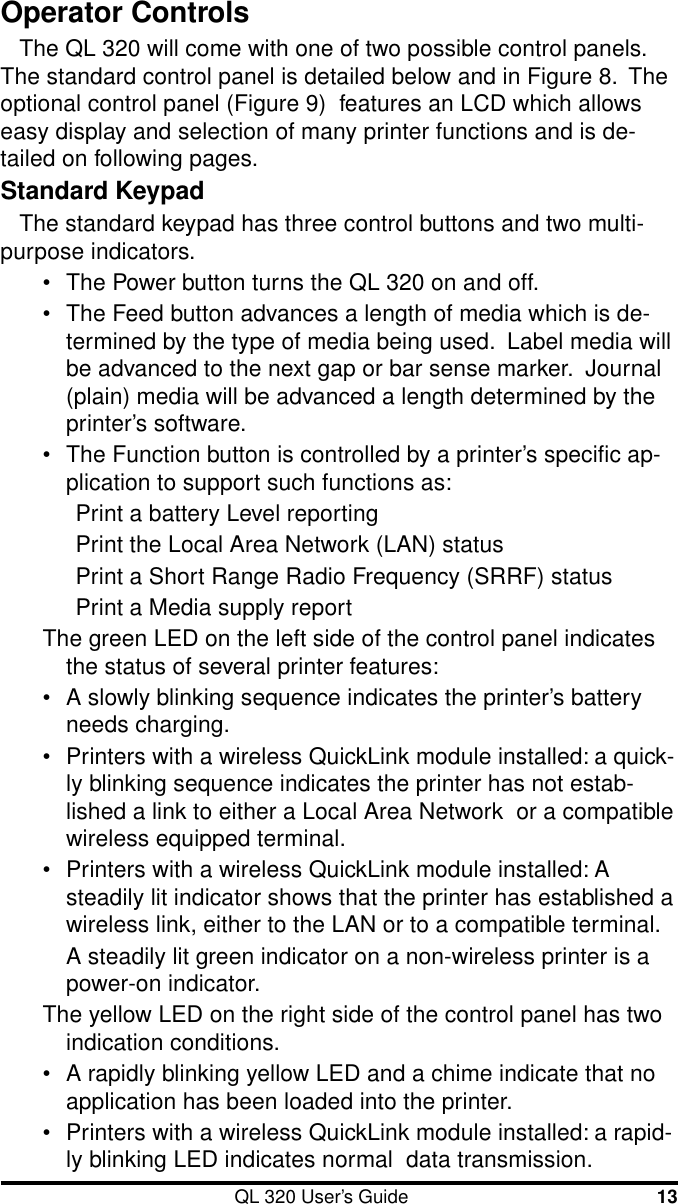
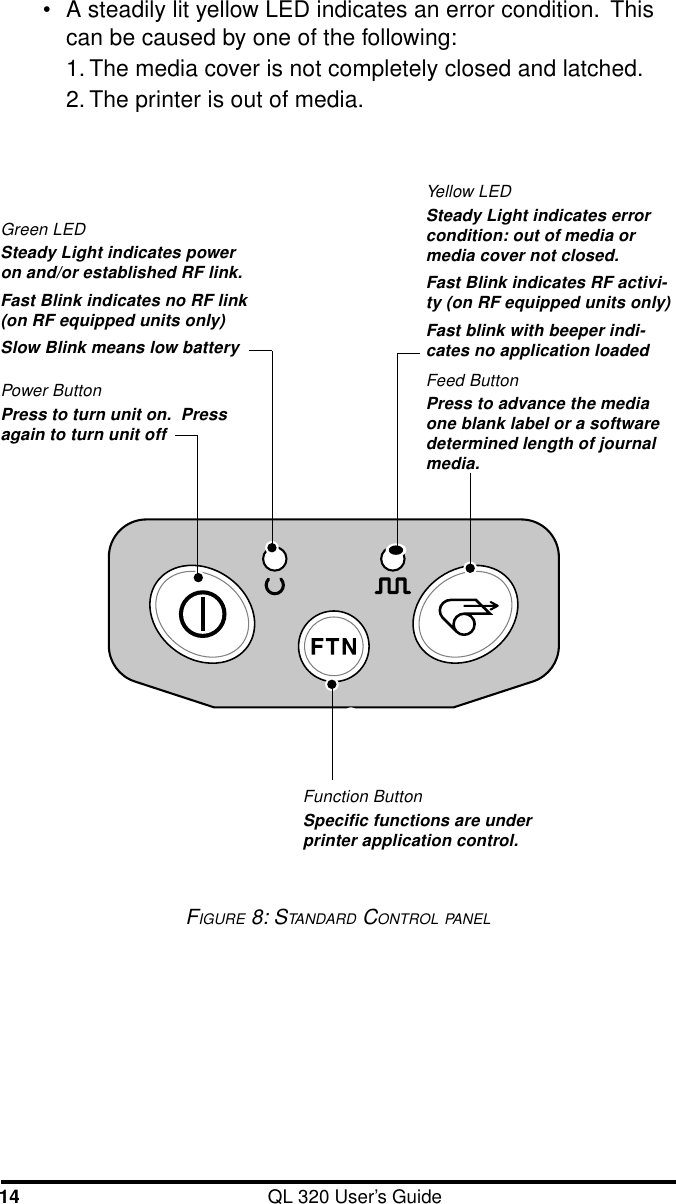

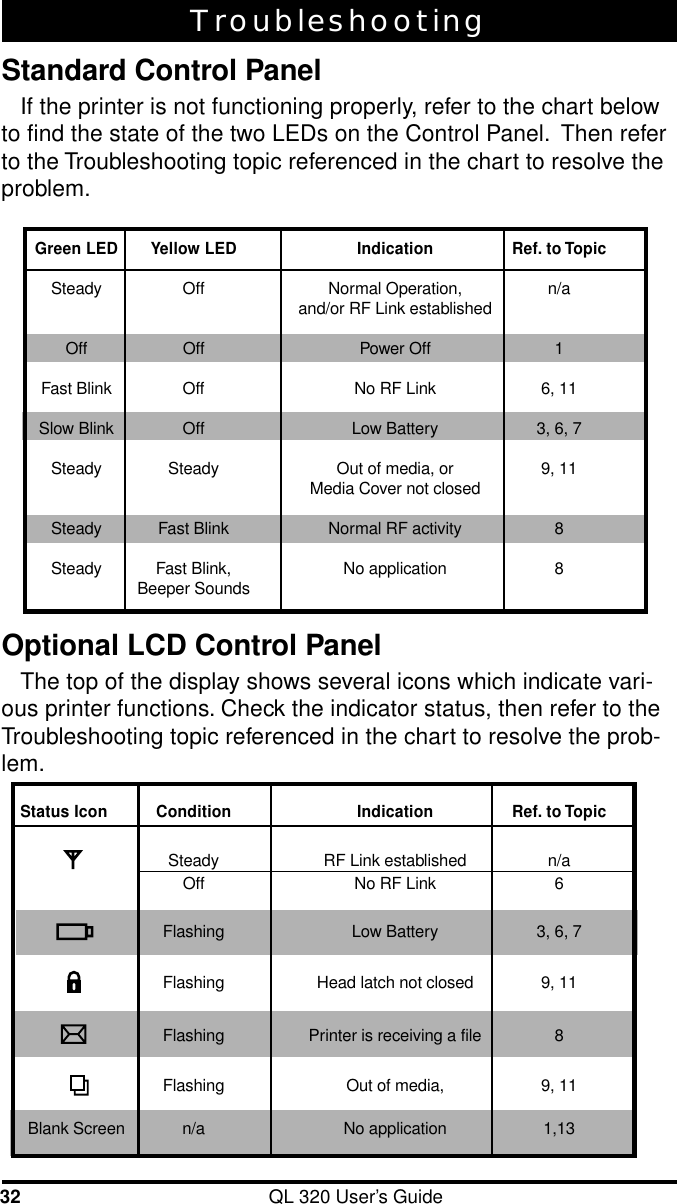
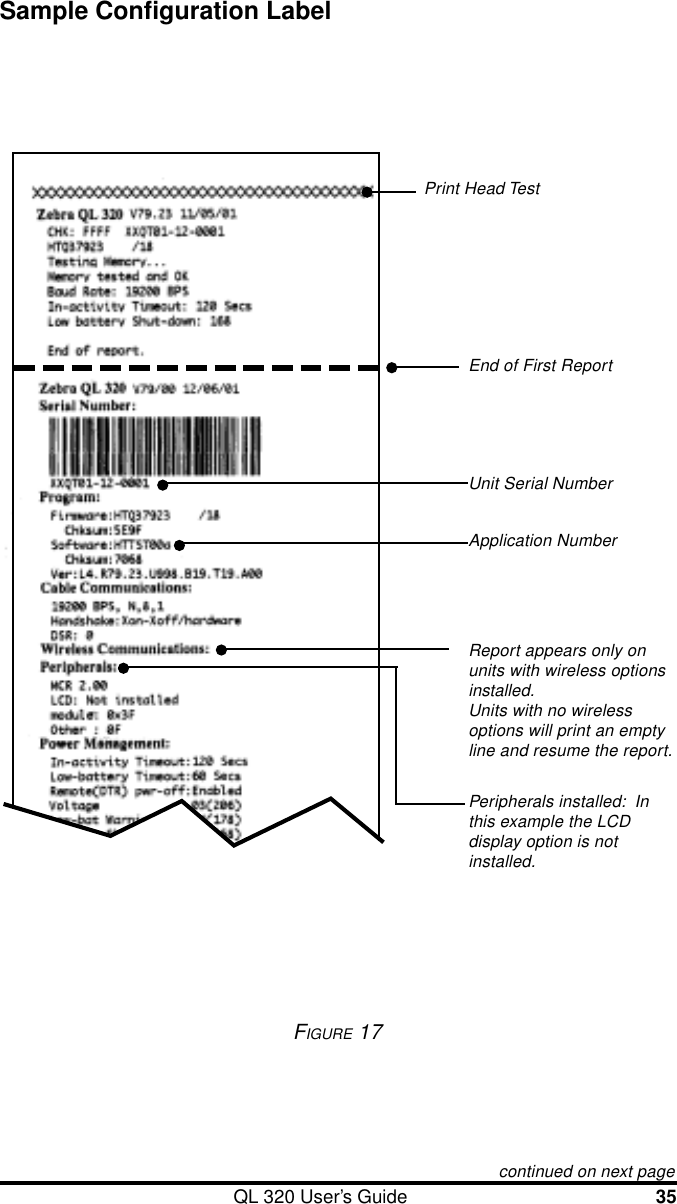
![40 QL 320 User’s GuidePhysical/Environmental/Electrical SpecificationsWeightw/ battery 1.65 lbs. (.75 kg. )excluding media.TemperatureOperating 5∞ to 122∞ F (-15∞ to 50∞ C)Storage -13∞ to 158∞ F (-25∞ to 70∞ C) RangeRelative HumidityOperation 10% to 80% (non-condensing)Storage 10% to 90% (non-condensing)Electrical Battery: 7.4V Lithium-IonCharger: External battery charger, 120-230 VACdepending on model selected.FIGURE 18 OVERALL DIMENSIONS3.1”[78.7 mm]3.9”[97.9 mm]8.0”[203.2 mm]4.60”[116.8 mm]8.3”[210.2 mm]](https://usermanual.wiki/Zebra-Technologies/QL320352.Users-Manual/User-Guide-247962-Page-40.png)