Zhongshan City Richsound Electronic DS409 Docking Speaker, Bluetooth Speaker User Manual
Zhongshan City Richsound Electronic Industrial Ltd. Docking Speaker, Bluetooth Speaker
UserManual.wiki
>
Zhongshan City Richsound Electronic
>
DS409 User Manual
User Manual
Navigation menu
Upload a User Manual
Namespaces
Wiki Guide
HTML
PDF
Info
Views
User Manual
Discussion / Help
Navigation
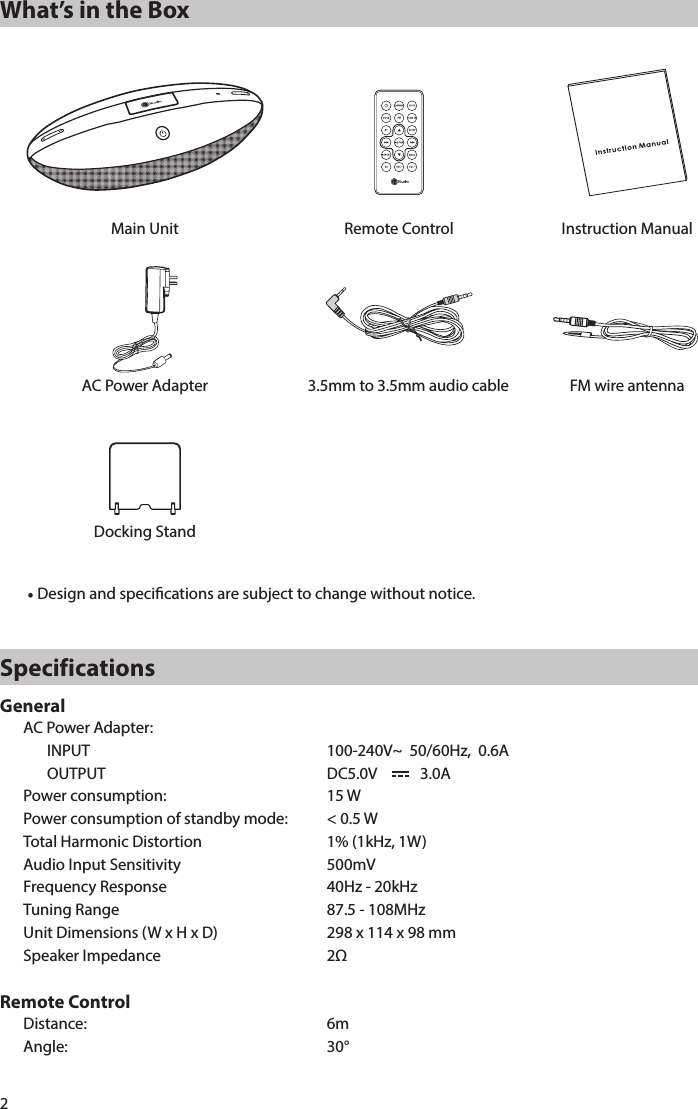
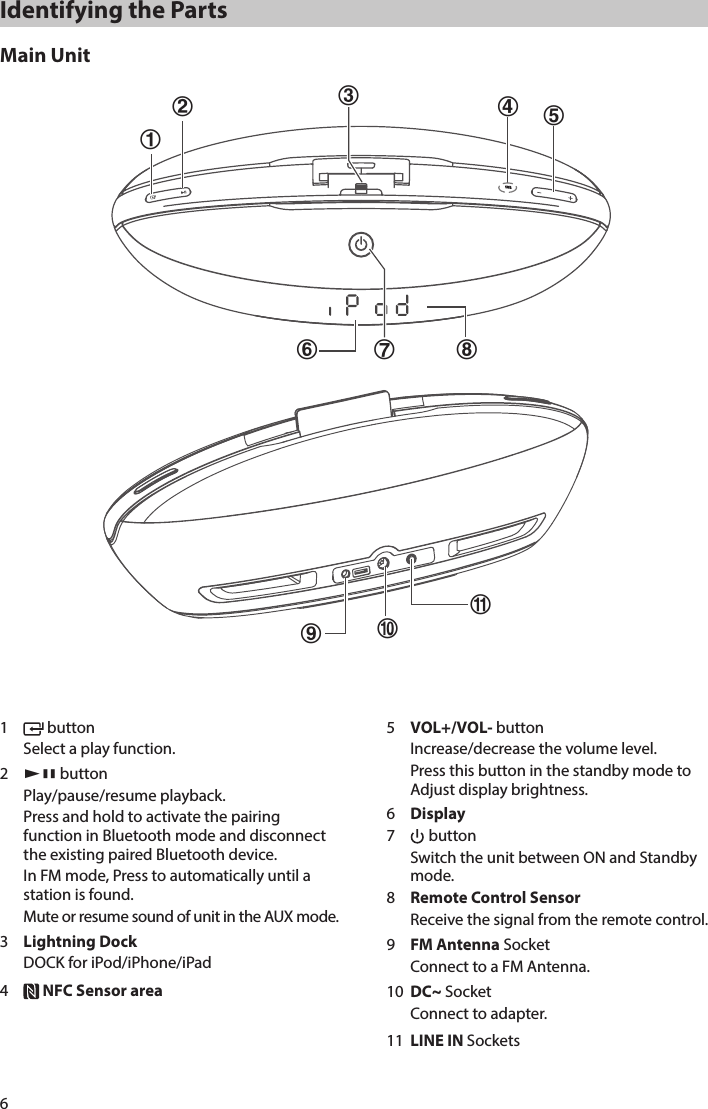
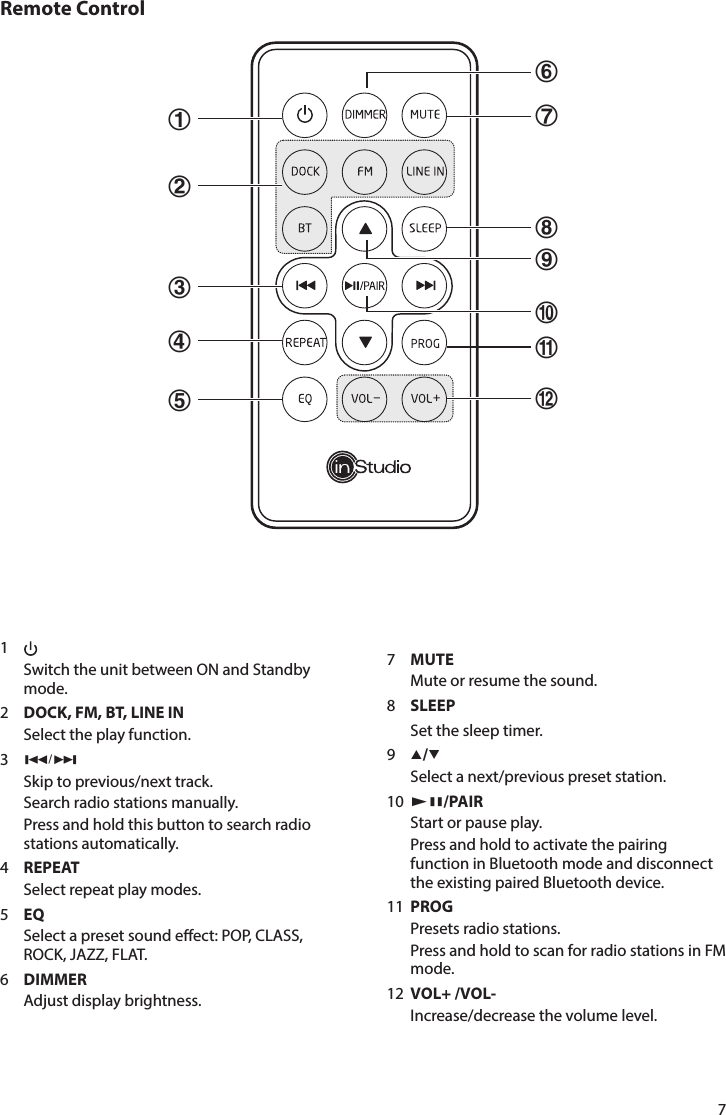
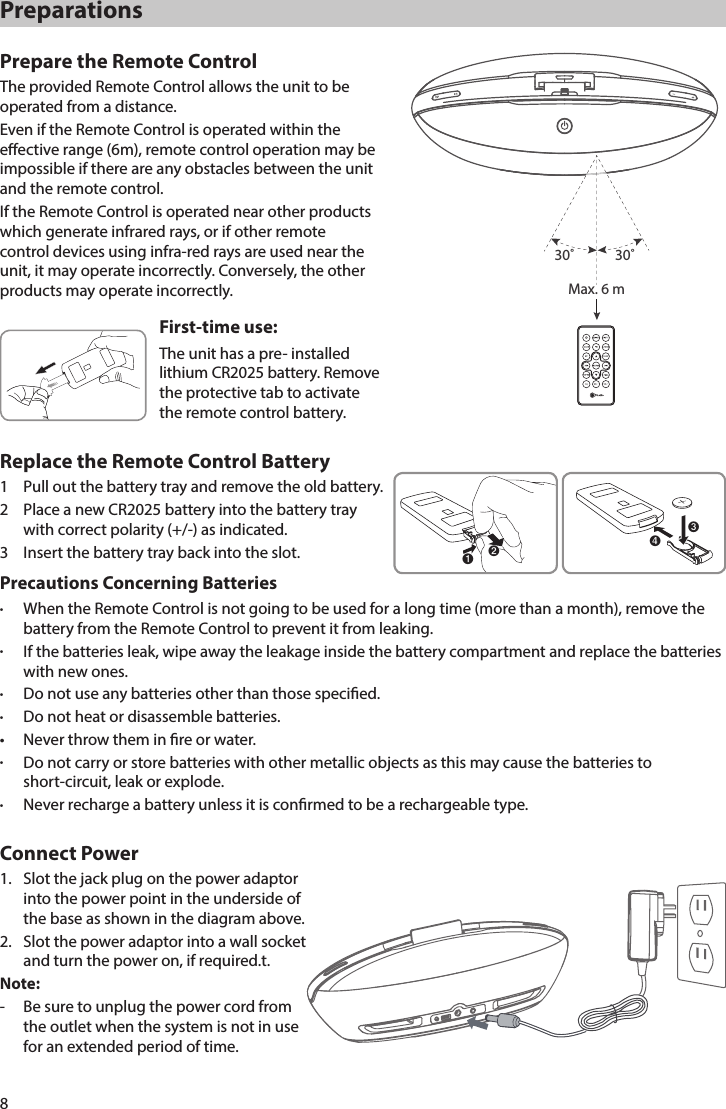
![9General OperationStandby/ONWhen you rst connect the main unit to the mains socket, the main unit will be in Standby mode.• Press the button on the remote control or on main unit to switch the main unit ON.• Press the button on the remote control or on main unit to switch the main unit back to Standby mode.Tips:- When turning the system on, the system will continue in the mode it was in when it was turned o last time.- Disconnect the mains plug from the mains socket if you want to switch the unit o completely.- If there is no signal under the DOCK, BT (Bluetooth) or LINE IN mode, the unit will automatically switch o within 15 minutes.Select ModesPress the button repeatedly on the unit or press the DOCK, FM, LINE IN or BT buttons on the remote control to select the desired mode. The selected mode will show on the display. Adjust the Volume- Press the VOL +/– buttons on the remote control or on the unit to adjust the volume.- If you wish to turn the sound o, press the MUTE button on the remote control. Press the MUTE button again or press VOL+/- button on the remote control or on the unit to resume normal volume.Select the EqualiserPress the EQ button on the remote control or on the unit repeatedly to select: [Pop] - [Class] -[Rock] - [Jazz] - [Flat]Adjust the BrightnessIn the standby mode, press the VOL +/– buttons on the unit or the DIMMER button on the remote control to adjust display brightness. Set the Sleep TimerThis unit can switch to standby automatically after a set period of time.1 Press the SLEEP button on the remote control repeatedly to select your desired number of minutes. The number of minutes shown will display in this sequence: 90 60 30 15 02 Stop pressing the SLEEP button when your desired number of minutes is displayed. The sleep timer is now set.- Press the SLEEP button to view the remaining time before switch o.- To cancel the sleep timer, press the SLEEP button repeatedly until “0” shows on the display.](https://usermanual.wiki/Zhongshan-City-Richsound-Electronic/DS409/User-Guide-2823893-Page-10.png)